

Very nice progress Jessie, its looking pretty smooth from here.
Mikael
Early Aviation
Discuss World War I and the early years of aviation thru 1934.
Discuss World War I and the early years of aviation thru 1934.
Hosted by Jim Starkweather
KotS GB 2012 Boeing 247 - Jessie_C

OEFFAG_153

Joined: February 19, 2010
KitMaker: 1,473 posts
AeroScale: 1,450 posts

Posted: Monday, February 13, 2012 - 01:14 AM UTC

lcarroll

Joined: July 26, 2010
KitMaker: 1,032 posts
AeroScale: 1,025 posts
Posted: Monday, February 13, 2012 - 03:44 AM UTC
Jessie,
Nice clean up! The "silk purse" is starting to show through very well, should be a real beauty when completed.
I've never tried Milliput, what are your thoughts on it vs. the standard fillers such as Squadron Green and Tamiya white putty?
Interesting thread for sure; looking forward to the next stages.
Cheers,
Lance

Jessie_C

Joined: September 03, 2009
KitMaker: 6,965 posts
AeroScale: 6,247 posts

Posted: Monday, February 13, 2012 - 04:34 AM UTC
Miliput is a two part epoxy putty rather than a solvent-based putty like green stuff. Its consistency is like a very stiff dough once you've kneaded the two parts together. It's very versatile. You can sculpt it to shape, smooth it off with a little water, thin it with water, roll it into sheets or snakes or even use it to make moulds to cast reproductions of parts. It doesn't shrink while curing, so figure builders like it when they're modifying figures and its ability to be rolled thin makes it ideal for modifying clothing. When casting and rolling you need to use talcum powder to keep it from sticking. Roll between sheets of waxed paper for best results.
When it's dry it's rock hard so sanding and filing can be a little tedious. This is why it's important to sculpt it to nearly its final shape, and why the ability to work it using water is so important. It takes paint very well. It can be sanded glass smooth and with a little practise it can be scribed without chunks breaking off. It also does well on trailing edges without chipping.
When it's dry it's rock hard so sanding and filing can be a little tedious. This is why it's important to sculpt it to nearly its final shape, and why the ability to work it using water is so important. It takes paint very well. It can be sanded glass smooth and with a little practise it can be scribed without chunks breaking off. It also does well on trailing edges without chipping.
lcarroll
Joined: July 26, 2010
KitMaker: 1,032 posts
AeroScale: 1,025 posts
Posted: Monday, February 13, 2012 - 06:31 AM UTC
Jessie,
Thanks for all the detailed info on Milliput; guess I'll be ordering some next on-line shopping expedition. Sounds like pretty handy stuff to have on the bench and it certainly looks good on your build.
Cheers,
Lance
Thanks for all the detailed info on Milliput; guess I'll be ordering some next on-line shopping expedition. Sounds like pretty handy stuff to have on the bench and it certainly looks good on your build.
Cheers,
Lance
Jessie_C
Joined: September 03, 2009
KitMaker: 6,965 posts
AeroScale: 6,247 posts
Posted: Monday, February 13, 2012 - 07:13 AM UTC
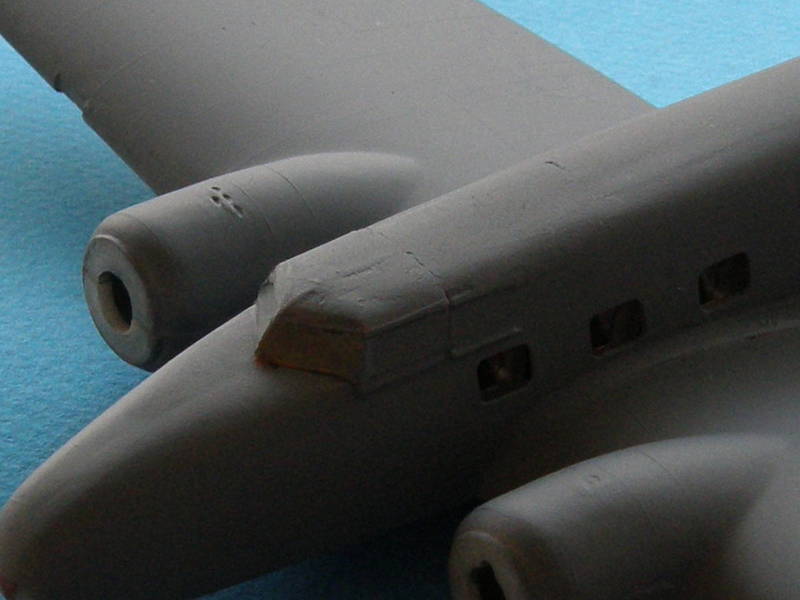
Photos taken in the warm lamplit evening often lie. In the cold, harsh light of morning one can see where there is still a lot of smoothing down remaining to be done.


amegan

#243

Joined: March 21, 2008
KitMaker: 996 posts
AeroScale: 915 posts

Posted: Friday, February 17, 2012 - 10:37 PM UTC
Hi Jessie, looks as though there is still a lot of work in that but she is beginning to look good. I've used Milliput many times, even making the Captains bed for a 1/72 warship, out of it. As a filler for large gaps or making mods it is the best but small gaps are often better with paste fillers. The other problem with Milliput I have is it goes off faster than I can use it in the packet, the last lot was useless after a mere five years 
Jessie_C
Joined: September 03, 2009
KitMaker: 6,965 posts
AeroScale: 6,247 posts
Posted: Saturday, February 18, 2012 - 03:34 PM UTC
Quoted Text
The other problem with Milliput I have is it goes off faster than I can use it in the packet, the last lot was useless after a mere five years
I think they do that deliberately, just to make us buy more. The batch I used on this kit was the very first one that I've ever managed to finish.
amegan
#243
Joined: March 21, 2008
KitMaker: 996 posts
AeroScale: 915 posts
Posted: Sunday, February 19, 2012 - 07:59 AM UTC
Not all on that kit I hope 
Jessie_C
Joined: September 03, 2009
KitMaker: 6,965 posts
AeroScale: 6,247 posts
Posted: Sunday, February 19, 2012 - 08:32 AM UTC
No, it's not quite that far gone

Mgunns

Joined: December 12, 2008
KitMaker: 1,423 posts
AeroScale: 1,319 posts

Posted: Sunday, February 19, 2012 - 10:36 AM UTC
Hi Jessie C:
It is coming along nicely. I use super glue for filler and then hit it with the accelerator and am ready to sand. It is especially good for doing natural metal finishes,
Looking forward to more.
Best
Mark
It is coming along nicely. I use super glue for filler and then hit it with the accelerator and am ready to sand. It is especially good for doing natural metal finishes,
Looking forward to more.
Best
Mark
Jessie_C
Joined: September 03, 2009
KitMaker: 6,965 posts
AeroScale: 6,247 posts
Posted: Sunday, February 19, 2012 - 11:32 AM UTC
There are indeed many applications for superglue. But in this case I needed to fill gaping voids and at the same time fair them into the surrounding structures. Miliput was the best fit for this case.
I think that possibly I could use superglue to fill in any gaps left after the next sanding session. We'll see how it goes.
I think that possibly I could use superglue to fill in any gaps left after the next sanding session. We'll see how it goes.

eseperic

Joined: November 06, 2009
KitMaker: 624 posts
AeroScale: 609 posts

Posted: Tuesday, February 21, 2012 - 04:50 AM UTC
Quoted Text
The other problem with Milliput I have is it goes off faster than I can use it in the packet, the last lot was useless after a mere five years
@amegan: I cut Miliput in smaller batches and then store it in my freezer. It usually works for me.
Jessica,
The work seems exasperating with all the putty required! I am sure you'll handle it masterfully! All the best!
Entoni

dogsbody
Joined: October 23, 2007
KitMaker: 9 posts
AeroScale: 7 posts
Posted: Tuesday, February 21, 2012 - 07:28 AM UTC
Quoted Text
I disagree with your disagreement. That swill isn't fit to wash out the vats real beer is made in.

Touche!

md72
#439
Joined: November 05, 2005
KitMaker: 4,950 posts
AeroScale: 3,192 posts

Posted: Tuesday, February 21, 2012 - 09:10 AM UTC
Well Jesse, I didn't think of the 247 as a KotS candidate. You're realling making a silk purse out of that sow's ear. Good luck with it. I've got the WB C-46 in the stash waiting for the day (week, year) I get up the skills and courage to face that monster...

Jessie_C
Joined: September 03, 2009
KitMaker: 6,965 posts
AeroScale: 6,247 posts
Posted: Tuesday, February 21, 2012 - 01:08 PM UTC
Another coat of primer reveals that the general situation is much better, but there's still a little more filling and shaping remaining to be done.
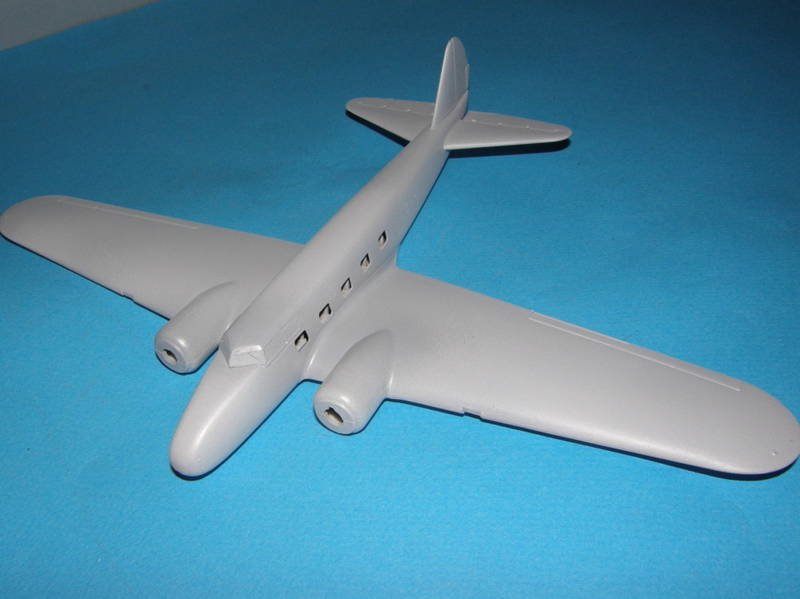

I should be able to get some colour in it soon enough.
I should be able to get some colour in it soon enough.
Mgunns
Joined: December 12, 2008
KitMaker: 1,423 posts
AeroScale: 1,319 posts
Posted: Thursday, February 23, 2012 - 03:24 AM UTC
 Hello Jessie C:
That pesky nose area. You are almost there and it is really shaping up nicely.
Best
Mark

gajouette
Joined: February 01, 2007
KitMaker: 365 posts
AeroScale: 356 posts

Posted: Saturday, February 25, 2012 - 02:03 AM UTC
Jessica,
I get the feeling we're witnessing the making of a silk purse from a sow's ear.Excellent progress to date and I'm looking forward to seeing more.
Highest Regards,
Gregory Jouette
I get the feeling we're witnessing the making of a silk purse from a sow's ear.Excellent progress to date and I'm looking forward to seeing more.
Highest Regards,
Gregory Jouette

thegirl
Joined: January 19, 2008
KitMaker: 6,743 posts
AeroScale: 6,151 posts
Posted: Saturday, February 25, 2012 - 11:12 AM UTC
Hi Jess ,
Not my cup of tea for aircraft choice , but you are doing one exceptional job so far . I never did like filling and sanding much so you are one up on me on that . Looking forward to your next up-date .......
Terri
Not my cup of tea for aircraft choice , but you are doing one exceptional job so far . I never did like filling and sanding much so you are one up on me on that . Looking forward to your next up-date .......
Terri
guitarlute101
Joined: December 18, 2006
KitMaker: 1,121 posts
AeroScale: 1,063 posts
Posted: Sunday, March 11, 2012 - 03:42 AM UTC
Very nice Jess, all of that hard work is paying off!
Mark
Jessie_C
Joined: September 03, 2009
KitMaker: 6,965 posts
AeroScale: 6,247 posts
Posted: Monday, March 26, 2012 - 11:12 AM UTC
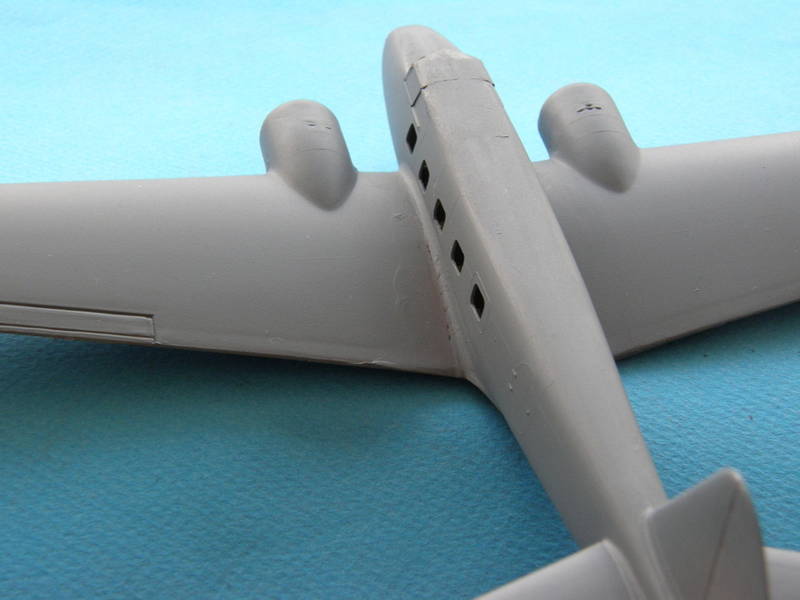
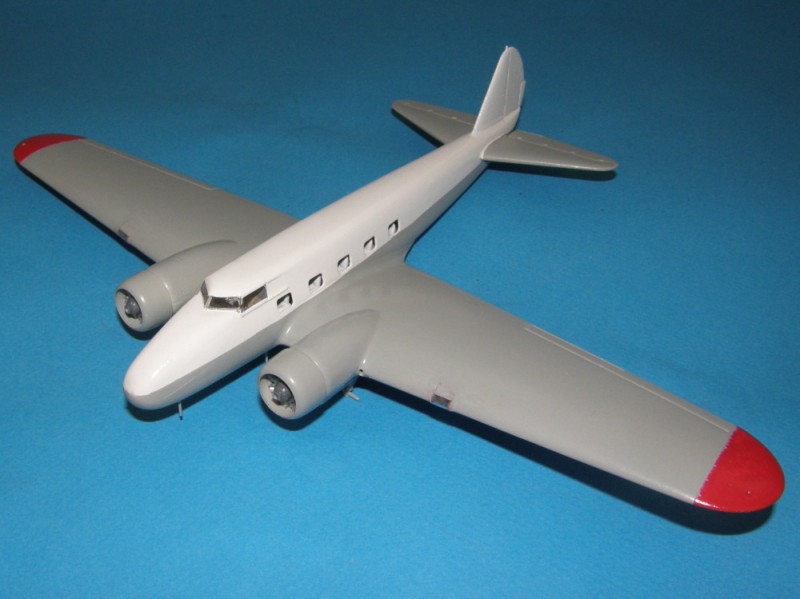
I'm not happy with the landing light transparencies. They're not moulded to fit the wing cutouts, meaning that either the transparency must be reshaped, or the wing surface above the cutout must be cut back. I chose the latter course but as is inevitable, the transparency chose to leap out of my fingers to the space warp that lives on the modelling desk. Search as I might, I couldn't find it. This leaves scratchbuilding as the only alternative. I sanded back the edges of the cutout a little further and lined it with .010 styrene sheet. JRQ wasn't equipped with the inboard shades that were so prominent on many 247s which makes the cleanup a snap. Once the lining is dry, I'll paint it, install MV Products lenses and clear thermoform covers.
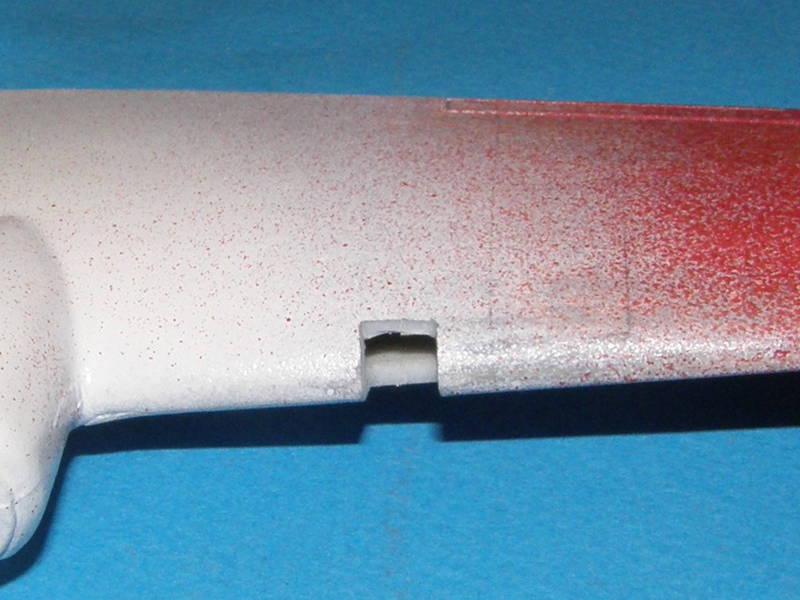
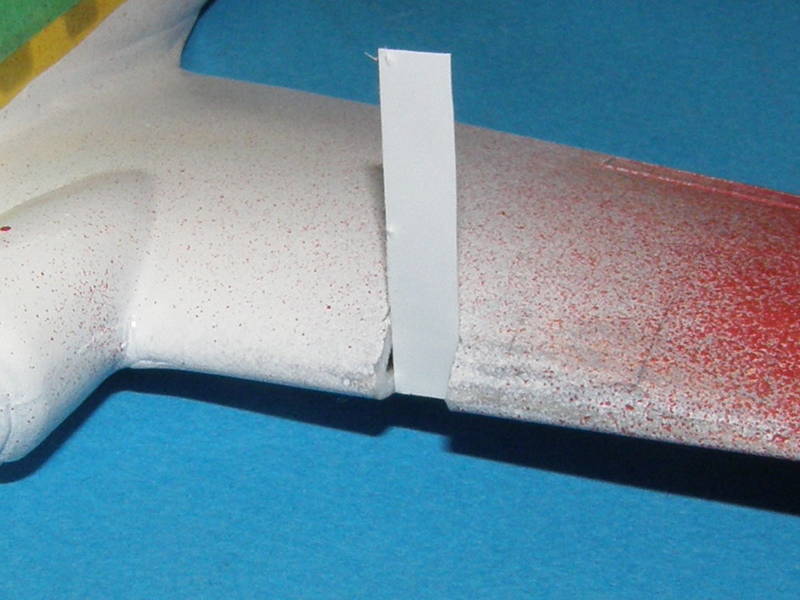
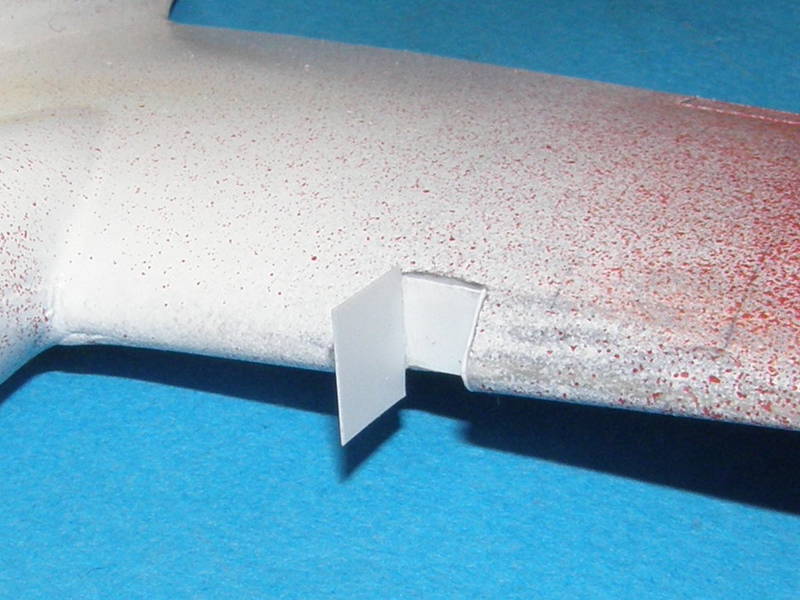
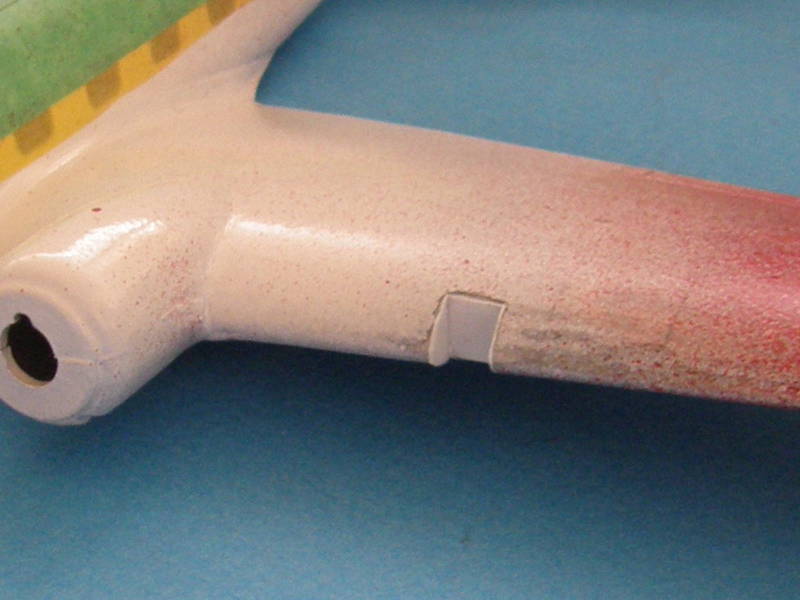
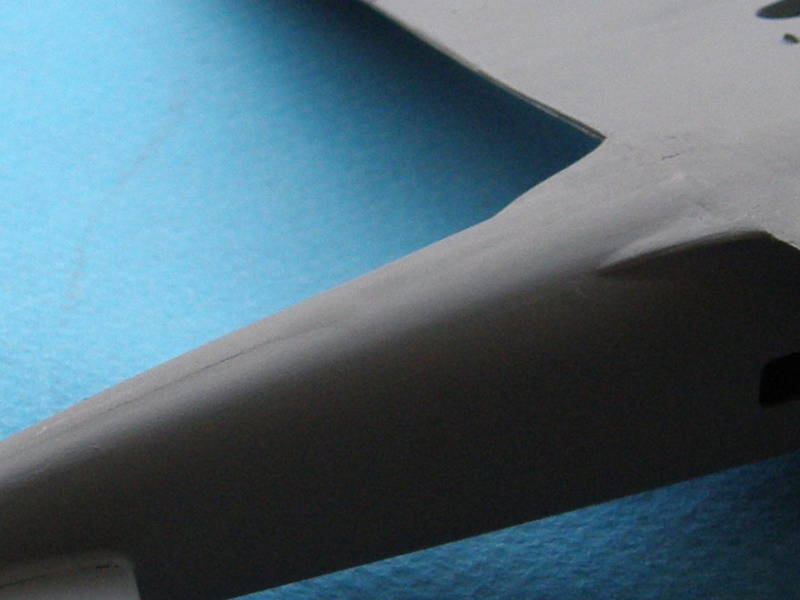
The red is overspray from the wingtips. Since I'm going to mask them and paint the entire lower portion of the aircraft light grey shortly I didn't bother with being neat when I painted them. The gloss white is already on the upper fuselage hiding behind the masking tape
I can also see a portion of the nacelle to wing fairing that needs some more cleaning up and smoothing down before the final paint goes on. Curse this camera for showing me where I need to do more work!
lcarroll
Joined: July 26, 2010
KitMaker: 1,032 posts
AeroScale: 1,025 posts
Posted: Monday, March 26, 2012 - 01:32 PM UTC
Jessie,
If you eventually locate the "leaping transparancy" let me know if my Lewis Magazine or magneto crank handle are with it please. I'm sure I've looked everywhere else in Western Canada and they are still MIA!
Looking very good by the way, you have really put some time into this build and it's paying off.
Cheers,
Lance
Jessie_C
Joined: September 03, 2009
KitMaker: 6,965 posts
AeroScale: 6,247 posts
Posted: Friday, March 30, 2012 - 11:26 AM UTC
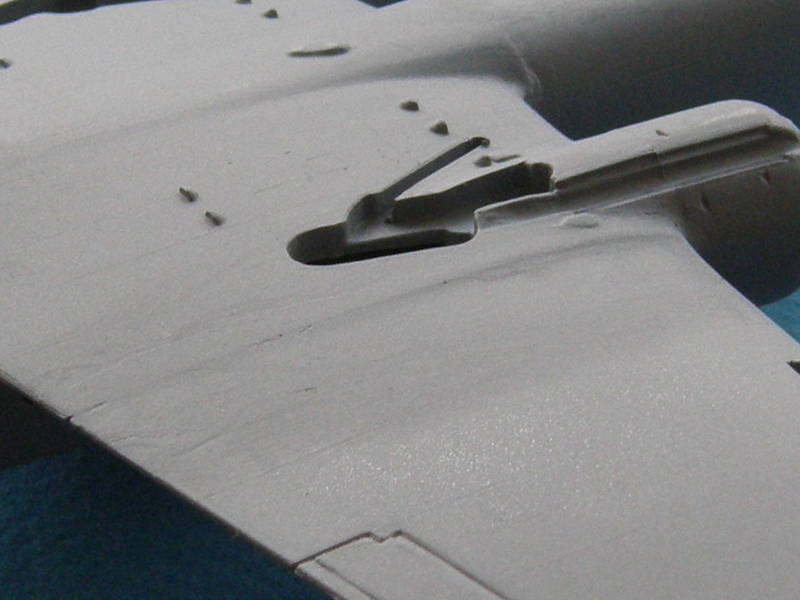
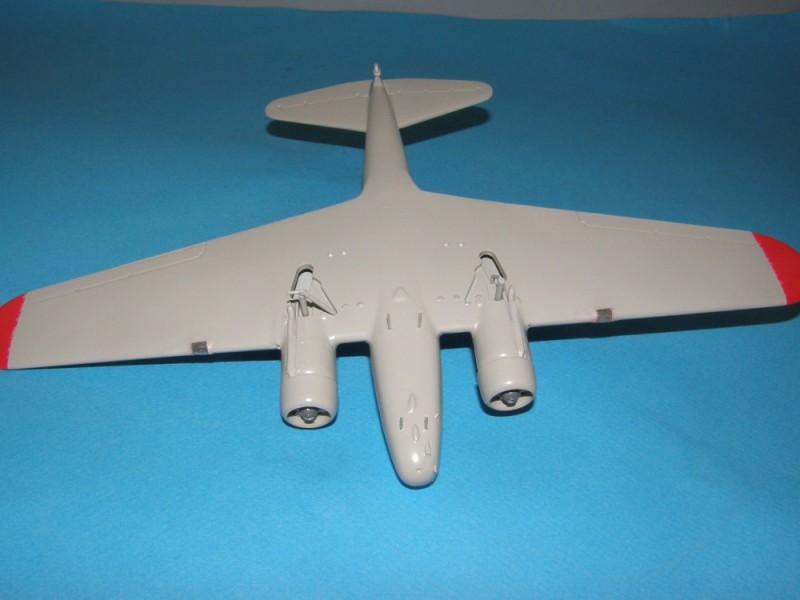
JRQ had all sorts of interesting greeblies under the nose while the kit had a very generic looking antenna. I used pieces of plastic rod, airfoil shaped strut material and a squashed aluminium tube to replicate them.
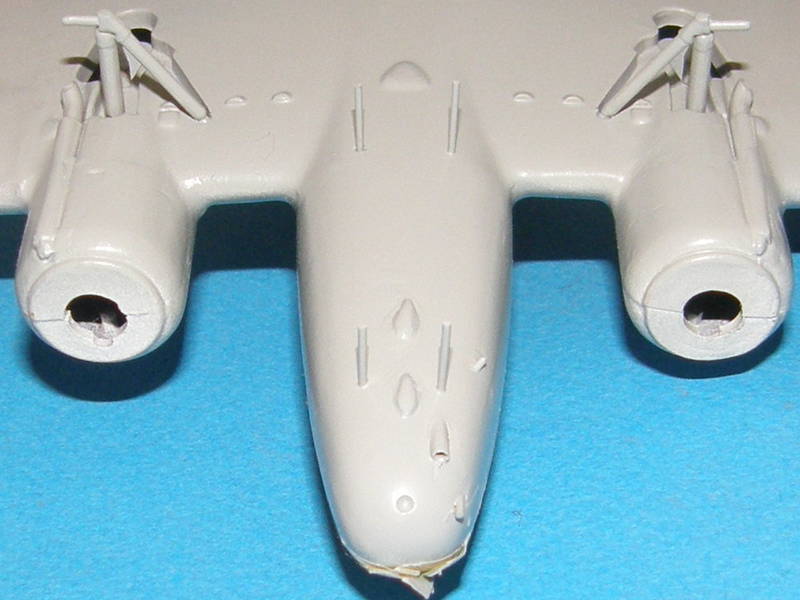
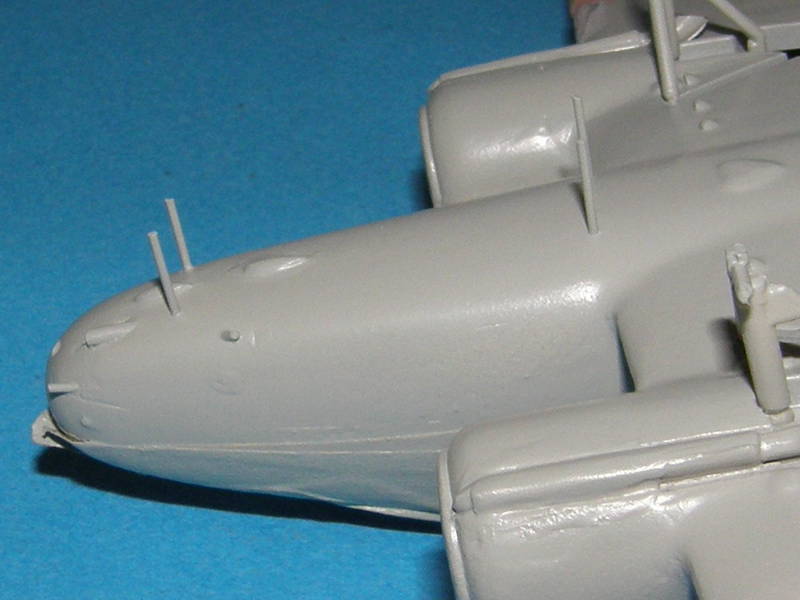
I stil have to drill out the intakes at the outboard roots of the nacelle. I'll make the glideslope antenna out of wire at the last minute so I don't destroy it while I'm handling the model.
I stil have to drill out the intakes at the outboard roots of the nacelle. I'll make the glideslope antenna out of wire at the last minute so I don't destroy it while I'm handling the model.
thegirl
Joined: January 19, 2008
KitMaker: 6,743 posts
AeroScale: 6,151 posts
Posted: Saturday, March 31, 2012 - 01:45 AM UTC
Looking good so far Jessica .
Jessie_C
Joined: September 03, 2009
KitMaker: 6,965 posts
AeroScale: 6,247 posts
Posted: Saturday, April 14, 2012 - 01:54 PM UTC
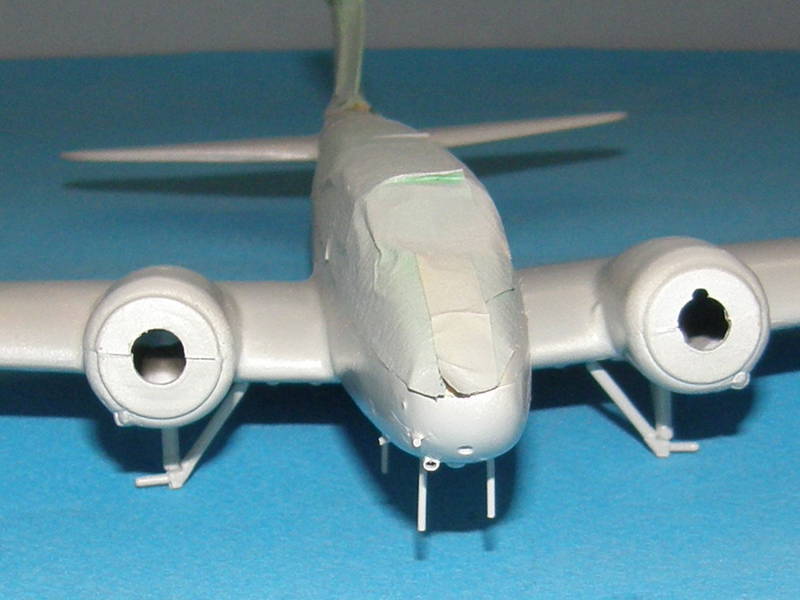
Masking off, engines on, getting near the end of the build.

I got some paint on the windscreen. That's going to take a little repairing.
And one of the gear legs jumped into the space warp.
Not to worry though, the guys at Williams Brothers are sending me a replacement.
I got some paint on the windscreen. That's going to take a little repairing.
And one of the gear legs jumped into the space warp.
Not to worry though, the guys at Williams Brothers are sending me a replacement.
amegan
#243
Joined: March 21, 2008
KitMaker: 996 posts
AeroScale: 915 posts
Posted: Sunday, April 15, 2012 - 10:48 AM UTC
Hi Jessie
I wouldn't have believed it is the same model, and I hate painting gloss white, yours looks fantastic. I think this interpretation of Knights of the Sky has really shown this forum in a new light. I love WWI but these 30s aircraft have something extra, not modern but reaching toward it.
I wouldn't have believed it is the same model, and I hate painting gloss white, yours looks fantastic. I think this interpretation of Knights of the Sky has really shown this forum in a new light. I love WWI but these 30s aircraft have something extra, not modern but reaching toward it.
 |

WEB HOSTING BY


Copyright ©2021 AeroScale and Kitmaker Network, a subsidiary of Silver Star Enterprises
All Rights Reserved. Please read our Conditions of Use and Privacy Policy.
All Rights Reserved. Please read our Conditions of Use and Privacy Policy.