Air Campaigns
Want to start or join a group build? This is where to start.
OFFICIAL: Douglas Parade of Propeller Power
Joel_W
Staff MemberAssociate Editor
AUTOMODELER
_VISITCOMMUNITY
New York, United States
Joined: December 04, 2010
KitMaker: 11,666 posts
AeroScale: 7,410 posts
Posted: Monday, October 07, 2013 - 11:36 AM UTC
Finally, I've been able to make some serious headway in my 1/48 scale GWM Douglas TBD_1 Devastator. As with most kits, I start out with the cockpit.

Here lies the 1st issue I had to deal with, what color to paint the interior. Research has shown that all Naval Interior colors were aluminum lacquer for pre war to early production models of the Vindicator and Devastator. After the Pearl Harbor attack, through the Battle of the Coral Sea, and up to Midway, all Naval aircraft were repainted. That included the interiors to what is commonly called Bronze/Interior Green. The issue is that not all planes were painted, and certainly not all the interiors were converted according to the allotted time schedule. I'm going on the assumption that both depicted aircraft in the kit were repainted to Bronze/Interior Green.

Before I started my painting procedures, I had to do a little PE work. Two hinges and a bracket for the radio were added, and the large front fuselage section that when the doors are opened, allows the pilot to see out of a large bottom window.


I primed the interior of the fuselage and all the interior cockpit parts flat black to help with color modulation and shading. I next airbrushed the same parts a custom mixture of Tamiya Acrylic XF-4 & XF-5 thinned 2 parts thinner to 1 part paint. The mixture flowed like when I used enamels. Applying several light coats gave me the finish I was looking for. Unfortunately, this set of pictures I once again took the easy way out and used the pop up flash, which just killed the drybrushing and the dark interior green color. Next series of pictures I'm going back to natural light and a tripod for the proper effect. So please bare with me on the colors.


Next I glued up the PE section for the lower fuselage. Hindsight would have made it a lot easier to glue it up, then paint it, as I'm doing some needed putty and sanding that will destroy the paint anyway.


Finally, I painted both instrument panels flat black, then installed each decal instrument, and used Pledge to make the clear gloss lenses.


I'm on my last of 3 weeks vacation, and hope to get in quite a bit of modeling time besides working on the ever growing Honey To do list for around the house.

Joel
tinbanger
_VISITCOMMUNITY
Ontario, Canada
Joined: February 04, 2008
KitMaker: 2,507 posts
AeroScale: 1,814 posts
Posted: Monday, October 07, 2013 - 12:51 PM UTC
Coming along nicely Joel.
Joel_W
Staff MemberAssociate Editor
AUTOMODELER
_VISITCOMMUNITY
New York, United States
Joined: December 04, 2010
KitMaker: 11,666 posts
AeroScale: 7,410 posts
Posted: Tuesday, October 08, 2013 - 02:49 AM UTC
Thanks Rich.

Joel
tinbanger
_VISITCOMMUNITY
Ontario, Canada
Joined: February 04, 2008
KitMaker: 2,507 posts
AeroScale: 1,814 posts
Posted: Tuesday, October 08, 2013 - 04:04 AM UTC
I have sent Allen a request for a photo feature to be done at the end of this campaign.
When posting your photos in the campaign gallery please have your model photo (at least One) taken with a plain blue background.
Thank you.
Richard.
Joel_W
Staff MemberAssociate Editor
AUTOMODELER
_VISITCOMMUNITY
New York, United States
Joined: December 04, 2010
KitMaker: 11,666 posts
AeroScale: 7,410 posts
Posted: Tuesday, October 08, 2013 - 04:49 AM UTC

Quoted Text

I have sent Allen a request for a photo feature to be done at the end of this campaign.
When posting your photos in the campaign gallery please have your model photo (at least One) taken with a plain blue background.
Thank you.
Richard.


Richard, have no fear, all my final build pictures are done with a plain background, tripod, and better lighting then just the poop pop up flash on my Nikon. Just getting lazy in my old age.
Joel
Mcleod
_VISITCOMMUNITY
Alberta, Canada
Joined: April 07, 2010
KitMaker: 1,028 posts
AeroScale: 939 posts
Posted: Tuesday, October 08, 2013 - 05:44 AM UTC
Lots of fine looking progress being posted; here's a little bit more.

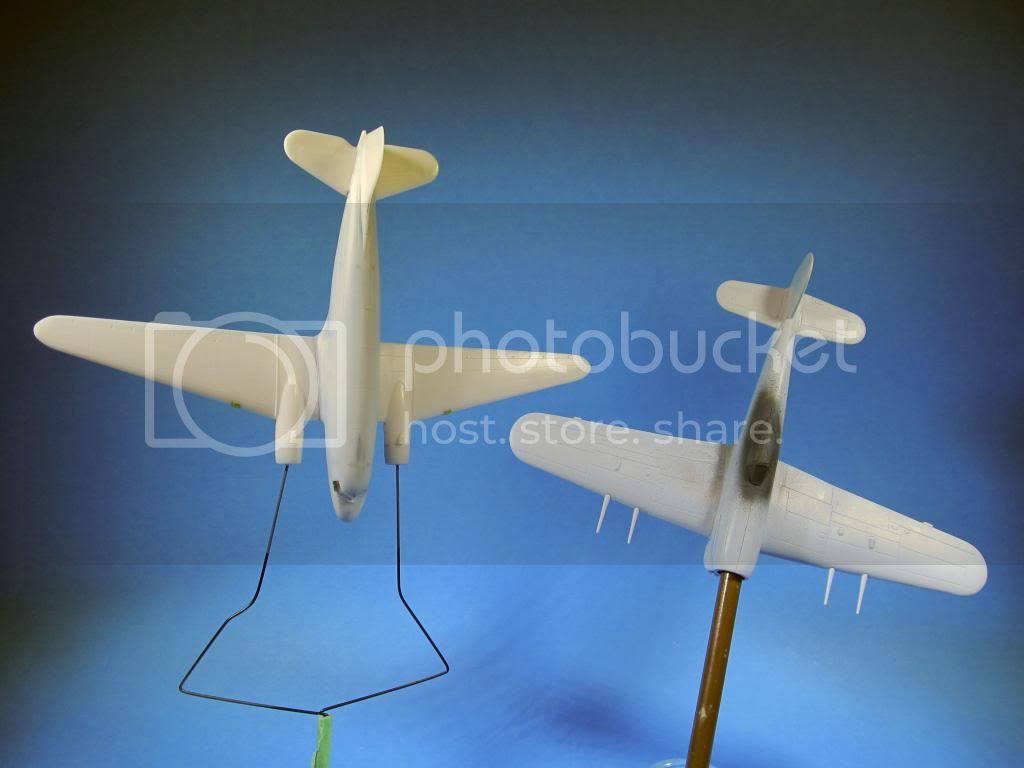
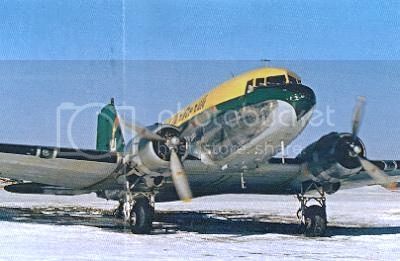
Since I've enlisted in multiple campaigns, I have multiple builds in different states of progress on the bench. I always try to bring a couple to the same stage as I'm going along. In this case, I have the Minicraft C-47 primer prepped for this campaign, along with an Airfix Typhoon for another campaign.


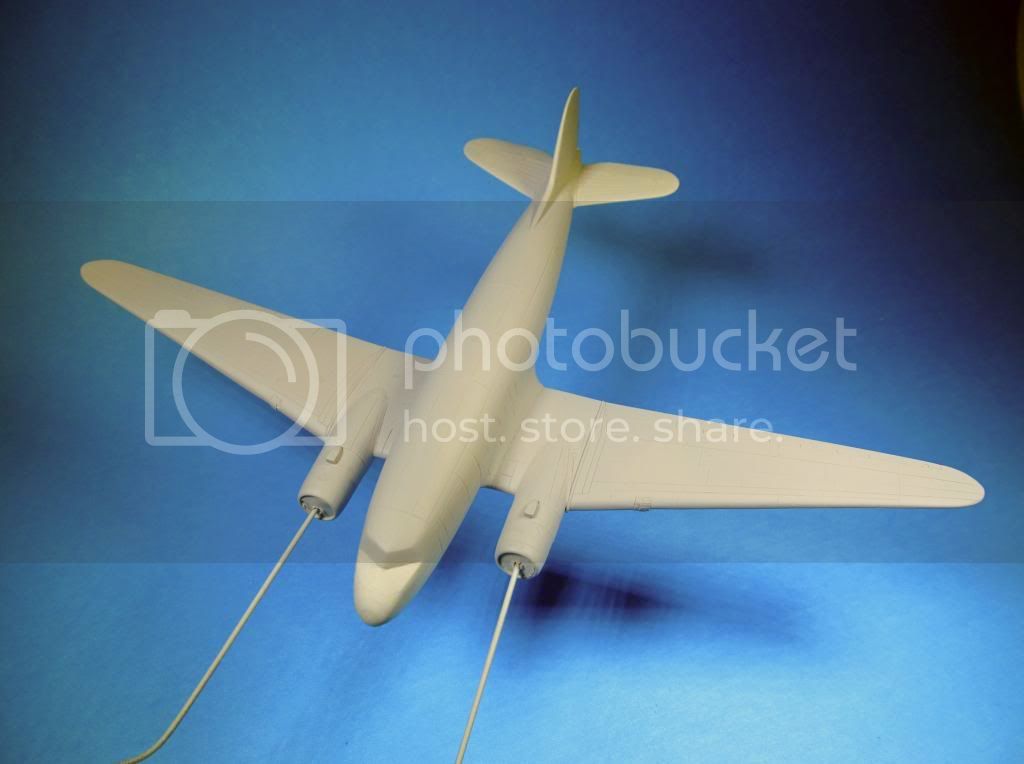
And here's the C-47 primed. I'm really quite happy the way its coming along:


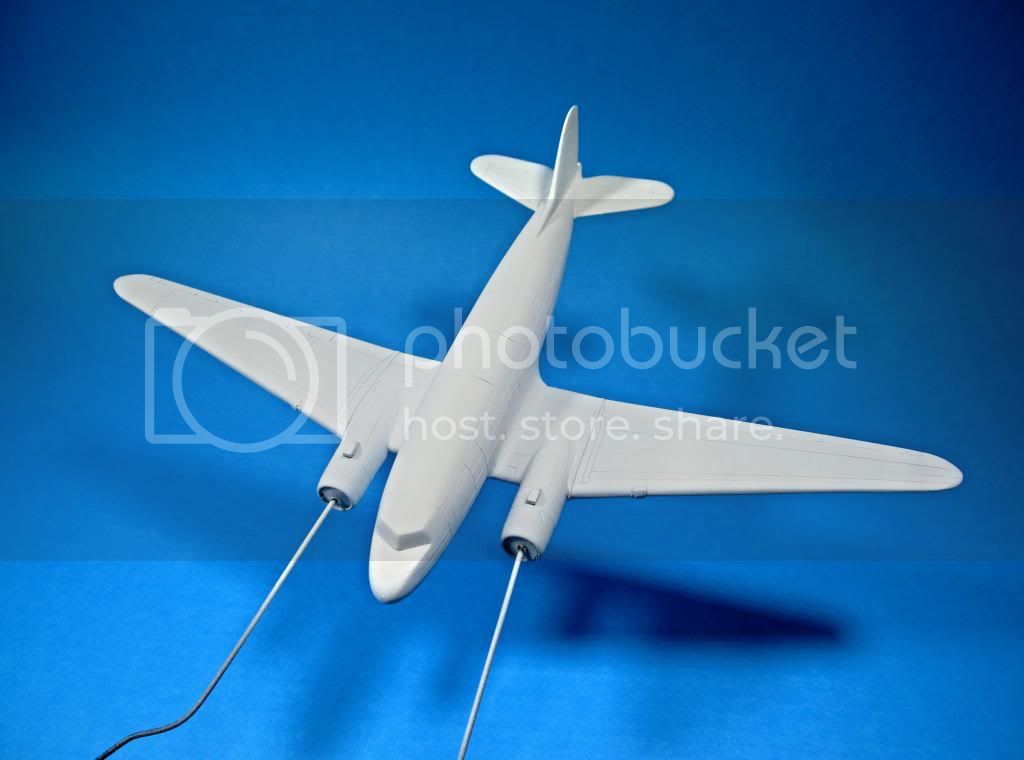
Now the really fun part is here. To put her all together in these colors:


Joel_W
Staff MemberAssociate Editor
AUTOMODELER
_VISITCOMMUNITY
New York, United States
Joined: December 04, 2010
KitMaker: 11,666 posts
AeroScale: 7,410 posts
Posted: Tuesday, October 08, 2013 - 06:09 AM UTC
Ben, looking good. Looking forward to see your paint/decal match that photo. Should be really outstanding.
Joel
Joel_W
Staff MemberAssociate Editor
AUTOMODELER
_VISITCOMMUNITY
New York, United States
Joined: December 04, 2010
KitMaker: 11,666 posts
AeroScale: 7,410 posts
Posted: Tuesday, October 08, 2013 - 09:34 AM UTC
Well, earlier I saw a major, and I mean major screw up. I installed the pilots seat bracket upside down!! The instructions clearly show it the right way, but I must have suffered from another senior moment.

With the Fuselage closed up, and the top plate on, it's hard to see, but I see it as the seat is pitched to far forward. So this afternoon I carefully pried the seat off, then ended up breaking the bracket off. Carefully sanded the mounting spots, and repaired the broken bar. Glued everything back into place, and it looks a million times better.

Joel
Joel_W
Staff MemberAssociate Editor
AUTOMODELER
_VISITCOMMUNITY
New York, United States
Joined: December 04, 2010
KitMaker: 11,666 posts
AeroScale: 7,410 posts
Posted: Wednesday, October 09, 2013 - 08:30 AM UTC
Here's a picture of the fix.
Joel

Joel_W
Staff MemberAssociate Editor
AUTOMODELER
_VISITCOMMUNITY
New York, United States
Joined: December 04, 2010
KitMaker: 11,666 posts
AeroScale: 7,410 posts
Posted: Wednesday, October 09, 2013 - 12:28 PM UTC
Looks like the TBD-1 is going on permanent hold. I wanted to test fit the engine cowling to the fuselage after I glued the fuselage halves together, and I can't find the cowl! It's a separate part, not on a sprue. Looked everywhere, and I can't find it. Not sure if it was ever in the box, but I'm sure it was.

Does anyone know how to get in touch with Great Wall Hobby, as there is no address that I can find in the box, the instructions, or online?

Thanks
Joel
Joel_W
Staff MemberAssociate Editor
AUTOMODELER
_VISITCOMMUNITY
New York, United States
Joined: December 04, 2010
KitMaker: 11,666 posts
AeroScale: 7,410 posts
Posted: Saturday, October 12, 2013 - 03:49 AM UTC
Thanks to Guido "Tailor" Whose their Customer service rep in Europe, a engine cowl is on the way, so the build is back on.
Joel
Joel_W
Staff MemberAssociate Editor
AUTOMODELER
_VISITCOMMUNITY
New York, United States
Joined: December 04, 2010
KitMaker: 11,666 posts
AeroScale: 7,410 posts
Posted: Saturday, October 12, 2013 - 03:49 AM UTC
One glaring issue with the GWH TBD-1 kit, is that the main wheel wells have absolutely no detail, none, just a completely open area that you can see the fuselage main spar on one side, and the spar at the point where the wings fold in the opposite direction. Doing more and more research, I came across a Build Blog by Vance from 5/11/12. He posted about this very issue, and supplied several B&W pictures of the lower wings and landing gear. His solution was to box in the wheel wells, which I'm just about finished doing. Still have the ribs to glue into the other wheel well.


Now the issue is just what color to paint it. Pre-WW11 Devastators with the Chrome Yellow wings, then Neutrality Overall Gray; interiors & wheel wells were painted Aluminum Lacquer. By Dec.1941, the scheme was changed to Intermediate Blue/Lite Gray, After The Battle of the Coral Sea other changes consisted of removal of the Red Meatball and the White & Red paint on the rudders. When the paint scheme changed to the blue/lt gray, the interiors were repainted to what we refer to now as interior Green. The question is what were the wheels repainted to? As an example, F4F Wildcats & SBD Dauntlesses had their wheel wells painted the same color as the bottom of the aircraft.
Were the wheel wells left Aluminum Lacquer, painted Interior Green, or paint lite Gray to match the bottom of the aircraft? My take since the wheel wells are open having them the same color as the bottom of the aircraft makes the most sense. The Aluminum Lacquer would reflect light like a mirror making it an easier target to hone in on, and the interior Green would also be so contrasting as to have a similar effect.
Does anyone know the proper color the wheel wells were painted?
Joel


Jessie_C
_VISITCOMMUNITY
British Columbia, Canada
Joined: September 03, 2009
KitMaker: 6,965 posts
AeroScale: 6,247 posts
Posted: Saturday, October 12, 2013 - 04:03 AM UTC
That's very well done. Perhaps you could paint them aluminium, and then overspray that with a hasty spray of the underside light grey as if it was done in a hurry, leaving just a little of the aluminium visible in the corners?
Joel_W
Staff MemberAssociate Editor
AUTOMODELER
_VISITCOMMUNITY
New York, United States
Joined: December 04, 2010
KitMaker: 11,666 posts
AeroScale: 7,410 posts
Posted: Saturday, October 12, 2013 - 04:16 AM UTC
Found an article: USN & USMC Aircraft Interiors of WWII
by William Reece

Mr. Reese has written several articles on WW11 Corsairs, and Naval aircraft colors. He states that the wheel wheels should be painted the same color as the bottom of the aircraft for that period.
At this point I think I'm really leaning that way.

Joel
Joel_W
Staff MemberAssociate Editor
AUTOMODELER
_VISITCOMMUNITY
New York, United States
Joined: December 04, 2010
KitMaker: 11,666 posts
AeroScale: 7,410 posts
Posted: Saturday, October 12, 2013 - 04:26 AM UTC

Quoted Text

That's very well done. Perhaps you could paint them aluminium, and then overspray that with a hasty spray of the underside light grey as if it was done in a hurry, leaving just a little of the aluminium visible in the corners?


Jessica,
Thanks. It's really pretty easy to do. Hardest part was getting the 1st spar to have the correct upper and lower curves. Then I just traced it on the other three. Some filing and sanding, and everything fit just fine. The braces are just HO 1x3s Evergreen strips.

Really like your idea of a light over spray. Think I'll go in that direction.

You would think that this is a highly visible area, it's not. Bottom, and deeply recessed. Still, it's the right way to handle it.

Joel

Mcleod
_VISITCOMMUNITY
Alberta, Canada
Joined: April 07, 2010
KitMaker: 1,028 posts
AeroScale: 939 posts
Posted: Monday, October 14, 2013 - 05:07 PM UTC

Quoted Text

It's really pretty easy to do.


Might be easy for you; it looks really, really nice!!!

I worked on 3 models this weekend, and my DC-3 for this campaign was one of them.

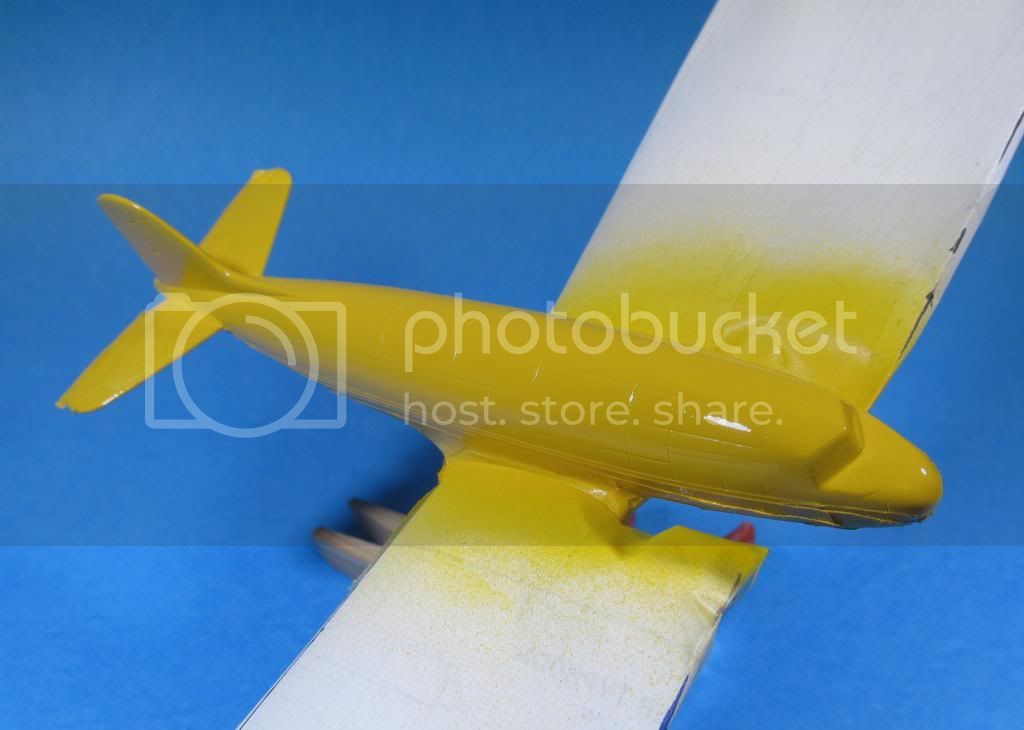
I had already primed her before, so in anticipation of the yellow top coat, I applied a couple of thin flat white coats for the base.


That dryed overnight. Then I masked the under-fuselage, and applied a fine yellow coat of Tamiya Lemon Yellow. After that dried overnight, I applied a thinned coat of Humbrol Gloss Yellow. Unfortunately, I had the enamel over-thinned, and it ran abit; even on a light coat.
So, out comes the sandpaper, when I have time this week, I'll get that straightened out.


This is actually quite a complicated 4 color scheme; 5 if you count the black deicing boots on wings and tailplane.


I'm just hoping my approach plan is good.
tinbanger
_VISITCOMMUNITY
Ontario, Canada
Joined: February 04, 2008
KitMaker: 2,507 posts
AeroScale: 1,814 posts
Posted: Monday, October 14, 2013 - 10:27 PM UTC
Hi Ben
For me Yellow paint always gives me the most trouble.
Keep up the good work.
Joel_W
Staff MemberAssociate Editor
AUTOMODELER
_VISITCOMMUNITY
New York, United States
Joined: December 04, 2010
KitMaker: 11,666 posts
AeroScale: 7,410 posts
Posted: Tuesday, October 15, 2013 - 04:59 AM UTC
Ben, Your gloss yellow really looks glossy. Don't know how bad your runs are, but before you sand them, try using a little rubbing compound worked slowly, carefully, and with a light touch, then follow up with polishing compound, not polish, or wax. That's how I use to produce gloss finishes on my car models. Done right, it should be the smoothest and glossiest part of your paint job.

Joel
Mcleod
_VISITCOMMUNITY
Alberta, Canada
Joined: April 07, 2010
KitMaker: 1,028 posts
AeroScale: 939 posts
Posted: Tuesday, October 15, 2013 - 08:35 AM UTC

Quoted Text

before you sand them, try using a little rubbing compound worked slowly, carefully, and with a light touch, then follow up with polishing compound


Thankyou for the insight, Joel. However, the only rubbing compound I own is Absorbine Jr.. The runs arn't all that bad anyway. I'm thinking my wet buffing pads will do the trick.
Joel_W
Staff MemberAssociate Editor
AUTOMODELER
_VISITCOMMUNITY
New York, United States
Joined: December 04, 2010
KitMaker: 11,666 posts
AeroScale: 7,410 posts
Posted: Tuesday, October 15, 2013 - 09:39 AM UTC
Ben, sure hope so.
Joel
Joel_W
Staff MemberAssociate Editor
AUTOMODELER
_VISITCOMMUNITY
New York, United States
Joined: December 04, 2010
KitMaker: 11,666 posts
AeroScale: 7,410 posts
Posted: Tuesday, October 15, 2013 - 09:40 AM UTC
Finally finished the main wheel wells. I decided just to go with Tamiya Medium Gray XF-20 with a few drops of Flat white XF-2. Once the wing halves were glued together, you really can't see very much of the wheel well. And since I'm planning on having the wings folded, the odds of ever turning the model over for viewing other for the Build blog pictures is slim to none. The red tint you see is what's left of my blood after I missed with a brand new #11 Exacto blade. Here's a picture of one of the Wheel wells:


The bottom front of the fuselage has a compartment with doors, which allows the pilot to look down through a very large window. The compartment is made from one large piece of PE, that I glued in with CCA the. Squadron Green stuff was used to blend in my less then stellar PE work. The two doors are just test fitted loosely in the open position. The doors are comprised of a plastic outer skin, and a PE inner skin to form the complex shape. I also used Green Stuff to blend in the PE to the plastic as my PE work is constantly less then average . There are 3 hinges on each door that is used only when you opt to have the doors closed. I'm going to have them in the open position. The instructions call to remove the rear most hinge from each door, which I did. Research information isn't easy to come by on the Devastator, so I'm just going to assume that they did their homework, and the 2 hinge assembly is correct.


Until my next update. That's for stopping by for a progress check.

Joel
Mcleod
_VISITCOMMUNITY
Alberta, Canada
Joined: April 07, 2010
KitMaker: 1,028 posts
AeroScale: 939 posts
Posted: Tuesday, October 15, 2013 - 01:13 PM UTC
Joel, you have the bomb aiming doors right with two hinges. There are clear photos in Ginters TBD-1 book.

Nice job, bye the way.
Joel_W
Staff MemberAssociate Editor
AUTOMODELER
_VISITCOMMUNITY
New York, United States
Joined: December 04, 2010
KitMaker: 11,666 posts
AeroScale: 7,410 posts
Posted: Tuesday, October 15, 2013 - 01:55 PM UTC

Quoted Text

Joel, you have the bomb aiming doors right with two hinges. There are clear photos in Ginters TBD-1 book.

Nice job, bye the way.


Ben, thanks for keeping me heading in the right direction. Unfortunately, I don't have the Ginter's book. Since I'm only using two hinges per side, does the book show the 3rd hinge cavity, or should I remove Them? Easy enough to do with some Thick CCA and Green Stuff.
Thanks,
Joel
Mcleod
_VISITCOMMUNITY
Alberta, Canada
Joined: April 07, 2010
KitMaker: 1,028 posts
AeroScale: 939 posts
Posted: Tuesday, October 15, 2013 - 03:30 PM UTC

Quoted Text

does the book show the 3rd hinge cavity,


Earlier TBD's had the 3 hinges, along with a significantly swiss cheesed (lightening holes) inner skin on the bomb aiming doors. Sometime after 1937, they went with solid inner skins as you have it, and reduced too 2 hinges. There is no sign of a third cavity in the photograph with 2 hinges.

Bye the way, if your putting on a torpedo, the bomb aiming doors would have been kept closed. The doors could have been opened with a torpedo, but the weapon totally obscured any sighting use of the Norden sighting system. So, there was no reason to crank them open on torpedo planes.
Surprising how much intel one can gather studying one captioned photo in one good book.
Joel_W
Staff MemberAssociate Editor
AUTOMODELER
_VISITCOMMUNITY
New York, United States
Joined: December 04, 2010
KitMaker: 11,666 posts
AeroScale: 7,410 posts
Posted: Wednesday, October 16, 2013 - 02:26 AM UTC
Ben,
You just saved me from making a huge, huge mistake. Right from the start I wanted to keep the bomb aiming doors open as it's such a unusual feature of this aircraft that GWH included.

I'm building the Midway version, which comes with just two different torpedoes. There is a Coral Sea version which has bombs instead. My brother bought that version, might talk him into a swap. Decals are completely different, as they have the red meatballs in the center of the star, and the red/white rudder.

Joel