Been working on sanding and cleaning up the fuselage & wing joint seams. I used like always, my go to glue: Tamiya Xtra Thin, but ran into a issue I haven't really seen before. The Xtra thin is a hotter glue, really melting the surface plastic so that the parts are fused together. This time, it did the job too well. Besides the usual plastic little globs that you sand off, I also found a ton of little pin holes that needed filling. This I guess is caused by a carbon based gas being formed in the fusing process. GWH uses a rather softer plastic then Tamiya or Hasegawa, that is very easy to work with, & sands easily.
It was very easy to solve this issue by simply switching to Tamiya Orange glue, and Testors thin liquid glue which is has the same consistency of the Orange. Only difference is that is doesn't dry nearly as fast.
Joel
Air Campaigns
Want to start or join a group build? This is where to start.
Want to start or join a group build? This is where to start.
Hosted by Frederick Boucher, Michael Satin
OFFICIAL: Douglas Parade of Propeller Power
Joel_W

Joined: December 04, 2010
KitMaker: 11,666 posts
AeroScale: 7,410 posts

Posted: Wednesday, October 16, 2013 - 05:24 AM UTC

Mcleod

Joined: April 07, 2010
KitMaker: 1,028 posts
AeroScale: 939 posts

Posted: Friday, October 18, 2013 - 05:24 PM UTC
After thinning my yellow enamel so bad, it ran on the initial paint-job, I managed to get her fixed up.
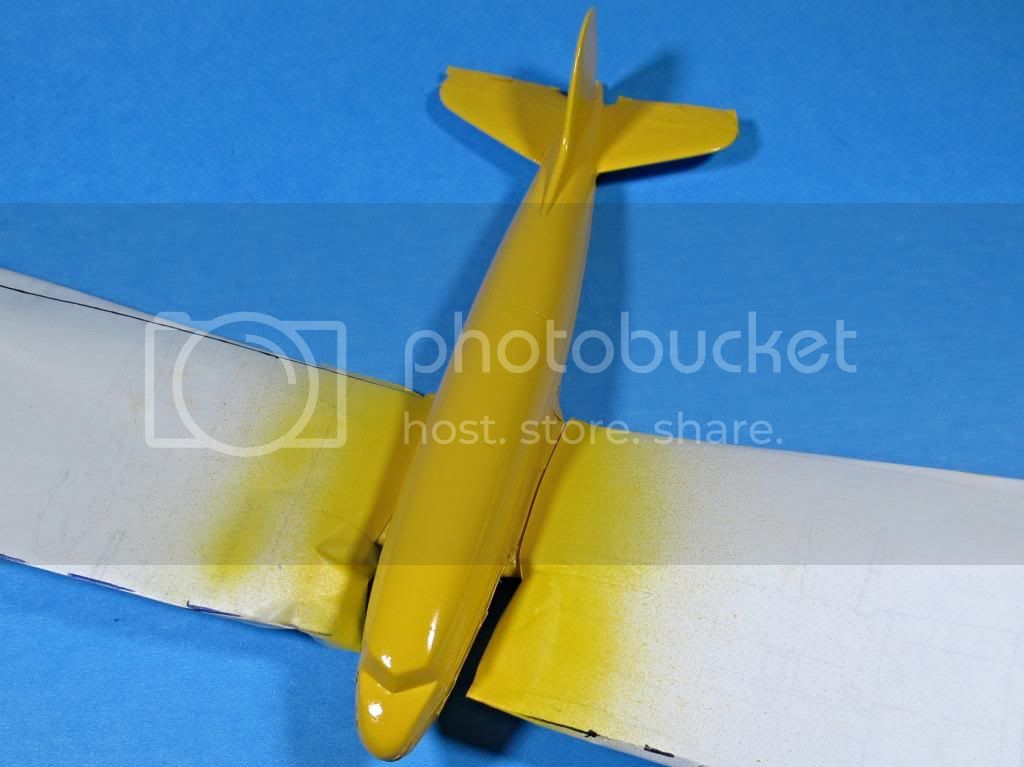
Did it with some wet sanding pads, starting from 2400grit and moving up to 4000grit. I feel I got the yellow evened out well enough:
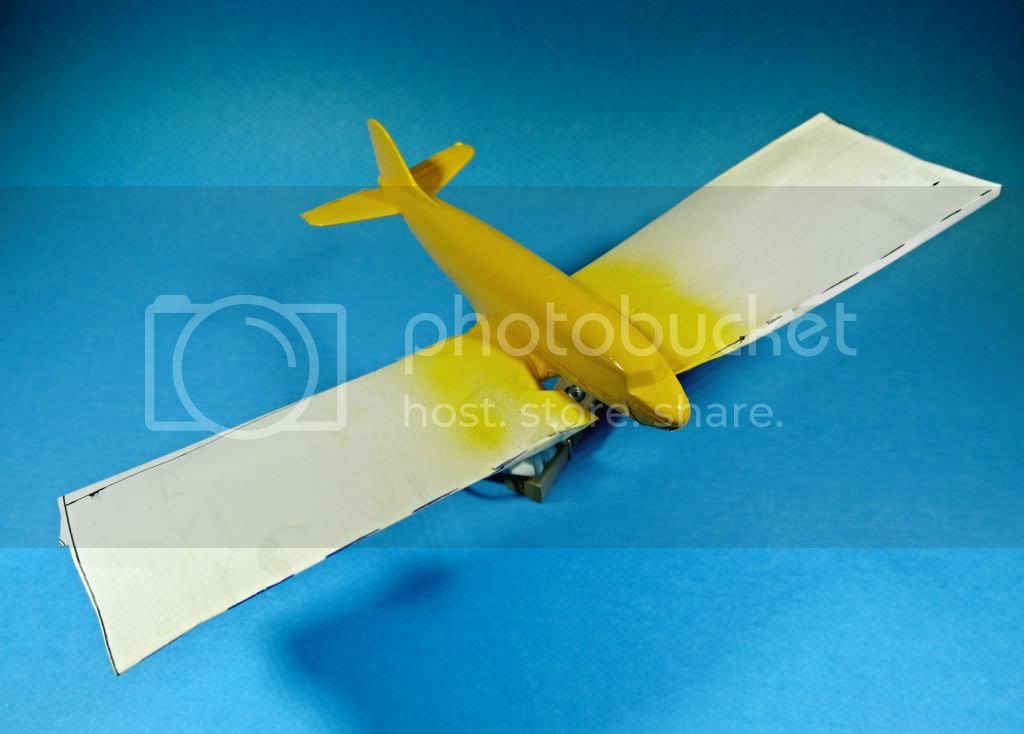
When the enamel is set in a couple of days, I'll add the green cheat line. After that, I'm seriously considering Bare Metal Foil for the sides and upper wings. Never have tried it before; there's always a first time for everything.
The underside is done in light grey with a realitively soft demarcation line. I'll try to put that on after the foil, if that experiment works out.
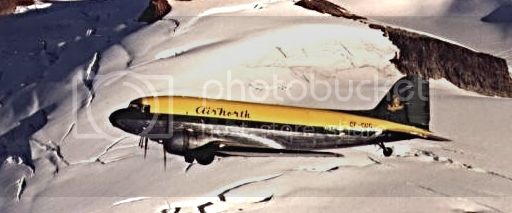

Did it with some wet sanding pads, starting from 2400grit and moving up to 4000grit. I feel I got the yellow evened out well enough:

When the enamel is set in a couple of days, I'll add the green cheat line. After that, I'm seriously considering Bare Metal Foil for the sides and upper wings. Never have tried it before; there's always a first time for everything.
The underside is done in light grey with a realitively soft demarcation line. I'll try to put that on after the foil, if that experiment works out.

Posted: Friday, October 18, 2013 - 11:30 PM UTC
Hi Ben
I have never tried foil so it will be interesting to see how you
make out,good luck!

I have never tried foil so it will be interesting to see how you
make out,good luck!

Joel_W

Joined: December 04, 2010
KitMaker: 11,666 posts
AeroScale: 7,410 posts

Posted: Saturday, October 19, 2013 - 11:04 AM UTC
Ben, looking good.
I've used Bare Metal foil a few times on some F1 race cars. It's rather tricky to work with. Try using smallish pieces rather then a few larger pieces. Rubbing it down, and smoothing out the foil, it's very easy to cause a wrinkle. Once done, it's almost impossible to lift up and remove the wrinkle. It also is very easy to tear once removed from the backing. If you cut pieces slightly larger then a panel, then work the foil into the panel line to line, it cuts very easy with a new #11 Exacto blade. You only use the slightest of pressure to cut. Too much and the foil just tears.
Joel

Mcleod

Joined: April 07, 2010
KitMaker: 1,028 posts
AeroScale: 939 posts

Posted: Saturday, October 19, 2013 - 11:29 AM UTC
Some good information there, Joel. I'll use it when I get to trying the foil. Thankyou

Jessie_C


Joined: September 03, 2009
KitMaker: 6,965 posts
AeroScale: 6,247 posts

Posted: Thursday, October 31, 2013 - 05:12 AM UTC
We were talking about conversions in the recruiting thread. Here's a 1/72 BT-67 conversion to make a modern DC-3.
Posted: Thursday, October 31, 2013 - 11:38 AM UTC
Thank you for the link Jessica.
I am looking forward to getting home and back to the modeling bench!

I am looking forward to getting home and back to the modeling bench!


Jessie_C


Joined: September 03, 2009
KitMaker: 6,965 posts
AeroScale: 6,247 posts

Posted: Wednesday, November 06, 2013 - 05:20 PM UTC
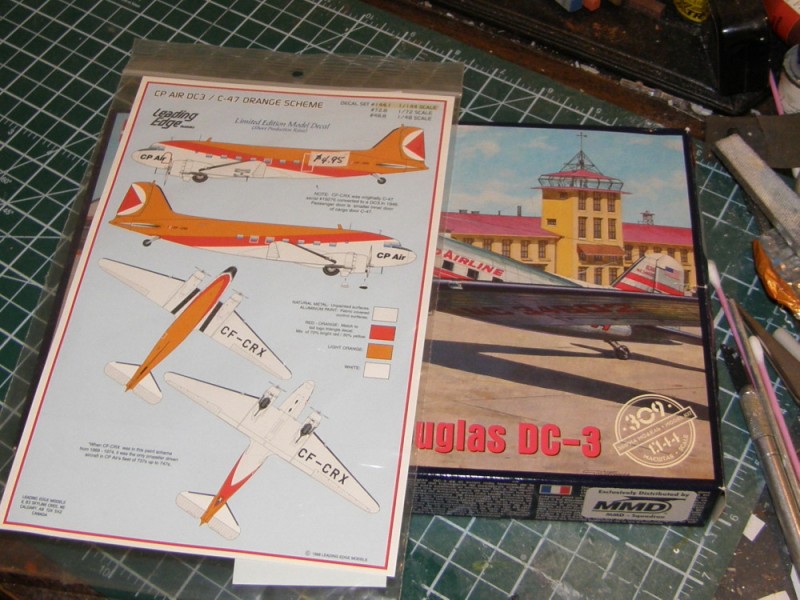
I think I just might feel a DC-3 coming on...


warreni

Joined: August 14, 2007
KitMaker: 5,926 posts
AeroScale: 2,201 posts

Posted: Wednesday, November 06, 2013 - 08:09 PM UTC
Some great builds in here.
@ Jessica, well done on the two micro birds.
@ Mike, your NMF bird looks amazing. I was going to build a DB-8 but I might have to find something else now.
All the builds look as though they are coming along well.
I will have to stop dragging the chain and get something started not the Amiot is finished.
Cheers
Warren
Posted: Wednesday, November 06, 2013 - 11:25 PM UTC
Hi Jessica.
Nice choice of decals.
Is the decal set just the lettering and the rest a masking job?

Nice choice of decals.
Is the decal set just the lettering and the rest a masking job?


Jessie_C


Joined: September 03, 2009
KitMaker: 6,965 posts
AeroScale: 6,247 posts

Posted: Thursday, November 07, 2013 - 05:42 AM UTC
No, in this scale you get the red stripe. It's the 1/72 and 1/48 sheets which require you to mask and paint the red, not that that's a difficult task.
Posted: Thursday, November 07, 2013 - 06:58 AM UTC
Quoted Text
No, in this scale you get the red stripe. It's the 1/72 and 1/48 sheets which require you to mask and paint the red, not that that's a difficult task.
Thank you good to know.


warreni

Joined: August 14, 2007
KitMaker: 5,926 posts
AeroScale: 2,201 posts

Posted: Thursday, November 07, 2013 - 08:15 AM UTC
Hello Everyone.
My name is Warren and I am a campaign junkie..
Too keep my habit going I propose to build another DB-8, even though it was initially designed and built by Northrop Douglas took them over and inherited this fine attack bomber.. well fine a few years before WW2 but a little obsolete by the time The Netherlands had to use them.
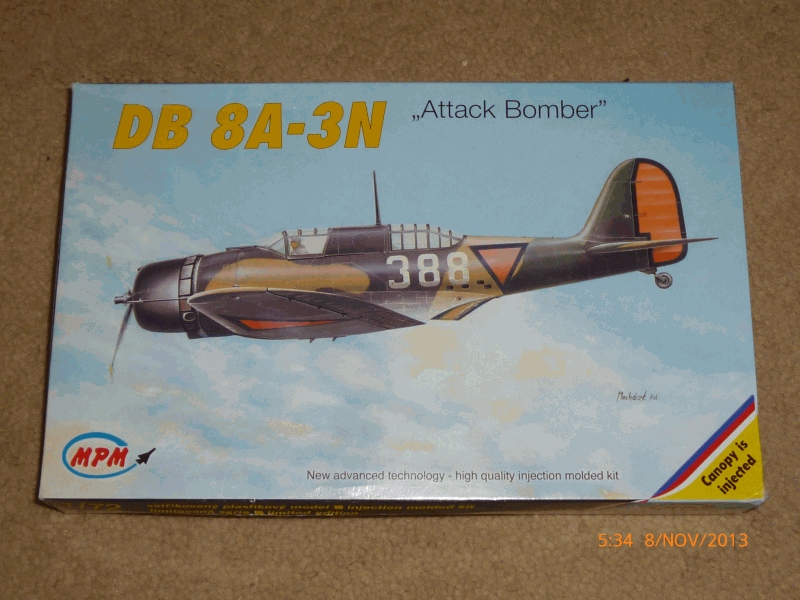
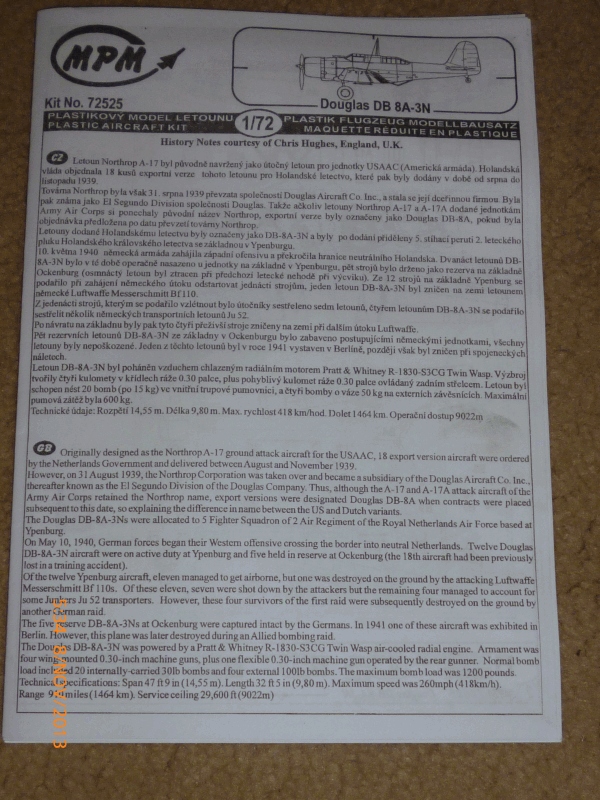
This is the MPM 1/72 DB 8A-3N Attack Bomber.
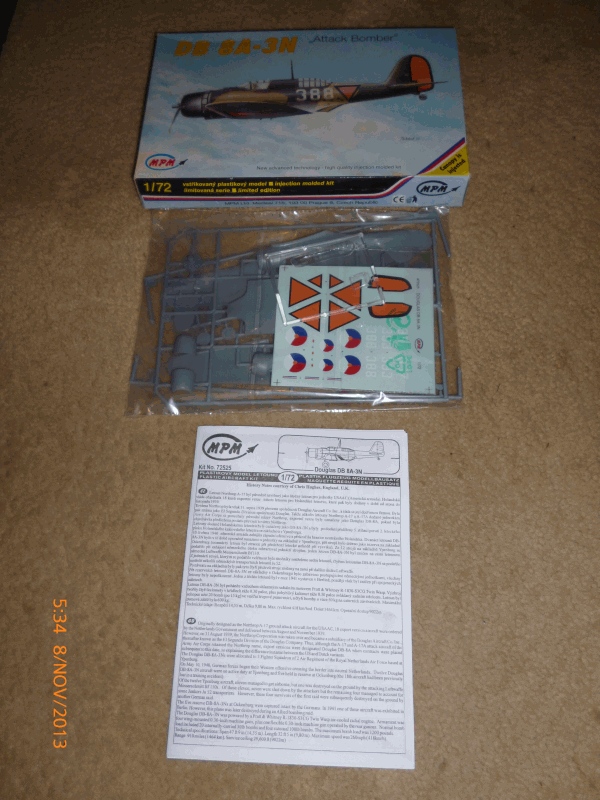
Box art..
Instructions..
Plastic bits..
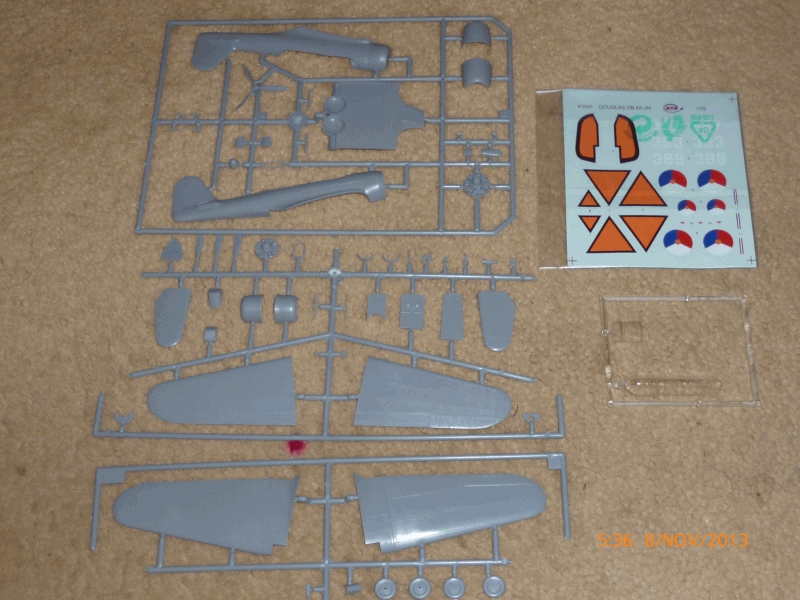
As you can see from the following photo the surface detailing is very nice, like most MPM/Special Hobby/Azur kits..
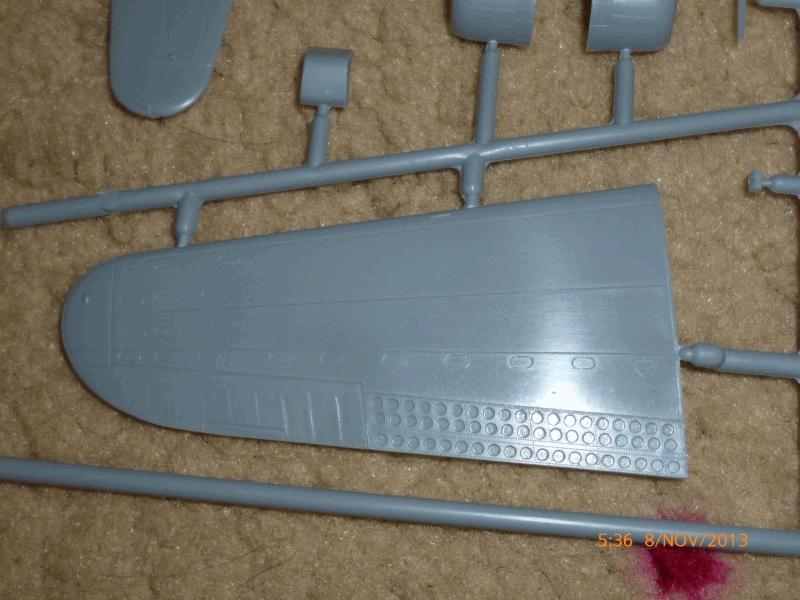
There are three marking options, all Dutch, and I am not sure as yet as to which one I will build. I also have the A-17 in the stash but as Mike did such a fantastic job on his 1/48 one I thought a 1/72 one would be a bit much..
I also have about 4 DC-2s in the stash but there are enough of them being built here for the time being.
Cheers for now
Warren
My name is Warren and I am a campaign junkie..

Too keep my habit going I propose to build another DB-8, even though it was initially designed and built by Northrop Douglas took them over and inherited this fine attack bomber.. well fine a few years before WW2 but a little obsolete by the time The Netherlands had to use them.
This is the MPM 1/72 DB 8A-3N Attack Bomber.

Box art..

Instructions..

Plastic bits..

As you can see from the following photo the surface detailing is very nice, like most MPM/Special Hobby/Azur kits..

There are three marking options, all Dutch, and I am not sure as yet as to which one I will build. I also have the A-17 in the stash but as Mike did such a fantastic job on his 1/48 one I thought a 1/72 one would be a bit much..

I also have about 4 DC-2s in the stash but there are enough of them being built here for the time being.
Cheers for now
Warren

Jessie_C


Joined: September 03, 2009
KitMaker: 6,965 posts
AeroScale: 6,247 posts

Posted: Thursday, November 07, 2013 - 09:00 AM UTC
There is no such thing as "enough" DCs of any kind.
Joel_W

Joined: December 04, 2010
KitMaker: 11,666 posts
AeroScale: 7,410 posts

Posted: Thursday, November 07, 2013 - 11:50 AM UTC
Time for a major update, but just a few pictures.
My apologies to the group build members as in my hast to post my latest update in my build blog, I forgot to post it in the Douglas campaign as well.
I completed the painting stage except for the propeller and wheels. Mal, of Miracle Masks
https://www.facebook.com/miraclemasks
is making me a set of masks for the main wheels, as I prefer to airbrush the tires and the wheels. I must say that I'm really looking forward to trying them.
As with all my two tone USA Navy WW11 aircraft painted in the two tone Coral Sea/Midway scheme, I use Tamiya acrylics, custom mixed on the light side to help define fading due to the tropical sun and salt water.
Intermediate Blue/Gray is a 1:1 mix of FX 18 Medium Blue & FX19 Sky Gray with a few drops of FX-1 black.
Faded intermediate Blue/Gray is the above mix with FX-2 White added till it looked about right.
Light Grey undersides is a mix of FX-20 Medium Gray with a few drops of FX-2 White.
The fading usually wasn't uniform, so I over sprayed the Intermediate the Intermediate blue/gray with a the light shade in a random blotchy pattern.
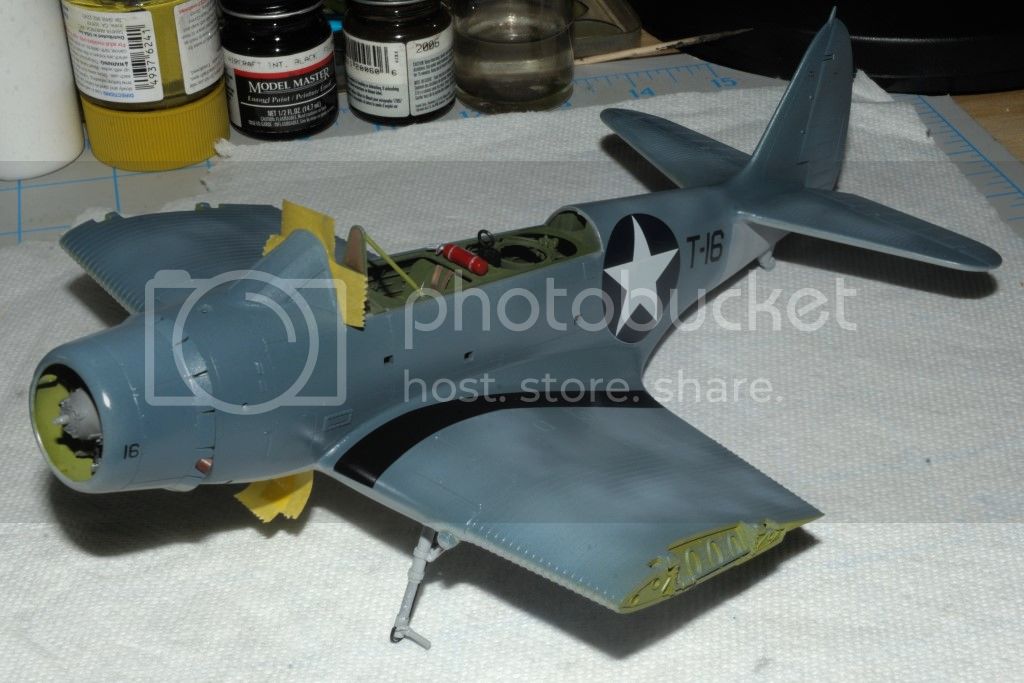
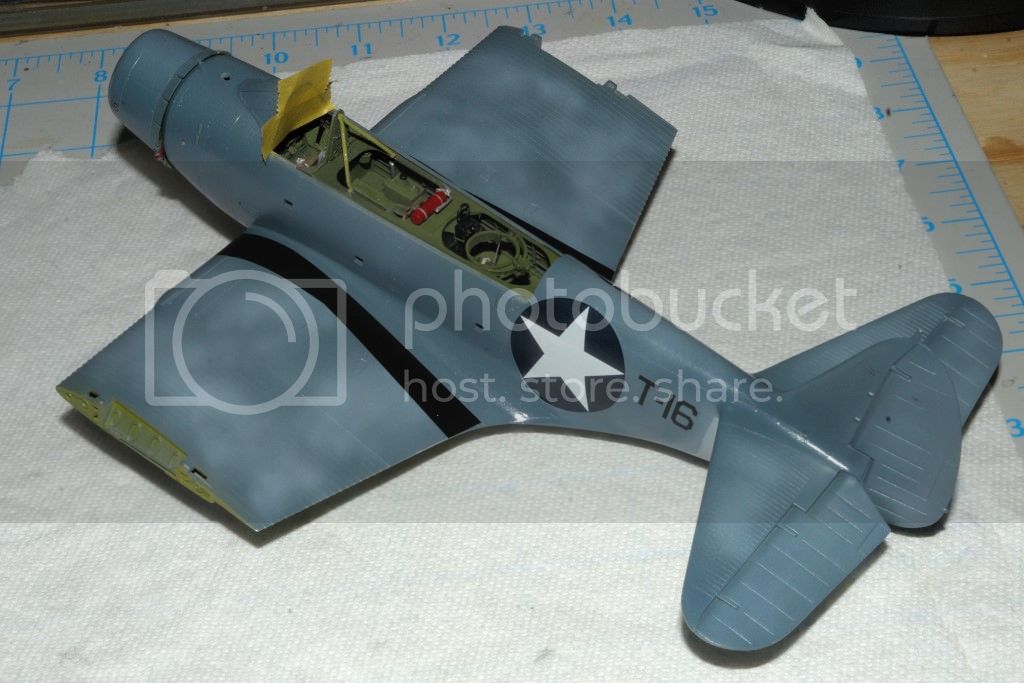
When the paint had dried for a day, I coated all the surfaces by air brushing on a few coats of Pledge/Future. When dry, the decals were applied using the Microscale Set/Sol system. Kit decals were used, and I was really impressed with the quality of the GWH decals. Colors and registration were perfect, slightly glossy, and whatever glue they use, really sticks to the Pledge. moving the decals was an issue till I tried using a #5/0 brush that I slid under the decal. They then all moved quite easily. The following day when I checked the decals, they looked painted on as they just settled into all the recesses. The only issue I had was the circles & stars on the ribbed wings. Asking decals to conform to that undulation was always a major issue, that required much time and effort, and didn't always work out as one hoped it would. The GWH decals with just a good overcoat of Sol settled down just fine, with only a few spots that needed further work the following day. I used a needle to poke some holes so I could work the trapped air out, then Set on a Qtip with. A few spots did require another application of Sol, but the end result was near perfect.
A few more coats of Pledge/Future was air brushed on all surfaces, when dry, the weathering process started.
Started the weathering process the following day for the bottom of the aircraft with just Flory Dark wash to help tone down, stain, and created blackened panel lines.
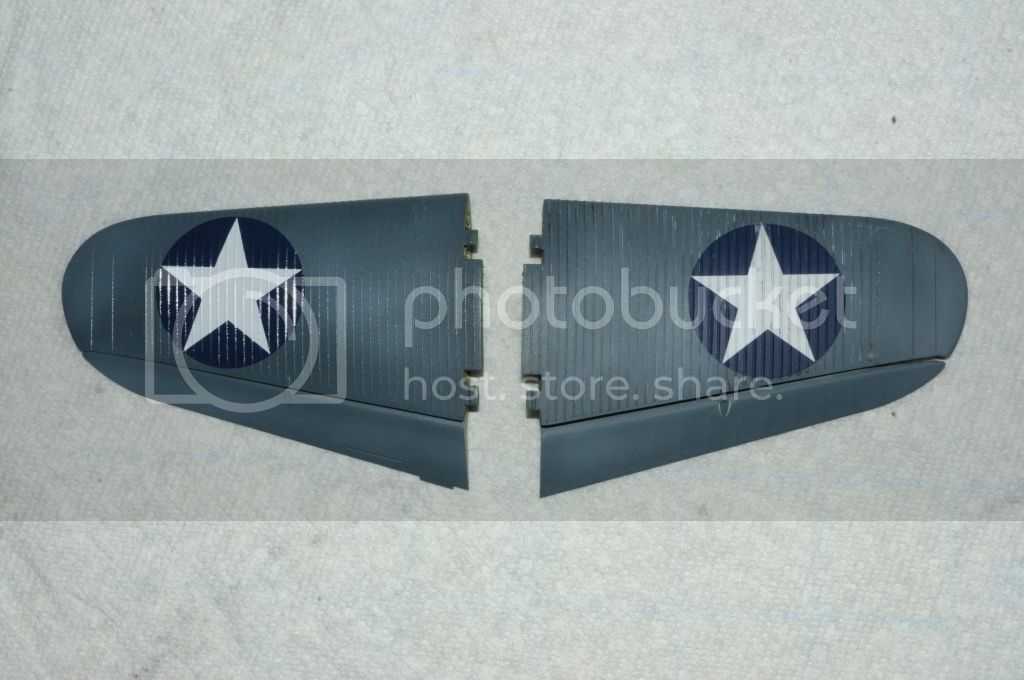
The upper surfaces was process that I tested on one outer wing 1st.
Overall coat of Dark Flory wash
blotchy, uneven coat of light wash trying to follow the airbrush fading to some degree. In this case, close was good enough.
no matter how I tried to not get any light wash into the panel lines, I did that in many places. So I carefully applied a pin wash of MM enamel Black. A slight clean up with a Qtip dampened with Mineral Spirits worked just fine. Here's two pictures. The 1st is one outer wing weathered, with the other not weathered for comparison.
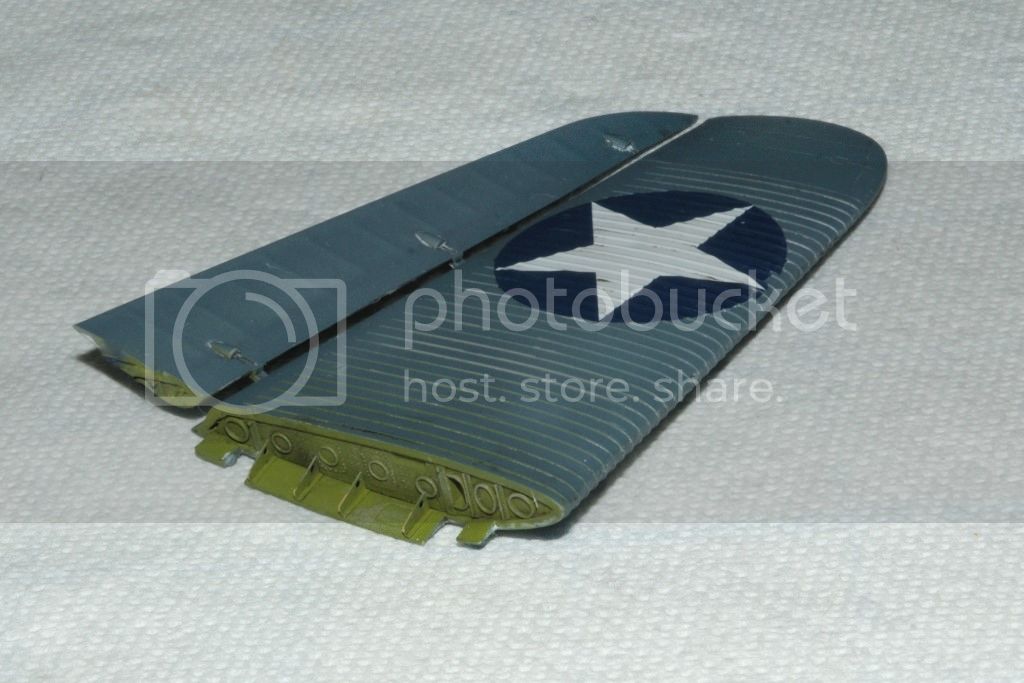
Thanks for stopping by and having a look.
Joel
My apologies to the group build members as in my hast to post my latest update in my build blog, I forgot to post it in the Douglas campaign as well.
I completed the painting stage except for the propeller and wheels. Mal, of Miracle Masks
https://www.facebook.com/miraclemasks
is making me a set of masks for the main wheels, as I prefer to airbrush the tires and the wheels. I must say that I'm really looking forward to trying them.
As with all my two tone USA Navy WW11 aircraft painted in the two tone Coral Sea/Midway scheme, I use Tamiya acrylics, custom mixed on the light side to help define fading due to the tropical sun and salt water.
Intermediate Blue/Gray is a 1:1 mix of FX 18 Medium Blue & FX19 Sky Gray with a few drops of FX-1 black.
Faded intermediate Blue/Gray is the above mix with FX-2 White added till it looked about right.
Light Grey undersides is a mix of FX-20 Medium Gray with a few drops of FX-2 White.
The fading usually wasn't uniform, so I over sprayed the Intermediate the Intermediate blue/gray with a the light shade in a random blotchy pattern.
When the paint had dried for a day, I coated all the surfaces by air brushing on a few coats of Pledge/Future. When dry, the decals were applied using the Microscale Set/Sol system. Kit decals were used, and I was really impressed with the quality of the GWH decals. Colors and registration were perfect, slightly glossy, and whatever glue they use, really sticks to the Pledge. moving the decals was an issue till I tried using a #5/0 brush that I slid under the decal. They then all moved quite easily. The following day when I checked the decals, they looked painted on as they just settled into all the recesses. The only issue I had was the circles & stars on the ribbed wings. Asking decals to conform to that undulation was always a major issue, that required much time and effort, and didn't always work out as one hoped it would. The GWH decals with just a good overcoat of Sol settled down just fine, with only a few spots that needed further work the following day. I used a needle to poke some holes so I could work the trapped air out, then Set on a Qtip with. A few spots did require another application of Sol, but the end result was near perfect.
A few more coats of Pledge/Future was air brushed on all surfaces, when dry, the weathering process started.
Started the weathering process the following day for the bottom of the aircraft with just Flory Dark wash to help tone down, stain, and created blackened panel lines.
The upper surfaces was process that I tested on one outer wing 1st.
Overall coat of Dark Flory wash
blotchy, uneven coat of light wash trying to follow the airbrush fading to some degree. In this case, close was good enough.
no matter how I tried to not get any light wash into the panel lines, I did that in many places. So I carefully applied a pin wash of MM enamel Black. A slight clean up with a Qtip dampened with Mineral Spirits worked just fine. Here's two pictures. The 1st is one outer wing weathered, with the other not weathered for comparison.
Thanks for stopping by and having a look.
Joel
Posted: Thursday, November 07, 2013 - 12:43 PM UTC
My name is Warren and I am a campaign junkie.
Welcome Warren to the Aeroscale rehab Campaign HQ
Joel nice paint work,looking forward to more posts.
Jessica maybe we could run a DC-? group build like the P-61
and blog as we build with no time limit.

Welcome Warren to the Aeroscale rehab Campaign HQ

Joel nice paint work,looking forward to more posts.
Jessica maybe we could run a DC-? group build like the P-61
and blog as we build with no time limit.


Jessie_C


Joined: September 03, 2009
KitMaker: 6,965 posts
AeroScale: 6,247 posts

Posted: Thursday, November 07, 2013 - 03:25 PM UTC
Quoted Text
Jessica maybe we could run a DC-? group build like the P-61 and blog as we build with no time limit.
That's just the thing which would make me get my Execform DC-5 out of the mothballs. I'd be up for that

Posted: Thursday, November 07, 2013 - 11:52 PM UTC
Quoted Text
Quoted TextJessica maybe we could run a DC-? group build like the P-61 and blog as we build with no time limit.
That's just the thing which would make me get my Execform DC-5 out of the mothballs. I'd be up for that
Hi Jessica.
I will set up a DC-? build blog in the WWII forum.
We need a Civil Aircraft Forum set up covering all time lines.

Joel_W

Joined: December 04, 2010
KitMaker: 11,666 posts
AeroScale: 7,410 posts

Posted: Friday, November 08, 2013 - 02:23 AM UTC
Richard, thanks for the positive comment on the paint. The fading process is getting there, but still not exactly what I'm looking for.
Like your idea about a DC-? unofficial GB. We've been getting way more responses to our (Justin & mine) P61 GB then we originally thought. It started off with Justin and I just doing the same P-61 kit, and kicking ideas back and forth. It just kind of morphed into what it is now.
Joel
Like your idea about a DC-? unofficial GB. We've been getting way more responses to our (Justin & mine) P61 GB then we originally thought. It started off with Justin and I just doing the same P-61 kit, and kicking ideas back and forth. It just kind of morphed into what it is now.
Joel
Posted: Friday, November 08, 2013 - 04:58 AM UTC
Hi Joel
I like the idea of an informal build schedule as a break from the campaign time constraints,less likely to rush to a finish date only to find the Campaign has been given an extention(a pet peev of mine).
Giving Civil Aircraft their on forum instead of breaking it into different eras by build/service date, would be nice to have set up.

Richard.
I like the idea of an informal build schedule as a break from the campaign time constraints,less likely to rush to a finish date only to find the Campaign has been given an extention(a pet peev of mine).
Giving Civil Aircraft their on forum instead of breaking it into different eras by build/service date, would be nice to have set up.

Richard.
Joel_W

Joined: December 04, 2010
KitMaker: 11,666 posts
AeroScale: 7,410 posts

Posted: Saturday, November 09, 2013 - 09:45 AM UTC
Quoted Text
Hi Joel
I like the idea of an informal build schedule as a break from the campaign time constraints,less likely to rush to a finish date only to find the Campaign has been given an extention(a pet peev of mine).
Giving Civil Aircraft their on forum instead of breaking it into different eras by build/service date, would be nice to have set up.
Richard.
Richard, it's been one of my pet campaign issues as well. Almost all the campaigns I've been associated with were during my armor days on Armorama, and most were 6 months or more. Guys would sign up, and not get around to starting till the last month or so, then ask for an extension of a few weeks to finish. That's really not fair to the rest of the campaign members, who left enough time to complete their build within the campaign designated time frame.
Joel

warreni

Joined: August 14, 2007
KitMaker: 5,926 posts
AeroScale: 2,201 posts

Posted: Monday, November 11, 2013 - 03:19 AM UTC
Quoted Text
Quoted TextHi Joel
I like the idea of an informal build schedule as a break from the campaign time constraints,less likely to rush to a finish date only to find the Campaign has been given an extention(a pet peev of mine).
Giving Civil Aircraft their on forum instead of breaking it into different eras by build/service date, would be nice to have set up.
Richard.
Richard, it's been one of my pet campaign issues as well. Almost all the campaigns I've been associated with were during my armor days on Armorama, and most were 6 months or more. Guys would sign up, and not get around to starting till the last month or so, then ask for an extension of a few weeks to finish. That's really not fair to the rest of the campaign members, who left enough time to complete their build within the campaign designated time frame.
Joel
Agree 100%.
Just add a rule prohibiting extensions..

Joel_W

Joined: December 04, 2010
KitMaker: 11,666 posts
AeroScale: 7,410 posts

Posted: Monday, November 11, 2013 - 04:29 AM UTC
Warren, that's a great idea if you're the Campaign leader. I guess you can always suggest that it be included in the campaign rules before the campaign actually starts. I know that for the Grumman campaign there will be no extensions. 5 months is more then enough time to finish a OOB.
The problem from the way I perceive it is that members sign on, and have so many prior commitments to other campaigns and builds, that they just don't have the time to do them all within the allotted time frame.
Joel
The problem from the way I perceive it is that members sign on, and have so many prior commitments to other campaigns and builds, that they just don't have the time to do them all within the allotted time frame.
Joel
Joel_W

Joined: December 04, 2010
KitMaker: 11,666 posts
AeroScale: 7,410 posts

Posted: Monday, November 11, 2013 - 04:34 AM UTC
Richard,
If there is enough interest in civil aviation as a forum, rather then being split by era, why not propose it? You can post your ideas in Site Feedback forum, pm Admins, and even have members sign up for it by having them post their interest in your thread.
If there can be a Rotary forum, a Civil airplane forum is certainly a justifiable concept. You have a very active Moderator in Jessica that seems to love Civil airliners. She would be a great co-sponsor, and advisor to you on how to proceed.
Joel
Posted: Monday, November 11, 2013 - 05:04 AM UTC
Hi Joel
Thank you for your comments which I will copy and post in the feed back forum.

Thank you for your comments which I will copy and post in the feed back forum.

 |


