

Mal, from trying to find and define your Mojo, to now resurrecting two kits along with your splendid BF110 , I'd say you've got your hands quite full. Whatever you do, don't overload yourself, and get burnt out again.
My Mantra has always been just one kit at a time from start to finish, trying to reach the goals I've set for that build. If I have little to nothing to do at any one point, or need a break, I start/continue with my research for my next build, and even purchase the kit (if I don't already have it), AM parts, paints, research material, etc. that I will need based on my research, but I don't open up the kit, nor any of the AM packages.
Joel
Hosted by Rowan Baylis
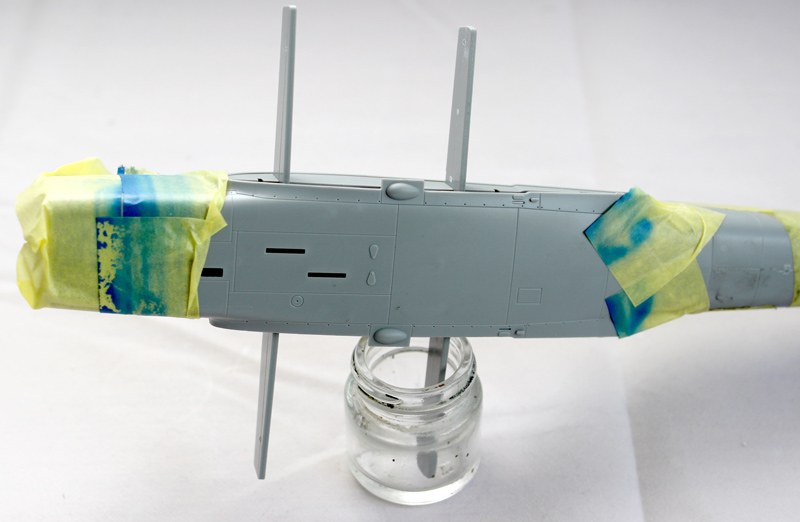
1/32 Bf110 + painted on markings
Joel_W

Joined: December 04, 2010
KitMaker: 11,666 posts
AeroScale: 7,410 posts
Posted: Thursday, January 30, 2014 - 01:43 AM UTC

Holdfast

#056

Joined: September 30, 2002
KitMaker: 8,581 posts
AeroScale: 4,913 posts

Posted: Thursday, January 30, 2014 - 08:24 PM UTC
A nice idea Joel  but this doesn't work for me. I'm not too worried about after market stuff or scratch building, although I do use AM goodies when I feel that they are worth it, and I do do some scratch building, when I feel that it is the way to go or just for the fun of it. My primary goal is to get to the painting stage and get those Miracle Paint Masks on. The He163 and Bf109 had stalled for different reasons and are not stopping me from cracking on, in fact they are helping me to get my mojo back as I can now see them both getting finished along with the Bf110
  I am also looking at a P-47, which stalled because I desperately wanted to do it in the markings of "No Guts-No Glory" but producing paint masks for the checkers on the nose is proving next to impossible. I have all but decided to do it as "Big Ass Bird" for which I have already produce the masks for a certain manufacturer but I need to clarify the sub type of the to see if I can go that route with where I am with the build.
My sticking point with the Bf110 is what colour to paint the "boxes", black or RLM66?
but this doesn't work for me. I'm not too worried about after market stuff or scratch building, although I do use AM goodies when I feel that they are worth it, and I do do some scratch building, when I feel that it is the way to go or just for the fun of it. My primary goal is to get to the painting stage and get those Miracle Paint Masks on. The He163 and Bf109 had stalled for different reasons and are not stopping me from cracking on, in fact they are helping me to get my mojo back as I can now see them both getting finished along with the Bf110 I am also looking at a P-47, which stalled because I desperately wanted to do it in the markings of "No Guts-No Glory" but producing paint masks for the checkers on the nose is proving next to impossible. I have all but decided to do it as "Big Ass Bird" for which I have already produce the masks for a certain manufacturer but I need to clarify the sub type of the to see if I can go that route with where I am with the build.My sticking point with the Bf110 is what colour to paint the "boxes", black or RLM66?


greif8

Joined: January 17, 2006
KitMaker: 673 posts
AeroScale: 492 posts

Posted: Thursday, January 30, 2014 - 11:57 PM UTC
Hi Mal, for what it is worth, I think you could paint the "boxes" either black or RLM66 and be right. I have looked at thousands of photos of Luftwaffe aircraft and one thing I have learned from all that eyestrain is very often that when it came to painting Luftwaffe standardization was any but standard. A bane due to the frustrations of trying to pin down exactly what paint instructions applied when to what aircraft. I boon because it allows us modellers A LOT of latitude when it comes to painting. I have learned not to obsess too much when it comes to painting areas or things where there is a fair amount of question as to "what right looks like" on the actual aircraft. Just my two cents.
Ernest
Ernest
Quoted Text
My sticking point with the Bf110 is what colour to paint the "boxes", black or RLM66?
Joel_W
Joined: December 04, 2010
KitMaker: 11,666 posts
AeroScale: 7,410 posts
Posted: Friday, January 31, 2014 - 06:48 AM UTC
Mal,
And a P-47 now!!
I've always shied away from those checkered cowls, as I have very little success with compound curves. Jet drop tanks and wing tip tanks have all caused me to age at a faster then normal rate. I've learned the hard way to cut those decals into smaller, workable sections. Perhaps that's the way you should attempt masks for those massive Jug cowlings. Top, bottom, right, & left sides. Just food for thought.
Joel

FredrikA

Joined: January 09, 2008
KitMaker: 92 posts
AeroScale: 90 posts
Posted: Friday, January 31, 2014 - 09:12 AM UTC
Hello Mal!
What a nice blog to follow!
I second Ernest about the painting of the boxes, but might lean towards RLM66 since black tends to be too black, too stark. A very dark grey instead of either black or RLM66 could be a third option.
The wasp mask will be interesting to see sprayed. I have now seen how fantastic your masks are, but there are no shapes that complex on a Spitfire with the normal markings. Hope it really works out well.
/Fred
Holdfast
#056
Joined: September 30, 2002
KitMaker: 8,581 posts
AeroScale: 4,913 posts
Posted: Friday, January 31, 2014 - 08:12 PM UTC
Thanks Ernest, I will paint some black and leave some RLM66 I was just about to start doing that when I started thinking that I had missed something (lost mojo at work!), then I realised that I hadn't given the parts a matt coat! So I have been experimenting with a new matt varnish that I picked up; so when I know that it will work I'll be able to crack on and do that, hopefully today
LOL, before I moved I had about 30 models on the go! I haven't mentioned the Do215, the Catalina, the Mistel, The Hurricane, the Sherman (what!) the B-25, the F6F-3. There some others I think? These are all 1/48 apart from the Hurricane which is 1/32 and in 1/72 I have a Spit, 109, Hurri, Fw190 and Typhoon
I'm afraid that there is no easy way; the only way that the checkered cowl can be masked for a one coat of black (after the whole cowl has been painted white) Is to apply individual squares to mask out the white. To position them each accurately you need to cover the whole cowling in mask squares and then weed out the ones to be painted black. I have had numerous attempts at doing this but with the altering compound curvature of the cowling it has proved an illusive concept to master. If I could accurately draw the cowling and apply the squares to it I could then "unwrap" it and the problem would be solved. A customer actually sent me a high end drawing package so that I could do this but My PC wouldn't except it! The only other way is to use long lengths of masking material, cut to the correct width that will go around the cowling and have lengths of tape for and aft, which will enable you to paint half of the black squares, then do the same for the other half, but that isn't as easy as it sounds. When I say squares not one of the checks is actually square. I have come up with what might be a solution though, so watch this space, well not this one it will be another one
Hi Fredrik,
Thanks
The boxes that I paint black will be dray brushed with dark grey, with the RLM66 interior colour the black will give a nice contrast, I may use Mitsubishi cowl black
Yes I'm looking forward to getting the Wespe painted, it will require a few more tweaks first though but, once the mask is applied it essentially won't be any more difficult than a 4 coloured RAF C1 roundel, there will just be many more elements to replace Like I said in your Spitfire thread, the hardest part is the positioning, I will expect to go through a couple of masks getting the first half accurately positioned; I already know, from the earlier trials in this blog that I will have to get inventive with the transfer tape I am itching to get to the painting stage
I was just about to start doing that when I started thinking that I had missed something (lost mojo at work!), then I realised that I hadn't given the parts a matt coat! So I have been experimenting with a new matt varnish that I picked up; so when I know that it will work I'll be able to crack on and do that, hopefully today Quoted Text
And a P-47 now!!
LOL, before I moved I had about 30 models on the go! I haven't mentioned the Do215, the Catalina, the Mistel, The Hurricane, the Sherman (what!) the B-25, the F6F-3. There some others I think? These are all 1/48 apart from the Hurricane which is 1/32 and in 1/72 I have a Spit, 109, Hurri, Fw190 and Typhoon
Quoted Text
Perhaps that's the way you should attempt masks for those massive Jug cowlings. Top, bottom, right, & left sides. Just food for thought.
Joel
I'm afraid that there is no easy way; the only way that the checkered cowl can be masked for a one coat of black (after the whole cowl has been painted white) Is to apply individual squares to mask out the white. To position them each accurately you need to cover the whole cowling in mask squares and then weed out the ones to be painted black. I have had numerous attempts at doing this but with the altering compound curvature of the cowling it has proved an illusive concept to master. If I could accurately draw the cowling and apply the squares to it I could then "unwrap" it and the problem would be solved. A customer actually sent me a high end drawing package so that I could do this but My PC wouldn't except it! The only other way is to use long lengths of masking material, cut to the correct width that will go around the cowling and have lengths of tape for and aft, which will enable you to paint half of the black squares, then do the same for the other half, but that isn't as easy as it sounds. When I say squares not one of the checks is actually square. I have come up with what might be a solution though, so watch this space, well not this one it will be another one
Hi Fredrik,
Thanks
The boxes that I paint black will be dray brushed with dark grey, with the RLM66 interior colour the black will give a nice contrast, I may use Mitsubishi cowl black
Yes I'm looking forward to getting the Wespe painted, it will require a few more tweaks first though but, once the mask is applied it essentially won't be any more difficult than a 4 coloured RAF C1 roundel, there will just be many more elements to replace
Like I said in your Spitfire thread, the hardest part is the positioning, I will expect to go through a couple of masks getting the first half accurately positioned; I already know, from the earlier trials in this blog that I will have to get inventive with the transfer tape I am itching to get to the painting stage greif8
Joined: January 17, 2006
KitMaker: 673 posts
AeroScale: 492 posts
Posted: Friday, January 31, 2014 - 09:08 PM UTC
Hi Mal, I am currently using Vallejo's matt finish, and while it gets the job done I am not completely satisfied with it. Is the new matt finish you bought acrylic? If so could you tell me your impressions after you use it?
Cheers,
Ernest
Cheers,
Ernest
Joel_W
Joined: December 04, 2010
KitMaker: 11,666 posts
AeroScale: 7,410 posts
Posted: Saturday, February 01, 2014 - 10:06 AM UTC
Mal, I've tried many different clear matt finishes over the years, and none come close to Testors Dullcoat.
Joel
Joel
Holdfast
#056
Joined: September 30, 2002
KitMaker: 8,581 posts
AeroScale: 4,913 posts
Posted: Saturday, February 01, 2014 - 08:50 PM UTC
Quoted Text
Mal, I've tried many different clear matt finishes over the years, and none come close to Testors Dullcoat.
Joel
Is that an acrylic varnish Joel? I'm not sure where I could get that over here. If it is an enamel varnish then I won't use it! That sounds odd as I only use enamel paints but for varnish I light the way that acrylic varnish dries quickly.
Quoted Text
could you tell me your impressions after you use it?
Hi Ernest,
The matt varnish that I used is "Windsor & Newton Artistic Acrylic Matt UV Varnish".
I have been using artist acrylic varnish for some time but it always dried with a very slight sheen to it, but I thought that it did look quite cool. However when I saw models with a dead flat finish these appealed more. This varnish comes in a 125ml plastic bottle and is a whitish liquid that is thicker than water.
First of all I mixed it about 50/50 with some water and brushed it on a part that was painted RLM02 and had Klear applied over it. When this mix dried it had a disappointing sheen to it!
I added more varnish and brushed the mix on, there was still a sheen!
So I bit the bullet and loaded one of my airbrushes, not my best one, with neat varnish. I had to crank up the pressure to around 25/26psi (2bar) and pull the trigger all the way back but it then sprayed well in a narrow spray pattern (this seemed a bit odd as I had the trigger all the way back, but no matter, it sprayed. I flushed the airbrush with water.
I ended up with exactly what I was looking for, a dead matt finish and the varnish dried quickly, so I am more than pleased with the outcome; I'll post some pictures soon
Joel_W
Joined: December 04, 2010
KitMaker: 11,666 posts
AeroScale: 7,410 posts
Posted: Sunday, February 02, 2014 - 01:41 AM UTC
Mal, Testors Dullcoat and Glosscoat are Lacquer based clear coats. You can mix them for various effects if needed. Straight out of the bottle the gloss is like glass, and the Dull is dead flat Matt. And yes there is a lacquer odor only when thinning them for airbrushing.
I thin them 50/50 with any old Lacquer Thinner. I don't bother with the more expensive Testor thinners. This gives me the same consistency as any thinned Tamiya acrylic paint. I don't change needle & cone in my Paasche 1H airbrush, rather shooting the mixture through the standard #3 setup. I've tried using the #5 which has a much larger dia. opening in the cone, but way too much comes out for proper control. I adjust the compressor to 15-17 psi, and apply it just like paint.
A few mist coats, then a lite coat. one right after the other. Wait like 10 min and a then apply a wet coat. Dries to a hand touch by the time the gun is cleaned.
As for price, each 51.7ml bottle I have is labeled $3.29, but I've had them for a few years now. Every online retailer sells them.
While I've heard of people successfully hand brushing, I've only been able to apply them via airbrush.
Joel
greif8
Joined: January 17, 2006
KitMaker: 673 posts
AeroScale: 492 posts
Posted: Monday, February 03, 2014 - 12:14 AM UTC
Hi Mal, thank you for the answer on the matt varnish. I will have to pick some up and give it a try.
Sincerely,
Ernest
Sincerely,
Ernest
officer_crabtree

Joined: February 11, 2014
KitMaker: 27 posts
AeroScale: 20 posts
Posted: Wednesday, February 12, 2014 - 06:21 PM UTC
Hi mal,
You're making great progress on this big old' thing!
As I see you're doing the wasp scheme I looked through my 110 kits and found that I have a 1/72 airfix kit the same scheme.
I could take a picture of the scheme if you would like
James.
You're making great progress on this big old' thing!
As I see you're doing the wasp scheme I looked through my 110 kits and found that I have a 1/72 airfix kit the same scheme.
I could take a picture of the scheme if you would like
James.
Holdfast
#056
Joined: September 30, 2002
KitMaker: 8,581 posts
AeroScale: 4,913 posts
Posted: Wednesday, February 12, 2014 - 08:23 PM UTC
Quoted Text
Hi Mal, thank you for the answer on the matt varnish. I will have to pick some up and give it a try.
Sincerely,
Ernest
Further to the "new varnish", I had occasion to matt a couple of parts that I had missed so I used some of the thinned varnish that I had left in the jar, just to see if it would spray on matt (remember that it had'nt hand brushed matt). Well, being thinned it sprayed better and yes, it dried matt. This mix was around a 50/50 mix, possibly more varnish, so I need to check that a proper 50/50 mix works, but I am confident that it will
Quoted Text
Hi mal,
You're making great progress on this big old' thing!
As I see you're doing the wasp scheme I looked through my 110 kits and found that I have a 1/72 airfix kit the same scheme.
I could take a picture of the scheme if you would like
James.
Thanks James but I have all the information that I need
Are you going to build your Airfix 110?officer_crabtree
Joined: February 11, 2014
KitMaker: 27 posts
AeroScale: 20 posts
Posted: Thursday, February 13, 2014 - 04:16 AM UTC
[/quote]
Thanks James but I have all the information that I need Are you going to build your Airfix 110?[/quote]
oh, you must be very well prepared! as for my 110, maybe if a twin engine fighter campaign was to come around...
james.
Thanks James but I have all the information that I need
Are you going to build your Airfix 110?[/quote]oh, you must be very well prepared! as for my 110, maybe if a twin engine fighter campaign was to come around...
james.
Holdfast
#056
Joined: September 30, 2002
KitMaker: 8,581 posts
AeroScale: 4,913 posts
Posted: Thursday, February 13, 2014 - 10:29 PM UTC
Quoted Text
oh, you must be very well prepared!
LOL, well I have been planning this for a number of years, the painting of the markings that is, I only started it so that I could get them finalised. I'm glad that I did because I am really looking forward to getting to that stage
I am making progress, painting the cockpit and a few other bits and pieces, it just doesn't seem worth posting anything just yet. I am at a model show at the FAA museum in Yeovilton this week end, so I won't be doing any more until I get back on Sunday; I will then start adding the decal instruments to the instrument panel
Joel_W
Joined: December 04, 2010
KitMaker: 11,666 posts
AeroScale: 7,410 posts
Posted: Friday, February 14, 2014 - 01:40 AM UTC
Mal, small updates are still better then no updates at all.
Joel
Joel
Holdfast
#056
Joined: September 30, 2002
KitMaker: 8,581 posts
AeroScale: 4,913 posts
Posted: Monday, May 12, 2014 - 12:06 AM UTC
Well, my last post on this was in February!
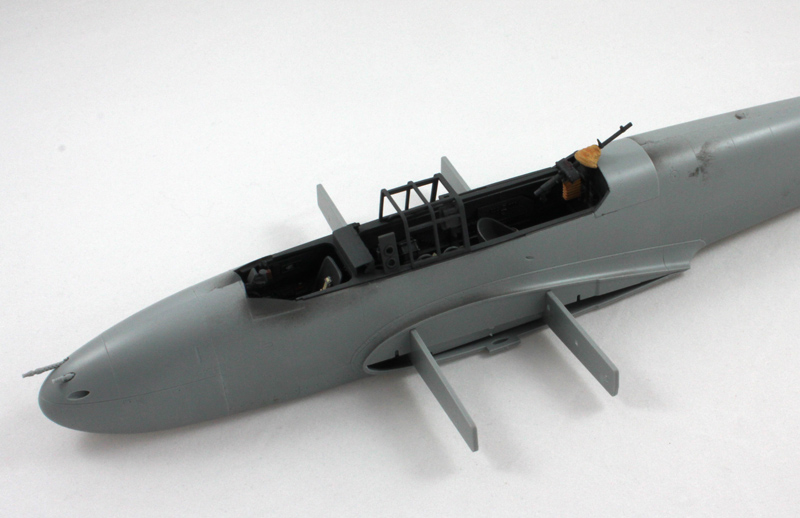
Although I haven't posted I haven't been totally idle I haven't quite managed to keep to my original mantra of doing something everyday but that is more because I have been working through things as apposed to not wanting to do anything. I originally painted the air bottles for the cannon blue, but this didn't ring true with me because in the luftwaffe colour system blue is for Oxygen, not air. I asked a few questions and came up with either silver or red primer. So I have repainted them red primer. You will find many luftwaffe aircraft models with wiring painted yellow; this looks good but yellow is the colour for fuel! I was also just going to use the kit etch seat belts, but they are *rap! So I bought a set of HGW belts. Over this week end I finished building the belts, which meant that I could finally get the cockpit and rear cockpit finished. This morning I got the fuselage halves together. When the glue has cured I can get the nose on and then, finally sort out the wespe mask


And also this morning I started building the Airfix 1/24 scale Hawker Typhoon
Although I haven't posted I haven't been totally idle
I haven't quite managed to keep to my original mantra of doing something everyday but that is more because I have been working through things as apposed to not wanting to do anything. I originally painted the air bottles for the cannon blue, but this didn't ring true with me because in the luftwaffe colour system blue is for Oxygen, not air. I asked a few questions and came up with either silver or red primer. So I have repainted them red primer. You will find many luftwaffe aircraft models with wiring painted yellow; this looks good but yellow is the colour for fuel! I was also just going to use the kit etch seat belts, but they are *rap! So I bought a set of HGW belts. Over this week end I finished building the belts, which meant that I could finally get the cockpit and rear cockpit finished. This morning I got the fuselage halves together. When the glue has cured I can get the nose on and then, finally sort out the wespe mask And also this morning I started building the Airfix 1/24 scale Hawker Typhoon
Joel_W
Joined: December 04, 2010
KitMaker: 11,666 posts
AeroScale: 7,410 posts
Posted: Monday, May 12, 2014 - 02:40 AM UTC
Mal,
It's really nice to finally see an update. The finished cockpit looks great, especially the harness & belts. My only suggestion is just a slight wash on them so they don't all look so brand new.
So you started the 1/24 scale Typhoon. That should keep you busy for quite some time. Sure hope it doesn't take time away from your BF110 build.
Joel

DougN1
Joined: August 08, 2011
KitMaker: 410 posts
AeroScale: 409 posts

Posted: Monday, May 12, 2014 - 04:33 AM UTC
Nice to see an update Mal! Btw, I believe the correct color for the compressed air bottles is purple  Regardless, I wouldn't worry about it as they won't be visible on the finished model unless someone looks really hard.
Doug
Regardless, I wouldn't worry about it as they won't be visible on the finished model unless someone looks really hard.Doug
Holdfast
#056
Joined: September 30, 2002
KitMaker: 8,581 posts
AeroScale: 4,913 posts
Posted: Monday, May 12, 2014 - 04:54 AM UTC
Quoted Text
Mal,
It's really nice to finally see an update. The finished cockpit looks great, especially the harness & belts. My only suggestion is just a slight wash on them so they don't all look so brand new.
I tried a wash on a spare piece of belt and it basically "painted" it so I ain't gonna spoil all the hard work to get them put together; actually they don't look so brand new up close, in fact they are screwed up into a ball and rolled about a bit to make them look used, so they have some finger oils on them
Quoted Text
So you started the 1/24 scale Typhoon. That should keep you busy for quite some time. Sure hope it doesn't take time away from your BF110 build.
Yep started the Tiffie
I will be posting the progress later I have the nose on the 110, so that's all about getting the Wespe nose art done now. The Tiffy will take priority as above all else this must now be finished for SMW. I do however intend to finish the Bf110, the He162 and the Bf109E-1 for SMW that I also have on the go Quoted Text
Nice to see an update Mal! Btw, I believe the correct color for the compressed air bottles is purple Regardless, I wouldn't worry about it as they won't be visible on the finished model unless someone looks really hard.
Doug
Doh! Really?
 Well nearly every Bf110 that I have seen with the bottles in have them painted blue, I'm happy that, in this build I didn't fall into that trap
FredrikA
Joined: January 09, 2008
KitMaker: 92 posts
AeroScale: 90 posts
Posted: Monday, May 12, 2014 - 05:46 AM UTC
Great work Mal! Very nice details in the cockpit, but I cant help the fact that I'm really looking forward to the wespe and its mask.
Keep at it!
/Fredrik
Keep at it!
/Fredrik

thegirl

Joined: January 19, 2008
KitMaker: 6,743 posts
AeroScale: 6,151 posts
Posted: Monday, May 12, 2014 - 12:03 PM UTC
Very nice paint work Mal 
Terri
Terri
Joel_W
Joined: December 04, 2010
KitMaker: 11,666 posts
AeroScale: 7,410 posts
Posted: Tuesday, May 13, 2014 - 02:16 AM UTC
Mal,
That's some list of models to complete for the SMW, just how much time to you have?
Was still thinking about the harness and belts when I saw Terri's post to you. Not that it had anything to do with them, but she's a big fan of pastels. I thought that maybe a rub with a brownish pastel powder, then a flat clearcoat would do the trick. I'm going to be trying it myself, as I've had issues with weathering pre-painted PE belts too.
Joel
Holdfast
#056
Joined: September 30, 2002
KitMaker: 8,581 posts
AeroScale: 4,913 posts
Posted: Tuesday, May 13, 2014 - 06:39 PM UTC
Quoted Text
Very nice paint work Mal
Thanks Terri
Quoted Text
Mal,
That's some list of models to complete for the SMW, just how much time to you have?
Yep, and until very recently nothing was moving forward. I now have the fuselage halves of the, Bf110, the Bf109 and the He162, glued together and there is now the prospect of me actually finishing them in time
Quoted Text
Great work Mal! Very nice details in the cockpit, but I cant help the fact that I'm really looking forward to the wespe and its mask.
Keep at it!
/Fredrik
The nose is on and I now need to get the canopy glazing on then it is full speed ahead with the masks. The canopy will take some time as I will be using it to trial my generic canopy masks
With my new found "building frenzy" I am hoping to get that all sorted sometime by the beginning of next week Holdfast
#056
Joined: September 30, 2002
KitMaker: 8,581 posts
AeroScale: 4,913 posts
Posted: Wednesday, May 21, 2014 - 06:04 PM UTC
A quick update just to show that this is moving forward:


As I said in my last post, I need to get the canopies on before I start man handling it while checking out the nose art mask. I have all the pieces off the sprues and I washed them in isopropynol, but after dipping in Klear they didn't look too good! The Klear was contaminated so Ihad to strip off the Klear and start again. I am taking it easy, doing one piece of the canopy at a time. I am off to a show on Friday, for the week end, so I won't get anymore of this until next week; I have an American friend coming to visit though so I won't get much done that week.
As I said in my last post, I need to get the canopies on before I start man handling it while checking out the nose art mask. I have all the pieces off the sprues and I washed them in isopropynol, but after dipping in Klear they didn't look too good! The Klear was contaminated so Ihad to strip off the Klear and start again. I am taking it easy, doing one piece of the canopy at a time. I am off to a show on Friday, for the week end, so I won't get anymore of this until next week; I have an American friend coming to visit though so I won't get much done that week.
 |

WEB HOSTING BY


Copyright ©2021 AeroScale and Kitmaker Network, a subsidiary of Silver Star Enterprises
All Rights Reserved. Please read our Conditions of Use and Privacy Policy.
All Rights Reserved. Please read our Conditions of Use and Privacy Policy.