Cold War (1950-1974)
Discuss the aircraft modeling subjects during the Cold War period.
Discuss the aircraft modeling subjects during the Cold War period.
Hosted by Tim Hatton
Academy's 1/48 scale F4B Phantom 11
Joel_W

Joined: December 04, 2010
KitMaker: 11,666 posts
AeroScale: 7,410 posts

Posted: Thursday, June 05, 2014 - 06:58 AM UTC
[/quote]
Yep Eric your right, I had already done some research and knew the Navy F-4G was derived from the F-4B, Kitsworld do a set of decals for two machines one VF-213 and the other VF-121. Just be so different to have a 'green' Navy F-4.
Joel sorry to have taken this of topic.[/quote]
Luciano,
It's no problem. It's F4 related, and if I bettered remembered what you wrote, some of this wouldn't have been necessary. Then again, I do find it fascinating that the Navy and USAAF used a completely different variant to produce a G Wild Weasel.
Joel
Posted: Thursday, June 05, 2014 - 07:38 AM UTC
Quoted Text
Yep Eric your right, I had already done some research and knew the Navy F-4G was derived from the F-4B, Kitsworld do a set of decals for two machines one VF-213 and the other VF-121. Just be so different to have a 'green' Navy F-4.
Joel sorry to have taken this of topic.
Luciano,
It's no problem. It's F4 related, and if I bettered remembered what you wrote, some of this wouldn't have been necessary. Then again, I do find it fascinating that the Navy and USAAF used a completely different variant to produce a G Wild Weasel.
Joel
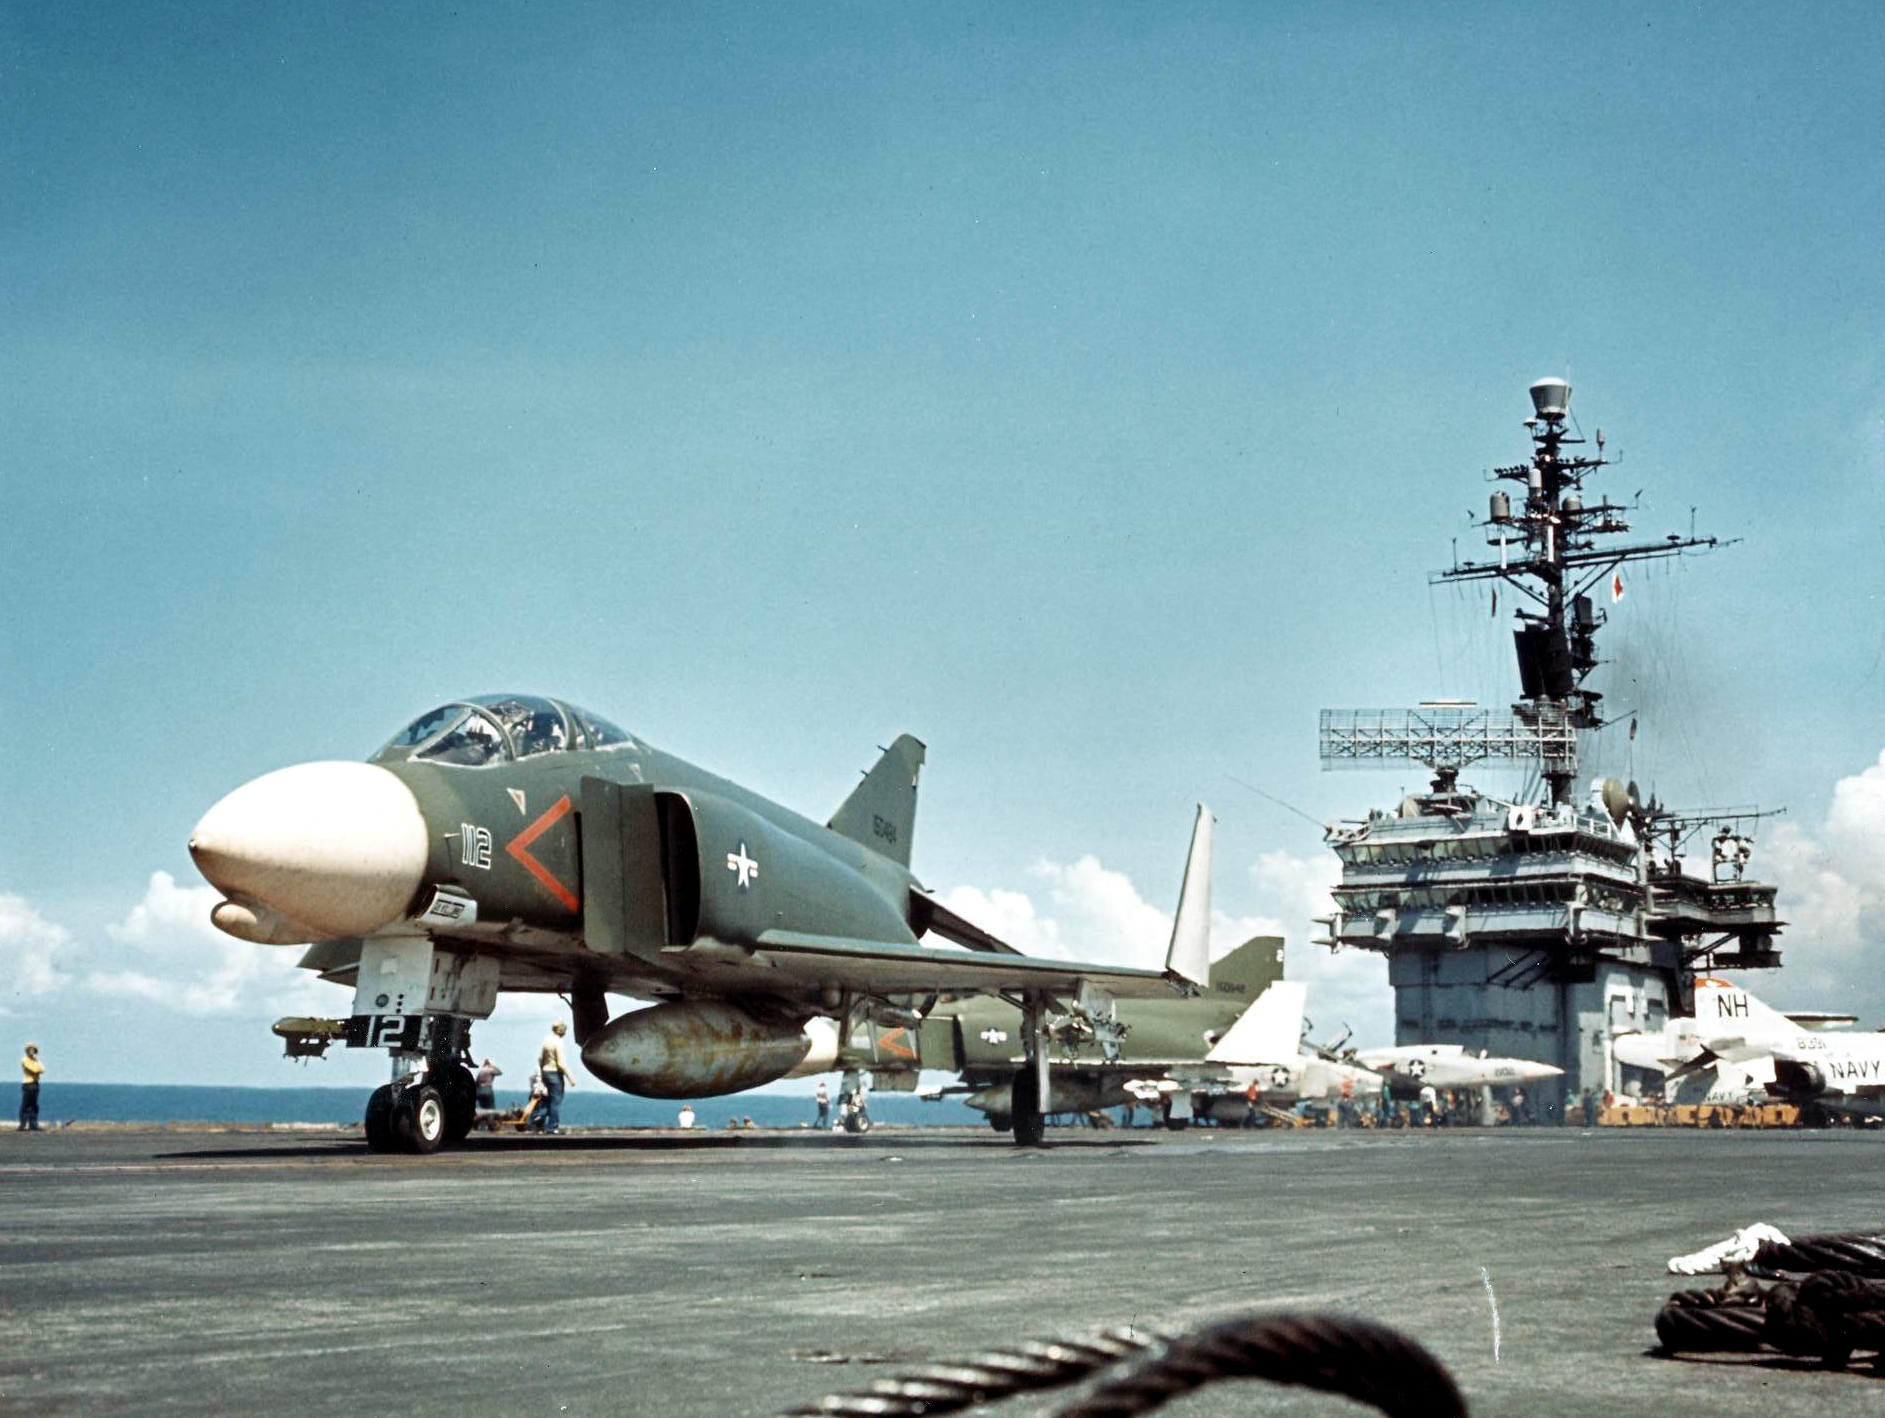
Hi Joel, just so your not confused the Navy F-4G was not a SEAD 'Wild Weasel' aircraft it was a manned automated interceptor which could be controlled with out voice by ship, other fighters or AEW aircraft using two way data links.
If you follow this link it will better explain it.
Just want to get it clear that the Navy and Airforce F-4G's were nothing alike except name.
And here's a image
Joel_W

Joined: December 04, 2010
KitMaker: 11,666 posts
AeroScale: 7,410 posts

Posted: Thursday, June 05, 2014 - 08:32 AM UTC
Luciano,
Thanks for the clarification. Taking a look at that link now.
Joel
Thanks for the clarification. Taking a look at that link now.
Joel
eclarson

Joined: February 22, 2010
KitMaker: 171 posts
AeroScale: 166 posts

Posted: Thursday, June 05, 2014 - 08:43 AM UTC
Quoted Text
Luciano,
Thanks for the clarification. Taking a look at that link now.
Joel
And if you ever want to build the USAF one, this is the way to go! I don't expect we'll see Academy doing the later USAF Phantoms any time soon. :-)
http://www.hyperscale.com/2010/features/f4g48dwa_1.htm
Eric
Joel_W

Joined: December 04, 2010
KitMaker: 11,666 posts
AeroScale: 7,410 posts

Posted: Sunday, June 08, 2014 - 09:56 AM UTC
Well, it's been a rather long build for me as I started the F4-B way back on 1/30, and just finished it yesterday. Well, I almost finished it. I just discovered major decal damage on the right side of the vertical tail as I was uploading the pictures to Photobucket. I guess I was just to heavy handed rubbing and working the sludge wash in, and managed to rip a small piece of the multi colored ray off. Fortunately, I have a complete extra decal sheet that I purchased to repair my other decaling screw up, so I'll just gloss, decal, gloss, weather, and Dullcoat once again over the next several days.
Here's the final set of update pictures, but I'll be posting a few more pictures once the repairs are made to the tail decal.
I want to thank all of you that have stopped by over the course of the build to view, &/or post your comments, help, and encouragement.
Joel
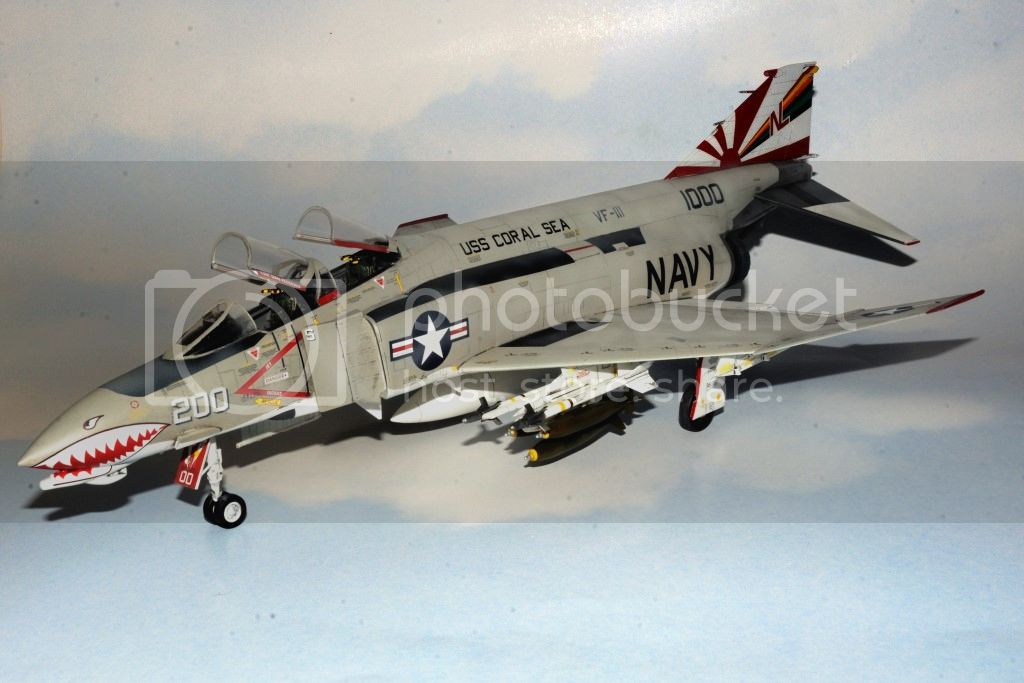
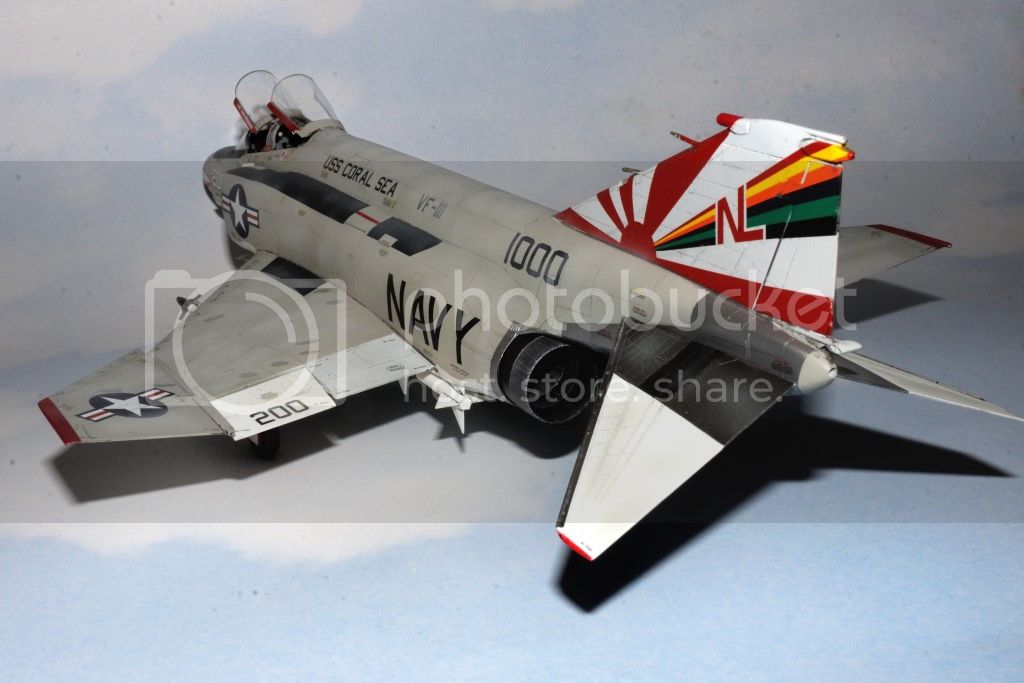
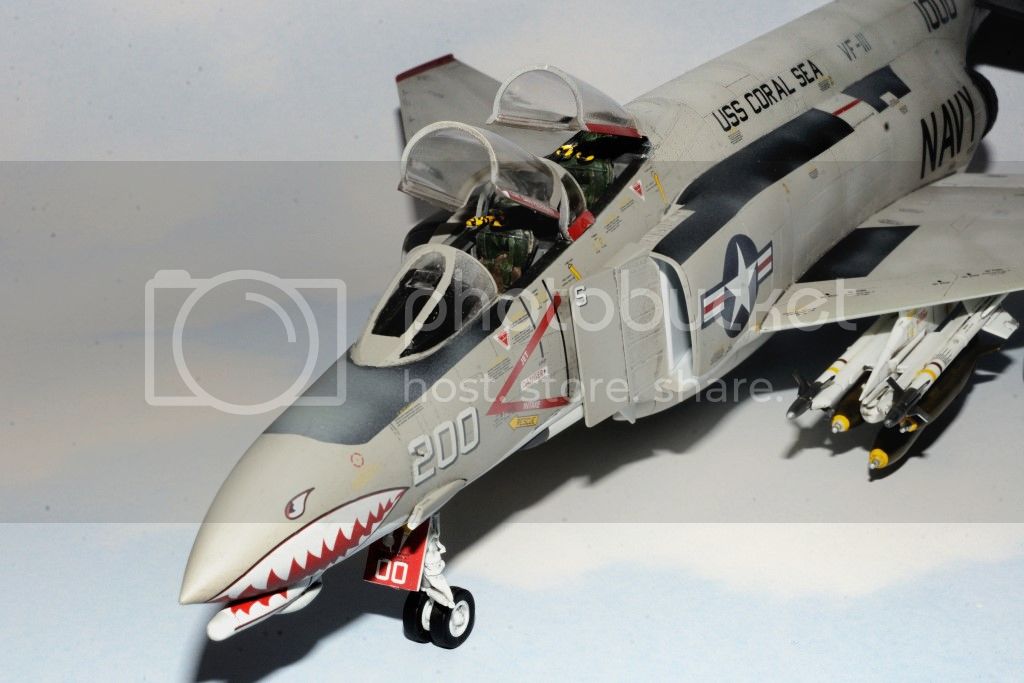

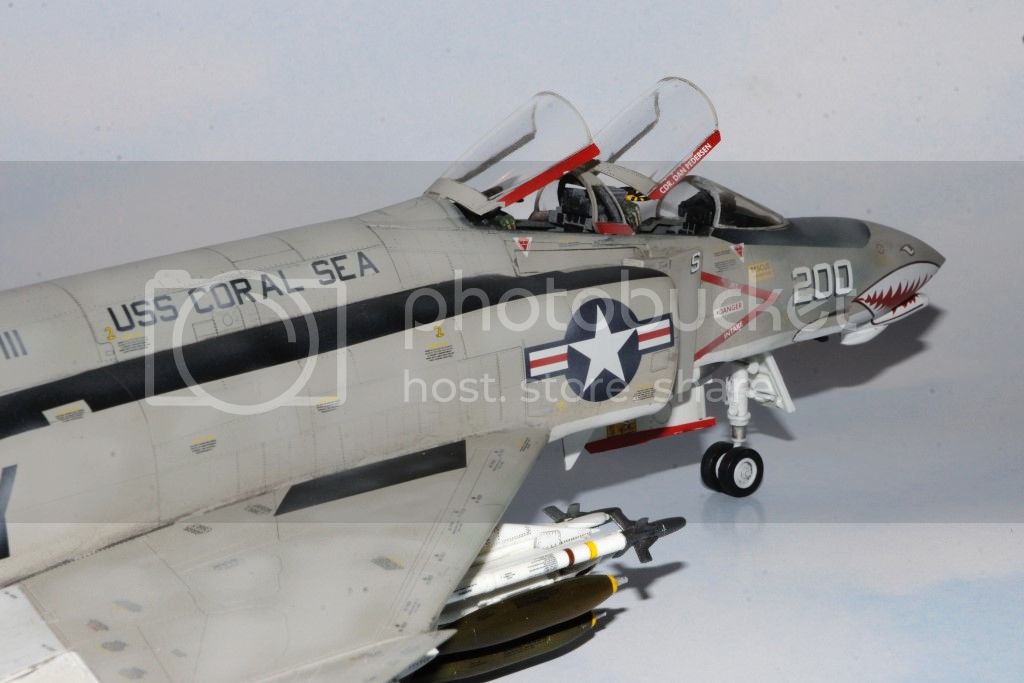
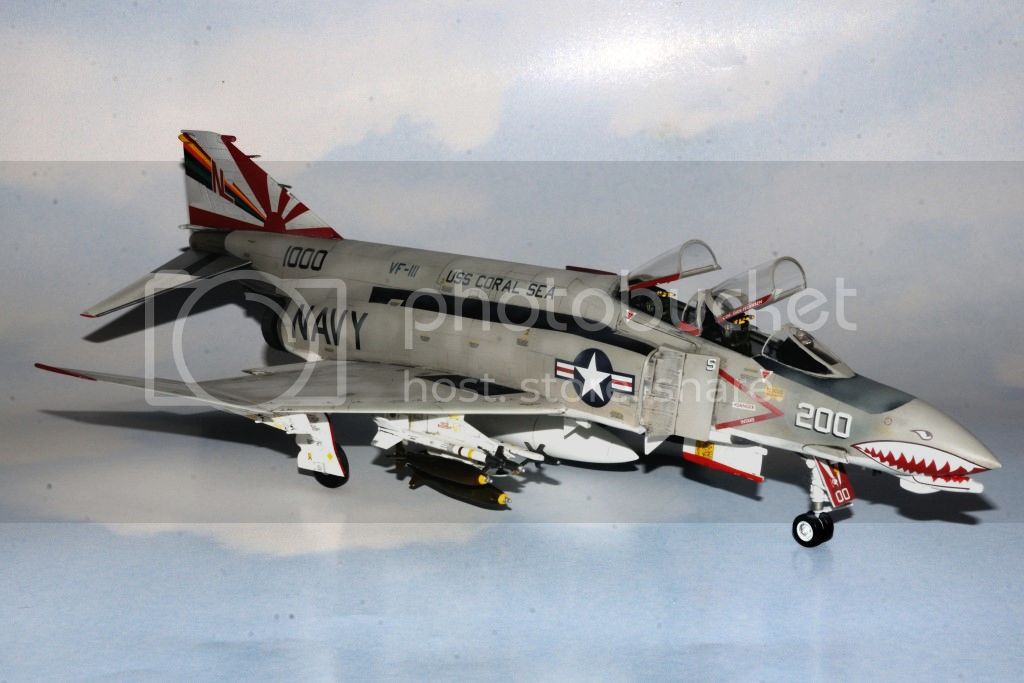
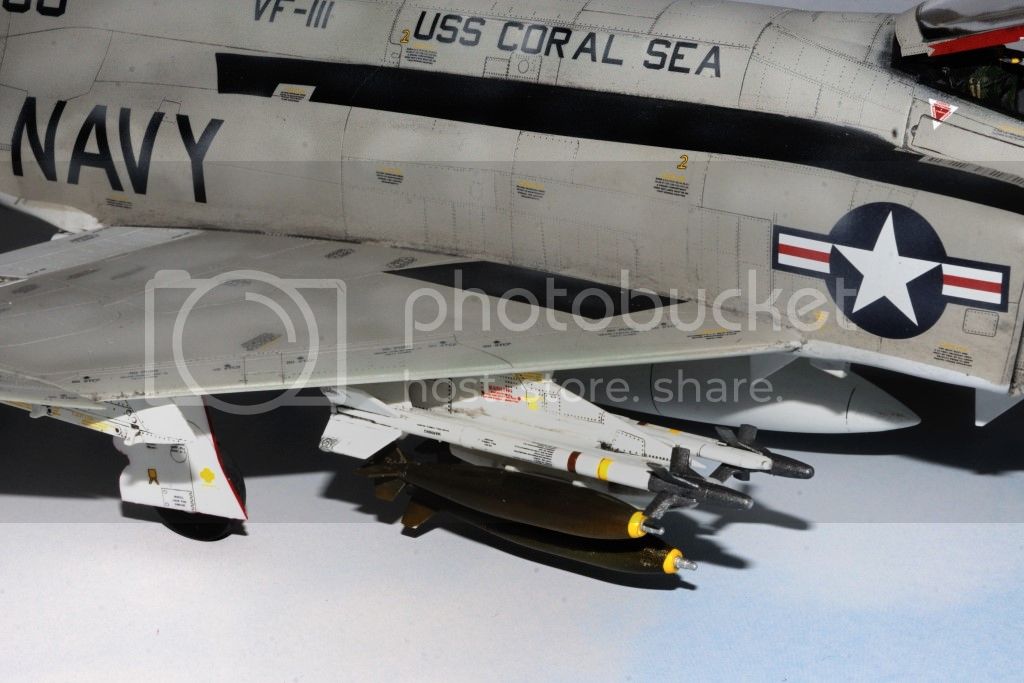
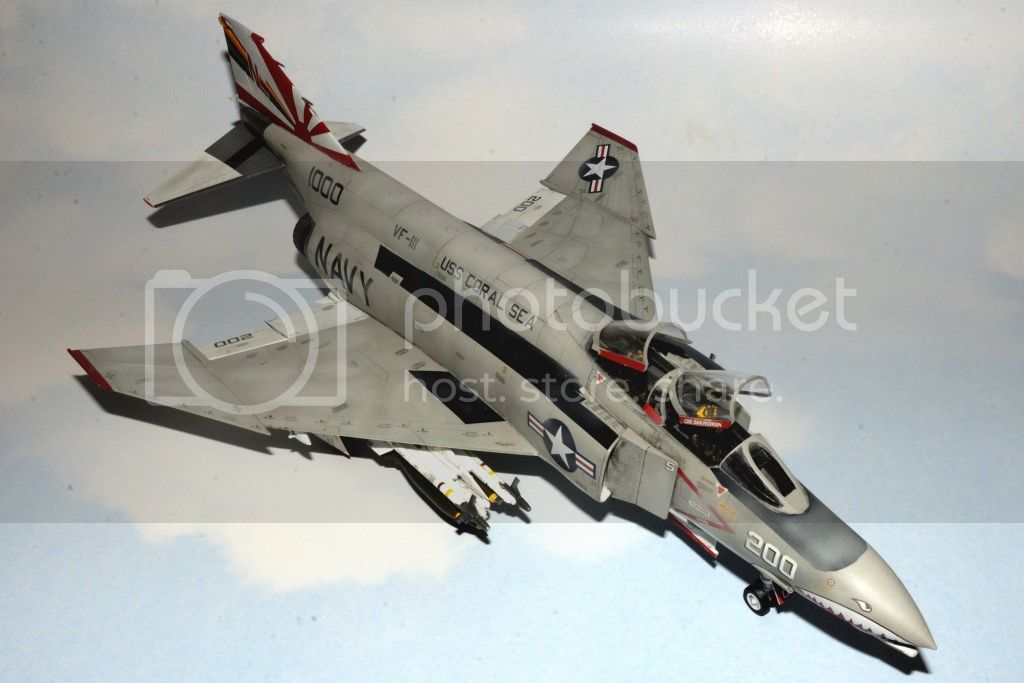
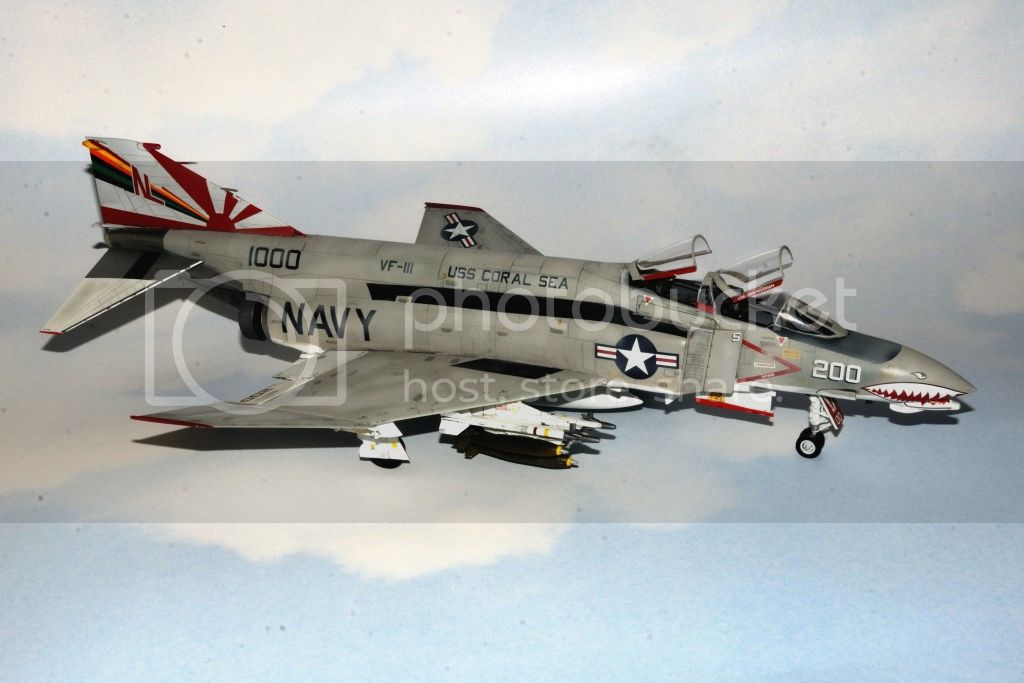
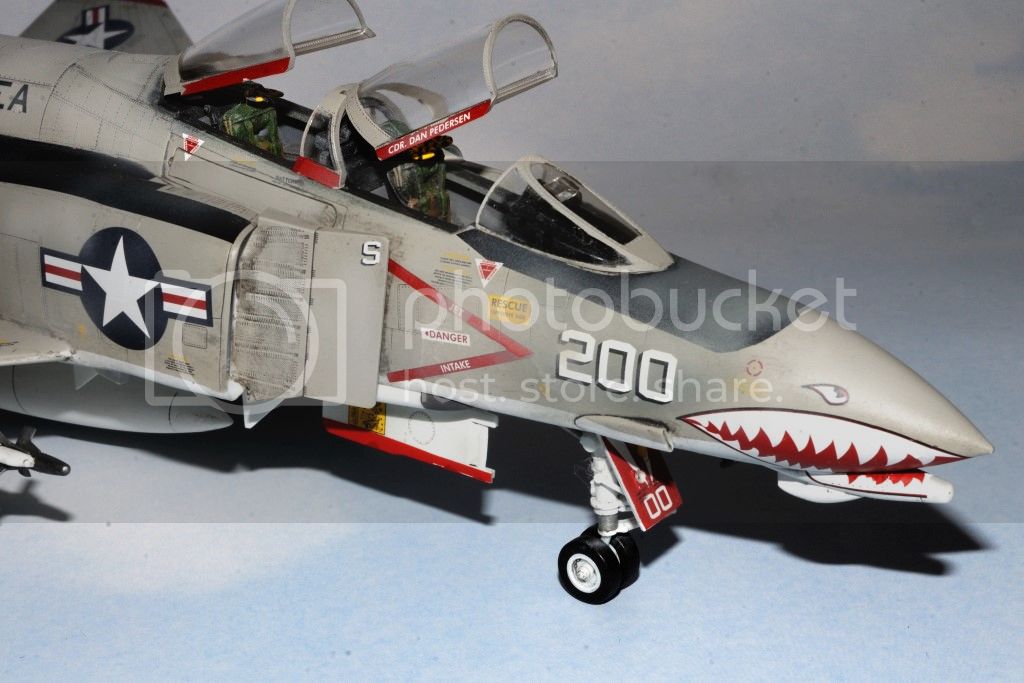
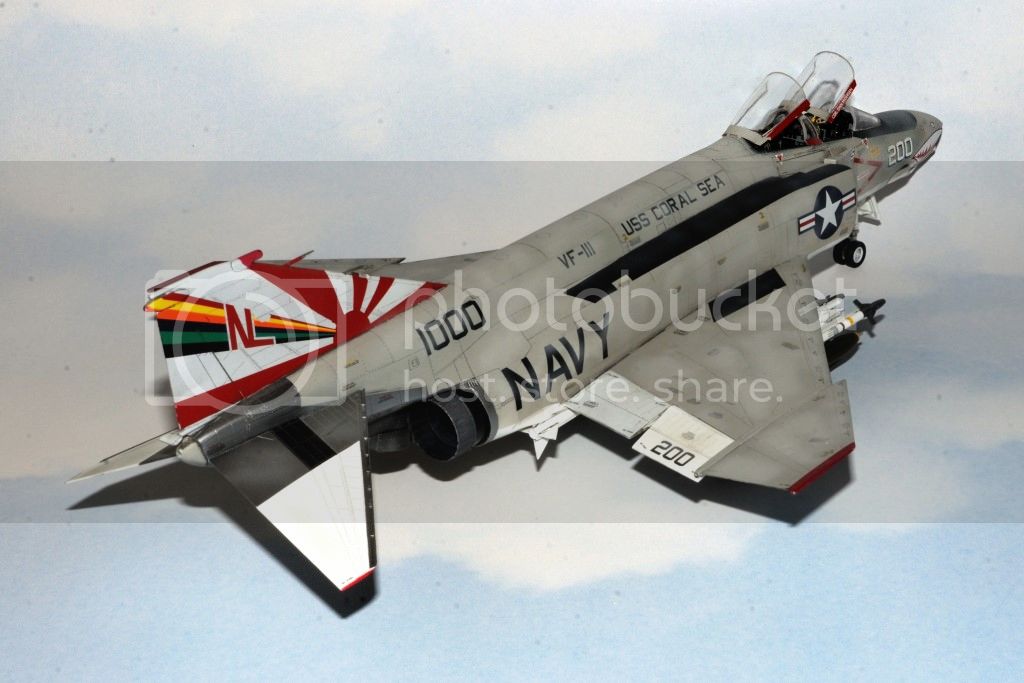
Here's the final set of update pictures, but I'll be posting a few more pictures once the repairs are made to the tail decal.
I want to thank all of you that have stopped by over the course of the build to view, &/or post your comments, help, and encouragement.
Joel

Jessie_C


Joined: September 03, 2009
KitMaker: 6,965 posts
AeroScale: 6,247 posts

Posted: Sunday, June 08, 2014 - 10:21 AM UTC
I'll bet that you can touch up the tail decal with paint and pass it off as a repair done on board; they always ended up looking pretty ratty at the end of a cruise because keeping them flying was more important than making them look good. No even the boss' bird was exempt from that.
Joel_W

Joined: December 04, 2010
KitMaker: 11,666 posts
AeroScale: 7,410 posts

Posted: Sunday, June 08, 2014 - 10:44 AM UTC
Jess,
I guess I could try, but I tend to shake a little these days, and by the time I hand painted the two colors and sealed them, I could have applied the patch.
I wasn't very happy when I 1st saw my screw up. Almost didn't want to post my finished pictures, but then I thought what the heck, everyone screws up once in a while. At least I can fix my screw up (I hope).
Joel
berndm

Joined: March 26, 2014
KitMaker: 844 posts
AeroScale: 630 posts

Posted: Sunday, June 08, 2014 - 11:58 AM UTC
Hi Joel, you did a very nice F-4, just phabulous!Accidents
can happen in every step of the build, they are part of the
modelling thrill ; - )
Your weathering looks fantastic, i hope, i will get mine
started this year and hopefully half good as yours !
Bernd
can happen in every step of the build, they are part of the
modelling thrill ; - )
Your weathering looks fantastic, i hope, i will get mine
started this year and hopefully half good as yours !
Bernd
Joel_W

Joined: December 04, 2010
KitMaker: 11,666 posts
AeroScale: 7,410 posts

Posted: Sunday, June 08, 2014 - 12:06 PM UTC
Quoted Text
Hi Joel, you did a very nice F-4, just phabulous!Accidents
can happen in every step of the build, they are part of the
modelling thrill ; - )
Your weathering looks fantastic, i hope, i will get mine
started this year and hopefully half good as yours !
Bernd
Bernd,
Thanks so much for your kind words. You're really going to love the build. I'm already looking forward to Academy's F4-C.
Joel
berndm

Joined: March 26, 2014
KitMaker: 844 posts
AeroScale: 630 posts

Posted: Sunday, June 08, 2014 - 12:30 PM UTC
Hi Joel, i am looking for your F-4C as well ! It will be a pleasure to see this !
I hope, i will getting mine started this year.
Bernd
I hope, i will getting mine started this year.
Bernd
eclarson

Joined: February 22, 2010
KitMaker: 171 posts
AeroScale: 166 posts

Posted: Monday, June 09, 2014 - 09:04 AM UTC
Quoted Text
....
I wasn't very happy when I 1st saw my screw up. Almost didn't want to post my finished pictures, but then I thought what the heck, everyone screws up once in a while. At least I can fix my screw up (I hope).
Joel
Congratulations on completing you Phantom Joel! Well done. If you hadn't mentioned the tail decal screw-up I doubt anyone would have noticed. I sure wouldn't have.
Cheers,
Eric
Joel_W

Joined: December 04, 2010
KitMaker: 11,666 posts
AeroScale: 7,410 posts

Posted: Monday, June 09, 2014 - 11:33 AM UTC
Quoted Text
Quoted Text....
I wasn't very happy when I 1st saw my screw up. Almost didn't want to post my finished pictures, but then I thought what the heck, everyone screws up once in a while. At least I can fix my screw up (I hope).
Joel
Congratulations on completing you Phantom Joel! Well done. If you hadn't mentioned the tail decal screw-up I doubt anyone would have noticed. I sure wouldn't have.
Cheers,
Eric
Eric,
Thanks so much for your kind words. It's a minor issue, but thankfully, it's easily correctable especially since I have a extra decal sheet.
Joel
chris1

Joined: October 25, 2005
KitMaker: 949 posts
AeroScale: 493 posts

Posted: Monday, June 09, 2014 - 04:00 PM UTC
Hey Joel,
Now that you have finished take a deep breath.
She looks brilliant-are they plans for an article?
Now you built one as a test when are going to start the real one?
Whats next?
Well done
Chris
Now that you have finished take a deep breath.
She looks brilliant-are they plans for an article?
Now you built one as a test when are going to start the real one?

Whats next?
Well done
Chris
Posted: Monday, June 09, 2014 - 05:17 PM UTC
Very nicely done Joel, I can't see the damage to the decal! Could you just cut a piece of decal to patch the damaged area?
Joel_W

Joined: December 04, 2010
KitMaker: 11,666 posts
AeroScale: 7,410 posts

Posted: Tuesday, June 10, 2014 - 12:38 AM UTC
Quoted Text
Very nicely done Joel, I can't see the damage to the decal! Could you just cut a piece of decal to patch the damaged area?
Mal,
Thanks for the kind words.
The damaged spot is on the starboard side (right) just a head of the "NL". If you didn't know what to look for based on the Port side, one would never know. And yes, that's my plan to repair the decal. I have a complete 2nd decal set that I bought online for an earlier decal screw up. So far I've already glossed the area.
Joel
 |


