OFFICIAL: Big Bad Bombers Campaign
Western Australia, Australia
Joined: December 31, 2013
KitMaker: 338 posts
AeroScale: 190 posts
Posted: Monday, September 15, 2014 - 08:13 PM UTC
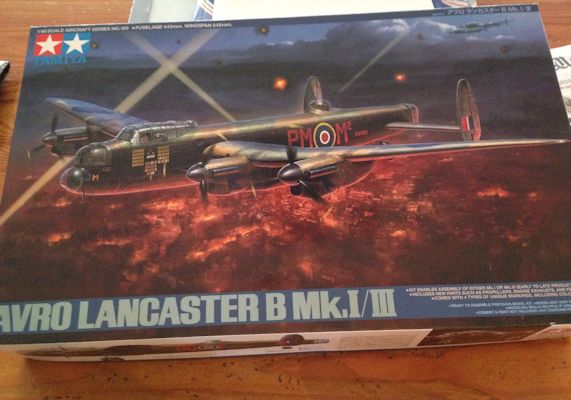
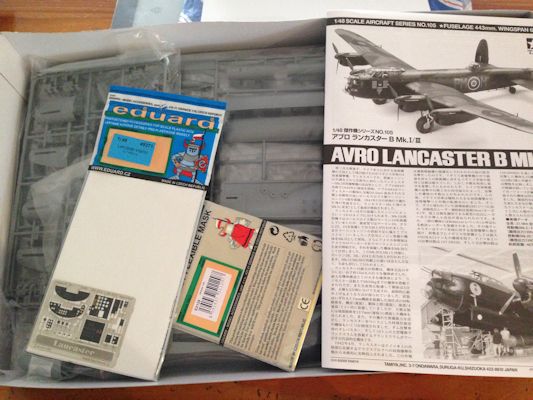
Hi all am in with Tamiya's 1/48 Lanc:
In the Hangar:
- 1/48 Hasegawa P-38J/L
In the Workshop
-1/35 Tamiya Mobelwagen
England - South East, United Kingdom
Joined: August 15, 2012
KitMaker: 408 posts
AeroScale: 365 posts
Posted: Monday, September 15, 2014 - 08:55 PM UTC
Following on from the Vulcan, I'm in with another all British Cold War classic:
Cheers Everyone!

On the workbench
National Pride - 1/72 BAe Nimrod MR2.P
Tiger Meet! - 1/72 Panavia Tornado ECR (Luftwaffe)
Airfix III - 1/72 Hawker Hunter FGA.9
Hairy Brush - 1/72 P-51D Mustang
Mustang 75 - 1/72 P-51D "Ferocious Frankie"

#523
Idaho, United States
Joined: February 28, 2014
KitMaker: 342 posts
AeroScale: 250 posts
Posted: Thursday, September 18, 2014 - 03:29 PM UTC
I just finished the Italian Camo scheme on the BR.20M.
The Italian Sand Brown base on top is a bit darker than I expected and seemed to dry about 4 shades lighter than it looked. Maybe it was the primer gray I used but that sure looked light to me. All in all I am fine with this, especially since this was my first attempt at a Camo scheme like this with my new airbrush.


Western Australia, Australia
Joined: December 31, 2013
KitMaker: 338 posts
AeroScale: 190 posts
Posted: Thursday, September 18, 2014 - 04:47 PM UTC
Quoted Text
All in all I am fine with this, especially since this was my first attempt at a Camo scheme like this with my new airbrush.
Wow nice work. Ill have to keep practising to be able to get to that fine work.
In the Hangar:
- 1/48 Hasegawa P-38J/L
In the Workshop
-1/35 Tamiya Mobelwagen
#363
Pennsylvania, United States
Joined: January 08, 2014
KitMaker: 425 posts
AeroScale: 401 posts
Posted: Thursday, September 18, 2014 - 10:16 PM UTC
That is an outstanding camouflage job. Did you use a mask/template, or did you freehand all of that? It had to take some serious effort.
On the Bench:
The Big Three: Eduard 1:48 Bf 109G-2 Trop
Radial Fighters: Hasegawa 1:48 Ki84 Frank
The Mighty Eighth: Eduard 1:48 P-51D-10
New York, United States
Joined: March 08, 2010
KitMaker: 3,662 posts
AeroScale: 174 posts
Posted: Thursday, September 18, 2014 - 11:10 PM UTC
Quoted Text
That is an outstanding camouflage job. Did you use a mask/template, or did you freehand all of that? It had to take some serious effort.
I have to agree with the other guys outstanding camo job
Active Campaigns on the bench:
Operation Fall Gelb - Pz.Kpfw. IV Ausf. C
Engineering the Future - M-26 Recovery Vehicle
115 Campaigns completed
#523
Idaho, United States
Joined: February 28, 2014
KitMaker: 342 posts
AeroScale: 250 posts
Posted: Friday, September 19, 2014 - 02:14 AM UTC
Thank you, This is free handed with my Badger Sotar 20/20.
I picked up this airbrush last year when they had a deal on Amazon just to try and do things like this, and it has not disappointed me.
I used to use mostly masks or poster tack when I wanted a softer edge but want more freedom. I will next do smoke rings for the Overshadowed Fighters campaign.
It was kind of time consuming, about 1-1.5 hr per color.
But I like the outcome.
Now time to gloss coat and decal!
England - East Midlands, United Kingdom
Joined: April 27, 2013
KitMaker: 450 posts
AeroScale: 387 posts
Posted: Friday, September 19, 2014 - 08:54 AM UTC
I have nearly completed the Vulcan and are now making the aircraft on a base. My intention was to show it on a 'bombing' mission having just launched a Blue Steel at night. As you can see the mount has been made, it is a black foam plastic pizza dish cut and mounted on a balsa wood base. The Vulcan is held up by 2x4mm knitting needles which fit snugly into the exhausts.


The base will be completed with the addition of clouds, cotton wool and tumble drier fluff being experimented with.
I have had one embarrassing incident, the Blue Steel I had assembled, painted and decalled has gone walkies

so, luckily I had a spare kit in the stash which has donated the spare missile to this good cause. Progress is relentless(ish)

England - East Midlands, United Kingdom
Joined: February 07, 2004
KitMaker: 911 posts
AeroScale: 415 posts
Posted: Friday, September 19, 2014 - 08:47 PM UTC
Outstanding airbrush work Jeff, I couldn't even begin to spray freehand like that!

"Nelson be damned.......Lets get the hell out of here!"
Texas, United States
Joined: February 22, 2008
KitMaker: 5,026 posts
AeroScale: 2,811 posts
Posted: Friday, September 26, 2014 - 02:07 AM UTC
Jeff-D
Job well done on the camo, maybe an article later on for those of us (ME) who could use additional instruction.
Bob
If it aint broke dont fix it.
#523
Idaho, United States
Joined: February 28, 2014
KitMaker: 342 posts
AeroScale: 250 posts
Posted: Wednesday, October 01, 2014 - 04:45 PM UTC
Thanks all for the comments

Here is the latest getting close now......
Hatches, details and weathering left.......


Oulu, Finland
Joined: August 10, 2005
KitMaker: 77 posts
AeroScale: 34 posts
Posted: Wednesday, October 01, 2014 - 09:16 PM UTC
Wow! That looks great Jeff.
#439
Washington, United States
Joined: November 05, 2005
KitMaker: 4,950 posts
AeroScale: 3,192 posts
Posted: Wednesday, October 01, 2014 - 10:42 PM UTC
Impressive. But I think it's going to be a long time before I try a scheme like that.

Hanger Queens in Waiting:
Monogram 1/72 F8F-1
Corsair the Sky Pirate - 1/72 Ace A-7D
Century Series - Airfix 1/72 F-105G
Anti Shipping - Academy 1/72 PBJ-1D
Academy 1/72 F-84E
England - South East, United Kingdom
Joined: August 15, 2012
KitMaker: 408 posts
AeroScale: 365 posts
Posted: Thursday, October 02, 2014 - 05:31 AM UTC
Amazing airbrushing there Jeff, and freehand as well!
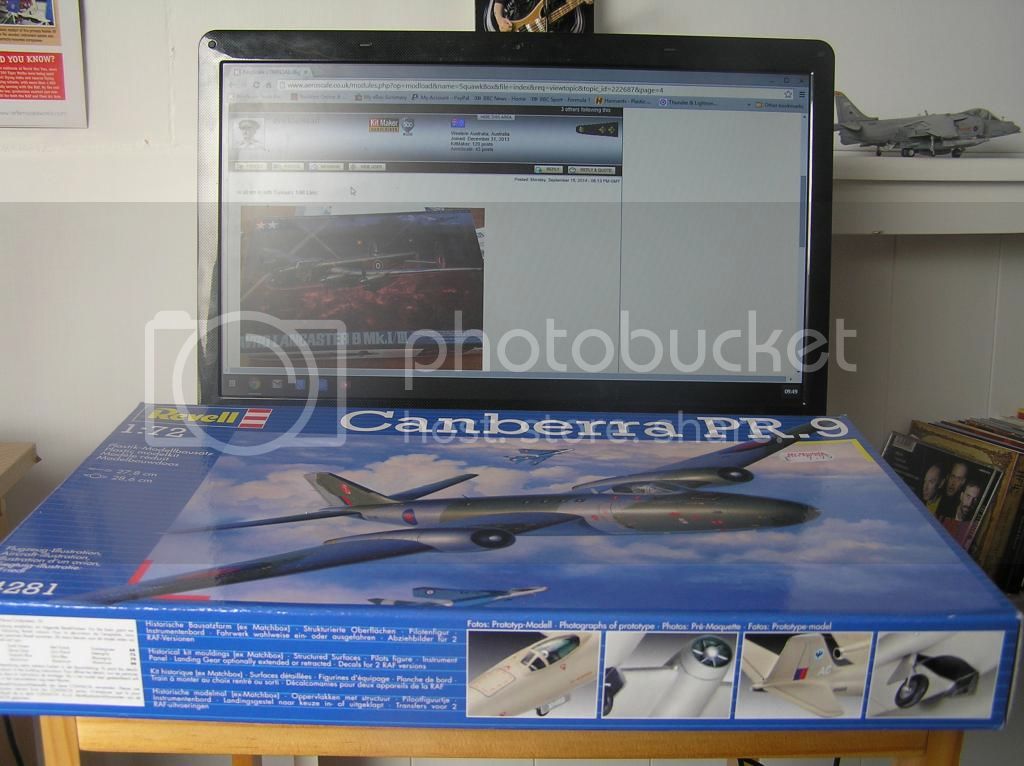
Right! Some progress on the Canberra. This kit is a Revell rebox of the old Matchbox mouldings, and as such, I could very easily go completely OTT correcting everything that is wrong with it. As there isn't time for all that, I will confine myself to getting the overall shape accurate.

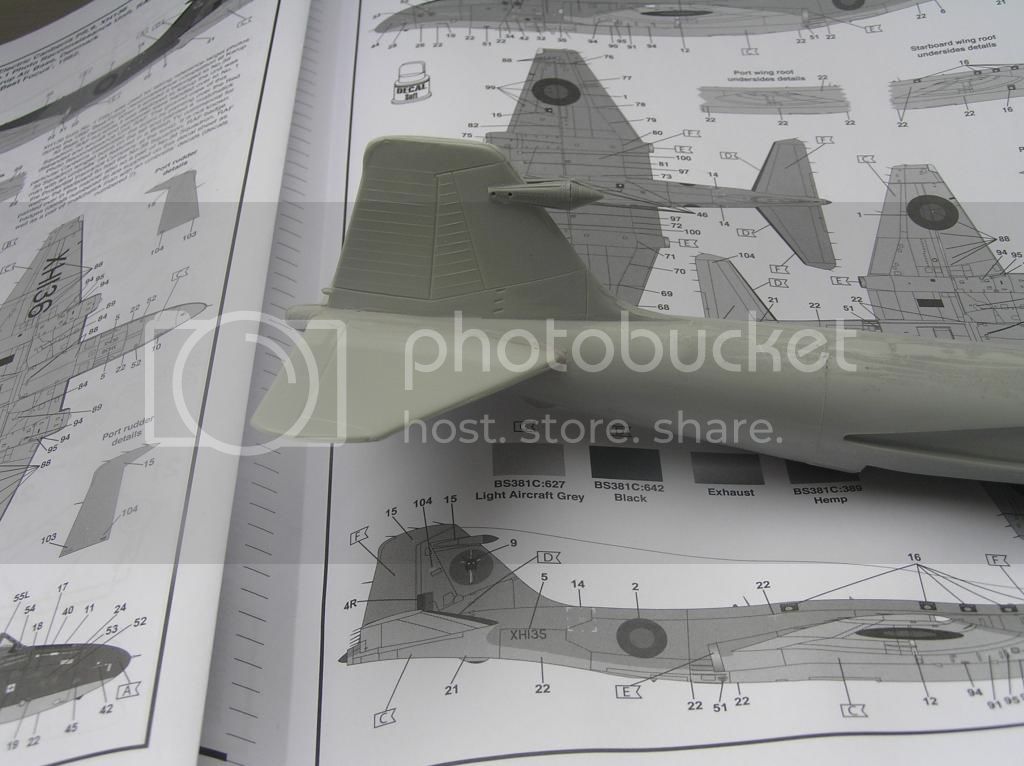
As you can see on the decal placing diagram underneath, there is a fairly prominent fairing missing from the leading edge of the tail. A quick dip into the bits box yielded some suitable parts (from a 1000lb bomb), and liberal applications of filler will sort that out.
Cheers Everyone!
On the workbench
National Pride - 1/72 BAe Nimrod MR2.P
Tiger Meet! - 1/72 Panavia Tornado ECR (Luftwaffe)
Airfix III - 1/72 Hawker Hunter FGA.9
Hairy Brush - 1/72 P-51D Mustang
Mustang 75 - 1/72 P-51D "Ferocious Frankie"
New York, United States
Joined: March 08, 2010
KitMaker: 3,662 posts
AeroScale: 174 posts
Posted: Thursday, October 02, 2014 - 09:08 AM UTC
Again im working left handed here can anyone advise what color the inside of a German bomber would be

Active Campaigns on the bench:
Operation Fall Gelb - Pz.Kpfw. IV Ausf. C
Engineering the Future - M-26 Recovery Vehicle
115 Campaigns completed
#330
Queensland, Australia
Joined: July 15, 2011
KitMaker: 175 posts
AeroScale: 103 posts
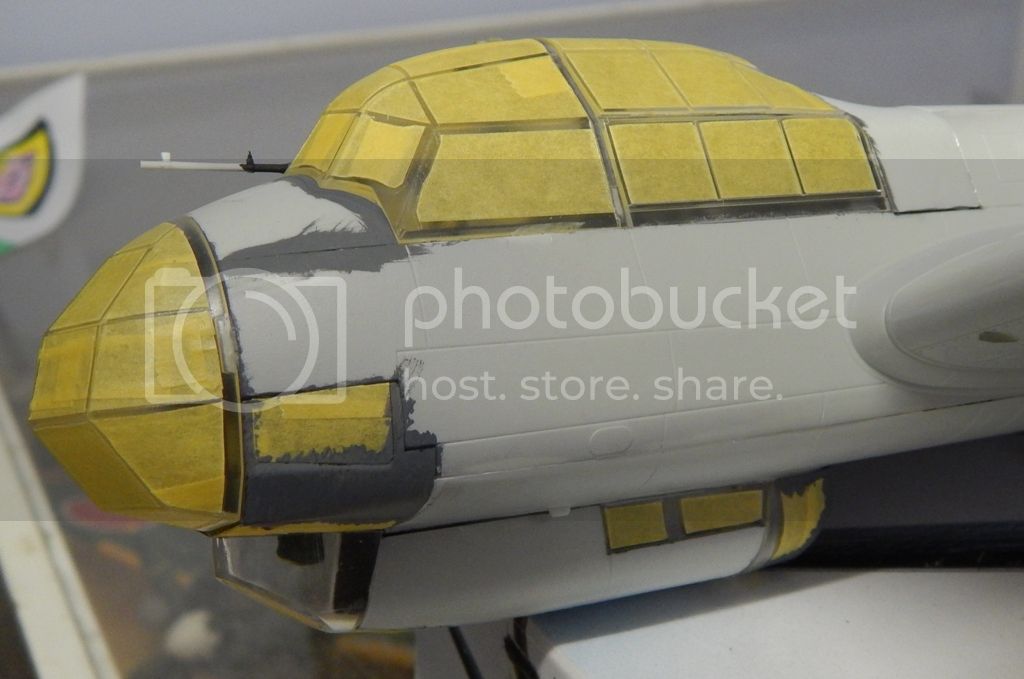
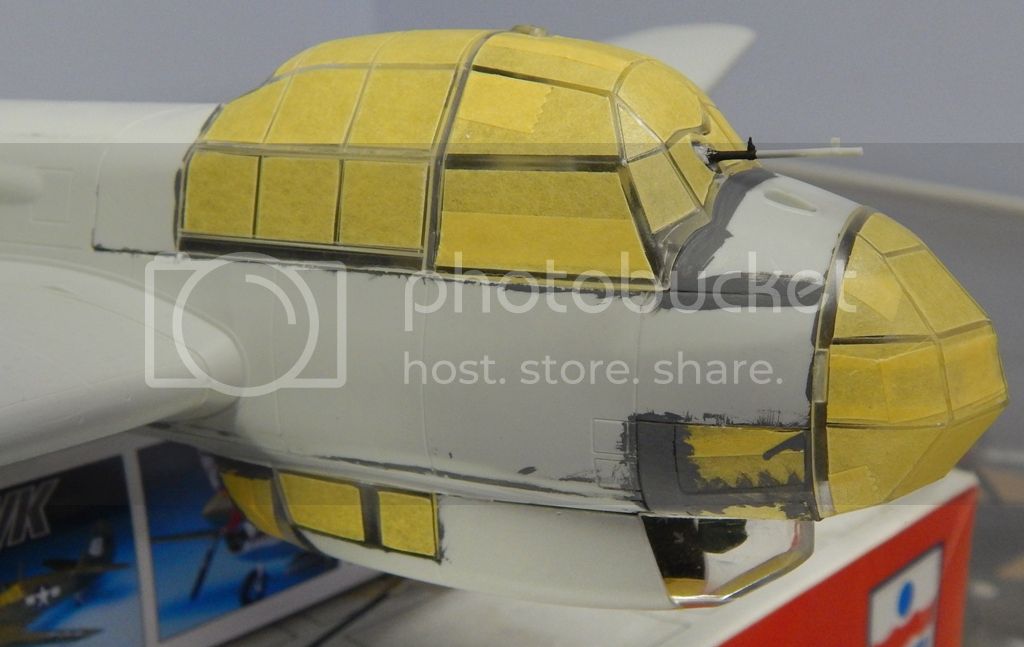
Posted: Sunday, October 05, 2014 - 10:50 PM UTC
I hate masking canopies!!!
The JU-88 is getting close to paint.
Texas, United States
Joined: February 22, 2008
KitMaker: 5,026 posts
AeroScale: 2,811 posts
Posted: Sunday, October 05, 2014 - 11:49 PM UTC
Sal, try this link.
http://www.ipmsstockholm.org/colorcharts/stuff_eng_colorcharts_germany.htmLook under 1935-1945, RLM Standard at RLM 02 Grau. Hope this helps.
Bob
If it aint broke dont fix it.
Uusimaa, Finland
Joined: March 30, 2004
KitMaker: 2,845 posts
AeroScale: 1,564 posts
Posted: Monday, October 06, 2014 - 03:16 AM UTC
The interior color of German aircraft depends on the time period. Either RLM 02 or RLM 66.
Here's one article on the subject:
http://www.swannysmodels.com/Painting.html Alberta, Canada
Joined: April 07, 2010
KitMaker: 1,028 posts
AeroScale: 939 posts
Posted: Monday, October 06, 2014 - 03:51 AM UTC
Quoted Text
I hate masking canopies!!!
You certainly don't stand alone there, John. Sadly, no great hobby is ever all fun. Your doing a wonderful job, though, suffering through the pain of masking your JU-88 canopy.

To prevent being called an 'expert', screw something up good every now and again.
New York, United States
Joined: March 08, 2010
KitMaker: 3,662 posts
AeroScale: 174 posts
Posted: Monday, October 06, 2014 - 04:15 AM UTC
Hey guys thanks for the links I kind of figured it would be like a gray green

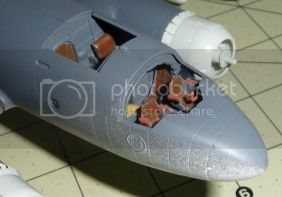
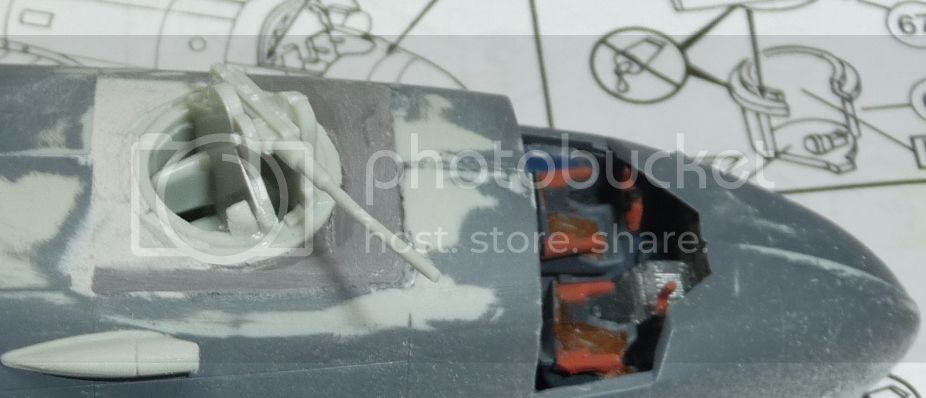
But I made some progress and she is starting to look like a big bad bomber
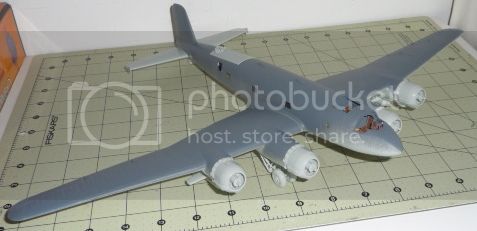
The piece that sit behind the cockpit is missing so I scratched 1 from plastic card
by the way John great job on that masking looking forward to seeing that painted
Active Campaigns on the bench:
Operation Fall Gelb - Pz.Kpfw. IV Ausf. C
Engineering the Future - M-26 Recovery Vehicle
115 Campaigns completed
#523
Idaho, United States
Joined: February 28, 2014
KitMaker: 342 posts
AeroScale: 250 posts
Posted: Wednesday, October 08, 2014 - 05:20 AM UTC
John,
I hear ya!
But that said, your masking looks great to me.....
Mine is usually a few hundred more pieces of tape than that!
England - East Midlands, United Kingdom
Joined: April 27, 2013
KitMaker: 450 posts
AeroScale: 387 posts
Posted: Wednesday, October 08, 2014 - 11:02 AM UTC
England - South East, United Kingdom
Joined: August 15, 2012
KitMaker: 408 posts
AeroScale: 365 posts
Posted: Wednesday, October 08, 2014 - 05:45 PM UTC
That's looking very dramatic Mike - what a great display idea!
On the workbench
National Pride - 1/72 BAe Nimrod MR2.P
Tiger Meet! - 1/72 Panavia Tornado ECR (Luftwaffe)
Airfix III - 1/72 Hawker Hunter FGA.9
Hairy Brush - 1/72 P-51D Mustang
Mustang 75 - 1/72 P-51D "Ferocious Frankie"
#523
Idaho, United States
Joined: February 28, 2014
KitMaker: 342 posts
AeroScale: 250 posts
Posted: Thursday, October 09, 2014 - 10:20 AM UTC
Mike,
I really like the display presentation!
Did you airbrush the cotton to get the look you wanted?
That looks like it would be a great idea for a Vietnam Sandy with Napalm. Just add some red and orange into it as well.
Might be an effect I may need to plagiarize from you
#523
Idaho, United States
Joined: February 28, 2014
KitMaker: 342 posts
AeroScale: 250 posts
Posted: Friday, October 10, 2014 - 02:39 AM UTC
I was told Plagiarize is the wrong word....
I would never take someone's idea and pass it off as my own... I just meant to say I may COPY the idea....
Sorry, this old timer is NOT an English major