OFFICIAL: Grumman Campaign
Texas, United States
Joined: February 22, 2008
KitMaker: 5,026 posts
AeroScale: 2,811 posts
Posted: Sunday, July 06, 2014 - 07:07 AM UTC
Pedro: I googeled this. Maybe it will help some.

Bob
If it aint broke dont fix it.
British Columbia, Canada
Joined: September 03, 2009
KitMaker: 6,965 posts
AeroScale: 6,247 posts
Posted: Sunday, July 06, 2014 - 08:15 AM UTC
Everybody ought to have
the IPMS Stockholm colour charts bookmarked.
The chart provides matches for the colours you're looking for in the "United States" section near the bottom of the page.
When once you have tasted flight you will walk the Earth with your eyes turned skyward.
For there you have been, and there you will always long to return.
-Leonardo Da Vinci
Lisboa, Portugal
Joined: August 27, 2010
KitMaker: 679 posts
AeroScale: 669 posts
Posted: Sunday, July 06, 2014 - 08:45 AM UTC
@Thanks Bob, that is indeed identical camo to the decal I've got.
I had a bad choiche of words for my question, because what I'm really after is paint brands offering those precise colours, if there are any (mixing a home brew will be my option under that circumstance).
@ Jessica, thank you also. I did google that IPMS color chart before, but the non spec blue grey or the light grey are not that clear to me. It seems M-485 for top and M-495 for lower might be what I need? I really am no expert in US navy.
Joel_W
 Associate Editor
New York, United States
Joined: December 04, 2010
KitMaker: 11,666 posts
AeroScale: 7,410 posts
Posted: Sunday, July 06, 2014 - 10:49 AM UTC
John,
Welcome to our Grumman campaign. Glad to see that you've started what I'm assuming is the 1/72 scale F-14A you previously posted pictures. of Looking forward to another jet cat in our Gallery section.
Joel
On my Workbench:
Monogram 1/24 scale 427 Shelby Cobra
Just Completed:
Beemax 1/24 scale BMW M3 E30 1992 Evolution II
Joel_W
 Associate Editor
New York, United States
Joined: December 04, 2010
KitMaker: 11,666 posts
AeroScale: 7,410 posts
Posted: Sunday, July 06, 2014 - 10:59 AM UTC
Pedro,
The link that Jessica provided has been my go to color chart for just about all my aircraft builds. If anything, go a shade or two lighter as the salt air, humidity, and baking sun did a number on the topside colors.
As for the interior colors of the F4F-3/4 Wildcats, F4F-3 / F4F-4, Wildcat:
Cockpit: FS 34058 Bronze Green. The only area that was Bronze Green was the pilot’s portion of the cockpit above and below the 'Floor'.
Fuselage: The fuel tank under the cockpit was light gray. The inside of the engine cowling and main gear bay were Light Gray, as was the interior of the fuselage all the way back to the tail.
Joel
On my Workbench:
Monogram 1/24 scale 427 Shelby Cobra
Just Completed:
Beemax 1/24 scale BMW M3 E30 1992 Evolution II
Lisboa, Portugal
Joined: March 04, 2008
KitMaker: 5,386 posts
AeroScale: 635 posts
Posted: Sunday, July 06, 2014 - 02:31 PM UTC
Quoted Text
John,
Welcome to our Grumman campaign. Glad to see that you've started what I'm assuming is the 1/72 scale F-14A you previously posted pictures. of Looking forward to another jet cat in our Gallery section.
Joel
Yes, that's the one.
First Academy's Aircraft kit.
Let's see how it goes.
It's going to be a slow build but a fun one I hope !

Active Builds: 0
Active Campaigns: 0

#439
Washington, United States
Joined: November 05, 2005
KitMaker: 4,950 posts
AeroScale: 3,192 posts
Posted: Sunday, July 06, 2014 - 03:54 PM UTC
I found it!! I found it!!

Monogram's 1967 tool, cleaned up and re shot in 2001. Now if I can find the AM decals I bought...

Hanger Queens in Waiting:
Monogram 1/72 F8F-1
Corsair the Sky Pirate - 1/72 Ace A-7D
Century Series - Airfix 1/72 F-105G
Anti Shipping - Academy 1/72 PBJ-1D
Academy 1/72 F-84E
British Columbia, Canada
Joined: September 03, 2009
KitMaker: 6,965 posts
AeroScale: 6,247 posts
Posted: Sunday, July 06, 2014 - 04:43 PM UTC
Mark, you might be interested in
this 
Pedro, Testors does USN Intermediate Blue
premixed. The light grey is very close to Light Gull Grey, which they also offer
premixed. You can lighten or darken these to suit your tastes.
When once you have tasted flight you will walk the Earth with your eyes turned skyward.
For there you have been, and there you will always long to return.
-Leonardo Da Vinci
Joel_W
 Associate Editor
New York, United States
Joined: December 04, 2010
KitMaker: 11,666 posts
AeroScale: 7,410 posts
Posted: Monday, July 07, 2014 - 12:55 AM UTC
Mark,
That's certainly an Oldie but a Goodie. Jessica gave you a link to some really nice AM parts for it. Might be just the thing to make it a special build.
Pedro,
The two tone early war paint scheme is usually referred to as just Blue Gray FS35189 over Light Gray FS 36440. Testors Model Master paints, both their enamel and acrylic lines have both colors pre-mixed.
Joel
On my Workbench:
Monogram 1/24 scale 427 Shelby Cobra
Just Completed:
Beemax 1/24 scale BMW M3 E30 1992 Evolution II

#439
Washington, United States
Joined: November 05, 2005
KitMaker: 4,950 posts
AeroScale: 3,192 posts
Posted: Monday, July 07, 2014 - 03:35 AM UTC
Thanks Jessie, the Mono kit is a true child of the '60's. Build the wing, trap the wing, the elevator, the engine and the cockpit between the fuselage halves and you're practically done. I may have to check it out, looks like I could spend 3-4 times the price of the plastic on AM...

Hanger Queens in Waiting:
Monogram 1/72 F8F-1
Corsair the Sky Pirate - 1/72 Ace A-7D
Century Series - Airfix 1/72 F-105G
Anti Shipping - Academy 1/72 PBJ-1D
Academy 1/72 F-84E
Joel_W
 Associate Editor
New York, United States
Joined: December 04, 2010
KitMaker: 11,666 posts
AeroScale: 7,410 posts
Posted: Tuesday, July 08, 2014 - 01:33 AM UTC
I finally was able to spend several hours over the last few days (I'm on another weeks vacation) at the bench, and actually made some decent progress on the A-6E.
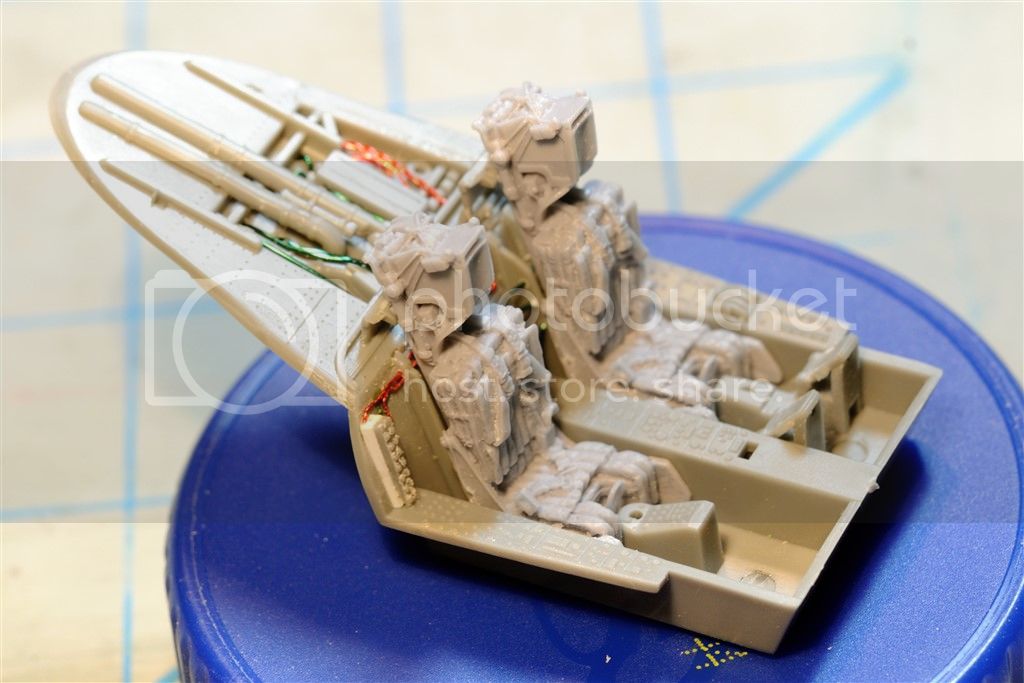
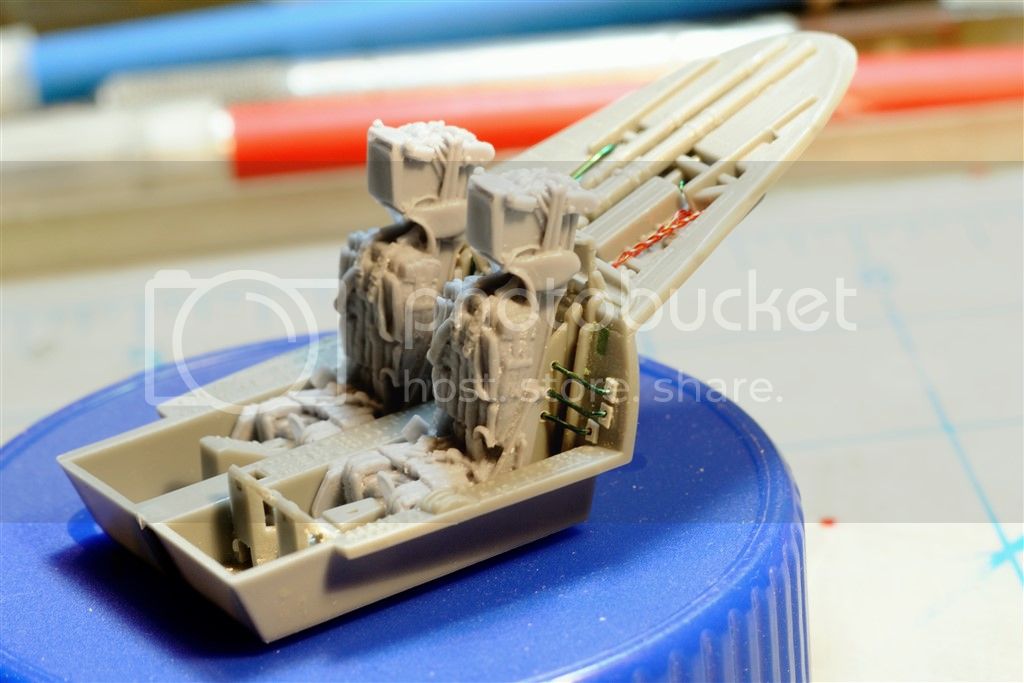
The instructions start with the basic cockpit construction, so that's where I started as well. Checking the dozens of cockpit pictures I've amassed, the Hobby Boss cockpit is really well done, and with enough detail to make it look pretty decent. There are still a few areas that could use a little extra detailing such as both sides of the seats up against cockpit bulkhead are basically void of any details. And a lot of the complex plumbing has been omitted from the shelf behind the seats.
The two Wolfpack Martin Baker GRU-7 ejection seats needed some filing to fit. Since you'll never see those areas, the loss of detail wasn't a issue for me.
Using reference photos I added home made braided lines, and two different dia. solid lines to represent both electrical and hydraulic lines. My intention was to just busy these areas enough, but not spend countless hours trying to duplicate nearly every line there.
Next up is painting and some weathering of the cockpit.
Joel



On my Workbench:
Monogram 1/24 scale 427 Shelby Cobra
Just Completed:
Beemax 1/24 scale BMW M3 E30 1992 Evolution II
Lisboa, Portugal
Joined: August 27, 2010
KitMaker: 679 posts
AeroScale: 669 posts
Posted: Tuesday, July 08, 2014 - 07:17 AM UTC
Joel,
You got some serious pipeline going on there

And thanks for the color info (@ Jessica also), appreciate.
Sadly MM or Testors are not easy to find in Portugal for some years now, so I'll be trying some mix valejo or gunze.
Cheers
Pedro

#439
Washington, United States
Joined: November 05, 2005
KitMaker: 4,950 posts
AeroScale: 3,192 posts
Posted: Tuesday, July 08, 2014 - 07:55 AM UTC
I think Vallejo has a good cross for Intermediate Blue. Gunze might have it. Besides IPMS Stockholm, I check out the color references at
Cyber Modeler . The color stuff seeks to be useful, if you don't get too tangled up in 'Scale Effect'.
Hanger Queens in Waiting:
Monogram 1/72 F8F-1
Corsair the Sky Pirate - 1/72 Ace A-7D
Century Series - Airfix 1/72 F-105G
Anti Shipping - Academy 1/72 PBJ-1D
Academy 1/72 F-84E
Joel_W
 Associate Editor
New York, United States
Joined: December 04, 2010
KitMaker: 11,666 posts
AeroScale: 7,410 posts
Posted: Tuesday, July 08, 2014 - 07:59 AM UTC
Quoted Text
Joel,
You got some serious pipeline going on there 
And thanks for the color info (@ Jessica also), appreciate.
Sadly MM or Testors are not easy to find in Portugal for some years now, so I'll be trying some mix valejo or gunze.
Cheers
Pedro
Pedro,
I just did a quick check on Vallejo paints, and they have a full line of USN WW11 colors. Blue Gray and light/Med/Dark Grays.
And thanks for those more then kind words.
Joel
On my Workbench:
Monogram 1/24 scale 427 Shelby Cobra
Just Completed:
Beemax 1/24 scale BMW M3 E30 1992 Evolution II
Noord-Holland, Netherlands
Joined: January 27, 2014
KitMaker: 200 posts
AeroScale: 85 posts
Posted: Thursday, July 10, 2014 - 10:16 AM UTC
Hi all,
This is going to be my entre, most likly 90% OOB with 2 figures from PJ Productions.

Lego, building blocks for life
Joel_W
 Associate Editor
New York, United States
Joined: December 04, 2010
KitMaker: 11,666 posts
AeroScale: 7,410 posts
Posted: Thursday, July 10, 2014 - 10:46 AM UTC
Jan welcome to the Grumman Campaign.
Excellent choice of kits. The Italeri 1/48 TBF/TBM-1 is the old Accurate Miniatures kit. It builds up into a excellent model. From what I remember of the kit the wings don't fold, which is a plus for me, as every Navy plane I've built has folding wings.
Joel
On my Workbench:
Monogram 1/24 scale 427 Shelby Cobra
Just Completed:
Beemax 1/24 scale BMW M3 E30 1992 Evolution II
Joel_W
 Associate Editor
New York, United States
Joined: December 04, 2010
KitMaker: 11,666 posts
AeroScale: 7,410 posts
Posted: Saturday, July 12, 2014 - 05:30 AM UTC
Made a fair amount of progress in the cockpit. All that I have left to do is paint and weather the Wolfpack GRU-7 ejection seats, and the two joysticks. Thought that I'd share my progress with you.
One thing that I'm still having an issue with is using the on camera flash. While I can make the corrections for over exposure in post processing, the dry brushing and washes consistently vanish, or at best are almost visible. The final set of cockpit pictures will be done the old fashion way. No flash, two flood lamps, and my sturdy old tripod for rather longish exposures.
The IP and hood were air brushed with Tamiya FX-69 Nato Black, rather then plain old Tamiya FX-1 Flat black, as it's just to stark black in scale. The Natio Black has just a touch of gray to soften it up. As for the instruments, they're all decals from the Hobby Boss decal sheet. I really need to stop procrastinating and buy a decent punch set. I had to cut out each decal separately, and the smaller ones were done as pairs so I could hold them with a pair of tweezers. Took forever is an understatement.
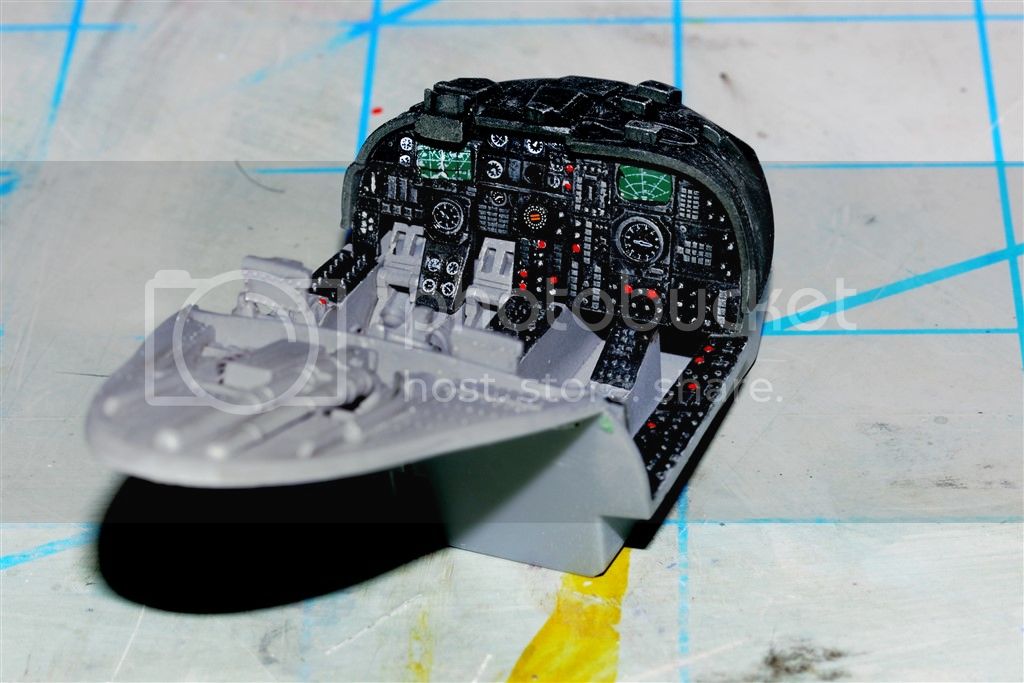

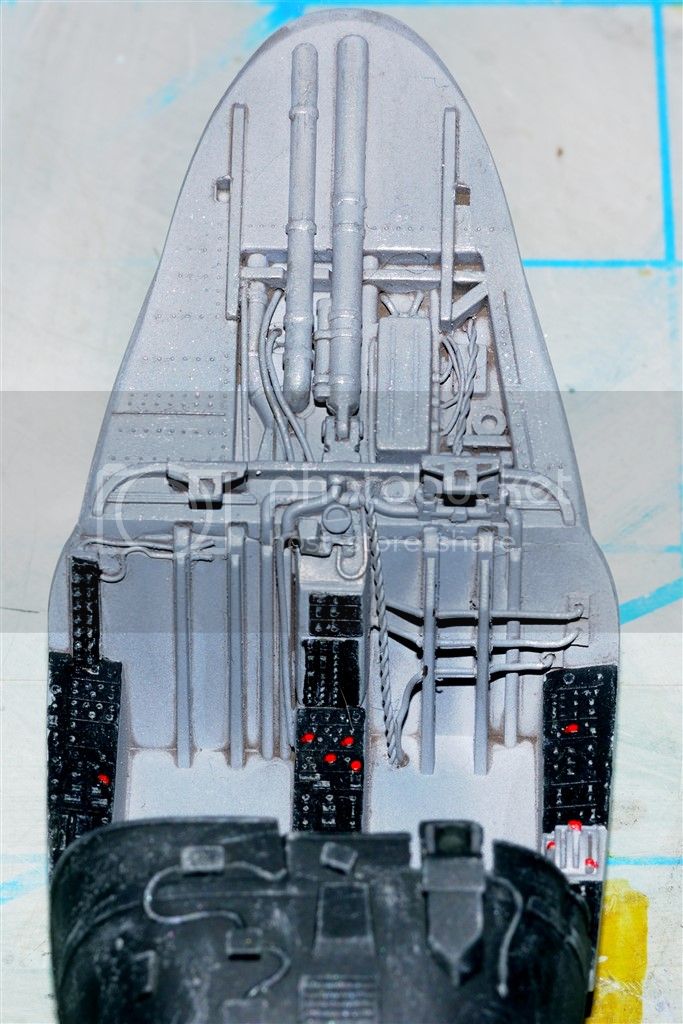
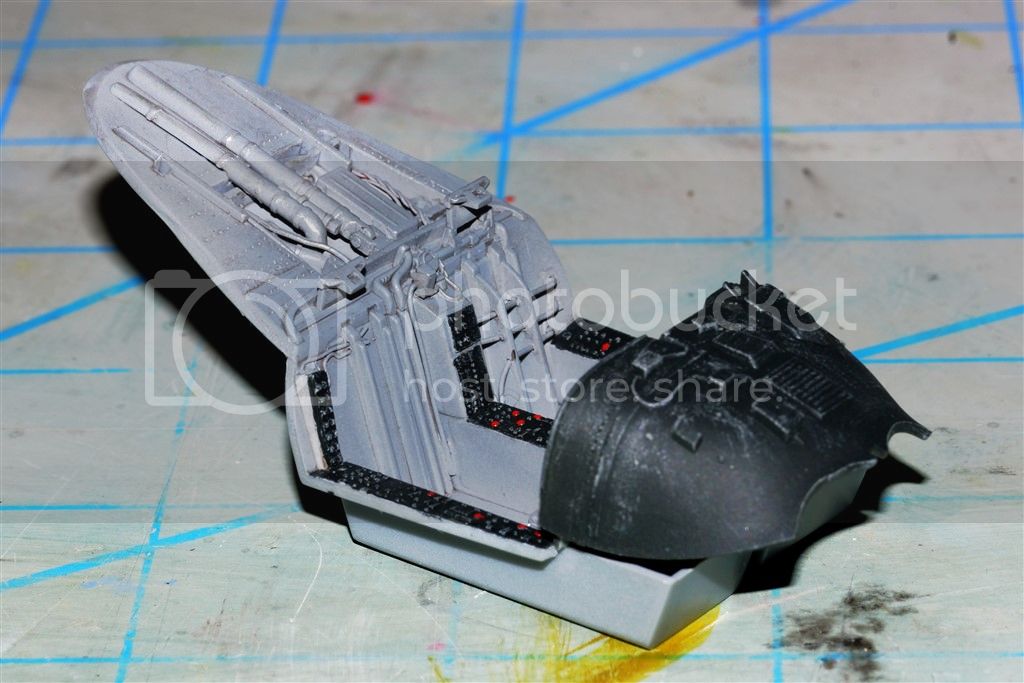
And here's a picture with the ejection seats just for effect.

Joel
On my Workbench:
Monogram 1/24 scale 427 Shelby Cobra
Just Completed:
Beemax 1/24 scale BMW M3 E30 1992 Evolution II

#363
Pennsylvania, United States
Joined: January 08, 2014
KitMaker: 425 posts
AeroScale: 401 posts
Posted: Saturday, July 12, 2014 - 07:13 AM UTC
I'm finally getting started today now that I have my other projects under control. Eduard's F6F-3 Hellcat with folded wings thanks to Wolfpack Designs.
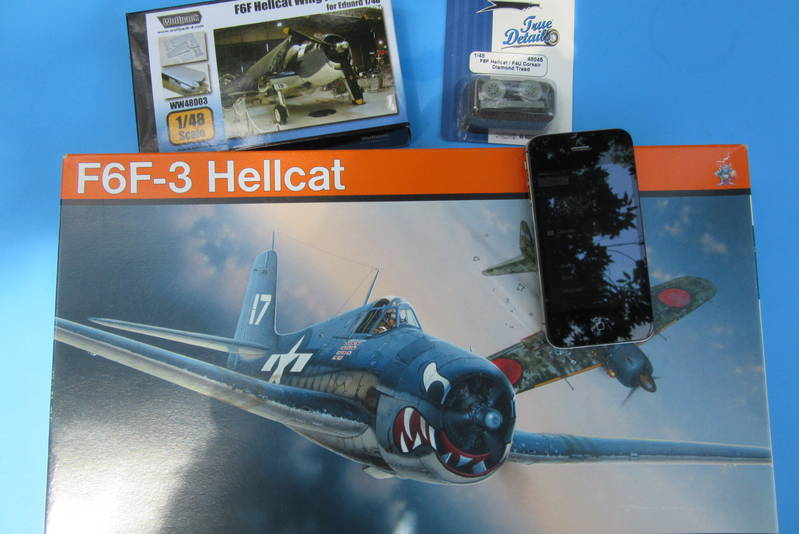 The profipack edition, no aftermarket needed thanks to Eduard's all inclusive philosophy. Well, other than some resin wings.
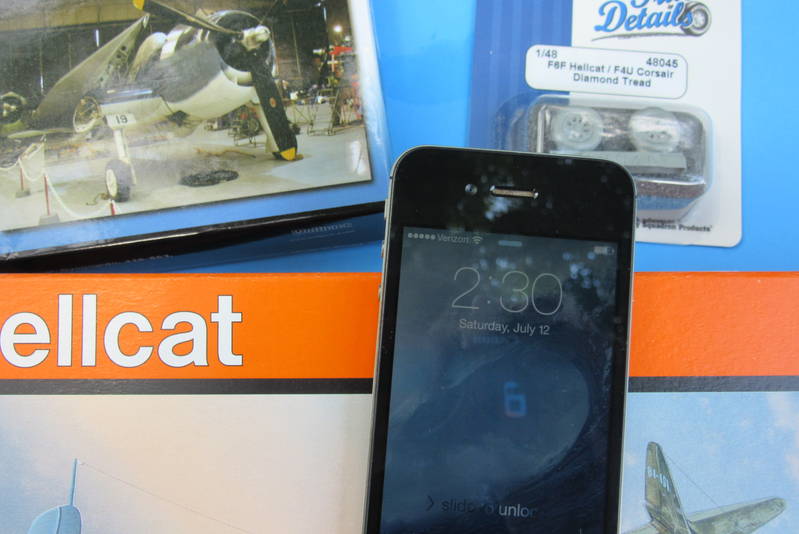 12 days late but getting started at last.
 She should look similar to this at the end.
Hopefully I will get the majority of the cockpit done today.
On the Bench:
The Big Three: Eduard 1:48 Bf 109G-2 Trop
Radial Fighters: Hasegawa 1:48 Ki84 Frank
The Mighty Eighth: Eduard 1:48 P-51D-10
Joel_W
 Associate Editor
New York, United States
Joined: December 04, 2010
KitMaker: 11,666 posts
AeroScale: 7,410 posts
Posted: Saturday, July 12, 2014 - 07:31 AM UTC
On my Workbench:
Monogram 1/24 scale 427 Shelby Cobra
Just Completed:
Beemax 1/24 scale BMW M3 E30 1992 Evolution II

#042
England - North East, United Kingdom
Joined: November 18, 2006
KitMaker: 2,828 posts
AeroScale: 1,720 posts
Posted: Monday, July 14, 2014 - 12:52 AM UTC
Rather than tying up this thread I've started a blog over on the modern forum and will provide highlights here.
Allen's F-14D Tomcat Build LogThe first order of business was to tidy the workspace (which gets done around 3 times a year if its lucky).
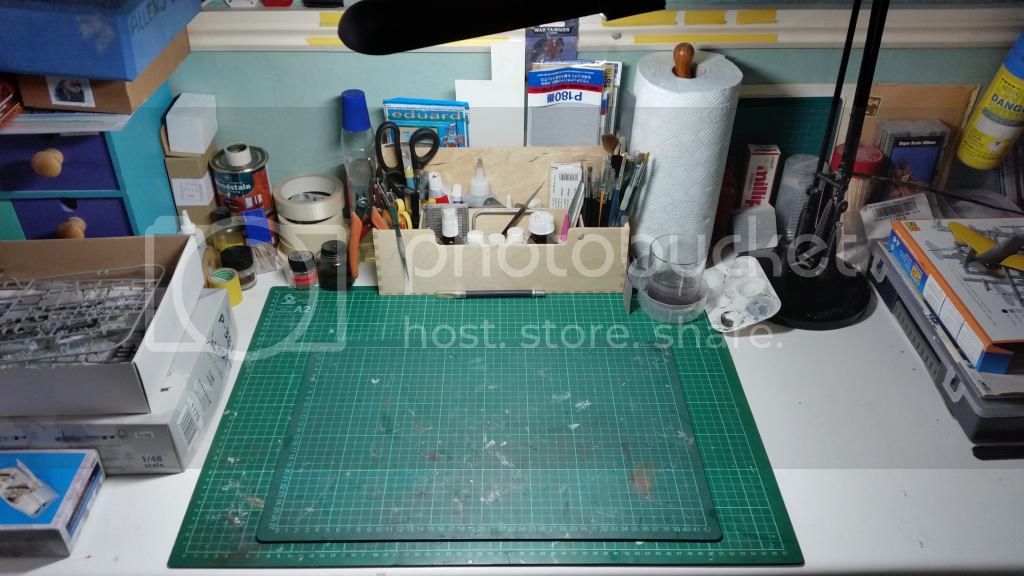
And then it was time to start. I didn't get far apart from opening the Aires resin cockpit with it incredible detail and wash in some mild detergent.


Thats all for now but will hopefully get more of a start over the week.

Modellers Creed: This is my toolbox. There are many like it, but this one is mine. My toolbox is my best friend. It is my life. I must master it as I must master my life. My toolbox, without me, is useless. Without my toolbox, I am useless.
Joel_W
 Associate Editor
New York, United States
Joined: December 04, 2010
KitMaker: 11,666 posts
AeroScale: 7,410 posts
Posted: Monday, July 14, 2014 - 02:01 AM UTC
Allen,
Looking forward to your conversion build with all that added detail.
Since you have so much experience with campaigns, and posted that most of your build will be in a separate build blog in the Modern Forum to keep from tying up this thread. I'm rethinking the need for my double posting here, and in my own build blog in the Cold War forum. Are you just going to post here that a new update has been posted in your build blog? Seems to me that will make a lot more sense. Think I'm going to go that route as well.
Joel
On my Workbench:
Monogram 1/24 scale 427 Shelby Cobra
Just Completed:
Beemax 1/24 scale BMW M3 E30 1992 Evolution II

#042
England - North East, United Kingdom
Joined: November 18, 2006
KitMaker: 2,828 posts
AeroScale: 1,720 posts
Posted: Monday, July 14, 2014 - 03:03 AM UTC
Hi Joel
All I probably do is post a couple of photos at each milestone with a link to other blog thread.
Normally I would just post my sporadic progress in the campaign thread but this time I want to do a full blog as this is going to be quite an in depth build. I also like the idea of all my blog to gether rather than being lsot in amongst other builds.

It was discussed about doing something like that and setting up sub forums for each campaign to keep it tidier but I don't think the idae ever got off the ground. I know in the past that the WWI builders normally just posted their campaign builds in the WWI forum but they had their own way of keeping track of who did what.
Modellers Creed: This is my toolbox. There are many like it, but this one is mine. My toolbox is my best friend. It is my life. I must master it as I must master my life. My toolbox, without me, is useless. Without my toolbox, I am useless.
Joel_W
 Associate Editor
New York, United States
Joined: December 04, 2010
KitMaker: 11,666 posts
AeroScale: 7,410 posts
Posted: Monday, July 14, 2014 - 04:15 AM UTC
Allen,
I completely agree with your ideas. I also started my separate build blog for non-campaign members since I figured if I don't look at campaign threads I'm not in, most others don't either. I enjoy sharing my work with other members, so it was a natural.
In the past I've also questioned how one follows individual builds just through a campaign thread, as it does get confusing if there are several similar builds going on at the same time.
Joel
On my Workbench:
Monogram 1/24 scale 427 Shelby Cobra
Just Completed:
Beemax 1/24 scale BMW M3 E30 1992 Evolution II
MichaelSatin
 Campaigns Administrator
Colorado, United States
Joined: January 19, 2008
KitMaker: 3,909 posts
AeroScale: 2,904 posts
Posted: Monday, July 14, 2014 - 10:59 AM UTC
One thing I always try to do (assuming I get any models built) is to always say right at the beginning of my post exactly which model I'm working on. I think that helps a little to keep things straight.
Michael

On the bench:
Sorta depends on your definition of "on the bench"...
Joel_W
 Associate Editor
New York, United States
Joined: December 04, 2010
KitMaker: 11,666 posts
AeroScale: 7,410 posts
Posted: Monday, July 14, 2014 - 11:50 AM UTC
Quoted Text
One thing I always try to do (assuming I get any models built) is to always say right at the beginning of my post exactly which model I'm working on. I think that helps a little to keep things straight.
Michael 
Michael,
From my years here, I know that I'm in the minority with how I build what. Namely that I only have one model on my workbench at a time. For me that's how I stay focused on that build. I usually go from start to finish without ever starting another kit. I do have my next build planned, and ready to go with most of the research needed done, and any paints, AM stuff purchased. But that's not model building.
With that said, I had almost 2 1/2 weeks from the time I finished the F-4B to the start of the Grumman Campaign, so I deviated from my usual routine, and started the Special Hobbies 1/48 scale F2A-3 Buffalo. But once the campaigned started, the Buffalo was boxed up.
Joel
On my Workbench:
Monogram 1/24 scale 427 Shelby Cobra
Just Completed:
Beemax 1/24 scale BMW M3 E30 1992 Evolution II


