Air Campaigns
Want to start or join a group build? This is where to start.
OFFICIAL: Lifesavers Campaign
Antilles
_VISITCOMMUNITY
Nordrhein-Westfalen, Germany
Joined: March 22, 2015
KitMaker: 671 posts
AeroScale: 614 posts
Posted: Friday, September 11, 2015 - 02:58 AM UTC
Paul: Nice painting job so far. Those small parallel bands are hard to paint. It reminds me of my H-19 in the rotor rpm campaign looking upside down .

Oliver
turtle65
_VISITCOMMUNITY
Dunedin, New Zealand
Joined: September 17, 2012
KitMaker: 266 posts
AeroScale: 13 posts
Posted: Friday, September 11, 2015 - 02:37 PM UTC
all,
Just wondering if there would be any objections if I enrolled with a previously started (and abandoned ) project
D8R Fire Dozer
Most definitely not up to 30% completed .
Hopefully this Campaign will give me the incentive to complete something .
Cheers.
KelticKnot
_VISITCOMMUNITY
Scotland, United Kingdom
Joined: May 11, 2015
KitMaker: 768 posts
AeroScale: 656 posts
Posted: Friday, September 11, 2015 - 04:01 PM UTC
Roger, being that the dozer definitely fits into the fire fighting role I would certainly allow this.
Besides, this looks like it is a really interesting and unique project with plenty of scratchbuilt elements.
Fire ahead if you will excuse the pun
KelticKnot
_VISITCOMMUNITY
Scotland, United Kingdom
Joined: May 11, 2015
KitMaker: 768 posts
AeroScale: 656 posts
Posted: Friday, September 11, 2015 - 09:00 PM UTC
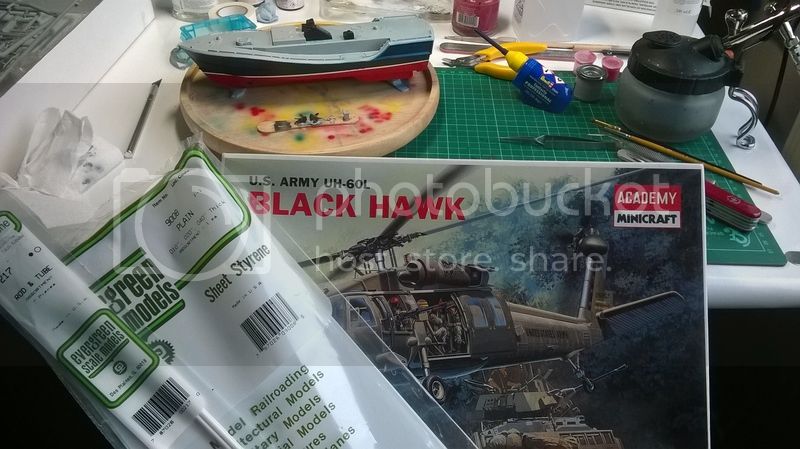
Hmm, so I've been a little bored waiting on countless layers of paint drying and thought it might be a nice idea to have another kit to keep me going throughout the entire duration of the campaign as i don't see the lifeboat taking up all that time. (best laid plans and all that...)


Gonna turn this heap of plastic into a medevac chopper with an extensive scratchbuilt interior (again, best laid plans etc... LOL)
jimb
_VISITCOMMUNITY
New York, United States
Joined: August 25, 2006
KitMaker: 2,539 posts
AeroScale: 231 posts
Posted: Saturday, September 12, 2015 - 12:37 AM UTC
So, I started working on the Bell H-13, and I was going through the instructions making sure that I knew what I was doing & that I had the correct paint. I have most of the paint except Olive Drab & Zinc Chromate. No problem. I went to the LHS & picked up the Testors Model Masters 1911 Olive Drab; but the Zinc Chromate threw me for a loop. I saw Yellow Zinc Chromate & Green Zinc Chromate. The paint list didn't have a FS number, so I'm not totally sure which one to get. Since it will be the interior of the helicopter, I'm leaning toward the Green Zinc Chromate. Does that sound correct?

Jim
Jessie_C
_VISITCOMMUNITY
British Columbia, Canada
Joined: September 03, 2009
KitMaker: 6,965 posts
AeroScale: 6,247 posts
Posted: Saturday, September 12, 2015 - 12:51 AM UTC
Most H-13s were painted light grey inside. I suspect that the instructions are incorrect. Both green and yellow zinc chromate are intended to be protective coats and are used in portions of the aircraft which are not used by the crew.
jimb
_VISITCOMMUNITY
New York, United States
Joined: August 25, 2006
KitMaker: 2,539 posts
AeroScale: 231 posts
Posted: Saturday, September 12, 2015 - 02:32 AM UTC
Jessica, that's a great picture. Where did you find it? All of the photos I've been able to find were black & white.

Jim
Jessie_C
_VISITCOMMUNITY
British Columbia, Canada
Joined: September 03, 2009
KitMaker: 6,965 posts
AeroScale: 6,247 posts
Posted: Saturday, September 12, 2015 - 02:57 AM UTC
I googled "MASH H-13" and skipped past a lot of model photos and black and white photos until I found it
MichaelSatin
Staff MemberCampaigns Administrator
AEROSCALE
_VISITCOMMUNITY
Colorado, United States
Joined: January 19, 2008
KitMaker: 3,909 posts
AeroScale: 2,904 posts
Posted: Sunday, September 13, 2015 - 06:32 PM UTC
In case anyone wash't aware, the gallery is experiencing issues. Admin is aware of it and working on it. I'll try to post when it gets fixed.

Michael
Delbert
#073
_VISITCOMMUNITY
Pennsylvania, United States
Joined: October 05, 2002
KitMaker: 2,659 posts
AeroScale: 209 posts
Posted: Monday, September 14, 2015 - 04:11 AM UTC
Hello everyone.

Here is a photo of what I will be working on soon.

a 1977 GMC Wrecker. Looks like a nice enough kit in the box. We will see..


Delbert
MichaelSatin
Staff MemberCampaigns Administrator
AEROSCALE
_VISITCOMMUNITY
Colorado, United States
Joined: January 19, 2008
KitMaker: 3,909 posts
AeroScale: 2,904 posts
Posted: Tuesday, September 15, 2015 - 04:43 AM UTC
OK, apparently the galleries are fixed. A big thanks to Jim at Admin! Post away everyone!

Michael
KelticKnot
_VISITCOMMUNITY
Scotland, United Kingdom
Joined: May 11, 2015
KitMaker: 768 posts
AeroScale: 656 posts
Posted: Thursday, September 24, 2015 - 06:44 PM UTC
Things have been quiet on the modelling front lately with overtime at work and the Rugby World Cup diverting my attention (c'mon Scotland!)
However, i've managed to break out the paints today and get moving again.
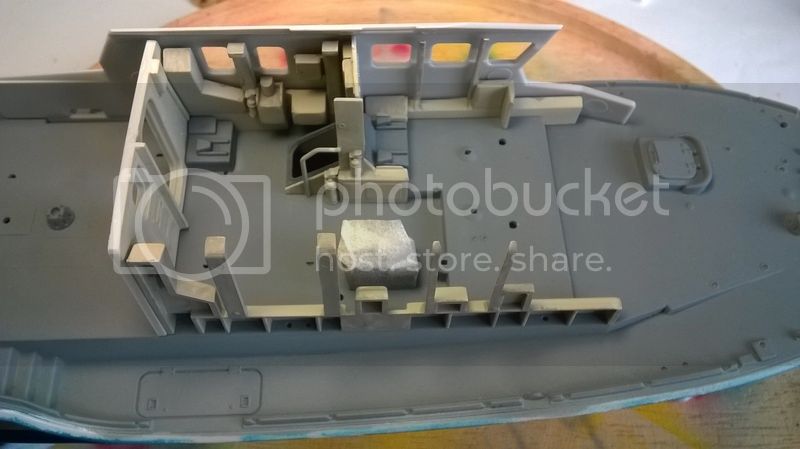
I've painted the main deck and made some headway with the interior of the superstructure. These components are only dry fitted at the moment until i can figure out where everything goes to guarantee the best fit.
I've shaved off most of the locating pegs on these parts as they are simply too big or slightly out of position to fit the relevant holes.


Antilles
_VISITCOMMUNITY
Nordrhein-Westfalen, Germany
Joined: March 22, 2015
KitMaker: 671 posts
AeroScale: 614 posts
Posted: Thursday, September 24, 2015 - 11:22 PM UTC
Hello Paul!
Nice progress on Your model. The interior looks fine. Will You put some figures into it?

I have just painted the interior of my chopper. As I will build the rear door closed, only the front cockpit was detailed up.

cockpit prepainted:


seats and panel installed:


looking through the cockpit door:


Oliver
KelticKnot
_VISITCOMMUNITY
Scotland, United Kingdom
Joined: May 11, 2015
KitMaker: 768 posts
AeroScale: 656 posts
Posted: Friday, September 25, 2015 - 04:06 AM UTC
Hi Oliver, i don't know of any lifeboat figures to scale. Maybe some kind of chopper or boat crew that had lifejackets could be modified though???

Your extra work putting in the details in the cockpit has certainly paid off. It looks great !
KelticKnot
_VISITCOMMUNITY
Scotland, United Kingdom
Joined: May 11, 2015
KitMaker: 768 posts
AeroScale: 656 posts
Posted: Thursday, October 01, 2015 - 12:26 AM UTC


Getting some detail into the insides ! Starting to come together...
KelticKnot
_VISITCOMMUNITY
Scotland, United Kingdom
Joined: May 11, 2015
KitMaker: 768 posts
AeroScale: 656 posts
Posted: Thursday, October 01, 2015 - 12:44 AM UTC
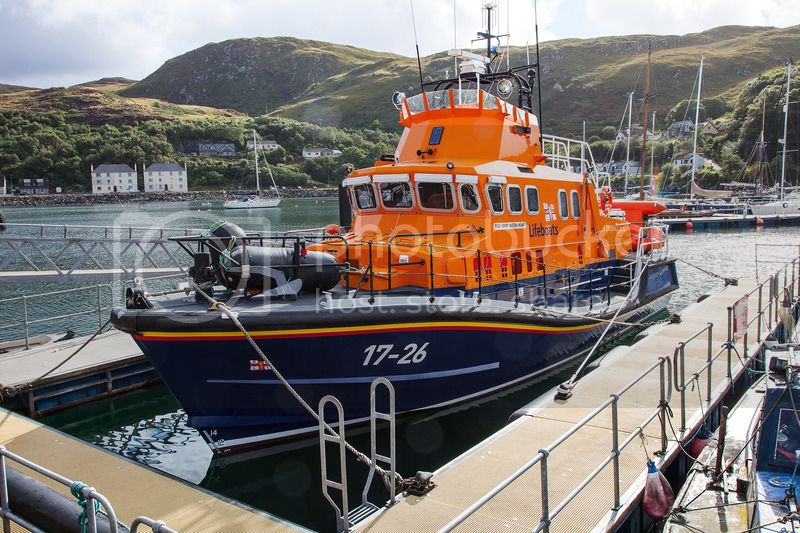
Oh, and i've been very lucky and grateful for some high-res reference pics of a Severn-class.
Antilles
_VISITCOMMUNITY
Nordrhein-Westfalen, Germany
Joined: March 22, 2015
KitMaker: 671 posts
AeroScale: 614 posts
Posted: Thursday, October 01, 2015 - 02:51 PM UTC
Hello Paul,

I am rather astonished about the factory fresh paint on this boat. There seems to be no fading. So the weathering process will be small on Your model .

Oliver
KelticKnot
_VISITCOMMUNITY
Scotland, United Kingdom
Joined: May 11, 2015
KitMaker: 768 posts
AeroScale: 656 posts
Posted: Thursday, October 01, 2015 - 06:12 PM UTC
Yes, my brother in-law who volunteers on another class of lifeboat tells me that their standard procedure after a call-out is to clean down the lifeboat so they are always very well maintained.
Antilles
_VISITCOMMUNITY
Nordrhein-Westfalen, Germany
Joined: March 22, 2015
KitMaker: 671 posts
AeroScale: 614 posts
Posted: Saturday, October 03, 2015 - 02:48 AM UTC
Hello everybody,

just a small update today.

I enhanced the exhaust area by glueing a straw into it. So it gets more depth after all is painted black, hopefully.


Additionally, the inside was painted and filled with equipment.


Now the main parts are glued together. Fitting is not quite perfect, but compared to the age of the kit, it is brilliant.


Oliver
KelticKnot
_VISITCOMMUNITY
Scotland, United Kingdom
Joined: May 11, 2015
KitMaker: 768 posts
AeroScale: 656 posts
Posted: Saturday, October 03, 2015 - 11:55 PM UTC
Hey, nice idea with the straw! Things are looking really great.
Antilles
_VISITCOMMUNITY
Nordrhein-Westfalen, Germany
Joined: March 22, 2015
KitMaker: 671 posts
AeroScale: 614 posts
Posted: Tuesday, October 06, 2015 - 05:39 PM UTC
Thanks Paul!

Last night, I really suffered a setback. As somebody might learn out of my mistake, I will show You this one.

One of the rear rotor blades of the kit was bend. Hence, I wanted to straighten it.

For this I used the steam of boiling water. The blade was fixed in the straightened position and held in the steam.

The effect was awful. Not even, that the blade twisted in all directions. It even shortened about 10 mm .

Can anybody tell me what went wrong ? Was the distance to the steam too short? Or is there enhanced stress in the plastic, releaving due to deformation when heat is applied?

As I had no spare parts I had to make a new blade out of sheet material. This was ground to a proper profile.


Sure, the blade of the kit is more convex, but in this scale, it is okay for me. The mounting of the old blade was cut of and glued to the new one. Following is a picture of the three rear blades. Guess which one is the new .


Oliver
KelticKnot
_VISITCOMMUNITY
Scotland, United Kingdom
Joined: May 11, 2015
KitMaker: 768 posts
AeroScale: 656 posts
Posted: Tuesday, October 06, 2015 - 06:33 PM UTC
Bad luck on the rotor blade but you've made a great replacement. Lucky the mounting didnt get warped too.
I've noticed that the sprue from different kits stretches in different ways when heated so i suppose there are variables in each type of plastic. Maybe you could use the exact same trick on another rotor from a different manufacturer and it would be fine.
On the other hand, maybe you are correct and the steam was just too hot. Also the steam would make a heat source that is not constant. I would suggest putting the part in warm water so that it heats evenly.

But again, you've scratched a nice replacement and you wont know which it is once its painted and attached.
Jessie_C
_VISITCOMMUNITY
British Columbia, Canada
Joined: September 03, 2009
KitMaker: 6,965 posts
AeroScale: 6,247 posts
Posted: Tuesday, October 06, 2015 - 08:54 PM UTC
I second the suggestion that the steam was too hot. The best trick is to take the water off the heat and wait until just after the bubbles stop. By then it's cool enough not to damage thin parts, yet still hot enough to cause the plastic's thermoplastic properties to reset its shape. You may need to plunge your part into the water for a few seconds. Long thin parts (like rotor blades) are especially prone to the type of damage you encountered.
Antilles
_VISITCOMMUNITY
Nordrhein-Westfalen, Germany
Joined: March 22, 2015
KitMaker: 671 posts
AeroScale: 614 posts
Posted: Wednesday, October 07, 2015 - 05:49 PM UTC
Jessica and Paul,

thank You very much for Your quick answers. Jessica, next time I will try Your method to plunge the part into warm water only. Probably it will be safer to test it onto a bent sprue first .

Oliver
KelticKnot
_VISITCOMMUNITY
Scotland, United Kingdom
Joined: May 11, 2015
KitMaker: 768 posts
AeroScale: 656 posts
Posted: Wednesday, October 07, 2015 - 07:34 PM UTC


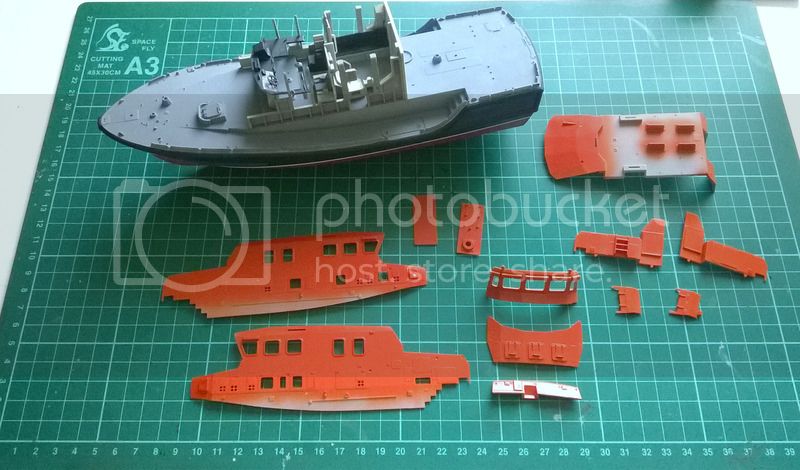
I've thrown paint all over the place today!
Loads of airbrushing the glossy orange ( i'm getting more comfortable with the airbrush on each kit )
And some good old fashioned brush painting of the black rubber fenders.
Suddenly with the distinctive orange appearing it really feels like i'm building an RNLI vessel for the first time.