Air Campaigns
Want to start or join a group build? This is where to start.
OFFICIAL: Lifesavers Campaign
tatbaqui
Staff MemberNews Reporter
ARMORAMA
#040
_VISITCOMMUNITY
Metro Manila, Philippines
Joined: May 06, 2007
KitMaker: 2,713 posts
AeroScale: 65 posts
Posted: Friday, October 09, 2015 - 04:03 AM UTC
Hi,

I read that it may be finished as an ambulance during the French campaign. Hope it qualifies?


Cheers,

Tat
KelticKnot
_VISITCOMMUNITY
Scotland, United Kingdom
Joined: May 11, 2015
KitMaker: 768 posts
AeroScale: 656 posts
Posted: Friday, October 09, 2015 - 01:58 PM UTC
Anything with a red cross on it surely qualifies !
Welcome to the campaign Tat, i'm looking forward to your build
tatbaqui
Staff MemberNews Reporter
ARMORAMA
#040
_VISITCOMMUNITY
Metro Manila, Philippines
Joined: May 06, 2007
KitMaker: 2,713 posts
AeroScale: 65 posts
Posted: Saturday, October 10, 2015 - 05:47 AM UTC
Cool, thanks Paul! My start pic:


Cheers,

Tat
tatbaqui
Staff MemberNews Reporter
ARMORAMA
#040
_VISITCOMMUNITY
Metro Manila, Philippines
Joined: May 06, 2007
KitMaker: 2,713 posts
AeroScale: 65 posts
Posted: Wednesday, October 14, 2015 - 04:57 PM UTC
Hello,

First order of the build -- the suspension.


Had a bit of a challenge in the bogie assembly as it doesn't line up easily. Next came the tracks, 200+ in all. Quite disappointing as the plastic was brittle and I broke a fair amount of track links when cutting from its sprues. Hope that there is still enough to complete the build. Now off to cleaning up these tiny bits!
Cheers,

Tat
KelticKnot
_VISITCOMMUNITY
Scotland, United Kingdom
Joined: May 11, 2015
KitMaker: 768 posts
AeroScale: 656 posts
Posted: Wednesday, October 14, 2015 - 06:46 PM UTC
Oh man, those are a lot of tiny pieces to clean up!
The only AFV i've built was a Tamiya Sherman with rubber tracks which got me back into the hobby. I found that to be a test of patience making six nearly identical bogies. Seems I don't do well at repetition.
I can't begin to imagine putting a track together link by link.
KelticKnot
_VISITCOMMUNITY
Scotland, United Kingdom
Joined: May 11, 2015
KitMaker: 768 posts
AeroScale: 656 posts
Posted: Thursday, October 15, 2015 - 12:24 AM UTC
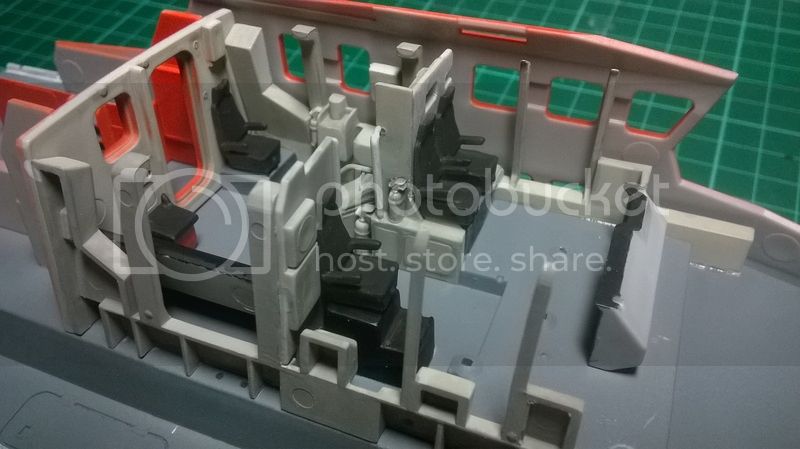
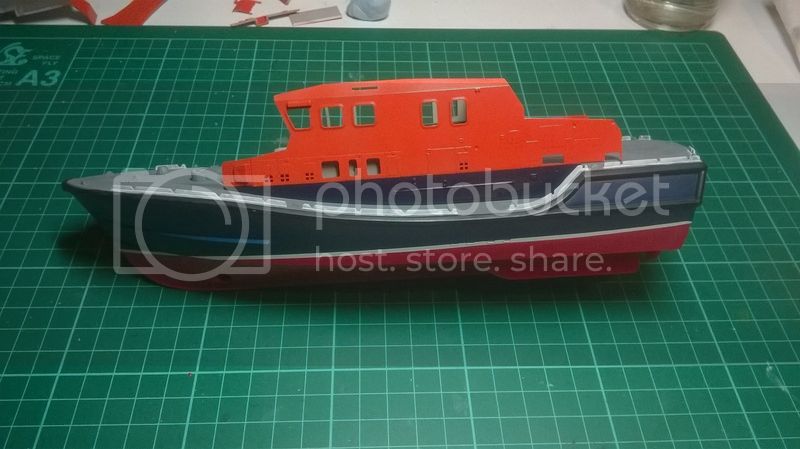
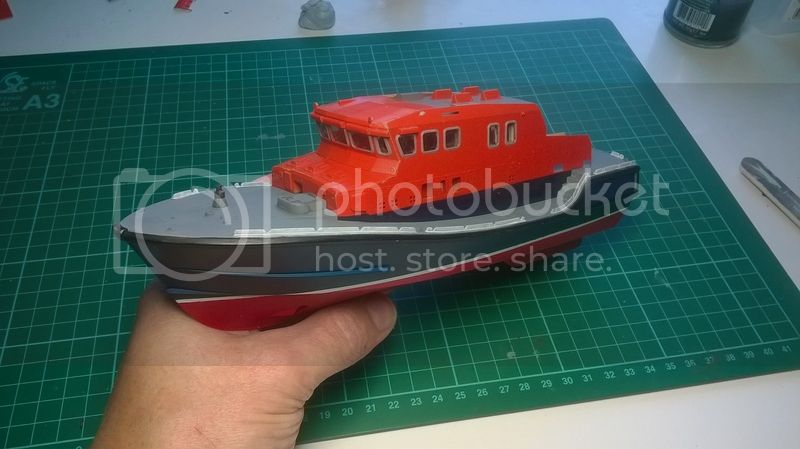
Working on the interior again as well as shooting a layer of blue on the side of the cabin.
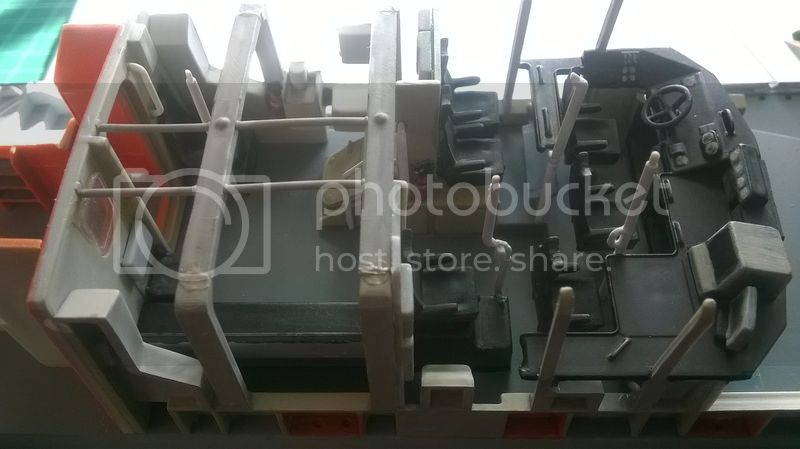
Lots of interesting detail in there but the view will be very restricted. I believe the whole superstructure can be left unglued to lift off but it seems a bit risky with so much delicate railing and antenna detail to be added. I'll likely glue the whole thing shut but its fun to practise detailing for future projects


Still a few techniques i want to try before its sealed in but looking ok so far.

The colours are really working now. Add all the railings etc and this builds into a lovely kit. No great issues so far at all.
Delbert
#073
_VISITCOMMUNITY
Pennsylvania, United States
Joined: October 05, 2002
KitMaker: 2,659 posts
AeroScale: 209 posts
Posted: Thursday, October 15, 2015 - 01:33 AM UTC

Quoted Text

Hello,

First order of the build -- the suspension.

Had a bit of a challenge in the bogie assembly as it doesn't line up easily. Next came the tracks, 200+ in all. Quite disappointing as the plastic was brittle and I broke a fair amount of track links when cutting from its sprues. Hope that there is still enough to complete the build. Now off to cleaning up these tiny bits!


Hey Tat I did one of Dragon's Panzer IB's a few years ago (they have the same tracks) and cutting them off the sprue was intact was a bear, also sanding them without breaking them. I had to flatten a set of tweezers to hold the pieces longways while I gently sanded them so that they didn't break in half. Those tracks will look really good when finished.

Good luck
Delbert

oh and they take freaking forever....

nico37
_VISITCOMMUNITY
Indre-et-Loire, France
Joined: May 23, 2011
KitMaker: 651 posts
AeroScale: 181 posts
Posted: Thursday, October 15, 2015 - 12:28 PM UTC
Hi all,

i finally found what to do in this campaign, a single figure:
WW1 french strecher bearer, a kind of tribute to my grand-grand-father (from my mother side) who was one of them (he was a pharmacist as civilian).

cheers
nico
KelticKnot
_VISITCOMMUNITY
Scotland, United Kingdom
Joined: May 11, 2015
KitMaker: 768 posts
AeroScale: 656 posts
Posted: Thursday, October 15, 2015 - 03:11 PM UTC
Welcome on board Nicolas. I was hoping someone would do a figure
We now have boats, aircraft, AFV and figures represented in a single campaign. Thats fantastic! And it really adds something when there is a story behind the subject.
jimb
_VISITCOMMUNITY
New York, United States
Joined: August 25, 2006
KitMaker: 2,539 posts
AeroScale: 231 posts
Posted: Thursday, October 15, 2015 - 05:38 PM UTC
Paul, your lifeboat is really coming along nicely. Wish I could say the same about my H-13. That's life, you know.

Tat, that panzer is interesting, but I have to say that if I opened the kit & found all of those track links. think my next post would be in the "Buy, Sell, Trade" section!


Welcome aboard, Nico. Looking forward to your figure. Just picked up "All Quiet on the Western Front" again.

Jim
tatbaqui
Staff MemberNews Reporter
ARMORAMA
#040
_VISITCOMMUNITY
Metro Manila, Philippines
Joined: May 06, 2007
KitMaker: 2,713 posts
AeroScale: 65 posts
Posted: Friday, October 16, 2015 - 05:45 AM UTC
Thanks all for the comments! Indeed the number of these links seem daunting. I can live with the number, it's the handling of the tiny and fragile bits that I have to contend with. Well, I''ve set aside the cleaning for now, as I've made good progress on other sub-assemblies. Actually, tracks aside, I think this is a quick build at 11 - 12 steps. Cheers, Tat
tatbaqui
Staff MemberNews Reporter
ARMORAMA
#040
_VISITCOMMUNITY
Metro Manila, Philippines
Joined: May 06, 2007
KitMaker: 2,713 posts
AeroScale: 65 posts
Posted: Monday, October 19, 2015 - 11:07 AM UTC
Hello,

Almost done, with the exception of the tracks:


Need to straighten the antenna tray:


Cheers,

Tat
KelticKnot
_VISITCOMMUNITY
Scotland, United Kingdom
Joined: May 11, 2015
KitMaker: 768 posts
AeroScale: 656 posts
Posted: Tuesday, October 20, 2015 - 12:21 AM UTC
That's come together really fast! I've no overtime at work this week so I'm planning to make a big leap forward on the lifeboat. I'm also making a lot of plans for the Blackhawk too; I'm looking forward to starting it soon. Plenty of scratchbuilding !
Antilles
_VISITCOMMUNITY
Nordrhein-Westfalen, Germany
Joined: March 22, 2015
KitMaker: 671 posts
AeroScale: 614 posts
Posted: Tuesday, October 20, 2015 - 01:26 AM UTC
Tat, nice kick off and fast progess. I reckognize the chain of Your tank has more parts than my whole kit of the chopper .

Paul, Your boat comes along nicely, too!

My KV-107 was filled with some amount of putty due to some gaps.

Mainly these gaps are on the lower side near the rear door.

After sanding, I applied white primer and white acrylic colour, followed by red color. Markings were painted, too.

Than orange and yellow were sprayed. I have to say, that the yellow colour was rather bad, concerning its covering. Five layers had to be sprayed to have a sufficient appearance.

Paul, which colours did You use for Your boat? They look flawless.

Tonight, the last run was the black colour. After this, the major parts were demasked. Here is the result:


Some flaws have to be eliminated, but I am pleased with this.

Oliver
KelticKnot
_VISITCOMMUNITY
Scotland, United Kingdom
Joined: May 11, 2015
KitMaker: 768 posts
AeroScale: 656 posts
Posted: Tuesday, October 20, 2015 - 04:44 PM UTC
Looks great Oliver! I cant believe the Japanese marking isnt a decal. Nice work


Quoted Text

Paul, which colours did You use for Your boat? They look flawless.


I used the small pots of Humbrol acrylic that came with the kit. I think the important thing was that I thinned them a lot and sprayed several thin coats of each colour. Up close the finish isn't perfect (still get grainy texture sometimes) but my airbrushing is getting better.
KelticKnot
_VISITCOMMUNITY
Scotland, United Kingdom
Joined: May 11, 2015
KitMaker: 768 posts
AeroScale: 656 posts
Posted: Wednesday, October 21, 2015 - 07:18 PM UTC
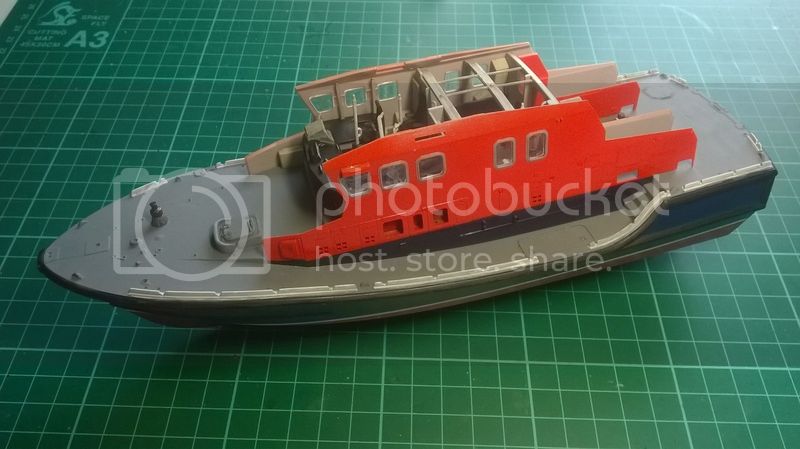
Much progress! I've sealed up the interior and assembled all the parts of the lower superstructure. The fit is pretty good it has to be said. There are no locator pins, all the pieces have bevelled edges which sit against each other so it was a case of squeezing parts together until they joined. There is some minor gap filling and some paint repair needed where glue seeped out but overall a success for a stage i felt was going to be tricky.

Saying goodbye to the cabin, it got quite crowded in there by the end...


Installed the clear parts into the cabin walls and attached them first :


Built up the front section piece by piece to this point. It looks pretty mean without the flying bridge on top.
Antilles
_VISITCOMMUNITY
Nordrhein-Westfalen, Germany
Joined: March 22, 2015
KitMaker: 671 posts
AeroScale: 614 posts
Posted: Wednesday, October 21, 2015 - 09:35 PM UTC
Hello Paul,
nice update of Your boat. How have You managed it, that there is nearly no seam visible, after glueing the prepainted front section piece?

Oliver
KelticKnot
_VISITCOMMUNITY
Scotland, United Kingdom
Joined: May 11, 2015
KitMaker: 768 posts
AeroScale: 656 posts
Posted: Wednesday, October 21, 2015 - 10:13 PM UTC

Quoted Text

Hello Paul,
nice update of Your boat. How have You managed it, that there is nearly no seam visible, after glueing the prepainted front section piece?

Oliver


Well the fit was OK to start with but i had to push the sides together as the glue dried to get each of the front parts to fit in place. Don't worry, there are some small gaps to fix up ! The photo makes it look a bit better than it is up close
tatbaqui
Staff MemberNews Reporter
ARMORAMA
#040
_VISITCOMMUNITY
Metro Manila, Philippines
Joined: May 06, 2007
KitMaker: 2,713 posts
AeroScale: 65 posts
Posted: Thursday, October 22, 2015 - 04:25 AM UTC
Thanks all for the comments.

It builds quick without the tracks. Well I've now slowed down because of those fiddly bits! Spent the last couple of nights cleaning up -- I've netted 168 links out of the 216 that came with the kit. I don't think I'll have enough to complete two sets of tracks -- am sure I will continue to lose some as I build. I have a set of Master Box Pz 1B tracks. Doesn't come close to the detail of DML's, but it sure looks the part! Still needs to be cleaned up and sanded for fit, but it's a lot better to handle, so I'll take that route moving forward.

Paul, that boat is coming along nicely. Curious about the shade on the topside -- what shade of orange is that?

Oliver, that Japanese emblem is tops -- did you use DIY mask for it?

Cheers,

Tat
KelticKnot
_VISITCOMMUNITY
Scotland, United Kingdom
Joined: May 11, 2015
KitMaker: 768 posts
AeroScale: 656 posts
Posted: Thursday, October 22, 2015 - 12:01 PM UTC
Tat, the colour is simply Humbrol no. 18 - gloss orange.
There is a grey walkway on top for the flying bridge which i'll start today that might be fooling your eye.
Antilles
_VISITCOMMUNITY
Nordrhein-Westfalen, Germany
Joined: March 22, 2015
KitMaker: 671 posts
AeroScale: 614 posts
Posted: Thursday, October 22, 2015 - 01:25 PM UTC

Quoted Text


Oliver, that Japanese emblem is tops -- did you use DIY mask for it?


Hello Tat,

yes, You are right. The masks are DIY. I just used tamiya masking tape and a cutting compass. The correct size of the circles was measured onto the old decal.

Oliver
Antilles
_VISITCOMMUNITY
Nordrhein-Westfalen, Germany
Joined: March 22, 2015
KitMaker: 671 posts
AeroScale: 614 posts
Posted: Saturday, October 24, 2015 - 04:14 AM UTC
Hello everybody,

tonight, I just put on the decals after sealing with a glossy cote. But, the decals for the face did not react to the decal softening media .

Hence, I took off those hard decals and made the standard version.


I guess, this bird will stand out of all the other camouflaged planes in my shelf, even without the face. Next will be a slight weathering.

Oliver
Konigwolf
_VISITCOMMUNITY
Tasmania, Australia
Joined: November 06, 2009
KitMaker: 368 posts
AeroScale: 27 posts
Posted: Sunday, October 25, 2015 - 10:45 AM UTC
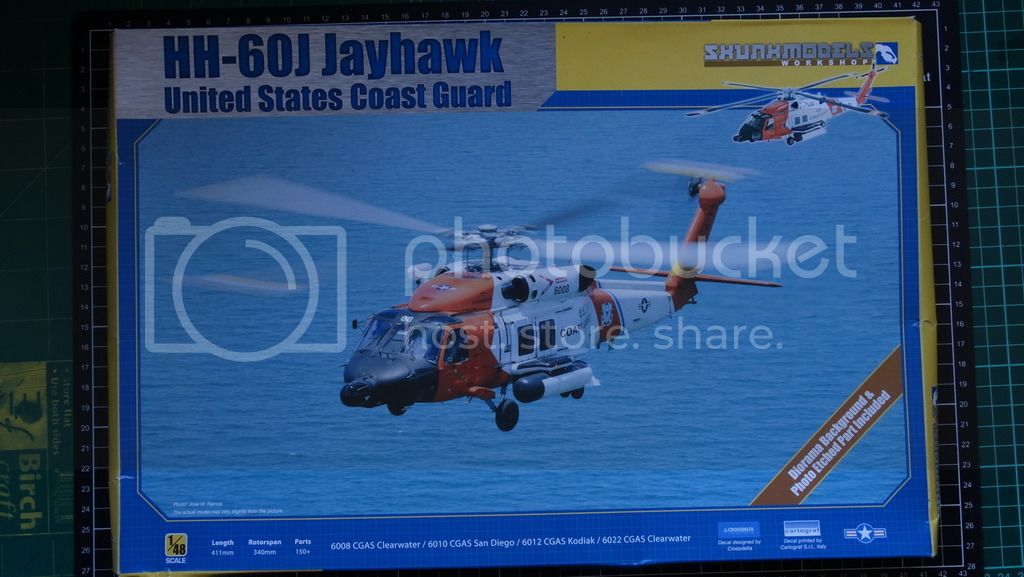
Hi, slightly late entry but I figure 4 months should be enough. I'll be building Skunkworks HH-60 Jayhawk. Will have some pictures up tonight.

Andrew
Konigwolf
_VISITCOMMUNITY
Tasmania, Australia
Joined: November 06, 2009
KitMaker: 368 posts
AeroScale: 27 posts
Posted: Sunday, October 25, 2015 - 06:00 PM UTC
For those unfamiliar with this kit it is a re-pop of Italeri's HH-60J with added goodies (photoetch etc)


KelticKnot
_VISITCOMMUNITY
Scotland, United Kingdom
Joined: May 11, 2015
KitMaker: 768 posts
AeroScale: 656 posts
Posted: Sunday, October 25, 2015 - 06:33 PM UTC
Welcome to the campaign Andrew, i'll follow your build with interest considering that i'm looking to start a 48th Blackhawk pretty soon too.