Hi Matt!
You are certainly a master of detail! Thank your for the painting lesson. I appreciate the Aotake information, especially. A month agoI had never even heard of Aotake. Now I have three Japanese fighters I will eventually build, and two of them will require Aotake to some extent. So your post comes at a really good time for me. Really enjoying your thread.
Gary
World War II
Discuss WWII and the era directly before and after the war from 1935-1949.
Discuss WWII and the era directly before and after the war from 1935-1949.
Hosted by Rowan Baylis
1/32 A6M2N Rufe & A6M5
Posted: Tuesday, November 10, 2015 - 11:17 PM UTC

Scrodes

Joined: July 22, 2012
KitMaker: 771 posts
AeroScale: 763 posts

Posted: Thursday, November 12, 2015 - 05:24 AM UTC
Quoted Text
Matt,
Your build blogs are not only easy to follow, but the information and techniques constantly cause "bells" to go off in my head. For quite some time I've been frustrated with how to mask bombs where the nose is a cylinder. No tape I've ever used seems to work. But your technique of using thin cardboard with the proper size hole drilled in it, is the answer to my frustrations. Can't wait to try it. For sizing I would have grabbed my calibers, but I do have the UMM hole punch set that would be a perfect solution.
Your attention to details, is just way beyond what us hackers normally accept and do. As is your well thought out process for duplicating the Japanese clear corrosive coating.
Without a doubt, this build will be a incredible experience for us to follow to completion.
Joel
Wow, high praise! Thanks Joel!
I would have used something more precise to determine the diameter of the cylinder, but it's more important to have a very clean circle, so I was limited to the punch sizes I have and luckily one worked. Otherwise I probably would've taken a small length of drinking straw, cut a slit lengthwise and made it smaller or larger as needed.
You're hardly a hacker my friend.

spaarndammer

Joined: January 28, 2007
KitMaker: 1,945 posts
AeroScale: 388 posts

Posted: Thursday, November 12, 2015 - 05:33 PM UTC
I can only agree with the others that your blog is full of useful information. The shadowing with the airbrush is indeed worth trying.
Thanks for sharing this build and your methodology.

Jelger
Thanks for sharing this build and your methodology.

Jelger

Scrodes

Joined: July 22, 2012
KitMaker: 771 posts
AeroScale: 763 posts

Posted: Friday, November 13, 2015 - 06:33 AM UTC
Quoted Text
Hi Matt!
You are certainly a master of detail! Thank your for the painting lesson. I appreciate the Aotake information, especially. A month agoI had never even heard of Aotake. Now I have three Japanese fighters I will eventually build, and two of them will require Aotake to some extent. So your post comes at a really good time for me. Really enjoying your thread.
Gary
Hey Gary, sorry - I missed your reply when I posted last and thanked Joel.
I was thinking of your builds as I explained my theory and method for aotake. I wouldn't normally have droned on about it, but for some reason it's only become apparent in recent years that the colour is a sealant and not an actual paint colour. I have that bottle of Tamiya paint because I didn't know better when I was younger - I cringe now looking at those old builds lol.
Hi Jelger - thanks for joining us - hit the subscribe button (I think it's up to the right when viewing the thread) to keep updated!

Scrodes

Joined: July 22, 2012
KitMaker: 771 posts
AeroScale: 763 posts

Posted: Sunday, December 06, 2015 - 09:52 AM UTC
Hey guys
I realize it's been a while, but it is that time of the year and I've been running around. I'm finally getting some solid modelling time in and I hope to have the cockpits closed up this week.
First though, some [hopefully] helpful stuff.
I hate seams - especially on parts that are going to have a metallic finish. You may think you have the problem solved, and then - voila, ghost seam that you notice far too late.
I like to use a coloured primer, black for grey plastic and grey for coloured plastic. You want to be able to see how close you are to being entirely into the plastic.
It's midnight, so I wont be MS painting the explanations.
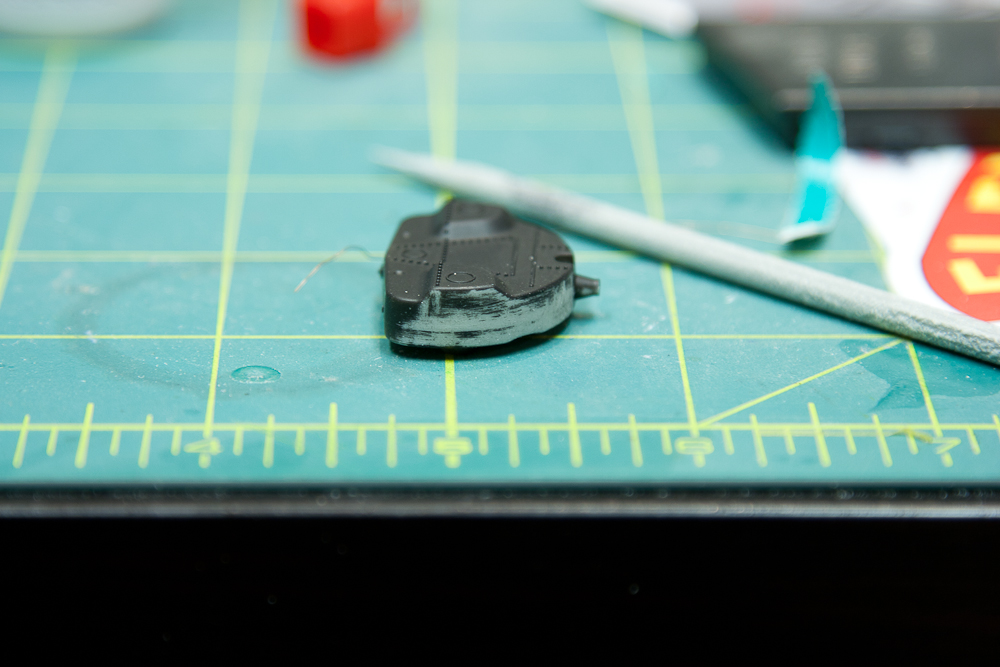
The edge of this tank has a mold seam. I thought I had it licked pretty good, so I primed with black and took a quick swipe lo and behold, one side of the seam was still higher than the other. The flexifile sanding sticks are awesome, for rounded surfaces like this you can just slide them down the curve. You can see the solid line of black. That indicates a seam, on the bottom side the seam is lower than on the top, so you have a slight ramp up to the height of the seam. Sometimes this is as you're going to get it, but take the extra time. Basically you're looking to sand until you can't see the primer butting up against the ridge.
We continue on until the primer is entirely gone, now we have no raised seam.
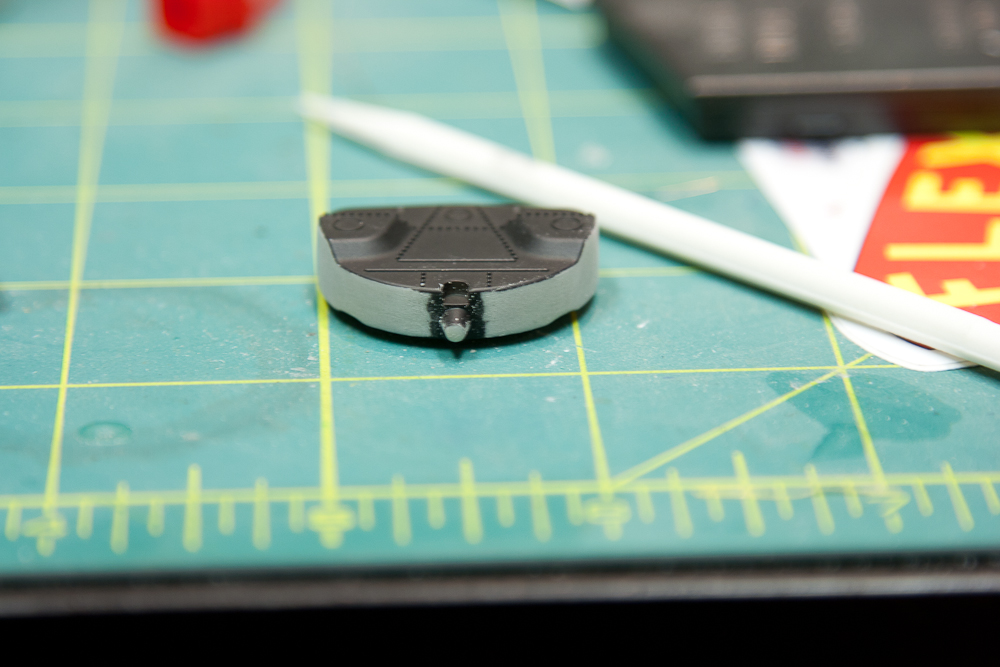
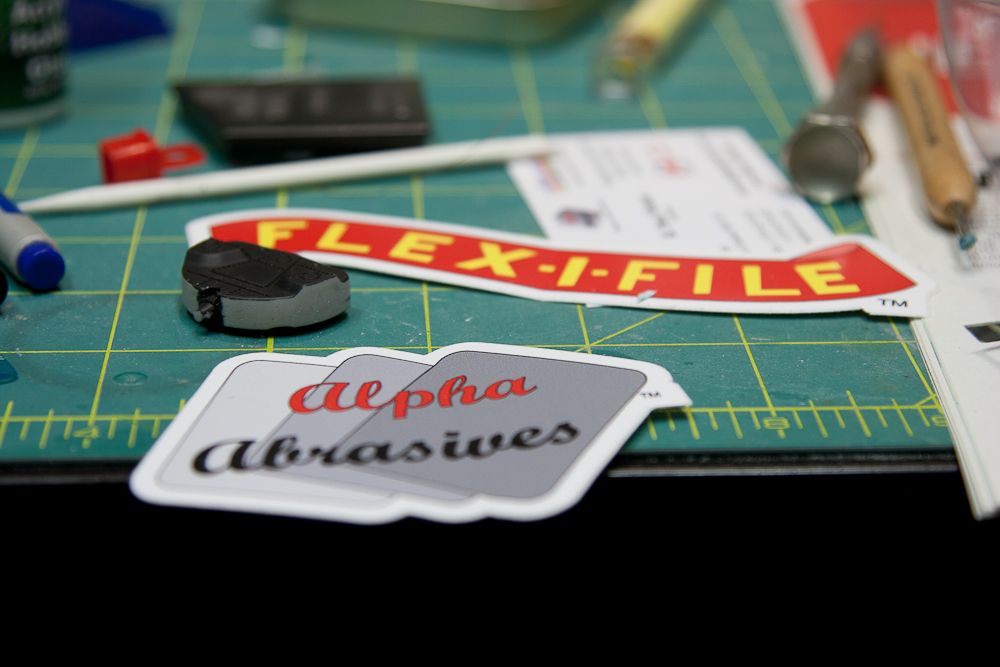
Flexifile is awesome, I just got these and I love them. That tank is now seam free and smooth
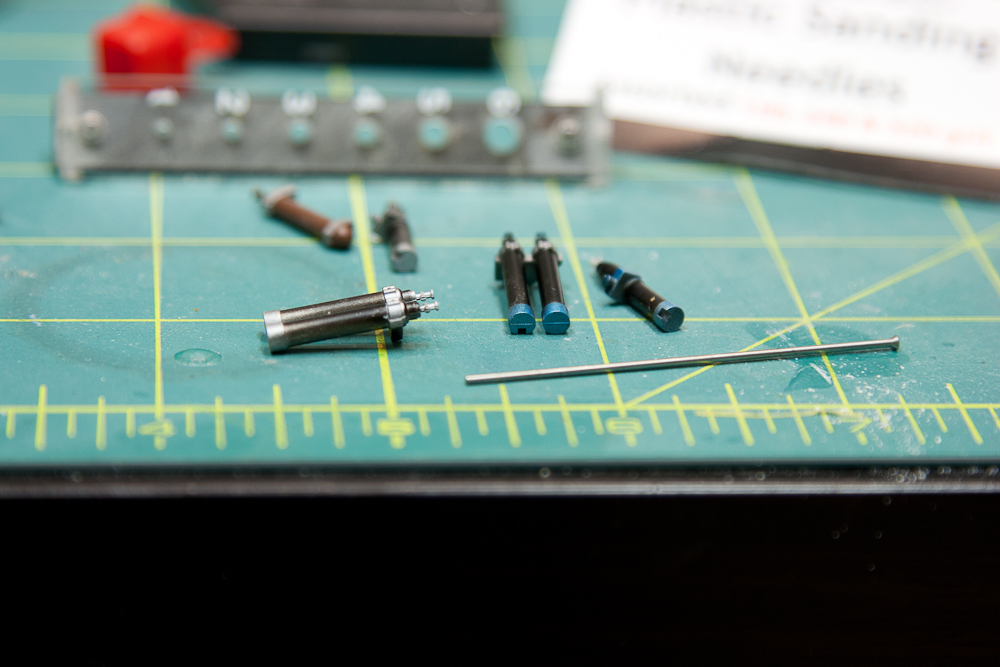
Oh no, the cylinders again - They just keep coming. Almost done, just need to paint the nozzles.
Punched some of the thin cardboard I always have floating around, cut a slit to it and we're good to go.
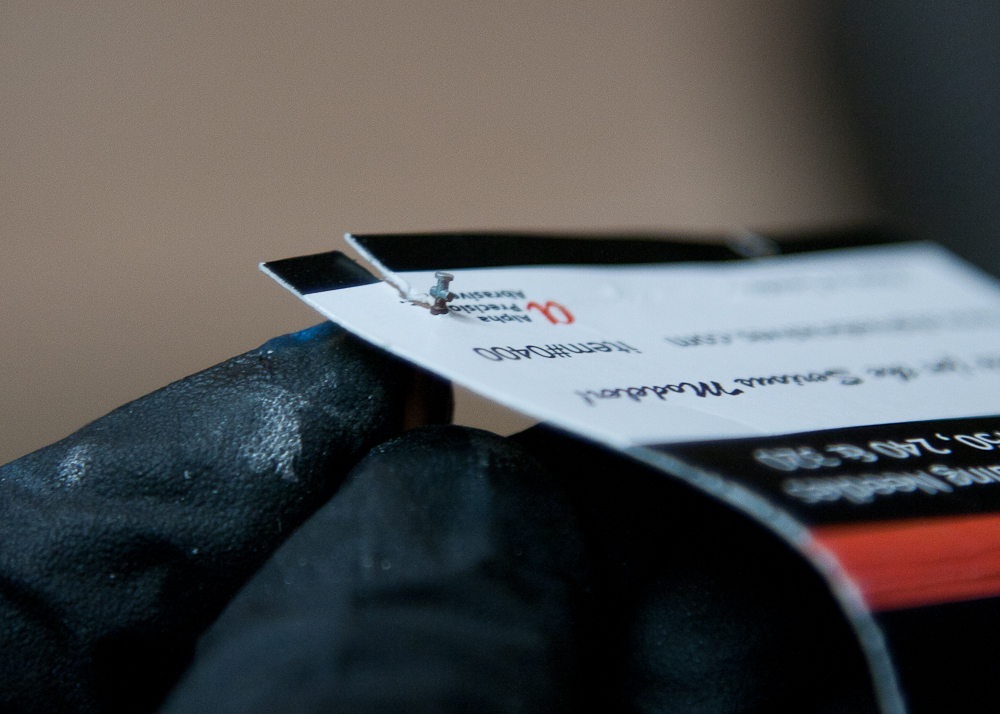
Sometimes I use this stuff, I think it's called masking tape.
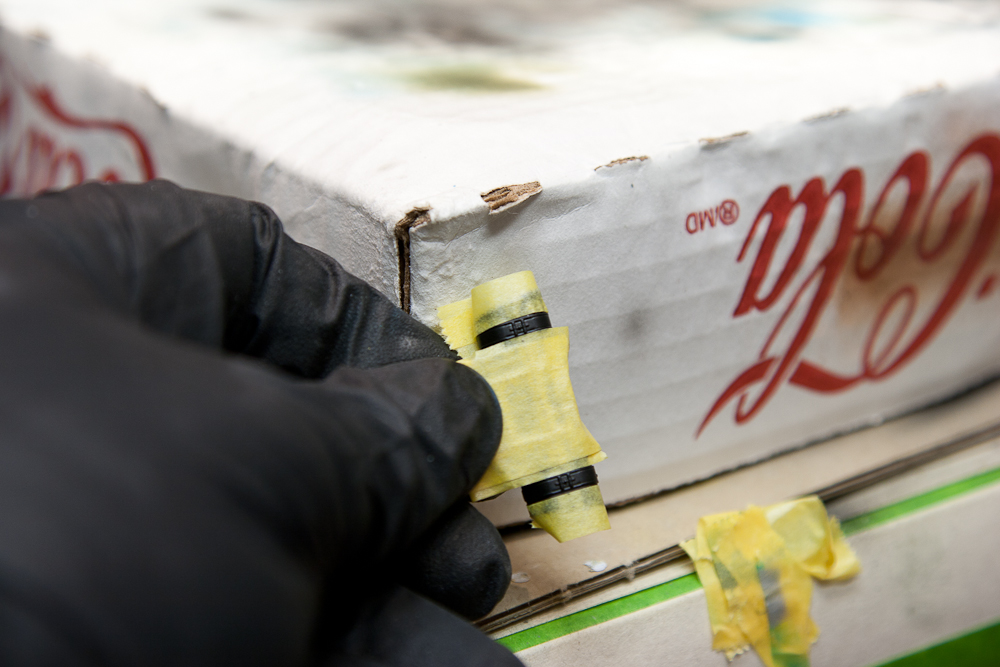
More cylinders
Back to the hole in the box.
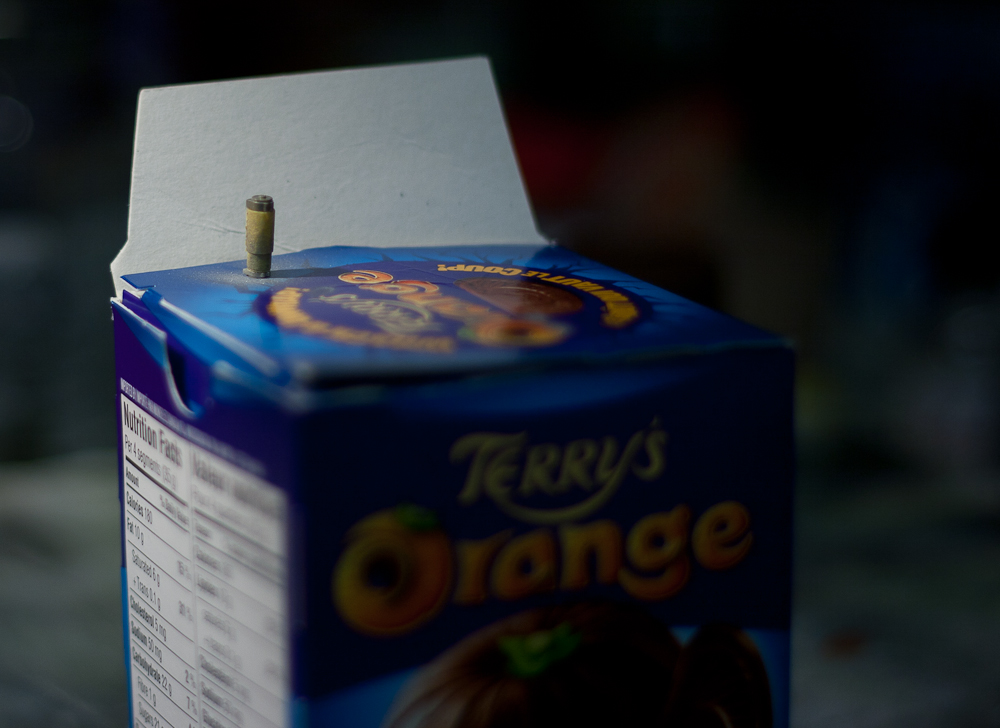
So much nicer than brush painted.

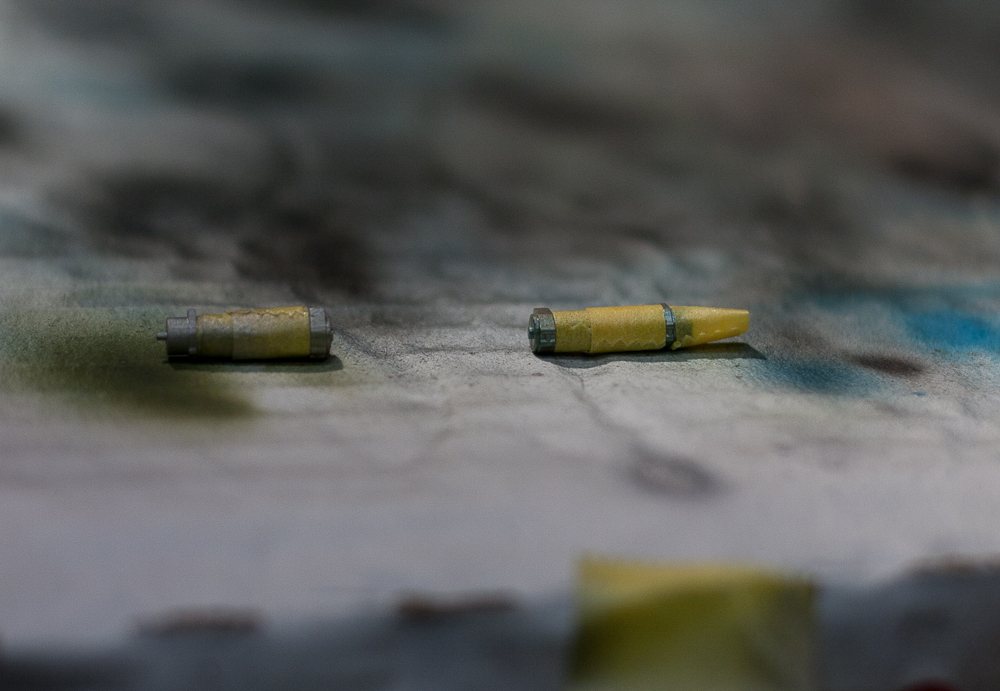
Masked with tape for a quick spray of the black.
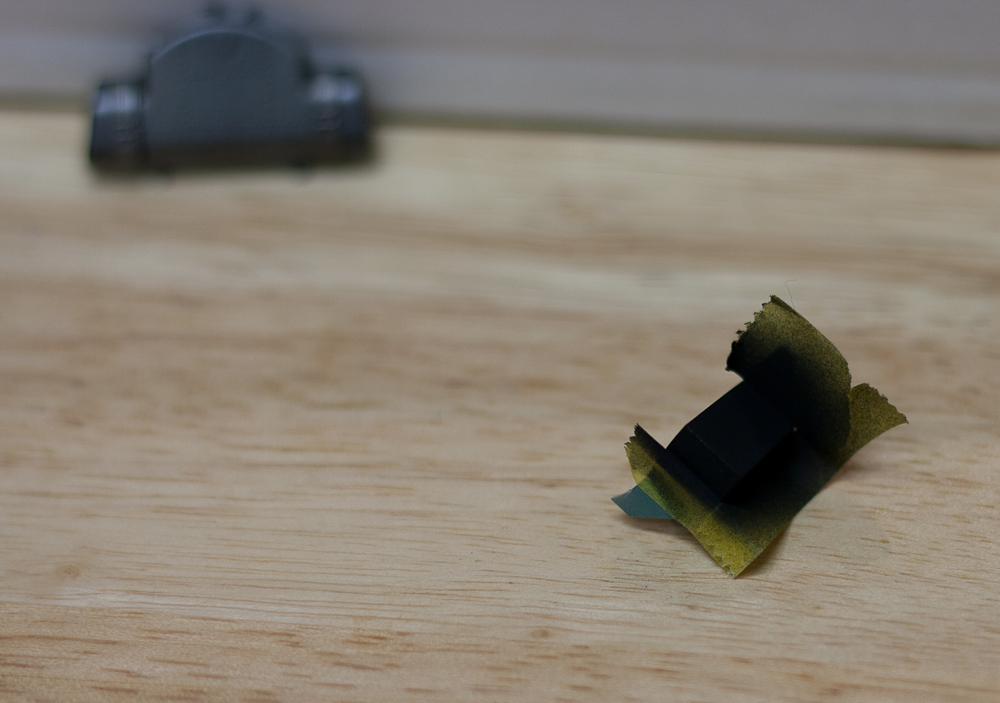
Came out nice and crisp.
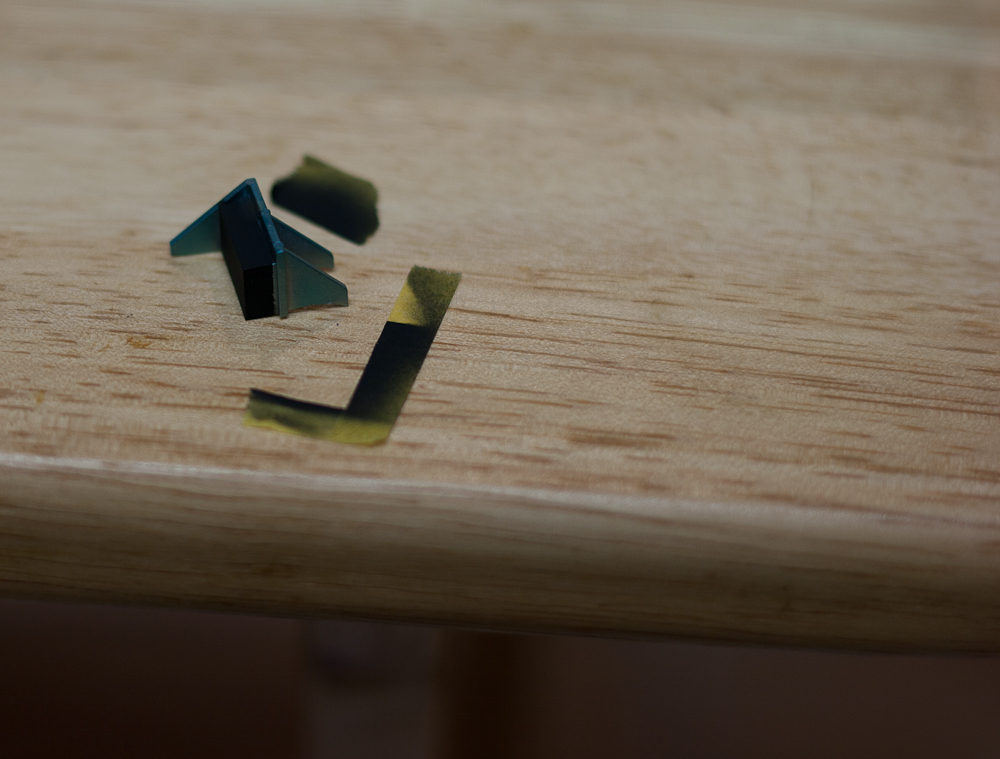
Another way I mask. punched tape. The trick to punching a clean disk/circle is to place it on a thin piece of plastic,and then place than in your punch set. Retrieve the punched disk with the tape on it and then slide your knife between the plastic disk and the tape and use the tip of the knife to place the mask where you need it.
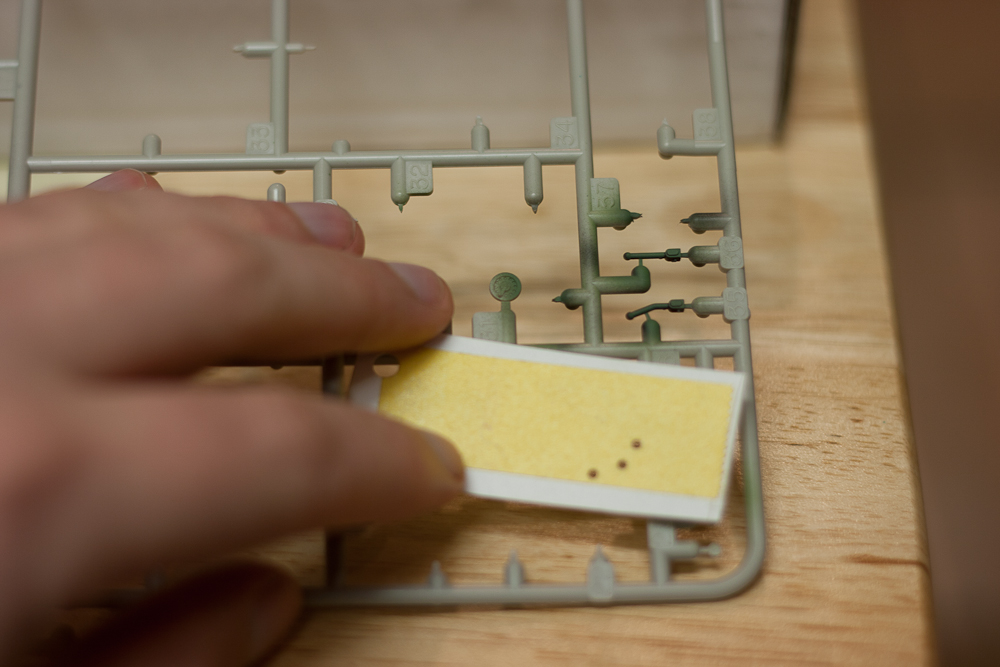


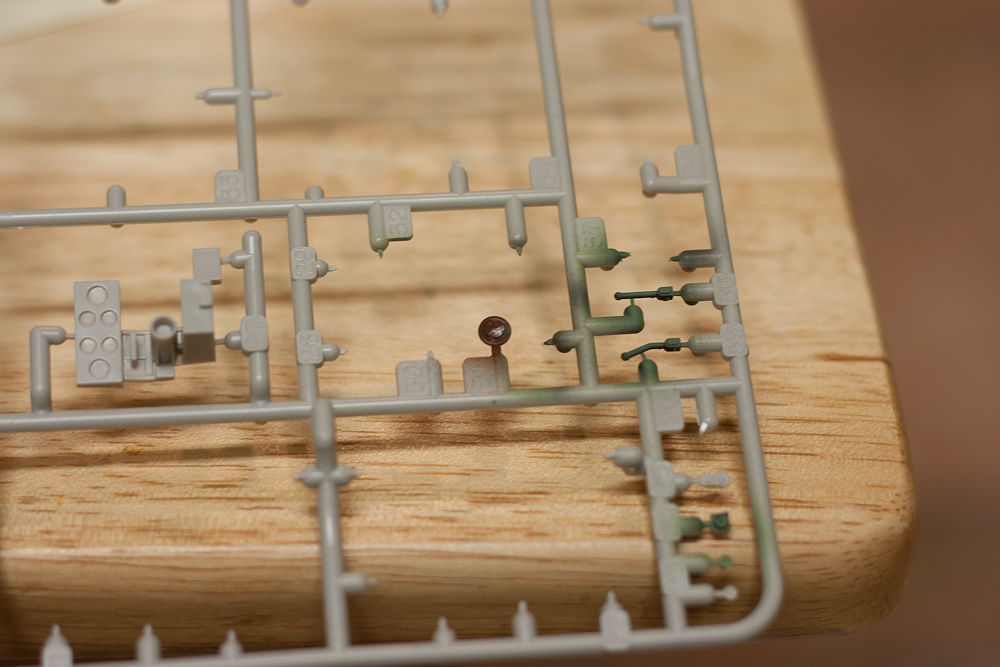
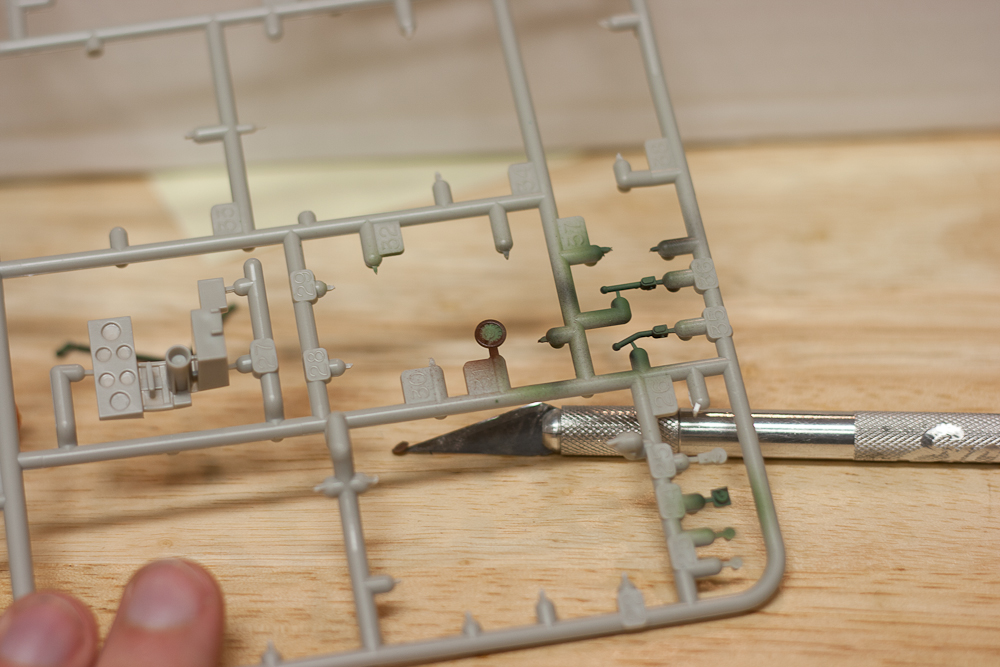
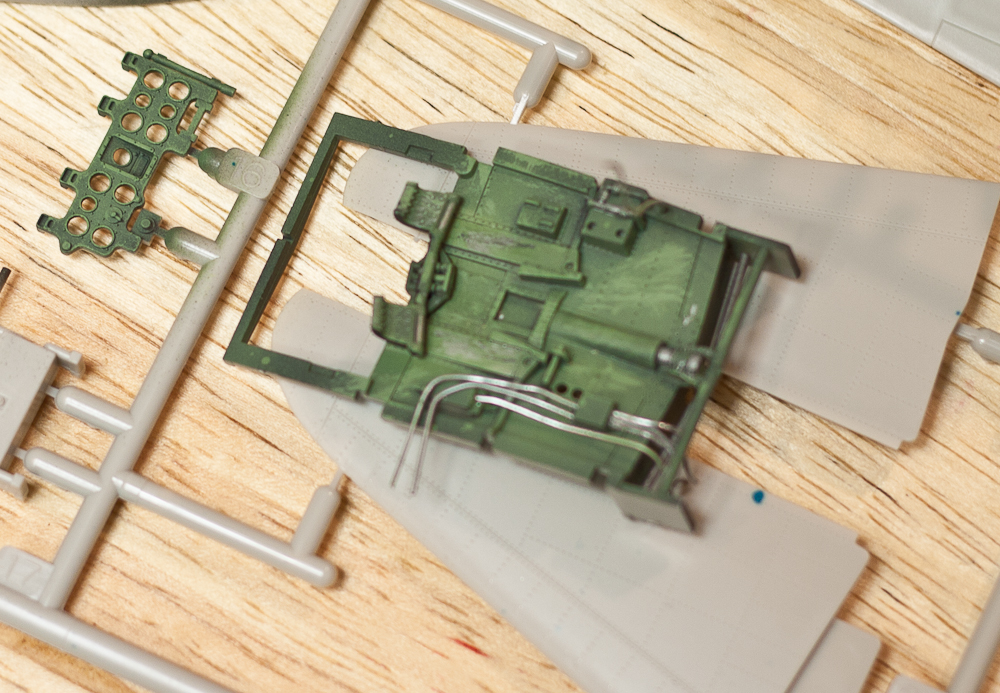
How dry brushing should look. The coming clear coats will change the contrast, so keep that in mind. I'm particularly happy with how the instrument panel came out. (One of these days I'll fork up the $800 for a good macro lens)
Now a small project. The Zero has a lever next to the pilots seat to adjust height. The kit piece is a poor representation of the part. Eduard make a nice photoetch piece, but I have three Zeros and only one of that set of etch. So I'm going to try something we've all learned from Chukw.
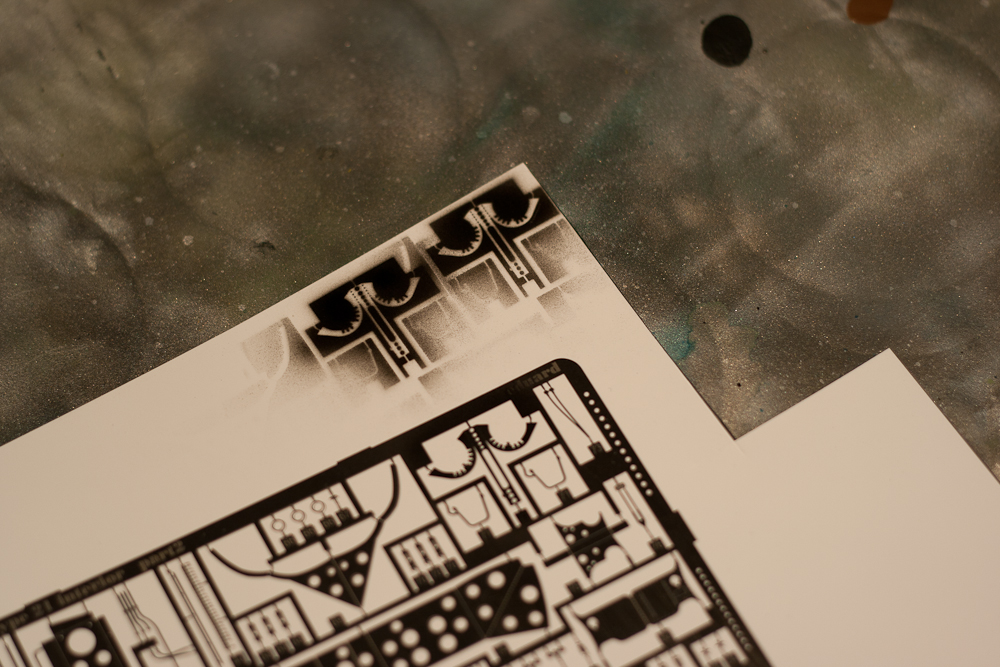
I sprayed the p/e part on plastic,creating a template. Now to carefully cut and file away the black.

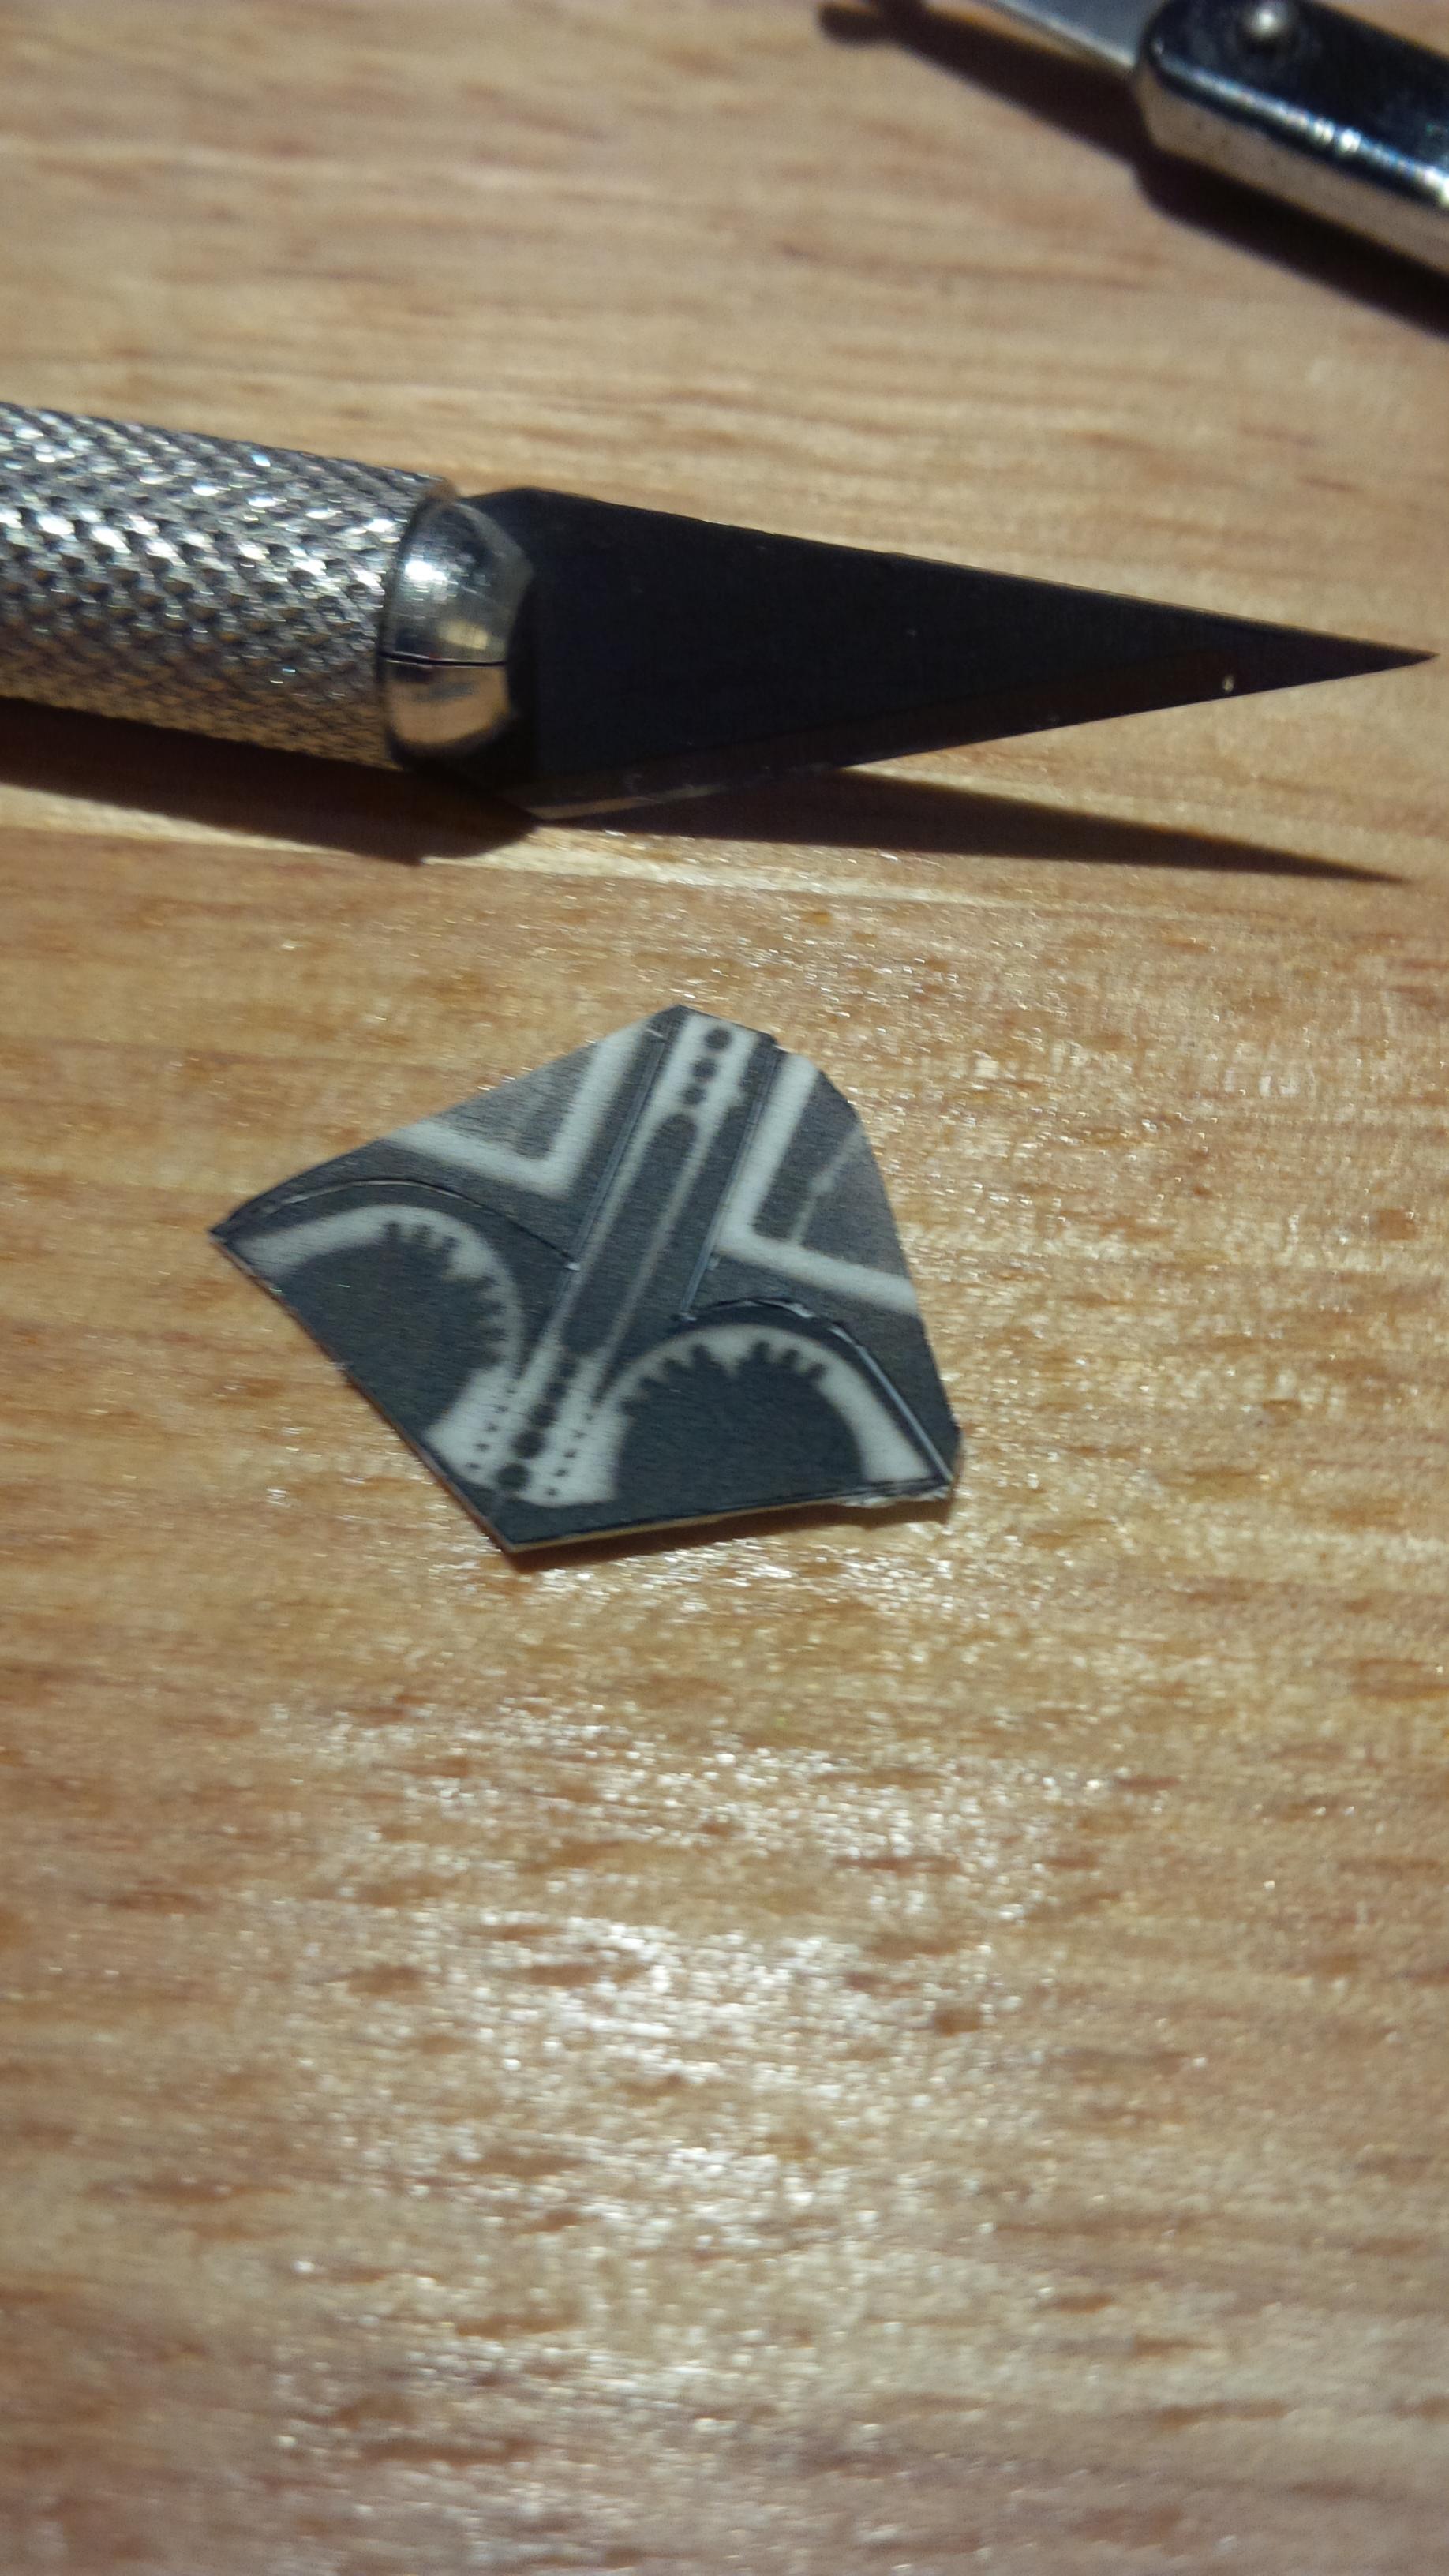
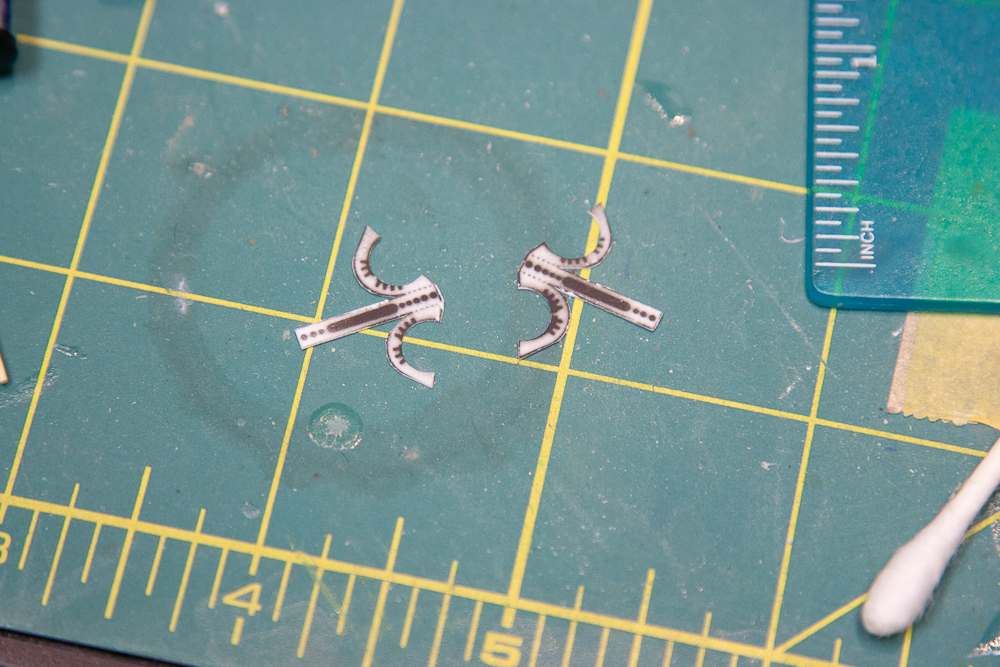
Left overnight to form a little.
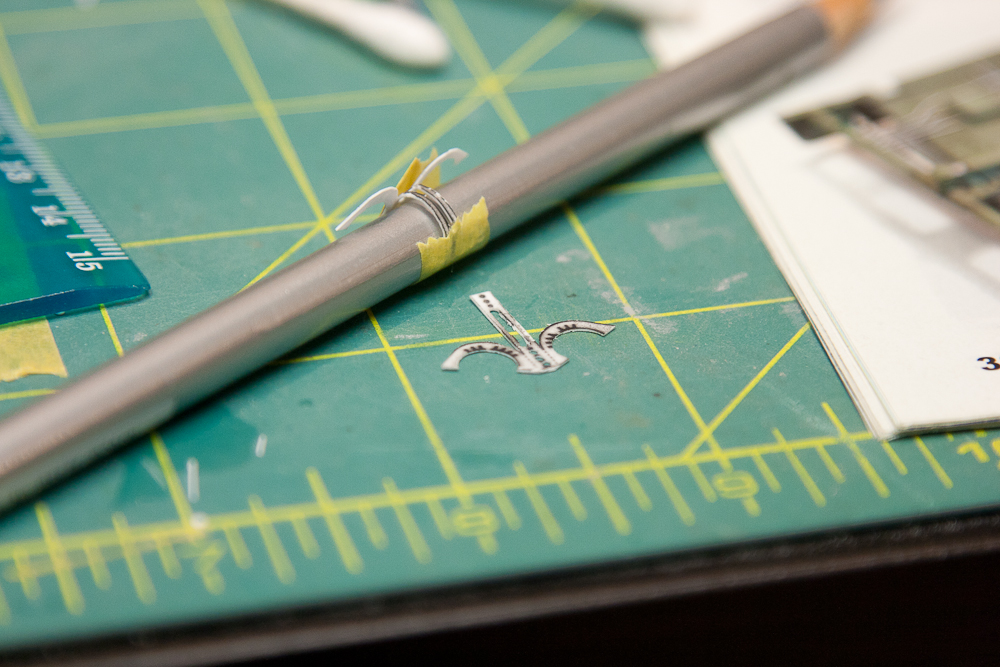
More coming soon - I have some days off.
I realize it's been a while, but it is that time of the year and I've been running around. I'm finally getting some solid modelling time in and I hope to have the cockpits closed up this week.
First though, some [hopefully] helpful stuff.
I hate seams - especially on parts that are going to have a metallic finish. You may think you have the problem solved, and then - voila, ghost seam that you notice far too late.
I like to use a coloured primer, black for grey plastic and grey for coloured plastic. You want to be able to see how close you are to being entirely into the plastic.
It's midnight, so I wont be MS painting the explanations.
The edge of this tank has a mold seam. I thought I had it licked pretty good, so I primed with black and took a quick swipe lo and behold, one side of the seam was still higher than the other. The flexifile sanding sticks are awesome, for rounded surfaces like this you can just slide them down the curve. You can see the solid line of black. That indicates a seam, on the bottom side the seam is lower than on the top, so you have a slight ramp up to the height of the seam. Sometimes this is as you're going to get it, but take the extra time. Basically you're looking to sand until you can't see the primer butting up against the ridge.

We continue on until the primer is entirely gone, now we have no raised seam.

Flexifile is awesome, I just got these and I love them. That tank is now seam free and smooth

Oh no, the cylinders again - They just keep coming. Almost done, just need to paint the nozzles.

Punched some of the thin cardboard I always have floating around, cut a slit to it and we're good to go.

Sometimes I use this stuff, I think it's called masking tape.

More cylinders

Back to the hole in the box.

So much nicer than brush painted.

Masked with tape for a quick spray of the black.

Came out nice and crisp.

Another way I mask. punched tape. The trick to punching a clean disk/circle is to place it on a thin piece of plastic,and then place than in your punch set. Retrieve the punched disk with the tape on it and then slide your knife between the plastic disk and the tape and use the tip of the knife to place the mask where you need it.


How dry brushing should look. The coming clear coats will change the contrast, so keep that in mind. I'm particularly happy with how the instrument panel came out. (One of these days I'll fork up the $800 for a good macro lens)

Now a small project. The Zero has a lever next to the pilots seat to adjust height. The kit piece is a poor representation of the part. Eduard make a nice photoetch piece, but I have three Zeros and only one of that set of etch. So I'm going to try something we've all learned from Chukw.

I sprayed the p/e part on plastic,creating a template. Now to carefully cut and file away the black.


Left overnight to form a little.

More coming soon - I have some days off.

Scrodes

Joined: July 22, 2012
KitMaker: 771 posts
AeroScale: 763 posts

Posted: Sunday, December 06, 2015 - 09:55 PM UTC
Wow, I guess I shouldn't be allowed near a keyboard at midnight, I'll have to come back and edit that post later today.
Twentecable

Joined: September 13, 2003
KitMaker: 339 posts
AeroScale: 244 posts

Posted: Sunday, December 06, 2015 - 11:35 PM UTC
Hi Matt,
very nice blog with some good ideas.. and ofcourse some nice modelling!
gr TC
very nice blog with some good ideas.. and ofcourse some nice modelling!
gr TC
Joel_W

Joined: December 04, 2010
KitMaker: 11,666 posts
AeroScale: 7,410 posts

Posted: Monday, December 07, 2015 - 09:11 PM UTC
Matt,
Just an outstanding update. I completely forgot about that technique of copying PE parts. although, in 1/48 scale it would be a lot harder to create a decent copy.
As for seams,they're a pain in the butt. So much so that now my process no matter how I fill and deal with the seam, is to finish it off with a coat of medium CCA glue. Sand and polish smooth. It doesn't shrink, and sands beautifully after 15-30 min or so.
Joel

Scrodes

Joined: July 22, 2012
KitMaker: 771 posts
AeroScale: 763 posts

Posted: Tuesday, December 08, 2015 - 04:17 AM UTC
Thanks Lars! I'm glad you're following along. This thread will pick up soon. I'm doing the fun painting now - all of the knobs and handles etc.
See Joel? All the more reason to switch to the big stuff. I'm not certain these parts will work out yet, in retrospect I probably should have used one of those aluminum pie plates I've been hoarding. Worse case is that I get to spend more time modelling.
I've never really enjoyed filling seams with CA - especially now that ZAP is impossible to find up here, I don't have the heart to waste it in vast quantities lol. I'll have to give it another try soon.
Quoted Text
Matt,
Just an outstanding update. I completely forgot about that technique of copying PE parts. although, in 1/48 scale it would be a lot harder to create a decent copy.
As for seams,they're a pain in the butt. So much so that now my process no matter how I fill and deal with the seam, is to finish it off with a coat of medium CCA glue. Sand and polish smooth. It doesn't shrink, and sands beautifully after 15-30 min or so.
Joel
See Joel? All the more reason to switch to the big stuff. I'm not certain these parts will work out yet, in retrospect I probably should have used one of those aluminum pie plates I've been hoarding. Worse case is that I get to spend more time modelling.

I've never really enjoyed filling seams with CA - especially now that ZAP is impossible to find up here, I don't have the heart to waste it in vast quantities lol. I'll have to give it another try soon.
Joel_W

Joined: December 04, 2010
KitMaker: 11,666 posts
AeroScale: 7,410 posts

Posted: Wednesday, December 09, 2015 - 01:01 AM UTC
Matt,
Gotta tell you that moving up in scale crosses my mind all the time these days, but old habits and a stash are just hard to walk away from. Still, the F2A-3 Buffalo was a real experience I completely enjoyed. I've got not one, but two Kingfishers penciled in for 2016 at this point.
Being basically thrifty, ok cheap, I don't buy Zap a Gap or any CCA glues targeted for the modeler, as they're so expensive. Rather I just go to my local Home Depot and in the paint department is super hot to thick Gel Loctite CCA glues, Gorilla Glues, and a few others. Price is more then reasonable too.
Joel

Scrodes

Joined: July 22, 2012
KitMaker: 771 posts
AeroScale: 763 posts

Posted: Saturday, December 12, 2015 - 10:19 AM UTC
Quoted Text
Matt,
basically thrifty, ok cheap, I don't buy Zap a Gap or any CCA glues targeted for the modeler, as they're so expensive. Rather I just go to my local Home Depot and in the paint department is super hot to thick Gel Loctite CCA glues, Gorilla Glues, and a few others. Price is more then reasonable too.
Joel
Joel, i always say stick to what you know, especially what you know works.

Scrodes

Joined: July 22, 2012
KitMaker: 771 posts
AeroScale: 763 posts

Posted: Monday, December 14, 2015 - 06:20 PM UTC
Mods - Is there a way for me to edit the thread title or must it be done on your end? I'd like to show the fact that there's a 32nd scale A6M2N Rufe being built in here as well.

Scrodes

Joined: July 22, 2012
KitMaker: 771 posts
AeroScale: 763 posts

Posted: Monday, January 18, 2016 - 03:12 AM UTC
Just like the cat - I'm back.
The cockpits are assembled, they're just waiting on a wash - which I can't do until my second set of HGW harnesses arrives. When I built the P-51, the single set had enough parts for two planes. Not the set for the Zero...
It took me a whole night in front of the TV to assemble the one set - as annoying as I remembered it to be, but in my opinion you can't beat the real cloth belts.
Here's where things stand - this is the cockpit of the Rufe

Sometimes you just can't get enough hands. This is the tensioner's cable that raises or lowers the seat. Tamiya was kind enough to make the two pulleys separate from the rear bulkhead, which allows the modeller to actually run a cable around them. It's not much - but it is visible.
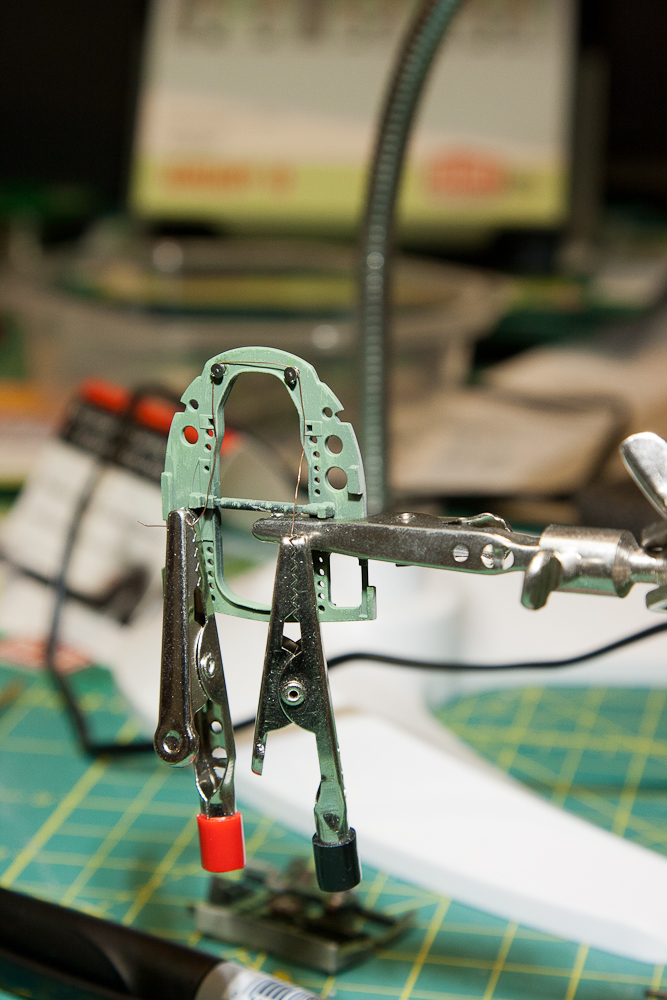
AND NOW FOR SOMETHING COMPLETELY DIFFERENT!
A complete change of pace, and the moment where I either make it or break it with this model. Time to cut into the wing for the conversion.
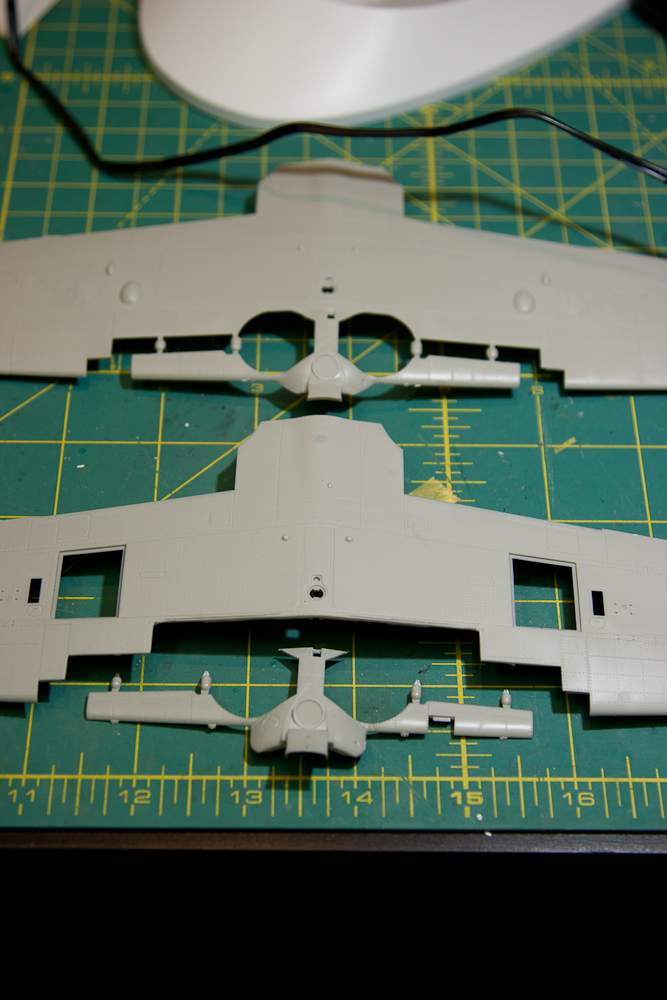
Here are the two wings, the A6M2-N wing in front was mostly identical to the A6M5 wing seen behind it. Up until this point, I still could have chickened out and built the second Zero as the intended 2B.
A quick story. I bought this conversion from MDC shortly after it came out. Originally it was missing two parts - small ones, I can see how they got missed. An email to MDC and the parts were sent promptly. My first impression of the conversion was that it was pretty impressive. The main float is a solid block of resin, the conversion is relatively straight forward and very professionaly done. It involves hacking apart the wing, and two parts of the tail - replacing the vertical stab and tailcone.
Shortly after I started this build, I was looking at the conversion and realized that the plug for the wing was far too small. Another email to MDC and a replacement part was sent out. It is definitely larger, but didn't resolve all the issues. Looking at an article in TMMI on this conversion, it seems that the new part fits the way it was intended. More on this later.

Look below and I'll explain the conundrum.
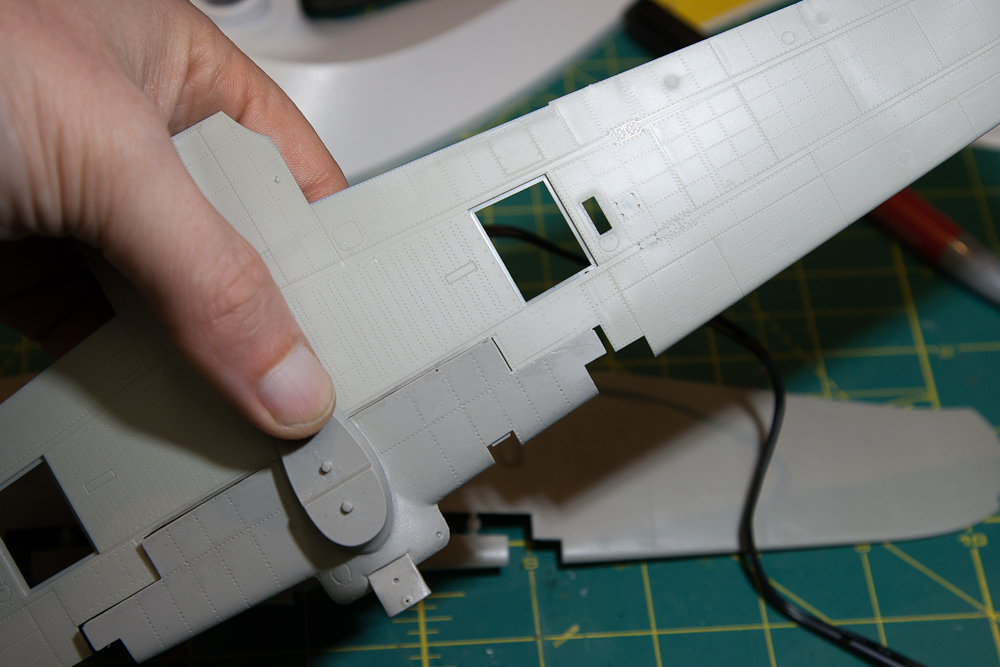
There are three steps from the back to the front of the piece - the rearmost one is where the wing is cut into, the foremost one has a panel that originally would have removed to raise or lower the landing gear. The middle step is the one that frustrates me - it is a set measurement - this is where the top of the landing gear door goes, so this part is a manufactured gap. Why MDC chose to make this part several mm short on both sides is beyond me - now I'll have to fill or shim a pretty big gap.
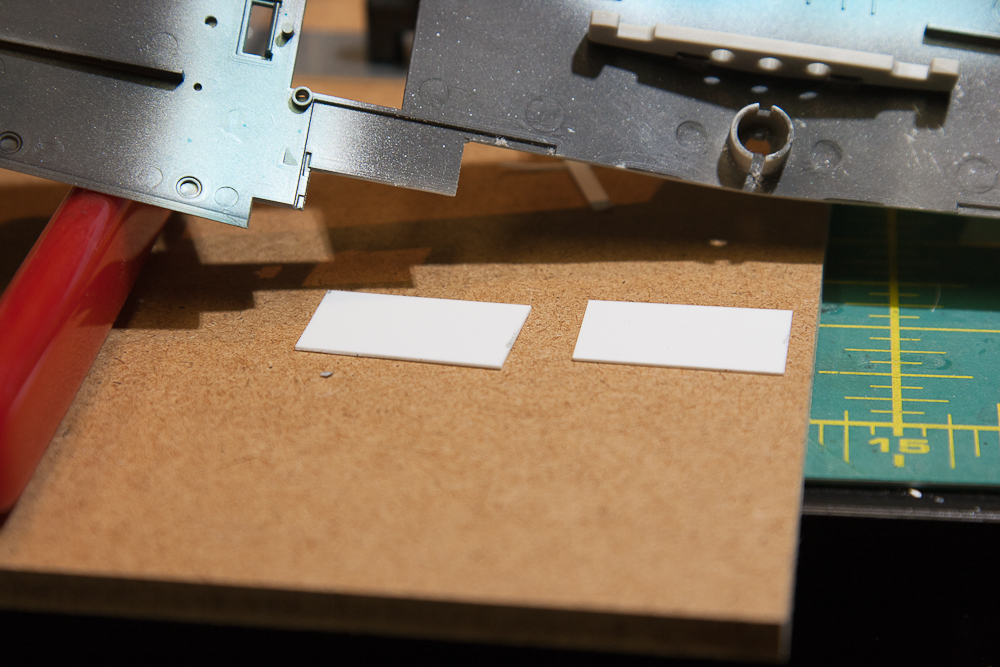
I made these two backing plates - using my handy "The Chopper" to ensure they are square. On the wing, the area below the access panel is recessed a small bit - this is handy because the resin plug is a TINY bit thinner than the wing itself. I will glue these plates into that recess. This allows me to glue the MDC part face to face, as opposed to having to rely on an edge to edge join. Plus, it caps off the recess - making it easier to fill. If this part of the wing was not thinner, then gluing the MDC part to the front of these plates would leave it recessed a bit on the bottom surface of the wing.
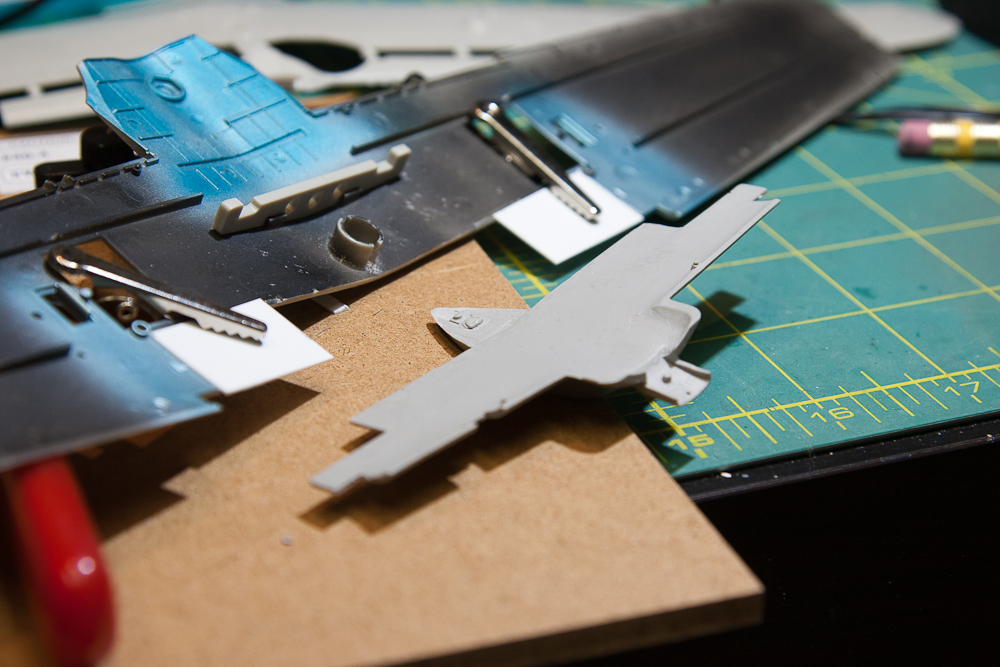
Does this help it make sense?

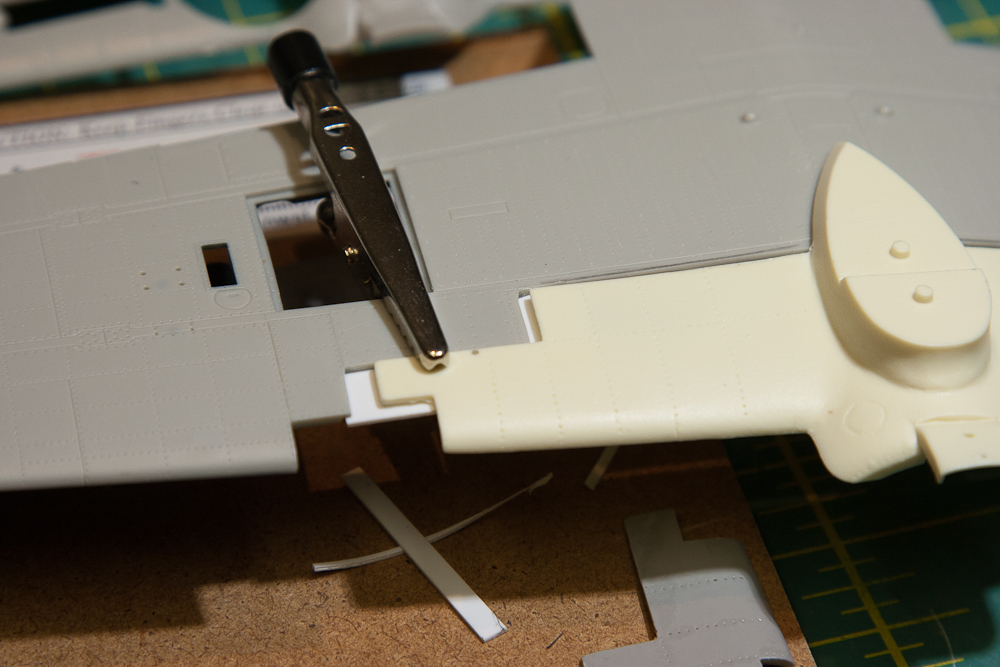
Here's the original MDC part - you can see that it is a fair bit smaller in span in both of the steps.
I have to take a second to thank Chukw [again, I know..] - if it weren't for one of his many tutorials, I would not have been able to correct the warp on the new lower wing part. I read, I learned, I conquered - thanks buddy!
I'm going to figure out how to align the whole center float on a vertical plane before I install this part on the wing, as it will probably involve drilling and pinning.
The cockpits are assembled, they're just waiting on a wash - which I can't do until my second set of HGW harnesses arrives. When I built the P-51, the single set had enough parts for two planes. Not the set for the Zero...
It took me a whole night in front of the TV to assemble the one set - as annoying as I remembered it to be, but in my opinion you can't beat the real cloth belts.
Here's where things stand - this is the cockpit of the Rufe

Sometimes you just can't get enough hands. This is the tensioner's cable that raises or lowers the seat. Tamiya was kind enough to make the two pulleys separate from the rear bulkhead, which allows the modeller to actually run a cable around them. It's not much - but it is visible.

AND NOW FOR SOMETHING COMPLETELY DIFFERENT!
A complete change of pace, and the moment where I either make it or break it with this model. Time to cut into the wing for the conversion.
Here are the two wings, the A6M2-N wing in front was mostly identical to the A6M5 wing seen behind it. Up until this point, I still could have chickened out and built the second Zero as the intended 2B.

A quick story. I bought this conversion from MDC shortly after it came out. Originally it was missing two parts - small ones, I can see how they got missed. An email to MDC and the parts were sent promptly. My first impression of the conversion was that it was pretty impressive. The main float is a solid block of resin, the conversion is relatively straight forward and very professionaly done. It involves hacking apart the wing, and two parts of the tail - replacing the vertical stab and tailcone.
Shortly after I started this build, I was looking at the conversion and realized that the plug for the wing was far too small. Another email to MDC and a replacement part was sent out. It is definitely larger, but didn't resolve all the issues. Looking at an article in TMMI on this conversion, it seems that the new part fits the way it was intended. More on this later.

Look below and I'll explain the conundrum.
There are three steps from the back to the front of the piece - the rearmost one is where the wing is cut into, the foremost one has a panel that originally would have removed to raise or lower the landing gear. The middle step is the one that frustrates me - it is a set measurement - this is where the top of the landing gear door goes, so this part is a manufactured gap. Why MDC chose to make this part several mm short on both sides is beyond me - now I'll have to fill or shim a pretty big gap.

I made these two backing plates - using my handy "The Chopper" to ensure they are square. On the wing, the area below the access panel is recessed a small bit - this is handy because the resin plug is a TINY bit thinner than the wing itself. I will glue these plates into that recess. This allows me to glue the MDC part face to face, as opposed to having to rely on an edge to edge join. Plus, it caps off the recess - making it easier to fill. If this part of the wing was not thinner, then gluing the MDC part to the front of these plates would leave it recessed a bit on the bottom surface of the wing.

Does this help it make sense?


Here's the original MDC part - you can see that it is a fair bit smaller in span in both of the steps.

I have to take a second to thank Chukw [again, I know..] - if it weren't for one of his many tutorials, I would not have been able to correct the warp on the new lower wing part. I read, I learned, I conquered - thanks buddy!
I'm going to figure out how to align the whole center float on a vertical plane before I install this part on the wing, as it will probably involve drilling and pinning.


greif8

Joined: January 17, 2006
KitMaker: 673 posts
AeroScale: 492 posts

Posted: Tuesday, January 19, 2016 - 11:33 AM UTC
Excellent build blog Matt, full of great building tips and your work is absolutely first class. I will be starting a build of Tamiya's 1/32 A6M2b soon, and several of your tips will be extremely helpful.
Twentecable

Joined: September 13, 2003
KitMaker: 339 posts
AeroScale: 244 posts

Posted: Wednesday, January 20, 2016 - 01:47 AM UTC
Very nice... looks so profassional and far away... but very inspiring thanks for sharing!
gr TC
gr TC

Scrodes

Joined: July 22, 2012
KitMaker: 771 posts
AeroScale: 763 posts

Posted: Wednesday, January 20, 2016 - 05:24 AM UTC
Quoted Text
Excellent build blog Matt, full of great building tips and your work is absolutely first class. I will be starting a build of Tamiya's 1/32 A6M2b soon, and several of your tips will be extremely helpful.
You'll love it, it's such a beautiful kit.
Quoted Text
Very nice... looks so professional and far away... but very inspiring thanks for sharing!
gr TC
Thanks TC, It's only going to get better -
The second harness made it here [Canada] from the Czech Republic in 12 days, pretty impressive. I couldn't seal the fuselage until I have both harnesses assembled and installed.
Joel_W

Joined: December 04, 2010
KitMaker: 11,666 posts
AeroScale: 7,410 posts

Posted: Friday, January 22, 2016 - 02:50 AM UTC
Matt,
I really like your fix. and like you said, it adds quite a bit of gluing area to the joint.
Joel
I really like your fix. and like you said, it adds quite a bit of gluing area to the joint.
Joel

Scrodes

Joined: July 22, 2012
KitMaker: 771 posts
AeroScale: 763 posts

Posted: Tuesday, January 26, 2016 - 12:06 AM UTC
Thanks Joel.
Of course I just found another build of the same kit (I wish I had found it earlier ) and the first thing I noticed was that the builder did almost exactly the same thing.
I've built both sets of belts and they're both attached to the seats. I was going to finish the cockpits today, but life just came up.
Of course I just found another build of the same kit (I wish I had found it earlier
 ) and the first thing I noticed was that the builder did almost exactly the same thing.
I've built both sets of belts and they're both attached to the seats. I was going to finish the cockpits today, but life just came up.

Scrodes

Joined: July 22, 2012
KitMaker: 771 posts
AeroScale: 763 posts

Posted: Tuesday, January 26, 2016 - 09:06 AM UTC
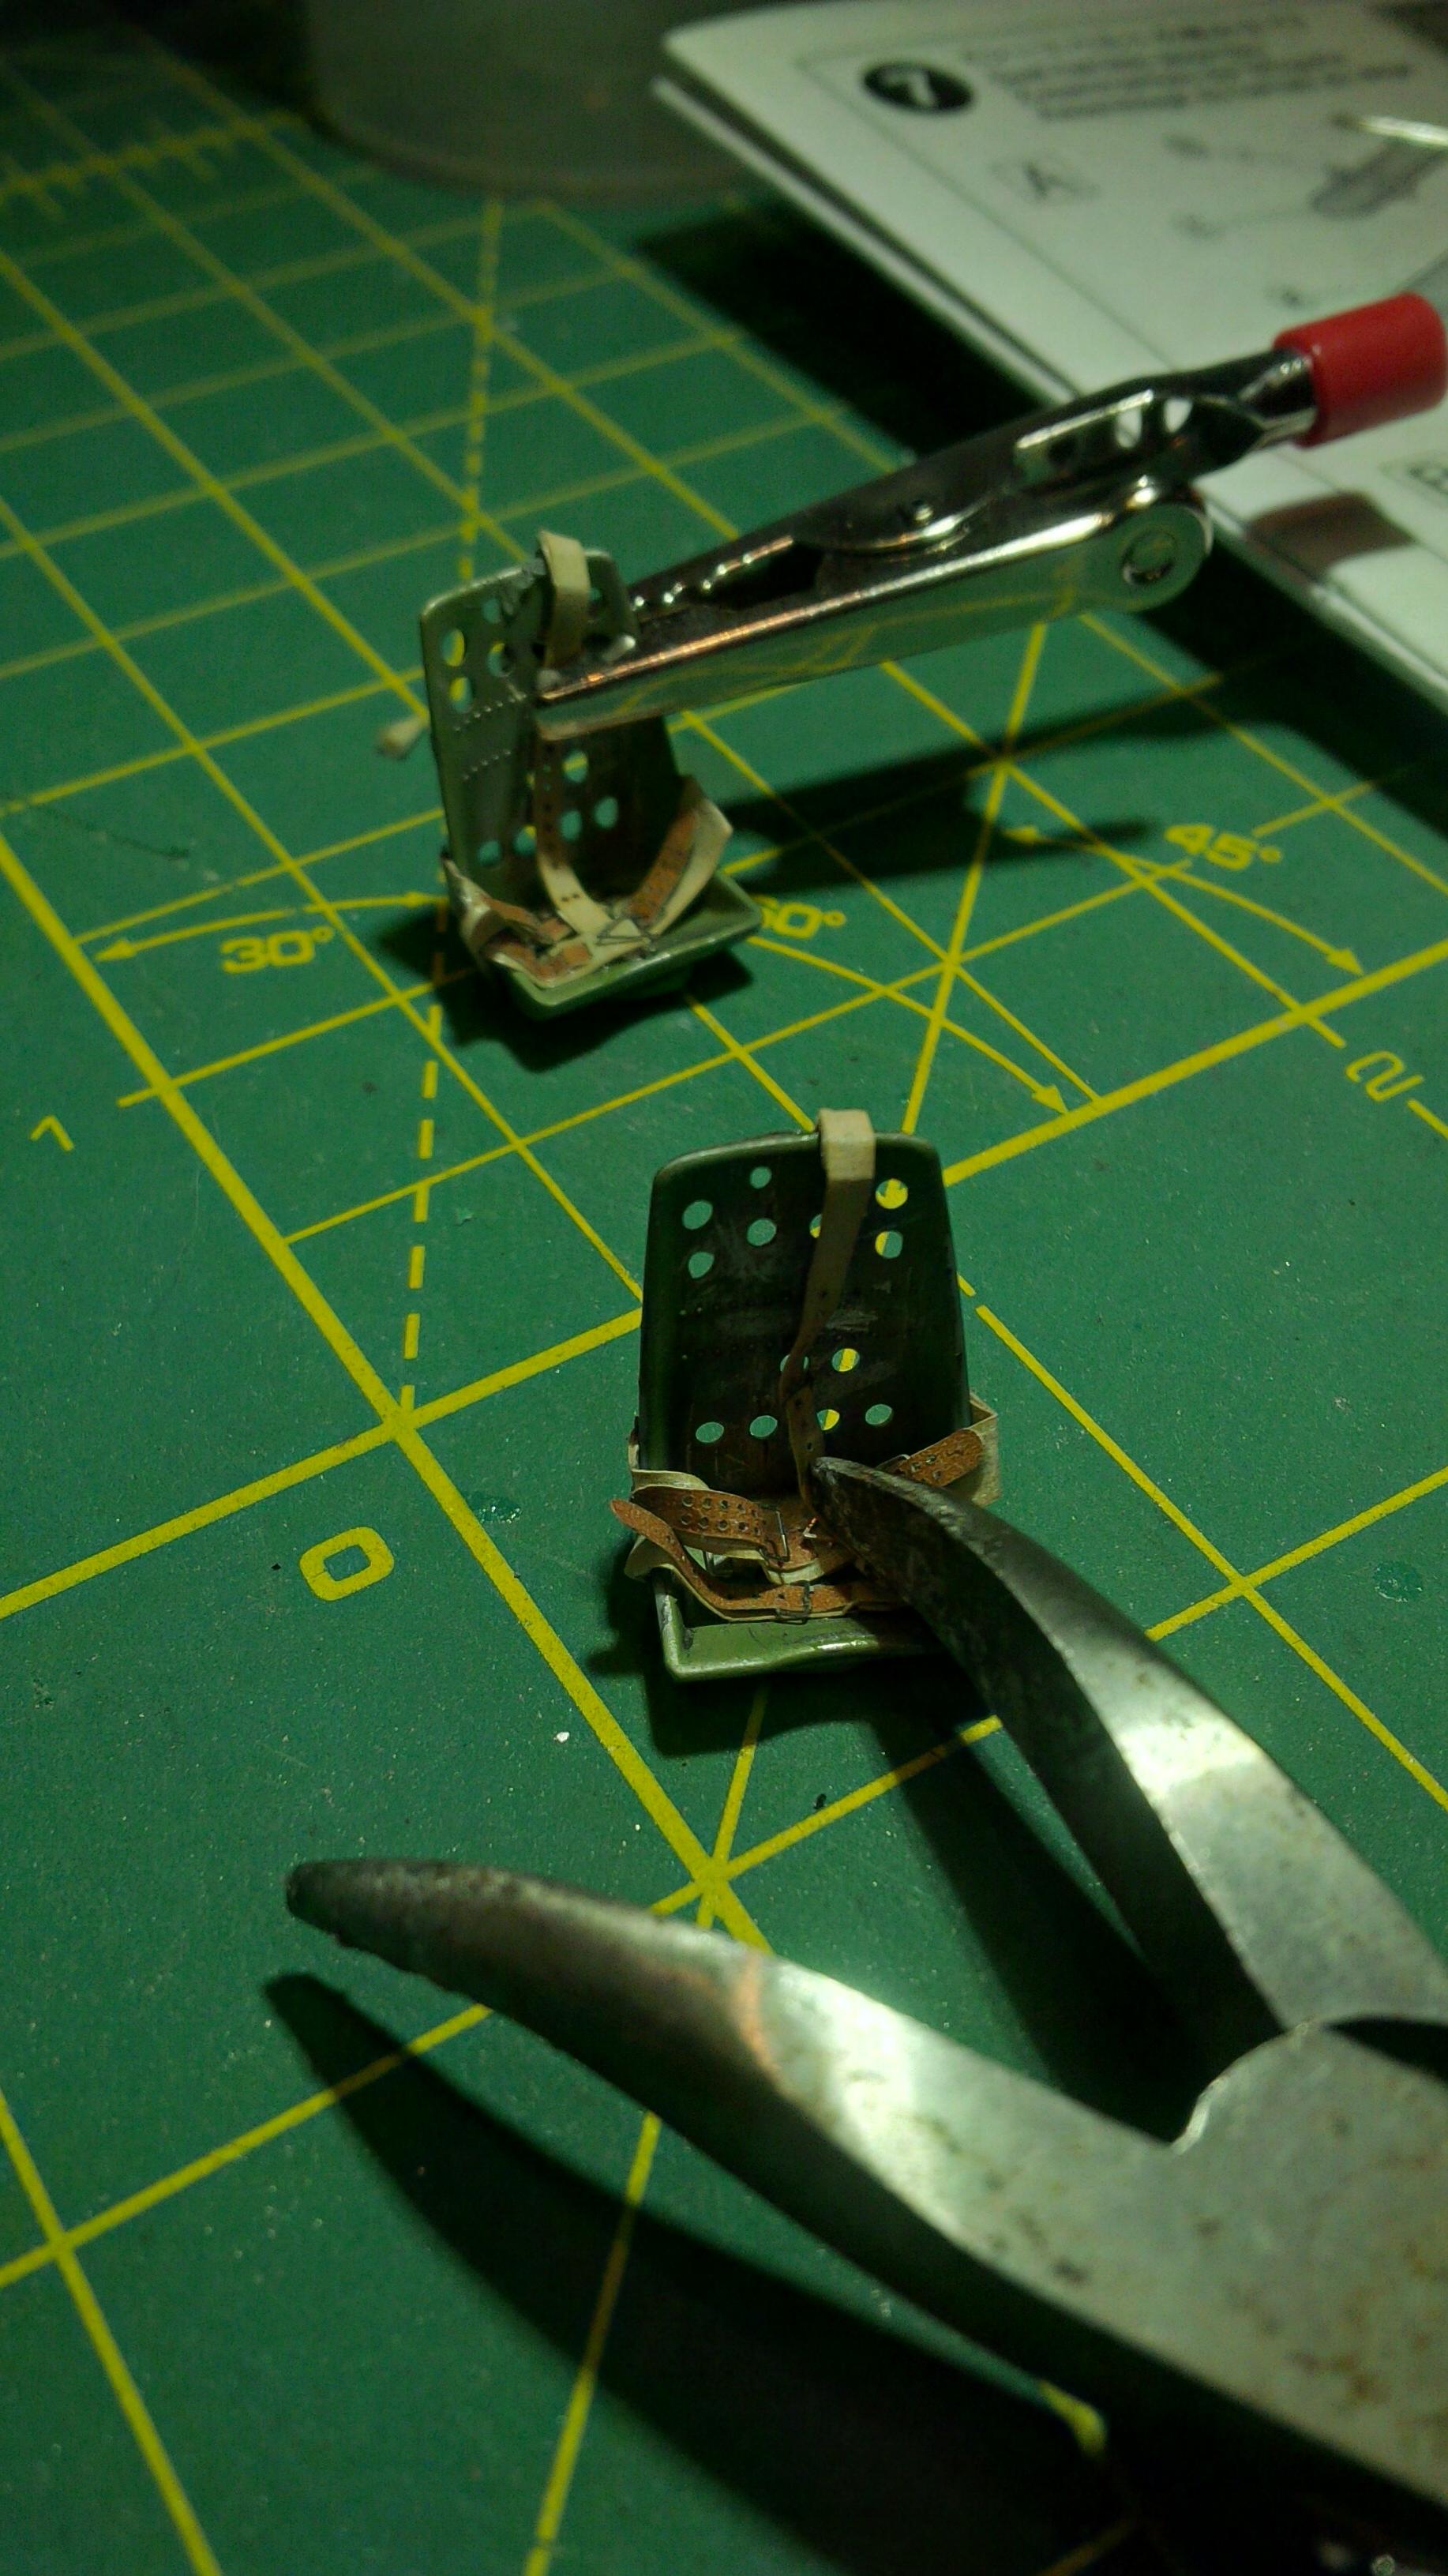
A very tiny update - this was the hold up for the cockpit completion, I had to wait for the second set of belts. They are a pain to assemble, but worth the time and effort.


Scrodes

Joined: July 22, 2012
KitMaker: 771 posts
AeroScale: 763 posts

Posted: Tuesday, January 26, 2016 - 09:09 AM UTC
**Because they are real cloth belts, The tools are holding them in a relatively natural position to help them settle. They belts are each glued at each end and after carefully arranging them, they are now setting into what [I hope] is a natural position.

greif8

Joined: January 17, 2006
KitMaker: 673 posts
AeroScale: 492 posts

Posted: Tuesday, January 26, 2016 - 05:50 PM UTC
Very good thinking and engineering to make the AM parts both work and be stable Matt. The HGW seatbelts are really nice AM items; I can't imagine ever using PE seatbelts again when building a 1/32 scale model.

Scrodes

Joined: July 22, 2012
KitMaker: 771 posts
AeroScale: 763 posts

Posted: Tuesday, January 26, 2016 - 08:41 PM UTC
It actually made me think back to those days not so long ago, when many a modeller would happily build a kit in any scale with no belts whatsoever. 

Joel_W

Joined: December 04, 2010
KitMaker: 11,666 posts
AeroScale: 7,410 posts

Posted: Tuesday, January 26, 2016 - 10:31 PM UTC
Matt,
Those fabric belts are the best I've ever seen. Very nicely done.
Joel
Those fabric belts are the best I've ever seen. Very nicely done.
Joel
Posted: Tuesday, January 26, 2016 - 11:12 PM UTC
Those seatbelts are sweet! Nice job of laying them down.

Scrodes

Joined: July 22, 2012
KitMaker: 771 posts
AeroScale: 763 posts

Posted: Wednesday, January 27, 2016 - 04:54 AM UTC
Thanks folks - Just wait until there's a wash on them, I expect them to really come to life then.
 |


