OFFICIAL: A Very Civil Campaign
Ontario, Canada
Joined: February 04, 2008
KitMaker: 2,507 posts
AeroScale: 1,814 posts
Posted: Tuesday, October 20, 2015 - 05:49 AM UTC
Thanks Jonathan!
Can you copy decals and print your own in the correct colour?

" The Die Hards"
43rd MIDDLESEX REGIMENT
MACHINE GUN CORPS
XXX CORP
The most effective way to do it, is to do it.
- Amelia Earhart

#259
Massachusetts, United States
Joined: October 23, 2011
KitMaker: 2,265 posts
AeroScale: 1,715 posts
Posted: Tuesday, October 20, 2015 - 06:12 AM UTC
That's the most likely scenario, but Ive written to Minicraft to see if they have a reprint available.
Ontario, Canada
Joined: February 04, 2008
KitMaker: 2,507 posts
AeroScale: 1,814 posts
Posted: Thursday, October 22, 2015 - 11:17 PM UTC
Away last week and flying out Sunday so not much in the way of bench work.
Did manage to fit

canopy and nose weight, nice gap to fill!
I have sanded off all the fuselage panel lines and now to add some filler:


" The Die Hards"
43rd MIDDLESEX REGIMENT
MACHINE GUN CORPS
XXX CORP
The most effective way to do it, is to do it.
- Amelia Earhart
United States
Joined: February 01, 2009
KitMaker: 1,233 posts
AeroScale: 663 posts
Posted: Friday, October 23, 2015 - 01:04 AM UTC
Richard, that certainly is a nasty little gap there. Might get drafty for Bruce and company. Nice progress so far.
UP THE IRONS


Ian
It is a fact that under equal conditions, large-scale battles and whole wars are won by troops which have a strong will for victory, clear goals before them, high moral standards, and devotion to the banner under which they go into battle.
-Georgy Zhukov
United States
Joined: February 01, 2009
KitMaker: 1,233 posts
AeroScale: 663 posts
Posted: Friday, October 23, 2015 - 09:46 PM UTC
I continued work on the Super Corsair air racer this weekend. I got the cockpit tub assembled and all the PE levers and knobs installed.

The seat assembly was also completed and the PE belts were added:

The instrument panel was built which consisted of film instruments applied over a white background. The PE panel face was then laid on top of that:

The tub was then installed in the fuselage:


The fuselage was then glued together and the tail was installed. The tail wheel assembly was a little weak so I reinforced it with a piece of brass rod:

The fuselage was then glued to the wings and the fit was actually very good:


Next, I will work on that massive resin "Corn-cob" radial engine.
Best wishes,
Ian
It is a fact that under equal conditions, large-scale battles and whole wars are won by troops which have a strong will for victory, clear goals before them, high moral standards, and devotion to the banner under which they go into battle.
-Georgy Zhukov
Ontario, Canada
Joined: February 04, 2008
KitMaker: 2,507 posts
AeroScale: 1,814 posts
Posted: Friday, October 23, 2015 - 09:51 PM UTC
Nice paint job on the cockpit Ian!

" The Die Hards"
43rd MIDDLESEX REGIMENT
MACHINE GUN CORPS
XXX CORP
The most effective way to do it, is to do it.
- Amelia Earhart
United States
Joined: February 01, 2009
KitMaker: 1,233 posts
AeroScale: 663 posts
Posted: Friday, October 23, 2015 - 09:55 PM UTC
Thanks Richard!
Best wishes,
Ian
It is a fact that under equal conditions, large-scale battles and whole wars are won by troops which have a strong will for victory, clear goals before them, high moral standards, and devotion to the banner under which they go into battle.
-Georgy Zhukov
United States
Joined: February 01, 2009
KitMaker: 1,233 posts
AeroScale: 663 posts
Posted: Friday, October 30, 2015 - 01:06 AM UTC
The true heart of a racehorse-----the R-4360 "Corn-Cob" radial. I worked on the resin engine today and it went together rather well. The crank case was painted RAF Ocean Grey and the cylinders were painted with Testors CREATE FX Silver. A wash of Testors CREATE FX Oil was applied to the cylinders and then the entire assembly was given a wash of Testors CREATE FX black.


I also installed the horizontal stabs. The fit was decent and it is a natural panel line. However, I caulked the seam with Contractors Glue to minimize it but still leave it intact to be drawn with the Micron Pen later.

Best wishes,
Ian
It is a fact that under equal conditions, large-scale battles and whole wars are won by troops which have a strong will for victory, clear goals before them, high moral standards, and devotion to the banner under which they go into battle.
-Georgy Zhukov
Western Australia, Australia
Joined: December 31, 2013
KitMaker: 338 posts
AeroScale: 190 posts
Posted: Friday, October 30, 2015 - 11:48 AM UTC
Am in with Airfix's Dakota.

In the Hangar:
- 1/48 Hasegawa P-38J/L
In the Workshop
-1/35 Tamiya Mobelwagen
Ontario, Canada
Joined: February 04, 2008
KitMaker: 2,507 posts
AeroScale: 1,814 posts
Posted: Sunday, November 01, 2015 - 03:45 AM UTC
Nice work Ian!
Welcome Pricklehead great aircraft choice!

" The Die Hards"
43rd MIDDLESEX REGIMENT
MACHINE GUN CORPS
XXX CORP
The most effective way to do it, is to do it.
- Amelia Earhart
AussieReg
 Associate Editor
#007
Victoria, Australia
Joined: June 09, 2009
KitMaker: 8,156 posts
AeroScale: 3,756 posts
Posted: Sunday, November 01, 2015 - 03:53 AM UTC
Ian that big radial powerplant looks awesome! Are you going to do some wiring?
Cheers, D
ON the bench
Revell 1/24 '53 Corvette (building as '54)
Revell 1/24 BMW 507 Coupe and Cabrio
Italeri 1/48 Me262 B-1a/U1 Nightfighter
Monogram 1/24 '57 Chevy Nomad
Dragon 1/350 USS Frank Knox DD-742
United States
Joined: February 01, 2009
KitMaker: 1,233 posts
AeroScale: 663 posts
Posted: Sunday, November 01, 2015 - 04:08 AM UTC
Thanks Damian and Richard! No plans to wire it because most of the plumbing on the R-4360 goes front to back in a spiral so it will be out of sight. Also, there is basically no room between the cylinders and the cowling so I don't want to throw off the whole cowling fit.
Best wishes,
Ian
It is a fact that under equal conditions, large-scale battles and whole wars are won by troops which have a strong will for victory, clear goals before them, high moral standards, and devotion to the banner under which they go into battle.
-Georgy Zhukov
Ontario, Canada
Joined: February 04, 2008
KitMaker: 2,507 posts
AeroScale: 1,814 posts
Posted: Sunday, November 01, 2015 - 04:16 AM UTC
Ian if you can not see it why bother thats how I build.

" The Die Hards"
43rd MIDDLESEX REGIMENT
MACHINE GUN CORPS
XXX CORP
The most effective way to do it, is to do it.
- Amelia Earhart
United States
Joined: February 01, 2009
KitMaker: 1,233 posts
AeroScale: 663 posts
Posted: Sunday, November 01, 2015 - 05:10 AM UTC
Quoted Text
Ian if you can not see it why bother thats how I build.

Richard, I had to do some detailing on the engine because some cylinder detail will be visible from the front. Wiring would be a moot point though because it really would not be seen. Plus, visible or not, detailing is good practice for me.
Happy modeling!!
Ian
It is a fact that under equal conditions, large-scale battles and whole wars are won by troops which have a strong will for victory, clear goals before them, high moral standards, and devotion to the banner under which they go into battle.
-Georgy Zhukov
United States
Joined: February 01, 2009
KitMaker: 1,233 posts
AeroScale: 663 posts
Posted: Sunday, November 01, 2015 - 05:30 AM UTC
Slight update on the Super Corsair. The airframe was sprayed with Testors Enamel Primer. I then added the orange trim. To make the orange stand out, I laid down a coat of Gloss White on the cowling and the tail. I then sprayed the International Orange over that. I will let that set up this week and then it will be time for some Gloss Sea Blue.
Best wishes,
Ian

It is a fact that under equal conditions, large-scale battles and whole wars are won by troops which have a strong will for victory, clear goals before them, high moral standards, and devotion to the banner under which they go into battle.
-Georgy Zhukov
tatbaqui
 News Reporter
#040
Metro Manila, Philippines
Joined: May 06, 2007
KitMaker: 2,713 posts
AeroScale: 65 posts
Posted: Sunday, November 01, 2015 - 03:22 PM UTC
Hello,
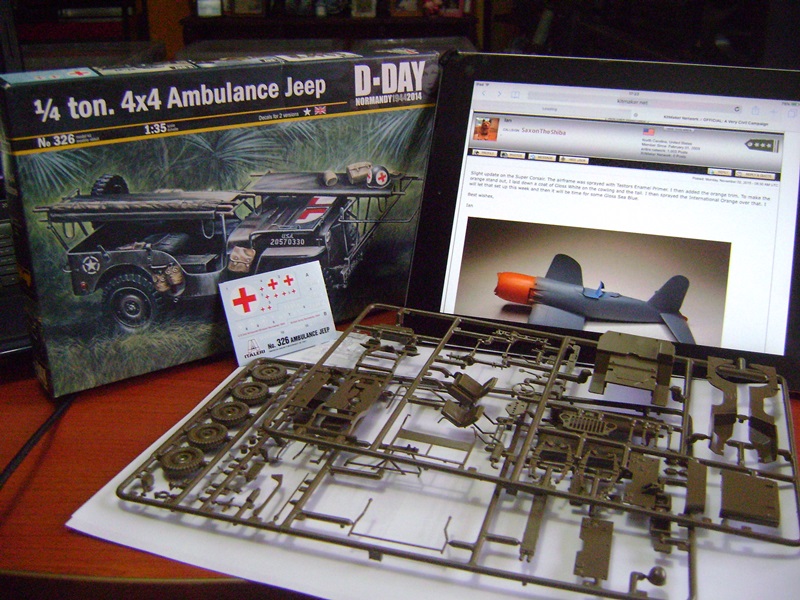
I've signed up and plan to do the Philippine "Jeepney".
The "Jeepney" continues to be the most popular if not iconic mode of mass transport in the Philippines. It traces its origins from surplus US military jeeps of WWII.
From Wikipedia: "The Jeeps were stripped down and altered locally: metal roofs were added for shade; and the vehicles decorated in vibrant colours with chrome-plated ornaments on the sides and bonnet. The back saloon was reconfigured with two long parallel benches with passengers facing each other to accommodate more passengers. The size, length and passenger capacity has increased as it evolved through the years. These were classified as passenger-type Jeeps. The non-extended, original-seat configuration jeeps were labeled owners, short for owner-type jeeps, and are used non-commercially. The original Jeepneys were refurbished military Jeeps by Willys and Ford. Modern Jeepneys are now produced with surplus engines and parts coming from Japan."
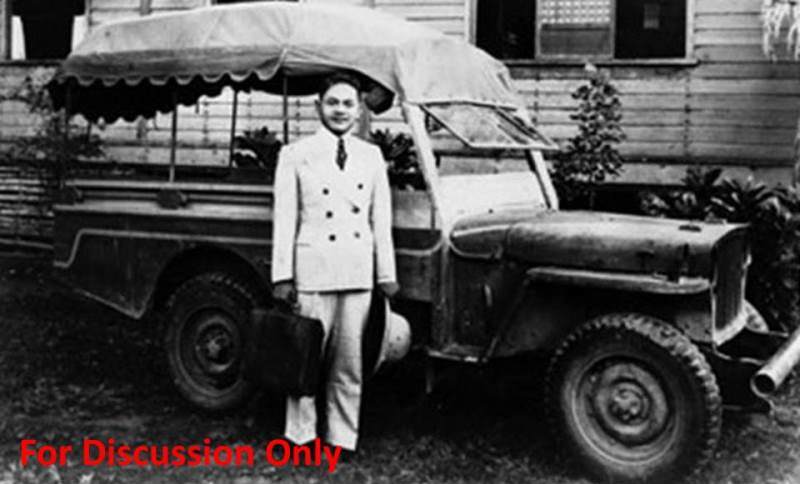
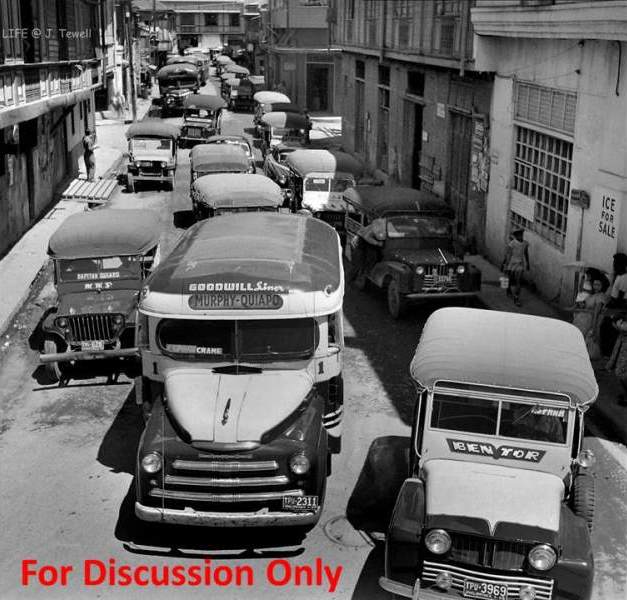

Well I don't think I have the patience to do a flashy jeepney with all the bling!

Will work on something similar (and simpler) as below:
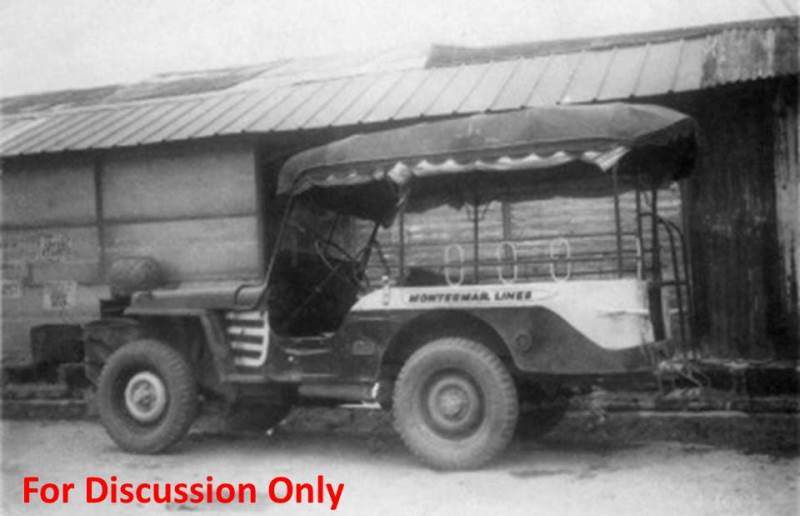
The above pic was captioned to be one of the earliest conversions when the war ended. The Italeri kit will be my base -- this campaign should get me some hands-on in scratchbuilding.
Cheers,
Tat

#259
Massachusetts, United States
Joined: October 23, 2011
KitMaker: 2,265 posts
AeroScale: 1,715 posts
Posted: Sunday, November 01, 2015 - 08:22 PM UTC
Tat, those Jeepneys are a quite interesting subject!
Some fun scratch building ahead, I look forward to seeing your model.

Ontario, Canada
Joined: February 04, 2008
KitMaker: 2,507 posts
AeroScale: 1,814 posts
Posted: Monday, November 02, 2015 - 02:41 AM UTC
Tat welcome to the campaign!
Interesting build you have there.

" The Die Hards"
43rd MIDDLESEX REGIMENT
MACHINE GUN CORPS
XXX CORP
The most effective way to do it, is to do it.
- Amelia Earhart
tatbaqui
 News Reporter
#040
Metro Manila, Philippines
Joined: May 06, 2007
KitMaker: 2,713 posts
AeroScale: 65 posts
Posted: Monday, November 02, 2015 - 04:13 AM UTC
Thanks Jonathan, Richard. Am now looking for suitable material/s for the frame and top. Will post pics soon. Cheers, Tat
United States
Joined: December 26, 2008
KitMaker: 288 posts
AeroScale: 195 posts
Posted: Thursday, November 05, 2015 - 08:46 PM UTC
Hi everyone! Things have been a tad busy on my end and I just noticed this Campaign. Egad, how could I have missed it!

Civil subjects out of military hardware is one of my favorite themes. As I am in the middle of a few other builds, I think I'll pick a subject that I have been planning to do but will likely be able to finish by the Campaign end date. I am planning on building a NASA F-8C Crusader in 1/144 using the Platz kit. Here is what it looks like today:

This will be done as the NASA Digital Fly-By-Wire test aircraft. Fortunately, I have some good photos of this plane and the decals come with the kit. I am planning on eventually converting 1/72 and a 1/48 Crusader kits to the NASA version so this will be a good practice run to get to know the aircraft.
Have fun modeling!
Mike

United States
Joined: February 01, 2009
KitMaker: 1,233 posts
AeroScale: 663 posts
Posted: Friday, November 06, 2015 - 02:34 AM UTC
Mike, I will be looking forward to that one. I always liked the "off" Crusader variants like the C, H, and K models. Haven't crossed paths with you in awhile......hope you are well.
Best wishes,
Ian
It is a fact that under equal conditions, large-scale battles and whole wars are won by troops which have a strong will for victory, clear goals before them, high moral standards, and devotion to the banner under which they go into battle.
-Georgy Zhukov
British Columbia, Canada
Joined: September 03, 2009
KitMaker: 6,965 posts
AeroScale: 6,247 posts
Posted: Friday, November 06, 2015 - 03:44 AM UTC
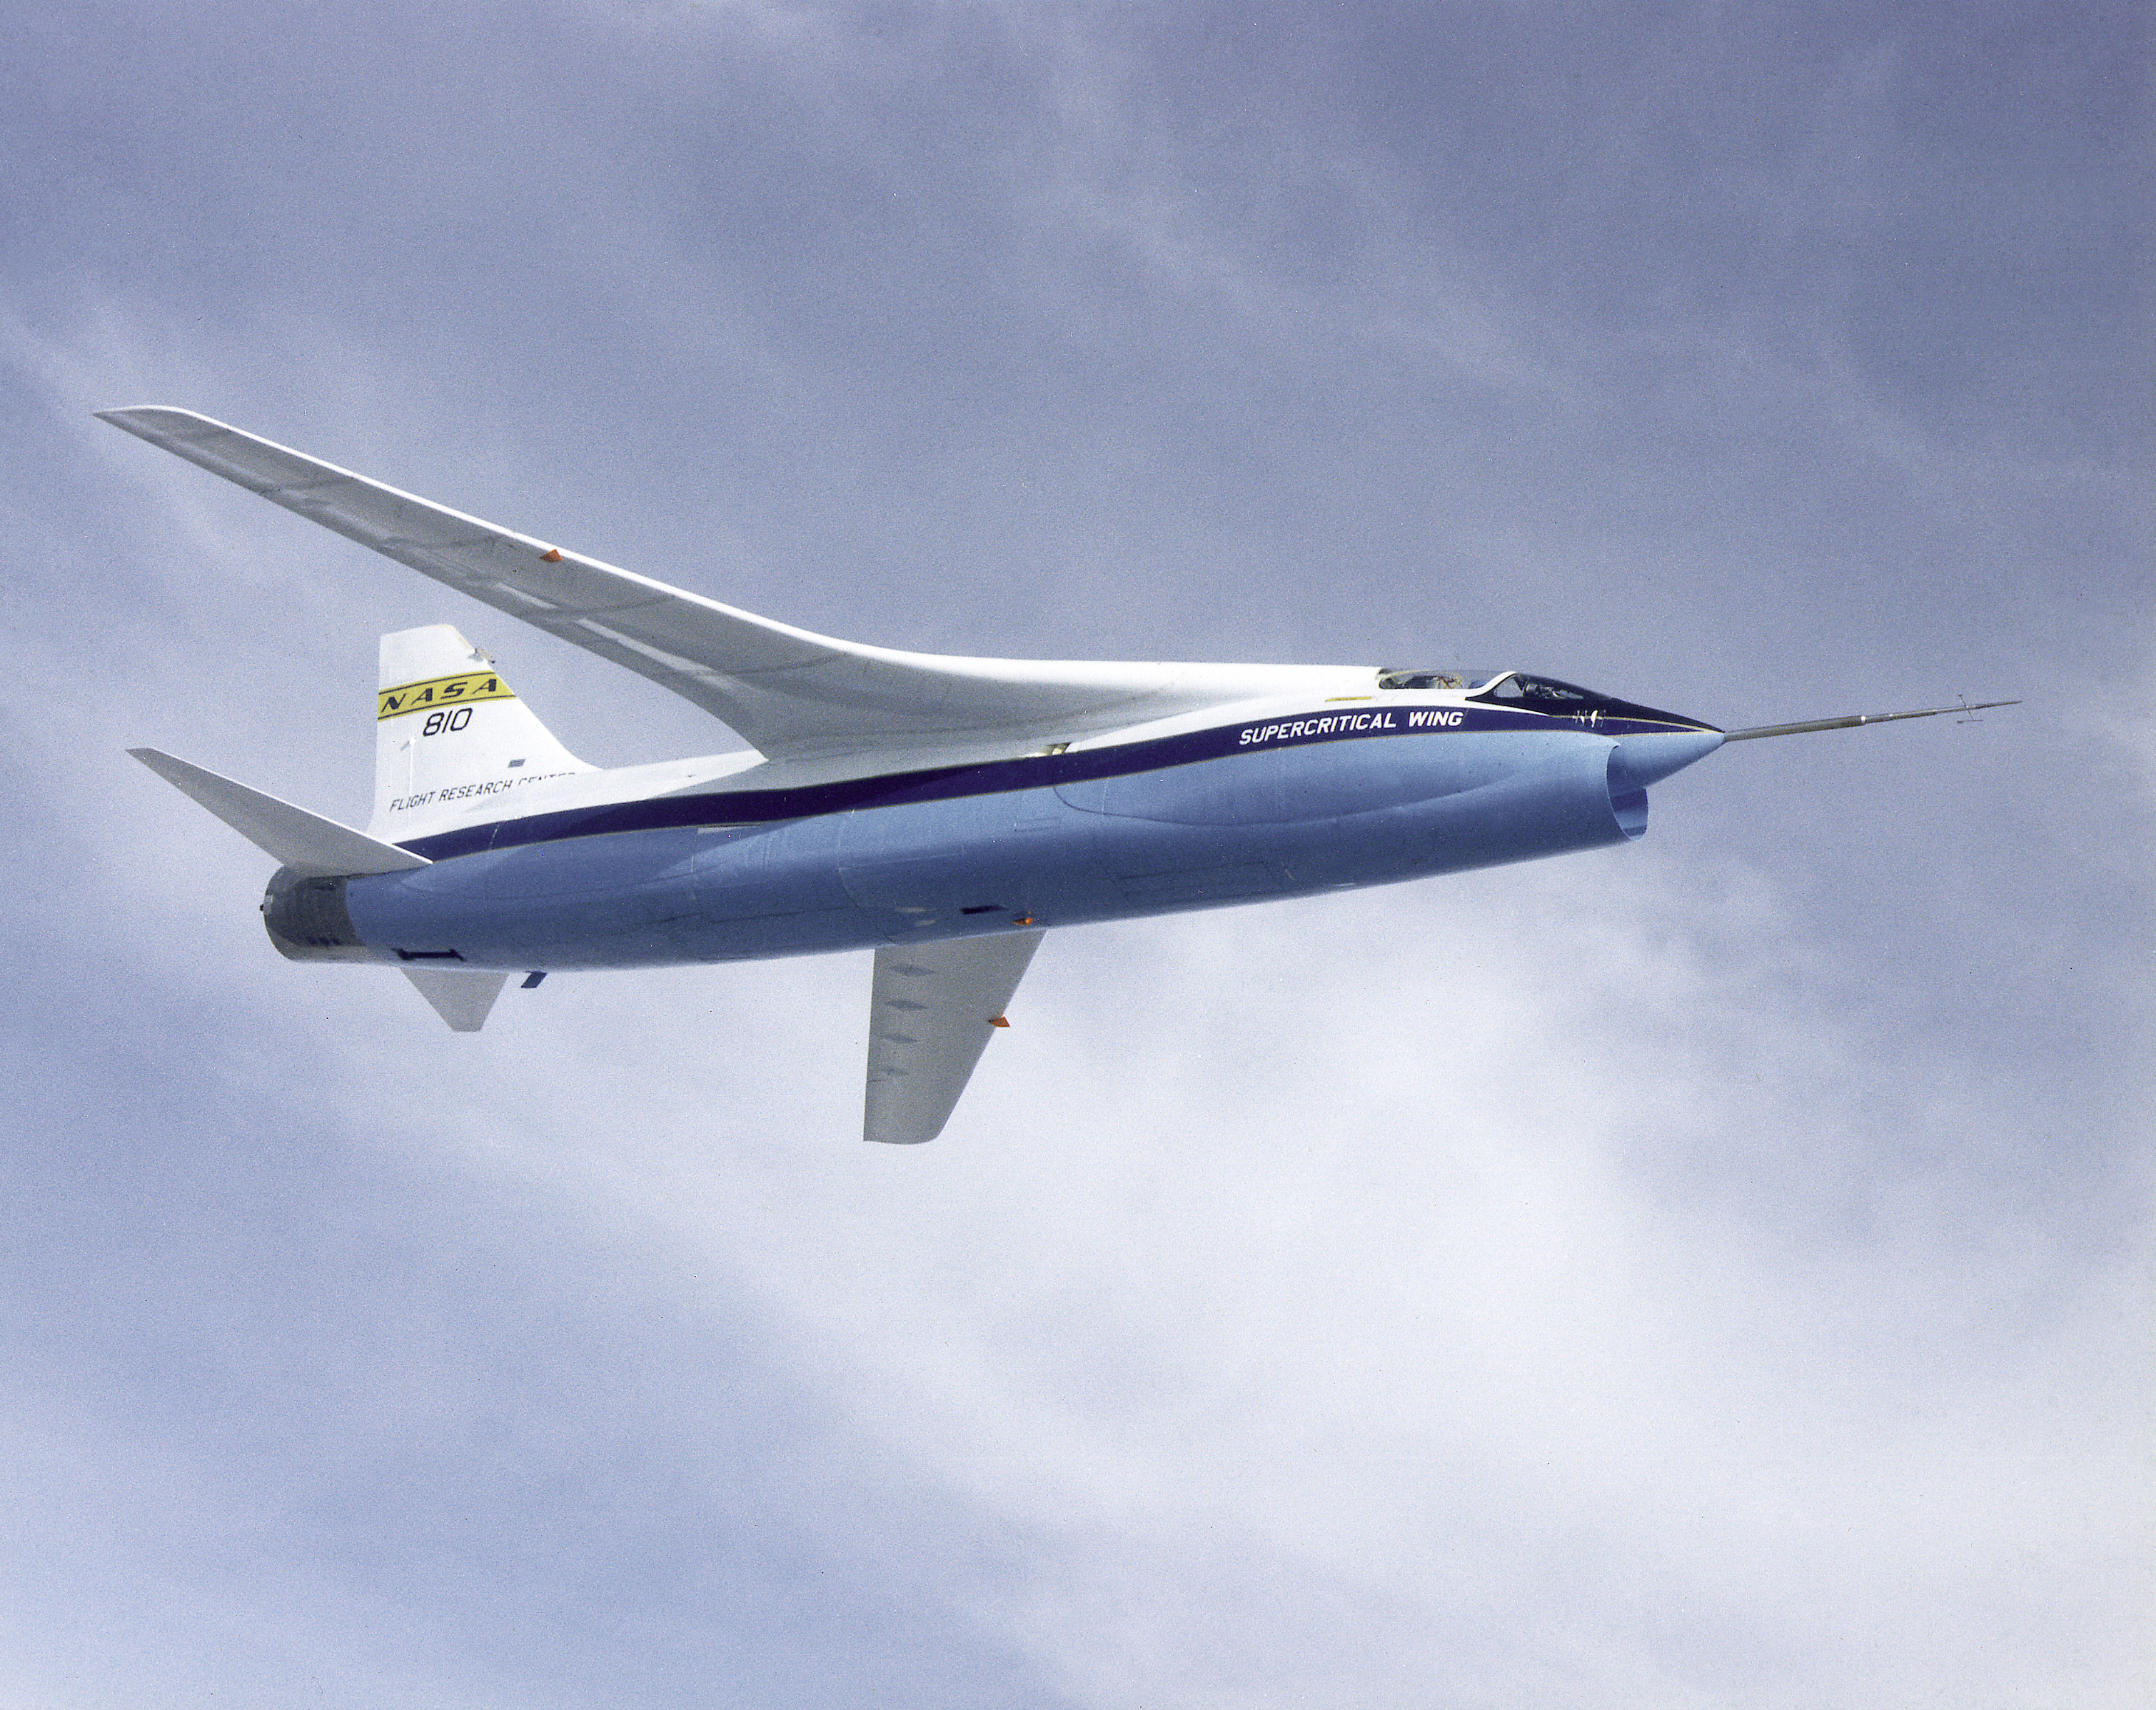
Now all you need is the
conversion kit to make this:
When once you have tasted flight you will walk the Earth with your eyes turned skyward.
For there you have been, and there you will always long to return.
-Leonardo Da Vinci
Ontario, Canada
Joined: February 04, 2008
KitMaker: 2,507 posts
AeroScale: 1,814 posts
Posted: Friday, November 06, 2015 - 05:33 AM UTC
Welcome to the campaign Mike.
Looking forward to your model build and conversion.

" The Die Hards"
43rd MIDDLESEX REGIMENT
MACHINE GUN CORPS
XXX CORP
The most effective way to do it, is to do it.
- Amelia Earhart
United States
Joined: December 26, 2008
KitMaker: 288 posts
AeroScale: 195 posts
Posted: Monday, November 09, 2015 - 08:46 PM UTC
Hi Ian, Jessica and Richard! Thanks for the notes of encouragement. I was a bit afraid that I might have been too late to this party or have a less than interesting entry.
Ian, things have been going great on my end, just extremely busy! I have taken an interest in the NASA Crusaders and do plan on building them in 1/72 and possibly 1/48. I am using this small scale build as an entry on understanding the mods required. Here's the F-8C that I am planning to build for this Campaign:

One good reason on my end was that I got to see the actual aircraft in a Dryden hanger back in October 1989:

Jessica, your suggestion is excellent and I do plan to build the very highly modified NASA SCW in both 1/144 and 1/72. This build will ease my entry into that project ((and I will likely finish it in time!). As a comparison, here is a shot of both the NASA DFBW and SCW Crusaders in flight:

Have fun modeling
Mike


#501
Kerala, India / भारत
Joined: August 25, 2009
KitMaker: 292 posts
AeroScale: 194 posts
Posted: Thursday, November 12, 2015 - 11:37 PM UTC
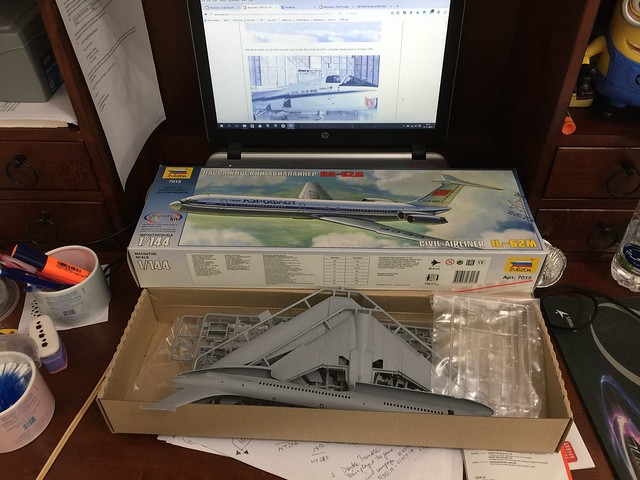
My entry for the GB
Zvezda kit. I will be using AM decals to finish it in a hybrid Aeroflot / Air India scheme.
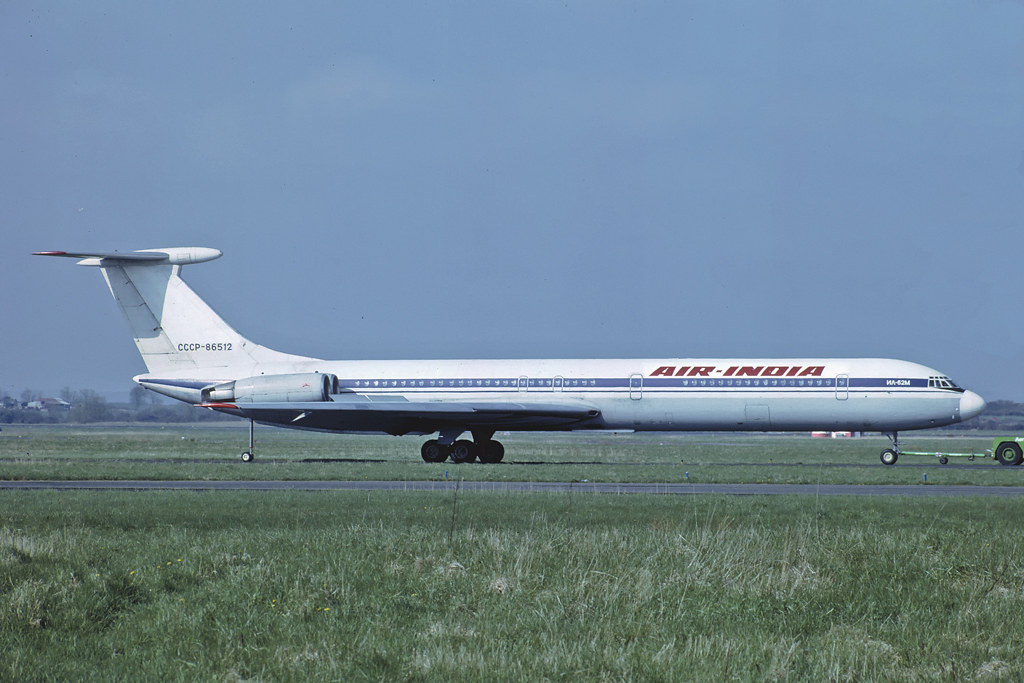
The planned scheme


 canopy and nose weight, nice gap to fill!


 Will work on something similar (and simpler) as below:


 Civil subjects out of military hardware is one of my favorite themes. As I am in the middle of a few other builds, I think I'll pick a subject that I have been planning to do but will likely be able to finish by the Campaign end date. I am planning on building a NASA F-8C Crusader in 1/144 using the Platz kit. Here is what it looks like today:


