Air Campaigns
Want to start or join a group build? This is where to start.
OFFICIAL: A Very Civil Campaign
EHAM0624
_VISITCOMMUNITY
Noord-Holland, Netherlands
Joined: January 27, 2014
KitMaker: 200 posts
AeroScale: 85 posts
Posted: Sunday, January 31, 2016 - 04:07 AM UTC
Kit's at some point need to be build,..


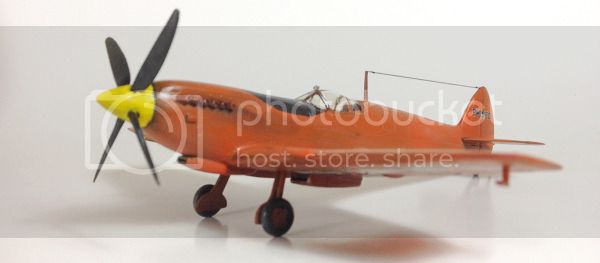
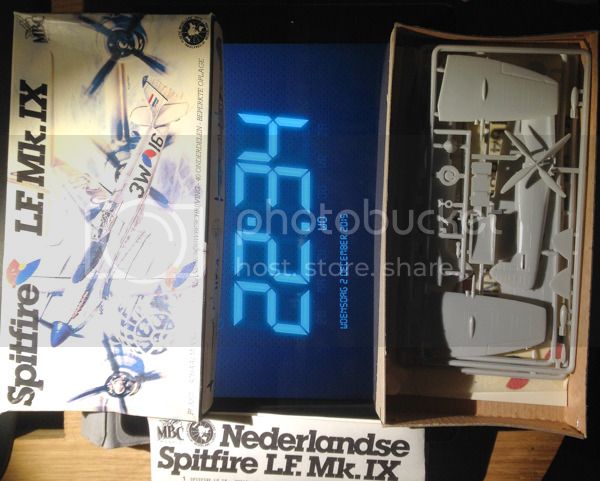
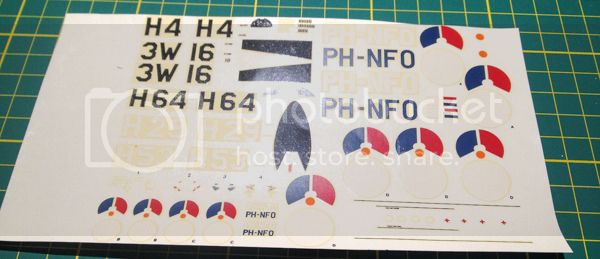
When I bought this MBC kit, I think I remember it was the only one of it's kind or most likely the only version with Dutch Air Force Decals I could buy from my allowance money but the time past by it ended up in storage and when I came back to modeling some years back I had this still in my stash, most likely sentimental reason as I sold off a bunch of models anyway I actually starter this build the with the intend to enter it in the "Edgar Brooks Memorial Spitfire Campaign" however I changed my mind after I tested one of the 25 year or so old decal that where included in the box and they seem to be OK to use so with this I could build one of the Dutch civil spitfires that one flew from the Dutch island Texel as target tugs


The kit from the 90's needs filling but the really downside is the canopy that is to thick and deformed, aftermarket is available but I think the kit with raised panel lines is not really worth it in this case so i used the one with the kit and with some floor polish,...it's looks sort off ok
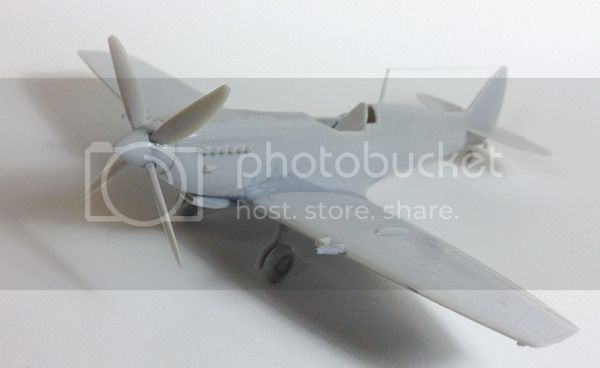
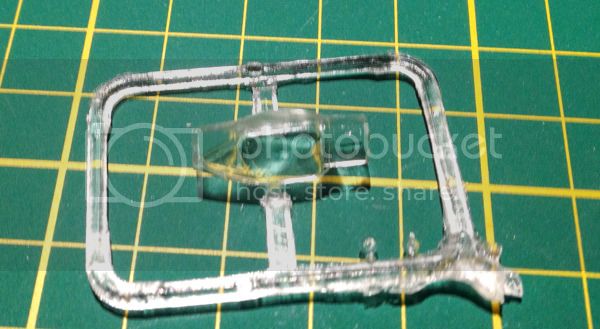


A bit of pre-shading applied and the guns cut off as these where removed from the civil Spitfires
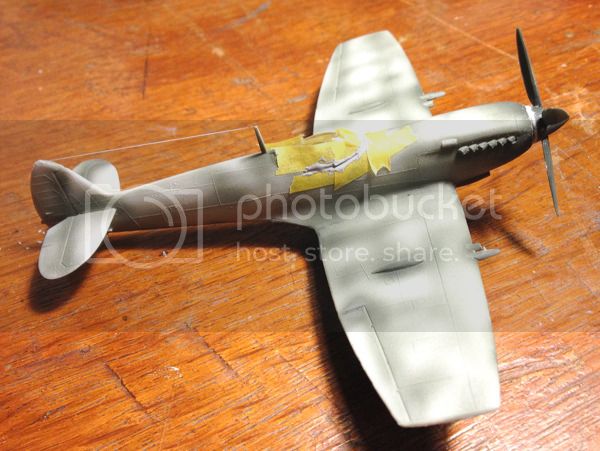


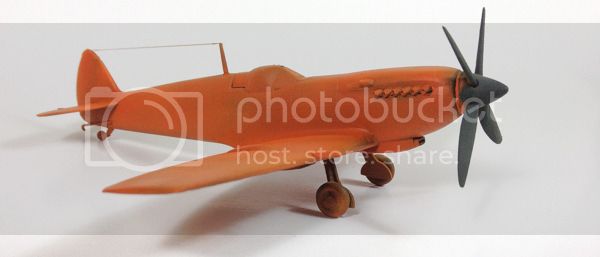
Easy color scheme almost so typically Dutch,... Orange


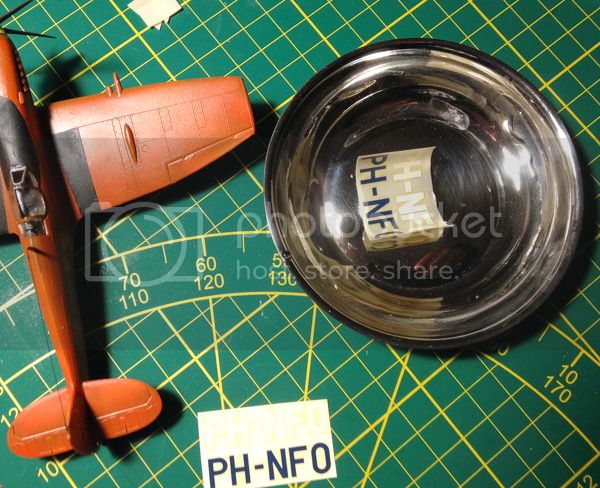
Decals on hopefully the large registration decals will not stick out as it's 2 layers


The final result, showing PH-NFO
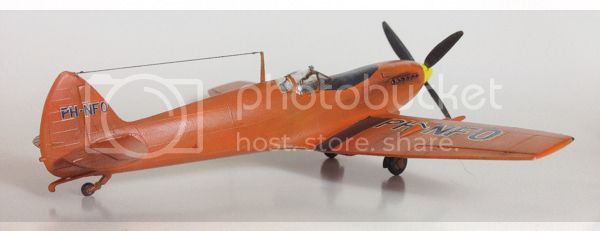


The real PH-NFO ex Dutch Air Force H-28 & 3W-14 and RAF MK475 crashed on take off from Texel airport 04-06-57 the pilot "Ben de Geus" miraculously survived
tatbaqui
Staff MemberNews Reporter
ARMORAMA
#040
_VISITCOMMUNITY
Metro Manila, Philippines
Joined: May 06, 2007
KitMaker: 2,713 posts
AeroScale: 65 posts
Posted: Sunday, January 31, 2016 - 02:52 PM UTC
Hello,

I've extended the rear and re-attached part of the tail gate.


Made seats out of Apoxie Sculpt. It turned out quite thick and lumpy so I've sanded it down after these pics were taken.


Now working on the frame for the canopy.

Cheers,

Tat
tatbaqui
Staff MemberNews Reporter
ARMORAMA
#040
_VISITCOMMUNITY
Metro Manila, Philippines
Joined: May 06, 2007
KitMaker: 2,713 posts
AeroScale: 65 posts
Posted: Tuesday, February 02, 2016 - 06:26 PM UTC
Hello,

I've put up the frame, and made a cardboard mock-up of the canopy that I'll use as template:


At a certain angle the step board seem out of sync. Will take a look again and adjust as need be.


The passenger seats still need further sanding work.

Cheers,

Tat
tinbanger
_VISITCOMMUNITY
Ontario, Canada
Joined: February 04, 2008
KitMaker: 2,507 posts
AeroScale: 1,814 posts
Posted: Wednesday, February 03, 2016 - 02:53 AM UTC
Welcome Jan!
Nice to see some scratch building in this campaign Tat!
dcandal
_VISITCOMMUNITY
Buenos Aires, Argentina
Joined: September 07, 2006
KitMaker: 918 posts
AeroScale: 688 posts
Posted: Wednesday, February 03, 2016 - 05:12 AM UTC
Thanks for your comments
dcandal
_VISITCOMMUNITY
Buenos Aires, Argentina
Joined: September 07, 2006
KitMaker: 918 posts
AeroScale: 688 posts
Posted: Wednesday, February 03, 2016 - 05:13 AM UTC
Now I´m going for the box,


tatbaqui
Staff MemberNews Reporter
ARMORAMA
#040
_VISITCOMMUNITY
Metro Manila, Philippines
Joined: May 06, 2007
KitMaker: 2,713 posts
AeroScale: 65 posts
Posted: Monday, February 08, 2016 - 11:12 AM UTC
Hello,

As I'm not that adept on working with wires, I was quite happy that the styrene rod cooperated into the the bend I wanted:


This solves my major challenge with this build.

Cheers,

Tat
dcandal
_VISITCOMMUNITY
Buenos Aires, Argentina
Joined: September 07, 2006
KitMaker: 918 posts
AeroScale: 688 posts
Posted: Tuesday, February 09, 2016 - 12:10 AM UTC
Here I´m going to add some details to the seat,


eMan
#298
_VISITCOMMUNITY
Hong Kong S.A.R. / 繁體
Joined: August 08, 2002
KitMaker: 1,182 posts
AeroScale: 351 posts
Posted: Wednesday, February 10, 2016 - 01:08 PM UTC
I'm going to build this for the campaign, Aoshima 1/32 Hino Oil Tanker.

tinbanger
_VISITCOMMUNITY
Ontario, Canada
Joined: February 04, 2008
KitMaker: 2,507 posts
AeroScale: 1,814 posts
Posted: Wednesday, February 10, 2016 - 04:44 PM UTC
Welcome to the campaign Lap Man.
Nice to see all the builds coming along.
Must get my build dusted off
V2Phantom
_VISITCOMMUNITY
United States
Joined: December 26, 2008
KitMaker: 288 posts
AeroScale: 195 posts
Posted: Thursday, February 18, 2016 - 08:19 PM UTC
Here's an update to my NASA Crusader build. I now have the gloss white paint on and dried plus the bare metal exhaust and ant-glare panel on the nose. Next step - Decals (adding some color)!


Have fun modeling
Mike
iflytb20
#501
_VISITCOMMUNITY
Kerala, India / भारत
Joined: August 25, 2009
KitMaker: 292 posts
AeroScale: 194 posts
Posted: Saturday, February 20, 2016 - 07:09 PM UTC
Calling her done. I'll do the weathering on a later date.


Thanks for looking
SaxonTheShiba
_VISITCOMMUNITY
United States
Joined: February 01, 2009
KitMaker: 1,233 posts
AeroScale: 663 posts
Posted: Saturday, February 20, 2016 - 08:36 PM UTC
Beautiful work, Raj. I like your sunset photo too.

Best wishes,

Ian
V2Phantom
_VISITCOMMUNITY
United States
Joined: December 26, 2008
KitMaker: 288 posts
AeroScale: 195 posts
Posted: Saturday, February 20, 2016 - 09:25 PM UTC
Raj

Great work!! I like the way your finished model looks. The wings give the model a nice real world look with the dropped flaps. Well done!
Have fun modeling
Mike
tinbanger
_VISITCOMMUNITY
Ontario, Canada
Joined: February 04, 2008
KitMaker: 2,507 posts
AeroScale: 1,814 posts
Posted: Saturday, February 20, 2016 - 09:57 PM UTC
Great work Raj!
iflytb20
#501
_VISITCOMMUNITY
Kerala, India / भारत
Joined: August 25, 2009
KitMaker: 292 posts
AeroScale: 194 posts
Posted: Monday, February 22, 2016 - 06:39 PM UTC
Ian, Mike & Richard

Thankyou for your kind words
2002hummer
#257
_VISITCOMMUNITY
Ontario, Canada
Joined: October 11, 2011
KitMaker: 812 posts
AeroScale: 458 posts
Posted: Monday, February 22, 2016 - 10:11 PM UTC
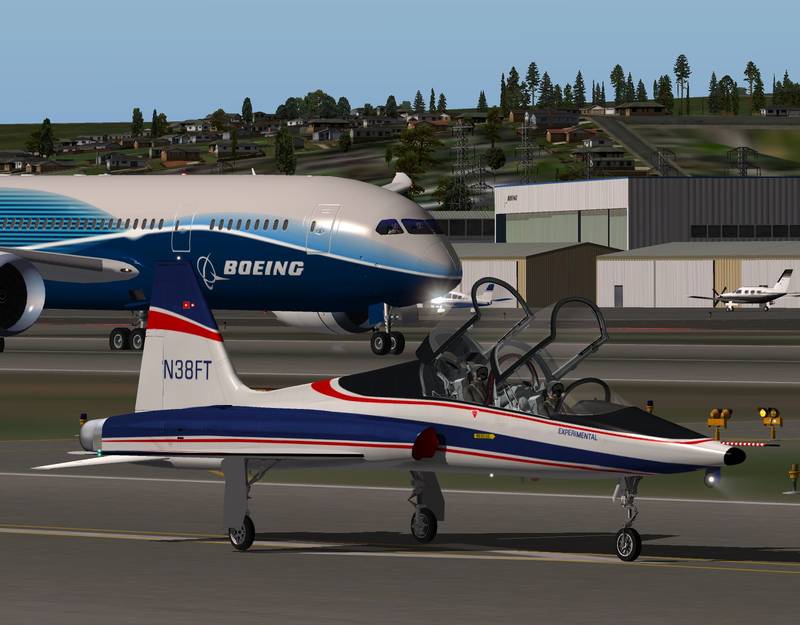
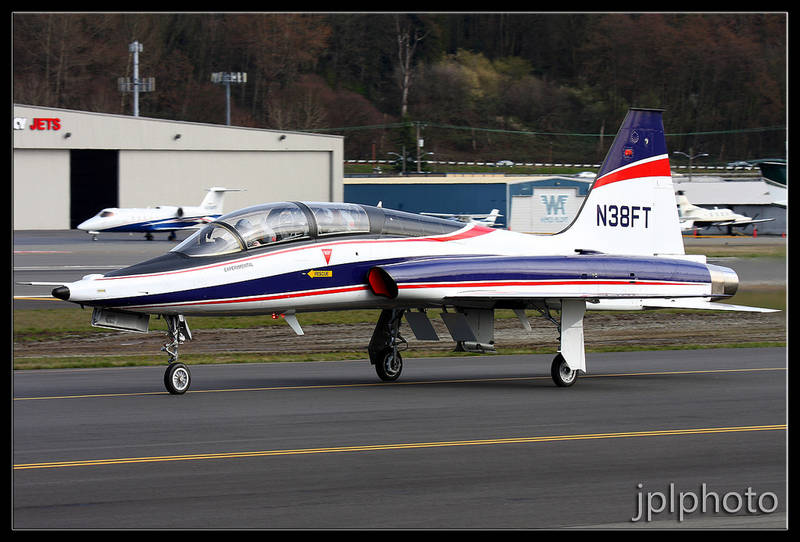
Here is my entry for the campaign. It is Boeing's T 38 Talon chase plane.


Here are a two photos of the actual plane.

dcandal
_VISITCOMMUNITY
Buenos Aires, Argentina
Joined: September 07, 2006
KitMaker: 918 posts
AeroScale: 688 posts
Posted: Thursday, February 25, 2016 - 01:06 AM UTC
Here I continue with the details on the seat of the Ford,


tatbaqui
Staff MemberNews Reporter
ARMORAMA
#040
_VISITCOMMUNITY
Metro Manila, Philippines
Joined: May 06, 2007
KitMaker: 2,713 posts
AeroScale: 65 posts
Posted: Thursday, February 25, 2016 - 04:09 AM UTC
I like the result Daniel, what wire gauges did you use? Tat
tinbanger
_VISITCOMMUNITY
Ontario, Canada
Joined: February 04, 2008
KitMaker: 2,507 posts
AeroScale: 1,814 posts
Posted: Thursday, March 03, 2016 - 03:36 AM UTC
Daniel nice details,keep up the great work.
I will post update photos of my build this weekend.
tatbaqui
Staff MemberNews Reporter
ARMORAMA
#040
_VISITCOMMUNITY
Metro Manila, Philippines
Joined: May 06, 2007
KitMaker: 2,713 posts
AeroScale: 65 posts
Posted: Friday, March 04, 2016 - 07:31 AM UTC
Hello,

Started the paintwork today:


Cheers,

Tat
SaxonTheShiba
_VISITCOMMUNITY
United States
Joined: February 01, 2009
KitMaker: 1,233 posts
AeroScale: 663 posts
Posted: Friday, March 04, 2016 - 09:02 AM UTC
Tat-----Your conversion looks really good.

Daniel----Great work regarding the springs in the seat. Looks really good.

Best wishes,

Ian
tatbaqui
Staff MemberNews Reporter
ARMORAMA
#040
_VISITCOMMUNITY
Metro Manila, Philippines
Joined: May 06, 2007
KitMaker: 2,713 posts
AeroScale: 65 posts
Posted: Saturday, March 05, 2016 - 05:06 AM UTC
Thanks Ian! I have the canopy partly built but will need to get the interior done before moving on to the external stuff. Cheers, Tat
V2Phantom
_VISITCOMMUNITY
United States
Joined: December 26, 2008
KitMaker: 288 posts
AeroScale: 195 posts
Posted: Saturday, March 05, 2016 - 09:10 PM UTC
Here's an update on my NASA F-8C build as I head into the homestretch. The model is now decaled, clear coated and is sitting on my bench looking like this:


I made a tactical mistake and held off adding the ejection seat and canopy until the end. I usually have my canopies open and this is an easy way to do it. I just tried putting on the canopy and it does not fit well. I am going to need same sanding and filling followed by touch up with the paint. Ah well, another learning experience!
Have fun modeling!
Mike
V2Phantom
_VISITCOMMUNITY
United States
Joined: December 26, 2008
KitMaker: 288 posts
AeroScale: 195 posts
Posted: Saturday, March 05, 2016 - 09:16 PM UTC
What a fantastic scheme Darrell!!! This would be a modeling subject that I would love to do. Are you making your own decals for this as the lettering seems straightforward? The masking and the painting might not be!

You might already know this but the Hasegawa 1/72 T-38A is actually their F-5B kit. There are several easy mods that need to be done to improve this kit to be more like a T-38A. I have the list of mods buried somewhere in my files but they should be easy to find with an internet search.

Good luck with your build, this is such a cool project!
Have fun modeling
Mike


Quoted Text

Here is my entry for the campaign. It is Boeing's T 38 Talon chase plane.


Here are a two photos of the actual plane.