United States
Joined: August 12, 2007
KitMaker: 153 posts
AeroScale: 139 posts
Posted: Monday, January 04, 2010 - 10:20 AM UTC
Quoted Text
Interesting choice, Automaton. I had no idea the French used the King Cobra in Vietnam.
Funny to see the "star" sprue - first time I have seen parts laid out like that on the sprue. It looks like this kit is going to fight you all the way to the finish line.
Looking forward to follow your build. 
Hi Jesper

The French used the Kingcobra for several years in Indochina until, if I'm not mistaken, they were replaced by F8F Bearcats.
As for the sprue layout (the star shape), it's actually a pretty frequent feature of these '90s-style short run kits. These companies didn't have the expensive injection molding equipment used by the big players. The radial sprues are used in a process called "centrifugal molding", whereby the mold was spun at relatively high speed while the plastic was injected in the center. The centrifugal force pulled the material outward to fill the mold cavities. It's an imperfect process at best (take a close look at the photos of my kit's horizontal stabilizers

).
Regards;
Automaton
Not everything that counts can be counted, and not everything that can be counted counts. (Albert Einstein)
United States
Joined: August 12, 2007
KitMaker: 153 posts
AeroScale: 139 posts
Posted: Monday, January 04, 2010 - 10:36 AM UTC
Quoted Text
What a can of worms you have there Automaton, Good Luck!
Yep, Dave, it's pretty rough. I'm not honestly that worried about the fit problems--a little cyanoacrylate and some styrene shavings can work wonders. What I AM worried about is all the surface prep it's going to need in order to get a slick enough surface for the natural metal finish (I'll be using Alclad).
Your Ki-44 is gorgeous! Very clean work and first rate nmf. You should be proud of that one.

I just joined this gb a few days ago, and to be honest, I haven't looked all the way back through the thread. Guess I need to read your progress reports on it--I might learn something useful.

Regards;
Automaton
Not everything that counts can be counted, and not everything that can be counted counts. (Albert Einstein)
Wellington, New Zealand
Joined: March 15, 2005
KitMaker: 169 posts
AeroScale: 132 posts
Posted: Monday, January 04, 2010 - 01:49 PM UTC
Thanks Automaton!
You should give it a coat or three with some Mr Surfacer airbrushed on, it the best way I fine to start a BMF!
AussieReg
 Associate Editor
#007
Victoria, Australia
Joined: June 09, 2009
KitMaker: 8,156 posts
AeroScale: 3,756 posts
Posted: Monday, January 04, 2010 - 02:59 PM UTC
G'day Dave
Quoted Text
Thanks Automaton!
You should give it a coat or three with some Mr Surfacer airbrushed on, it the best way I fine to start a BMF!
Tell me more about spraying Mr Surfacer, do you use a rattle-can or airbrush it ? I would like to get myself fully prepped before I tackle my VFS P-47, and it will most likely be BMF.
Cheers, D
ON the bench
Revell 1/24 '53 Corvette (building as '54)
Revell 1/24 BMW 507 Coupe and Cabrio
Italeri 1/48 Me262 B-1a/U1 Nightfighter
Monogram 1/24 '57 Chevy Nomad
Dragon 1/350 USS Frank Knox DD-742
Tennessee, United States
Joined: September 20, 2005
KitMaker: 1,747 posts
AeroScale: 1,673 posts
Posted: Monday, January 04, 2010 - 04:27 PM UTC
Hello there guys and any gals! Ha ha. I've been on Aeroscale going on five years and have yet to enter a campaign. Is there still time for me to get in on this one? I am working on a 1/72 scale Hasegawa KI-44 in markings not too different than the bigger sister, or brother if you like, on here already. I think I saw this campaign ends in April and I started the kit just a couple of days ago. Thanks in advance. Russell

P.S. I went to the campaign site and enlisted so I guess I'm in guys! Thanks.
To Thine Own Self Be True
Siderius
A.K.A., RTA
AussieReg
Associate Editor #007
Victoria, Australia
Joined: June 09, 2009
KitMaker: 8,156 posts
AeroScale: 3,756 posts
Posted: Monday, January 04, 2010 - 05:46 PM UTC
Greetings Russell, and thanks for joining us.
Quoted Text
Hello there guys and any gals! Ha ha. I've been on Aeroscale going on five years and have yet to enter a campaign. Is there still time for me to get in on this one? I am working on a 1/72 scale Hasegawa KI-44 in markings not too different than the bigger sister, or brother if you like, on here already. I think I saw this campaign ends in April and I started the kit just a couple of days ago. Thanks in advance. Russell
P.S. I went to the campaign site and enlisted so I guess I'm in guys! Thanks.
It's never too late to join the party, so have fun and enjoy your build. Please post lots of progress shots for us, and have a look back over the last page or so, I'm taking a vote on the options put forward for a ribbon.
There's a Roll Call on page 4 of the thread that I am updating whenever I can, so you can check out the details of what everybody is building, and I've just put your build in there.
BTW this is the first campaign I ever enlisted in as well, and I've become the default Campaign Leader !!

Cheers, D
ON the bench
Revell 1/24 '53 Corvette (building as '54)
Revell 1/24 BMW 507 Coupe and Cabrio
Italeri 1/48 Me262 B-1a/U1 Nightfighter
Monogram 1/24 '57 Chevy Nomad
Dragon 1/350 USS Frank Knox DD-742
Wellington, New Zealand
Joined: March 15, 2005
KitMaker: 169 posts
AeroScale: 132 posts
Posted: Monday, January 04, 2010 - 06:57 PM UTC
Quoted Text
G'day Dave
Tell me more about spraying Mr Surfacer, do you use a rattle-can or airbrush it ? I would like to get myself fully prepped before I tackle my VFS P-47, and it will most likely be BMF.
Cheers, D
Sure no worries! I air-brush the stuff on, I use Mr Surfacer 1000 and a High quality Automotive Two way thinners. I normally get the thinners from the local PPG agent or my next door neighbor who works for a automotive panel beater. I find that the cheaper thinners from the hardware store doesn't work aswell as the high quality automotive stuff. The price is normally a little bit higher but the end results are worth it, as you can see.
I thin down the Mr Surfacer as per normal if it was paint, kinda get a milky/watery flow to it. When you start airbrushing it and if you get stringy bits flying around you will need to thin it down some more.I normally do two coats of it and fix up any seams or stink marks I have missed, and do touch ups of those areas.
Sanding it, I normally use 2000 wet and dry sandpaper. You could polish it a lot more using 4000-6000 grit, but I'm normally lazy and don't bother....
Attica, Greece / Ελλάδα
Joined: May 01, 2008
KitMaker: 1,437 posts
AeroScale: 1,241 posts
Posted: Monday, January 04, 2010 - 08:08 PM UTC
AussieReg
Associate Editor #007
Victoria, Australia
Joined: June 09, 2009
KitMaker: 8,156 posts
AeroScale: 3,756 posts
Posted: Monday, January 04, 2010 - 08:27 PM UTC
G'day Nick, welcome aboard.
Roll Call updated, thanks for joining us here, I hope you have a great build.
@Dave, thanks for the tip on Mr Surfacer, I will certainly have a crack at this method before I hit my big P-47 with any BMF !
Cheers, D
ON the bench
Revell 1/24 '53 Corvette (building as '54)
Revell 1/24 BMW 507 Coupe and Cabrio
Italeri 1/48 Me262 B-1a/U1 Nightfighter
Monogram 1/24 '57 Chevy Nomad
Dragon 1/350 USS Frank Knox DD-742
Attica, Greece / Ελλάδα
Joined: May 01, 2008
KitMaker: 1,437 posts
AeroScale: 1,241 posts
Posted: Monday, January 04, 2010 - 10:24 PM UTC
Thank you for the welcoming Mr. Damian

Cheers Nick
Wellington, New Zealand
Joined: March 15, 2005
KitMaker: 169 posts
AeroScale: 132 posts
Posted: Tuesday, January 05, 2010 - 10:24 PM UTC
I have some bad news and good news...
The Bad is, Well... I just dropped the rear canopy and stepped on it! Its in two half's now!
The good news is that I just order a replacement from HLJ and the Ki-44II Otsu w/ 40mm Cannon arrived today so I am going to pinch that to finish the build!
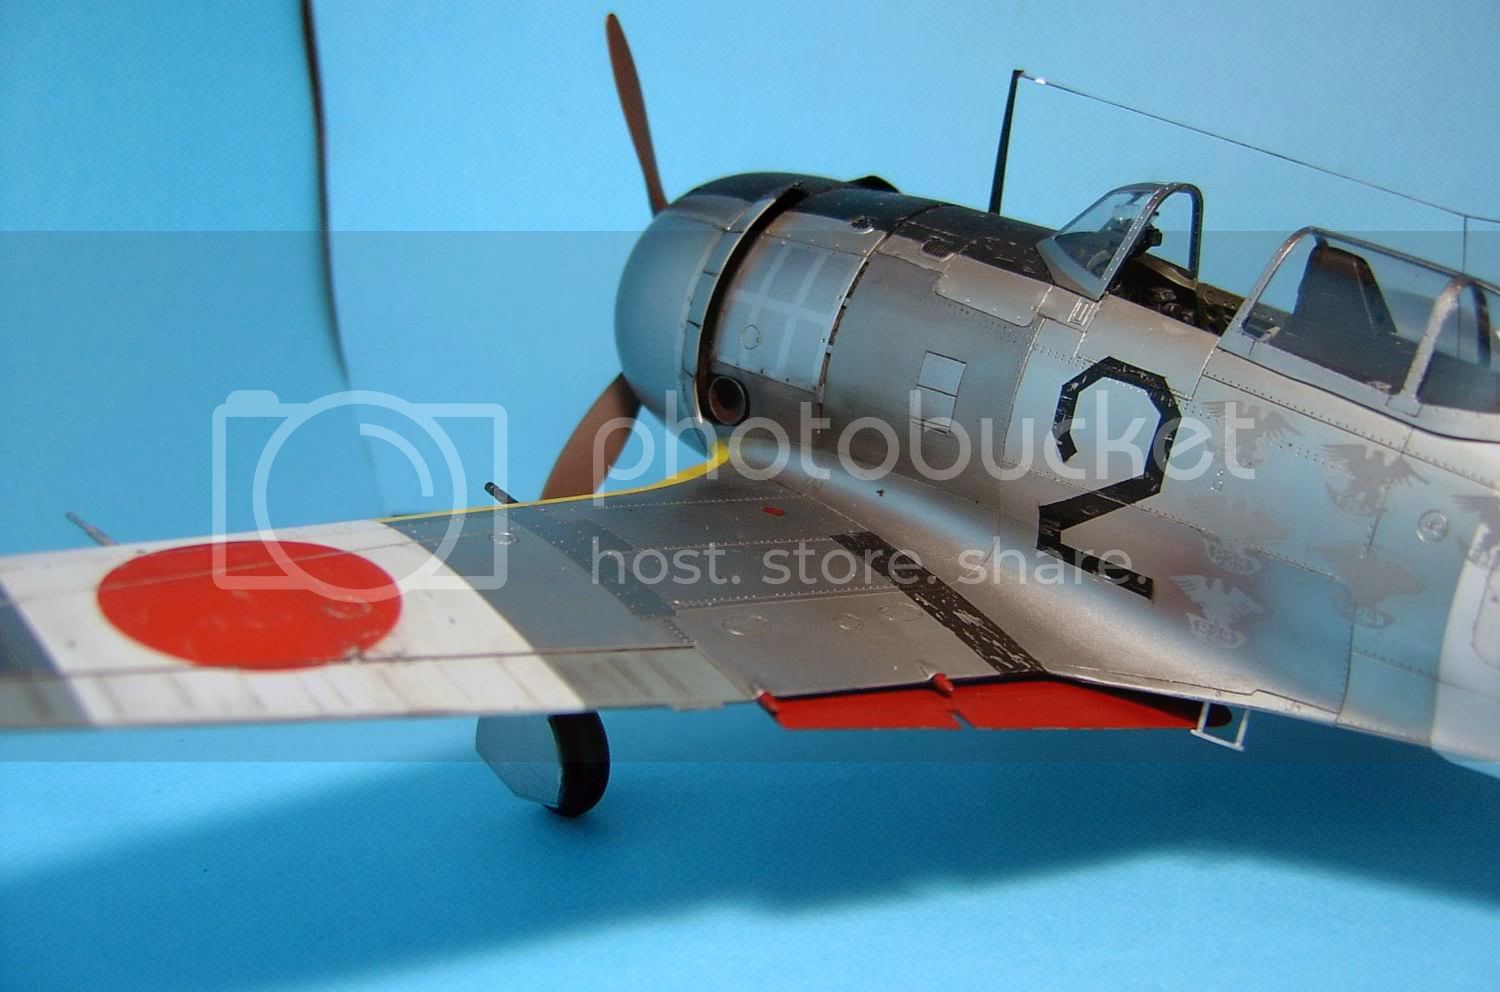
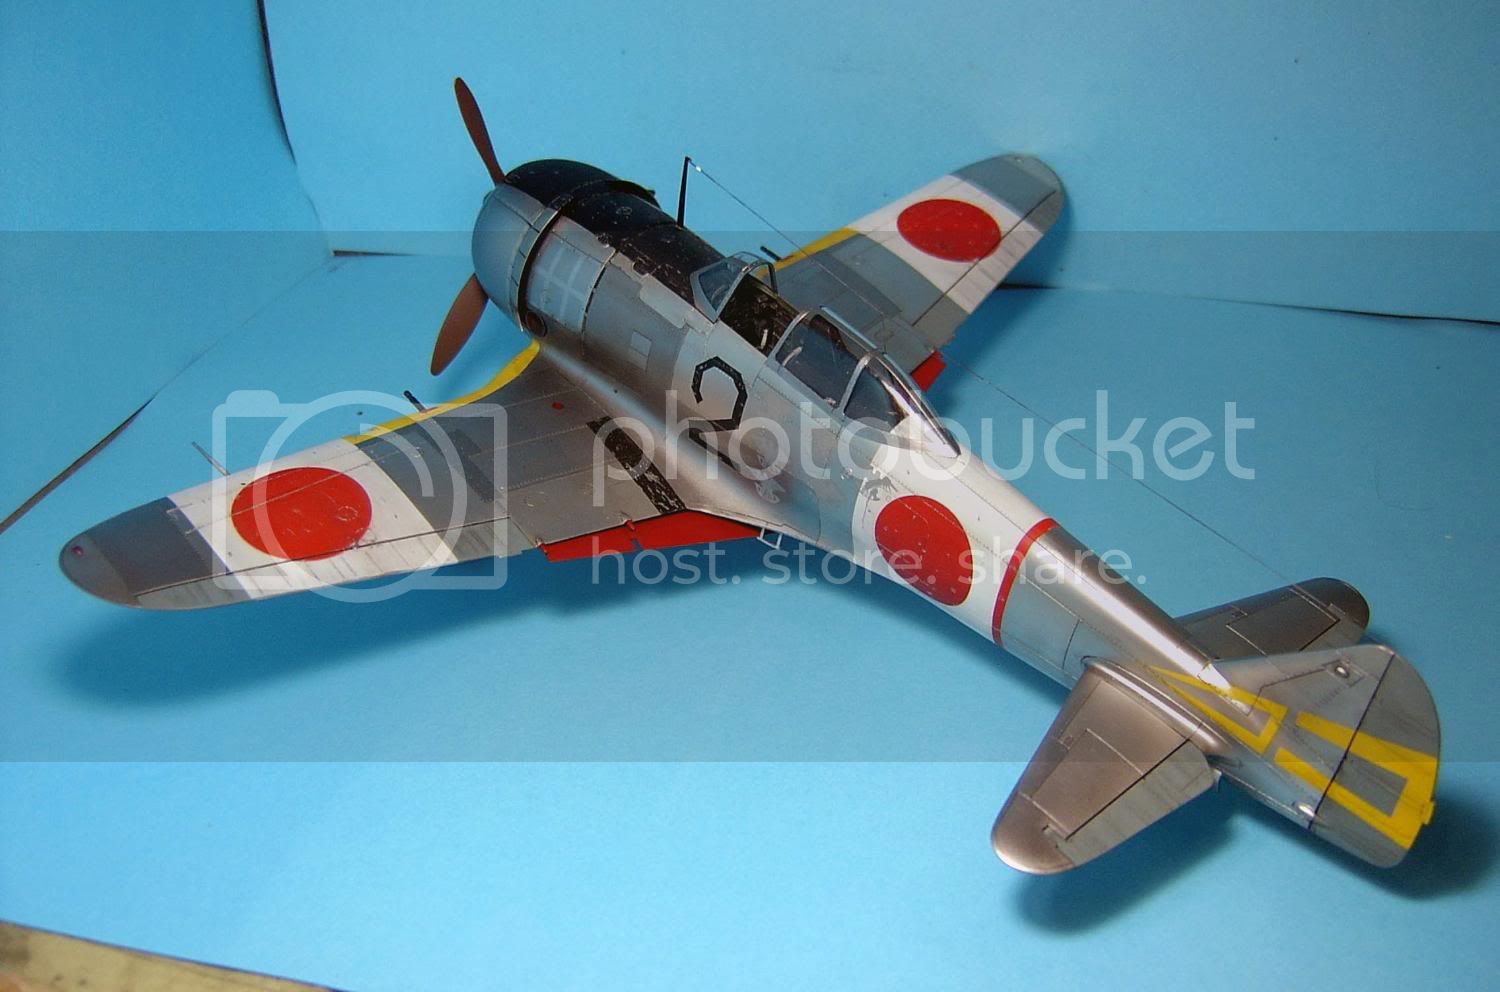
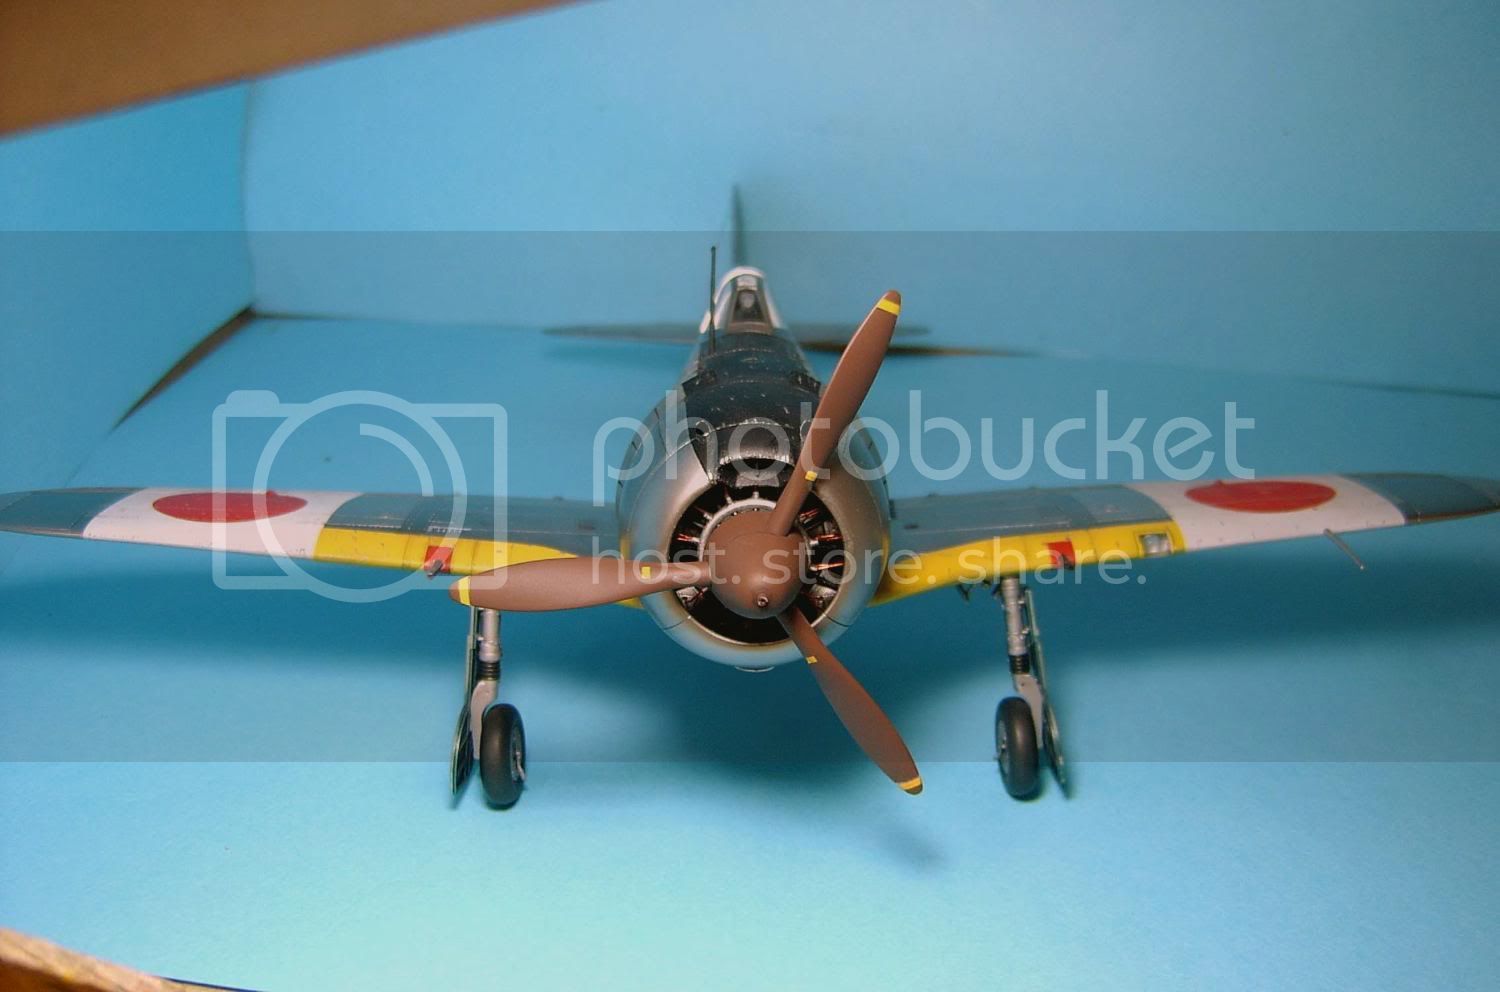
Progress is good... Oil wash is on and done.... Just need to apply a cost of future to seal everything in and flat coat all the markings and attach the aerial! This should be all done tomorrow!
Attica, Greece / Ελλάδα
Joined: May 01, 2008
KitMaker: 1,437 posts
AeroScale: 1,241 posts
Posted: Wednesday, January 06, 2010 - 05:05 AM UTC
AussieReg
Associate Editor #007
Victoria, Australia
Joined: June 09, 2009
KitMaker: 8,156 posts
AeroScale: 3,756 posts
Posted: Wednesday, January 06, 2010 - 08:11 AM UTC
Quoted Text
I have some bad news and good news...
The Bad is, Well... I just dropped the rear canopy and stepped on it! Its in two half's now!
Well Dave, there's nothing else for it I'm afraid. Take to the kit with a knife and a hammer and do a CRASH DIO !! It wasn't coming up too well anyway
Seriously, that would have been a heartbreaking moment. I'm glad you've been able to come up with a relatively easy fix.
Cheers, D
ON the bench
Revell 1/24 '53 Corvette (building as '54)
Revell 1/24 BMW 507 Coupe and Cabrio
Italeri 1/48 Me262 B-1a/U1 Nightfighter
Monogram 1/24 '57 Chevy Nomad
Dragon 1/350 USS Frank Knox DD-742
AussieReg
Associate Editor #007
Victoria, Australia
Joined: June 09, 2009
KitMaker: 8,156 posts
AeroScale: 3,756 posts
Posted: Wednesday, January 06, 2010 - 08:14 AM UTC
Quoted Text
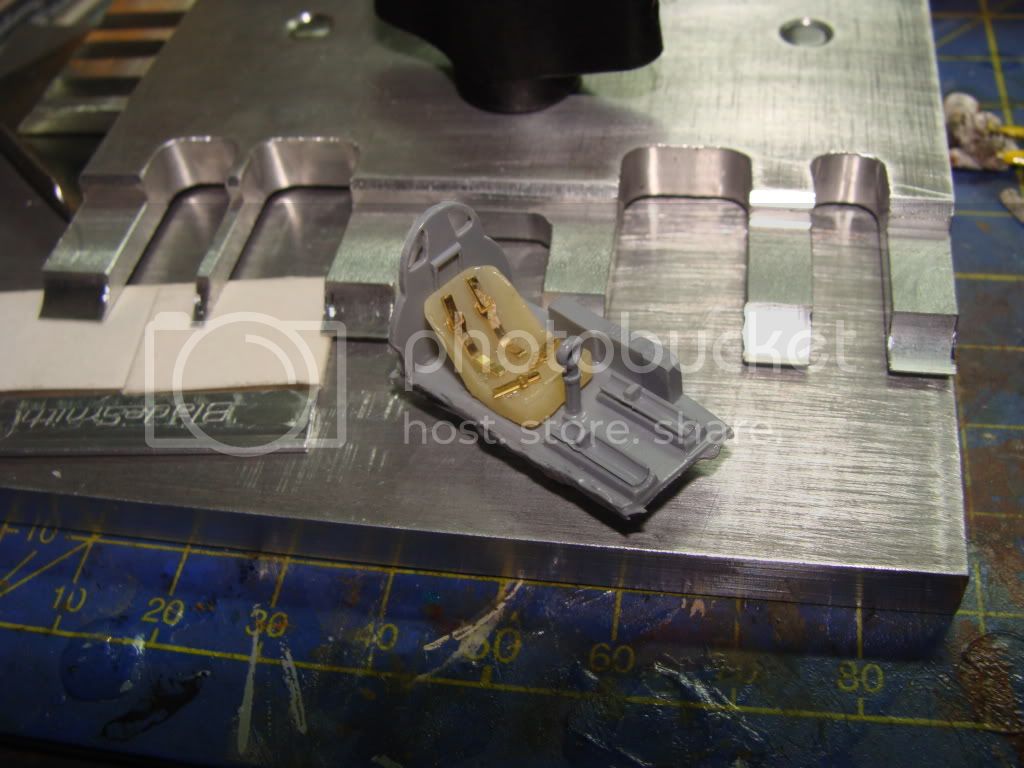
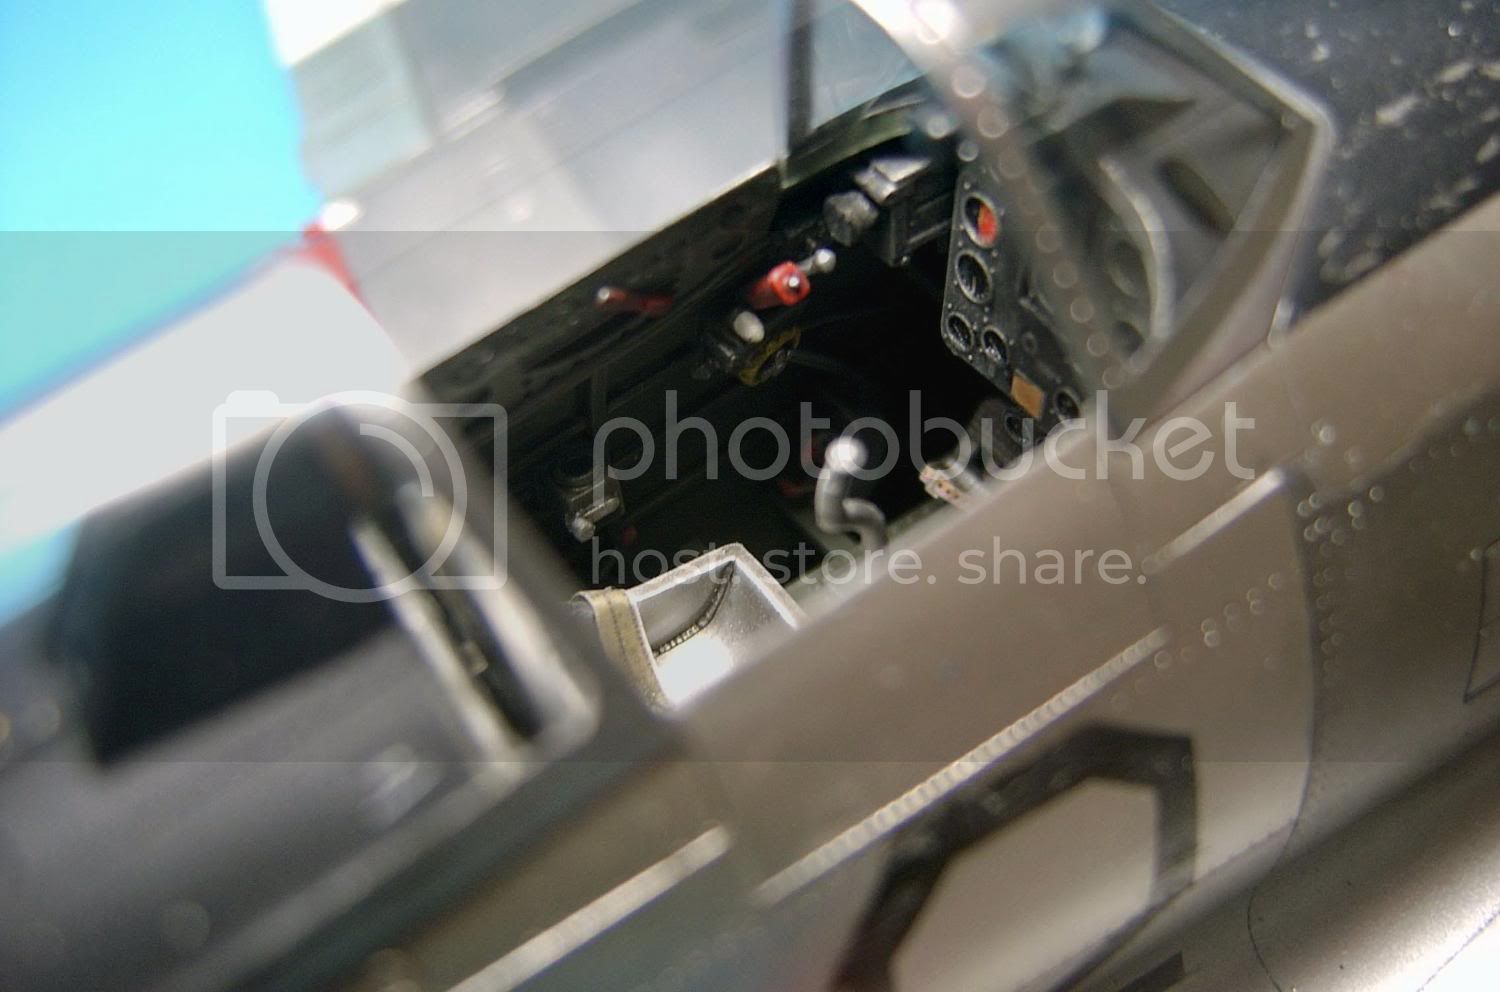
Look what I needed to do, to fit the cockpit in the fuselage 
Hi Nick. I'm sure with a clean up around the edges you will never know once it is all together. Keep up the great work, D
ON the bench
Revell 1/24 '53 Corvette (building as '54)
Revell 1/24 BMW 507 Coupe and Cabrio
Italeri 1/48 Me262 B-1a/U1 Nightfighter
Monogram 1/24 '57 Chevy Nomad
Dragon 1/350 USS Frank Knox DD-742
Attica, Greece / Ελλάδα
Joined: May 01, 2008
KitMaker: 1,437 posts
AeroScale: 1,241 posts
Posted: Wednesday, January 06, 2010 - 08:50 AM UTC
Of course, I'll smooth the edges
Cheers Nick
Wellington, New Zealand
Joined: March 15, 2005
KitMaker: 169 posts
AeroScale: 132 posts
Posted: Wednesday, January 06, 2010 - 12:48 PM UTC
Quoted Text
Well Dave, there's nothing else for it I'm afraid. Take to the kit with a knife and a hammer and do a CRASH DIO !! It wasn't coming up too well anyway
Seriously, that would have been a heartbreaking moment. I'm glad you've been able to come up with a relatively easy fix.
Cheers, D
Lucky I got the 40mm Cannon boxing aswell, or I could of been waiting for a while....
United States
Joined: August 12, 2007
KitMaker: 153 posts
AeroScale: 139 posts
Posted: Wednesday, January 06, 2010 - 01:48 PM UTC
@ Dave: I thought only I did stuff like that!
@ Nick: I think you have part of my P-63 there!
Regards;
Automaton
Not everything that counts can be counted, and not everything that can be counted counts. (Albert Einstein)
Attica, Greece / Ελλάδα
Joined: May 01, 2008
KitMaker: 1,437 posts
AeroScale: 1,241 posts
Posted: Wednesday, January 06, 2010 - 08:46 PM UTC
Quoted Text
@ Nick: I think you have part of my P-63 there!
Sorry, what do you mean
Cheers Nick
AussieReg
Associate Editor #007
Victoria, Australia
Joined: June 09, 2009
KitMaker: 8,156 posts
AeroScale: 3,756 posts
Posted: Wednesday, January 06, 2010 - 10:43 PM UTC
Nick, Auto is doing a resin P-63 for this campaign and is having a lot of trouble with the fit of some parts (or maybe ALL of them) so far. Your cockpit problem sems to be fitting in with that P-63.
Cheers, D
ON the bench
Revell 1/24 '53 Corvette (building as '54)
Revell 1/24 BMW 507 Coupe and Cabrio
Italeri 1/48 Me262 B-1a/U1 Nightfighter
Monogram 1/24 '57 Chevy Nomad
Dragon 1/350 USS Frank Knox DD-742
Wellington, New Zealand
Joined: March 15, 2005
KitMaker: 169 posts
AeroScale: 132 posts
Posted: Wednesday, January 06, 2010 - 11:56 PM UTC
Attica, Greece / Ελλάδα
Joined: May 01, 2008
KitMaker: 1,437 posts
AeroScale: 1,241 posts
Posted: Thursday, January 07, 2010 - 12:09 AM UTC
Quoted Text
Nick, Auto is doing a resin P-63 for this campaign and is having a lot of trouble with the fit of some parts (or maybe ALL of them) so far. Your cockpit problem sems to be fitting in with that P-63.
Cheers, D
Thanks for the reply
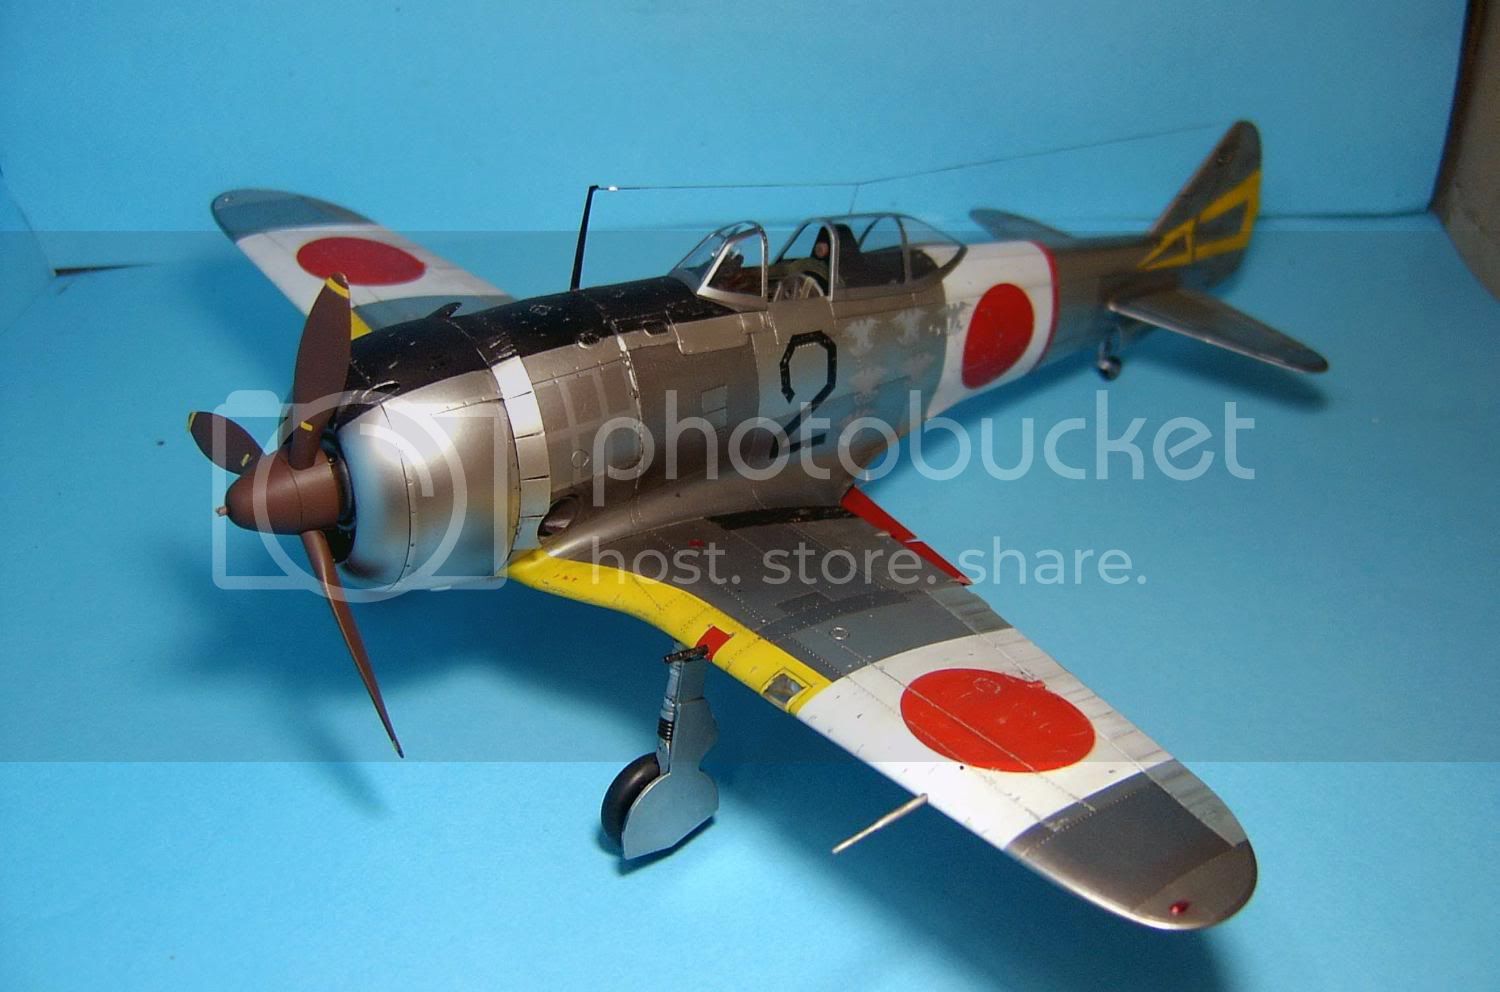
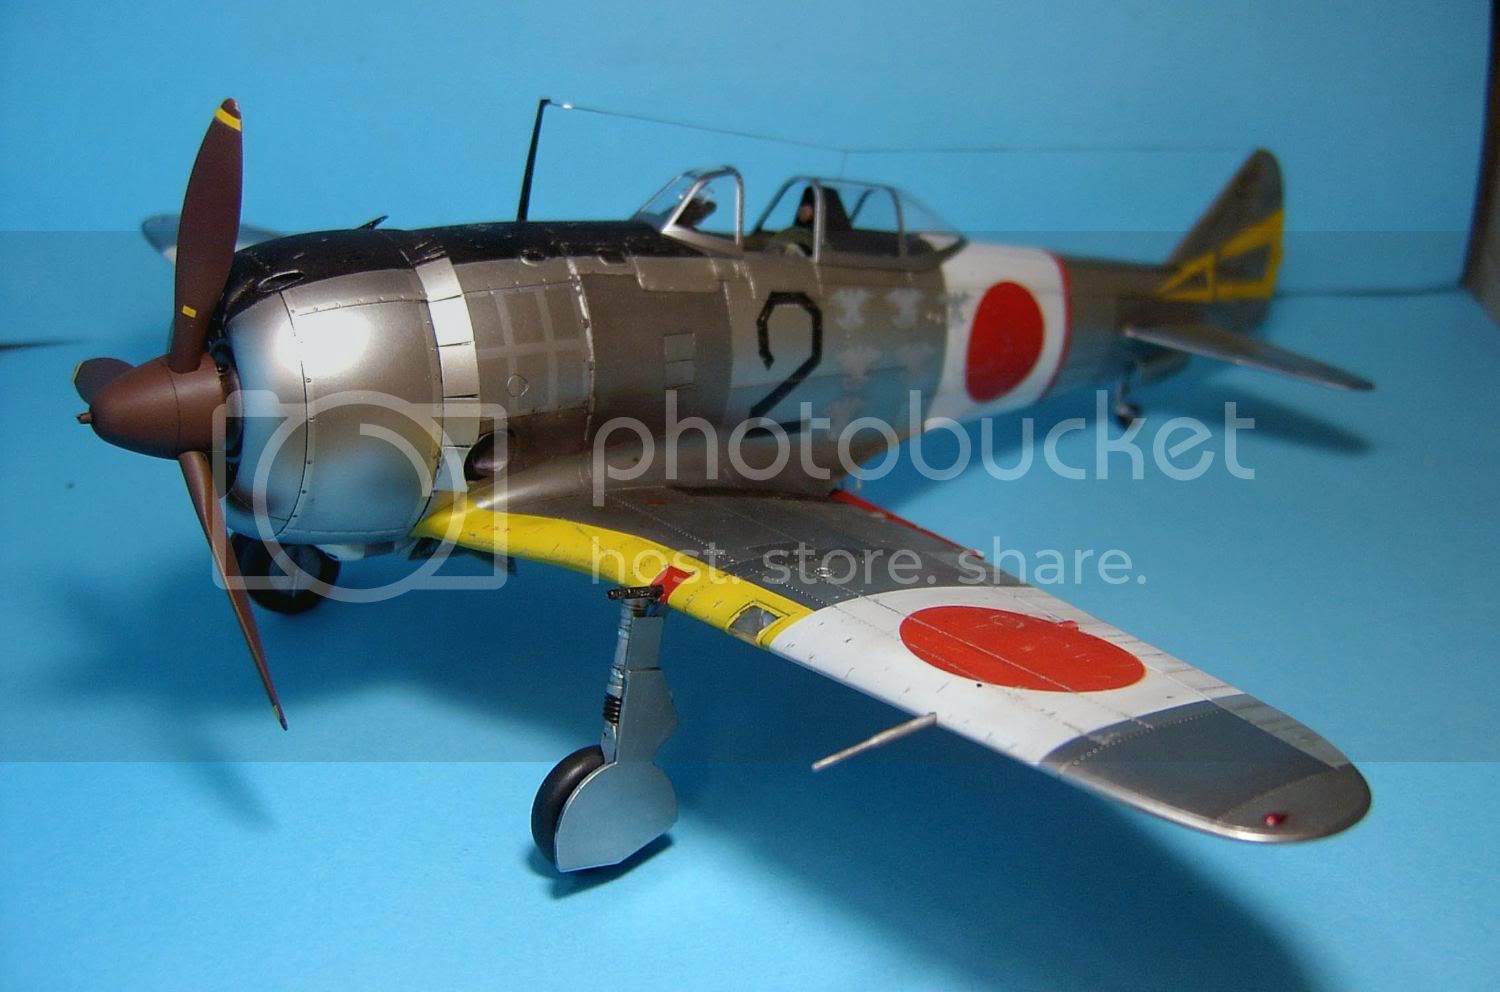
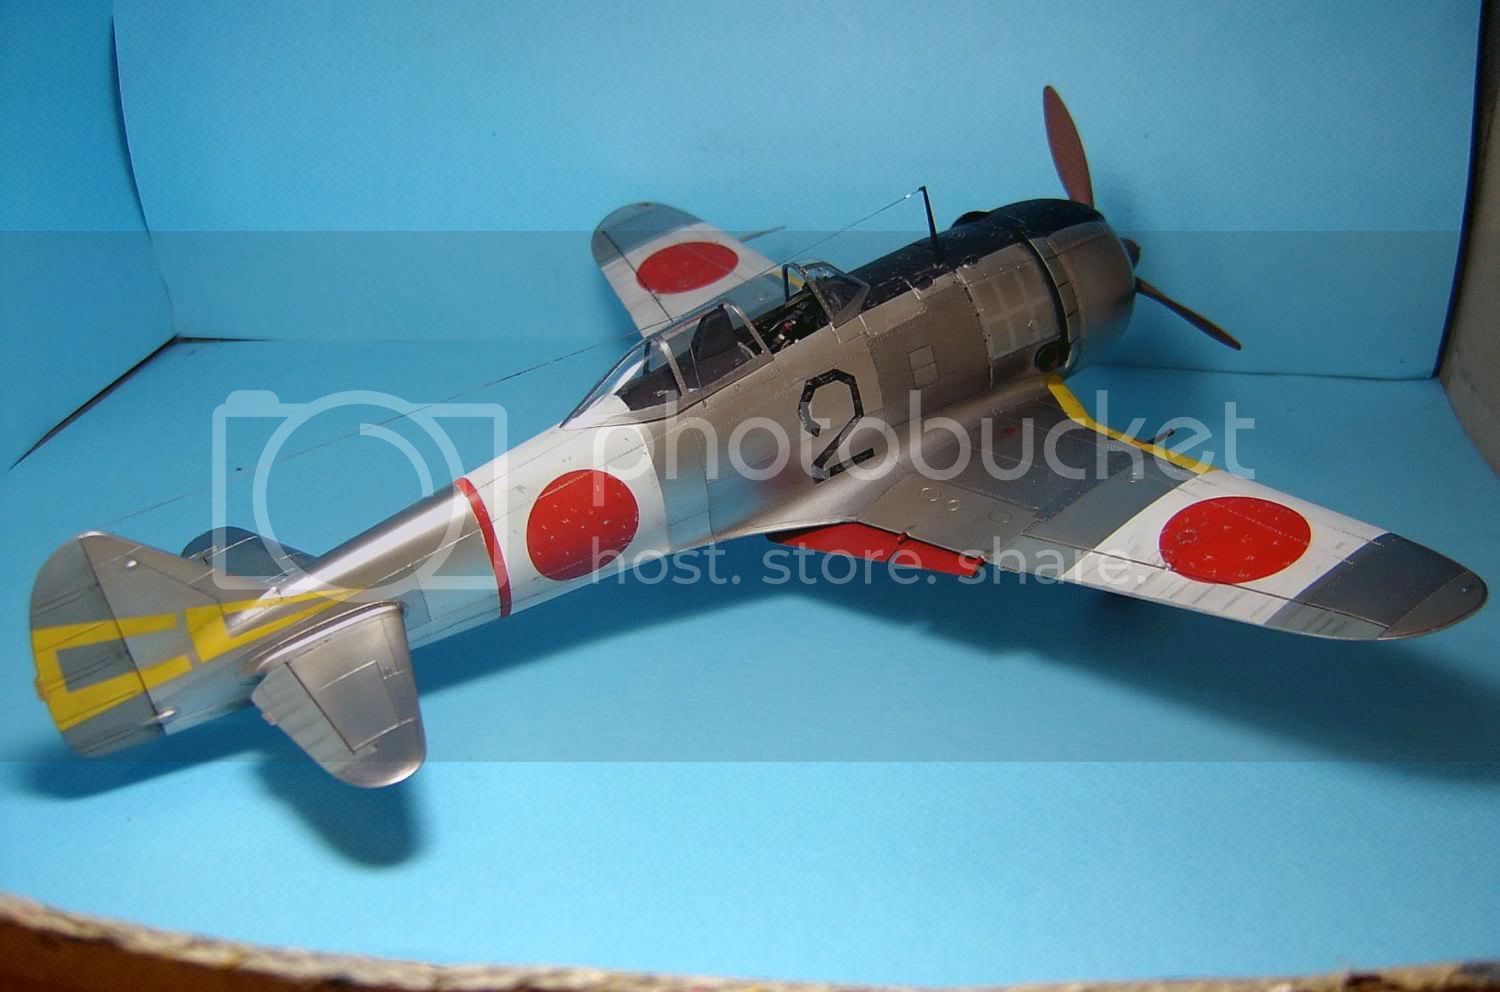
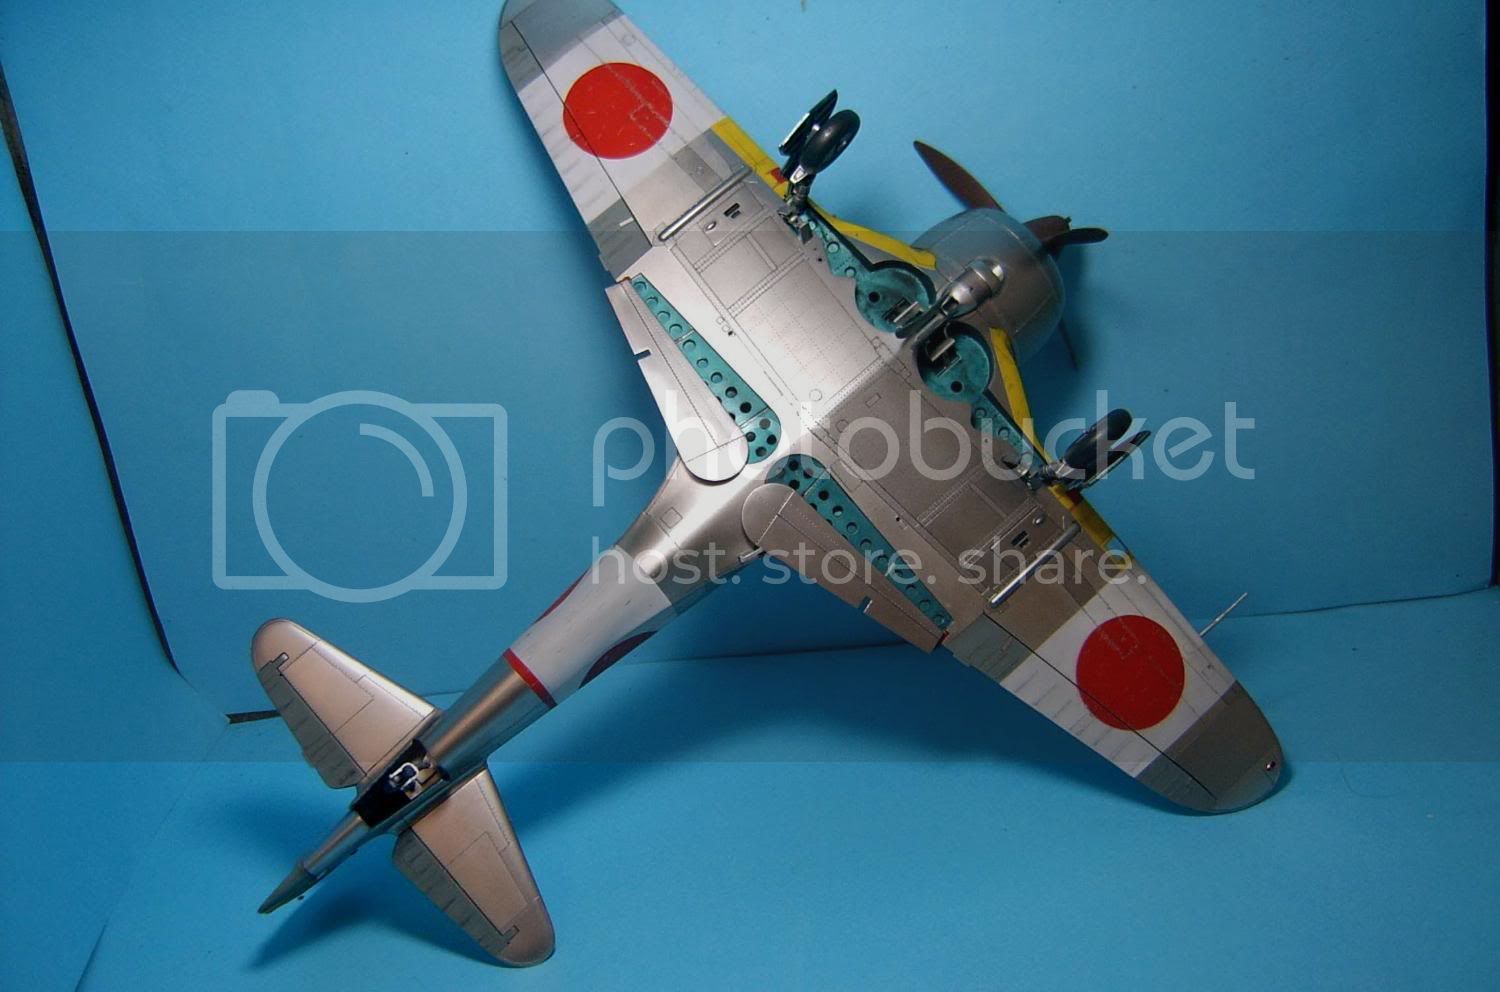
Mr. David, awesome metal finish!!!

Cheers Nick
AussieReg
Associate Editor #007
Victoria, Australia
Joined: June 09, 2009
KitMaker: 8,156 posts
AeroScale: 3,756 posts
Posted: Thursday, January 07, 2010 - 12:17 AM UTC
Beautiful job Dave, thanks so much for sharing your work with us. Like I said earlier, I'm really looking forward to your next project now, what's in store for us?
Congratulations on a great build, D
ON the bench
Revell 1/24 '53 Corvette (building as '54)
Revell 1/24 BMW 507 Coupe and Cabrio
Italeri 1/48 Me262 B-1a/U1 Nightfighter
Monogram 1/24 '57 Chevy Nomad
Dragon 1/350 USS Frank Knox DD-742
#041
Kobenhavn, Denmark
Joined: July 20, 2006
KitMaker: 10,069 posts
AeroScale: 3,788 posts
Posted: Thursday, January 07, 2010 - 12:33 AM UTC
Fantastic build, David. Excellent metal finish!
Thanks for sharing
Campaign'oholic - 252+ campaigns completed
Georgia, United States
Joined: August 22, 2005
KitMaker: 331 posts
AeroScale: 135 posts
Posted: Thursday, January 07, 2010 - 03:33 AM UTC
Nice job Dave. Can't wait for the full build article and would like to know how you did the different shades of metal.

Support your Local Hobby Store.
Still boycotting Dragon Sytrene tracks. Ick-poo!
Current project:
Looking for my mind, I lost it somewhere.
New Jersey, United States
Joined: May 24, 2008
KitMaker: 346 posts
AeroScale: 307 posts
Posted: Thursday, January 07, 2010 - 03:48 AM UTC
Dave
Stunning work. I also like the weathering. As I become more involved with model building my eye sees a lot more then it did before. The one thing that stands out from this beautiful build is that the aircraft is somewhat worn and the prop looks new. Other wise its just superb and I can only dream of doing something this good.
I look forward to more of your builds