

Automaton, are you sure that kit would'nt be of use holding down the bottom of some trash can somewhere? You know, just in case gravity reversed itself.
On that note...I can't decide what I want to build for this campaign. Has anyone build Trumpeter's 1/72 Beagle?
Air Campaigns
Want to start or join a group build? This is where to start.
Want to start or join a group build? This is where to start.
Hosted by Frederick Boucher, Michael Satin
Aluminium Campaign
Grenadier37

Joined: June 02, 2008
KitMaker: 232 posts
AeroScale: 155 posts
Posted: Thursday, January 07, 2010 - 06:33 AM UTC
vanize
Joined: January 30, 2006
KitMaker: 1,954 posts
AeroScale: 1,163 posts
Posted: Thursday, January 07, 2010 - 07:56 AM UTC
Here is my first build update for this campaign.
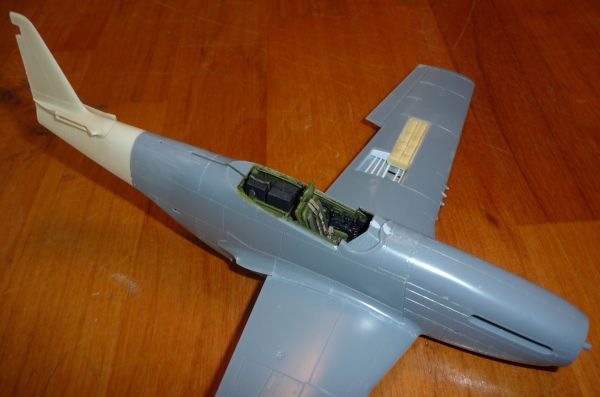
I am working on an early model P-51D Mustang (no dorsal fin fillet for the tail) using the Tamiya 1/48 kit.
The aftermarket tail is sort of OK - looks nice, but there are pinholes in the resin in critical areas. The result is that it would probably have been just as easy to modify the kit tail rather than cut it off, put on the resin tail, blend it in, and fix the casting and alignment errors. I'm also none-too-happy with the panel lines on the resin tail either - you either have to droop the tail or re-scribe the lines for everything to be properly parallel (the default is droopy tail unless you shim).
I am also working on opening the port gun bay. The ammo bay is from Aires, but i am building up the gun bay instead of using theirs. I will be using their guns and photo etch though.
The cockpit is from True Details.
I will be doing Major Robert McWherter's "Hoo Flung Dung/City of Paris" P-51D-5. McWherter commanded the 382nd FS, and had 3 japanese and 3 nazi kill markings on this aircraft.
Moeggo

Joined: March 15, 2005
KitMaker: 169 posts
AeroScale: 132 posts

Posted: Thursday, January 07, 2010 - 08:22 AM UTC
Cheers Everyone!
I have a 1/32 Tamiya Spitfire and a Wingnut Wings SE.5a... and after that.... 1/72 Revell Uboat!
Quoted Text
Like I said earlier, I'm really looking forward to your next project now, what's in store for us?
I have a 1/32 Tamiya Spitfire and a Wingnut Wings SE.5a... and after that.... 1/72 Revell Uboat!

AussieReg

#007

Joined: June 09, 2009
KitMaker: 8,156 posts
AeroScale: 3,756 posts
Posted: Thursday, January 07, 2010 - 08:32 AM UTC
Vance, great choice for the campaign and a really good start by the looks ! Please keep us posted with progress pics, especially the gun bay mods. I have 2 of these kits in the stash and I was looking to upgrade at least one of them.
Dave, thanks for posting your finished shots in the campaign gallery.
http://gallery.kitmaker.net/showgallery.php/cat/24561
Cheers, D
Dave, thanks for posting your finished shots in the campaign gallery.
http://gallery.kitmaker.net/showgallery.php/cat/24561
Cheers, D


PolarBear

Joined: February 23, 2005
KitMaker: 820 posts
AeroScale: 629 posts
Posted: Thursday, January 07, 2010 - 08:58 AM UTC
@ Moeggo: Great job! That must be one heck of a centerpiece!
@ Vanize: Warming up for the Mustang campaign, are you! Looks like you're going to put quite some effort into that P-51! I'm looking forward to it!
Cheers! // PolarBear
@ Vanize: Warming up for the Mustang campaign, are you! Looks like you're going to put quite some effort into that P-51! I'm looking forward to it!
Cheers! // PolarBear

NickZour

Joined: May 01, 2008
KitMaker: 1,437 posts
AeroScale: 1,241 posts
Posted: Thursday, January 07, 2010 - 09:36 AM UTC
Update 

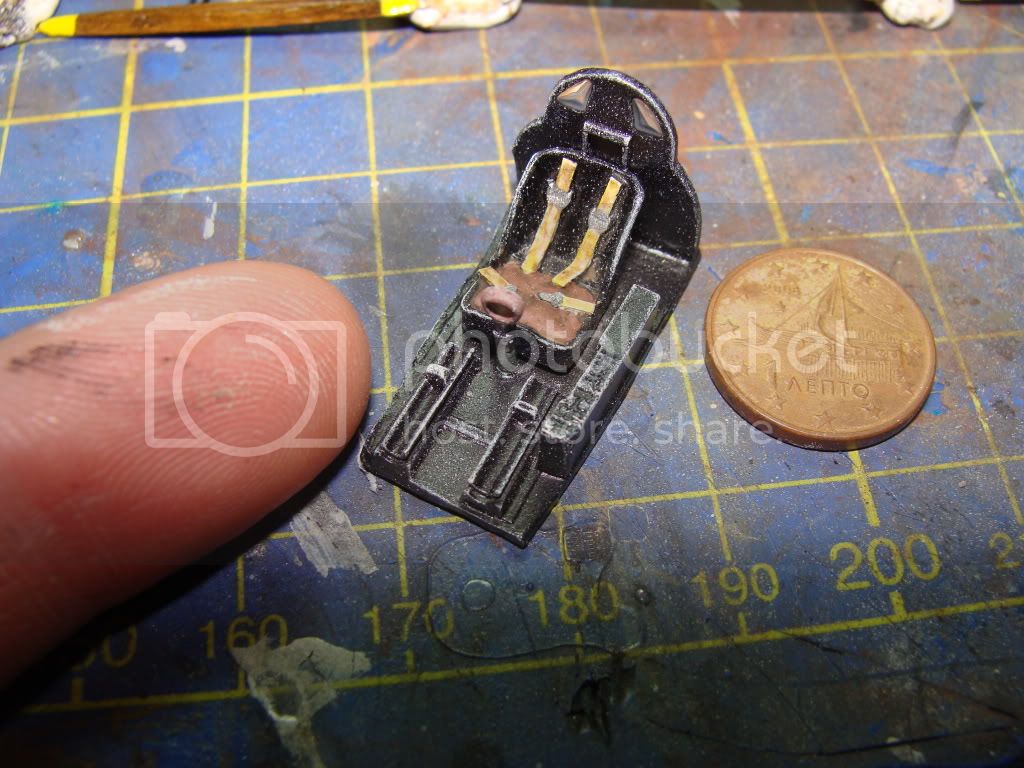
And with this material....
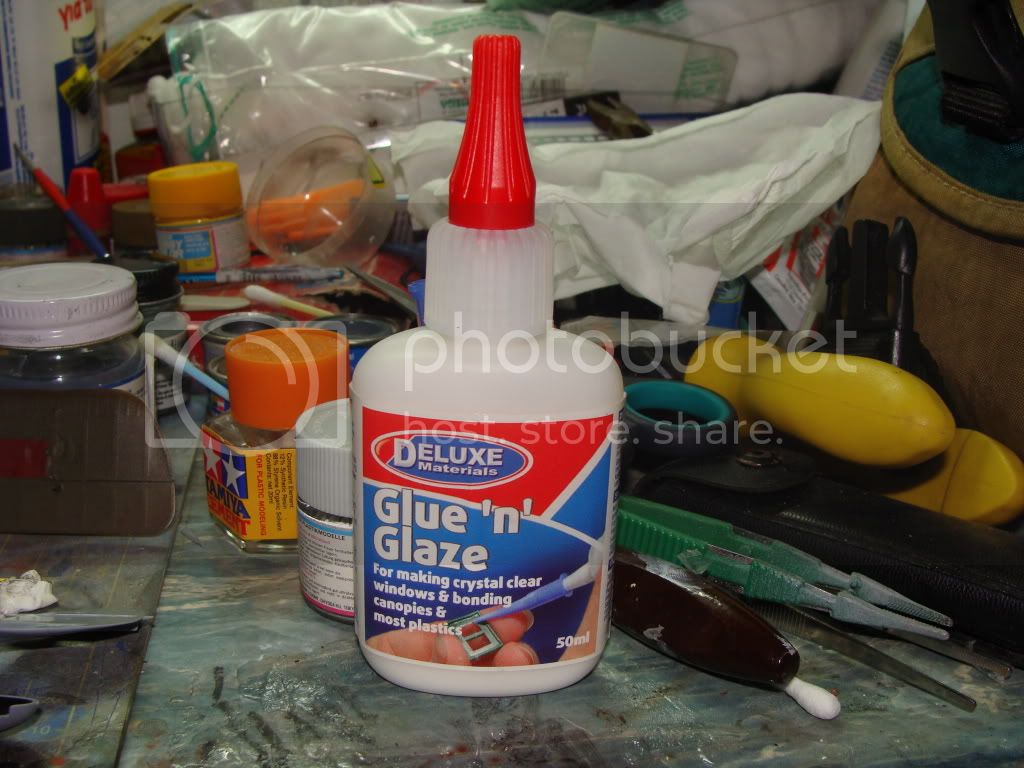
....I made this
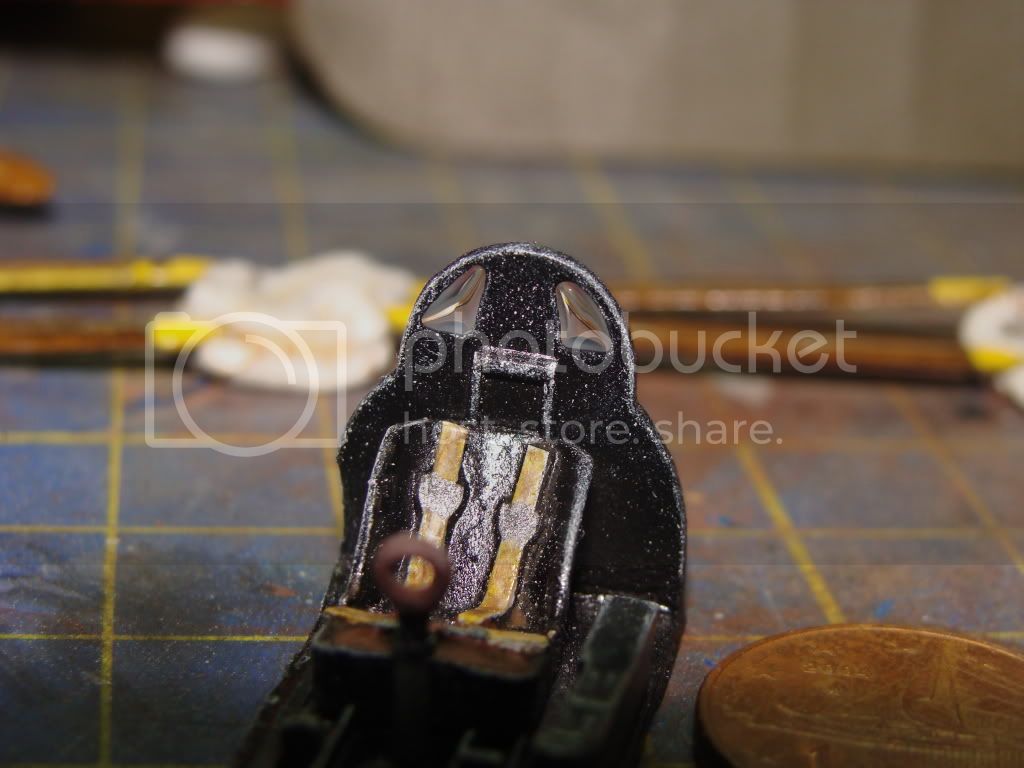
Cheers Nick
And with this material....
....I made this
Cheers Nick
Automaton
Joined: August 12, 2007
KitMaker: 153 posts
AeroScale: 139 posts
Posted: Thursday, January 07, 2010 - 11:18 AM UTC
Quoted Text
Quoted Text
@ Nick: I think you have part of my P-63 there!
Sorry, what do you mean
Damian's right--as I was looking at the pics of your kit, I was thinking how the parts looked very familiar (my kit is an MPM too).

Regards;
Automaton
Automaton
Joined: August 12, 2007
KitMaker: 153 posts
AeroScale: 139 posts
Posted: Thursday, January 07, 2010 - 11:25 AM UTC
@ Grenadier:
Well, when I mentioned to a friend that I was building the kit, he told me that's just where his ended up! It's not the kind of kit I'd want to build as a steady diet, but a limited run can be perversely enjoyable if done only occasionally.
@ Dave: I've already told you I like your build a lot, and it's good seeing the new batch of pics. I especially like the fourth one down in the last post (where you're looking into the cockpit from the starboard side--the instrument panel looks positively real).
@ Vance: Good looking start on what should be an interesting build. I'll be following that one with interest.
Quoted Text
Automaton, are you sure that kit would'nt be of use holding down the bottom of some trash can somewhere? You know, just in case gravity reversed itself.
Well, when I mentioned to a friend that I was building the kit, he told me that's just where his ended up!
It's not the kind of kit I'd want to build as a steady diet, but a limited run can be perversely enjoyable if done only occasionally.@ Dave: I've already told you I like your build a lot, and it's good seeing the new batch of pics. I especially like the fourth one down in the last post (where you're looking into the cockpit from the starboard side--the instrument panel looks positively real).
@ Vance: Good looking start on what should be an interesting build. I'll be following that one with interest.
Automaton
Joined: August 12, 2007
KitMaker: 153 posts
AeroScale: 139 posts
Posted: Saturday, January 09, 2010 - 01:29 PM UTC
A quick progress report:
I've been doing some research, needed some reference pics for detailing the wheelwells, etc. Good detail pics have been pretty elusive, but I did find some pretty good ones on Scalemodels.ru and the Silicon Valley Modelers site. I've done some preliminary work on boxing in the wheelwells, but they're still too "raw" to bother photographing at this stage.
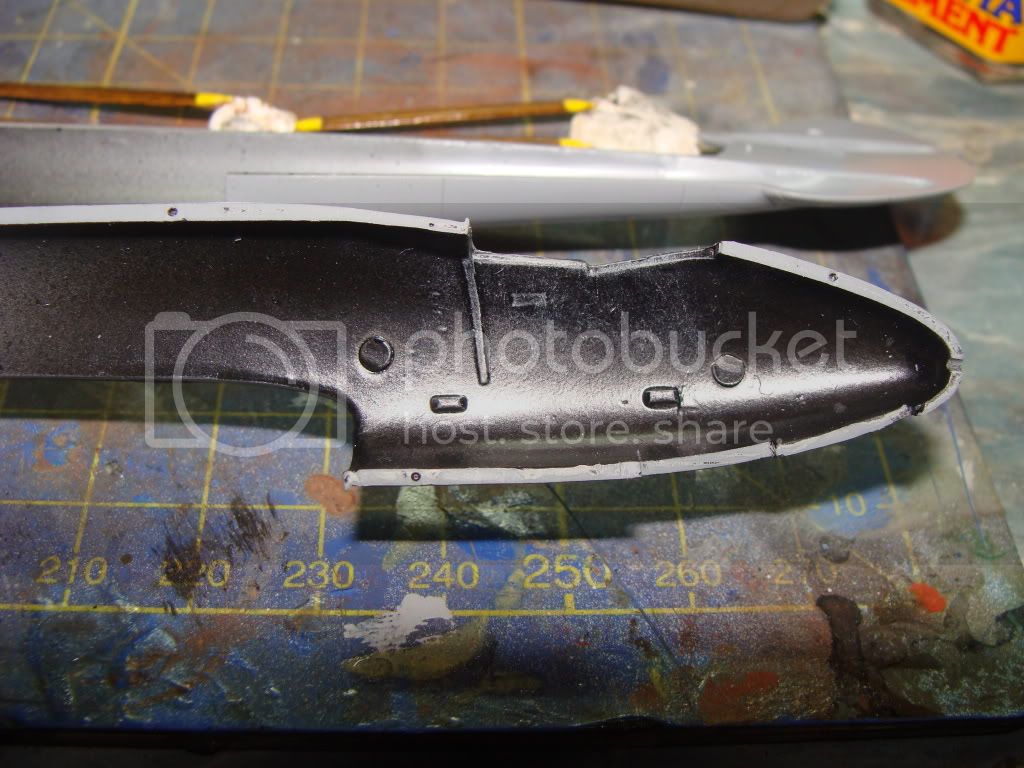
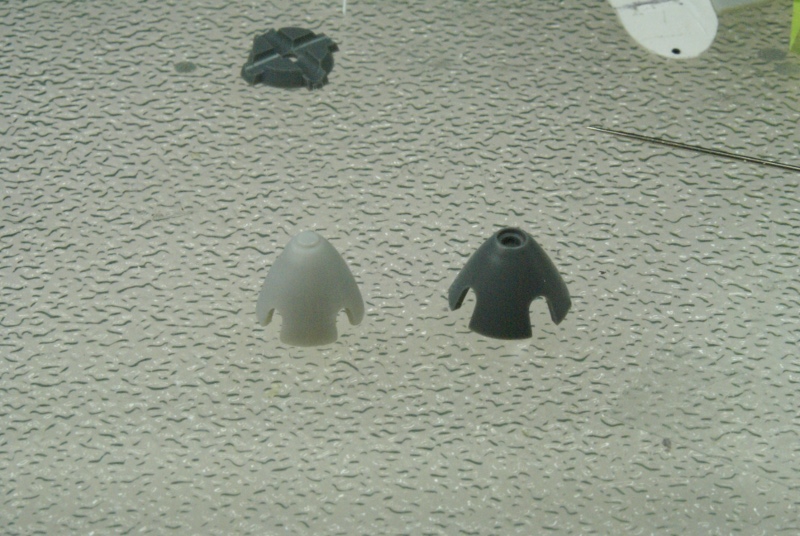
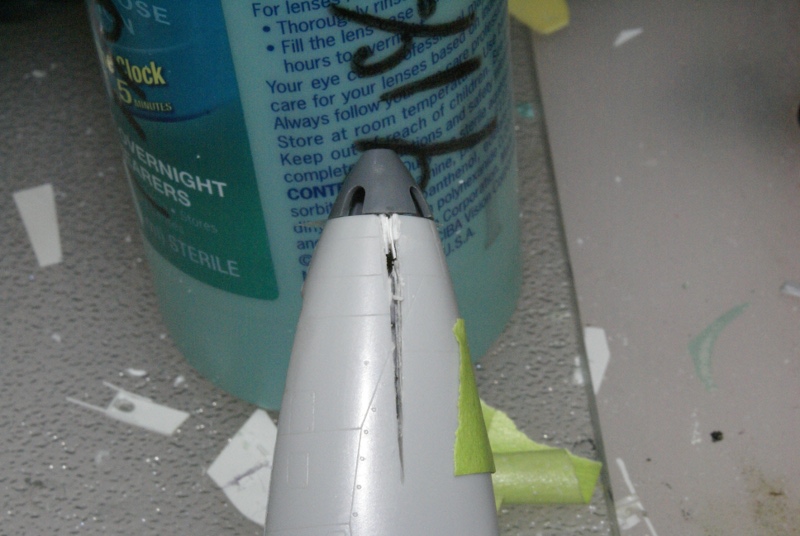
I've also looked at some online builds of P-63s by other modelers (also scarce). I read Tom Cleaver's review build on Modeling Madness, and he mentioned that the nose area and spinner of this kit are too small. After much study of photos and drawings, I'm inclined to think he's correct, so I spent my modeling time today working on that. I have an Eduard P-400 in my stash, and I'm going to use a copy of its spinner. Here's what needed to be done as preparation for that . . .
The spinner of the MPM kit compared against the one from the Eduard P-400:
Of course, the nose of the kit is smaller in diameter than the Eduard Spinner:
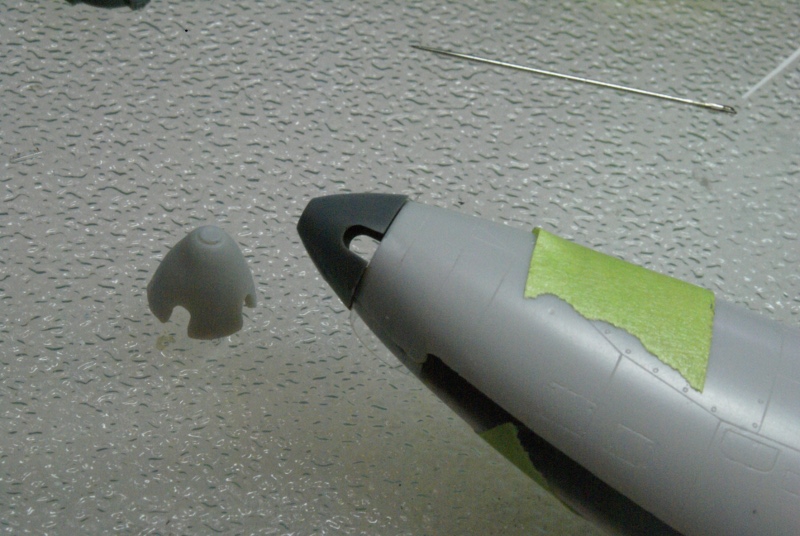
With shims, it now fits at 3 and 9 o'clock:
But this doesn't change the fit at 12 and 6 o'clock, so I made a cut on each side thusly:
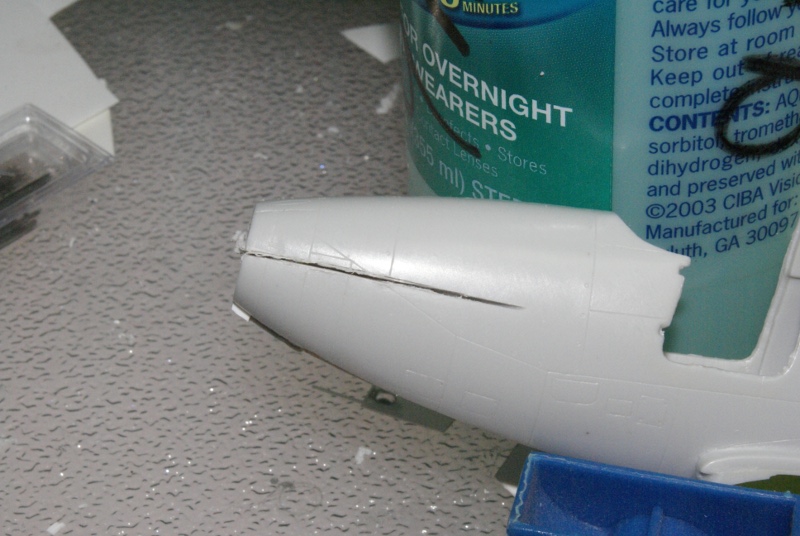
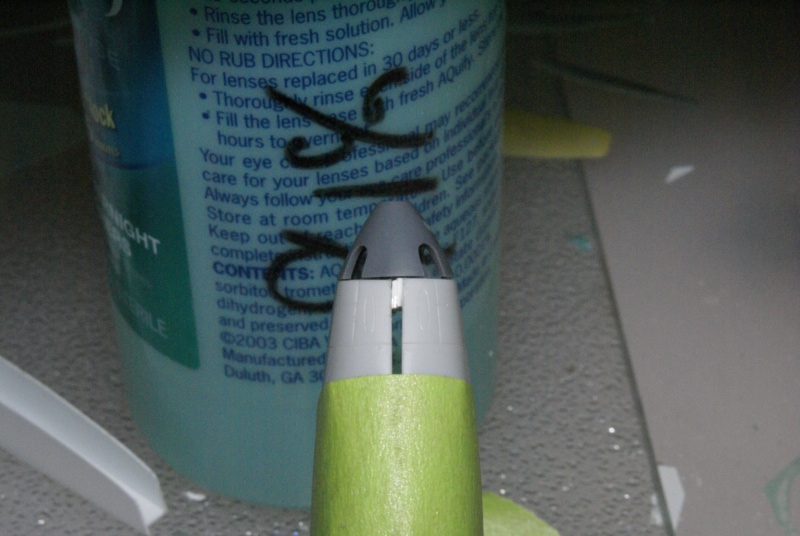
Which with the same thickness shims as top and bottom (plus one for the kerf of the saw blade) made it fit all around:
Filled the cuts, rescribed, "refastenered" with a beading tool, and polished:
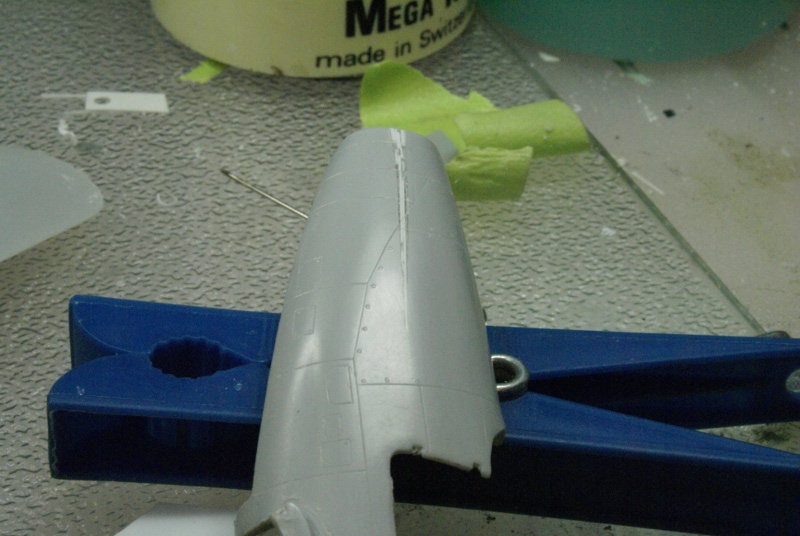
Satisfied with the fit now:
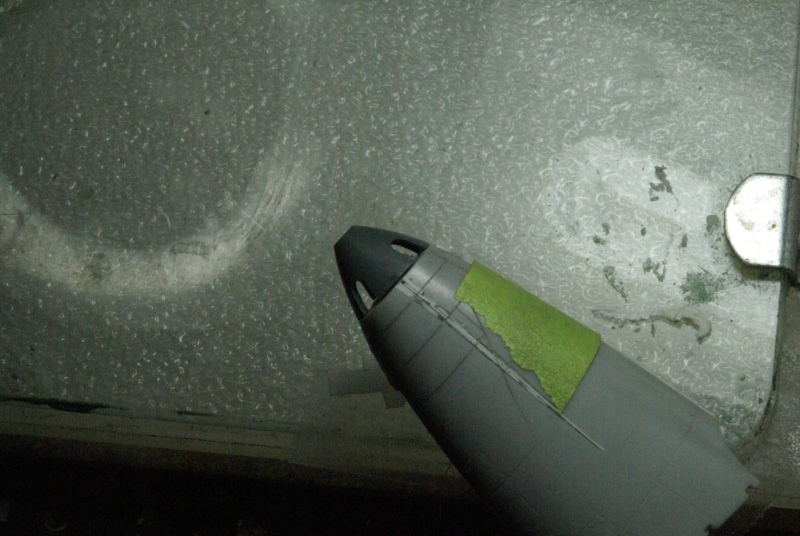
Shot a temporary coat of Tamiya gloss black to check the bodywork:
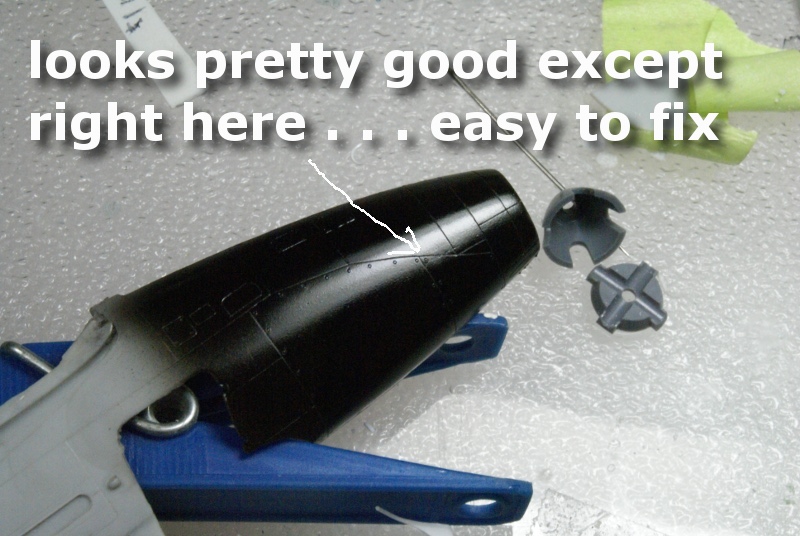
Whew!
More when I have it;
Automaton
I've been doing some research, needed some reference pics for detailing the wheelwells, etc. Good detail pics have been pretty elusive, but I did find some pretty good ones on Scalemodels.ru and the Silicon Valley Modelers site. I've done some preliminary work on boxing in the wheelwells, but they're still too "raw" to bother photographing at this stage.
I've also looked at some online builds of P-63s by other modelers (also scarce). I read Tom Cleaver's review build on Modeling Madness, and he mentioned that the nose area and spinner of this kit are too small. After much study of photos and drawings, I'm inclined to think he's correct, so I spent my modeling time today working on that. I have an Eduard P-400 in my stash, and I'm going to use a copy of its spinner. Here's what needed to be done as preparation for that . . .
The spinner of the MPM kit compared against the one from the Eduard P-400:
Of course, the nose of the kit is smaller in diameter than the Eduard Spinner:
With shims, it now fits at 3 and 9 o'clock:
But this doesn't change the fit at 12 and 6 o'clock, so I made a cut on each side thusly:
Which with the same thickness shims as top and bottom (plus one for the kerf of the saw blade) made it fit all around:
Filled the cuts, rescribed, "refastenered" with a beading tool, and polished:
Satisfied with the fit now:
Shot a temporary coat of Tamiya gloss black to check the bodywork:
Whew!
More when I have it;
Automaton

TedMamere

Joined: May 15, 2005
KitMaker: 5,653 posts
AeroScale: 4,347 posts

Posted: Wednesday, January 13, 2010 - 10:57 AM UTC
Hi Automaton,
Uuuuhh! Looks like a lot of work!
I've made a start on my entry: Czech Model's 1:48 scale Cessna UC-78 Bobcat? I will do "Uncle Tom's Cabin" (n°42-32072) a hack aircraft which belonged to the 361st FG in England...

I started the build with the wings...
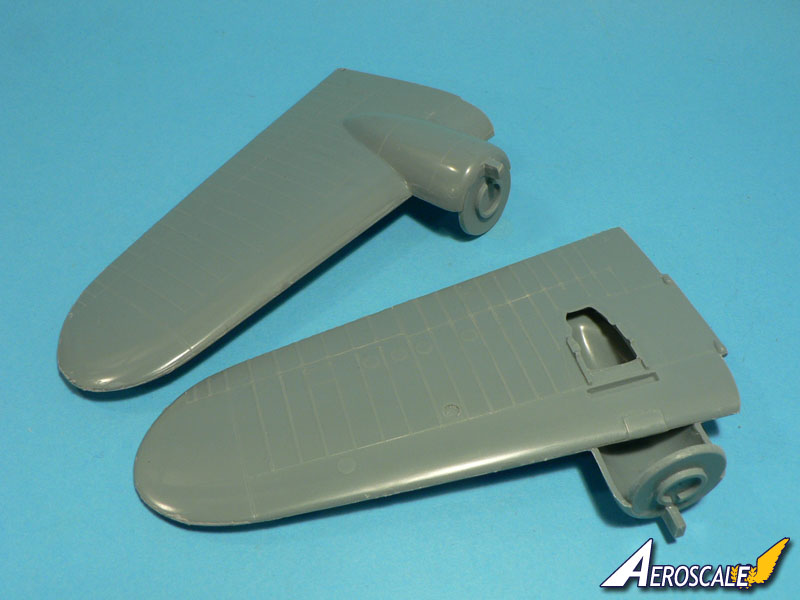
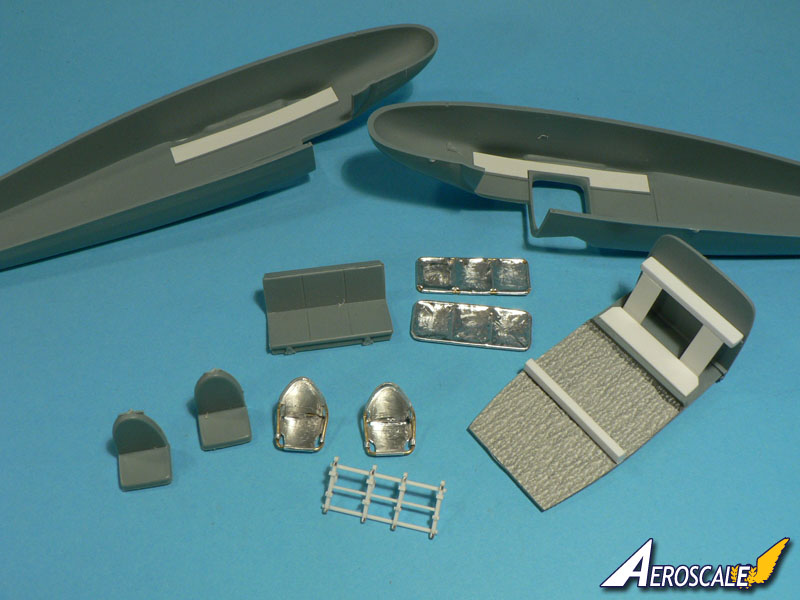
Since I want to display the cabin door open on the finished model, I did some scratchbuilding...
I made a separate blog (see here) with more infos about the build if you are interested...
Jean-Luc
Uuuuhh! Looks like a lot of work!
I've made a start on my entry: Czech Model's 1:48 scale Cessna UC-78 Bobcat? I will do "Uncle Tom's Cabin" (n°42-32072) a hack aircraft which belonged to the 361st FG in England...
I started the build with the wings...
Since I want to display the cabin door open on the finished model, I did some scratchbuilding...
I made a separate blog (see here) with more infos about the build if you are interested...
Jean-Luc

Grenadier37
Joined: June 02, 2008
KitMaker: 232 posts
AeroScale: 155 posts
Posted: Thursday, January 14, 2010 - 08:19 AM UTC
It looks great Jean-Luc. The scratch built seats are a nice touch. Can't wait to see the finished product.
Automaton
Joined: August 12, 2007
KitMaker: 153 posts
AeroScale: 139 posts
Posted: Thursday, January 14, 2010 - 04:02 PM UTC
Quoted Text
Hi Automaton,
Uuuuhh! Looks like a lot of work!
Hi Jean-Luc
Yes, it is indeed a lot of work. Remember that Fw-190v1 you built a few months ago (or are you trying to forget)?
Kinda like that I'd say. Even though I've had a heavy work schedule at my job since the the start of the year, I've been doing a lot of work on this kit, but a lot of it has been "engineering" fixes rather than actual hands-on building. I've been complaining a lot about the kit, but in truth, I've been enjoying it immensely (I knew what I was in for when I started it, and you just have to have the proper outlook). I'm hoping to have it ready (maybe a tall order) to go to BlizzardCon on February 20, though, so I hope things start to move along better.Your Cessna is looking excellent in its initial phases. VERY creative use of aluminum foil.
 I'll be following your build, Im sure it will turn out great, as your stuff always seems to.
Regards;
Automaton

TacFireGuru
Joined: December 25, 2004
KitMaker: 3,770 posts
AeroScale: 201 posts

Posted: Monday, January 18, 2010 - 09:23 AM UTC
Hey all, I'm in with this:

Started today. I'll start my build thread shortly.
Mike
Started today.
I'll start my build thread shortly.Mike

AussieReg
#007
Joined: June 09, 2009
KitMaker: 8,156 posts
AeroScale: 3,756 posts
Posted: Monday, January 18, 2010 - 04:25 PM UTC
G'day Mike, and thanks for joining up. Cool subject, can't wait to see some progress pics. I've added you to the Roll Call (on Page 4 of the thread if you want an update on who's who).
Keep on posting guys, there are some great builds going on out there !!
Cheers, D
Keep on posting guys, there are some great builds going on out there !!
Cheers, D

atoplu

Joined: August 17, 2003
KitMaker: 753 posts
AeroScale: 174 posts
Posted: Monday, January 18, 2010 - 08:22 PM UTC
Hi all,
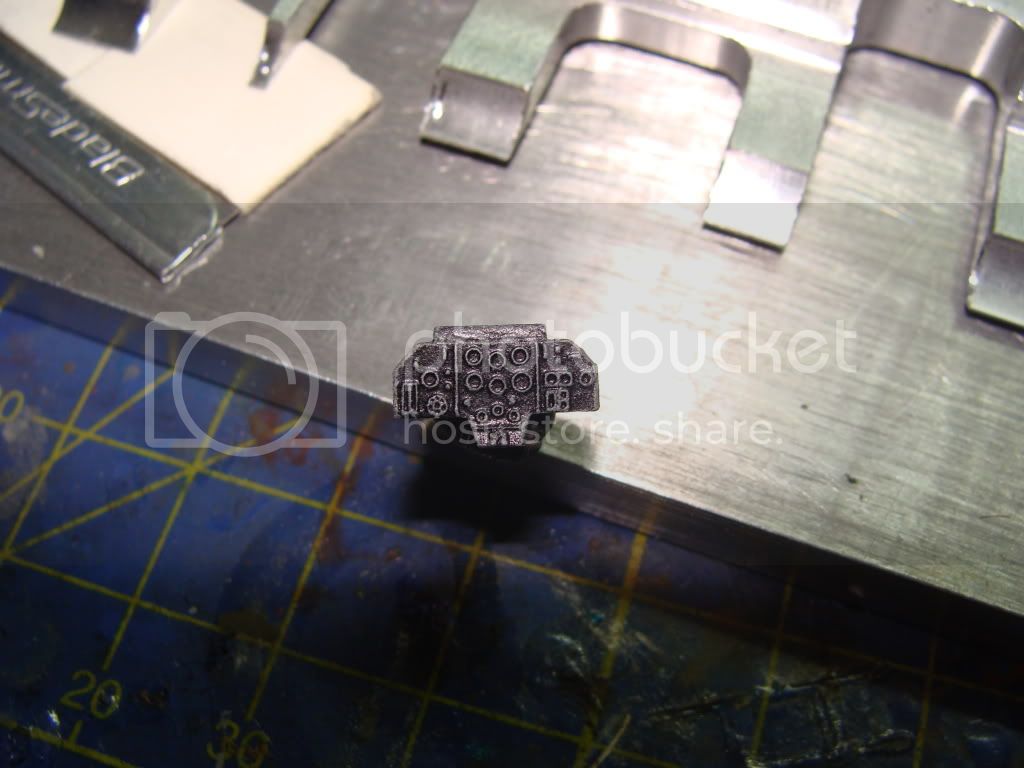
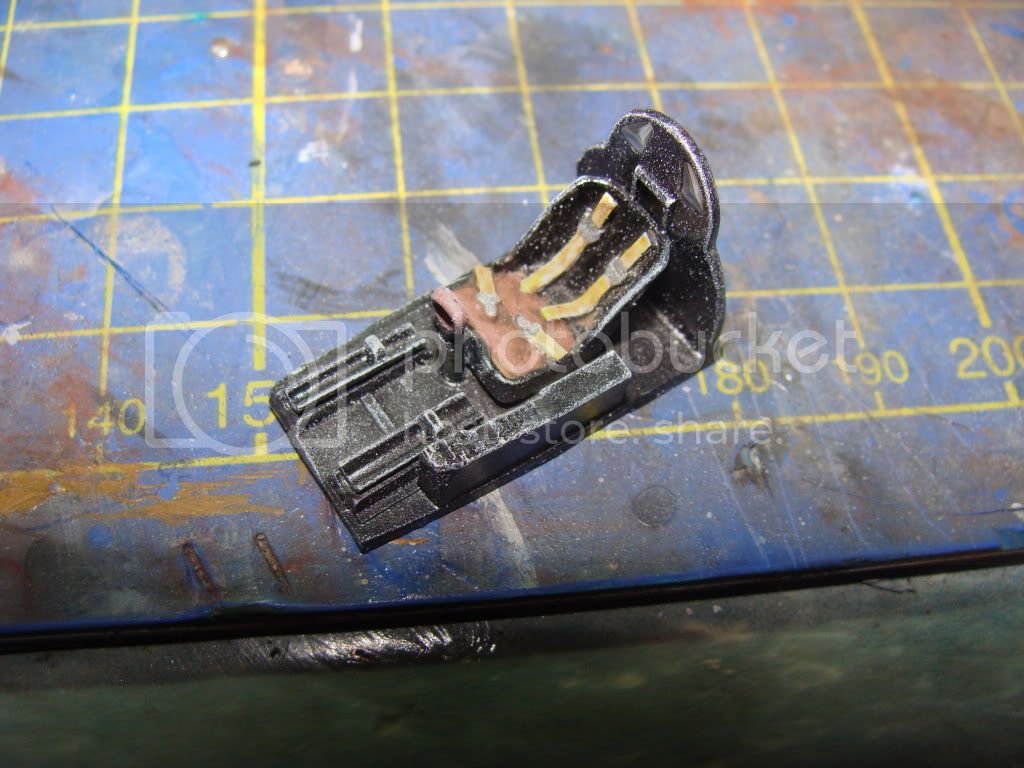
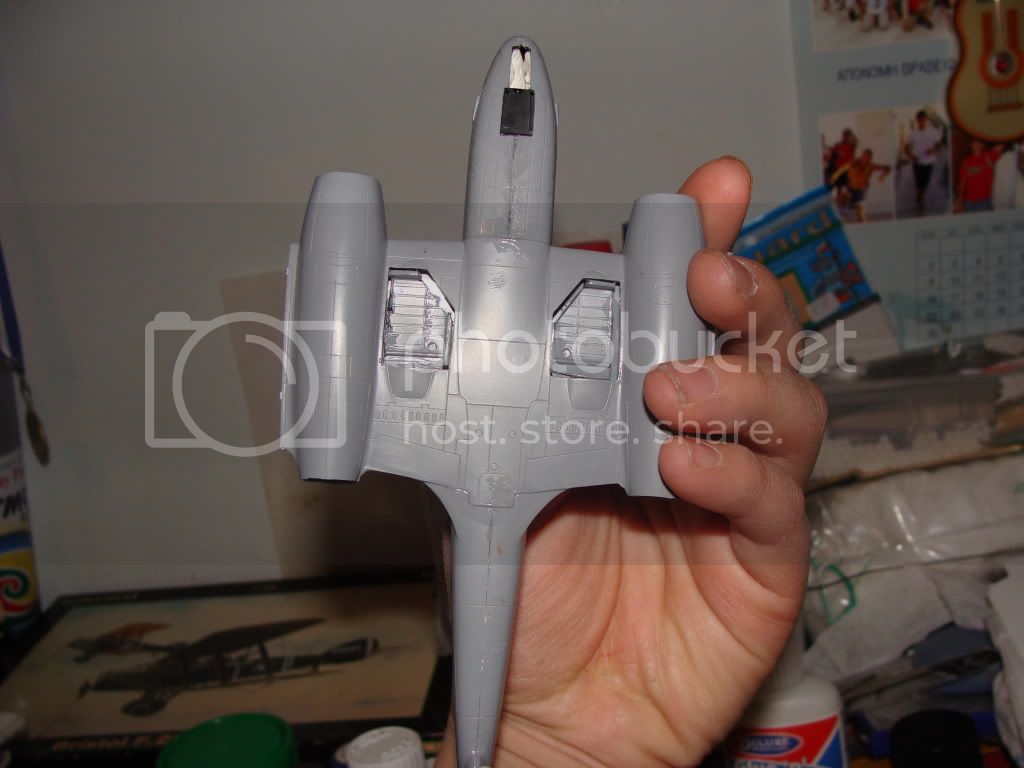
I want to do this following profile. Kit is Academy F-84 E/G in 1/72 scale.
Turkish Acroteam Milli (National)

I started assembling the cockpit after which, at the end of the day, the model looked like this:
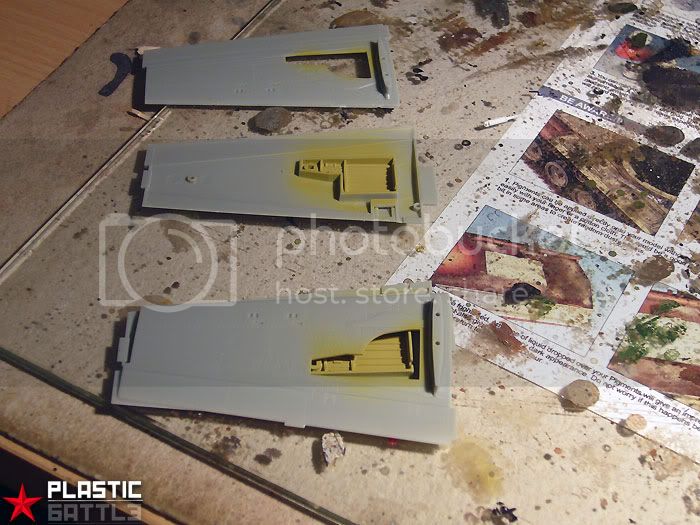

I want to do this following profile. Kit is Academy F-84 E/G in 1/72 scale.
Turkish Acroteam Milli (National)
I started assembling the cockpit after which, at the end of the day, the model looked like this:

AussieReg
#007
Joined: June 09, 2009
KitMaker: 8,156 posts
AeroScale: 3,756 posts
Posted: Monday, January 18, 2010 - 08:58 PM UTC
Hi Ayhan, thanks for joining up in this campaign. You have picked a great scheme for the Thunderjet, I'm looking forward to seeing your progress, so please post lots of pics for us. I have entered your name in ROLL CALL which is on page 4 if you want to see the range of builds going on.
And we are up to 36 enlisted now, PascalPati (Ulas) has joined us as well. Let us know what you have lined up for us Ulas, so I can complete the Roll Call for you as well.
Cheers, Damian
And we are up to 36 enlisted now, PascalPati (Ulas) has joined us as well. Let us know what you have lined up for us Ulas, so I can complete the Roll Call for you as well.
Cheers, Damian
NickZour
Joined: May 01, 2008
KitMaker: 1,437 posts
AeroScale: 1,241 posts
Posted: Tuesday, January 19, 2010 - 08:40 AM UTC
A little update

Cheers Nick
Cheers Nick
AussieReg
#007
Joined: June 09, 2009
KitMaker: 8,156 posts
AeroScale: 3,756 posts
Posted: Wednesday, January 20, 2010 - 08:08 PM UTC
Well it's true, "If you build it they will come." We are up to 38 enlisted now. Murdo has arrived with his C-47 95% complete, pics coming shortly, and Wolfsangel has enlisted as well. Welcome to Aeroscale, and welcome to our little party Charlie, what shiny goodness have you got in store for us ??
Nick, coming together very nicely !
Keep the progress posts coming in guys, our gallery will be grand come April 30 !!
Cheers, D
Nick, coming together very nicely !
Keep the progress posts coming in guys, our gallery will be grand come April 30 !!
Cheers, D
NickZour
Joined: May 01, 2008
KitMaker: 1,437 posts
AeroScale: 1,241 posts
Posted: Thursday, January 21, 2010 - 01:33 AM UTC
Quoted Text
Nick, coming together very nicely !
Keep the progress posts coming in guys, our gallery will be grand come April 30 !!
Thank you very much
Cheers Nick

jaypee

Joined: February 07, 2008
KitMaker: 1,699 posts
AeroScale: 1,384 posts

Posted: Thursday, January 21, 2010 - 10:07 PM UTC
As one of the first posters on this thread way back when Nito was running the show. I feel I should really finish up my little shorts sc-1 in 1/144.
So, last night as the glue was drying on the Sunderland's wings I freed the tiny undercarriage from the resin casting blocks. This was a very delicate operation. Feeling resin flex is not a nice feeling. Esp as this little kit is the most expensive model kit I've ever bought, £15 for a tiny A/c.
I feel a little daft spending that kind of money on this as even I could probably scratchbuild this. But it is the subject that is important to me. Me my dad and my wee bro used to go at least once a month to the Ulster Transport Museum in Whitla St to look at the trains, cars and planes, and I feel in love with the SC-1. She is not pretty, but very high maintenance, and pretty useless.
Sounds like all my old girlfriends
A little rub'n'buff silver leaf applied to a few panels and I'll leave it a day or two before polishing.
The canopy is cast in really thick resin, I'll try dipping it in future. But will also try to smash mould a replacement.
No pics yet, there was not enough light in the room to take a decent pic in 1/144 which means it was probably too dark to be working in 1/144. My eyes!!
Thanks for the extension Damo. I really aught to be ashamed of myself.

atoplu
Joined: August 17, 2003
KitMaker: 753 posts
AeroScale: 174 posts
Posted: Saturday, January 23, 2010 - 01:03 AM UTC
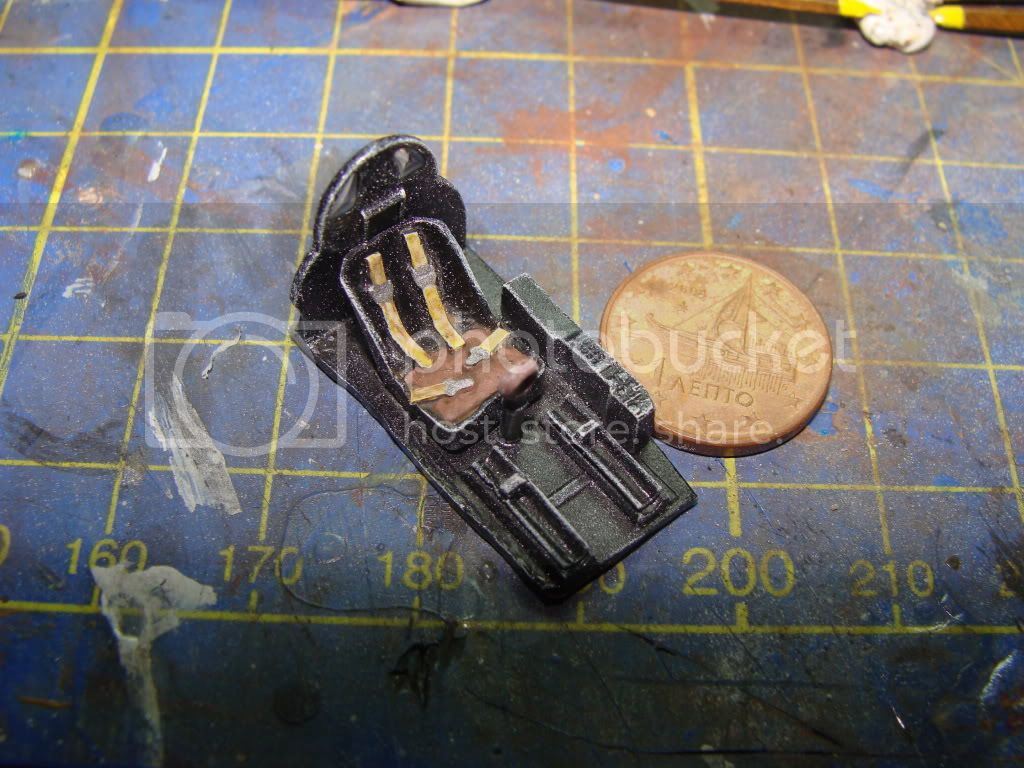
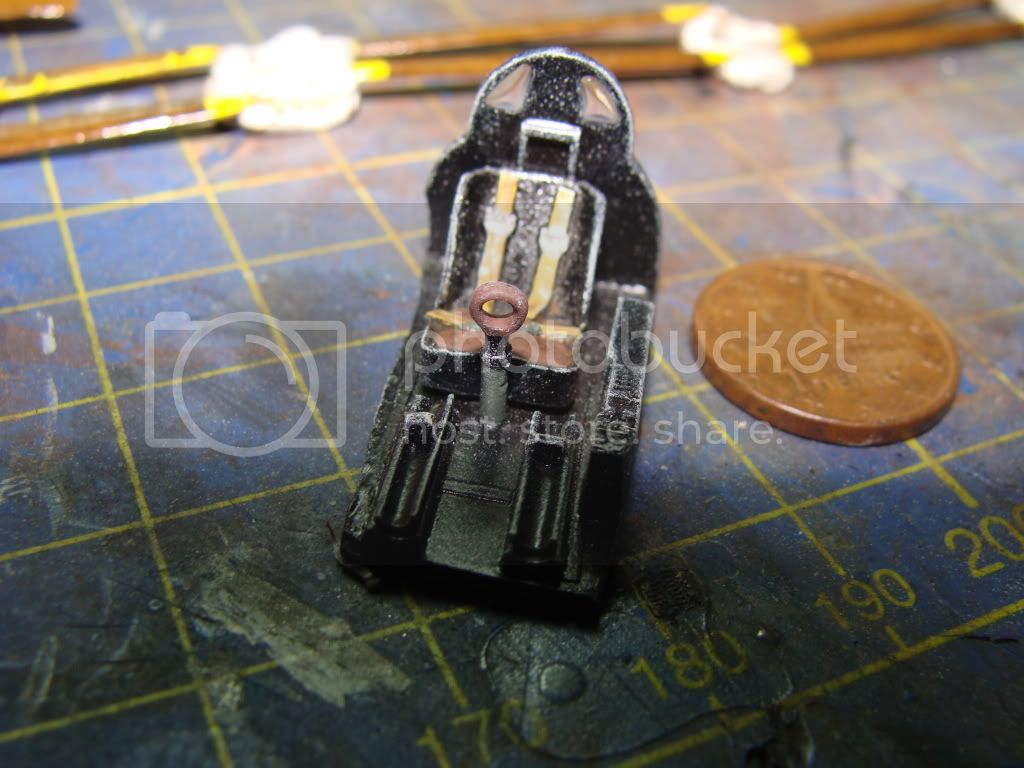
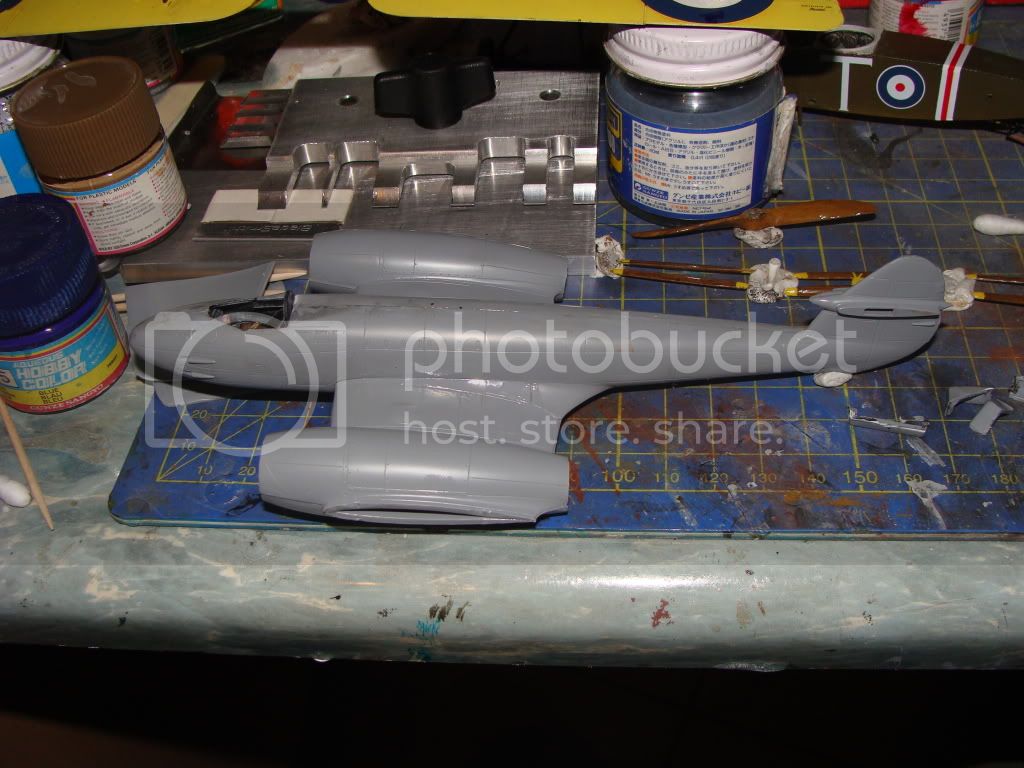
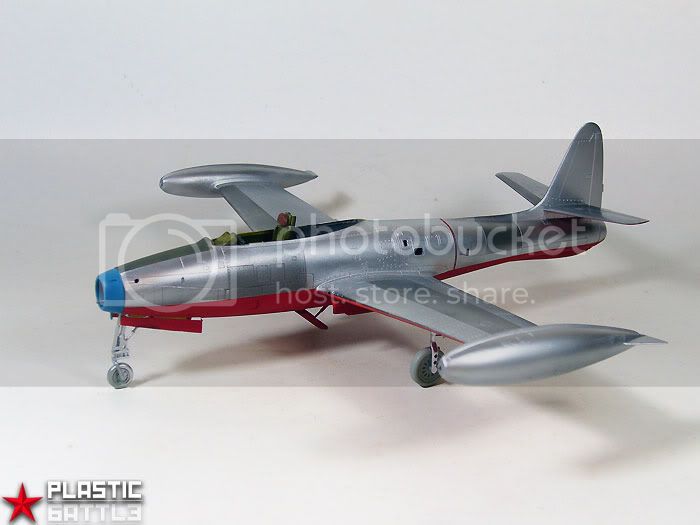
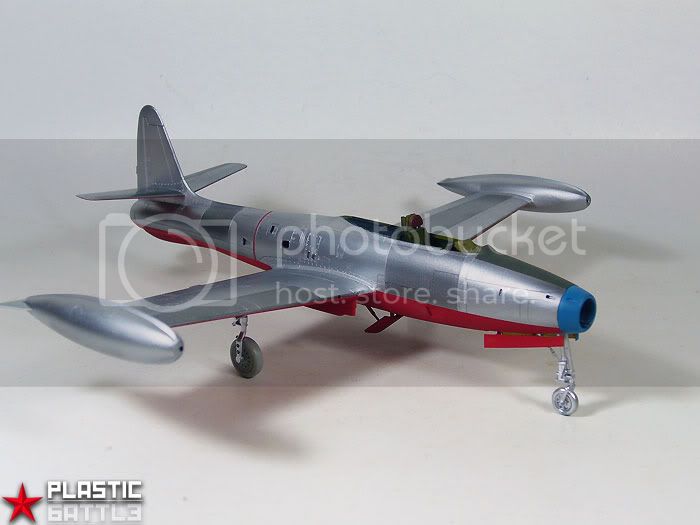
Some progress pictures.
Automaton
Joined: August 12, 2007
KitMaker: 153 posts
AeroScale: 139 posts
Posted: Saturday, January 23, 2010 - 04:45 PM UTC
That looks like it's going to be outstanding, Ayhan. Your metal finish is very convincing, and you've chosen a very attractive scheme.
Wish I built as quickly as you seem to. Unfortunately, I've been sidetracked the last few days by "real life" stuff, and my build hasn't progressed as much as I would like--hoping to have enough done to post an update late tomorrow, though.
Regards;
Automaton
Wish I built as quickly as you seem to. Unfortunately, I've been sidetracked the last few days by "real life" stuff, and my build hasn't progressed as much as I would like--hoping to have enough done to post an update late tomorrow, though.
Regards;
Automaton

Siderius
Joined: September 20, 2005
KitMaker: 1,747 posts
AeroScale: 1,673 posts
Posted: Saturday, January 23, 2010 - 05:02 PM UTC
Here is a picture of my 1/72 scale Shoki from Hasegawa. I hope to have some better ones soon, but am having problem uploading pictures onto Aeroscale. Enjoy. Russell


AussieReg
#007
Joined: June 09, 2009
KitMaker: 8,156 posts
AeroScale: 3,756 posts
Posted: Sunday, January 24, 2010 - 11:17 AM UTC
Nice little Shoki there Russell, what Aluminium did you use, it looks quite dark in that pic ??
I've marked you as FINISHED in the ROLL CALL. We have 6 FINISHED builds now, and EmperoR has had to withdraw due to other commitments. I'm pleased to have been able to help breathe some new life into this Campaign with all of your help.
Cheers, D
I've marked you as FINISHED in the ROLL CALL. We have 6 FINISHED builds now, and EmperoR has had to withdraw due to other commitments. I'm pleased to have been able to help breathe some new life into this Campaign with all of your help.
Cheers, D
Siderius
Joined: September 20, 2005
KitMaker: 1,747 posts
AeroScale: 1,673 posts
Posted: Sunday, January 24, 2010 - 12:08 PM UTC
Thanks Damian, I used Model Master Acryl. The lighting is the problem. I'll post some better pics in a bit. Thanks again, Russell.
 |

WEB HOSTING BY


Copyright ©2021 AeroScale and Kitmaker Network, a subsidiary of Silver Star Enterprises
All Rights Reserved. Please read our Conditions of Use and Privacy Policy.
All Rights Reserved. Please read our Conditions of Use and Privacy Policy.