Air Campaigns
Want to start or join a group build? This is where to start.
P51 campaign proposal for 2010
lampie
#029
_VISITCOMMUNITY
England - East Midlands, United Kingdom
Joined: December 23, 2005
KitMaker: 6,249 posts
AeroScale: 3,270 posts
Posted: Thursday, December 09, 2010 - 07:26 AM UTC
Well I finally got around to finishing the cockpit and only just remembered to take a couple of photos before closing the fusalage up.


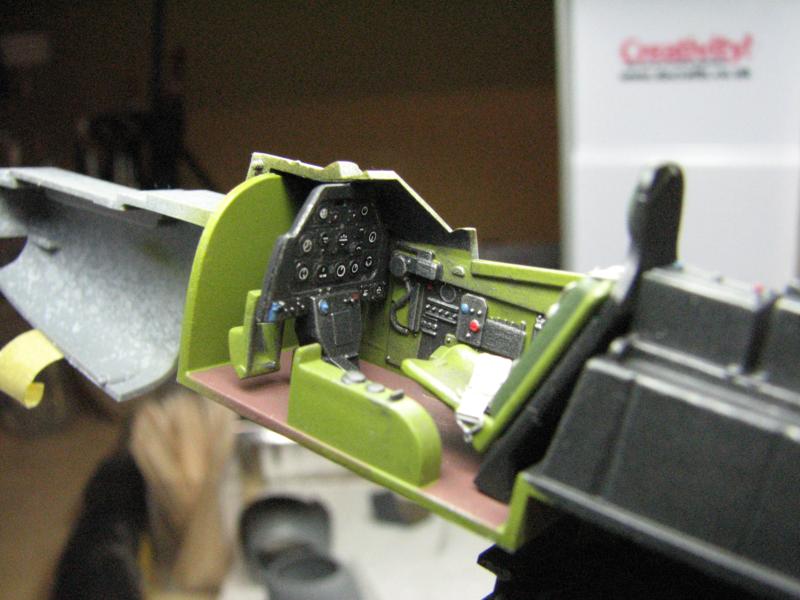
Still undecided what particular paint scheme this is going to end up wearing so watch this space.

Nige
Siderius
_VISITCOMMUNITY
Tennessee, United States
Joined: September 20, 2005
KitMaker: 1,747 posts
AeroScale: 1,673 posts
Posted: Thursday, December 09, 2010 - 11:41 AM UTC
Terri, you did very well with the decals from Academy. I know they can be frustrating. How new is that kit you built? Curious, because the Cartograph decals I have found in some of the newer Academy kits seem alright. Good job with a tough product. Russell
Bigrip74
_VISITCOMMUNITY
Texas, United States
Joined: February 22, 2008
KitMaker: 5,026 posts
AeroScale: 2,811 posts
Posted: Thursday, December 09, 2010 - 12:46 PM UTC
Good looking office Nige.

Bob
thegirl
_VISITCOMMUNITY
Alberta, Canada
Joined: January 19, 2008
KitMaker: 6,743 posts
AeroScale: 6,151 posts
Posted: Friday, December 10, 2010 - 02:05 PM UTC

Quoted Text

Terri, you did very well with the decals from Academy. I know they can be frustrating. How new is that kit you built? Curious, because the Cartograph decals I have found in some of the newer Academy kits seem alright. Good job with a tough product. Russell


Thanks Russell ! Just have to place the decals on the under side and finish off the canopy and she is done !

Looking good Nigel , looking forward to seeing what markings you come up with
Siderius
_VISITCOMMUNITY
Tennessee, United States
Joined: September 20, 2005
KitMaker: 1,747 posts
AeroScale: 1,673 posts
Posted: Friday, December 10, 2010 - 02:41 PM UTC
I have a question, I am not sure, is Terri running this campaign? I'll put it out there. I am building a 1/32 scale P-51D for a friend for a Christmas present. It isn't my kit but I thought I would enter it into this campaign for a ribbon if that would be permitted? Thought I would ask. Thanks. Russell
AussieReg
Staff MemberAssociate Editor
AUTOMODELER
#007
_VISITCOMMUNITY
Victoria, Australia
Joined: June 09, 2009
KitMaker: 8,156 posts
AeroScale: 3,756 posts
Posted: Saturday, December 11, 2010 - 11:14 PM UTC
Hi all, some great builds going on here. I'm still plugging away with the F-82, still dealing with poor fit and awkward construction details. Here are some pics of the fit of the forward fuselage and nose sections.


I have a cunning plan to get the nose section to fit square and secure. I will remove the "locating ring" from the nose section (as I have in the right hand nose piece in the pic below) and glue a thin section of flat card, the same dimensions as the nose section, on to the front of the main fuselage.


Fingers crossed, I'll let you know how it goes.

Talk about trying to make a silk purse from a sow's ear ! It's a shame about the fit issues, the parts have some really nice recessed panel line and rivet details.

Cheers, D
bdanie6
_VISITCOMMUNITY
New Hampshire, United States
Joined: November 09, 2008
KitMaker: 615 posts
AeroScale: 459 posts
Posted: Sunday, December 12, 2010 - 12:36 AM UTC
Damian, looks like you are going to make something out of that beast! It was at about this point that mine became abstract wall art (for about 1 second ) I wish you luck on the rest of the build my friend
AussieReg
Staff MemberAssociate Editor
AUTOMODELER
#007
_VISITCOMMUNITY
Victoria, Australia
Joined: June 09, 2009
KitMaker: 8,156 posts
AeroScale: 3,756 posts
Posted: Sunday, December 12, 2010 - 01:24 AM UTC

Quoted Text

Damian, looks like you are going to make something out of that beast! It was at about this point that mine became abstract wall art (for about 1 second ) I wish you luck on the rest of the build my friend


Thanks Bruce. If nothing else I am using this build to improve my skills at modifying and improvising, and it will be a test-bed for my first attempt at Alclad. After that my 2 sons (8 and 5) can have it, I anticipate it will last about 2 days !!
Bigrip74
_VISITCOMMUNITY
Texas, United States
Joined: February 22, 2008
KitMaker: 5,026 posts
AeroScale: 2,811 posts
Posted: Sunday, December 12, 2010 - 06:13 AM UTC
Ouch! Sorry for the pain that you are going through Damian, but adversity makes us better builders. I think that I heard that somewhere well I am learning from you posts.


bob
thegirl
_VISITCOMMUNITY
Alberta, Canada
Joined: January 19, 2008
KitMaker: 6,743 posts
AeroScale: 6,151 posts
Posted: Sunday, December 12, 2010 - 08:50 AM UTC

Quoted Text

I have a question, I am not sure, is Terri running this campaign? I'll put it out there. I am building a 1/32 scale P-51D for a friend for a Christmas present. It isn't my kit but I thought I would enter it into this campaign for a ribbon if that would be permitted? Thought I would ask. Thanks. Russell


Yes Russell I'm running the Canpaign .

I don't have a problem with you entering the GB , but pic's have to be posted , not just of the finished build . So if if you have some in progress pic's you are more then welcome to join .
thegirl
_VISITCOMMUNITY
Alberta, Canada
Joined: January 19, 2008
KitMaker: 6,743 posts
AeroScale: 6,151 posts
Posted: Sunday, December 12, 2010 - 08:56 AM UTC

Quoted Text

Hi all, some great builds going on here. I'm still plugging away with the F-82, still dealing with poor fit and awkward construction details. Here are some pics of the fit of the forward fuselage and nose sections.


I have a cunning plan to get the nose section to fit square and secure. I will remove the "locating ring" from the nose section (as I have in the right hand nose piece in the pic below) and glue a thin section of flat card, the same dimensions as the nose section, on to the front of the main fuselage.


Fingers crossed, I'll let you know how it goes.

Talk about trying to make a silk purse from a sow's ear ! It's a shame about the fit issues, the parts have some really nice recessed panel line and rivet details.

Cheers, D


Wow D , you do have your work cut out for you here on this bird and by the look of things you have a good handle on her .
mtnflyer
_VISITCOMMUNITY
Alberta, Canada
Joined: March 08, 2009
KitMaker: 394 posts
AeroScale: 360 posts
Posted: Sunday, December 12, 2010 - 10:32 AM UTC
Damien, I always enjoy seeing your builds. Seems you tackle what I would shy away from. Well done!!!

I was able to do a little more. Something I've had trouble with is camo patterns. Since I cannot do them freehand, I suppose there's no easy way. The following is how I chose to do my P-51.

First, I rolled some Handi-Tac into long, sausage like strips. These, I laid down in a pattern based on my subject drawings.


Then I took some tracing paper sheets and set them on the Tac. With a new #11 blade, I could score the paper and tear it away on top of the tac pattern. Finally, I had the model masked in an acceptable way.


I sprayed on the Tamiya RAF dark green, and removed the Handi-Tac.


It all worked out fairly well, me thinks. The artists drawing I used shows larger ocean grey patches than the dark green.

On it goes, but, I would like to know from those more learned than I if there is an easier way to do camo patterns.

Thanks. Guy
AussieReg
Staff MemberAssociate Editor
AUTOMODELER
#007
_VISITCOMMUNITY
Victoria, Australia
Joined: June 09, 2009
KitMaker: 8,156 posts
AeroScale: 3,756 posts
Posted: Sunday, December 12, 2010 - 10:43 AM UTC
Your camo looks great Guy, and I don't think there's any easier way to get those sharp demarkations. I do a lot of my camo freehand, but it always gives a soft edge. If I want a sharp edge I pretty much do what you have done.

Good job
Bigrip74
_VISITCOMMUNITY
Texas, United States
Joined: February 22, 2008
KitMaker: 5,026 posts
AeroScale: 2,811 posts
Posted: Sunday, December 12, 2010 - 10:51 AM UTC
Guy, thanks for the process in photos it helps me the illiterate of the inner mind to see how it shoud be done. BTW your 51 is looking good.

Bob
Siderius
_VISITCOMMUNITY
Tennessee, United States
Joined: September 20, 2005
KitMaker: 1,747 posts
AeroScale: 1,673 posts
Posted: Sunday, December 12, 2010 - 11:34 AM UTC
Hi all. I haven't built a 1/32 scale kit in three years or so. Normally I stay with 1/72 scale, however, this is a surprise build for a friend. Thought I would post some pictures in progress of the Hasegawa P-51D. I plan to decal it in 325 fighter group markings, the checkertail clan! Enjoy. Russell


warreni
_VISITCOMMUNITY
South Australia, Australia
Joined: August 14, 2007
KitMaker: 5,926 posts
AeroScale: 2,201 posts
Posted: Sunday, December 12, 2010 - 07:41 PM UTC
There is an even easier way to get good, sharp edge camo, just blow up the plans until they are the same size as the model, crop the images to exactly the right size, print them out, cut them up and there you go! Perfect camo every time! Just make sure you hold the paper mask down close to the surface you are spraying.. For soft edges, just raise the mask away from the surface a bit.. Experiment, it is fun!
Naseby
_VISITCOMMUNITY
Slovakia
Joined: October 15, 2010
KitMaker: 825 posts
AeroScale: 476 posts
Posted: Sunday, December 12, 2010 - 07:44 PM UTC
Hello!

I see there is a lot of activity in these days and its preatty cool to watch you all making good progress.
@ Damian, I see you are battling whit a real pig, but please hang in there, I realy look forward to see the end result.
@ Russel the closed wheelbays are a nice touch

I made a little progress myself, added decals and prepared other things. I also somehow managed to knock of the radio mast, which I must repair.


AussieReg
Staff MemberAssociate Editor
AUTOMODELER
#007
_VISITCOMMUNITY
Victoria, Australia
Joined: June 09, 2009
KitMaker: 8,156 posts
AeroScale: 3,756 posts
Posted: Sunday, December 12, 2010 - 11:37 PM UTC
Naseby your P-51 is looking great, you have done a really good job of the paint and the decals seem to have settled well.

Well I had a crack at fitting the noses on my dog today. They are still YUCK, but I think I might just be able to get away with it !


Cheers, D
mtnflyer
_VISITCOMMUNITY
Alberta, Canada
Joined: March 08, 2009
KitMaker: 394 posts
AeroScale: 360 posts
Posted: Monday, December 13, 2010 - 02:02 AM UTC
Damian- See, that,s what I was saying earlier. Your doing a wonderful job with something I would totally shy away from.

Russel - Your 32nd scale 51 looks great. I wonder if your going to try shading some aluminum panels a little darker and lighter.

Naseby - Your 51 looks splendid. I'm thinking of trying that post shading idea on mine. Perhaps Tamiya Smoke would be OK. Or do you think such an experiment would ruin a camo scheme?
Bigrip74
_VISITCOMMUNITY
Texas, United States
Joined: February 22, 2008
KitMaker: 5,026 posts
AeroScale: 2,811 posts
Posted: Monday, December 13, 2010 - 04:55 AM UTC
@ D: I have been following this build and I acctually learned some new tips to help me on my vac builds, thanks.

Bob
Naseby
_VISITCOMMUNITY
Slovakia
Joined: October 15, 2010
KitMaker: 825 posts
AeroScale: 476 posts
Posted: Monday, December 13, 2010 - 05:02 AM UTC
@Damian & Guy: Thank You for your comments, Im happy you like it. Guy as for the postshading You should try it. It brings your already nice work a step further. With this RAF camo I would try dark gray for panel lines and bright gray or white gray for the middle of panels. But very thinned. I usualy thin the colour so much, that it takes hours of spraying before I see any change at all! I once also tryed to make this RAF cam without shades but with distinctive colour variations for each pannel. It was realy good but I blow it with horrible silver dotts, see for your selves
thegirl
_VISITCOMMUNITY
Alberta, Canada
Joined: January 19, 2008
KitMaker: 6,743 posts
AeroScale: 6,151 posts
Posted: Monday, December 13, 2010 - 05:10 AM UTC
Guy , nice job on the camo , she is coming together very lovely indeed

Russell , looking very sweet so far , nice touch with the closed landing gear doors . Not very many modellers do this on there builds . After landing the lines would bleed out closing the doors until start up was done for another mission .

Naseby , very nice weathering and I look forward to seeing this one finished .

I only have to fix the canopy in place and my build will be done with pic's to follow by end of the day .


All you guy's are doing such fantastic work on your builds . Most impressive
NickZour
_VISITCOMMUNITY
Attica, Greece / Ελλάδα
Joined: May 01, 2008
KitMaker: 1,437 posts
AeroScale: 1,241 posts
Posted: Monday, December 13, 2010 - 06:51 AM UTC
That's a fantastic Mustang Mr. Naseby
I am in the same stage as you but YOU have forgot to add the prop' decals (8 in number)

B.t.w. it's BY FAR SUPERIOR to mine but anyway


Cheers Nick
thegirl
_VISITCOMMUNITY
Alberta, Canada
Joined: January 19, 2008
KitMaker: 6,743 posts
AeroScale: 6,151 posts
Posted: Monday, December 13, 2010 - 07:23 AM UTC
Well stick a fork in her , she is done !

Over all not a bad kit with a few minor fit issues , but easily fixed . Will never use their decals ever again . Rather use Rodens a Lot less head aches in the end . Weathering was keep on the light side using pastels . Some of the decals I didn't use at all , little blops of ink


Bigrip74
_VISITCOMMUNITY
Texas, United States
Joined: February 22, 2008
KitMaker: 5,026 posts
AeroScale: 2,811 posts
Posted: Monday, December 13, 2010 - 07:40 AM UTC
Terri, nicely done and in my favorite color. OD has always done something to me.

Bob