OFFICIAL: Grumman Campaign

#226
British Columbia, Canada
Joined: February 20, 2012
KitMaker: 1,909 posts
AeroScale: 508 posts
Posted: Tuesday, October 28, 2014 - 07:30 PM UTC
Anything without guns is a target!
27 completed campaigns and counting :)
Western Australia, Australia
Joined: December 31, 2013
KitMaker: 338 posts
AeroScale: 190 posts
Posted: Tuesday, October 28, 2014 - 10:03 PM UTC
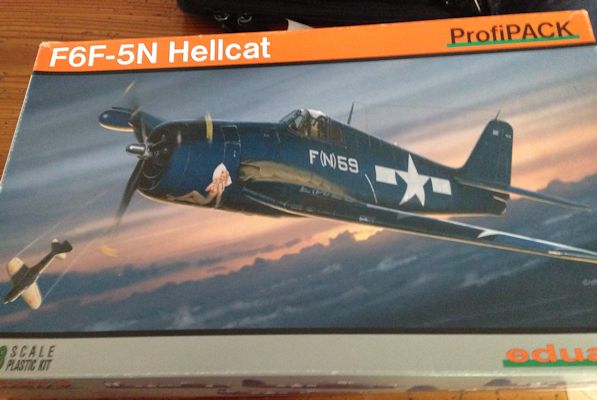
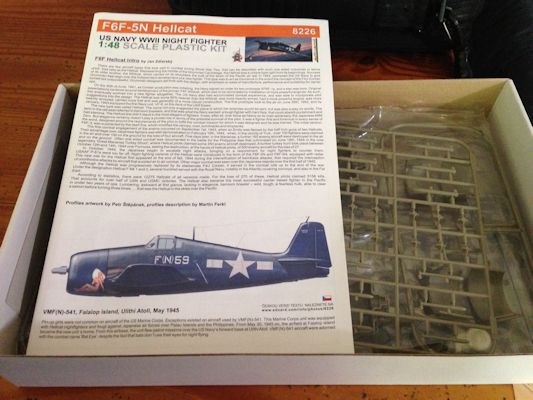
Restarting this with Eduards F6F-5N
In the Hangar:
- 1/48 Hasegawa P-38J/L
In the Workshop
-1/35 Tamiya Mobelwagen
Joel_W
 Associate Editor
New York, United States
Joined: December 04, 2010
KitMaker: 11,666 posts
AeroScale: 7,410 posts
Posted: Wednesday, October 29, 2014 - 02:10 AM UTC
Rob,
Your cockpit is coming along quite nicely. I really like your idea of adding mass and shape to PE parts as needed, as it's one of my pet peeves with the flatness of PE. In a lot of cases it just doesn't work. I've been using kit and spare plastic parts where I felt that it would workout better. Your method adds another option that I already see plenty of uses for.
Joel
On my Workbench:
Monogram 1/24 scale 427 Shelby Cobra
Just Completed:
Beemax 1/24 scale BMW M3 E30 1992 Evolution II
Joel_W
Associate Editor New York, United States
Joined: December 04, 2010
KitMaker: 11,666 posts
AeroScale: 7,410 posts
Posted: Wednesday, October 29, 2014 - 02:12 AM UTC
Stephan,
Excellent choice. It's a great kit with a lot of detail. Looking forward to your build.
Joel
On my Workbench:
Monogram 1/24 scale 427 Shelby Cobra
Just Completed:
Beemax 1/24 scale BMW M3 E30 1992 Evolution II
#226
British Columbia, Canada
Joined: February 20, 2012
KitMaker: 1,909 posts
AeroScale: 508 posts
Posted: Wednesday, October 29, 2014 - 06:10 PM UTC
Quoted Text
Rob,
Your cockpit is coming along quite nicely. I really like your idea of adding mass and shape to PE parts as needed, as it's one of my pet peeves with the flatness of PE. In a lot of cases it just doesn't work. I've been using kit and spare plastic parts where I felt that it would workout better. Your method adds another option that I already see plenty of uses for.
Joel
Thanks Joel!
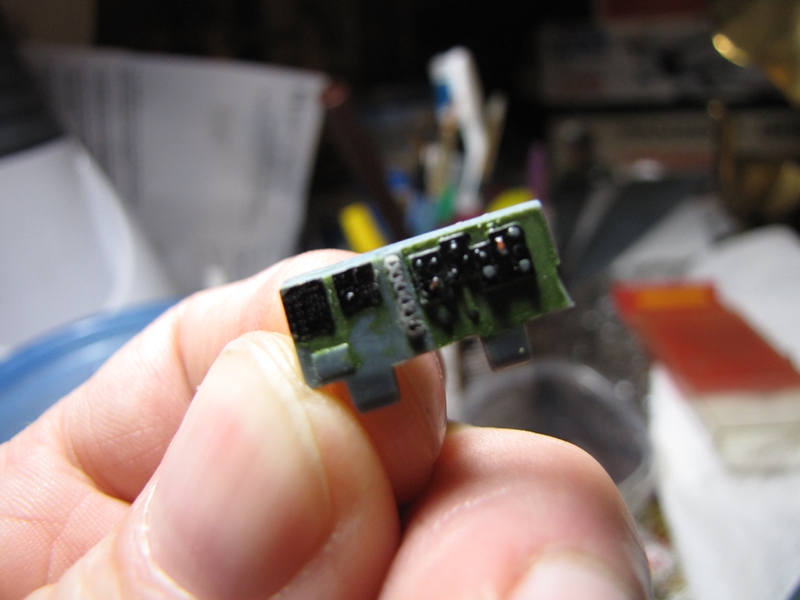
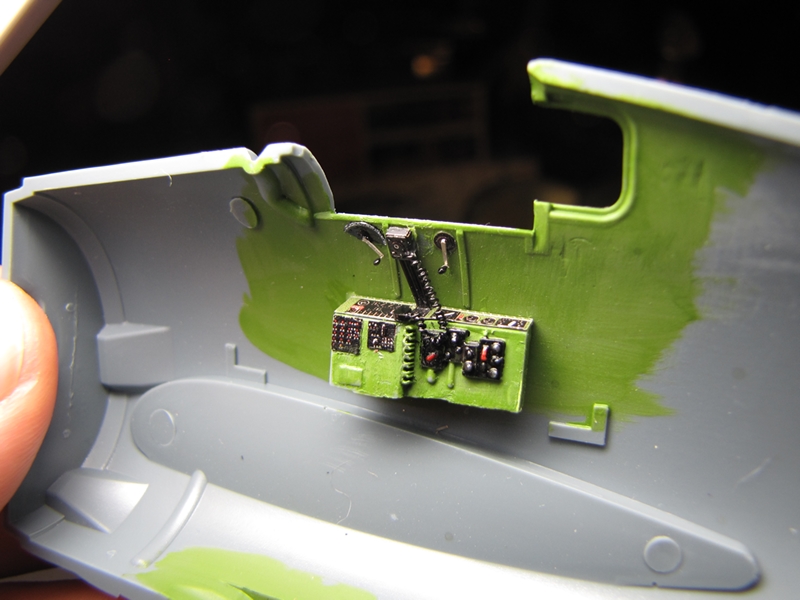
I agree, I like using PE but sometimes you want something in between the kit part and the PE part. I have tried CA and Future before to varying degrees of success but I think this is the best so far.

I do want to try the new thinner Gator Grip as I think that may be easier to work with.
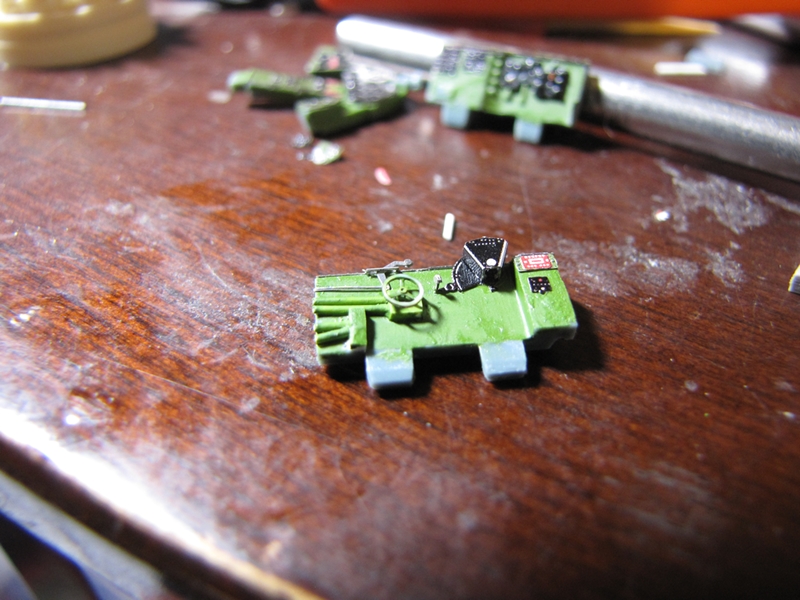
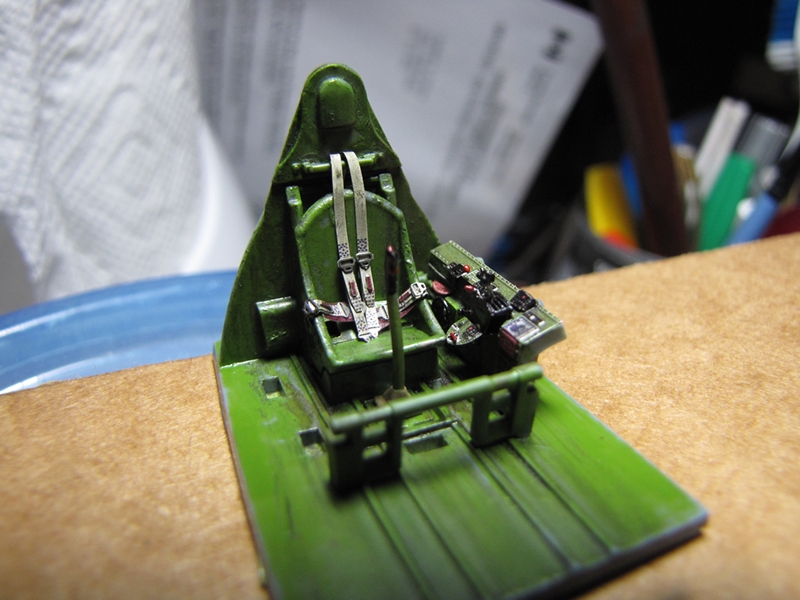
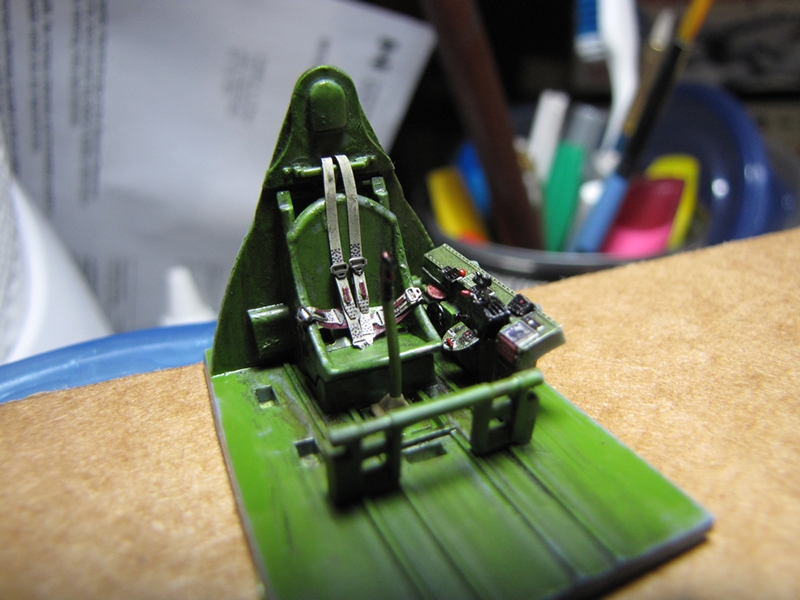
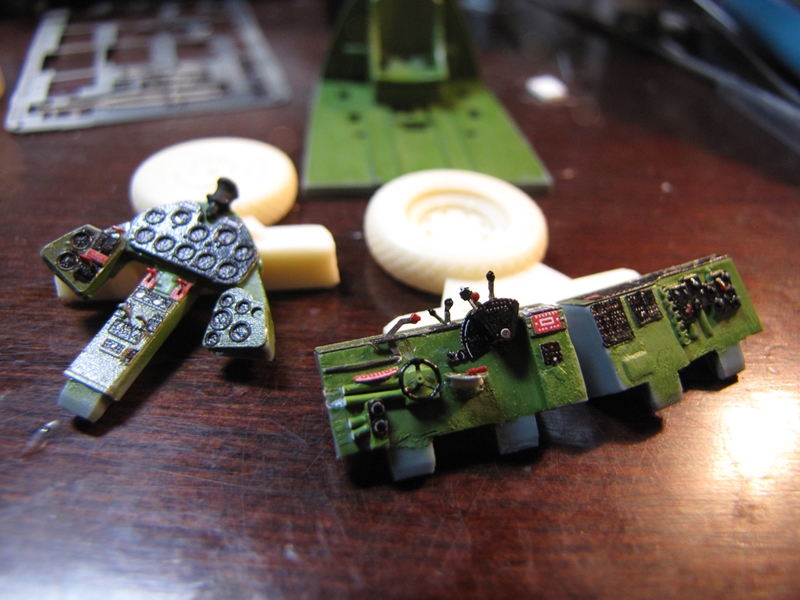
The flare holder came out good and the trim wheel and knobs have a bit more beef to them.

Cheers Rob.
Anything without guns is a target!
27 completed campaigns and counting :)
Joel_W
Associate Editor New York, United States
Joined: December 04, 2010
KitMaker: 11,666 posts
AeroScale: 7,410 posts
Posted: Thursday, October 30, 2014 - 01:15 AM UTC
Rob,
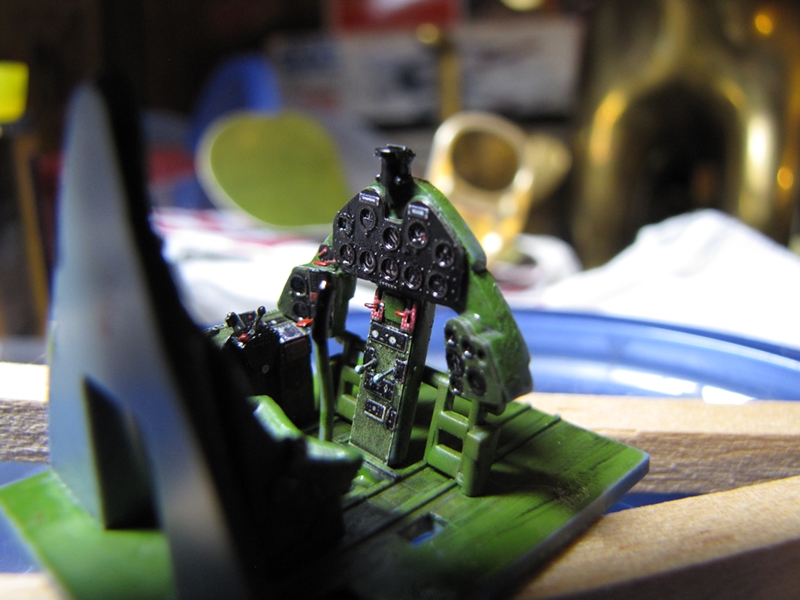
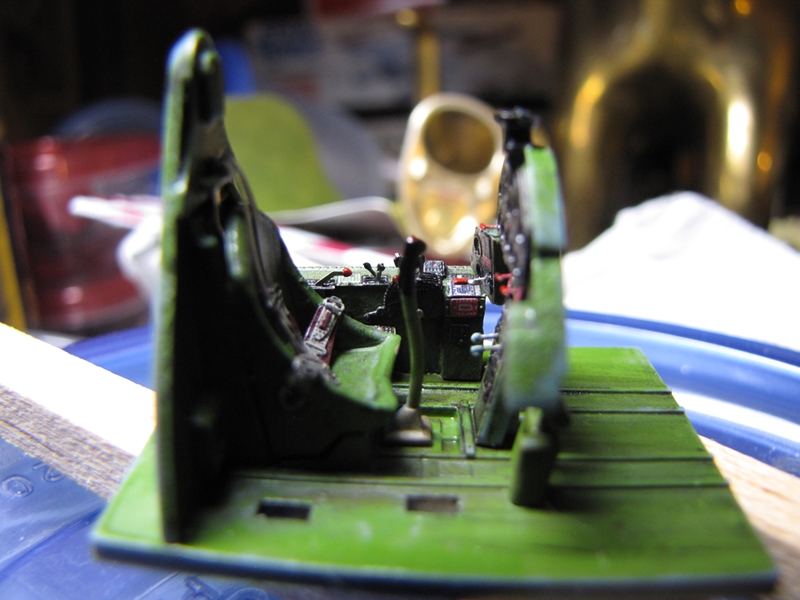
Looking real good. I think that the trim wheel came out perfect. Don't forget that at best it will be viewed from a angle greater then 45 degrees downward, while right now, with the cockpit under construction, one is looking at it head on. I'm guilty of the same false thinking, and have to force myself at times to change my perspective, which is very hard to do.
Joel
On my Workbench:
Monogram 1/24 scale 427 Shelby Cobra
Just Completed:
Beemax 1/24 scale BMW M3 E30 1992 Evolution II
#226
British Columbia, Canada
Joined: February 20, 2012
KitMaker: 1,909 posts
AeroScale: 508 posts
Posted: Thursday, October 30, 2014 - 01:15 PM UTC
I agree Joel, it looks better from above.
Cheers Rob.
Anything without guns is a target!
27 completed campaigns and counting :)
#226
British Columbia, Canada
Joined: February 20, 2012
KitMaker: 1,909 posts
AeroScale: 508 posts
Posted: Thursday, October 30, 2014 - 05:54 PM UTC
Anything without guns is a target!
27 completed campaigns and counting :)
Joel_W
Associate Editor New York, United States
Joined: December 04, 2010
KitMaker: 11,666 posts
AeroScale: 7,410 posts
Posted: Friday, October 31, 2014 - 02:36 AM UTC
Rob,
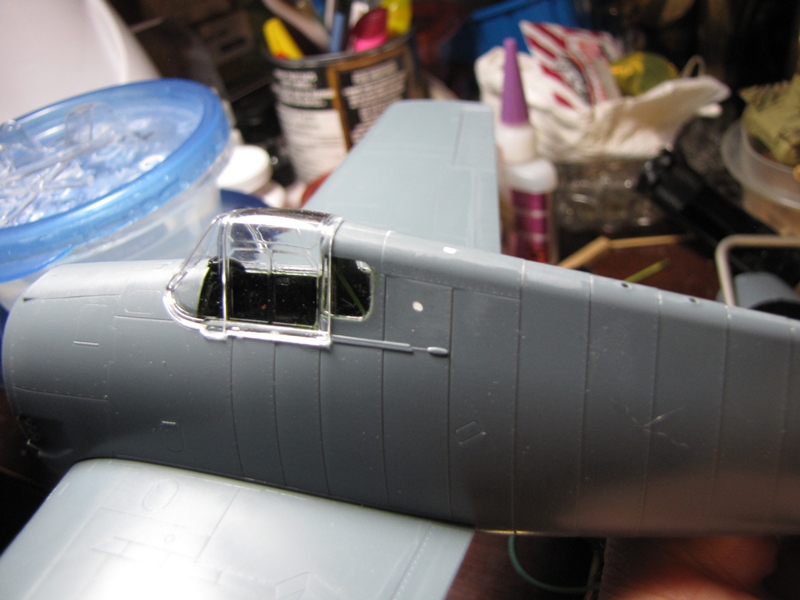
The radio wire really looks good. And the trim wheel viewed from the top down, as we would see it in the finished model, has a solid 3 dimensional look to it. I'd say that your method works extremely well.
Joel
On my Workbench:
Monogram 1/24 scale 427 Shelby Cobra
Just Completed:
Beemax 1/24 scale BMW M3 E30 1992 Evolution II
WARLORD
Associate Editor Warszawa, Poland
Joined: April 23, 2003
KitMaker: 1,923 posts
AeroScale: 100 posts
Posted: Friday, October 31, 2014 - 07:11 AM UTC
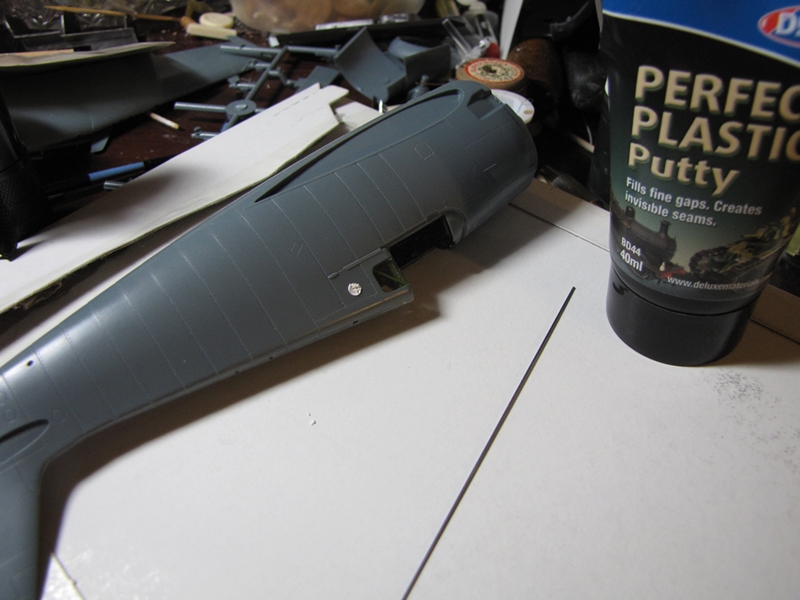
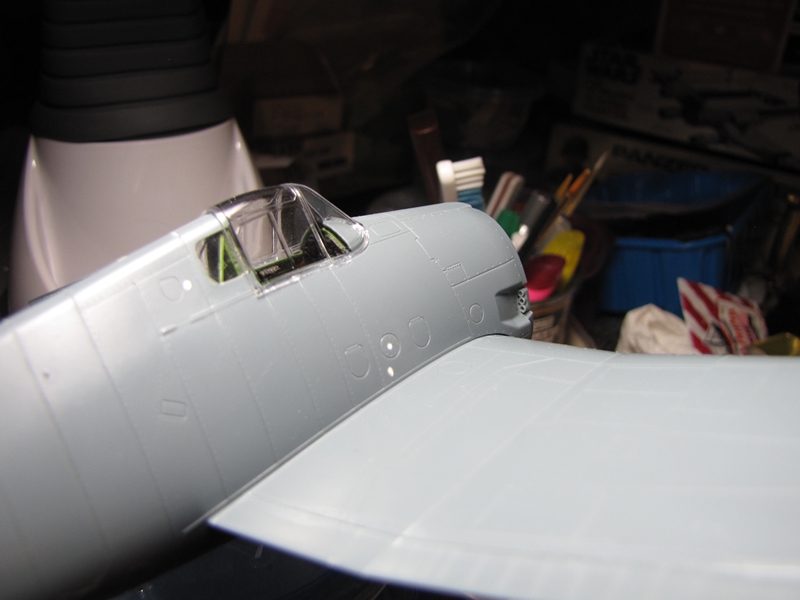
On top of fuselage is one of two attachment point that would be visible after assembly (the second one is on cowling).

As it appeared more difficult was to achieve perfect cut on tail part

Fit of fuselage elements so far is really good

Joel_W
Associate Editor New York, United States
Joined: December 04, 2010
KitMaker: 11,666 posts
AeroScale: 7,410 posts
Posted: Friday, October 31, 2014 - 08:29 AM UTC
Marcin,
I've been following your build with a great deal of interest, as the Attack F8F-1 Bearcat is about as difficult a build with a multi piece fuselage as one can get. So far your build is outstanding. The cockpit/fuselage section really looks well done.
Cutting out all those sections must be very time consuming and rather difficult. I can attest to the fact that I have difficulties trying to cut a straight line when just separating tires or scoops from their resin blocks.
Looking forward to your next update.
Joel
On my Workbench:
Monogram 1/24 scale 427 Shelby Cobra
Just Completed:
Beemax 1/24 scale BMW M3 E30 1992 Evolution II
#226
British Columbia, Canada
Joined: February 20, 2012
KitMaker: 1,909 posts
AeroScale: 508 posts
Posted: Monday, November 03, 2014 - 06:50 PM UTC
Anything without guns is a target!
27 completed campaigns and counting :)
Lisboa, Portugal
Joined: August 27, 2010
KitMaker: 679 posts
AeroScale: 669 posts
Posted: Wednesday, November 05, 2014 - 07:25 AM UTC
Hi everyone,
Continuing the work, the engine is ready. It's the Quickboost resin direct replacement for the one inbox. Tbh the detail is very good but I am not sure if it's that much better than the native plastic option.

[/url]

[/url]
Added those rods and tried to catch a genuine look. The photo doesn't quite catch the colors I'm afraid.
The Wildcat is basically almost ready to start the paint job, which I did on the elevators, painted with Vallejo US Blue Grey on the upper surfaces. The shade looks spot on. A first weathering is applied since i want to try to get the best method for this camo.

[/url]

[/url]
Cheers
Pedro
Joel_W
Associate Editor New York, United States
Joined: December 04, 2010
KitMaker: 11,666 posts
AeroScale: 7,410 posts
Posted: Wednesday, November 05, 2014 - 07:59 AM UTC
Pedro,
The Quickboost engine looks fantastic.
Joel
On my Workbench:
Monogram 1/24 scale 427 Shelby Cobra
Just Completed:
Beemax 1/24 scale BMW M3 E30 1992 Evolution II
#041
Kobenhavn, Denmark
Joined: July 20, 2006
KitMaker: 10,069 posts
AeroScale: 3,788 posts
Posted: Wednesday, November 05, 2014 - 08:07 PM UTC
Rob, outstanding work on the cockpit. Almost a pity to cover it up.
Beautiful engine, Pedro. Looks great!
Campaign'oholic - 252+ campaigns completed
Georgia, United States
Joined: January 07, 2013
KitMaker: 572 posts
AeroScale: 130 posts
Posted: Wednesday, November 05, 2014 - 11:25 PM UTC
Having some decal issues with the panther hopefully the new ones should be here shortly.
the work going on ii here is top notch builds are all really looking great
Sascha(Ironowl)

Joel_W
Associate Editor New York, United States
Joined: December 04, 2010
KitMaker: 11,666 posts
AeroScale: 7,410 posts
Posted: Thursday, November 06, 2014 - 05:26 AM UTC
Quoted Text
Having some decal issues with the panther hopefully the new ones should be here shortly.
the work going on ii here is top notch builds are all really looking great
Sascha(Ironowl)
Sascha,
What issues are you having with the kit decals? Whose decals did you get?
Joel
On my Workbench:
Monogram 1/24 scale 427 Shelby Cobra
Just Completed:
Beemax 1/24 scale BMW M3 E30 1992 Evolution II
Georgia, United States
Joined: January 07, 2013
KitMaker: 572 posts
AeroScale: 130 posts
Posted: Thursday, November 06, 2014 - 10:53 AM UTC
ah the decal issues were my big fingers lol the "new" decals are the exact same ones that come in the kit a friend bought the same kit to use as a test bed for painting and is sending me the set of decals he had.
Sascha(Ironowl)
Joel_W
Associate Editor New York, United States
Joined: December 04, 2010
KitMaker: 11,666 posts
AeroScale: 7,410 posts
Posted: Thursday, November 06, 2014 - 11:28 AM UTC
Quoted Text
ah the decal issues were my big fingers lol the "new" decals are the exact same ones that come in the kit a friend bought the same kit to use as a test bed for painting and is sending me the set of decals he had.
Sascha(Ironowl)
Talk about lucking out. That never happens to me. On the last two builds, I've had to buy 2 sheets of the AM decals due to builders stupidity.
Joel
On my Workbench:
Monogram 1/24 scale 427 Shelby Cobra
Just Completed:
Beemax 1/24 scale BMW M3 E30 1992 Evolution II
#439
Washington, United States
Joined: November 05, 2005
KitMaker: 4,950 posts
AeroScale: 3,192 posts
Posted: Tuesday, November 11, 2014 - 08:06 AM UTC
Built entirely in a hotel room, it mostly looks like a Bearcat.


Now I just gotta get it home in 1 piece....

Hanger Queens in Waiting:
Monogram 1/72 F8F-1
Corsair the Sky Pirate - 1/72 Ace A-7D
Century Series - Airfix 1/72 F-105G
Anti Shipping - Academy 1/72 PBJ-1D
Academy 1/72 F-84E
Joel_W
Associate Editor New York, United States
Joined: December 04, 2010
KitMaker: 11,666 posts
AeroScale: 7,410 posts
Posted: Tuesday, November 11, 2014 - 07:16 PM UTC
Mark,
Looking good.
Without the gear I see no reason why it won't survive the trip home. I sure have to hand it to you to actually build models while away on business. I wouldn't know where to begin if I had to do it.
Joel
On my Workbench:
Monogram 1/24 scale 427 Shelby Cobra
Just Completed:
Beemax 1/24 scale BMW M3 E30 1992 Evolution II
#439
Washington, United States
Joined: November 05, 2005
KitMaker: 4,950 posts
AeroScale: 3,192 posts
Posted: Tuesday, November 11, 2014 - 08:08 PM UTC
It's a sanity thing. There's about 6 English language channels in the hotel, CNN, CNBC, Discovery, the Soccer Channel, a Movie Channel and a features channel. There's only so many shark shows, 10 year old movies (oh Speed is 20 years old, and they showed it twice this weekend), soccer highlights or back issues of the voice/amazing race/scripted reality show that you can watch.
It's not easy, you can't bring enamel paints and thinners, most glues are flammable and not allowed on the plane. Same with super glue. So its' all acrylic paints and non flammable glues.
Hanger Queens in Waiting:
Monogram 1/72 F8F-1
Corsair the Sky Pirate - 1/72 Ace A-7D
Century Series - Airfix 1/72 F-105G
Anti Shipping - Academy 1/72 PBJ-1D
Academy 1/72 F-84E
Texas, United States
Joined: February 22, 2008
KitMaker: 5,026 posts
AeroScale: 2,811 posts
Posted: Tuesday, November 11, 2014 - 08:13 PM UTC
Mark, are there no hobby shops locally that would have the essentials that you could pick up when ever out of town? Cant help with the entertainment other than taking a portable dvd player and some dvds.
Bob
If it aint broke dont fix it.
#439
Washington, United States
Joined: November 05, 2005
KitMaker: 4,950 posts
AeroScale: 3,192 posts
Posted: Wednesday, November 12, 2014 - 02:38 AM UTC
There is one true hobby shop, he's about a half hour away by taxi. I spent 3 or 4 hours over there on Saturday chatting with local modelers. There's a big display and contest this weekend, but I'm flying home Saturday morning....

There's a Gundam shop in the mall across the street. He does sell Gunze paints and Tamiya glues. His prices on supplies are about the same as back home. It's just a bit silly to buy a $5-6 bottle of glue, use it for a few days and then throw it away.

Hanger Queens in Waiting:
Monogram 1/72 F8F-1
Corsair the Sky Pirate - 1/72 Ace A-7D
Century Series - Airfix 1/72 F-105G
Anti Shipping - Academy 1/72 PBJ-1D
Academy 1/72 F-84E
Joel_W
Associate Editor New York, United States
Joined: December 04, 2010
KitMaker: 11,666 posts
AeroScale: 7,410 posts
Posted: Wednesday, November 12, 2014 - 03:03 AM UTC
Quoted Text
There is one true hobby shop, he's about a half hour away by taxi. I spent 3 or 4 hours over there on Saturday chatting with local modelers. There's a big display and contest this weekend, but I'm flying home Saturday morning.... There's a Gundam shop in the mall across the street. He does sell Gunze paints and Tamiya glues. His prices on supplies are about the same as back home. It's just a bit silly to buy a $5-6 bottle of glue, use it for a few days and then throw it away.
Mark,
When you think about it, the $5 isn't so much, and it's letting you build like you do at home.
Joel
On my Workbench:
Monogram 1/24 scale 427 Shelby Cobra
Just Completed:
Beemax 1/24 scale BMW M3 E30 1992 Evolution II


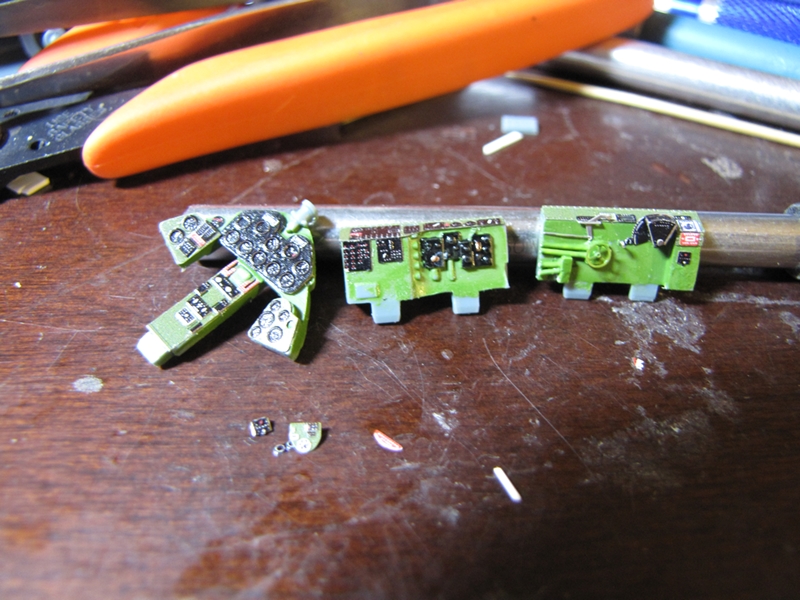
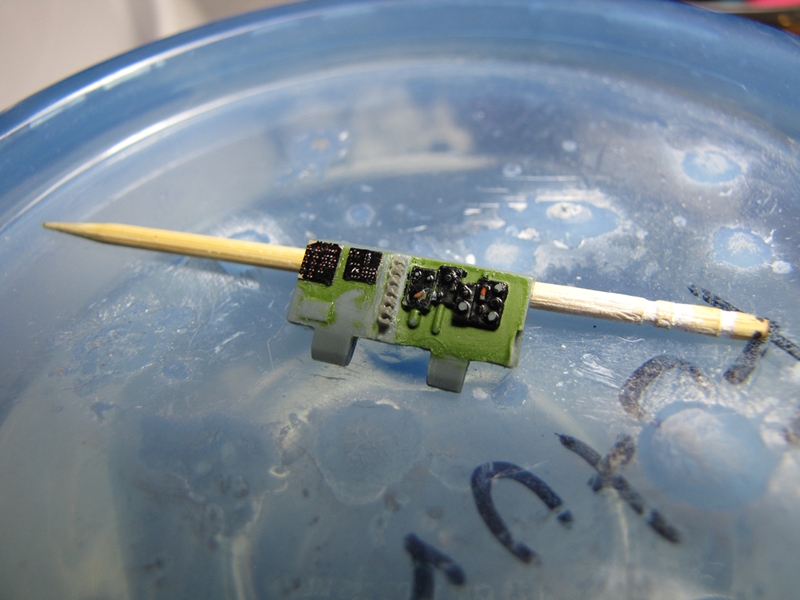
 but it's coming together. In the second pic I tied another way of adding depth to the flat PE, using a toothpick I carefully put thick Gator Grip glue all along the circumference of the trim wheel I think it came out well will no for sure once I paint it.
  And I found one picture in Detail & Scale of a bomb that looks like the kit bomb it's only described as being a fire bomb.