OFFICIAL: Grumman Campaign

#226
British Columbia, Canada
Joined: February 20, 2012
KitMaker: 1,909 posts
AeroScale: 508 posts
Posted: Sunday, December 14, 2014 - 05:59 AM UTC
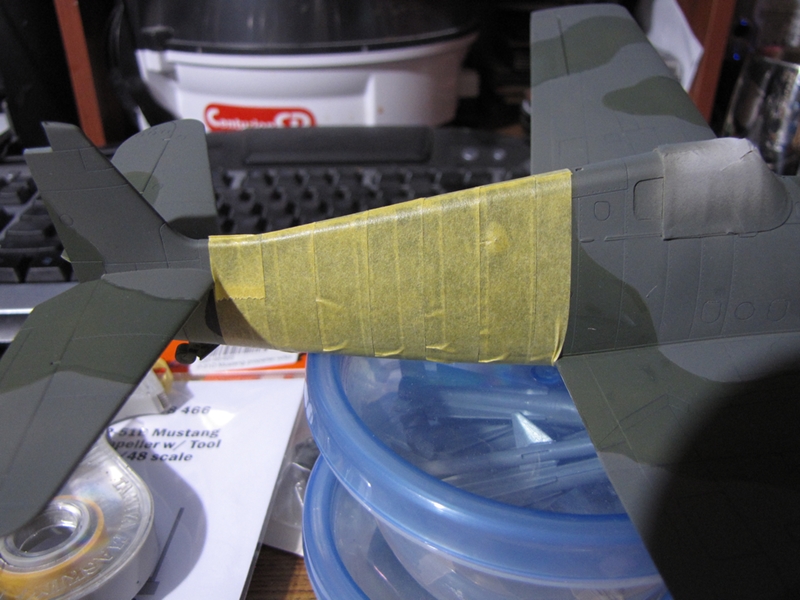
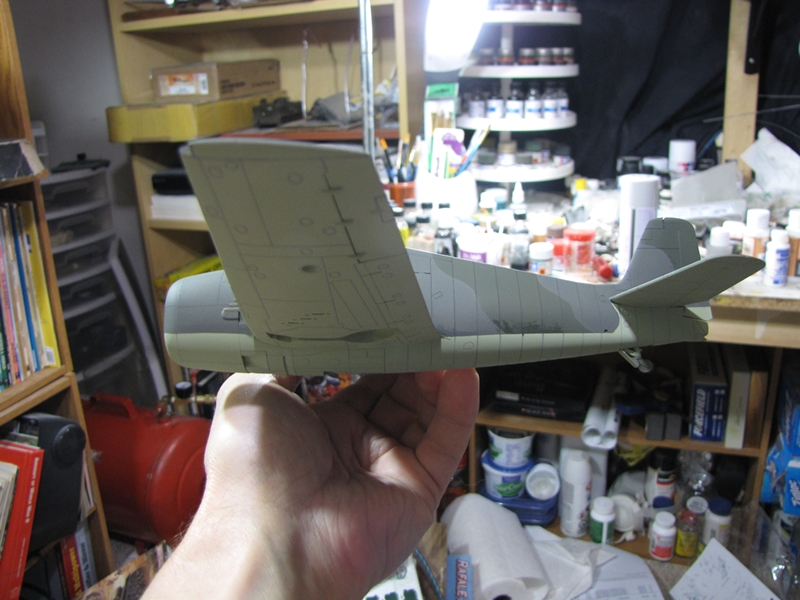
Thanks Jonathan, Joel!

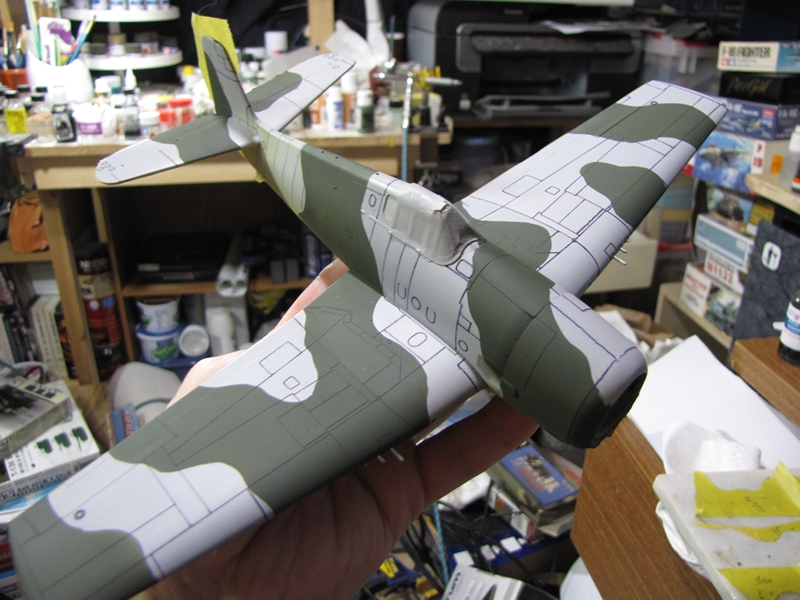
The more I use this technique the more I like it
so far I have used an ultra fine marker but if more definition is needed I am sure a fine marker would work.

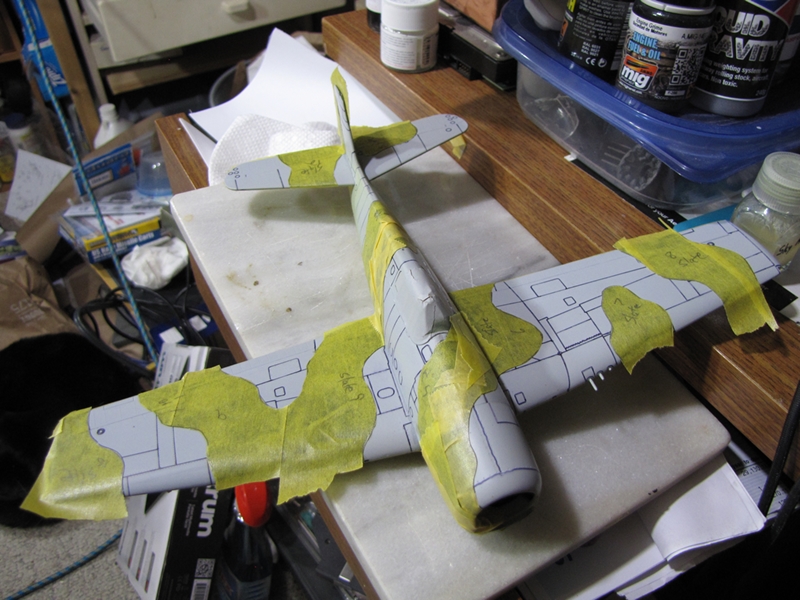
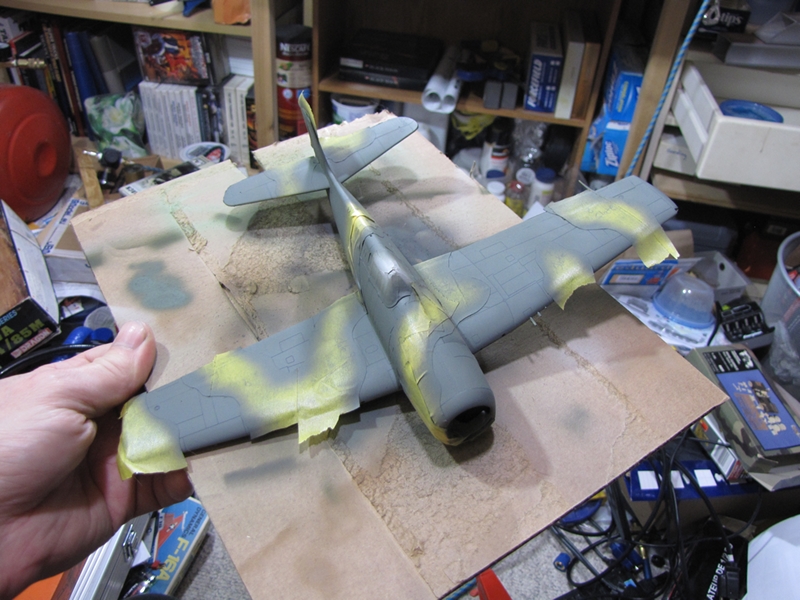
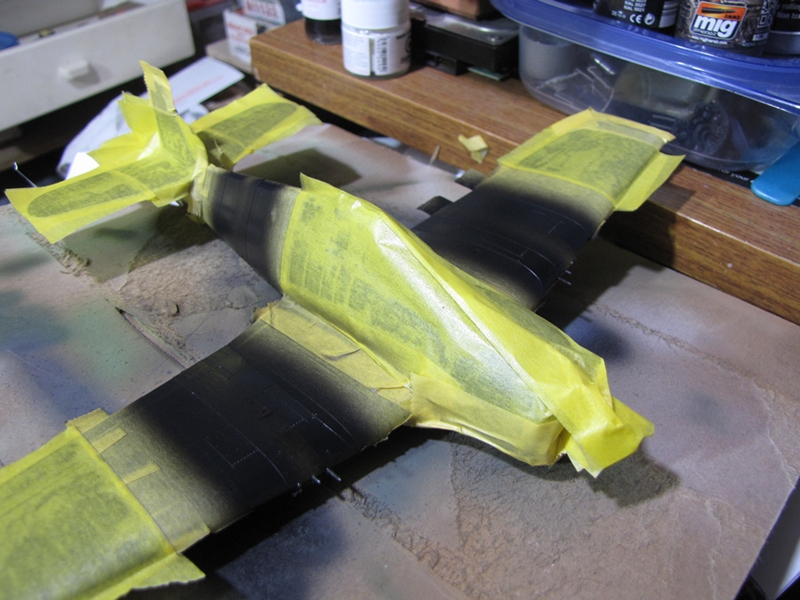
I got the first set of masks off, the second set on and the third color.
Cheers Rob.
Anything without guns is a target!
27 completed campaigns and counting :)
#226
British Columbia, Canada
Joined: February 20, 2012
KitMaker: 1,909 posts
AeroScale: 508 posts
Posted: Sunday, December 14, 2014 - 07:19 AM UTC
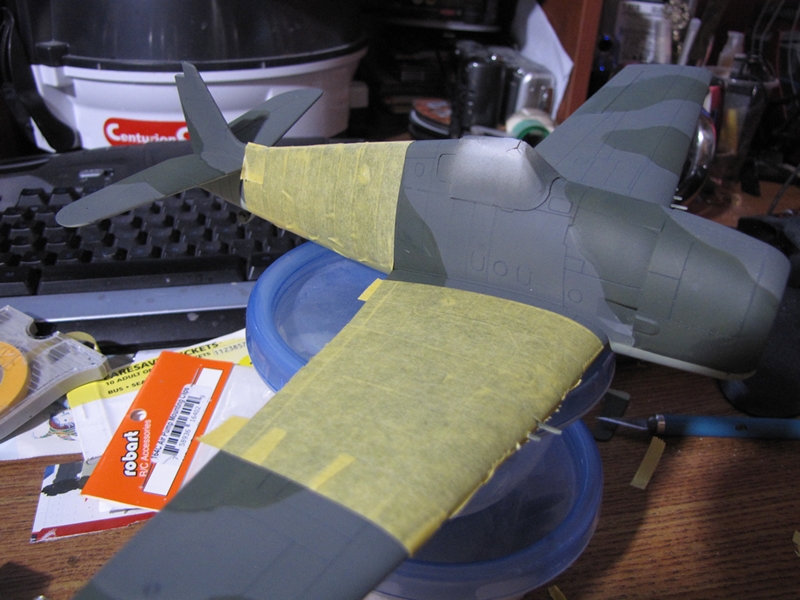
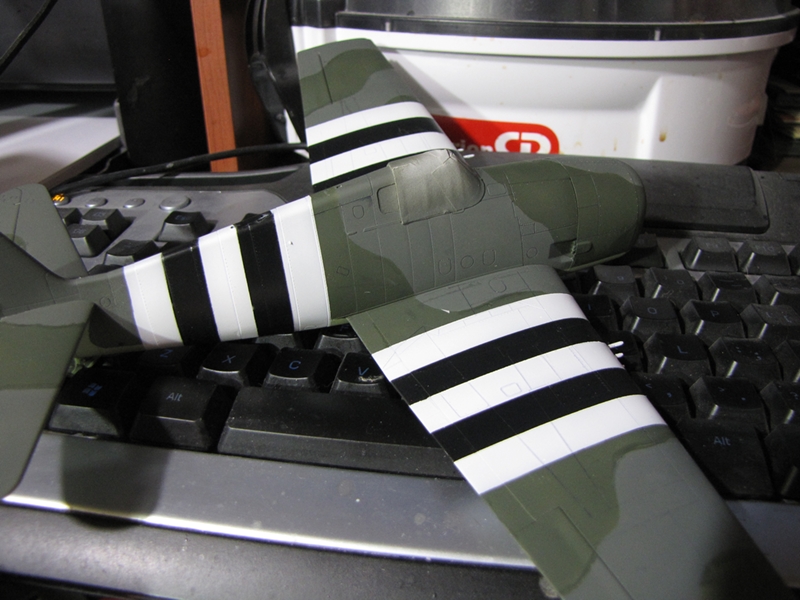
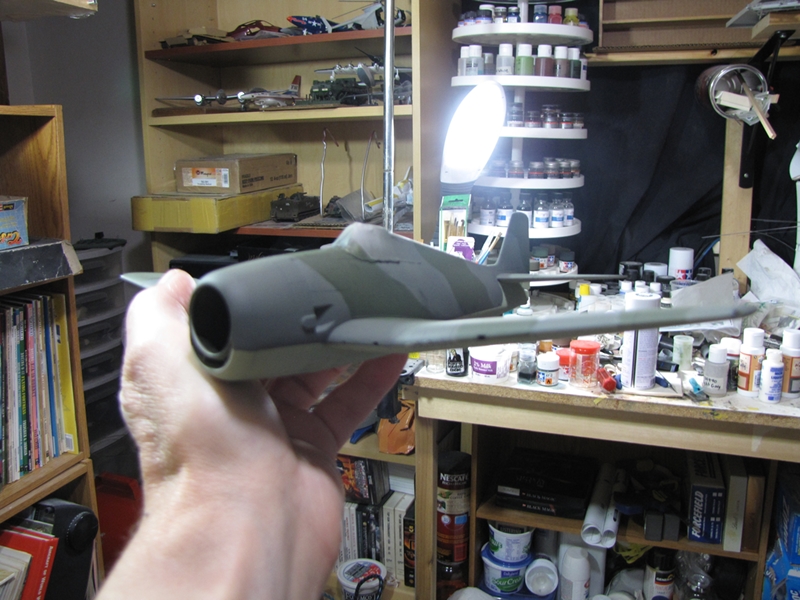
Mask's off, and some small touch-ups.
I got the slate too dark, but will live with it.
Cheers Rob.

Anything without guns is a target!
27 completed campaigns and counting :)
Joel_W
 Associate Editor
New York, United States
Joined: December 04, 2010
KitMaker: 11,666 posts
AeroScale: 7,410 posts
Posted: Sunday, December 14, 2014 - 07:03 PM UTC
Rob,
A most impressive application of a 3 tone paint scheme. The panel lines really blended in quite nicely, as now they just have that shadow effect. Next step is decaling. Looking forward to seeing it in British markings.
Joel
On my Workbench:
Monogram 1/24 scale 427 Shelby Cobra
Just Completed:
Beemax 1/24 scale BMW M3 E30 1992 Evolution II
Ontario, Canada
Joined: February 04, 2008
KitMaker: 2,507 posts
AeroScale: 1,814 posts
Posted: Monday, December 15, 2014 - 05:46 AM UTC
Hi Joel!
I have at last re-painted the bird with Model Master FS15042 Dark Sea Blue.:-


" The Die Hards"
43rd MIDDLESEX REGIMENT
MACHINE GUN CORPS
XXX CORP
The most effective way to do it, is to do it.
- Amelia Earhart
Joel_W
Associate Editor New York, United States
Joined: December 04, 2010
KitMaker: 11,666 posts
AeroScale: 7,410 posts
Posted: Monday, December 15, 2014 - 05:56 AM UTC
Richard,
She really goods quite good.
Joel
On my Workbench:
Monogram 1/24 scale 427 Shelby Cobra
Just Completed:
Beemax 1/24 scale BMW M3 E30 1992 Evolution II
Joel_W
Associate Editor New York, United States
Joined: December 04, 2010
KitMaker: 11,666 posts
AeroScale: 7,410 posts
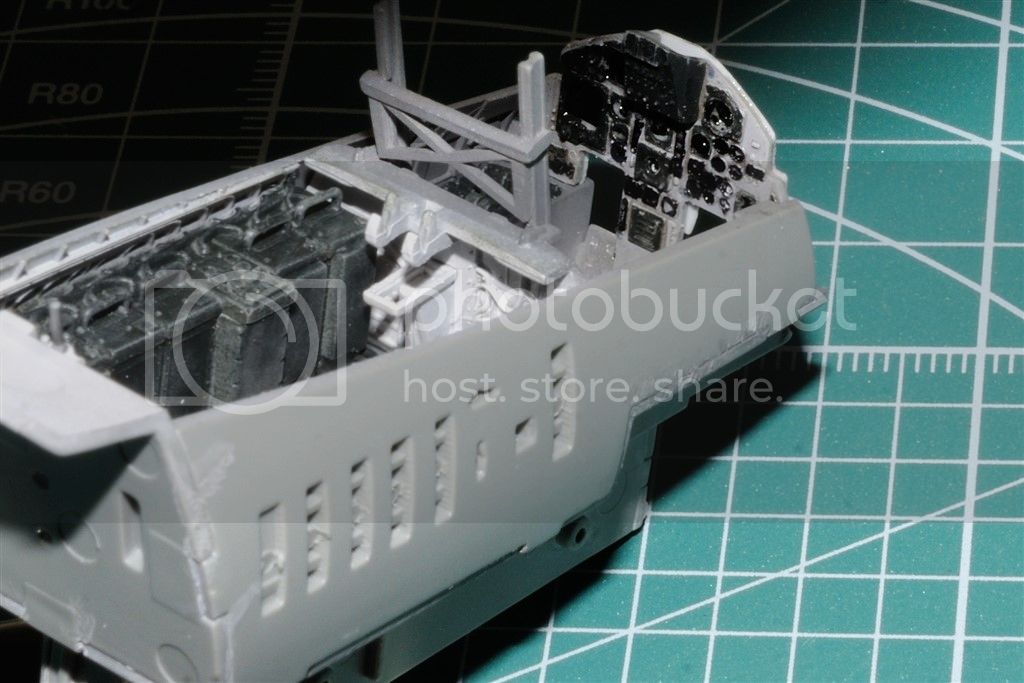
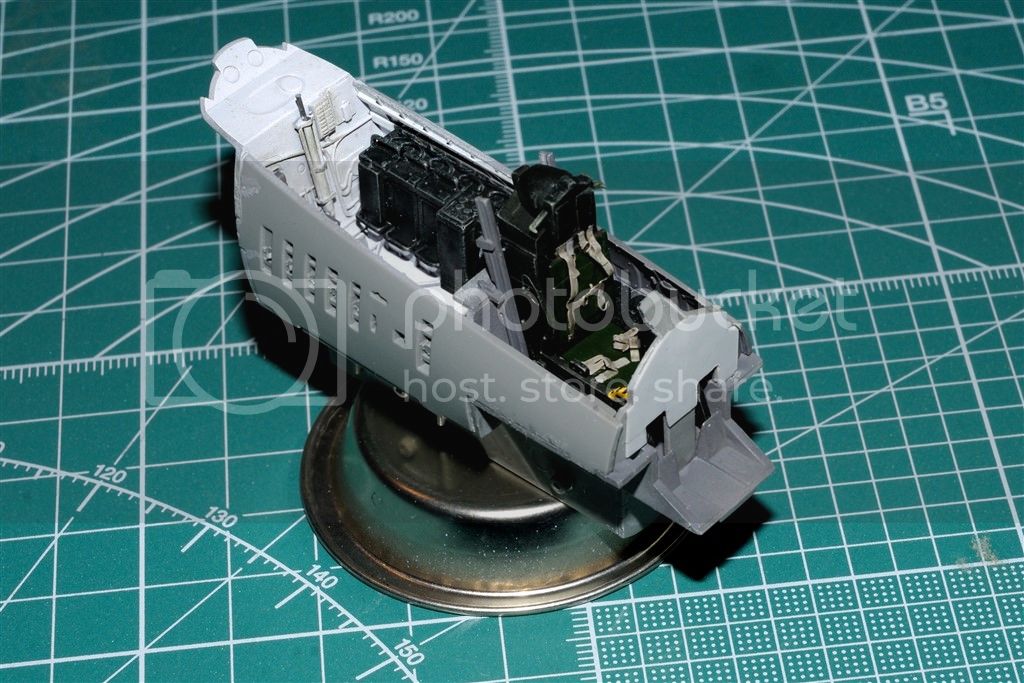
Posted: Monday, December 15, 2014 - 06:04 AM UTC
Well, I finally finished the cockpit including the IP. As usual, my conception of what I planned, didn't turn out exactly as I thought it would.
Here's the link to the full update in my build blog:
f-15CJoel
On my Workbench:
Monogram 1/24 scale 427 Shelby Cobra
Just Completed:
Beemax 1/24 scale BMW M3 E30 1992 Evolution II
#226
British Columbia, Canada
Joined: February 20, 2012
KitMaker: 1,909 posts
AeroScale: 508 posts
Posted: Monday, December 15, 2014 - 07:02 AM UTC
Thanks Joel!
I believe that your post is in the wrong thread.
Cheers Rob.
Anything without guns is a target!
27 completed campaigns and counting :)
WARLORD
Associate Editor Warszawa, Poland
Joined: April 23, 2003
KitMaker: 1,923 posts
AeroScale: 100 posts
Posted: Monday, December 15, 2014 - 02:43 PM UTC
Paintwork sealed with Pronto floor polish:

Joel_W
Associate Editor New York, United States
Joined: December 04, 2010
KitMaker: 11,666 posts
AeroScale: 7,410 posts
Posted: Monday, December 15, 2014 - 06:02 PM UTC
Quoted Text
Thanks Joel!
I believe that your post is in the wrong thread.
Cheers Rob.
Rob,
How right you are. My apologies. Just a case of rushing.
Joel
On my Workbench:
Monogram 1/24 scale 427 Shelby Cobra
Just Completed:
Beemax 1/24 scale BMW M3 E30 1992 Evolution II
WARLORD
Associate Editor Warszawa, Poland
Joined: April 23, 2003
KitMaker: 1,923 posts
AeroScale: 100 posts
Posted: Tuesday, December 16, 2014 - 03:14 PM UTC
Decals added.
They are very thin, Too thin. They are very fragile. National insignias can't be applied in one piece.


Joel_W
Associate Editor New York, United States
Joined: December 04, 2010
KitMaker: 11,666 posts
AeroScale: 7,410 posts
Posted: Tuesday, December 16, 2014 - 08:13 PM UTC
Marcin,
It's the final results that count, and the decals truly look like they were painted on. Well done.
Joel
On my Workbench:
Monogram 1/24 scale 427 Shelby Cobra
Just Completed:
Beemax 1/24 scale BMW M3 E30 1992 Evolution II
#226
British Columbia, Canada
Joined: February 20, 2012
KitMaker: 1,909 posts
AeroScale: 508 posts
Posted: Wednesday, December 17, 2014 - 08:29 AM UTC
Anything without guns is a target!
27 completed campaigns and counting :)
#226
British Columbia, Canada
Joined: February 20, 2012
KitMaker: 1,909 posts
AeroScale: 508 posts
Posted: Wednesday, December 17, 2014 - 09:11 PM UTC
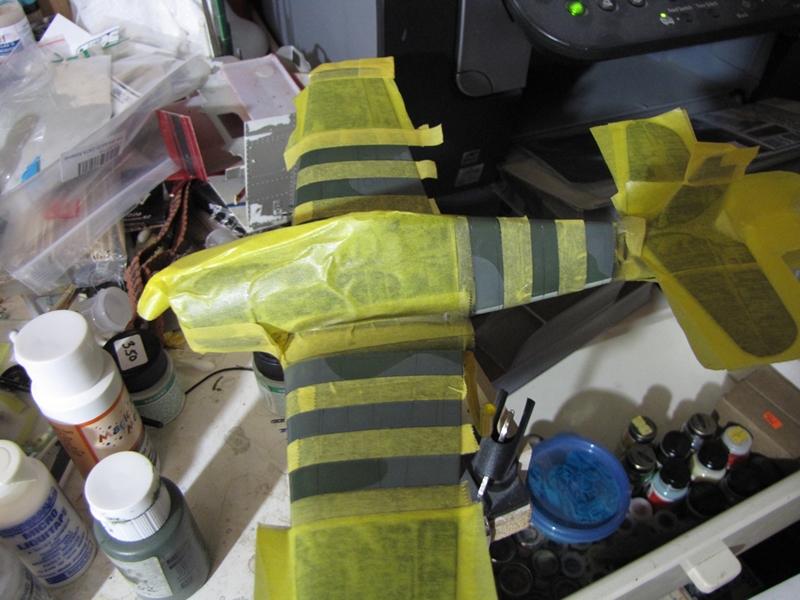
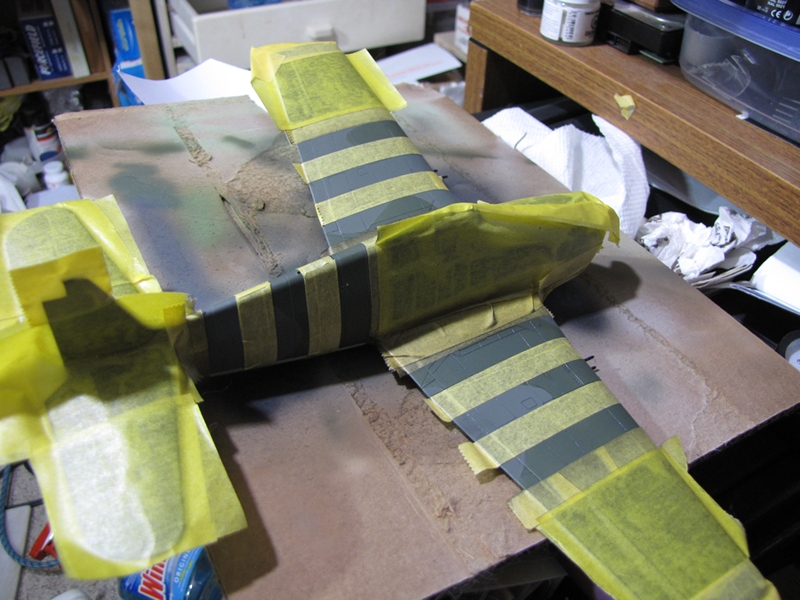
Got the black painted and re-masked
then removed the tape for the white.
Cheers Rob.
Anything without guns is a target!
27 completed campaigns and counting :)
Joel_W
Associate Editor New York, United States
Joined: December 04, 2010
KitMaker: 11,666 posts
AeroScale: 7,410 posts
Posted: Wednesday, December 17, 2014 - 09:52 PM UTC
Rob,
really nice job with all that masking, but the way you're going about it, you're masking more then necessary, and have to really be dead on with reapplying the masks over the black stripes. It's easier to 1st just mask the outside dimension of the invasion stripes, seal, a light coat of primer, then flat white. Then mask the white for the white stripes, and air brush the black stripes. You don't have to be absolutely perfect, and you're eliminating one more hard edge line that has to be dealt with.
Joel
On my Workbench:
Monogram 1/24 scale 427 Shelby Cobra
Just Completed:
Beemax 1/24 scale BMW M3 E30 1992 Evolution II
#298
Hong Kong S.A.R. / 繁體
Joined: August 08, 2002
KitMaker: 1,182 posts
AeroScale: 351 posts
Posted: Thursday, December 18, 2014 - 12:42 PM UTC
#041
Kobenhavn, Denmark
Joined: July 20, 2006
KitMaker: 10,069 posts
AeroScale: 3,788 posts
Posted: Thursday, December 18, 2014 - 03:13 PM UTC
Looks great, Rob. Looking forward to see it emerge with invasion stripes from all the masking tape.
Campaign'oholic - 252+ campaigns completed
#226
British Columbia, Canada
Joined: February 20, 2012
KitMaker: 1,909 posts
AeroScale: 508 posts
Posted: Thursday, December 18, 2014 - 06:41 PM UTC
Anything without guns is a target!
27 completed campaigns and counting :)
#226
British Columbia, Canada
Joined: February 20, 2012
KitMaker: 1,909 posts
AeroScale: 508 posts
Posted: Thursday, December 18, 2014 - 06:57 PM UTC
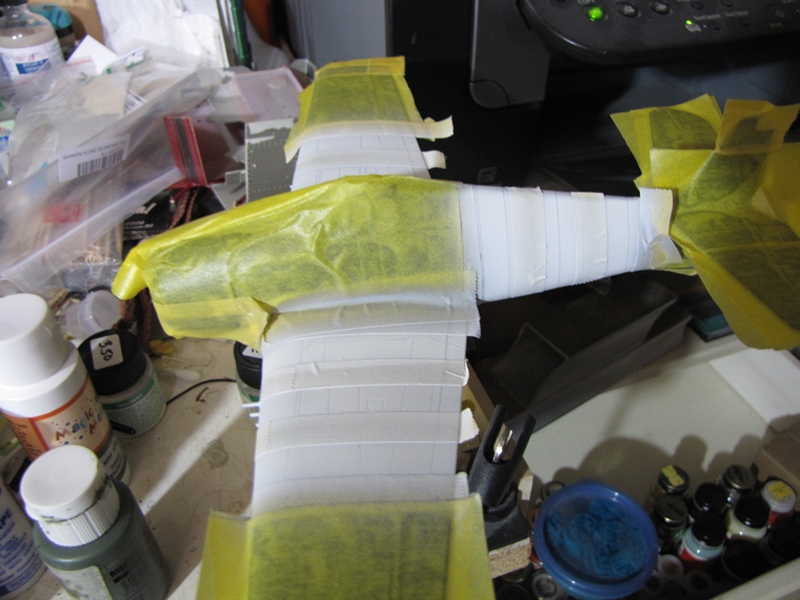
Oops

I was looking at the decals I am going to use and found they come with a mask that was to go on before the invasion stripes for where the serial numbers are

looks like I have more masking to do and there is still the red for the cowling.

Cheers Rob.
Anything without guns is a target!
27 completed campaigns and counting :)
Joel_W
Associate Editor New York, United States
Joined: December 04, 2010
KitMaker: 11,666 posts
AeroScale: 7,410 posts
Posted: Thursday, December 18, 2014 - 11:28 PM UTC
Rob,
Well done. The invasion stripes look fantastic. I did have to laugh when you posted that you needed to use a mask before the invasion stripes were painted. Don't feel bad, I screw up like that all the time.
Joel
On my Workbench:
Monogram 1/24 scale 427 Shelby Cobra
Just Completed:
Beemax 1/24 scale BMW M3 E30 1992 Evolution II
WARLORD
Associate Editor Warszawa, Poland
Joined: April 23, 2003
KitMaker: 1,923 posts
AeroScale: 100 posts
Posted: Friday, December 19, 2014 - 12:14 AM UTC
@ Joel, thanks!
Decals sealed:

Wash of black oil paint thinned with MIG thinner for washes

Lisboa, Portugal
Joined: August 27, 2010
KitMaker: 679 posts
AeroScale: 669 posts
Posted: Friday, December 19, 2014 - 02:58 AM UTC
Hi everyone,
I can see on this thread some unusual kits & modeling techniques which is exactly what I like about sharing stuff online. Good work everyone!
Almost there, I can see the finish line ahead


Unfortunately the artwork decal is off register
This was not perceptible while the decal was still in the sheet, but pops out easily against the blue background.
Anyway, the Cat should be completed within days.
Cheers
Pedro
#259
Massachusetts, United States
Joined: October 23, 2011
KitMaker: 2,265 posts
AeroScale: 1,715 posts
Posted: Friday, December 19, 2014 - 04:19 AM UTC
As I thought, the last weeks of the campaign are often the best, and with a topic like Grumman, the best of the best.
Rocha, Warlord, Dragon164, and Lapman - so much wonderful work to look at on this page

Joel_W
Associate Editor New York, United States
Joined: December 04, 2010
KitMaker: 11,666 posts
AeroScale: 7,410 posts
Posted: Friday, December 19, 2014 - 04:53 AM UTC
Pedro,
Excellent decaling. Love the tail emblem. Your weathering really brings the F4F to life with that "used but not abused" operational look to it. Getting close to the finish line.
Joel
On my Workbench:
Monogram 1/24 scale 427 Shelby Cobra
Just Completed:
Beemax 1/24 scale BMW M3 E30 1992 Evolution II
Lisboa, Portugal
Joined: August 27, 2010
KitMaker: 679 posts
AeroScale: 669 posts
Posted: Friday, December 19, 2014 - 03:20 PM UTC
Thank you for your comments guys

Cheers
Pedro
#226
British Columbia, Canada
Joined: February 20, 2012
KitMaker: 1,909 posts
AeroScale: 508 posts
Posted: Friday, December 19, 2014 - 06:10 PM UTC
Yes that looks Great! Pedro.
Cheers Rob.
Anything without guns is a target!
27 completed campaigns and counting :)


 luckily 10mm Tamiya tape is the perfect size.