OFFICIAL: Grumman Campaign

#226
British Columbia, Canada
Joined: February 20, 2012
KitMaker: 1,909 posts
AeroScale: 508 posts
Posted: Saturday, December 20, 2014 - 09:42 AM UTC
Anything without guns is a target!
27 completed campaigns and counting :)
Joel_W
 Associate Editor
New York, United States
Joined: December 04, 2010
KitMaker: 11,666 posts
AeroScale: 7,410 posts
Posted: Saturday, December 20, 2014 - 07:07 PM UTC
Rob,
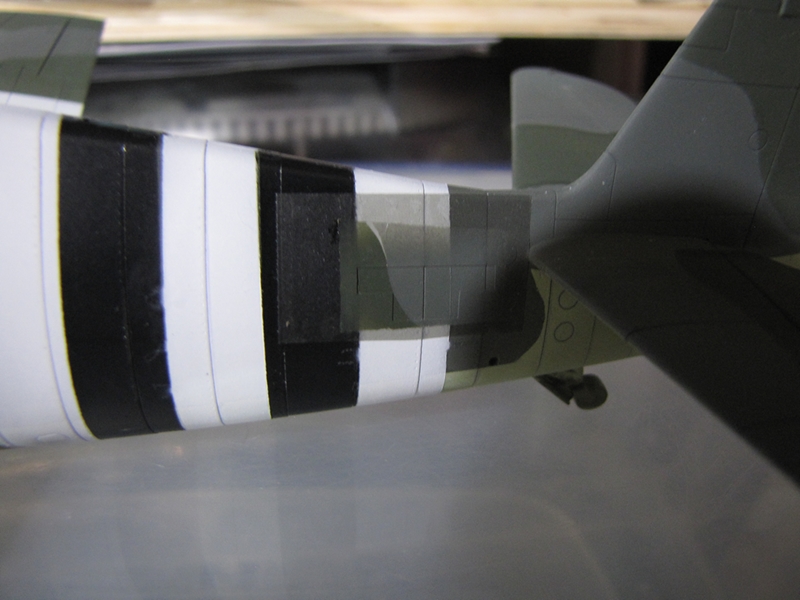
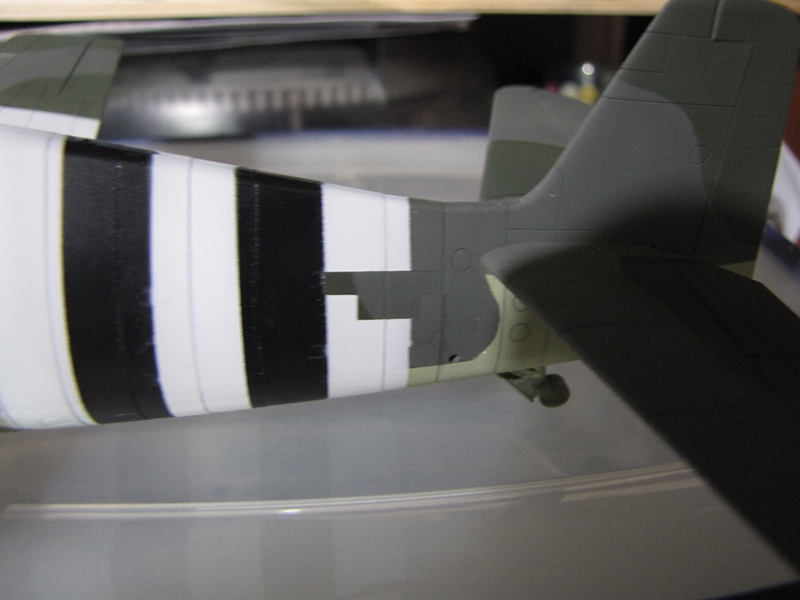
I'm really impressed with your masking skills in creating that paint detail.

Joel
On my Workbench:
Monogram 1/24 scale 427 Shelby Cobra
Just Completed:
Beemax 1/24 scale BMW M3 E30 1992 Evolution II
WARLORD
Associate Editor Warszawa, Poland
Joined: April 23, 2003
KitMaker: 1,923 posts
AeroScale: 100 posts
Posted: Sunday, December 21, 2014 - 12:07 AM UTC
#259
Massachusetts, United States
Joined: October 23, 2011
KitMaker: 2,265 posts
AeroScale: 1,715 posts
Posted: Sunday, December 21, 2014 - 12:56 AM UTC
Warlord, sir, The Bearcat is looking good as well as the tabby cat!
haha I have the same trouble


#226
British Columbia, Canada
Joined: February 20, 2012
KitMaker: 1,909 posts
AeroScale: 508 posts
Posted: Sunday, December 21, 2014 - 06:48 AM UTC
Thanks Joel!

Marcin, Jonathan,
You think you guys have trouble I have five cats.

Cheers Rob.
Anything without guns is a target!
27 completed campaigns and counting :)
#226
British Columbia, Canada
Joined: February 20, 2012
KitMaker: 1,909 posts
AeroScale: 508 posts
Posted: Sunday, December 21, 2014 - 02:07 PM UTC
Clear coat is on!

Cheers Rob.
Anything without guns is a target!
27 completed campaigns and counting :)
#226
British Columbia, Canada
Joined: February 20, 2012
KitMaker: 1,909 posts
AeroScale: 508 posts
Posted: Sunday, December 21, 2014 - 05:35 PM UTC
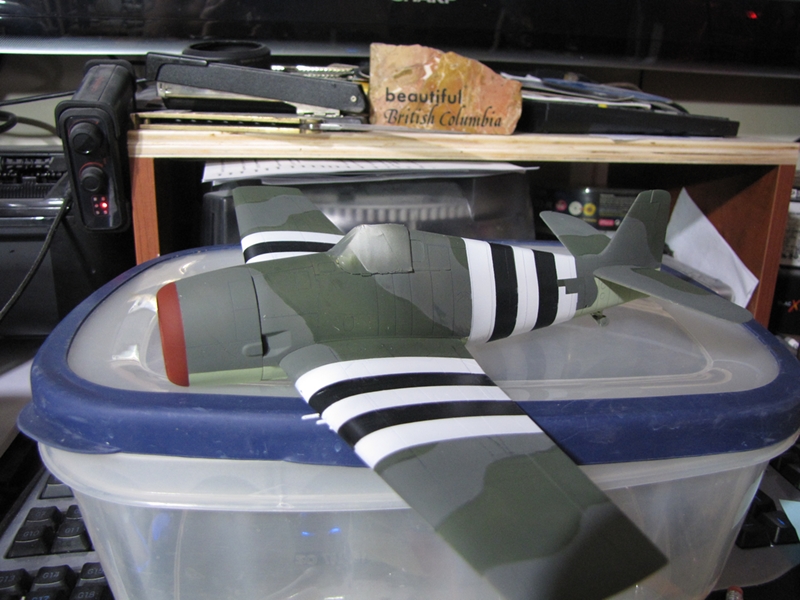
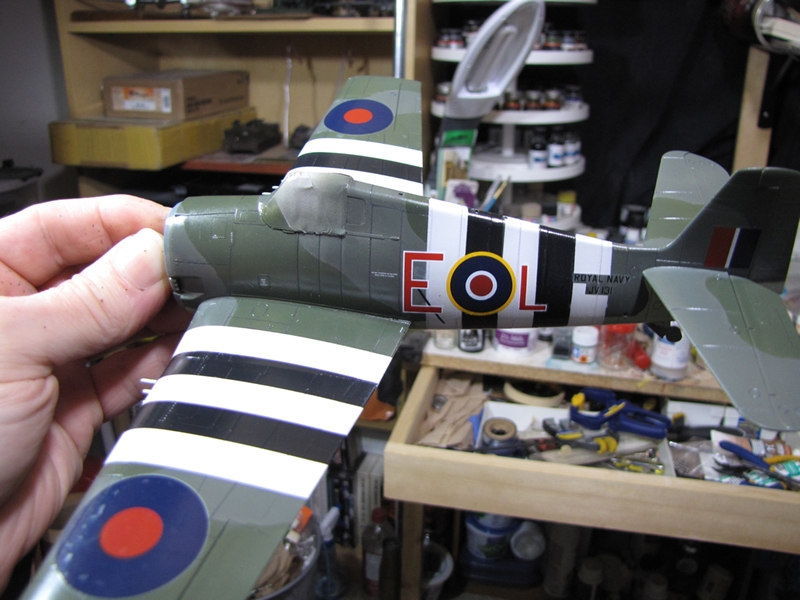
And the decals!
Cheers Rob.

Anything without guns is a target!
27 completed campaigns and counting :)
Joel_W
Associate Editor New York, United States
Joined: December 04, 2010
KitMaker: 11,666 posts
AeroScale: 7,410 posts
Posted: Sunday, December 21, 2014 - 07:45 PM UTC
Rob,
Decals looking real good.
I also have a cat that thinks he has equal rights in the computer/model room.
Joel
On my Workbench:
Monogram 1/24 scale 427 Shelby Cobra
Just Completed:
Beemax 1/24 scale BMW M3 E30 1992 Evolution II
WARLORD
Associate Editor Warszawa, Poland
Joined: April 23, 2003
KitMaker: 1,923 posts
AeroScale: 100 posts
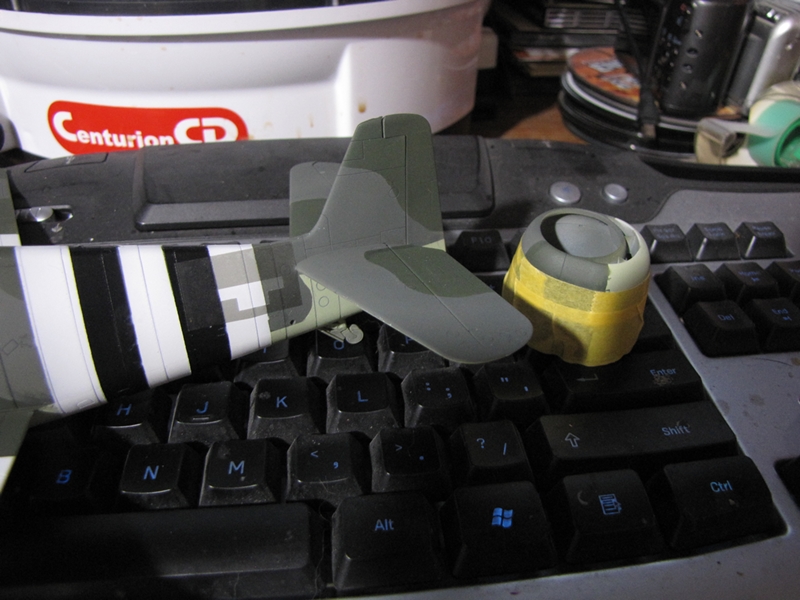
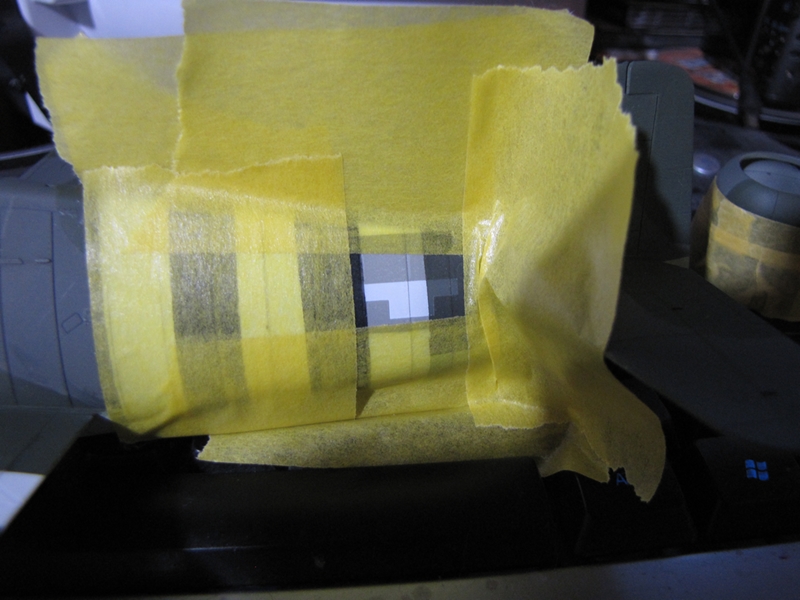
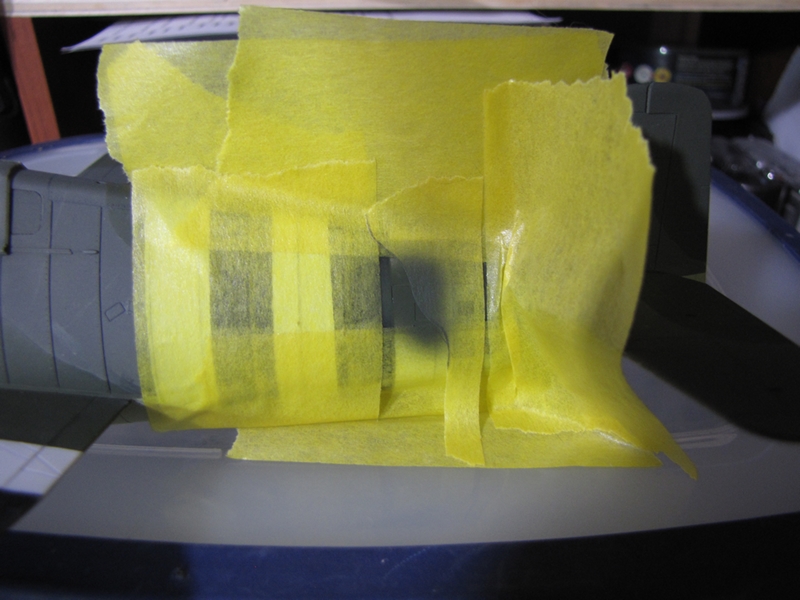
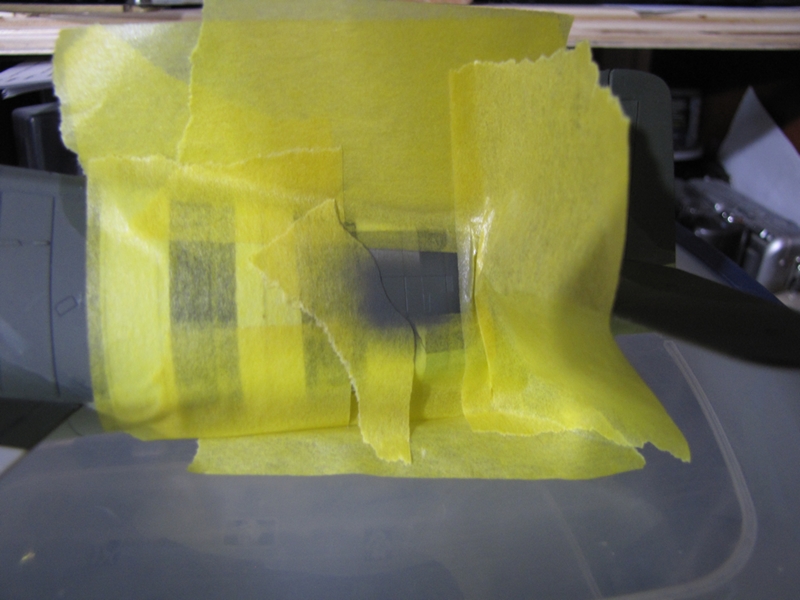
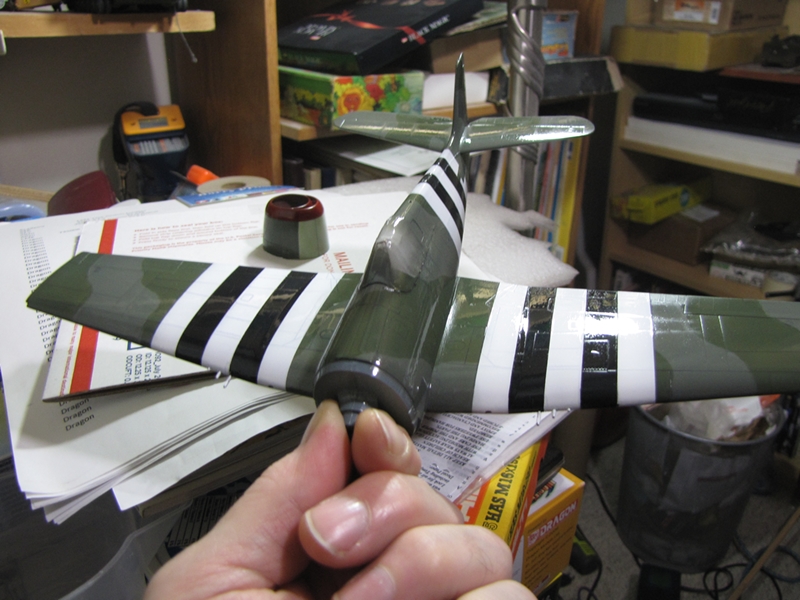
Posted: Monday, December 22, 2014 - 12:51 PM UTC
Some more weathering added and sealed with Lifecolor's Semi gloss (which looks very flat):


Joel_W
Associate Editor New York, United States
Joined: December 04, 2010
KitMaker: 11,666 posts
AeroScale: 7,410 posts
Posted: Monday, December 22, 2014 - 06:27 PM UTC
Marcin,
you're really getting close to the finish line. The satin finish does look rather Mattish, but all gloss finishes on operational aircraft slowly went from gloss to matt. Just the nature of the beast.
Joel
On my Workbench:
Monogram 1/24 scale 427 Shelby Cobra
Just Completed:
Beemax 1/24 scale BMW M3 E30 1992 Evolution II
Removed by original poster on 12/23/14 - 17:18:00 (GMT).
Arizona, United States
Joined: October 17, 2002
KitMaker: 192 posts
AeroScale: 70 posts
Posted: Monday, December 22, 2014 - 10:20 PM UTC
I've had a few days of productive work....In all, I've added:
'Wolfpacks' wing fold set, Eduards PE adhesive set, Eduards 'R-2800' engine (This A.M. resin kit is a perfect fit, the only duty to get it installed was to sand the engine 'stub' from both fuselage halves to accommodate the engine. The A.M. kit also comes with two panels that are replacements for removed ones on the kits cowling. They are very thing and have a rib down the center to look authentic.) I also added a set of True Detail diamond tread tires and a Quickboost gun sight. I also done some wire detail for the landing gear struts......


..............NOW comes the paint!!................
Joel_W
Associate Editor New York, United States
Joined: December 04, 2010
KitMaker: 11,666 posts
AeroScale: 7,410 posts
Posted: Monday, December 22, 2014 - 10:55 PM UTC
Thomas,
I'm really impressed with the Wolfpack folding wing set. Looks like it fit perfectly. Engine and struts really look outstanding. Can't wait to see some paint on your Cat.
Joel
On my Workbench:
Monogram 1/24 scale 427 Shelby Cobra
Just Completed:
Beemax 1/24 scale BMW M3 E30 1992 Evolution II
Lisboa, Portugal
Joined: August 27, 2010
KitMaker: 679 posts
AeroScale: 669 posts
Posted: Tuesday, December 23, 2014 - 07:48 AM UTC
Hi everyone,
Since its 2:30 a.m. right now I'm gonna be brief.
The cat is complete, by campaign standards at least. Still a few minor tasks but overall it's a wrap.
Considerations:
1- Fist time ever for me doing a marine corps AC, and also first time ever building the Wildcat. I loved it.
2-few scratch details added. this plane had a rather unique aerials layout, so i tried to replicate the little grip on the tail chord.
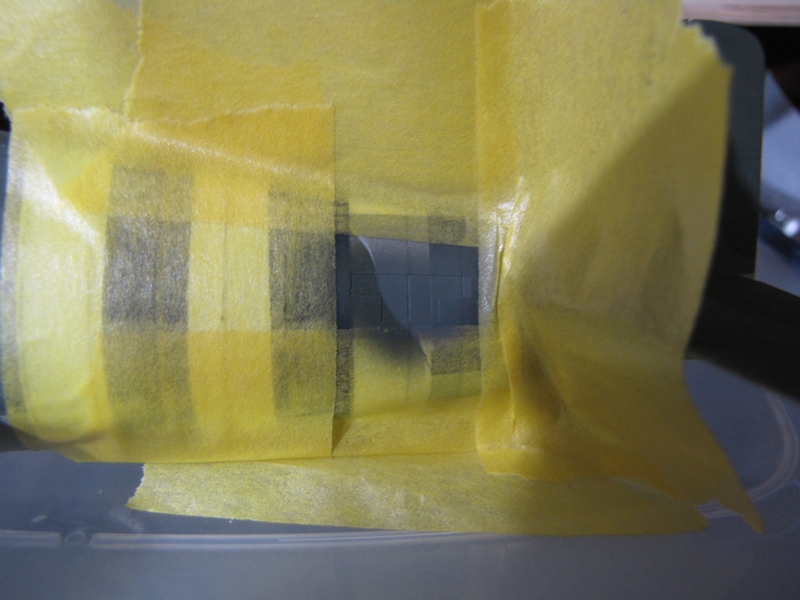
Hope you enjoy the photos, it was only when review the snapshots that I realized I had not removed the lower fuselage windows cover tape
Joel, I will upload some photos on the gallery until the end of the month, right now no time for that I'm afraid


Merry Xmas and a Happy new Year to all!
Pedro
Joel_W
Associate Editor New York, United States
Joined: December 04, 2010
KitMaker: 11,666 posts
AeroScale: 7,410 posts
Posted: Tuesday, December 23, 2014 - 07:20 PM UTC
Pedro,
Congratulations on crossing the finish line. A most successful build for sure.
Personally, I love it. A rock solid build, outstanding paint and weathering, which work so well together.
As long as you get your two pictures uploaded to the Campaign gallery by the end of the month, you're home free. It's the easy way for us to award campaign ribbons.
Joel
On my Workbench:
Monogram 1/24 scale 427 Shelby Cobra
Just Completed:
Beemax 1/24 scale BMW M3 E30 1992 Evolution II
#259
Massachusetts, United States
Joined: October 23, 2011
KitMaker: 2,265 posts
AeroScale: 1,715 posts
Posted: Tuesday, December 23, 2014 - 07:44 PM UTC
That Wildcat is beautiful! The faded blue gray is very impressive.

Lisboa, Portugal
Joined: August 27, 2010
KitMaker: 679 posts
AeroScale: 669 posts
Posted: Wednesday, December 24, 2014 - 04:11 PM UTC
Thank you both for th comments

Joel, I wont forget to put 2 photos in the gallery this weekend.
Cheers
Pedro
#226
British Columbia, Canada
Joined: February 20, 2012
KitMaker: 1,909 posts
AeroScale: 508 posts
Posted: Thursday, December 25, 2014 - 08:57 AM UTC
Very nice indeed Pedro!
Cheers Rob.
Anything without guns is a target!
27 completed campaigns and counting :)
Joel_W
Associate Editor New York, United States
Joined: December 04, 2010
KitMaker: 11,666 posts
AeroScale: 7,410 posts
Posted: Thursday, December 25, 2014 - 07:05 PM UTC
Just a quick reminder that the GRUMMAN CAMPAIGN officially ends on 12/31/14, just 6 days from now.
Joel
On my Workbench:
Monogram 1/24 scale 427 Shelby Cobra
Just Completed:
Beemax 1/24 scale BMW M3 E30 1992 Evolution II
#226
British Columbia, Canada
Joined: February 20, 2012
KitMaker: 1,909 posts
AeroScale: 508 posts
Posted: Friday, December 26, 2014 - 12:11 PM UTC
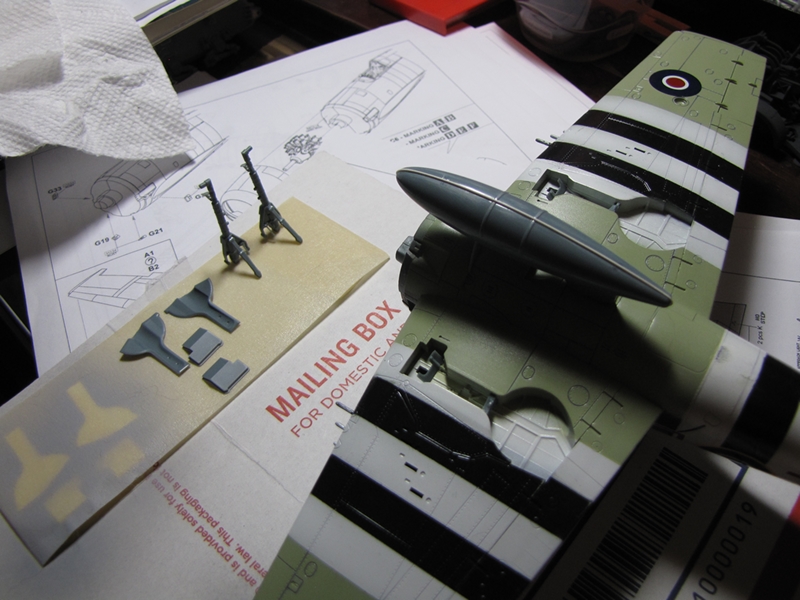
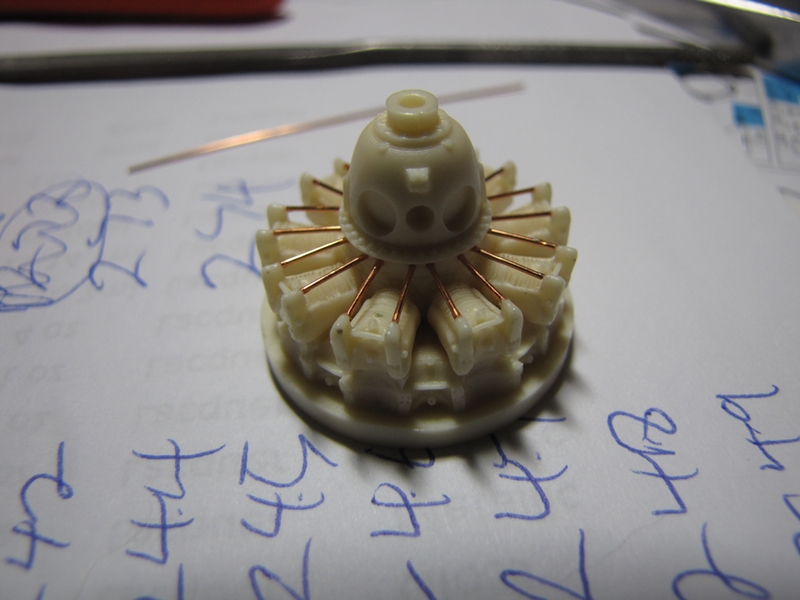
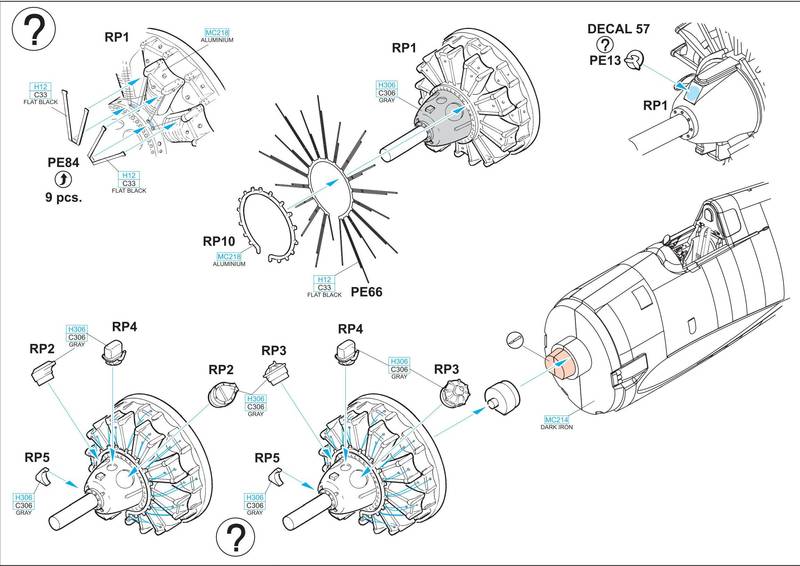
Working on the landing gear, fuel tank and engine.
I added wire for the push rods and to make the fit easier I drilled the holes in the crankcase deeper, that way when I glued the wire into the hole it was long enough to pull up to meet the rocker covers and still be in the crankcase.
I am not sure if I will use wire or the PE for the plug wires, will get to that in a moment.
I will say though that I see no way that the engine will fit the way the instructions show.

Cheers Rob.
Anything without guns is a target!
27 completed campaigns and counting :)
Ontario, Canada
Joined: July 22, 2012
KitMaker: 771 posts
AeroScale: 763 posts
Posted: Friday, December 26, 2014 - 08:24 PM UTC
Am I missing something? You're not painting the wheels interior green are you? Or are they sky and the white balance is off?
Matt Odom
I've been known to build a few things
Joel_W
Associate Editor New York, United States
Joined: December 04, 2010
KitMaker: 11,666 posts
AeroScale: 7,410 posts
Posted: Friday, December 26, 2014 - 11:09 PM UTC
Rob,
the resin engine really is looking quite nice. Personally, I've never liked the way that the PE wiring harness looks. The wires are round, not flat. PE works well for certain applications, but not for anything and everything as they would have us believe.
As for the fit of the engine, are you saying that due to the casting plate it will hit the front of the cowling?
I follow what Matt is saying, that compared to the sky color on the bottom of the aircraft, the Wheel Wells, Struts, and wheels look more like RAF Interior Green. Since I can see white cardboard, your White Balance doesn't seem to be off.
Joel
On my Workbench:
Monogram 1/24 scale 427 Shelby Cobra
Just Completed:
Beemax 1/24 scale BMW M3 E30 1992 Evolution II
#226
British Columbia, Canada
Joined: February 20, 2012
KitMaker: 1,909 posts
AeroScale: 508 posts
Posted: Saturday, December 27, 2014 - 02:37 AM UTC
It's all Sky
as for the fit of the engine the instructions have you cut off the front protruding section of the fuse and replace it with a similar resin part with a pin on the front, there is no mention of drilling a hole for the pin to fit and I don't think the engine will be in the right spot doing it that way.
Will figure it out when I finish the engine
I decided to use the PE for the plug wires it's not ideal as they are not round as you say but it will save a considerable amount of time with some fiddly drilling.

Cheers Rob.
Anything without guns is a target!
27 completed campaigns and counting :)
Joel_W
Associate Editor New York, United States
Joined: December 04, 2010
KitMaker: 11,666 posts
AeroScale: 7,410 posts
Posted: Saturday, December 27, 2014 - 03:09 AM UTC
Rob,
Seems to me that it would be easier to just square up the kit engine mount, and CA glue the engine to it. Of course you 1st need to make sure it fits correctly.
I understand your decision to use the PE harness, but I've never seen one that looks halfway decent up close and personal.
Joel
On my Workbench:
Monogram 1/24 scale 427 Shelby Cobra
Just Completed:
Beemax 1/24 scale BMW M3 E30 1992 Evolution II
Ontario, Canada
Joined: July 22, 2012
KitMaker: 771 posts
AeroScale: 763 posts
Posted: Saturday, December 27, 2014 - 05:16 AM UTC
Quoted Text
Rob,
Seems to me that it would be easier to just square up the kit engine mount, and CA glue the engine to it. Of course you 1st need to make sure it fits correctly.
I understand your decision to use the PE harness, but I've never seen one that looks halfway decent up close and personal.
Joel
IIRC (I've built 4 of these) the kit engine mount is already squared - so you may just have to add a styrene spacer to the front that is the same thickness as the pin on the front of the resin plug. That would be cleaner and stronger than replacing it with a resin plug that's exactly the same size and shape except the nipple.
Matt Odom
I've been known to build a few things