

Air Campaigns
Want to start or join a group build? This is where to start.
Want to start or join a group build? This is where to start.
Hosted by Frederick Boucher, Michael Satin
OFFICIAL:- Airfx III campaign

BravoTwoZero

Joined: June 11, 2009
KitMaker: 461 posts
AeroScale: 4 posts
Posted: Wednesday, February 11, 2015 - 04:26 AM UTC
Thanks for welcoming me in the campaign Richard! It's great to see all these Airfix models being built! I'm glad to get a chance to participate.

phantom_phanatic309

#372

Joined: March 10, 2010
KitMaker: 2,568 posts
AeroScale: 1,619 posts

Posted: Thursday, February 12, 2015 - 03:26 AM UTC
Quoted Text
Model coming together, not to much filler required:-

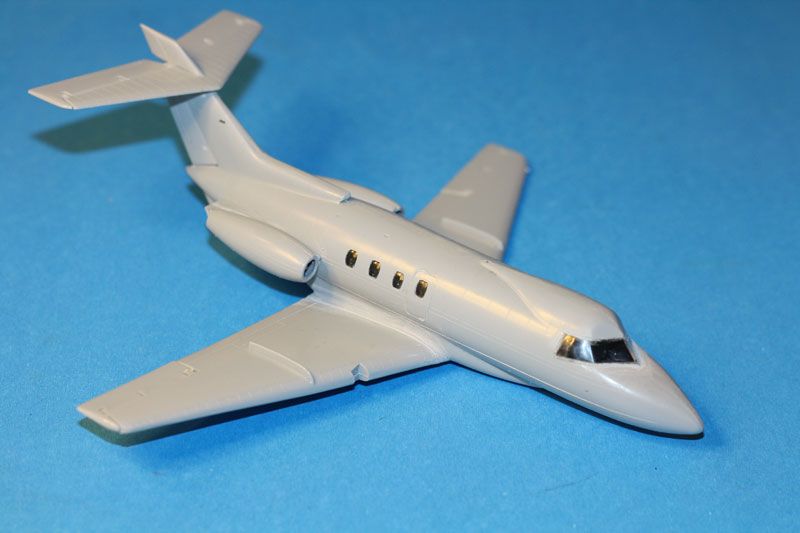
It's nice looking little jet isn't it. Just got my hands on an old boxing and I was surprised at how neat the moulding was (I can live with raised lines
 ). Not sure about the decals though, very yellowed.

tinbanger

Joined: February 04, 2008
KitMaker: 2,507 posts
AeroScale: 1,814 posts
Posted: Thursday, February 12, 2015 - 03:36 AM UTC
Quoted Text
Quoted TextModel coming together, not to much filler required:-
It's nice looking little jet isn't it. Just got my hands on an old boxing and I was surprised at how neat the moulding was (I can live with raised lines
The raised panel lines are so fine it's not an issue to me.


ljames0874

Joined: August 15, 2012
KitMaker: 408 posts
AeroScale: 365 posts

Posted: Thursday, February 12, 2015 - 06:55 PM UTC
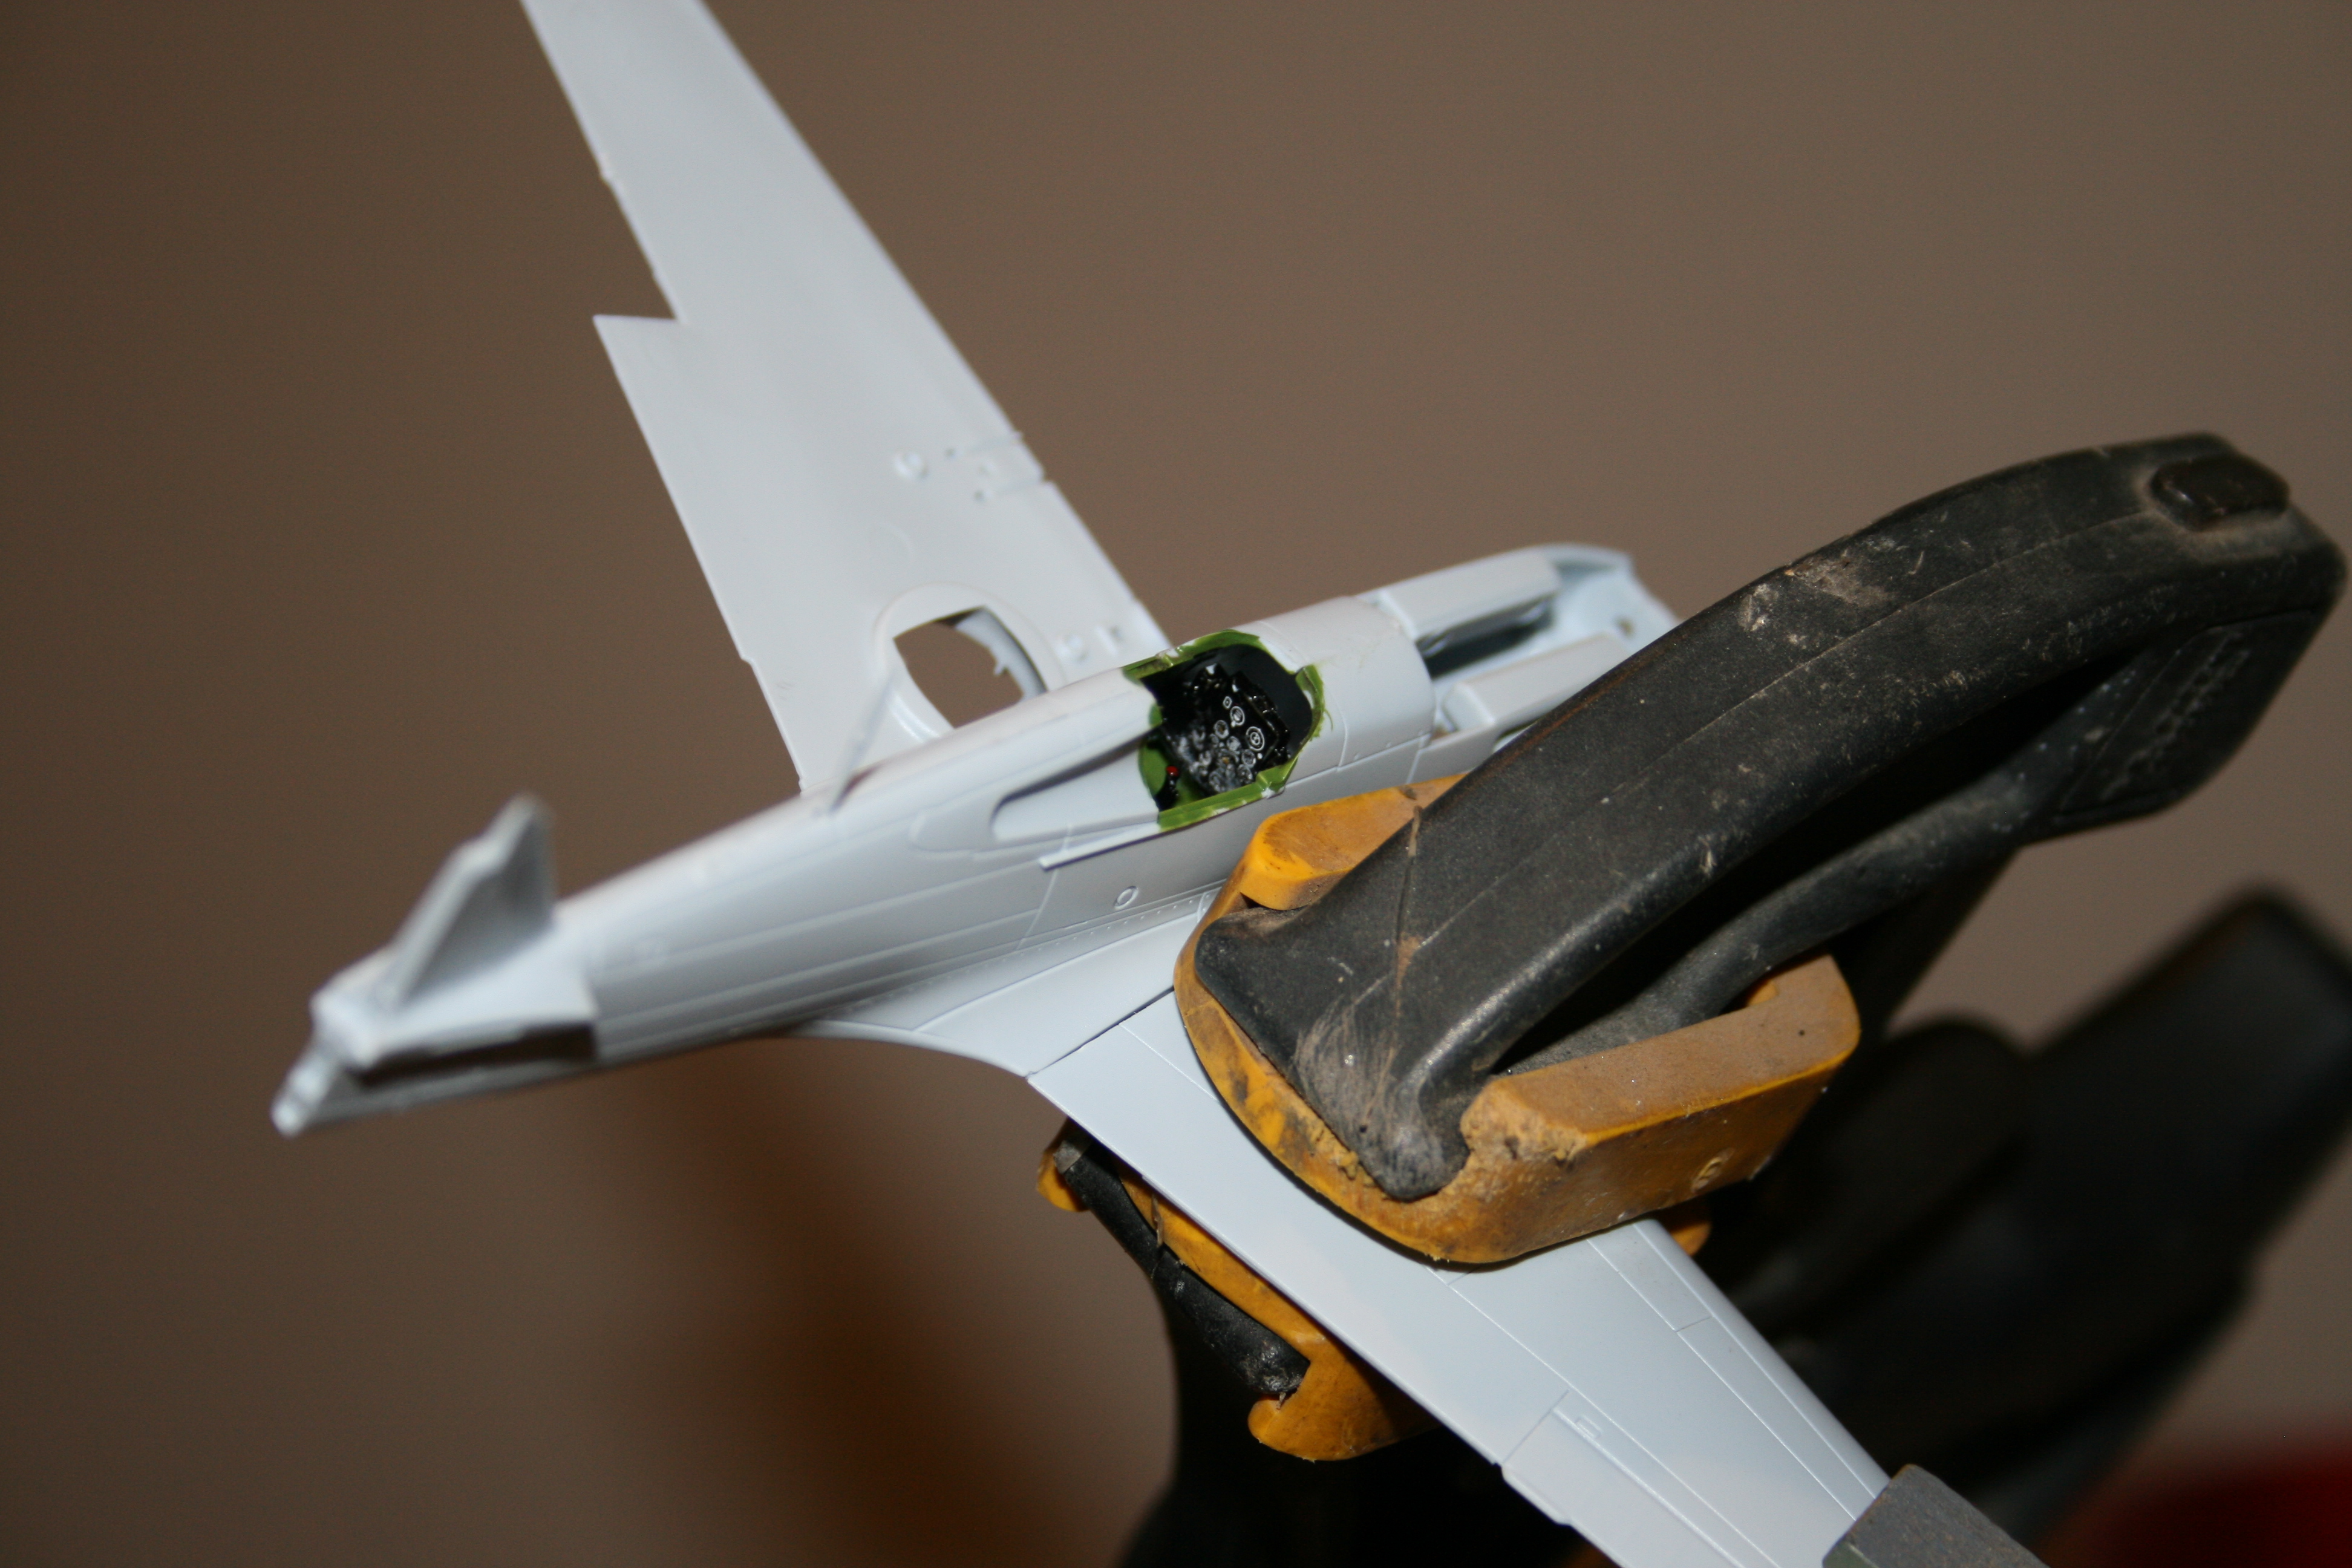
Starting to look like a Hunter now!
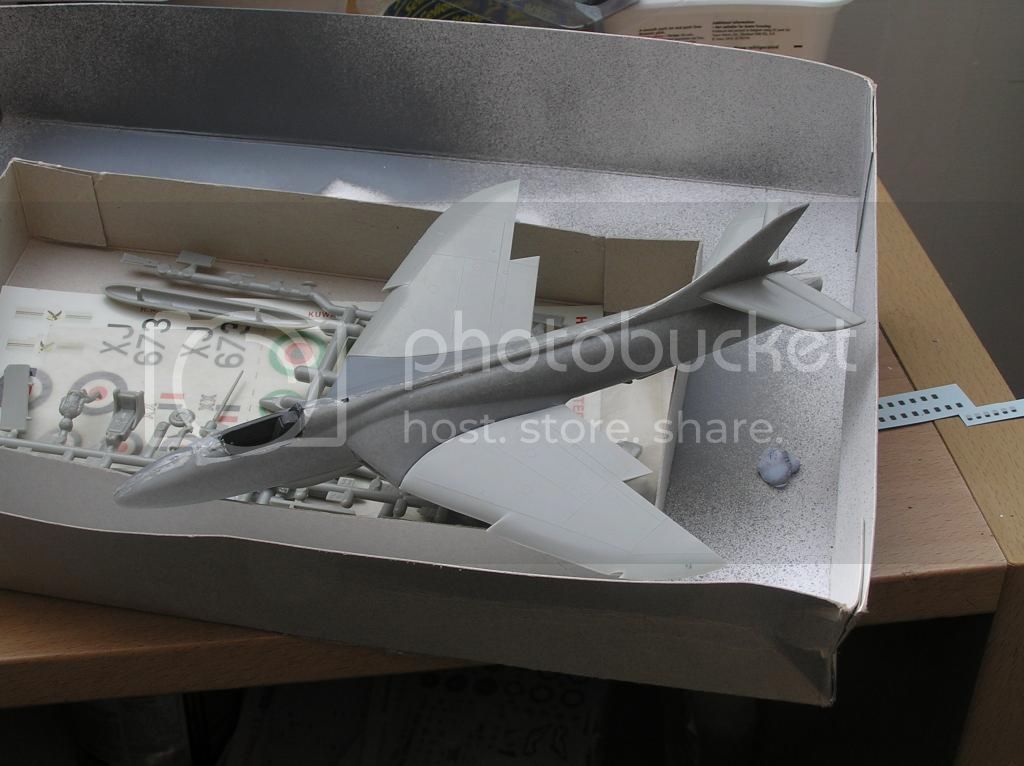
The kit is going together reasonably well for a kit of this vintage (1983). There is a slight warping around the lower fuselage seam, careful clamping helped when it was glued together, and a little filler finished it Ok. Now that the wings are on, there is a doozy of a gap to fill around the joint. Ho hum - cheers everyone!
The kit is going together reasonably well for a kit of this vintage (1983). There is a slight warping around the lower fuselage seam, careful clamping helped when it was glued together, and a little filler finished it Ok. Now that the wings are on, there is a doozy of a gap to fill around the joint. Ho hum - cheers everyone!

firstcircle
Joined: November 19, 2008
KitMaker: 2,249 posts
AeroScale: 34 posts
Posted: Saturday, February 14, 2015 - 05:56 AM UTC
Also flying the flag in this campaign for things that don't float in air or water (just on mud) - SdKfz250.
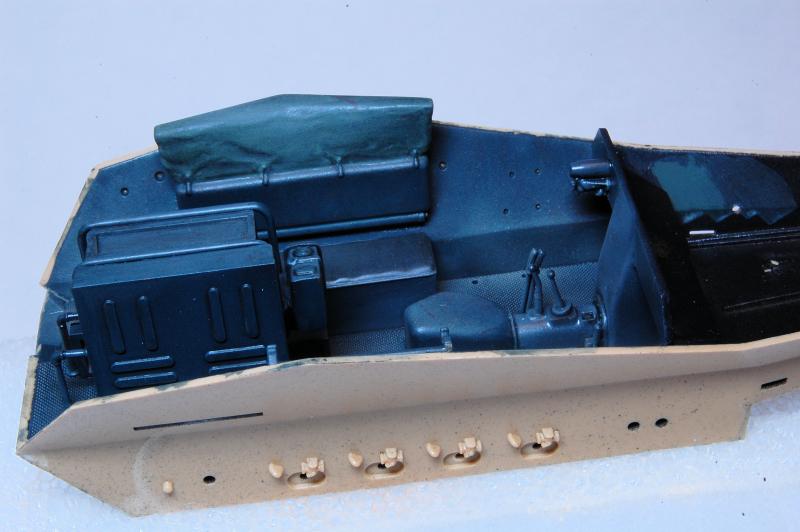
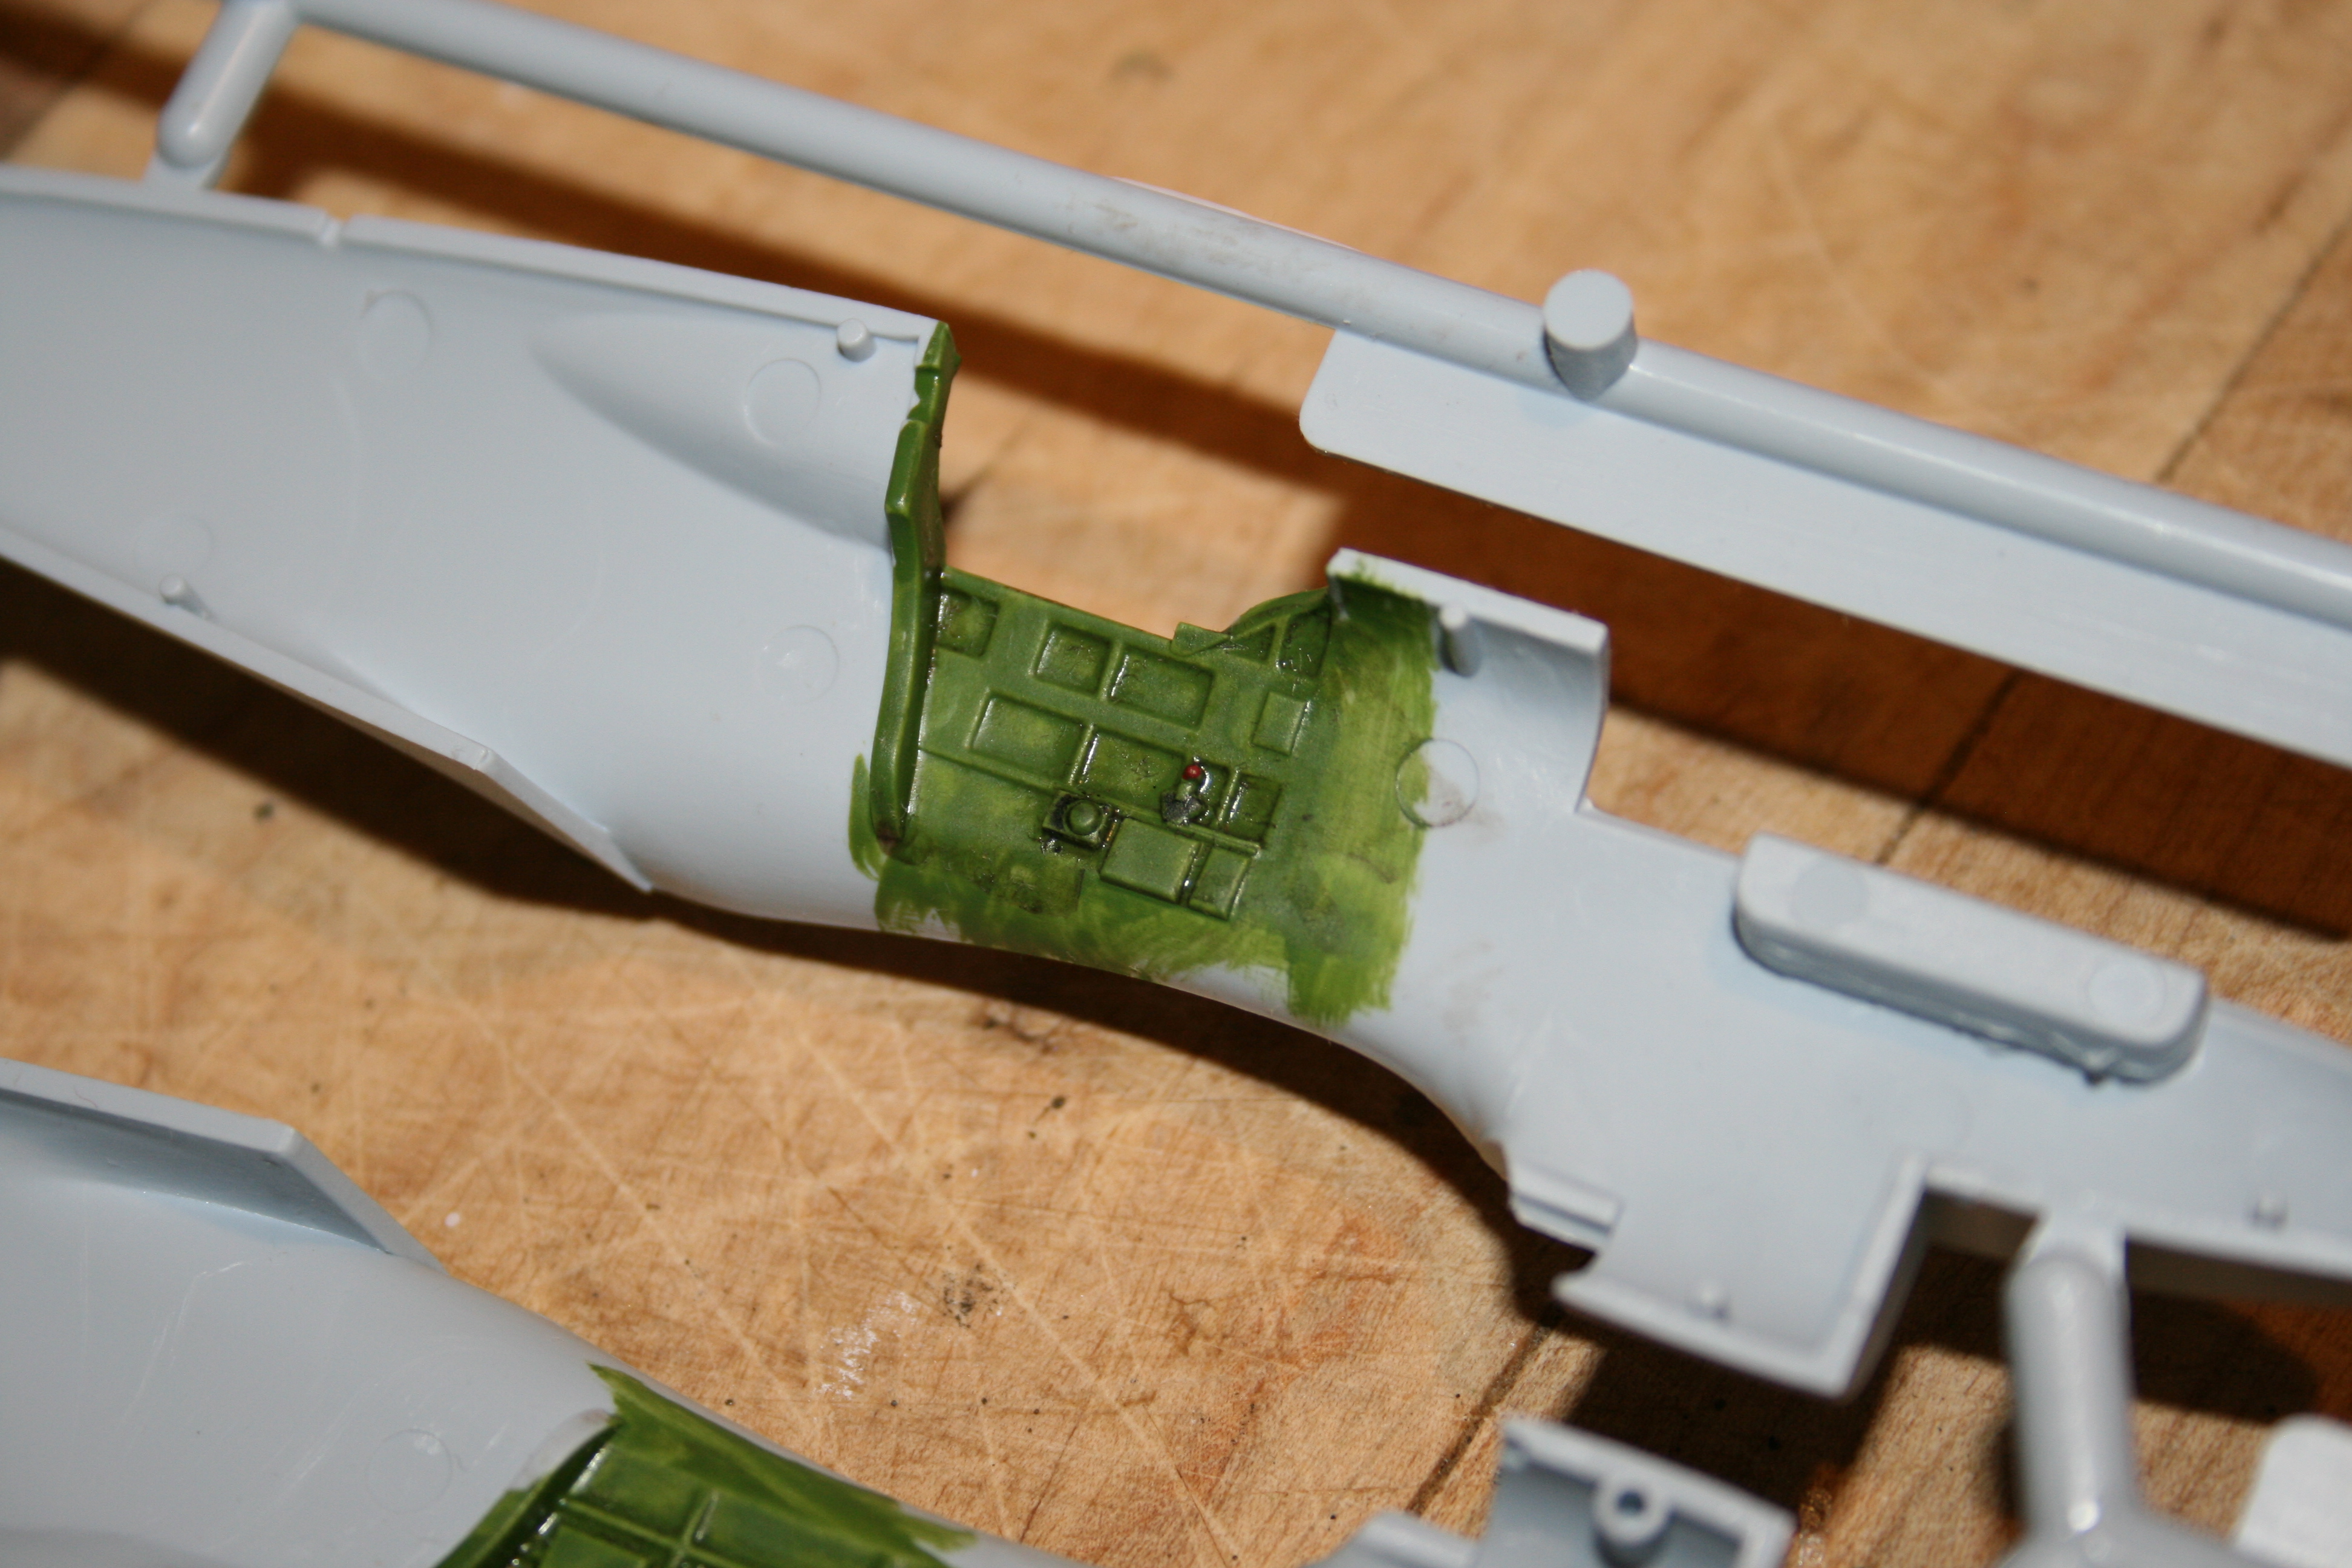
Painting of the interior is now mostly done, just some dirt / weathering to be added.
Radio details painted in. Should have done some wiring at this stage, not sure I can fit it in now the sides are on.
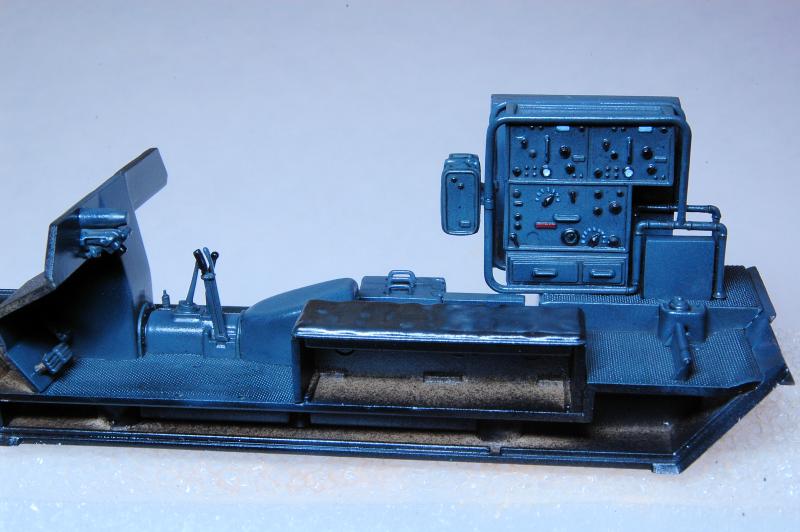
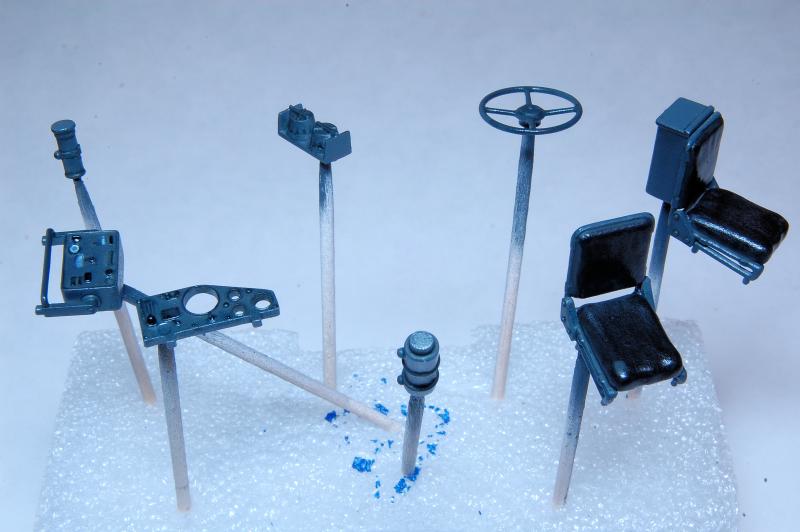
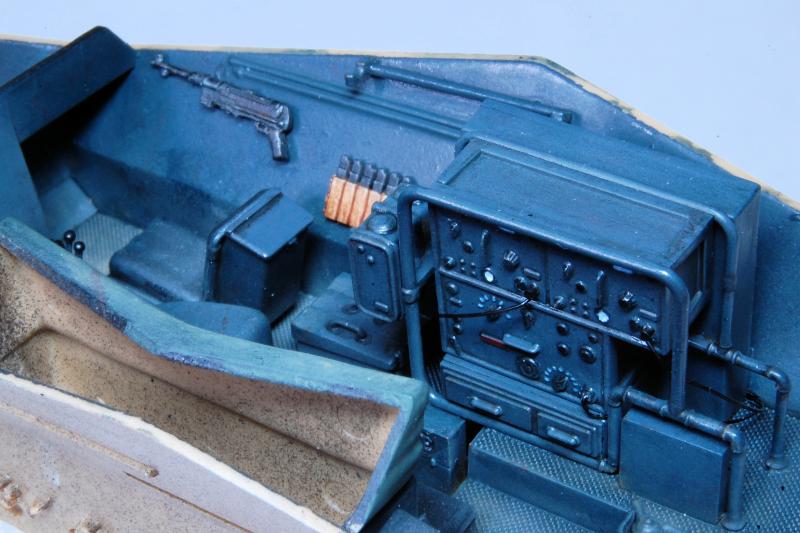
More interior details with basic paintwork:
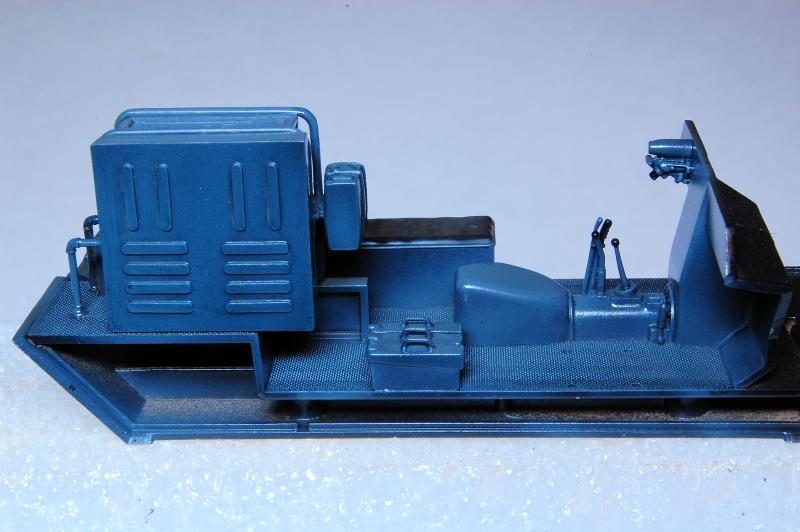
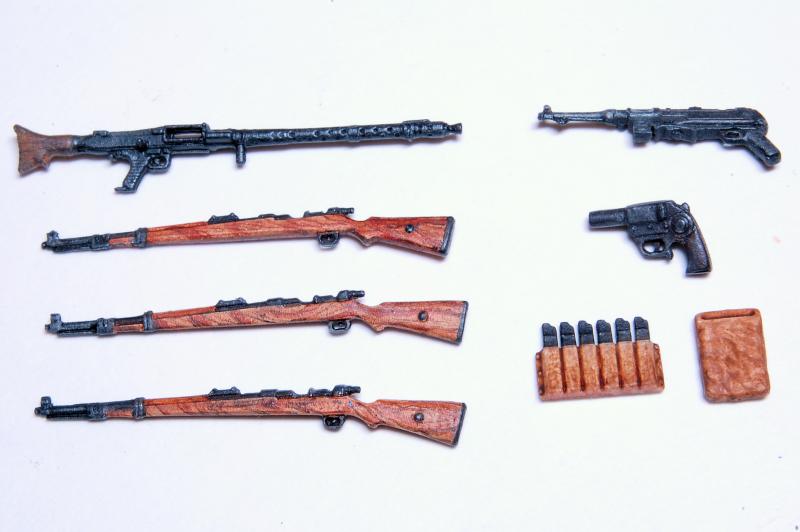
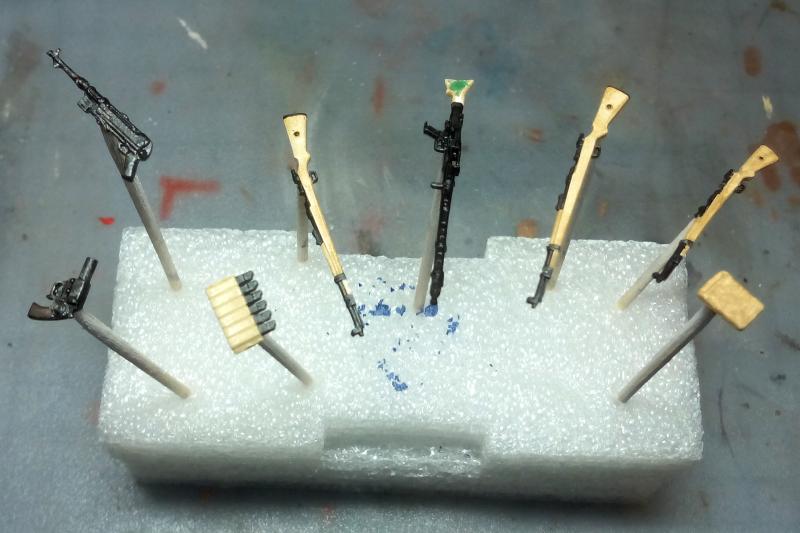
Weapons painted: tried hard on the Kar90 wood, grain probably will get slightly toned down later; MG34 needed big ejector hole on the stock filling. The little gun is a Walther flare pistol, from what I can make out in photos it seems to have a bakelite grip - certainly something dark. Barrel is nice and fat, so easy to drill out. Not sure what the furry leathery looking thing is.
With the hull sides added, space starts to look pretty tight, and that's without the hull top and the seats... The tarpy thing is meant to be grey / green, and is at least a lot more matt than the Klear coated rest of the interior.
Painting of the interior is now mostly done, just some dirt / weathering to be added.
Radio details painted in. Should have done some wiring at this stage, not sure I can fit it in now the sides are on.
More interior details with basic paintwork:
Weapons painted: tried hard on the Kar90 wood, grain probably will get slightly toned down later; MG34 needed big ejector hole on the stock filling. The little gun is a Walther flare pistol, from what I can make out in photos it seems to have a bakelite grip - certainly something dark. Barrel is nice and fat, so easy to drill out. Not sure what the furry leathery looking thing is.
With the hull sides added, space starts to look pretty tight, and that's without the hull top and the seats... The tarpy thing is meant to be grey / green, and is at least a lot more matt than the Klear coated rest of the interior.
SGTJKJ

#041

Joined: July 20, 2006
KitMaker: 10,069 posts
AeroScale: 3,788 posts

Posted: Saturday, February 14, 2015 - 11:47 AM UTC
Matthew, looks great! The wood on the Kar98s is outstanding! Awesome effect - how did you do that? Oils?
The square box is a map holder I think.....
This is a a really nice result so far on this old kit. Looking forward to see more!
The square box is a map holder I think.....
This is a a really nice result so far on this old kit. Looking forward to see more!


RedDuster
Joined: March 01, 2010
KitMaker: 7,078 posts
AeroScale: 118 posts

Posted: Sunday, February 15, 2015 - 03:24 AM UTC
Great builds going on, work on the 250/3 is excellent, have a real soft spot for that kit, built when it first came out, was ahead of the class back then, still looks good today.
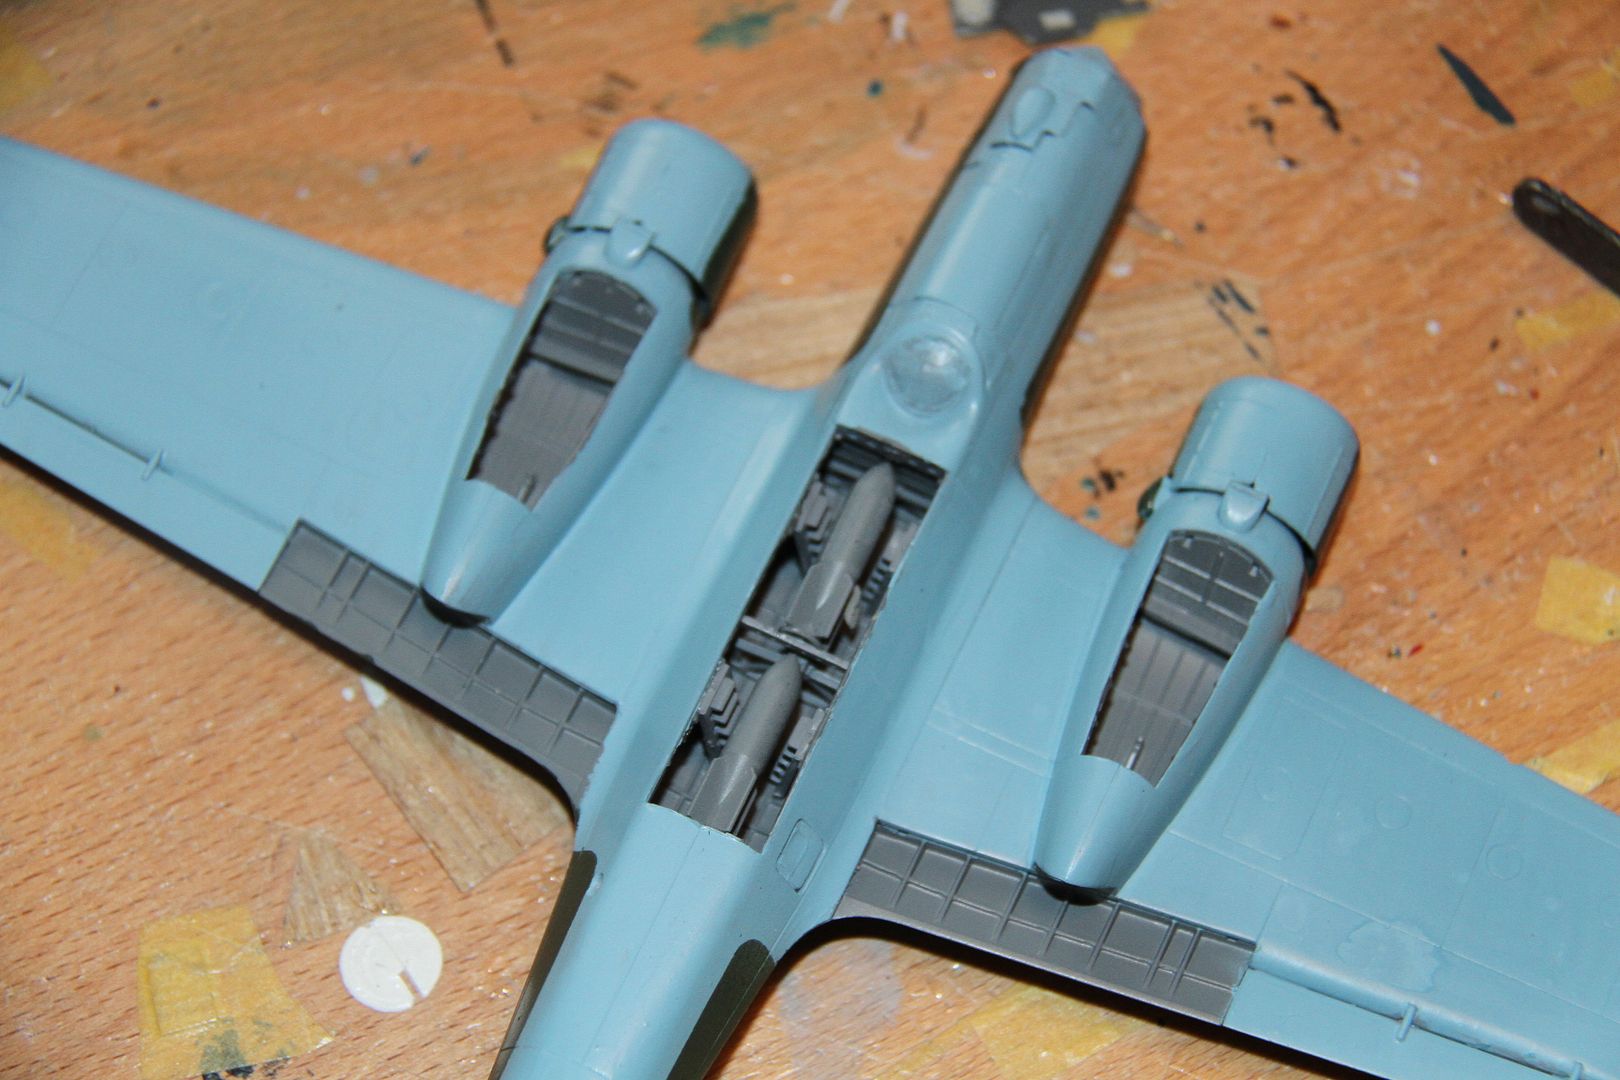
Finally the weather was good enough to get the windy stick out and sort out the paint on the underside out.
along with the bomb bay and undercarriage doors.
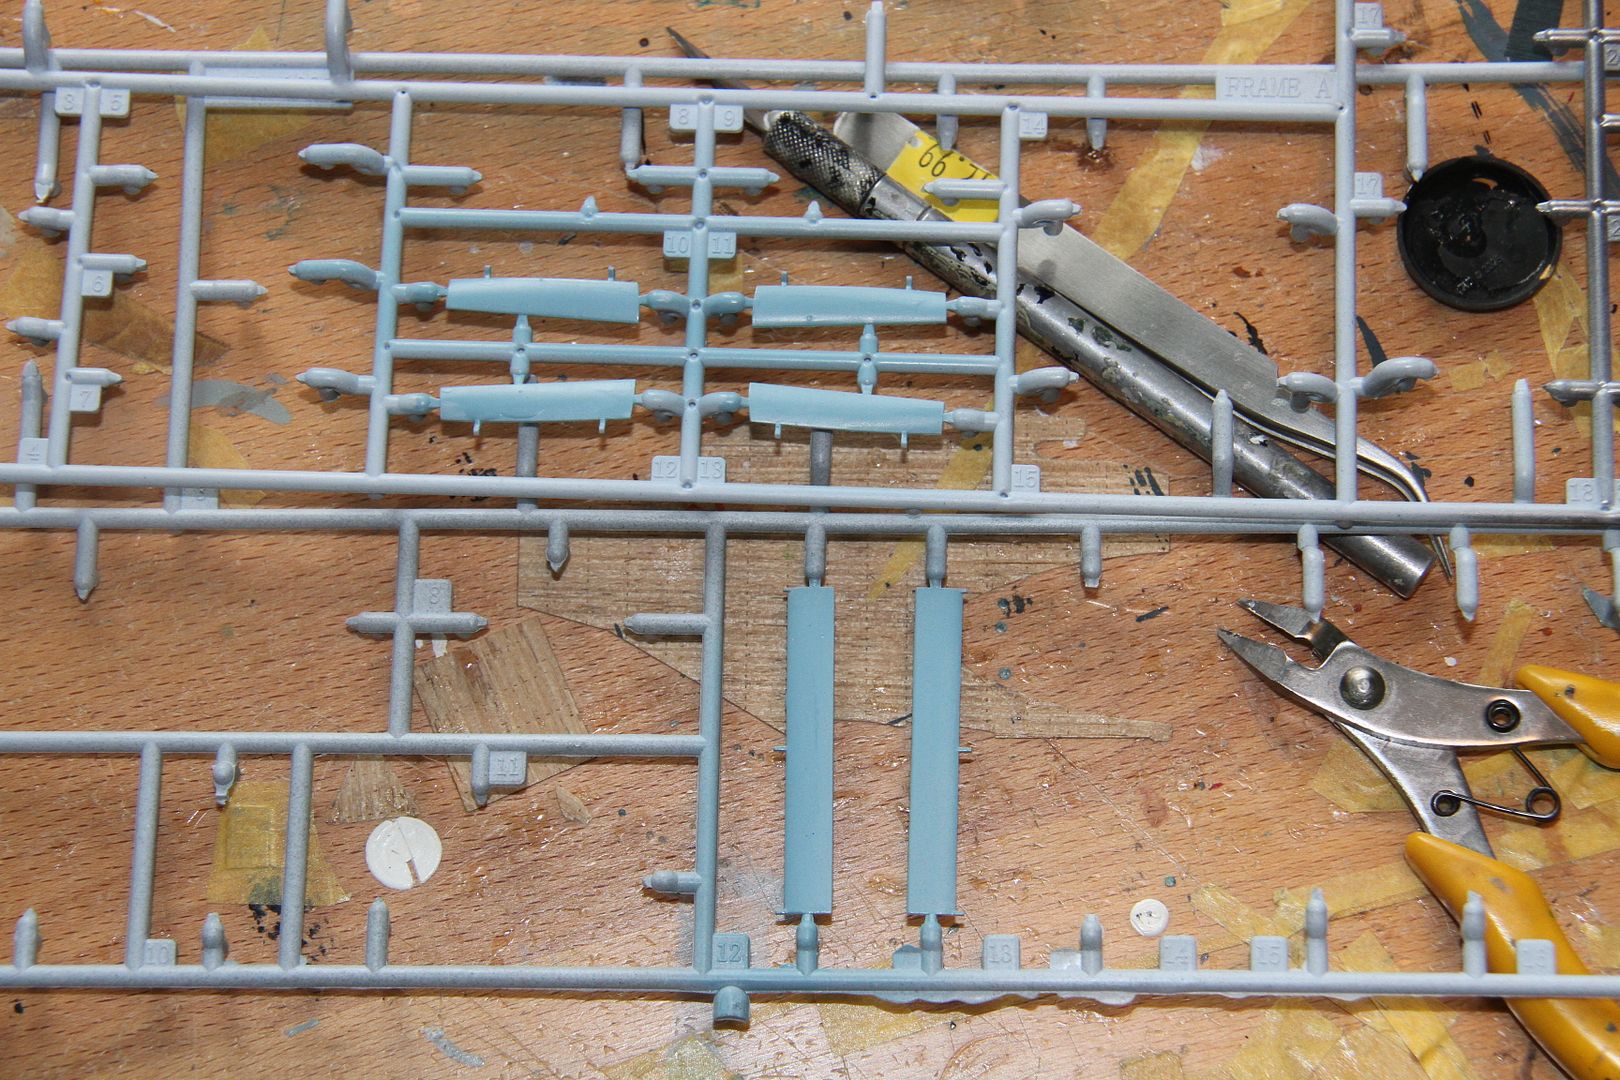
the bomb load also got a coat of paint.
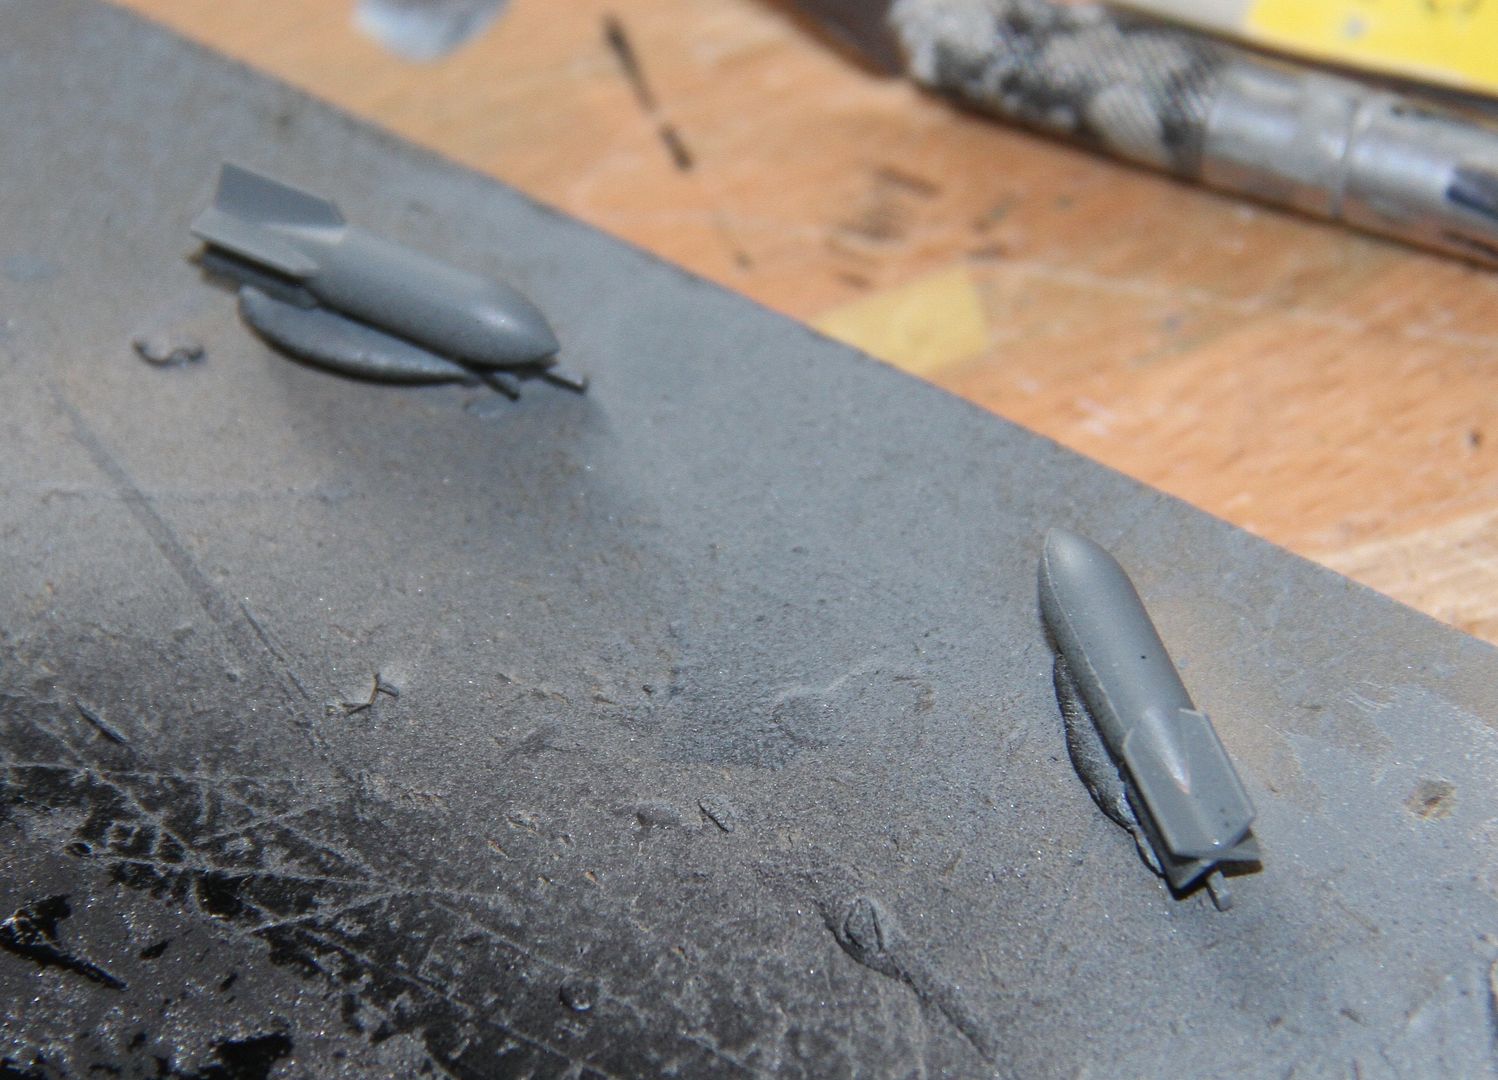
next job, camo on the upper surfaces, so masking time.
Si
Finally the weather was good enough to get the windy stick out and sort out the paint on the underside out.

along with the bomb bay and undercarriage doors.

the bomb load also got a coat of paint.

next job, camo on the upper surfaces, so masking time.
Si
phantom_phanatic309
#372
Joined: March 10, 2010
KitMaker: 2,568 posts
AeroScale: 1,619 posts
Posted: Sunday, February 15, 2015 - 04:05 AM UTC
Quoted Text
Also flying the flag in this campaign for things that don't float in air or water (just on mud) - SdKfz250.
Painting of the interior is now mostly done, just some dirt / weathering to be added.
Radio details painted in. Should have done some wiring at this stage, not sure I can fit it in now the sides are on.
More interior details with basic paintwork:
Weapons painted: tried hard on the Kar90 wood, grain probably will get slightly toned down later; MG34 needed big ejector hole on the stock filling. The little gun is a Walther flare pistol, from what I can make out in photos it seems to have a bakelite grip - certainly something dark. Barrel is nice and fat, so easy to drill out. Not sure what the furry leathery looking thing is.
With the hull sides added, space starts to look pretty tight, and that's without the hull top and the seats... The tarpy thing is meant to be grey / green, and is at least a lot more matt than the Klear coated rest of the interior.
I love those rifles! How did you do that?
firstcircle
Joined: November 19, 2008
KitMaker: 2,249 posts
AeroScale: 34 posts
Posted: Wednesday, February 18, 2015 - 04:45 AM UTC
Well being so old and for the campaign with a deadline and everything I decided just get on with it and add the sides and top to the body. Now that's been done the interior looks very dark, though as I keep reminding myself, that is how dark this grey was.
On the rifle wood grain... I expect some won't appreciate the kind of "walnut dash" finish, though I did refer to a photo when painting them... So the rifles were spray primed with white. The metal parts were brush painted black, the wood with Sand, both Model Air:
The thin brown lines were then added using same brand of Burnt Umber, well thinned and with retarder and a 5/0 brush. The thicker colour was added on top, a very thinned MA Tank Brown (I think) with a thicker brush:
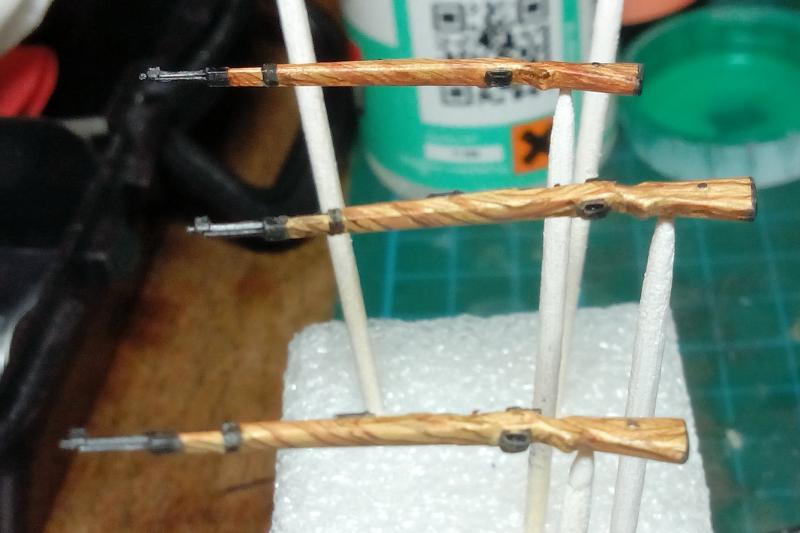
In the photo further up of them finished they've also had a wash of Sienna oil paint and the metal parts have had some graphite rubbed on them.
Managed some wiring on the radios even with the sides on:
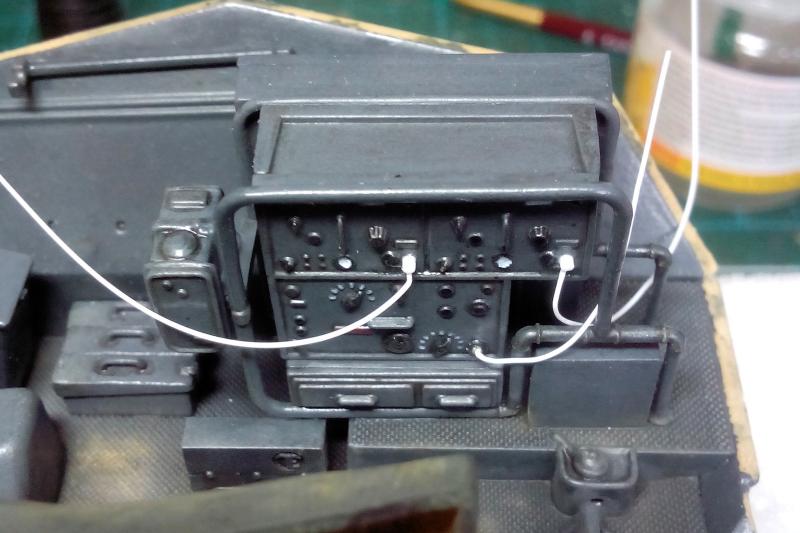
Speedo was printed from a photo and coated with Klear, the others I just relied on the supplied transparency provided. I must admit I have seen this done better...
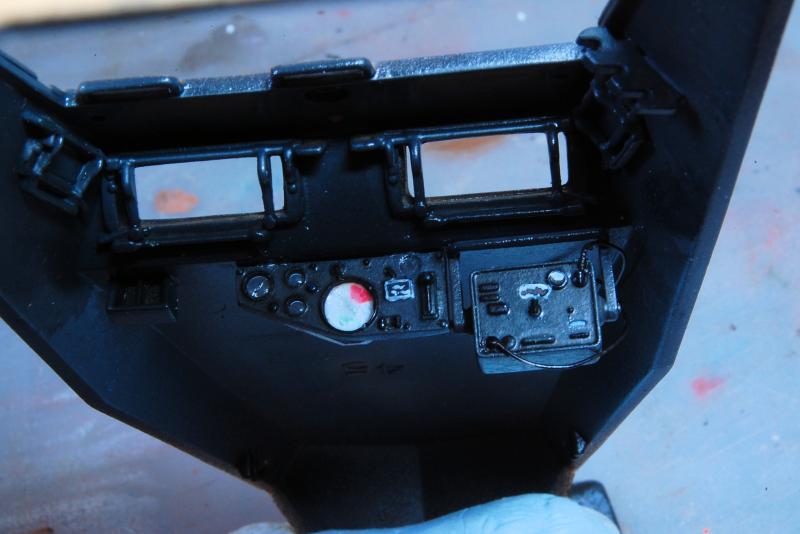
Few more of the details inside, and the wiring painted and tucked away behind the radio set:
Hull top added:
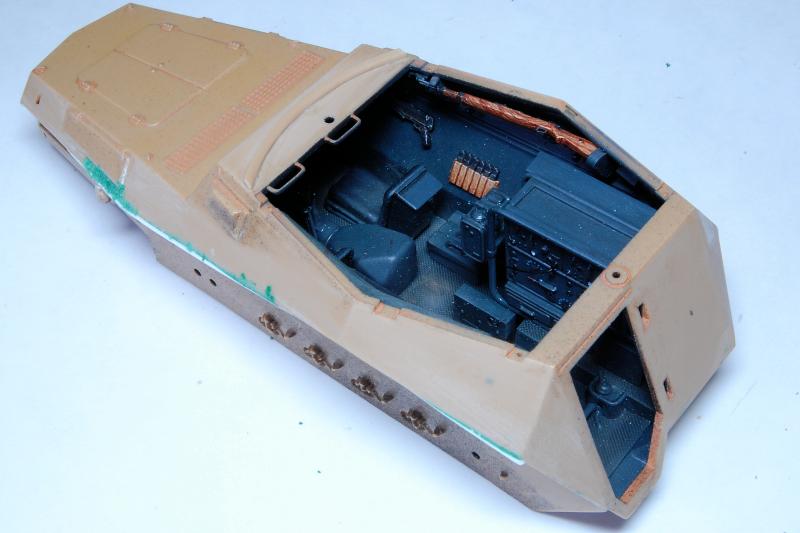
On the left side the hull top plate overlapped at the apex of the join, which it should do, though I'm not sure if that was by Airfix's design or not, I suspect not. I added this "ridge" on both sides with a triangular Plastruct strip.
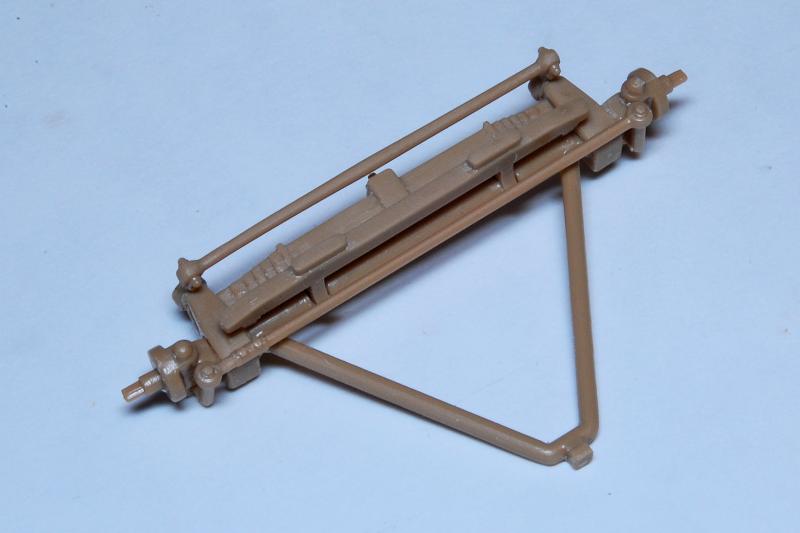
While that was hardening off in preparation for sanding, assembled the front steering rack and axle. The fit is so good that it would more or less all hold together without cement:
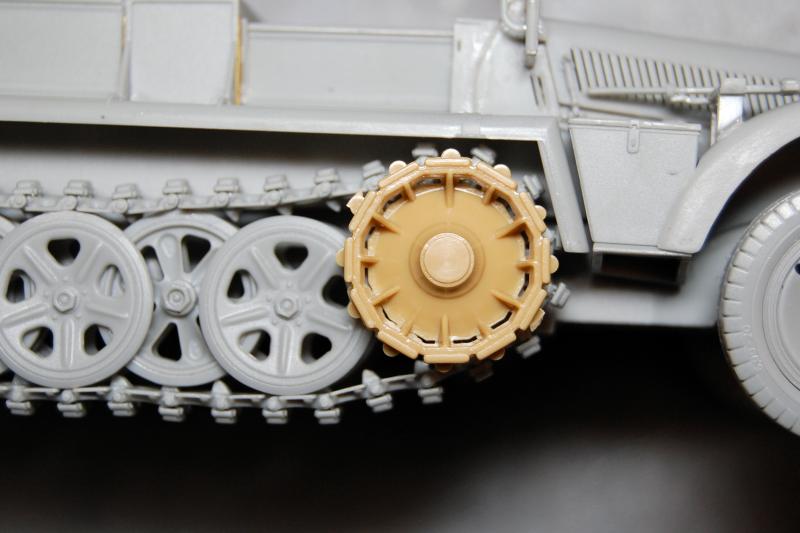
I'm now getting toward the tricky bit of this kit, the tracks. I expect some people will be appalled that I have laid out the money on a set of Friul tracks that aren't even in the right scale... but bear with me (I hope). I bought them after checking the Airfix tracks against the Dragon SdKfz10 tracks. In terms of width there isn't much difference: the real tracks are 240mm wide; Airfix tracks are 7mm wide; in 1/35 they should be 6.85mm. The pitch is a way out however: the Airfix tracks have a pitch of 5.5mm, in 1/35 they should be 4.6mm. This means the 1/35 tracks won't engage with the Airfix sprocket. It seems I have some choices to make: forget it and go with the Airfix rubber tracks; attempt to adapt the sprocket to fit the metal tracks; use the metal Friul sprocket even though it is slightly undersize; fabricate a custom sprocket that will be the correct diameter but that will also fit the pitch of the tracks. There will be enough track by the way... I think: these are for the SdKfz 10 and it has more links than the 250.
The metal sprocket trying for size:

The Airfix sprocket against the Dragon SdKfz10:
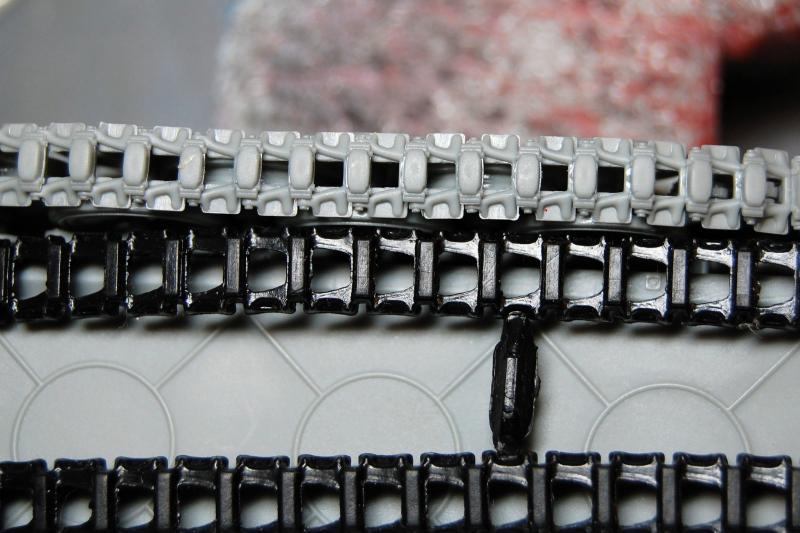
The Airfix tracks against the Dragon tracks:
Yeah, probably a stupid idea.
Is this allowed under the campaign rules by the way?
On the rifle wood grain... I expect some won't appreciate the kind of "walnut dash" finish, though I did refer to a photo when painting them... So the rifles were spray primed with white. The metal parts were brush painted black, the wood with Sand, both Model Air:
The thin brown lines were then added using same brand of Burnt Umber, well thinned and with retarder and a 5/0 brush. The thicker colour was added on top, a very thinned MA Tank Brown (I think) with a thicker brush:
In the photo further up of them finished they've also had a wash of Sienna oil paint and the metal parts have had some graphite rubbed on them.
Managed some wiring on the radios even with the sides on:
Speedo was printed from a photo and coated with Klear, the others I just relied on the supplied transparency provided. I must admit I have seen this done better...
Few more of the details inside, and the wiring painted and tucked away behind the radio set:
Hull top added:
On the left side the hull top plate overlapped at the apex of the join, which it should do, though I'm not sure if that was by Airfix's design or not, I suspect not. I added this "ridge" on both sides with a triangular Plastruct strip.
While that was hardening off in preparation for sanding, assembled the front steering rack and axle. The fit is so good that it would more or less all hold together without cement:
I'm now getting toward the tricky bit of this kit, the tracks. I expect some people will be appalled that I have laid out the money on a set of Friul tracks that aren't even in the right scale... but bear with me (I hope). I bought them after checking the Airfix tracks against the Dragon SdKfz10 tracks. In terms of width there isn't much difference: the real tracks are 240mm wide; Airfix tracks are 7mm wide; in 1/35 they should be 6.85mm. The pitch is a way out however: the Airfix tracks have a pitch of 5.5mm, in 1/35 they should be 4.6mm. This means the 1/35 tracks won't engage with the Airfix sprocket. It seems I have some choices to make: forget it and go with the Airfix rubber tracks; attempt to adapt the sprocket to fit the metal tracks; use the metal Friul sprocket even though it is slightly undersize; fabricate a custom sprocket that will be the correct diameter but that will also fit the pitch of the tracks. There will be enough track by the way... I think: these are for the SdKfz 10 and it has more links than the 250.
The metal sprocket trying for size:
The Airfix sprocket against the Dragon SdKfz10:
The Airfix tracks against the Dragon tracks:
Yeah, probably a stupid idea.
Is this allowed under the campaign rules by the way?
tinbanger
Joined: February 04, 2008
KitMaker: 2,507 posts
AeroScale: 1,814 posts
Posted: Wednesday, February 18, 2015 - 04:58 AM UTC
Hi Matthew
I would allow different tracks as per campaign rule #3
Good luck with the mod's.
I would allow different tracks as per campaign rule #3
Good luck with the mod's.

ZAPanzer

Joined: September 12, 2012
KitMaker: 88 posts
AeroScale: 39 posts
Posted: Wednesday, February 18, 2015 - 03:46 PM UTC
Mathew, that really looks amazing!
SGTJKJ
#041
Joined: July 20, 2006
KitMaker: 10,069 posts
AeroScale: 3,788 posts
Posted: Wednesday, February 18, 2015 - 04:16 PM UTC
Looks cool, Matthew. Thanks for sharing the tips on the wood grain.
Looking forward to see the track surgery.
Looking forward to see the track surgery.

Berwickboy

Joined: April 27, 2013
KitMaker: 450 posts
AeroScale: 387 posts
Posted: Thursday, February 19, 2015 - 02:07 AM UTC
The Defiant has reached a critical point, it's painting time.
The first cooat has been applied with a hairy stick, I have used Revell Matt Acrylic Swartz thinned with a few drops of Humbrol Thinners

This, of course, is the first coat
The first cooat has been applied with a hairy stick, I have used Revell Matt Acrylic Swartz thinned with a few drops of Humbrol Thinners

This, of course, is the first coat


DaGreatQueeg

Joined: August 01, 2005
KitMaker: 1,049 posts
AeroScale: 41 posts

Posted: Thursday, February 19, 2015 - 11:02 AM UTC
Hi gents .....
I'd like to enter the OO/HO (1/76th) Airfix Sherman circa 1961. It was one of the first tank kits released, it's partners being the Panther and Churchill.
My kits aren't boxed, they were brought bagged from the LHS many years ago, there's about 6 and some bits in the stash box, I hope this is ok?
cheers
Brent

tinbanger
Joined: February 04, 2008
KitMaker: 2,507 posts
AeroScale: 1,814 posts
Posted: Thursday, February 19, 2015 - 04:19 PM UTC
Welcome to the campaign Brent!
Don't mix the parts up
Don't mix the parts up

c4willy
#305
Joined: February 01, 2006
KitMaker: 1,673 posts
AeroScale: 1,517 posts

Posted: Friday, February 20, 2015 - 01:44 AM UTC
Well with the Bv141 absorbing most of my time the Anson has been languishing. So last night I worked on it some more and while doing so realised that Airfix neglected to provide exhausts for the old girl! So while looking for just what the exhausts should look like I found this article on the Anson that was restored to flying condition here in New Zealand and some of these photos are just outstanding I'll provide a link here so you can go check her out.
I've drilled into the cowls and put a length of brass tube which I've drilled out to incease the internal diameter. After checking the pics of the Anson I see exhaust staining on the underside of the wing but not on the cowls themselves.


I've drilled into the cowls and put a length of brass tube which I've drilled out to incease the internal diameter. After checking the pics of the Anson I see exhaust staining on the underside of the wing but not on the cowls themselves.
DaGreatQueeg
Joined: August 01, 2005
KitMaker: 1,049 posts
AeroScale: 41 posts
Posted: Friday, February 20, 2015 - 02:01 AM UTC
Quoted Text
Welcome to the campaign Brent!
Don't mix the parts up
Lol, it wouldn't be the first time ! I'm going to build 2, one with only minor tweaks pretty much OOB (as per campaign suggestions) and one with a little more tidying up. It's more to see if these old girls will scub up with paint more than anything ....
Chris - Lovely looking Anson !!!! It's Art Deco weekend here so we've got a few of the old visiting for the airshow ....
cheers
Brent
tinbanger
Joined: February 04, 2008
KitMaker: 2,507 posts
AeroScale: 1,814 posts
Posted: Friday, February 20, 2015 - 04:47 AM UTC
Chris the Anson is coming along nicely!
RedDuster
Joined: March 01, 2010
KitMaker: 7,078 posts
AeroScale: 118 posts
Posted: Saturday, February 21, 2015 - 03:21 AM UTC
Great stuff going on, the Defiant, 250 and Anson looking really good.
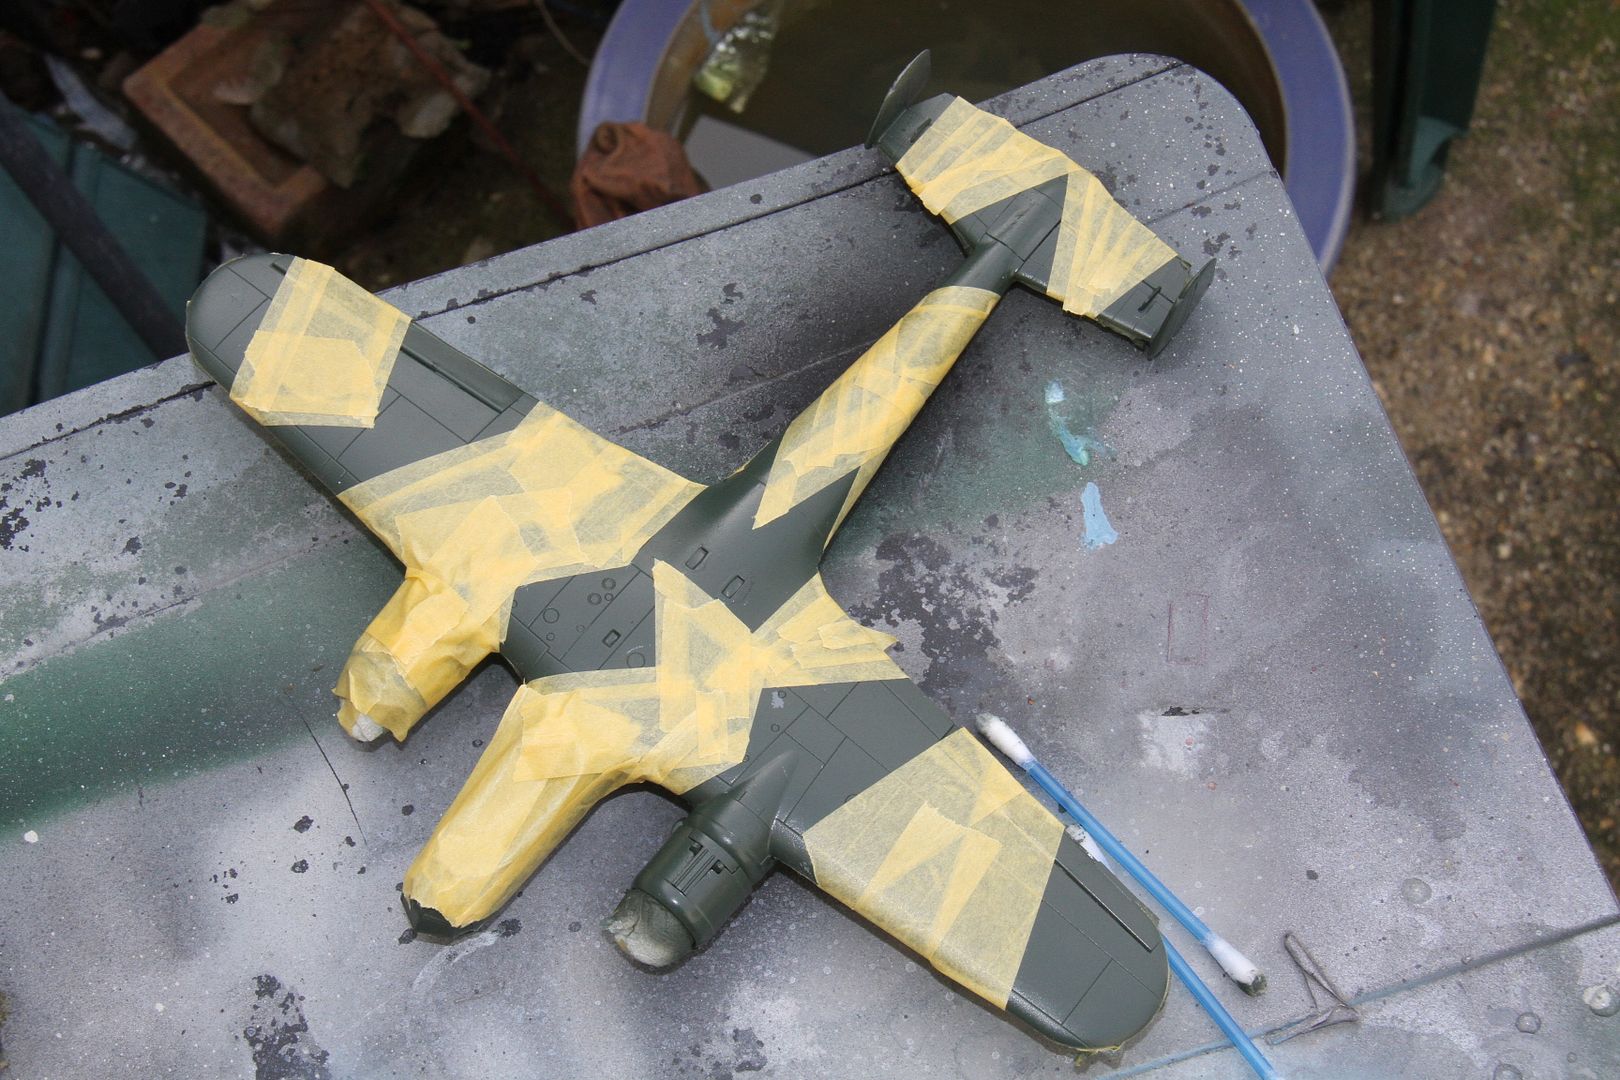
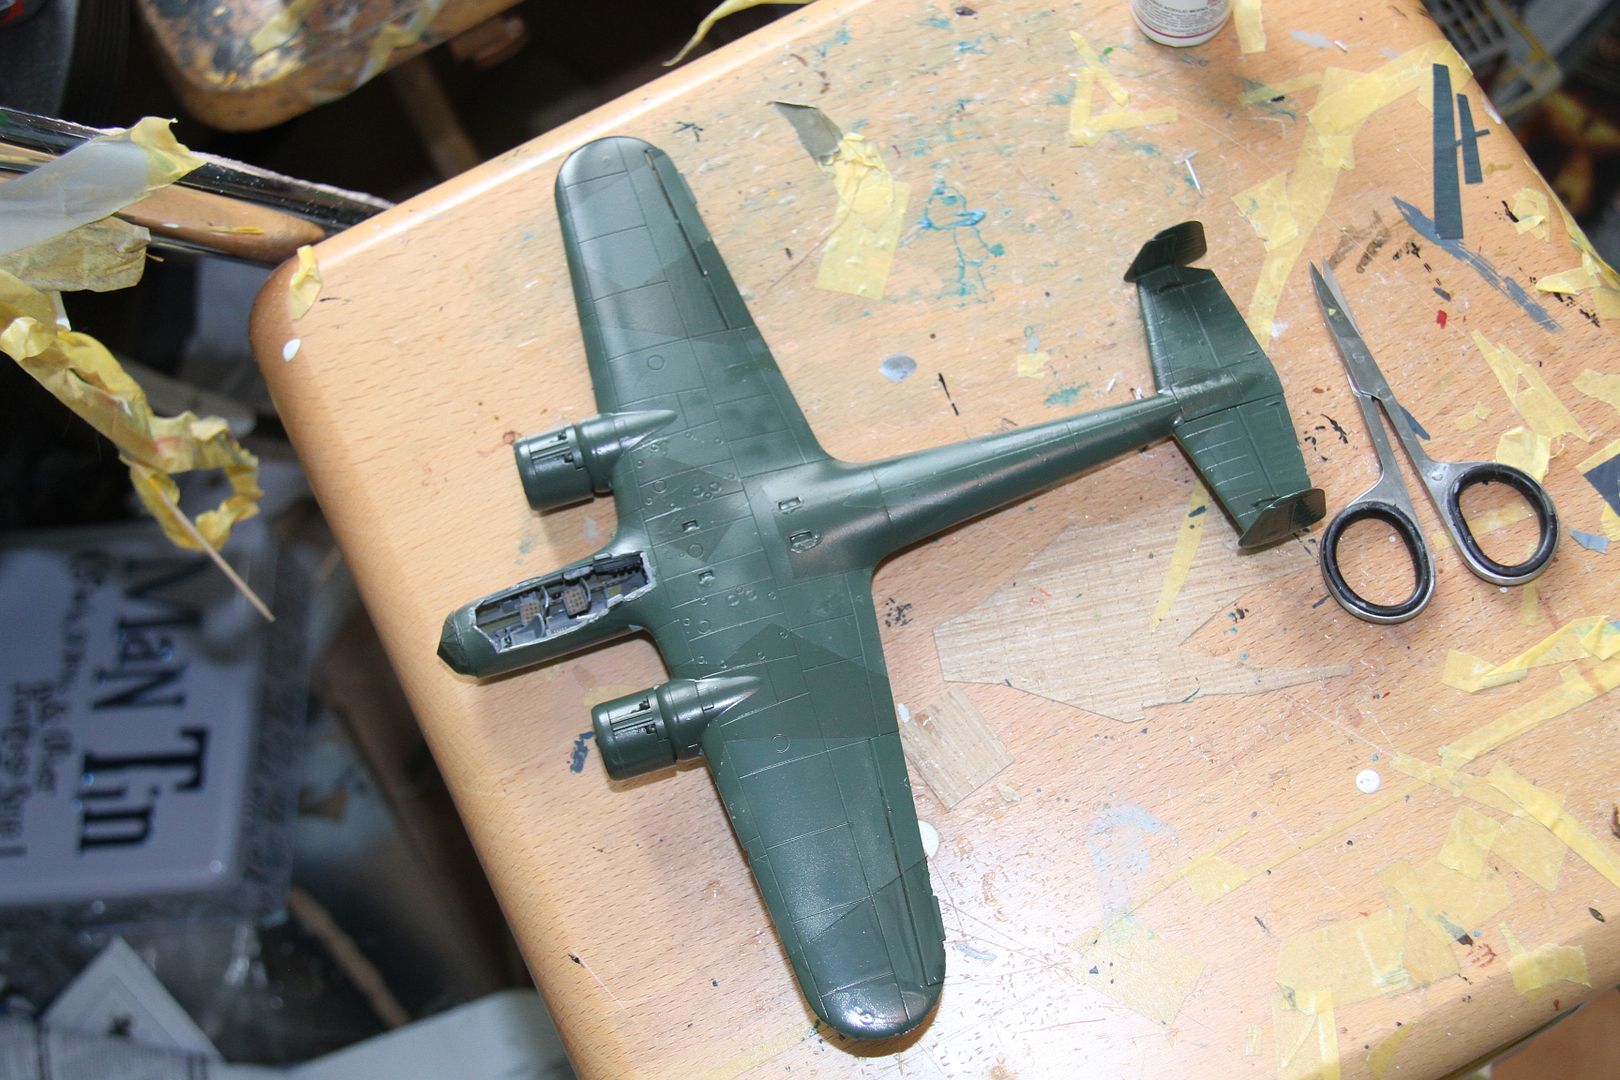
The underside masked and ready for spraying.
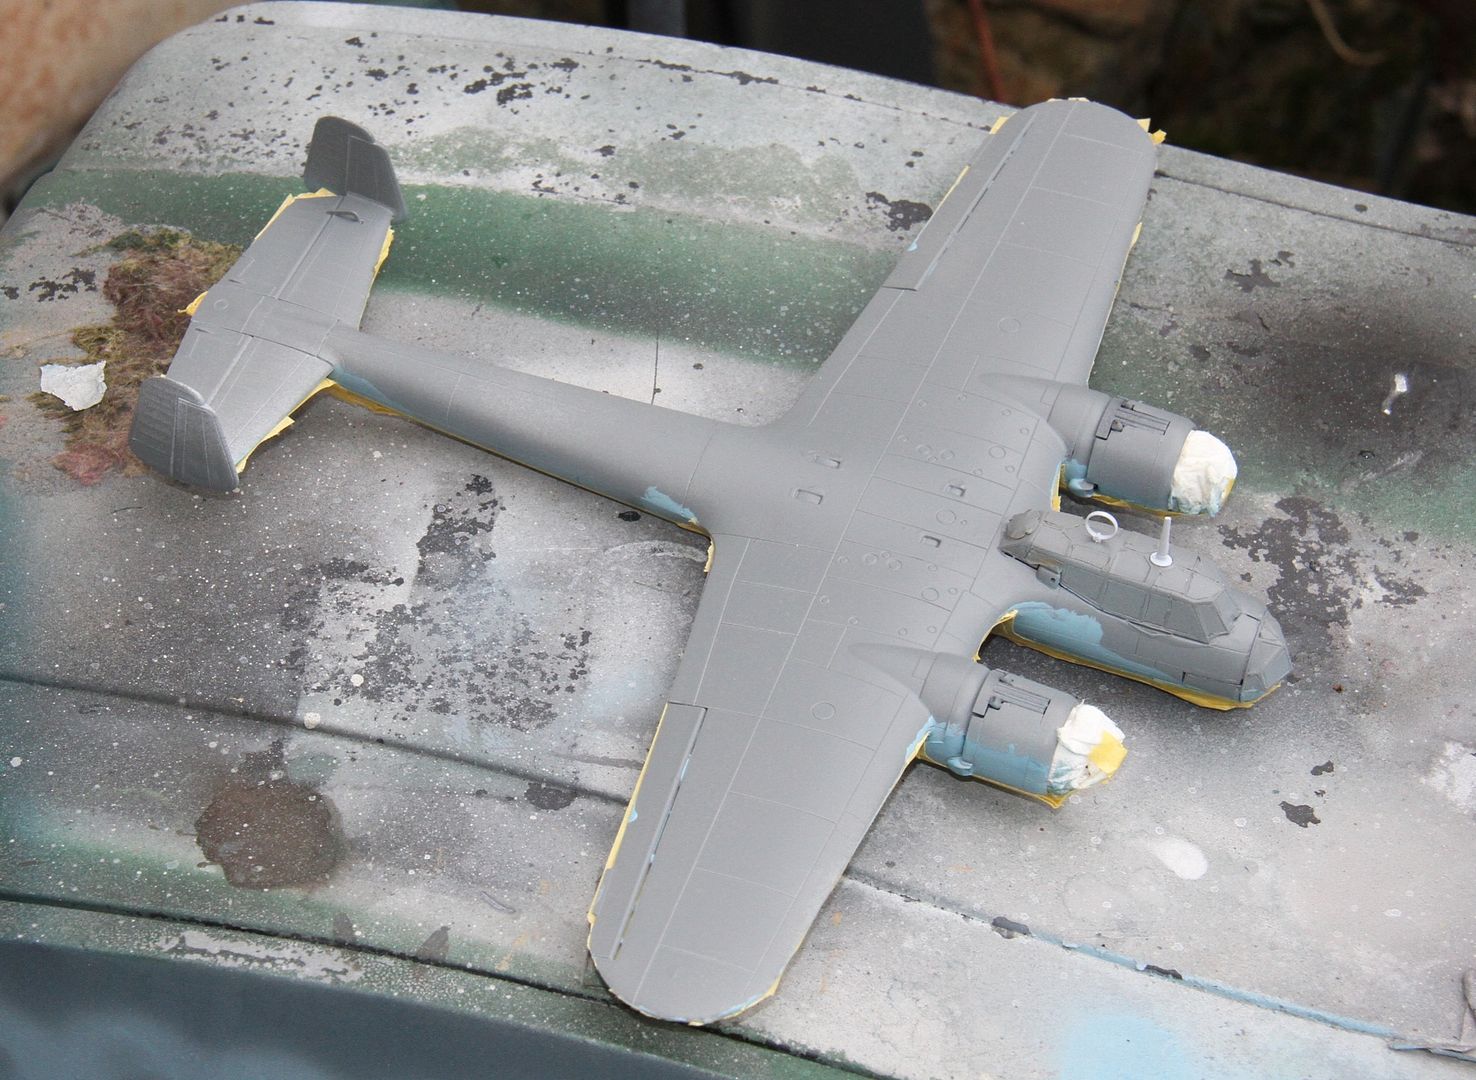
and given a coat of RLM70 Dunkelgrun.
more masking & spraying tomorrow.
Si
The underside masked and ready for spraying.

and given a coat of RLM70 Dunkelgrun.

more masking & spraying tomorrow.
Si
MichaelSatin

Joined: January 19, 2008
KitMaker: 3,909 posts
AeroScale: 2,904 posts
Posted: Saturday, February 21, 2015 - 03:37 AM UTC
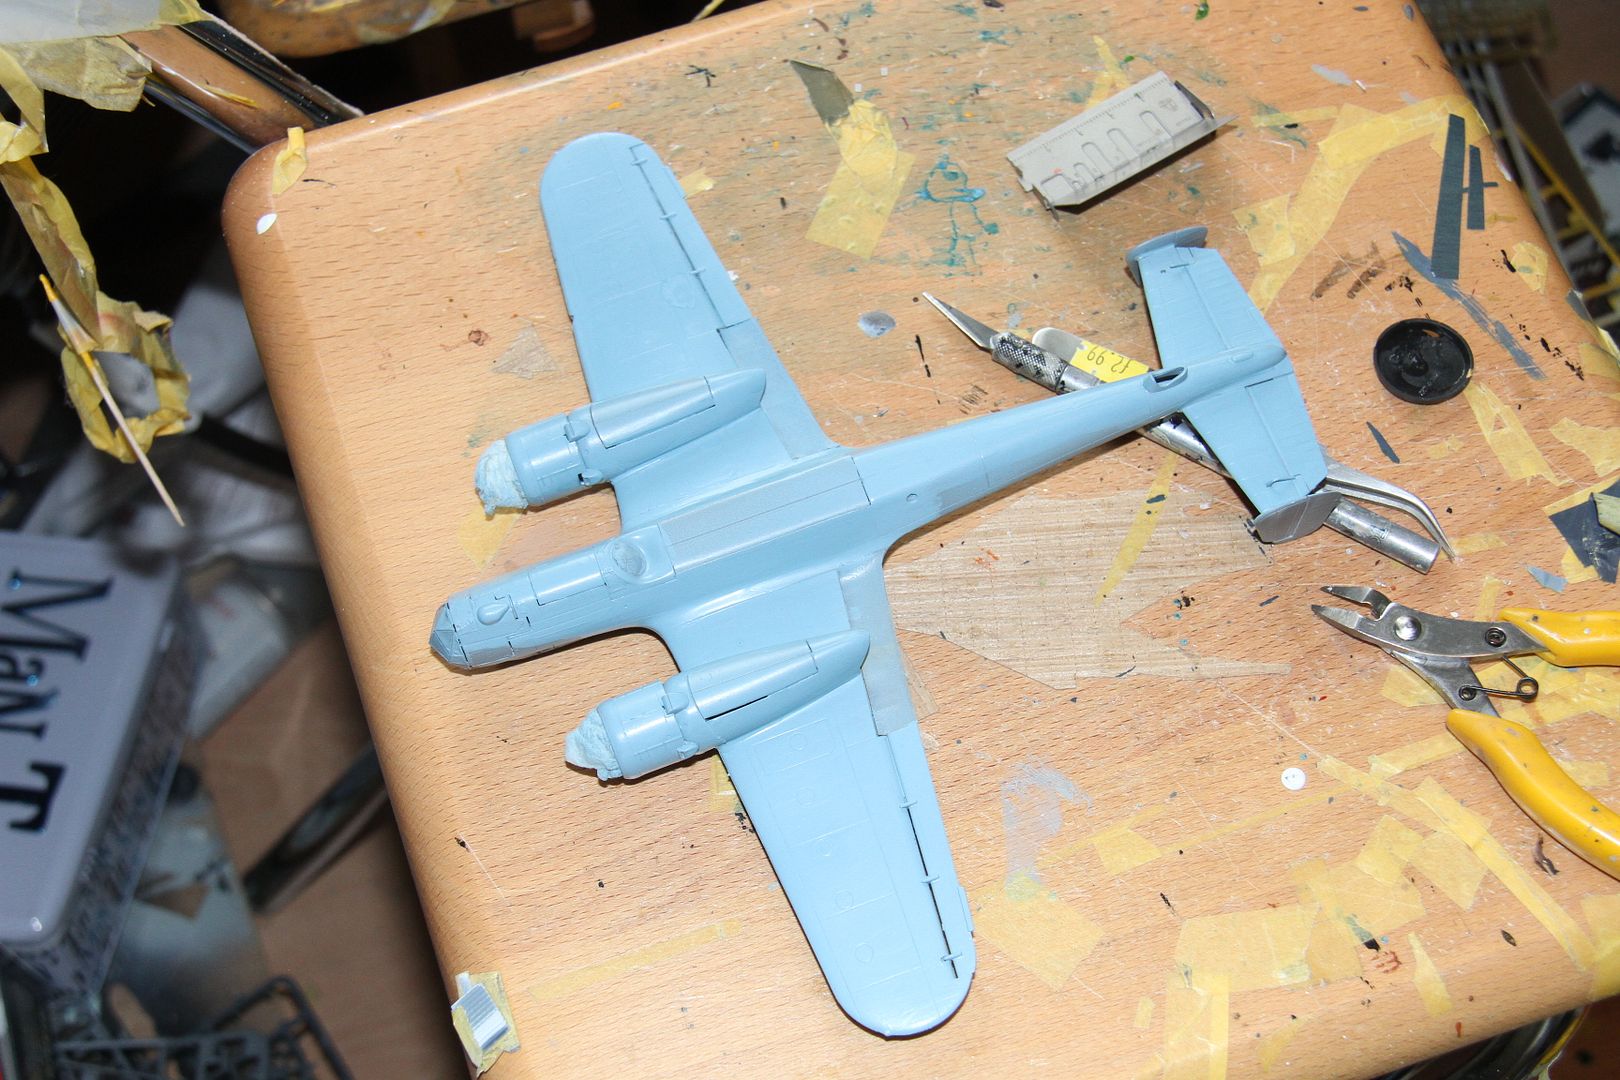
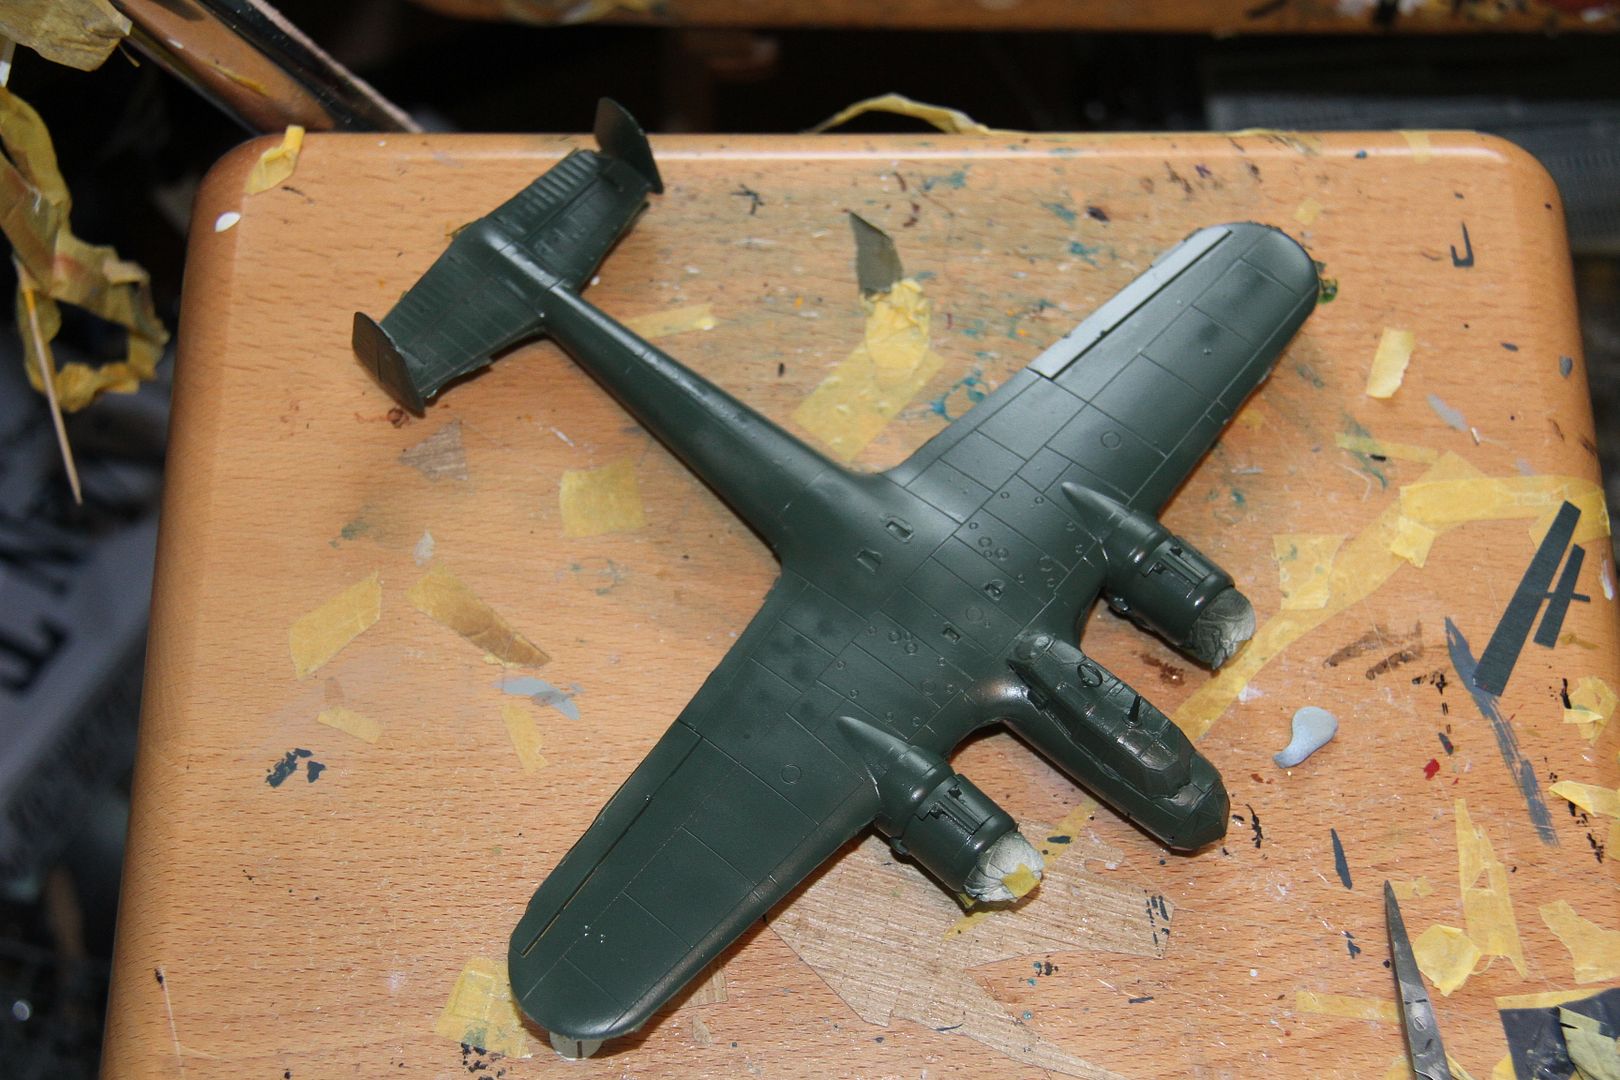
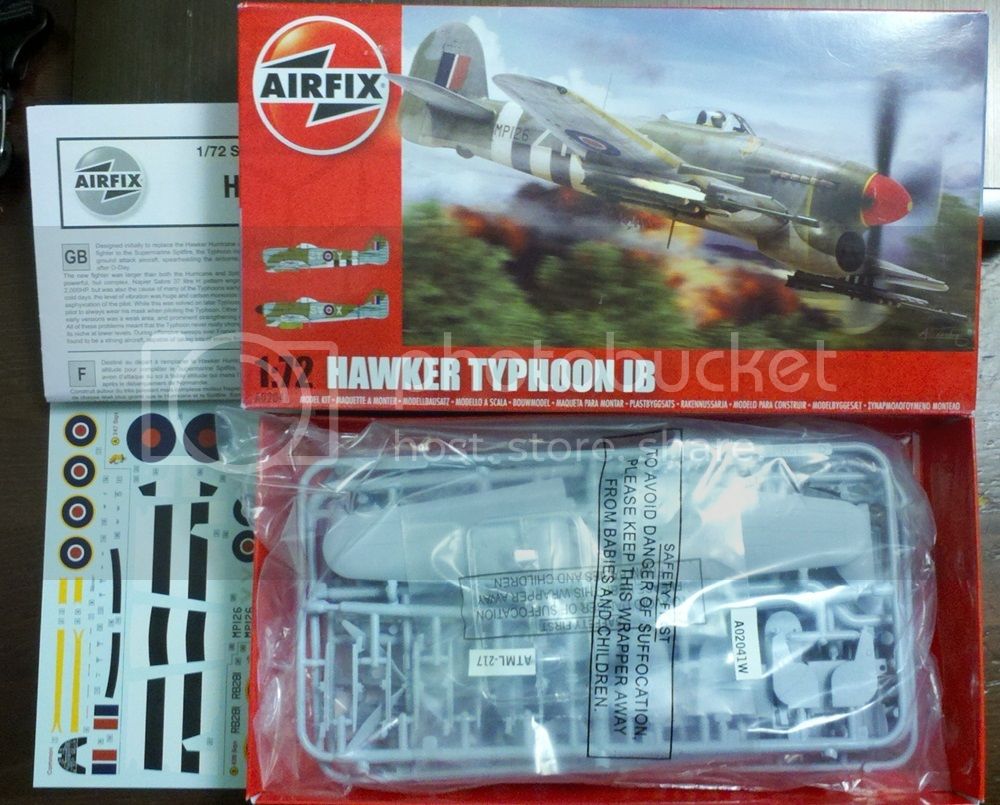
OK, it's time to get on with it. I'm building the newish 1/72 Typhoon:
I've started some basic painting on a snowy day here in Colorado:
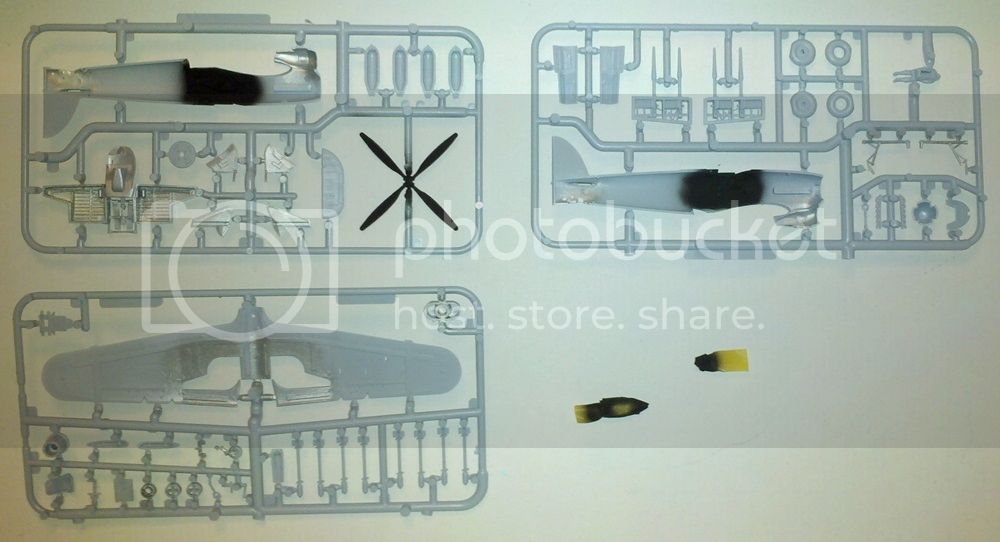
My plan, such as it is, is to build this kit in conjunction with the big 1/24 kit for the Hot Out of the Molds campaign. I'm using the painting instructions from the big kit to do this one, rather than the interior green called for here. I haven't done a 1/72 kit in a very long time, and everything is so small! We'll see.
BTW, I'm planning on doing Sqn. Ldr. Stapleton's 'plane which had a red spinner with a small yellow dot on the tip. Any brilliant ideas how to pull that off neatly? Thanks!
Michael
tinbanger
Joined: February 04, 2008
KitMaker: 2,507 posts
AeroScale: 1,814 posts
Posted: Saturday, February 21, 2015 - 06:03 AM UTC
Welcome to the campaign Michael!
I am building this in the "Hairy stick" campaign.
Model goes together well.
I am building this in the "Hairy stick" campaign.
Model goes together well.
lfetz145
Joined: May 18, 2014
KitMaker: 69 posts
AeroScale: 67 posts
Posted: Saturday, February 21, 2015 - 11:55 AM UTC
Hi all, here is the start to the P-40 half of my Dogfight Doubles build. So far it's coming together fairly easily, with no major problems.
I'm doing a very basic interior. I tried to put more detail in the Zero's cockpit, but after closing it up, I realized you couldn't see any of it anyways. So, This one is pretty plain.
Getting the major assemblies together, fit is decent, but wings will need some filler at the roots.
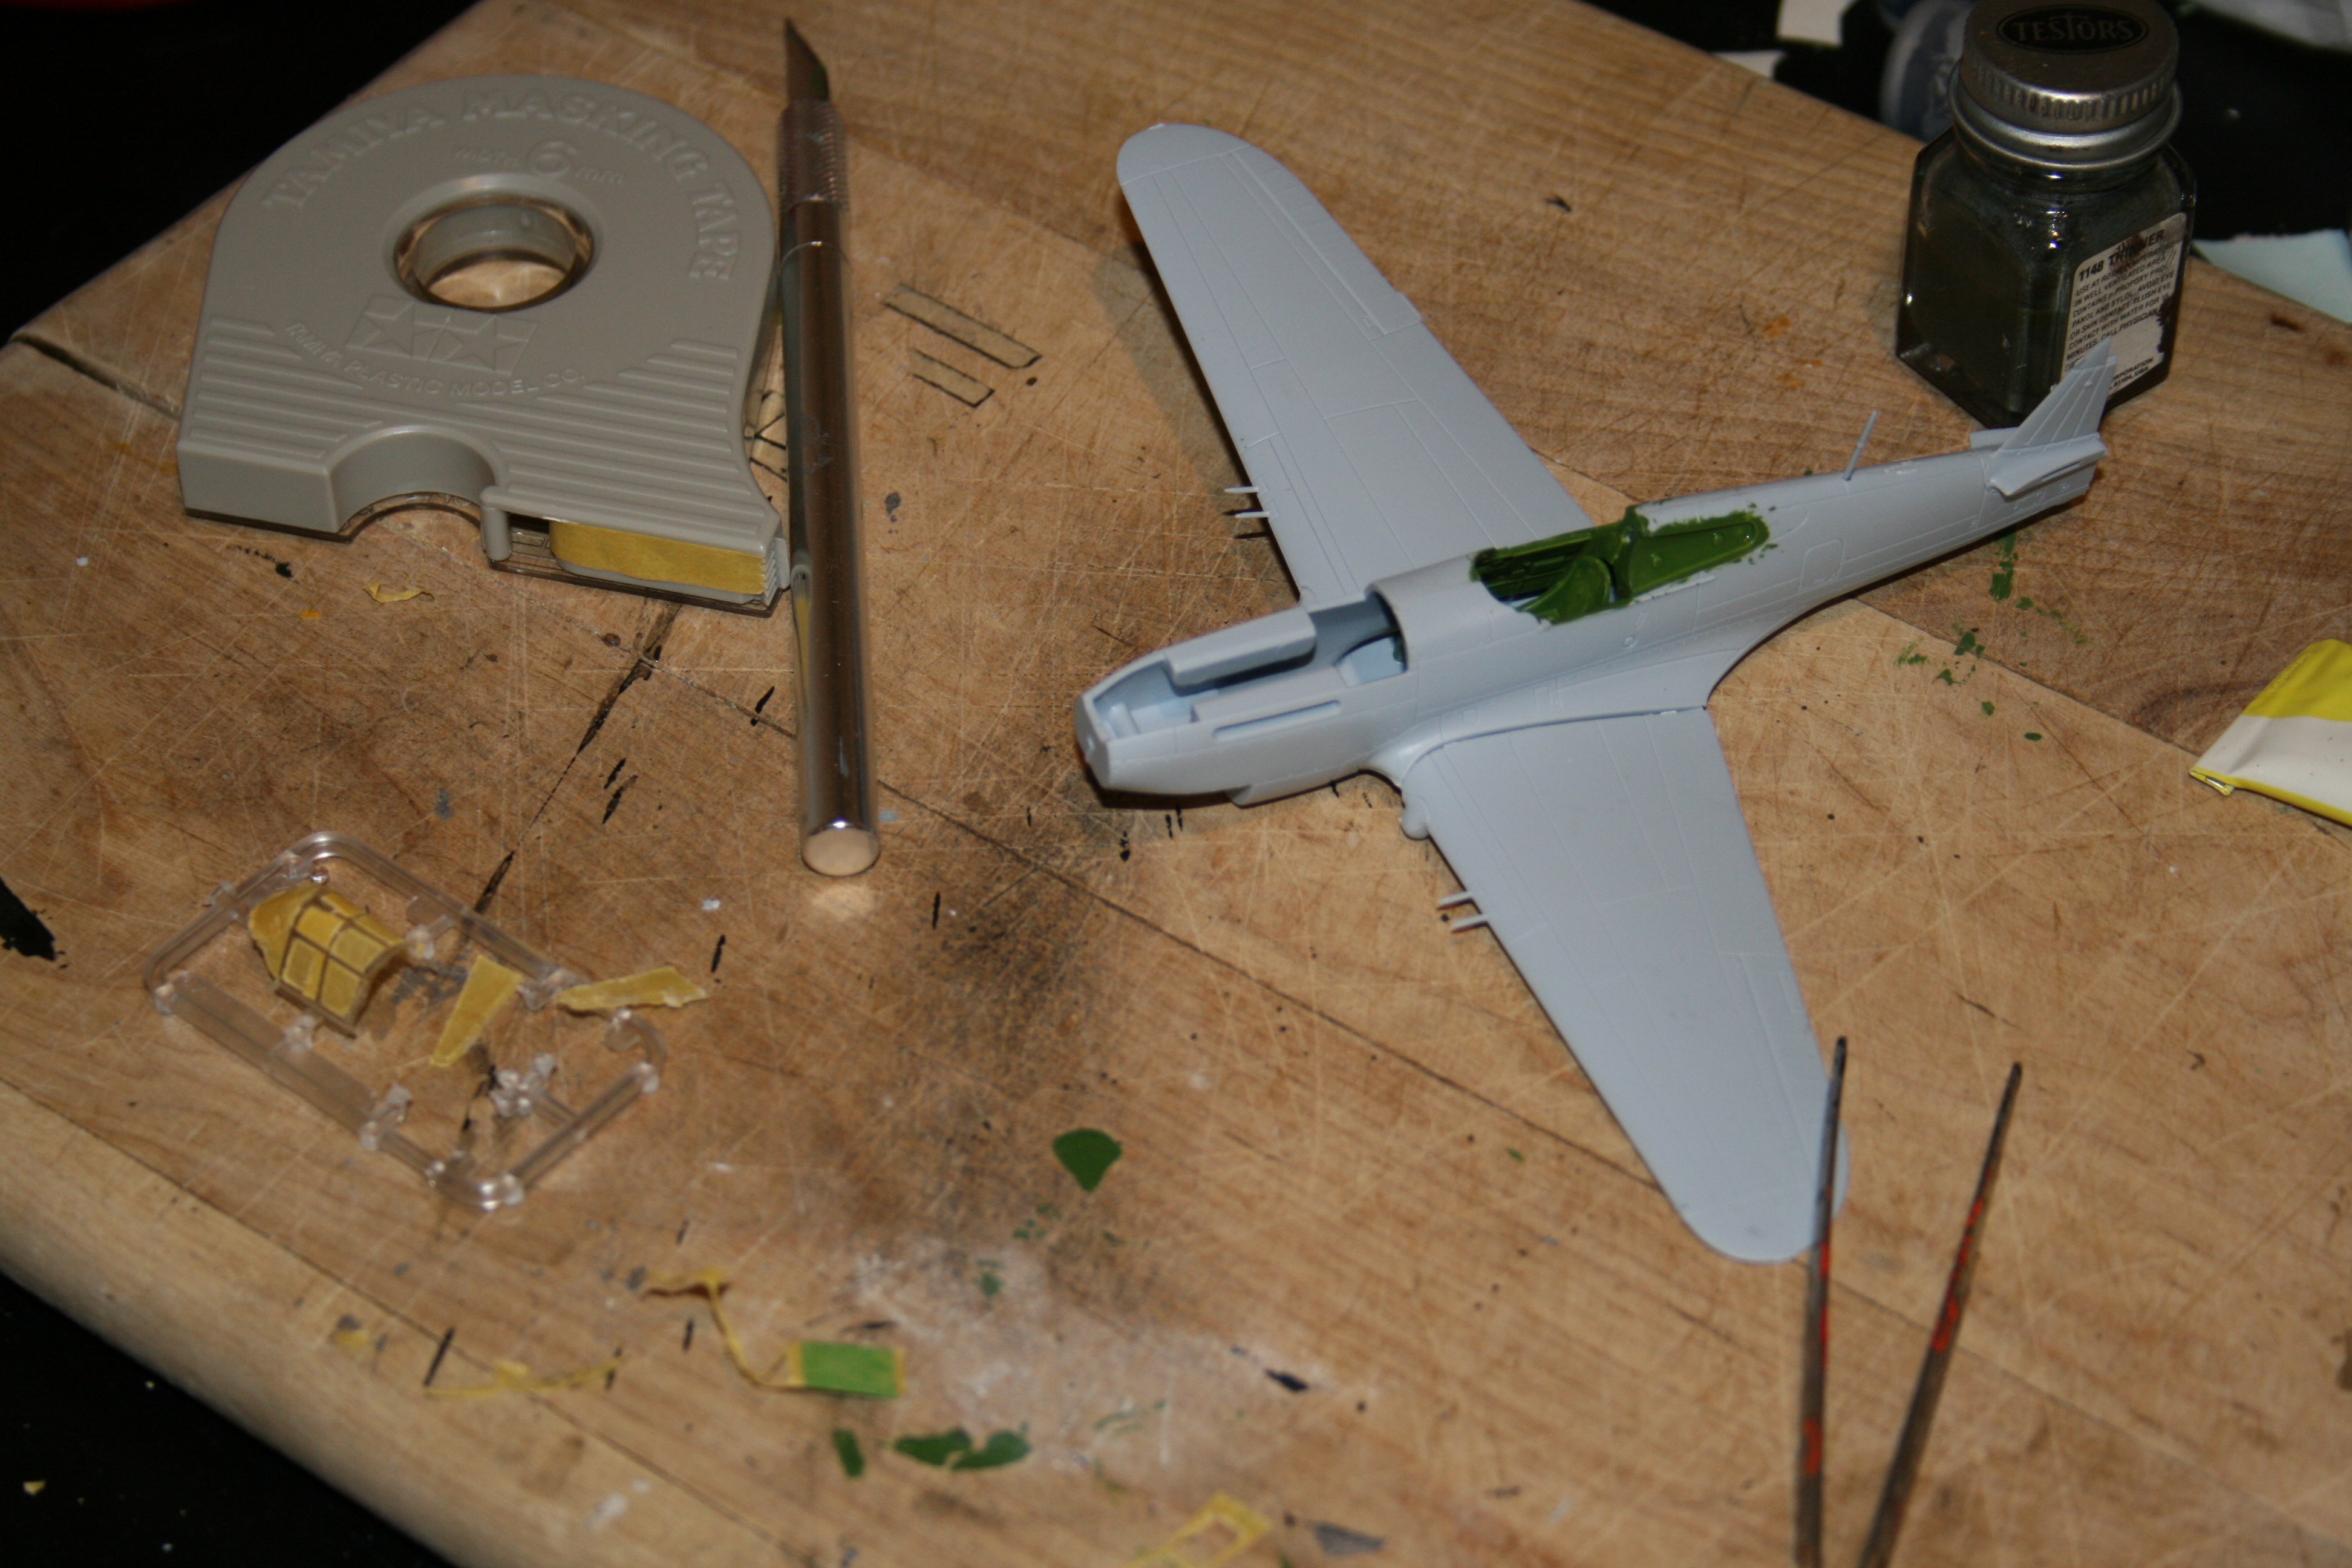
So this is where I leave it, for now. A little more masking needs done, some filler in the wing roots, and then it's time to throw some paint at it!!
I'm doing a very basic interior. I tried to put more detail in the Zero's cockpit, but after closing it up, I realized you couldn't see any of it anyways. So, This one is pretty plain.
Getting the major assemblies together, fit is decent, but wings will need some filler at the roots.
So this is where I leave it, for now. A little more masking needs done, some filler in the wing roots, and then it's time to throw some paint at it!!
lfetz145
Joined: May 18, 2014
KitMaker: 69 posts
AeroScale: 67 posts
Posted: Saturday, February 21, 2015 - 11:57 AM UTC
Quoted Text
I've started some basic painting on a snowy day here in Colorado:
It sure is crazy some crazy weather here right now, isn't it?
MichaelSatin
Joined: January 19, 2008
KitMaker: 3,909 posts
AeroScale: 2,904 posts
Posted: Saturday, February 21, 2015 - 08:03 PM UTC
Quoted Text
Quoted TextI've started some basic painting on a snowy day here in Colorado:
It sure is crazy some crazy weather here right now, isn't it?
Kind of an odd snowstorm. Nothing like they're getting out east, but it's settled into a steady fall that isn't supposed to let up all day today either.
Maybe I can get some more work done on the Tiffie!
Michael
RedDuster
Joined: March 01, 2010
KitMaker: 7,078 posts
AeroScale: 118 posts
Posted: Sunday, February 22, 2015 - 04:04 AM UTC
Nice choice with the Tiffie Michael,
More on the Dornier, The Dunkelgrun masked ready to spray the schwartzgrun.
job done.
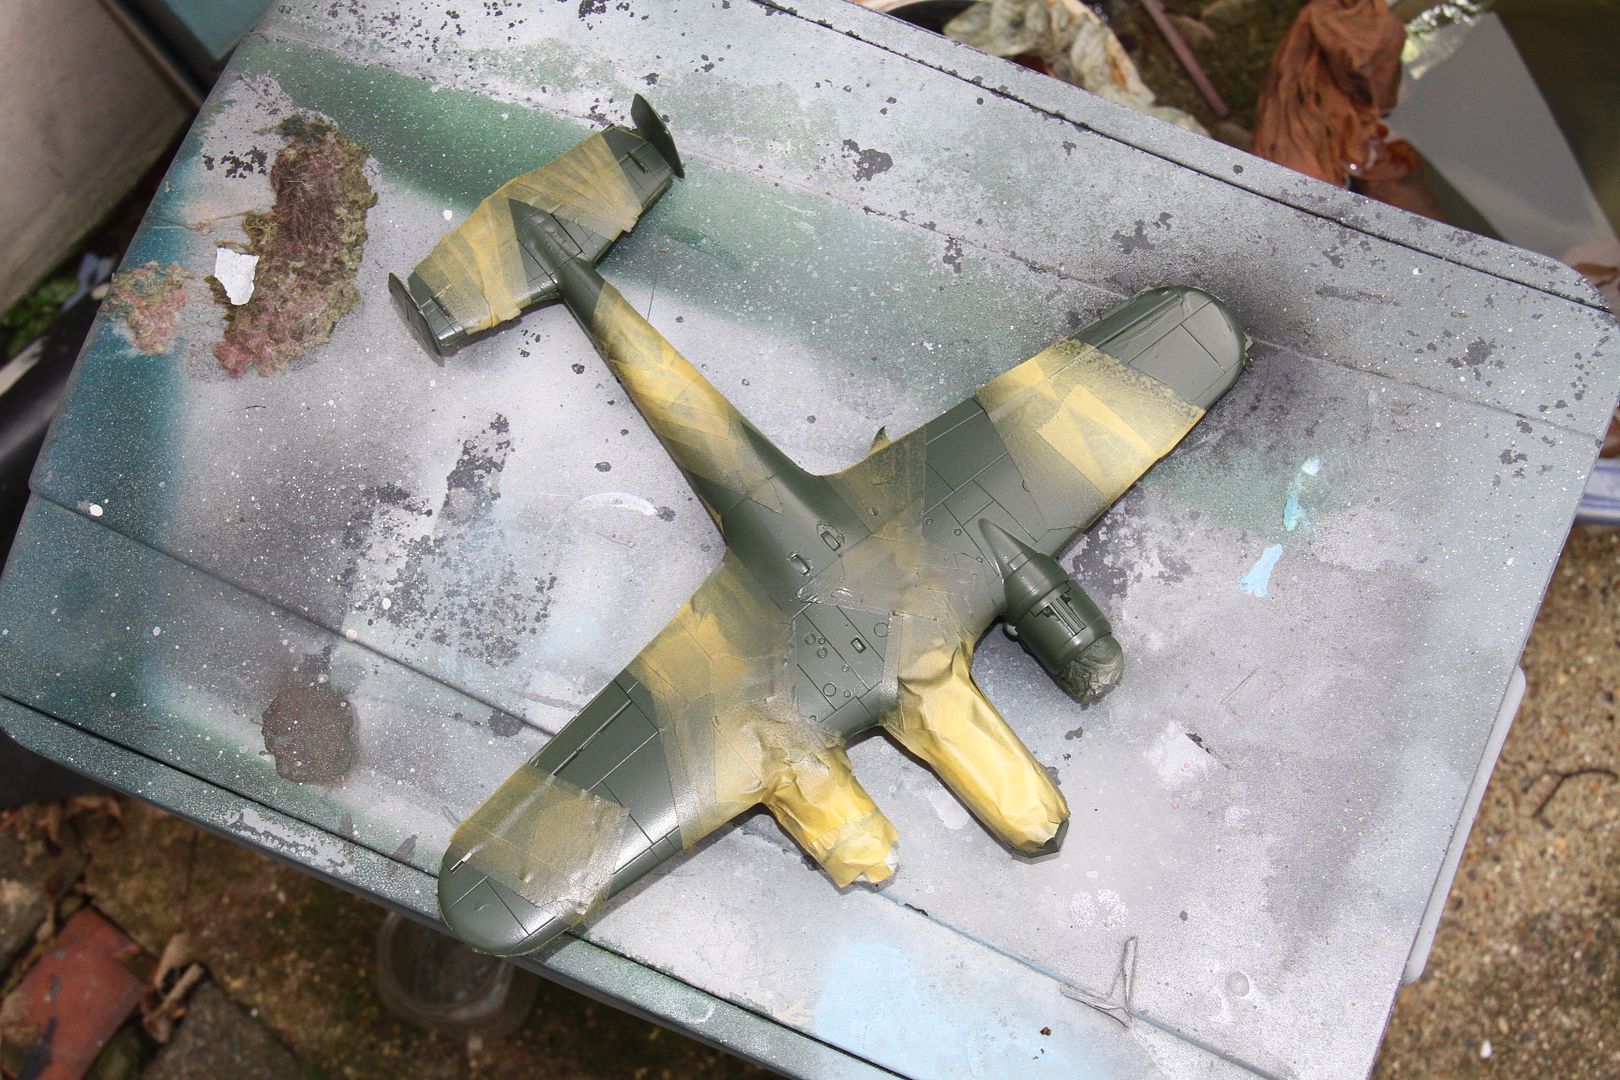
and the masking off.
not bad for the first one that the final paint job has been all airbrushed.
The bombracks and bomb load in place, next decals.
Si
More on the Dornier, The Dunkelgrun masked ready to spray the schwartzgrun.

job done.

and the masking off.

not bad for the first one that the final paint job has been all airbrushed.
The bombracks and bomb load in place, next decals.

Si
 |

WEB HOSTING BY


Copyright ©2021 AeroScale and Kitmaker Network, a subsidiary of Silver Star Enterprises
All Rights Reserved. Please read our Conditions of Use and Privacy Policy.
All Rights Reserved. Please read our Conditions of Use and Privacy Policy.