1⁄32Song of the Swallow
2
Comments
STEP 4 & 5 and 26-28 Landing Gear.
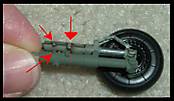
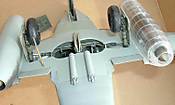
The landing gear is provided in both styrene and in white metal. You can choose from fat nose tire or the thin one. The struts and hubs for each are different. While the plastic struts are numbered, the metal ones are not on the instruction sheet, but one has “1“ cast on it, with “2“ on the other. The tires are vinyl. I took the risk and used them, but chose the metal struts. I coated the hub and tires with Future that I hope will act as a barrier should they experience the chemical reaction of some styrene and vinyl. If they do, they will not hurt the metal struts, and no doubt resin wheel are soon to be released. The tires have seams so I sanded them. This removes the seam, kills the vinyl shine and makes the tires look used. My metal main landing gear struts have horrible seam lines (the dark line running down the strut.) I had to file these down; not all of it as most of one side will be hidden by the gear doors. Other modelers with this kit, some report seams, some say theirs are seamless. The struts also have prominent ejector mark on the oleo but the torque hinge hides these. The metal gear’s mounting pins and tab for the gear doors are too widely spaced to fit into the mounting slots of the doors. The plastic struts fit perfectly and have negligible seam lines. Each torque link is a two-piece set that snaps together and onto the strut, mine holding without glue. The instructions have you put the nose gear in before mating the fuselage. I knew I’d break it off and waited till the end of the project. It snuggly fit into place. TIP: Let me suggest you eschew the instructions and put the main gear on before attaching the engines. The fit is very snug unless you have spider-fingers, and the mount of the gear doors is fragile. The gear doors exacerbate this. These attach via relatively small, shallow tabs into relatively small, shallow slots. You must have a light touch not to knock them off (over and over) while wedging the strut tab into the mounting slot in the gear well. I surmise that if you use the plastic gear, that will simplify the gluing and maybe there will be a stronger bond between the teeny tabs and the doors. Or not. Now, all this said, I used the metal gear. Unless you are a contortionist, I strongly suggest fitting the gear actuators into the gear well before mounting the gear.Comments
Hello Everyone,
I hope you enjoy my building review of my two sixty-two.
Additionally, here is Merlin's In-Box Review
and my building-in-progress 'blogs': Fred's In-progress Building Post URLs
Merlin also reviewed the Eagle Cal decals: Messerschmitt Me 262 Decal Sheets (1:32)
...and newly built flying Schwalben...OFFICIAL Me 262 PROJECT UPDATES
APR 11, 2006 - 03:50 AM
Copyright ©2021 by Fred Rick Boucher. Images also by copyright holder unless otherwise noted. The views and opinions expressed herein are solely the views and opinions of the authors and/or contributors to this Web site and do not necessarily represent the views and/or opinions of AeroScale, KitMaker Network, or Silver Star Enterrpises. Images also by copyright holder unless otherwise noted. Opinions expressed are those of the author(s) and not necessarily those of AeroScale. All rights reserved. Originally published on: 2006-04-10 00:00:00. Unique Reads: 22115


