

1⁄32Song of the Swallow
2
Comments
STEP 6 & 7 Weapons Bay and The Nose Gear
Guns guns guns! Four Rhinemetal Mk. 108 3cm cannon are provided, along with 14 pieces of gun fittings. All fit in a very detailed 3-piece gun bay. Four decals are to affix to the four junction boxes. Bundles of wiring enter these boxes and there is plenty of room for those of you with the inclination to add them. The gun barrels fit into the front bulkhead. My fit was very tight, test-fit to avoid woe. The gun bay sets upon part D4, a large piece that fills the forward fuselage. It is the nose gear well and mounting for the gun camera (you can not see it after joining the fuselage halves). This piece and the gun bay bulkheads and floor all fit interlocking. Go slow, because this fit was also very tight and the alignment of your fuselage and all within will depend upon how well these are aligned. The bottom, rear half of D4 is where the fired shell ejector chutes would be if Trumpeter provided any. This area makes a perfect place to mount ballast to keep the model on its nose wheel, or you can detail the area, as the access panels are separate.STEP 8 - 10 Jet Engines and Nacelles
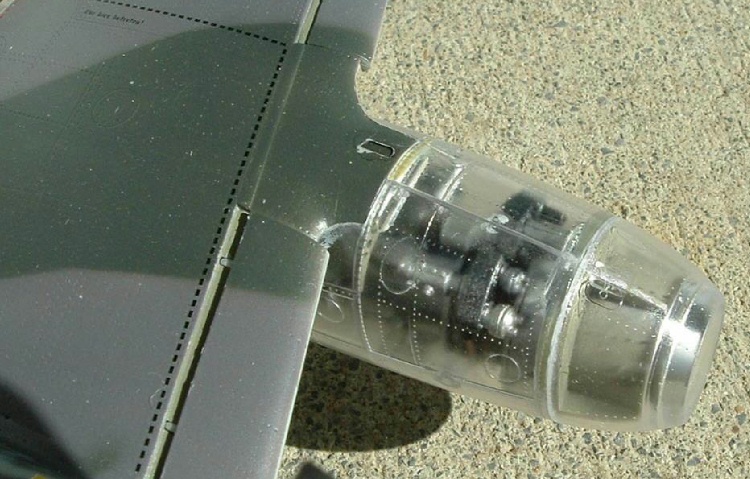
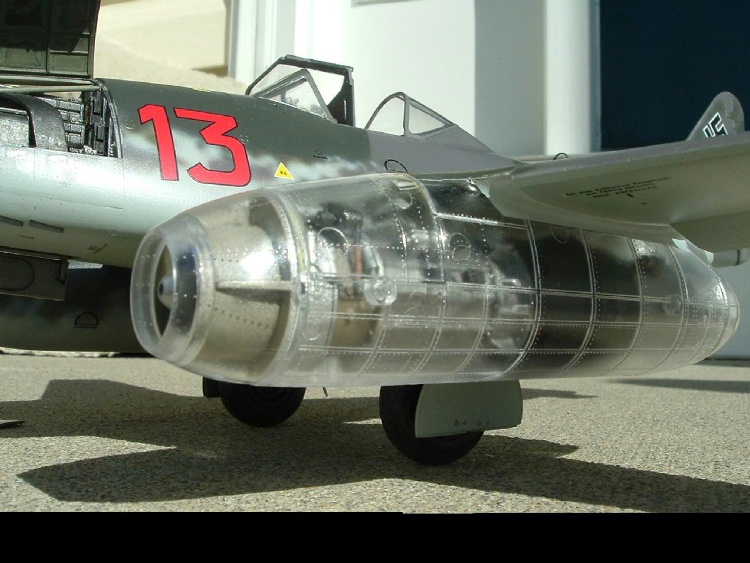
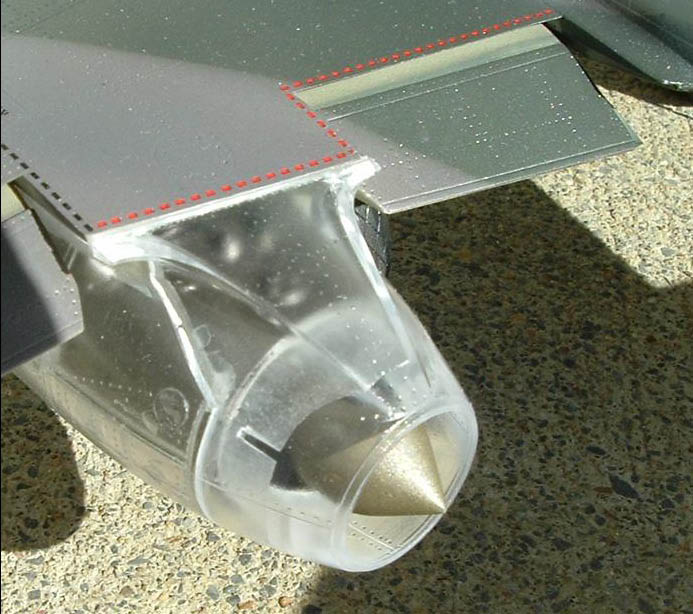
The next page is the beginning of the two 45-piece (each) Jumo 004 turbojets. There are many color photos of Jumos 004s out there, and seemingly no two are painted alike. Trumpeter provides clear nacelles to display these. Good, because you need most of each engine to make the nacelles fit together, in which the Jumos are then hidden from sight. All is not lost as there are, unidentified in the directions, recesses inside the nacelles to cut open for display. These nacelle halves are molded with interior structural members. Other builders of this kit have reported problems with the fit of the nacelles. Perhaps this is due to the nacelles attaching to mounts on each engine to hold them together, so I suggest you test fit and maybe shorten the mounting holes on the engines. I had to clamp the nacelles tightly to eliminate the gaps between the halves. Regardless, my nacelles are much narrower than the intake cowling and a lot of putty and sanding was required to blend them. My nacelles-to-wing fit was without any trouble. There is a slight gap that filled with nothing more than a big drop of liquid cement.


About the Author


FROM: TENNESSEE, UNITED STATES
I'm a professional pilot with a degree in art. My first model was an AMT semi dump truck. Then Monogram's Lunar Lander right after the lunar landing. Next, Revell's 1/32 Bf-109G...cried havoc and released the dogs of modeling! My interests--if built before 1900, or after 1955, then I proba...
Comments

Hello Everyone,
I hope you enjoy my building review of my two sixty-two.
Additionally, here is Merlin's In-Box Review
and my building-in-progress 'blogs': Fred's In-progress Building Post URLs
Merlin also reviewed the Eagle Cal decals: Messerschmitt Me 262 Decal Sheets (1:32)
...and newly built flying Schwalben...OFFICIAL Me 262 PROJECT UPDATES
APR 11, 2006 - 03:50 AM
Copyright ©2021 by Fred Rick Boucher. Images also by copyright holder unless otherwise noted. The views and opinions expressed herein are solely the views and opinions of the authors and/or contributors to this Web site and do not necessarily represent the views and/or opinions of AeroScale, KitMaker Network, or Silver Star Enterrpises. Images also by copyright holder unless otherwise noted. Opinions expressed are those of the author(s) and not necessarily those of AeroScale. All rights reserved. Originally published on: 2006-04-10 00:00:00. Unique Reads: 22115

WEB HOSTING BY


Copyright ©2021 AeroScale and Kitmaker Network, a subsidiary of Silver Star Enterprises
All Rights Reserved. Please read our Conditions of Use and Privacy Policy.
All Rights Reserved. Please read our Conditions of Use and Privacy Policy.