

1⁄32Song of the Swallow
2
Comments
STEP 25-28 Front Gunbay Cover and Main Gear
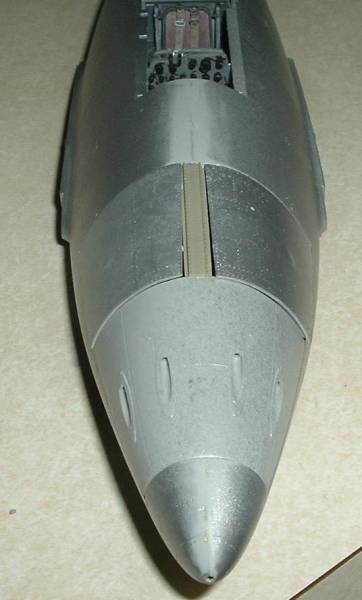
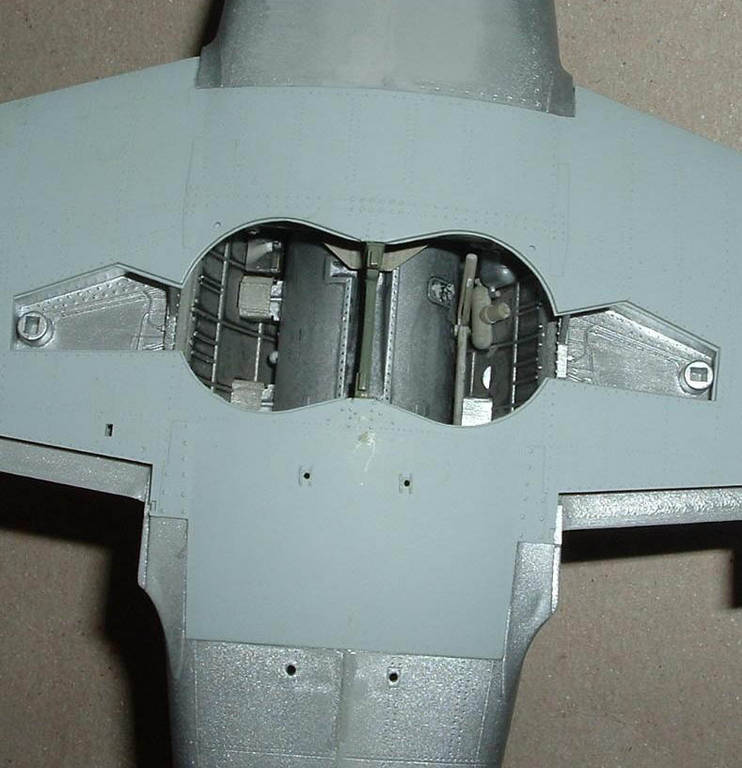
I glued C8 to the fuselage because I could not get a good fit. Consider not doing so as the front portion of the bay has very nice detail, though is empty except for the gun barrels. The spar for the gun access covers, part C31, fits loosely into the bulkhead mounting slots, fitting with big gaps. Dry fit and prepare to putty. The gear I already touched upon but another concern is if you use the metal struts. Test-fit the axles fit into the rotating hub of the wheels. I didnt and they were too tight. One main wheel now suffers from 3-D wobble about the axle. Glue will stop that but unless it is needed, I eschew glue!STEP 29 & 30 Joining Wings to Fuselage
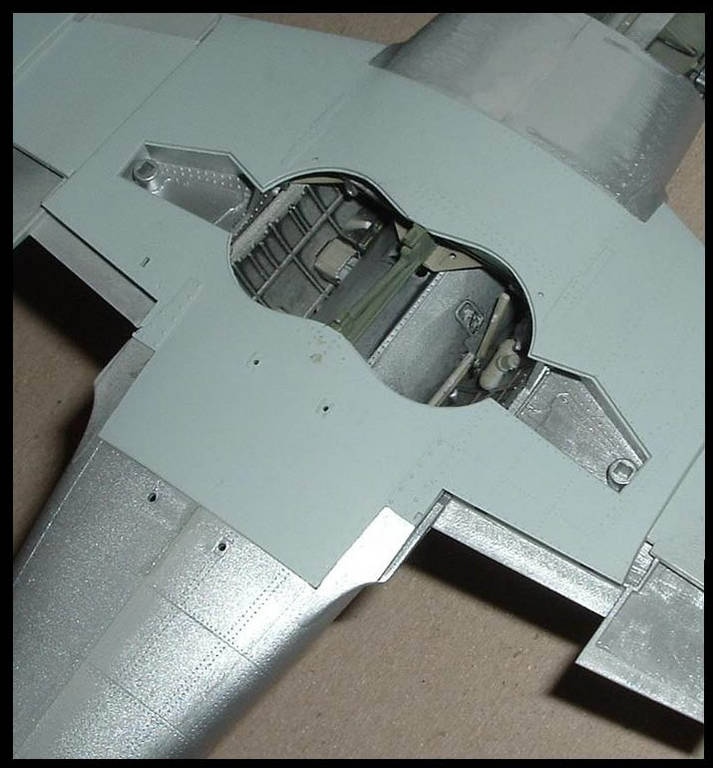
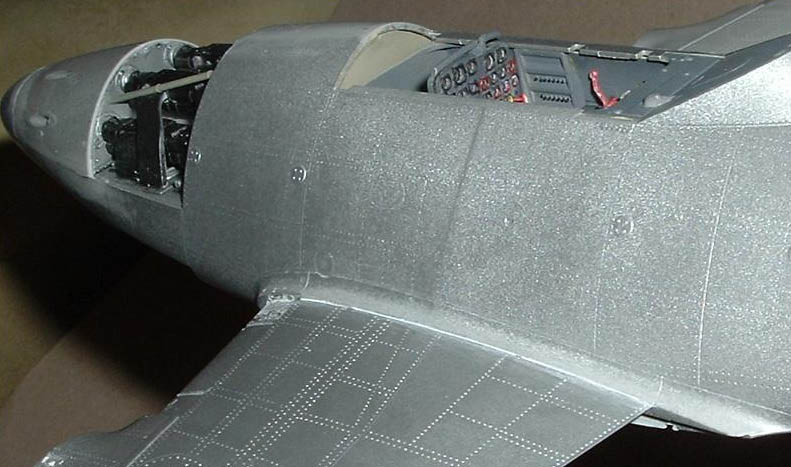
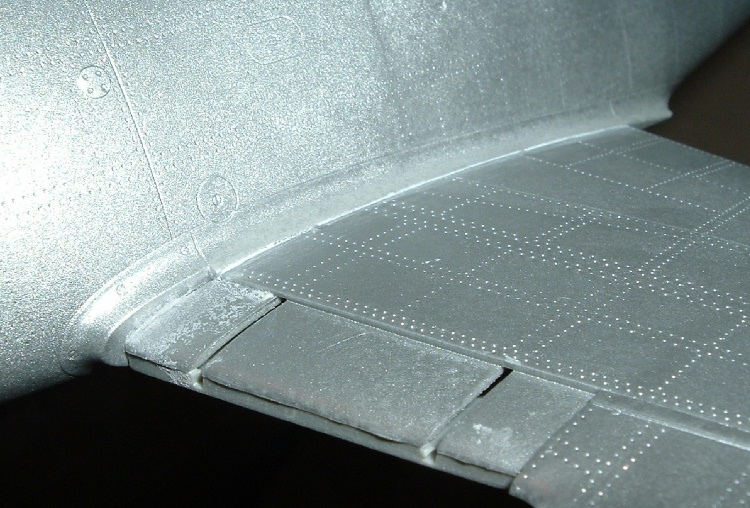
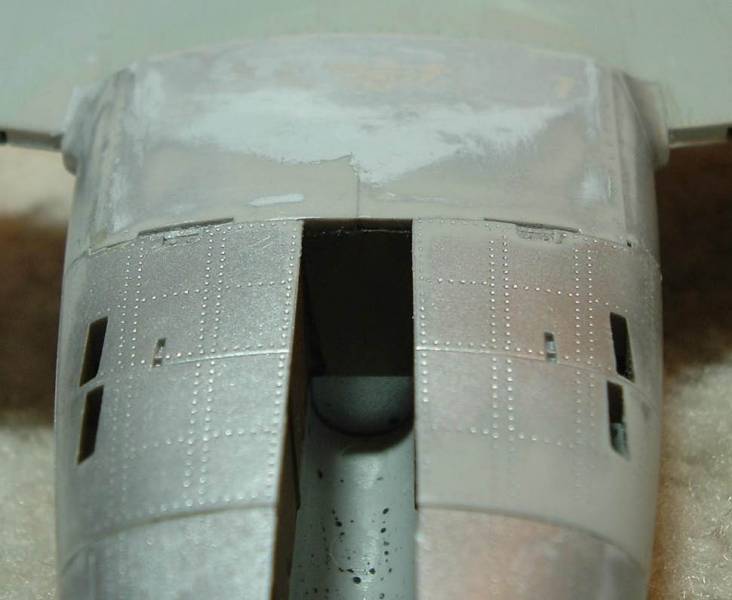
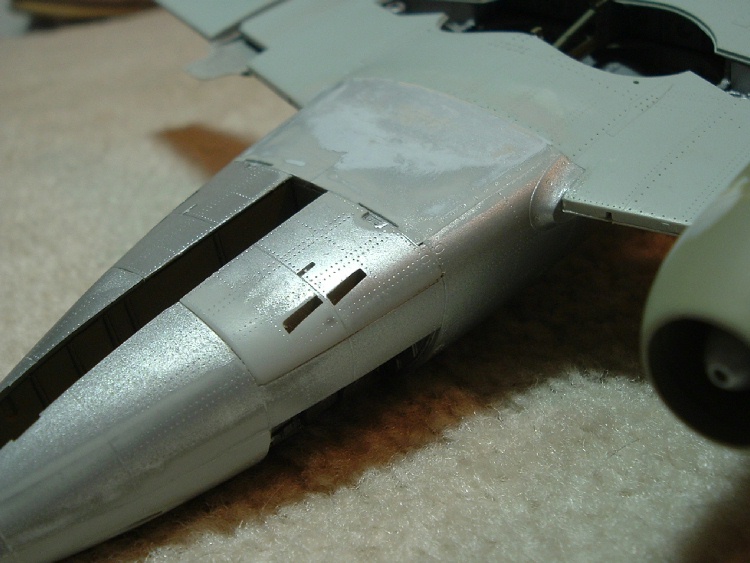
Oh boy! It is an airplane! Only 10 items to add in these steps, but a lot to discuss. Mainly the wing. The wing snaps securely to the fuselage due to detail molded into the root of the fuselage and wing. I did not have to add any glue and the wing was firmly seated. The rear portion fit snuggly to the bottom fuselage. Not much of a seam line at all, and is along a large access panel (non-removable on the model) and along the flaps, so it really isnt a seam line anyway. The upper wing-to-wing root, surprisingly, does have wide gaps. Worry not, easily filled and smoothed. The front of the bottom wing-to-fuselage joint is a big disappointment. There was a huge step to be filed, filled and sanded. The fuselage portion is a large panel bordered by large screws. These are, like all surface detail, very fine and shallow. They did not survive the blending of the wing-fuselage even though protected by tape. Mentioned above, this might have something to do with the fit of the front cockpit bulkhead. Consider this carefully. Parts C1 & 2, spent shell ejection chute access panels, did not fit well either. Three sides fit onto rims molded on the fuselage opening, the flat straight end joins the nose gear well. Large gaps, incompatible curvature. Nothing I think a modeler can do to make this bad fit, just the way this otherwise well molded model is. Much filling and sanding and shaping required. Much detail sacrificed. Just keep reminding yourself the real plane was supposed to have this detail puttied over. Yet despite hours of work and worry, I consider this area the main blemish on my kit. If you followed the kit instructions and mounted the main wheel doors, now you will regret it. Consider waiting to mount B20, bottom wing antennae until later, too. The main undercarriage is set into their mounts now. The main undercarriage should be angled inward slightly. Hopefully you took my advice and have not mounted the engines yet. Another main gear challenge is the actuators. These are difficult to fit. Each butts into a hole in the wing root that is under and behind the wing skin. I suggest you mount these before the gear struts.


About the Author


FROM: TENNESSEE, UNITED STATES
I'm a professional pilot with a degree in art. My first model was an AMT semi dump truck. Then Monogram's Lunar Lander right after the lunar landing. Next, Revell's 1/32 Bf-109G...cried havoc and released the dogs of modeling! My interests--if built before 1900, or after 1955, then I proba...
Comments

Hello Everyone,
I hope you enjoy my building review of my two sixty-two.
Additionally, here is Merlin's In-Box Review
and my building-in-progress 'blogs': Fred's In-progress Building Post URLs
Merlin also reviewed the Eagle Cal decals: Messerschmitt Me 262 Decal Sheets (1:32)
...and newly built flying Schwalben...OFFICIAL Me 262 PROJECT UPDATES
APR 11, 2006 - 03:50 AM
Copyright ©2021 by Fred Rick Boucher. Images also by copyright holder unless otherwise noted. The views and opinions expressed herein are solely the views and opinions of the authors and/or contributors to this Web site and do not necessarily represent the views and/or opinions of AeroScale, KitMaker Network, or Silver Star Enterrpises. Images also by copyright holder unless otherwise noted. Opinions expressed are those of the author(s) and not necessarily those of AeroScale. All rights reserved. Originally published on: 2006-04-10 00:00:00. Unique Reads: 22115

WEB HOSTING BY


Copyright ©2021 AeroScale and Kitmaker Network, a subsidiary of Silver Star Enterprises
All Rights Reserved. Please read our Conditions of Use and Privacy Policy.
All Rights Reserved. Please read our Conditions of Use and Privacy Policy.