

Hello everyone,
I'm searching for the book on the Grigorovich M-5 flying boat by Andrei Alexandrov. Anyone out there have one they'd like to part with?
(I'm also looking for the M-9 book also.)
Thanks!!!!!!!
-Mark
Early Aviation
Discuss World War I and the early years of aviation thru 1934.
Discuss World War I and the early years of aviation thru 1934.
Hosted by Jim Starkweather
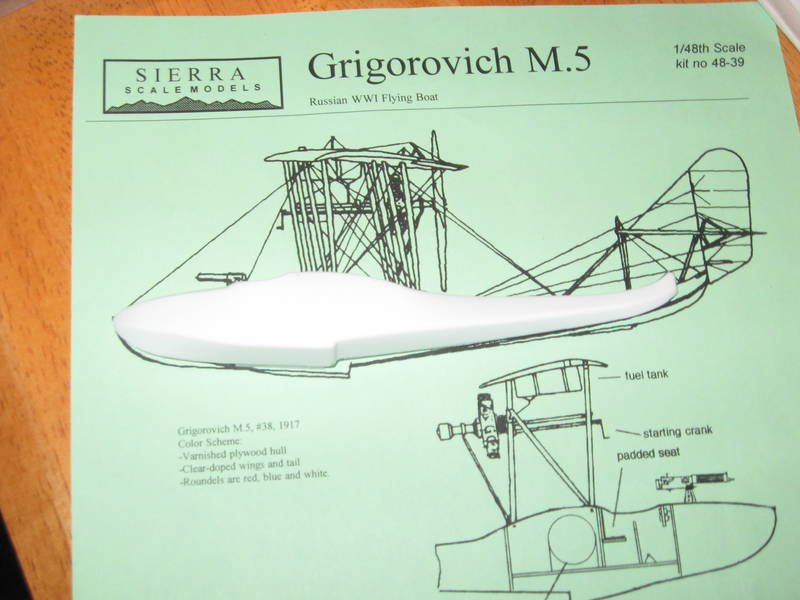
Grigorovich M-5 Flying Boat

guitarlute101

Joined: December 18, 2006
KitMaker: 1,121 posts
AeroScale: 1,063 posts
Posted: Friday, October 12, 2007 - 08:59 AM UTC
guitarlute101
Joined: December 18, 2006
KitMaker: 1,121 posts
AeroScale: 1,063 posts
Posted: Sunday, October 21, 2007 - 08:20 PM UTC
HI,
Does anyone have any info on this aircraft?
Thanks,
Mark
Does anyone have any info on this aircraft?
Thanks,
Mark

MerlinV

Joined: November 26, 2006
KitMaker: 608 posts
AeroScale: 602 posts

Posted: Monday, October 22, 2007 - 09:43 AM UTC
Hi Mark,
Sorry, but the best suggestion I can come up with is;
Have a look at Seawings.co.uk
There are heaps of drawings and plans in the reference section.
Cheers,
Hugh
Sorry, but the best suggestion I can come up with is;
Have a look at Seawings.co.uk
There are heaps of drawings and plans in the reference section.
Cheers,
Hugh
guitarlute101
Joined: December 18, 2006
KitMaker: 1,121 posts
AeroScale: 1,063 posts
Posted: Monday, October 22, 2007 - 02:20 PM UTC
Excellent, just what I needed. Thanks, Hugh. Now I'll start my Sierra Scale 1/48 Grig. M.5. I'll post when I get some progress underway.
Mark
guitarlute101
Joined: December 18, 2006
KitMaker: 1,121 posts
AeroScale: 1,063 posts
Posted: Tuesday, October 23, 2007 - 01:52 PM UTC
Hello all,
Here's the start of my 1st vac kit, 1/48 Sierra Scale Models Grigorovich M-5.
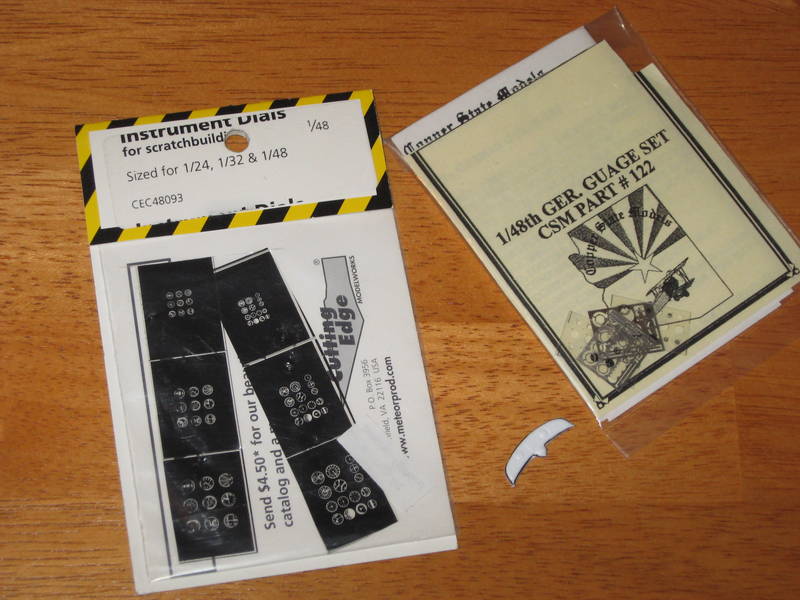
References:
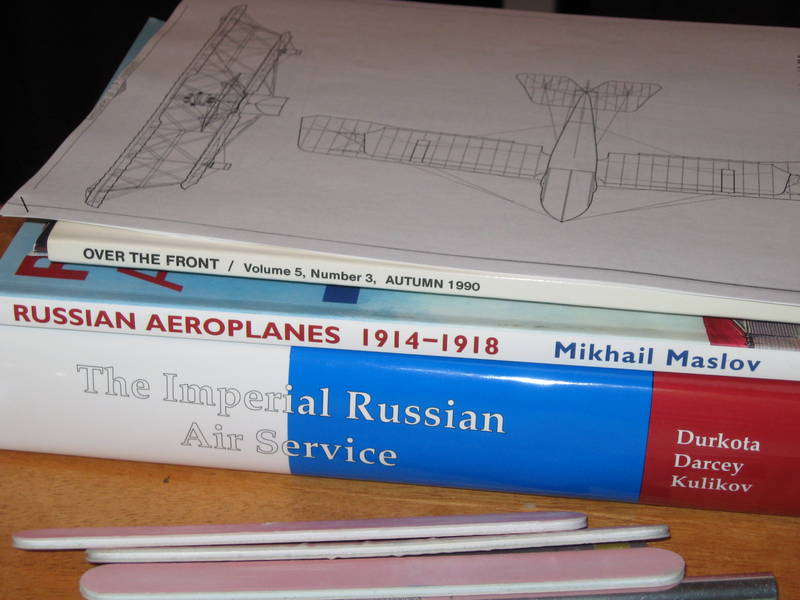
Carefully....................
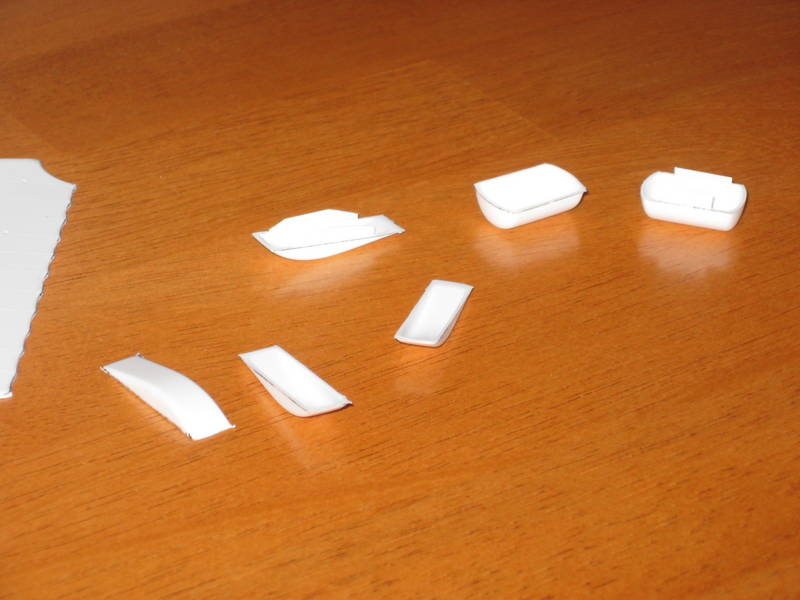
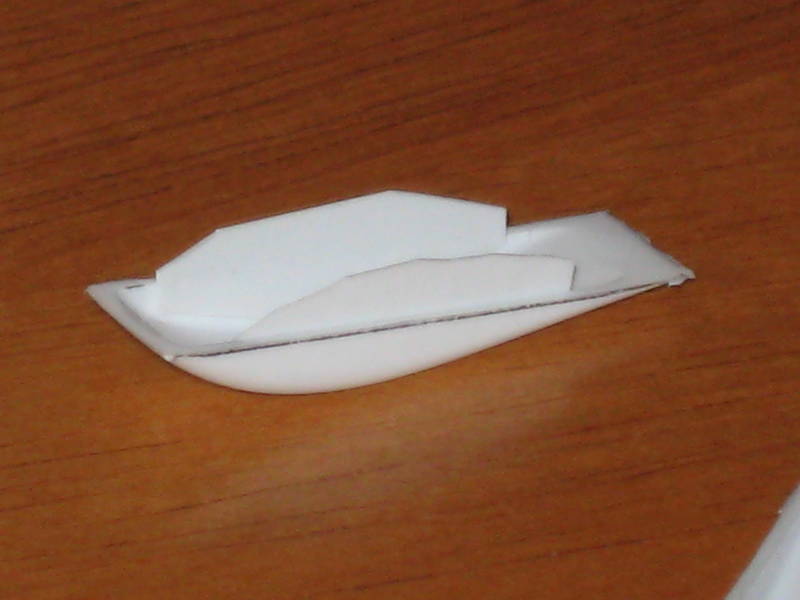
Wing float halves, fuselage and wing gas tanks...
More to come...
Mark
Here's the start of my 1st vac kit, 1/48 Sierra Scale Models Grigorovich M-5.
References:
Carefully....................
Wing float halves, fuselage and wing gas tanks...
More to come...
Mark

Percheron
Joined: September 23, 2006
KitMaker: 432 posts
AeroScale: 360 posts

Posted: Tuesday, October 23, 2007 - 03:57 PM UTC
Mark,
Very cool! I have not seen a vacuform done yet. Plus it is an interesting subject.
-Derek
Very cool! I have not seen a vacuform done yet. Plus it is an interesting subject.
-Derek
Removed by original poster on 10/26/07 - 02:53:28 (GMT).
guitarlute101
Joined: December 18, 2006
KitMaker: 1,121 posts
AeroScale: 1,063 posts
Posted: Thursday, October 25, 2007 - 03:20 AM UTC
Hello all,
Should I keep it here since I'll be providing info on WW1 Russian seaplanes and Vac building techniques for discussion?
Let me know some opinions - here or Pre-flight check section.
Mark
Should I keep it here since I'll be providing info on WW1 Russian seaplanes and Vac building techniques for discussion?
Let me know some opinions - here or Pre-flight check section.
Mark
MerlinV
Joined: November 26, 2006
KitMaker: 608 posts
AeroScale: 602 posts
Posted: Thursday, October 25, 2007 - 09:59 AM UTC
Yes, please. Leave it here. It might get lost in another section. That would be a travesty.
Keep on posting photos please.
Cheers,
Hugh
Keep on posting photos please.
Cheers,
Hugh
guitarlute101
Joined: December 18, 2006
KitMaker: 1,121 posts
AeroScale: 1,063 posts
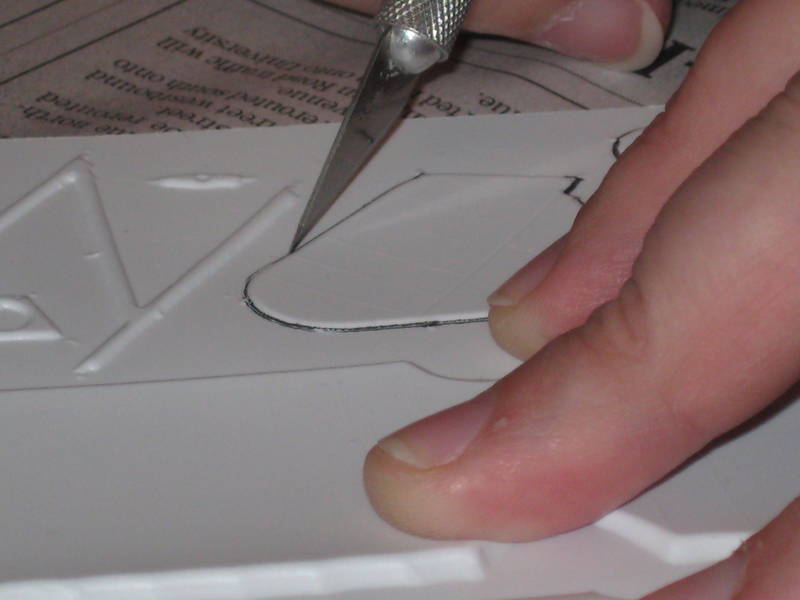
Posted: Thursday, October 25, 2007 - 03:11 PM UTC
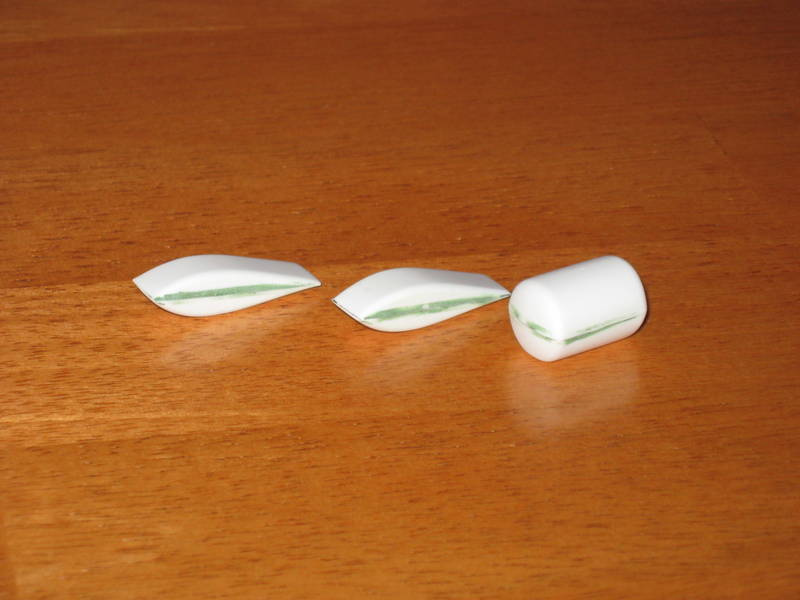
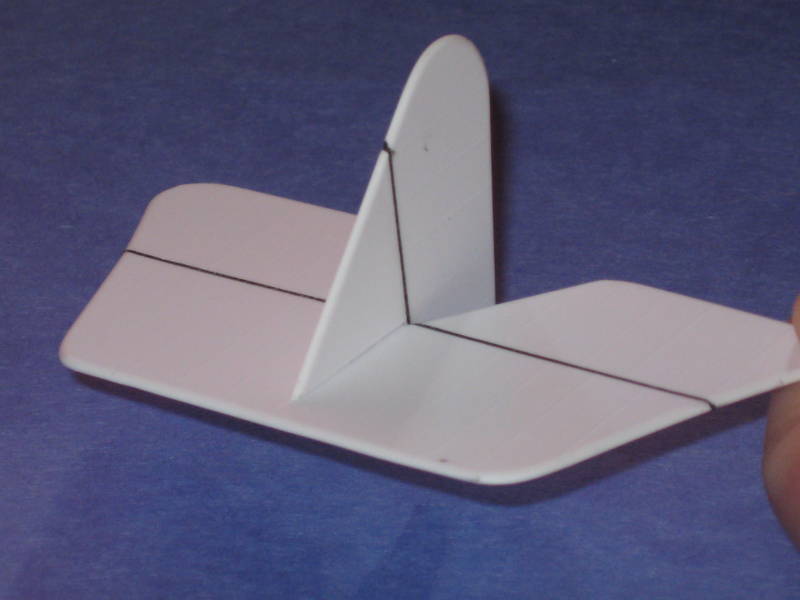
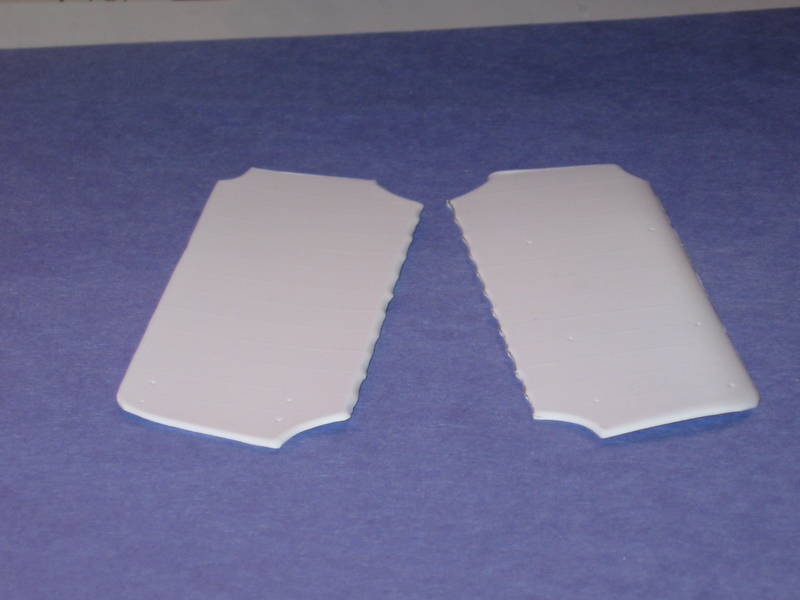
Here's a little more progress
Hull halves and tailplanes removed
Tabs glued in for wing float and gas tank halves
A little more detail, notice sanding to marker line

More tomorrow.........
guitarlute101
Joined: December 18, 2006
KitMaker: 1,121 posts
AeroScale: 1,063 posts
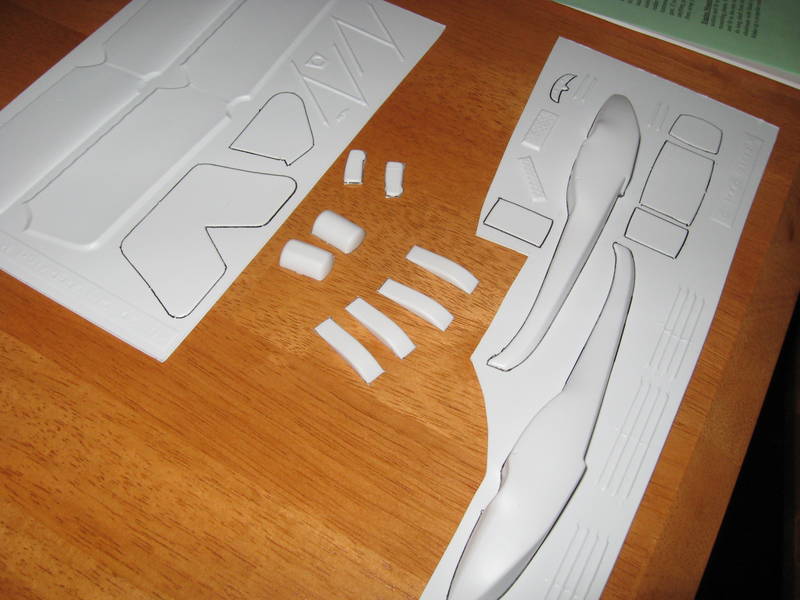
Posted: Wednesday, October 31, 2007 - 01:58 PM UTC
Hello all,
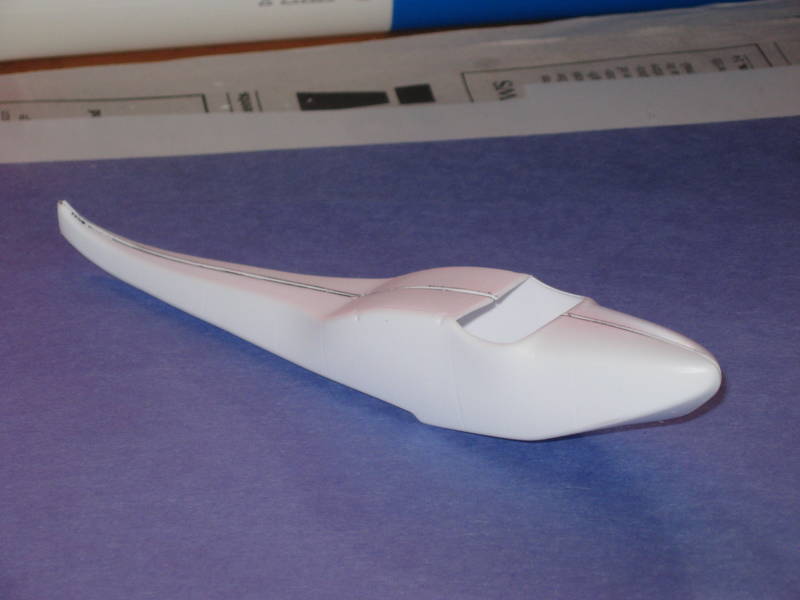
Here's some more progress. Sorry for the delay, business has been keeping me busy..
Fuselage halves with cockpit openings cut out... before anyone asks, I'm a classically trained guitarist...finger nails are a part of the job.....


Wing floats and fuselage gas tank puttied and sanded...ready for primer
Here's some more progress. Sorry for the delay, business has been keeping me busy..
Fuselage halves with cockpit openings cut out... before anyone asks, I'm a classically trained guitarist...finger nails are a part of the job.....
Wing floats and fuselage gas tank puttied and sanded...ready for primer
guitarlute101
Joined: December 18, 2006
KitMaker: 1,121 posts
AeroScale: 1,063 posts
Posted: Wednesday, October 31, 2007 - 02:26 PM UTC
Hello all,
Here's a little history on the Grigorovich M.5
The M.5 was a single engine, 2 seat float plane and the first notable success of D. P. Grigorovich. Around 105 were produced, powered by a 100 HP Gnome Monosoupape rotary engine in a trainer role. Combat M.5's were powered by the 100 HP Clerget engine. The M.5's maximum speed was 105 km/h (65.2 mph). Some M.5's had an infantry style Russian Maxim (sometimes Vickers or Lewis) machine gun mounted in front of the pilot on the right side of the cockpit. The M.5 was equipped with dual controls and wireless gear. The M.5 was different from previous Grigorovich models in that the designer strengthened the hull and increased the area of the lower wing and positioned the lower wings to mount to the side of the fuselage instead of on short struts above the fuselage. The Grigorovich served from 1915 into the 1920''s with 22 training M.5's recorded as serving with the Soviet Air Force as late as 1925. The M.5 was also used by Finland. The M.5's were used actively by the Black Sea Fleet with some M.5's based at Sevastopol,Odessa, and Batun. Some M.5's were used in shipborne aviation attachments and participated in an attack on the Turkish port of Zonguldak on January 24, 1916, damaging and sinking the supply ship Irmingrd. The M.5 was a highly successful flying boat and was well loved by its pilots as a dependable aircraft.
Wing span (upper wing) -- 44.3 feet
Length -- 26.9 feet
Speed at ground level -- 56-65 mph
Service ceiling -- 10,827 feet
Flight duration -- 3 1/2 - 4 hrs
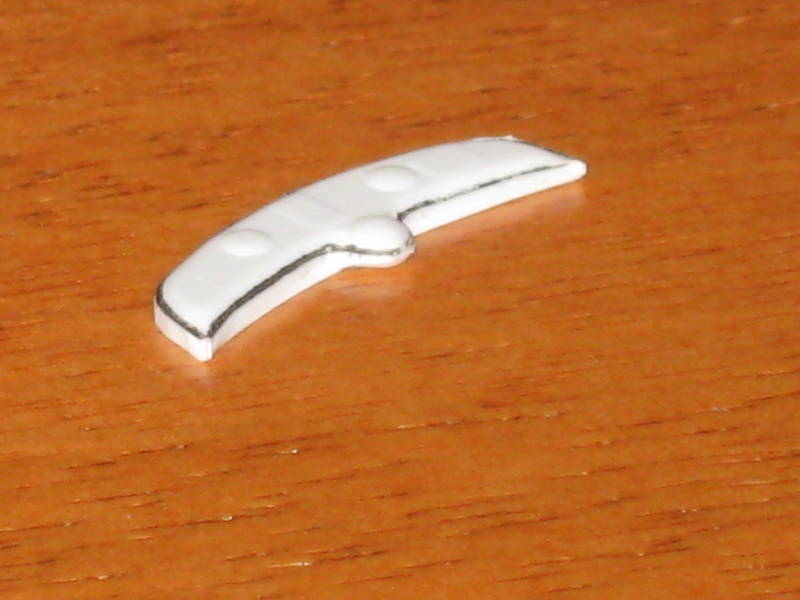
Here's a pic of the instrument panel provided, just an outline shape with some "blobs".
Time for some scratchbuilding.....
Scale plans provided by the manufacturer not quite lining up.....no worries
Here's a little history on the Grigorovich M.5
The M.5 was a single engine, 2 seat float plane and the first notable success of D. P. Grigorovich. Around 105 were produced, powered by a 100 HP Gnome Monosoupape rotary engine in a trainer role. Combat M.5's were powered by the 100 HP Clerget engine. The M.5's maximum speed was 105 km/h (65.2 mph). Some M.5's had an infantry style Russian Maxim (sometimes Vickers or Lewis) machine gun mounted in front of the pilot on the right side of the cockpit. The M.5 was equipped with dual controls and wireless gear. The M.5 was different from previous Grigorovich models in that the designer strengthened the hull and increased the area of the lower wing and positioned the lower wings to mount to the side of the fuselage instead of on short struts above the fuselage. The Grigorovich served from 1915 into the 1920''s with 22 training M.5's recorded as serving with the Soviet Air Force as late as 1925. The M.5 was also used by Finland. The M.5's were used actively by the Black Sea Fleet with some M.5's based at Sevastopol,Odessa, and Batun. Some M.5's were used in shipborne aviation attachments and participated in an attack on the Turkish port of Zonguldak on January 24, 1916, damaging and sinking the supply ship Irmingrd. The M.5 was a highly successful flying boat and was well loved by its pilots as a dependable aircraft.
Wing span (upper wing) -- 44.3 feet
Length -- 26.9 feet
Speed at ground level -- 56-65 mph
Service ceiling -- 10,827 feet
Flight duration -- 3 1/2 - 4 hrs
Here's a pic of the instrument panel provided, just an outline shape with some "blobs".
Time for some scratchbuilding.....
Scale plans provided by the manufacturer not quite lining up.....no worries

calvin2000
Joined: July 25, 2007
KitMaker: 886 posts
AeroScale: 332 posts

Posted: Wednesday, October 31, 2007 - 04:46 PM UTC
I am enjoying the build your doing . I have thought of doing a vacu form but never really knew what to expect. Keep up the good work. 


guitarlute101
Joined: December 18, 2006
KitMaker: 1,121 posts
AeroScale: 1,063 posts
Posted: Thursday, November 01, 2007 - 02:41 AM UTC
Hi Kelly,
I've put off building a vac kit for years, but I must admit that, so far, everything has went along very well. The parts came off of the sheet very nicely after scoring and took very little triming and sanding to get them to fit together. The wings might be a little more difficult, they will require very thin trailing edges, we'll see. I have a couple of Lone Star 1/48 resin/vac/photo-etch kits I'd like to start on next.
Thanks for the input.....it's really nice to hear from other modellers.
If you or anyone else have any questions about why or how I'm doing a particular technique, please post and let me know.
If anyone has any vac tips or advise....that would be great and appreciated by all.
I'm expecting more reference material soon, more to come............
Mark
guitarlute101
Joined: December 18, 2006
KitMaker: 1,121 posts
AeroScale: 1,063 posts
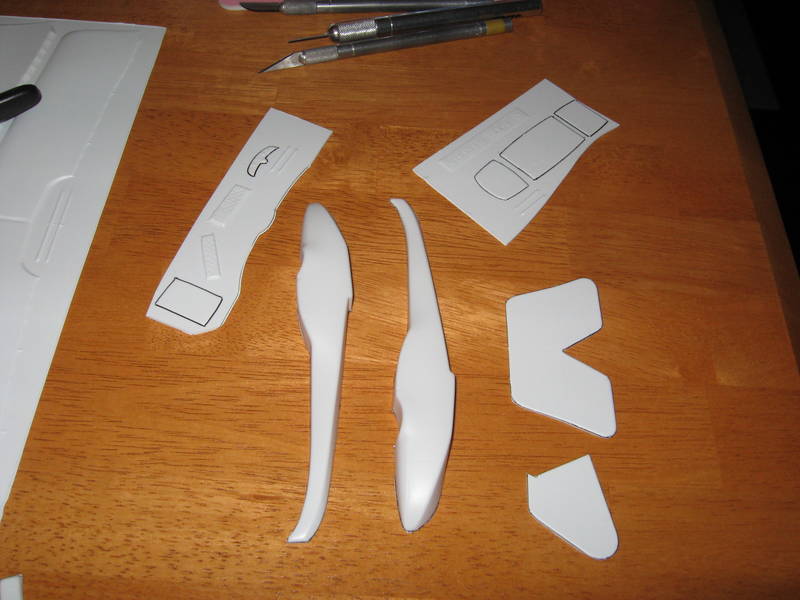
Posted: Friday, November 02, 2007 - 02:59 AM UTC
Hi,
I got a little more work done on the tailplane fuselage and wings.
Slot cut for horizontal tailplane.....

Great fit.........
Fuselage tabs in place..........

Tabs holding fuselage together........
Lower wing bottom-top, needs alot of sanding to thin out trailing edges.......
I got a little more work done on the tailplane fuselage and wings.
Slot cut for horizontal tailplane.....
Great fit.........
Fuselage tabs in place..........
Tabs holding fuselage together........
Lower wing bottom-top, needs alot of sanding to thin out trailing edges.......
guitarlute101
Joined: December 18, 2006
KitMaker: 1,121 posts
AeroScale: 1,063 posts
Posted: Friday, November 02, 2007 - 03:03 AM UTC
Hello all,
I just checked in on the Copper State Models website. It looks like Eric is producing an M.5 as his next project. Perhaps I'll do a build here for that one too, since I already have most of the reference material available.
Mark
I just checked in on the Copper State Models website. It looks like Eric is producing an M.5 as his next project. Perhaps I'll do a build here for that one too, since I already have most of the reference material available.
Mark
guitarlute101
Joined: December 18, 2006
KitMaker: 1,121 posts
AeroScale: 1,063 posts
Posted: Monday, November 12, 2007 - 05:39 PM UTC
Just got in the July/August 1991 issue of Windsock International......the mail runs slow here in WV....what can I say??

Just kidding...ebay find.
Here's the fuselage against the Windsock scale plans
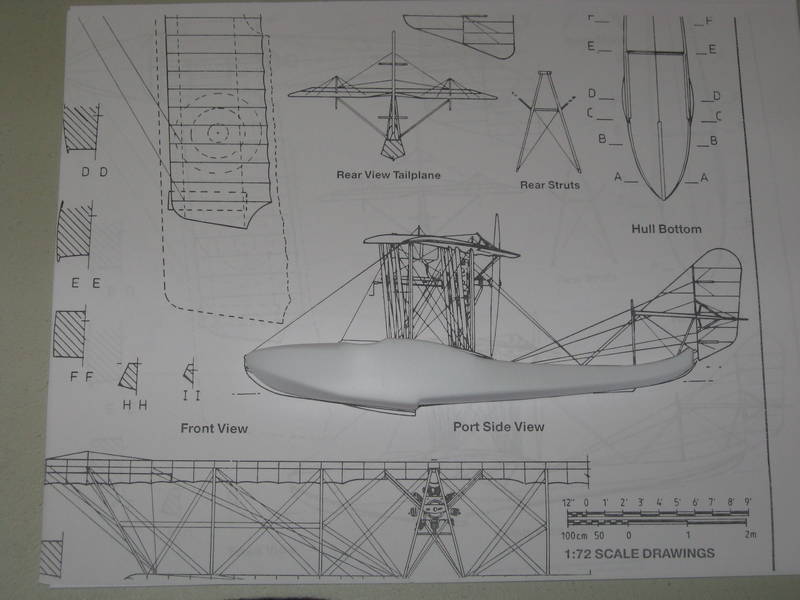
Good fit...onward to painting.
Does anyone have any wood effect painting techniques they'd like to share?
Mark
guitarlute101
Joined: December 18, 2006
KitMaker: 1,121 posts
AeroScale: 1,063 posts
Posted: Monday, November 12, 2007 - 05:42 PM UTC
All,
I forgot to mention I increased the 1/72 scale plans by 150% to get the 1/48 scale plans in the previous picture.
Mark
guitarlute101
Joined: December 18, 2006
KitMaker: 1,121 posts
AeroScale: 1,063 posts
Posted: Thursday, November 15, 2007 - 10:48 AM UTC
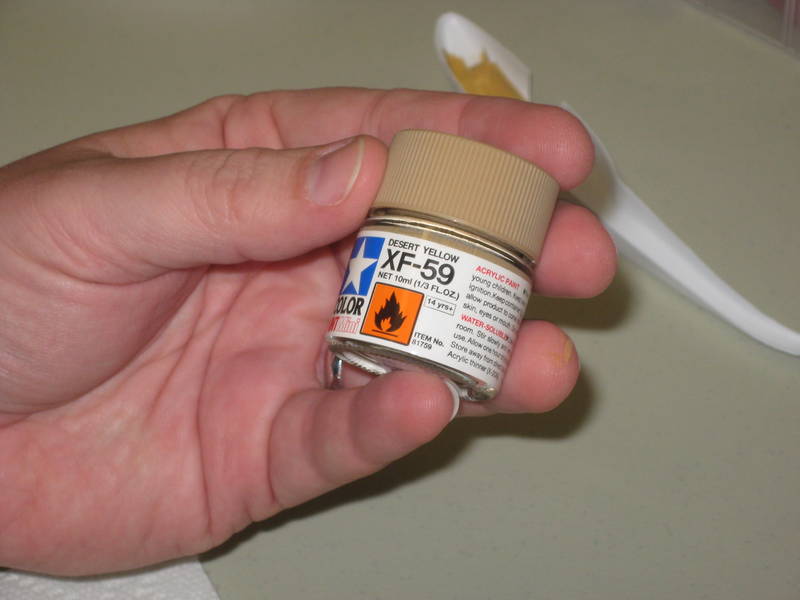
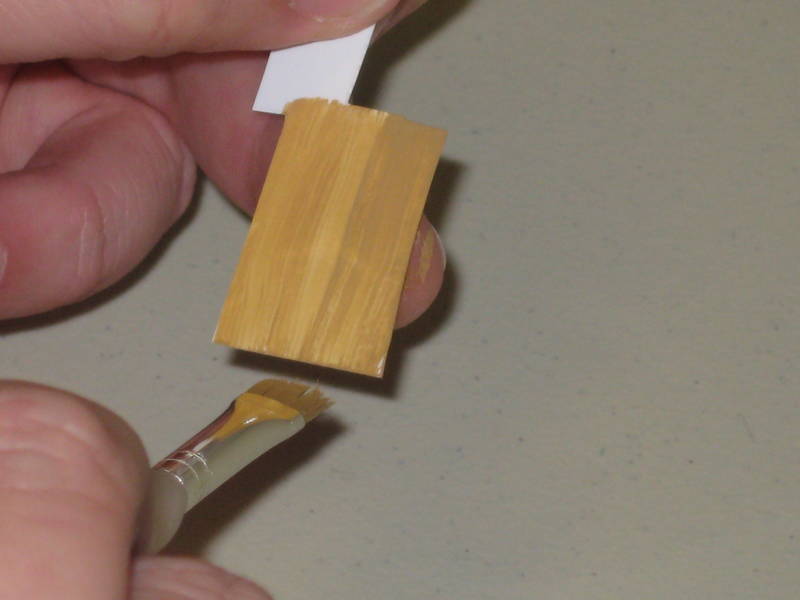
I've started on the painting. To get a wood grain effect I'm brushing Desert yellow over the cockpit interior parts.
Here are the parts...
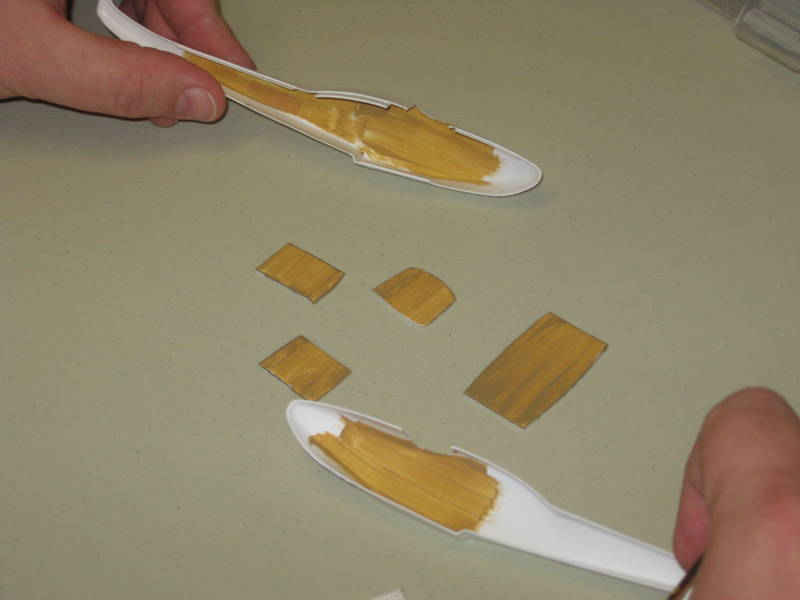
Here's how I did it...
A piece of scrap ...

Wide brush..lightly loaded with paint...

Complete strokes top to bottom, don't start in the middle..

Nice effect...just 3 or 4 strokes..let dry....

JackFlash
Joined: January 25, 2004
KitMaker: 11,669 posts
AeroScale: 11,011 posts
Posted: Thursday, November 15, 2007 - 09:46 PM UTC
Most impressive! You have truely created a great thread. I follow along and have to say. Most impressive. Model On!
guitarlute101
Joined: December 18, 2006
KitMaker: 1,121 posts
AeroScale: 1,063 posts
Posted: Friday, November 16, 2007 - 05:05 AM UTC
Stephen,
Thank you for the kind words. I consider it quite a compliment coming from you. I hope everyone enjoys my build and takes along a few pointers for their own modelling adventures.
Here's a few more pics for the wood effects technique. In most of my reference pics, the hulls of the M.5's are a dark varnished brown.
After I painted the scrap with desert yellow, I let it dry then covered it with a thin layer of Glosscoat with a brush. I let it dry overnight and brushed on Flat Brown over the Glosscoat.

Here's how it turned out. Here's a "Desert Yellow" painted piece for reference.
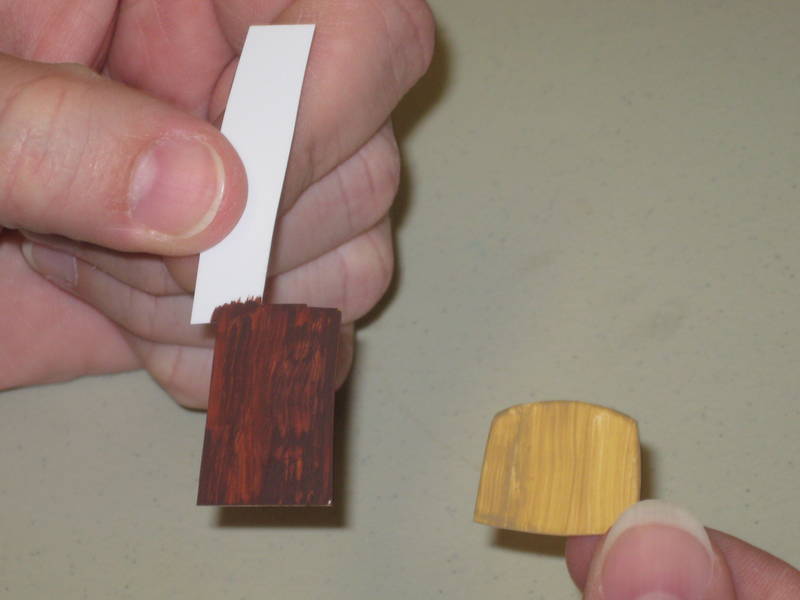
I'll apply the "Flat Brown" to my cockpit parts and will begin scratchbuilding a few cockpit interior parts...stay tuned....
guitarlute101
Joined: December 18, 2006
KitMaker: 1,121 posts
AeroScale: 1,063 posts
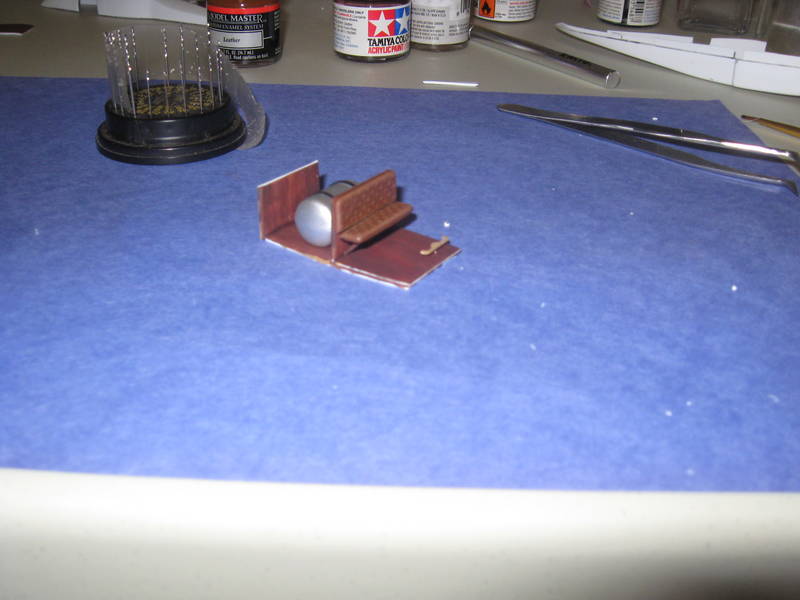
Posted: Sunday, November 18, 2007 - 09:56 AM UTC
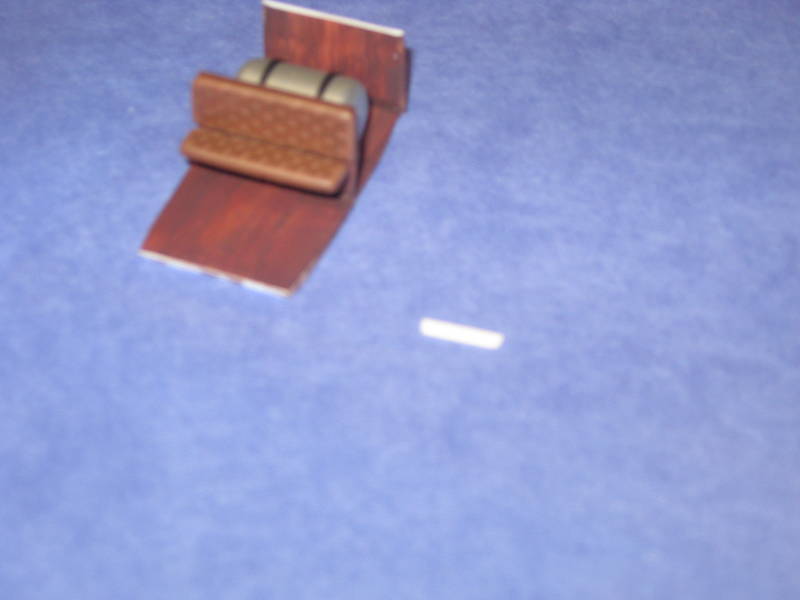
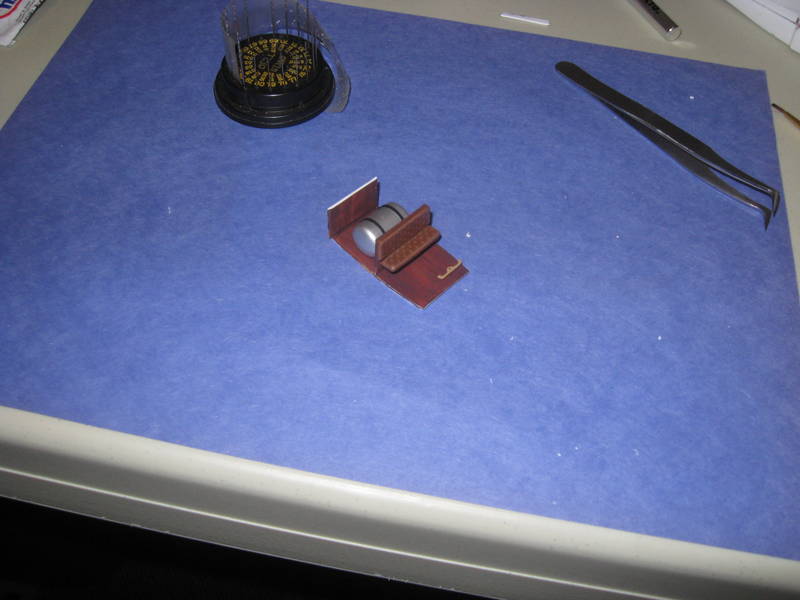
Here's a little done on the cockpit.
Here's the seat painted in Testor' Leather before a lighter shade was drybrushed on to bring out the detail.
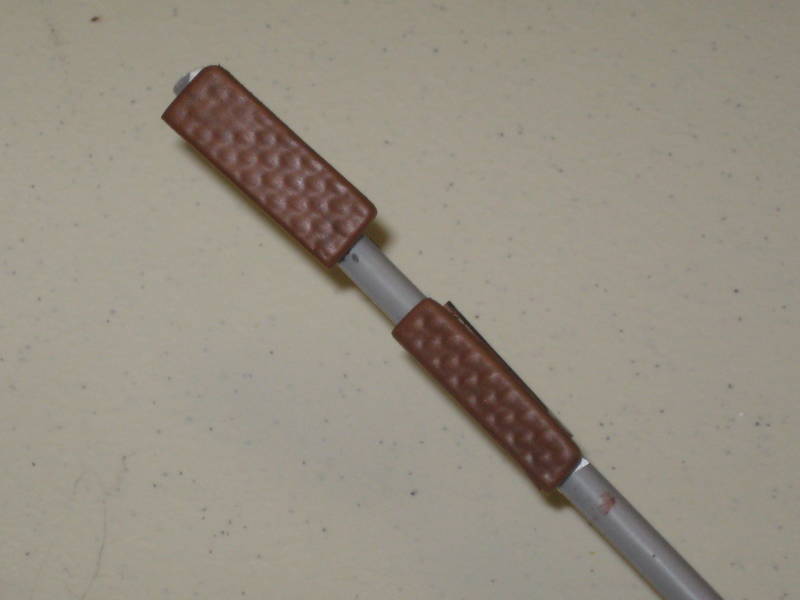
The seat with a few supports added in.
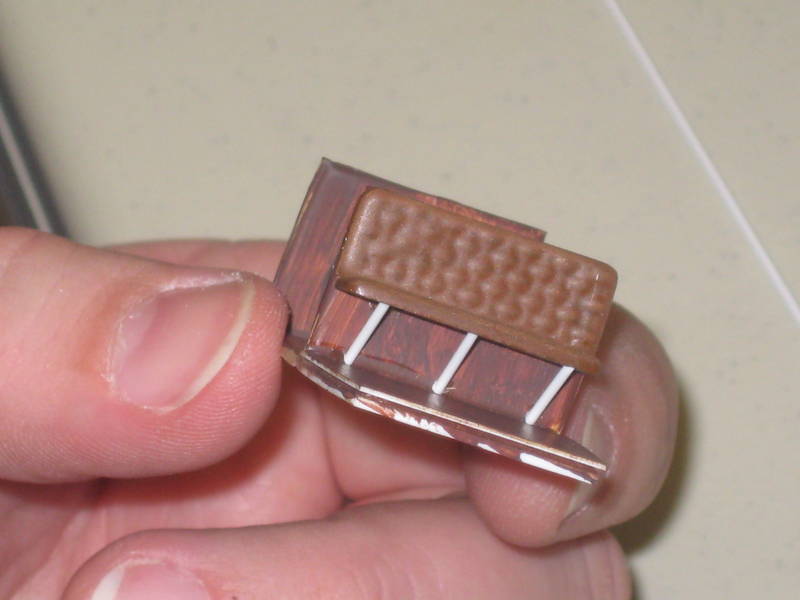
Here's the basic cockpit with the fuselage gas tank installed with evergreen strips for straps. I see a little spot I need to cover on the support under the seat...no worries.

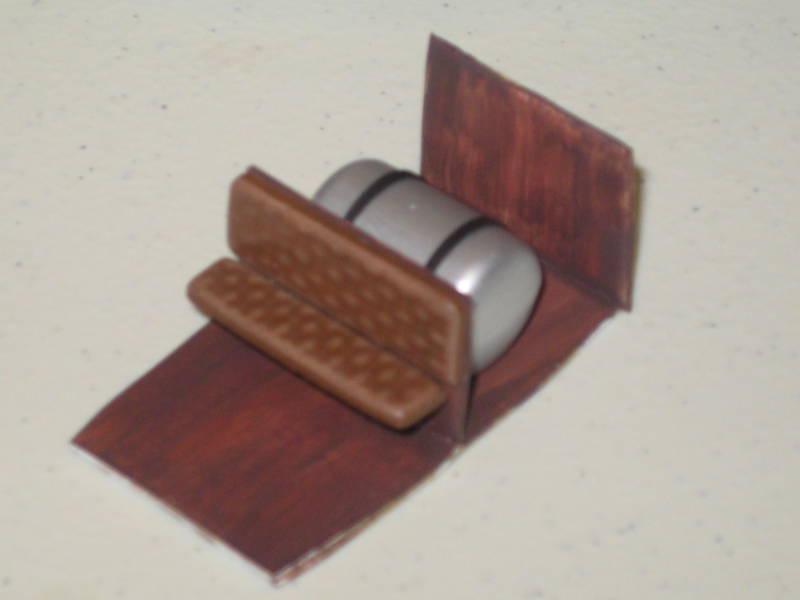

Next is to construct a rudder bar and control stick with some convincing linkage.
Comments welcomed.
Later taters,
Mark
calvin2000
Joined: July 25, 2007
KitMaker: 886 posts
AeroScale: 332 posts
Posted: Sunday, November 18, 2007 - 02:29 PM UTC
I like the way you did the wood grain. it was simple that means allot to me 

guitarlute101
Joined: December 18, 2006
KitMaker: 1,121 posts
AeroScale: 1,063 posts
Posted: Sunday, November 18, 2007 - 05:43 PM UTC
Here's a few pics of the scratchbuilt rudder. Sorry for the poor quality of some of them.
Measure it out and mark it....

Measure center,drill a hole with a pin vice for mounting....
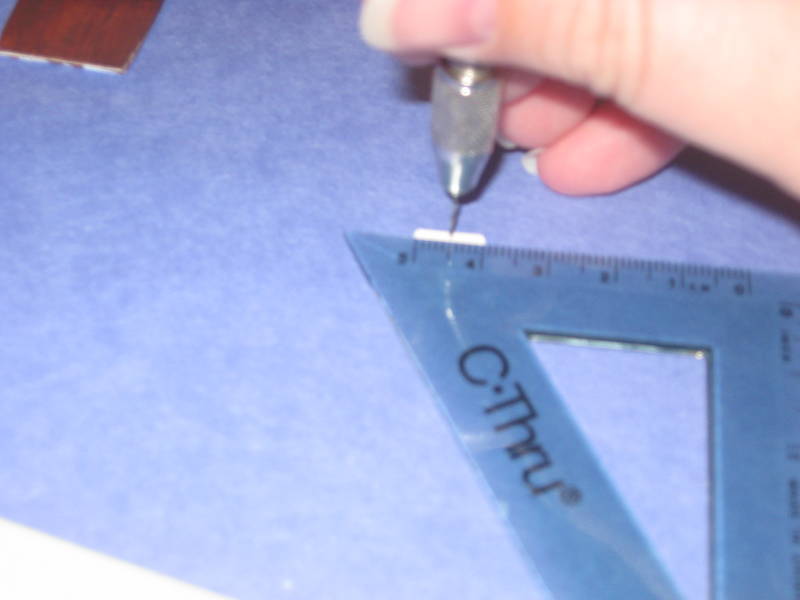
Rough outline, bad pic...
Carved, painted, mounted, ready to go....
More soon....................

TedMamere

Joined: May 15, 2005
KitMaker: 5,653 posts
AeroScale: 4,347 posts

Posted: Sunday, November 18, 2007 - 06:13 PM UTC
Quoted Text
More soon....................
I hope so!
This is a vey informative thread and I can't wait to see some more progress. This would make a nice feature for Aeroscale when it's finished I think!

Jean-Luc


 |

WEB HOSTING BY


Copyright ©2021 AeroScale and Kitmaker Network, a subsidiary of Silver Star Enterprises
All Rights Reserved. Please read our Conditions of Use and Privacy Policy.
All Rights Reserved. Please read our Conditions of Use and Privacy Policy.