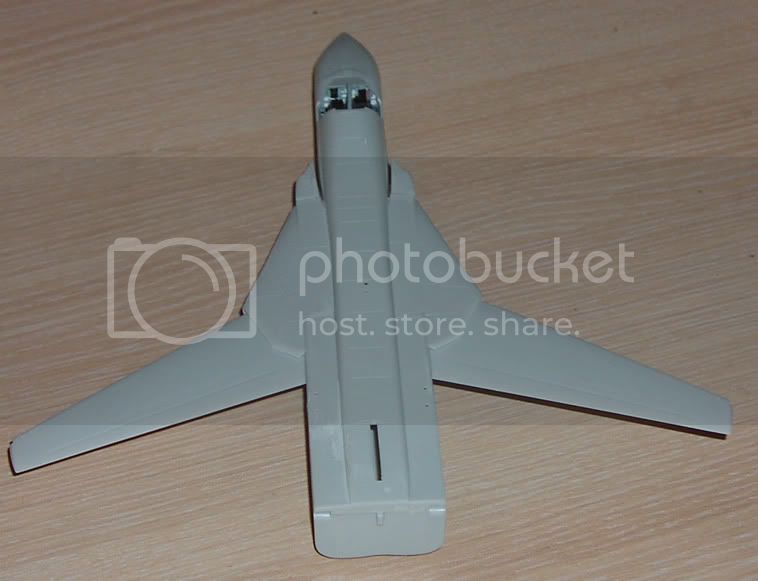
Just a bang seat tonight!
Build blog is here
Magnus
Air Campaigns
Want to start or join a group build? This is where to start.
Hosted by Frederick Boucher, Michael Satin
Swing-wing 2008 official thread
magnusf
Stockholm, Sweden
Joined: May 02, 2006
KitMaker: 1,953 posts
AeroScale: 1,902 posts
Joined: May 02, 2006
KitMaker: 1,953 posts
AeroScale: 1,902 posts
Posted: Thursday, February 19, 2009 - 09:23 AM UTC
warreni
South Australia, Australia
Joined: August 14, 2007
KitMaker: 5,926 posts
AeroScale: 2,201 posts
Joined: August 14, 2007
KitMaker: 5,926 posts
AeroScale: 2,201 posts
Posted: Friday, February 20, 2009 - 08:39 PM UTC
Greetings one and all!
Get out that green bucket again Magnus, although I see you haven't got my name on the list..
Ever had a kit you just knew you shouldn't have started? I was going to consign it to the too-build pile indefinitely until this campaign reared its head. Sad thing is I have another one to build!!!
Oh well, it is the cheapest way by far to get biggish F-111Cs. In the end I think this craft ended up with more plastic filler than plastic... The canopy was so bad that I just wacked it on to complete this build until a replacement canopy comes. It doesn't even go close to fitting! Then there was the mishapen wing that was missing its trailing edge.. Then the undercarriage doors that I am sure are moulded for a different plane...
Oh well.. don't look too closely please as in the end I lost the will to do my usual job on this one and just wanted it finished for the moment.
If you see one of these just walk away from it.. Even at US$16!!
The end result.
As you may be able to tell from the tail art it is an F-111C from 1SQN at RAAF Amberley. This aircraft participated in the Battle Of Britain remembrance celebrations in the early 1990s, but all 1SQN aircraft eventually received the big 1 on the tail.
The one bright thing in all this was that the Novascale decals I used were great. Give them a try as they have a huge range of decals and specialise in RAAF aircraft.
Now I just have to get the courage up to start the other one I have so I can paint it in the low-viz grey scheme the F-111s are going to finish their careers in.
Thanks for the campaign guys and gals.
magnusf
Stockholm, Sweden
Joined: May 02, 2006
KitMaker: 1,953 posts
AeroScale: 1,902 posts
Joined: May 02, 2006
KitMaker: 1,953 posts
AeroScale: 1,902 posts
Posted: Friday, February 20, 2009 - 09:49 PM UTC
Warren! Well done! There are kits out there that no matter what price they are never worth it!
Good to hear the the Novascale sheet is good, I have the same in 1/72 together with a Hase vark!
We are really starting to fill in the blanks now:
`
Magnus
Good to hear the the Novascale sheet is good, I have the same in 1/72 together with a Hase vark!
We are really starting to fill in the blanks now:
`
Magnus
warreni
South Australia, Australia
Joined: August 14, 2007
KitMaker: 5,926 posts
AeroScale: 2,201 posts
Joined: August 14, 2007
KitMaker: 5,926 posts
AeroScale: 2,201 posts
Posted: Saturday, February 21, 2009 - 01:37 PM UTC
I also have a Hasegawa F-111C in 1/72 but I don't think I will ever build it as I am not building braille scale much, if ever, anymore. I would love to see SOMEONE (Hasegawa?) bring out a 1/32 version.
magnusf
Stockholm, Sweden
Joined: May 02, 2006
KitMaker: 1,953 posts
AeroScale: 1,902 posts
Joined: May 02, 2006
KitMaker: 1,953 posts
AeroScale: 1,902 posts
Posted: Monday, February 23, 2009 - 09:18 AM UTC
One more week and I think I will be going green as well!
Canopy in place and faired in and a data probe added. Lots of sanding on this one!
Build blog is here
Magnus
Canopy in place and faired in and a data probe added. Lots of sanding on this one!
Build blog is here
Magnus
Posted: Tuesday, February 24, 2009 - 12:42 AM UTC
Some nice work there Magnus.
I'm really struggling to find time (despite having the last two weeks off from work) to work on my Tomcat but will endeavour to finish it (but it won't be in the intended diorama I had planned)
This weekend I finally go the fin decals fully removed and re-masked the entire plane (except the fins) and re-sprayed the gull grey, masked those area off and then sprayed the red. So once again the Tomcat can continue to be decaled.
No pics but hopefully there will be next weekend
Cheers
Allen
magnusf
Stockholm, Sweden
Joined: May 02, 2006
KitMaker: 1,953 posts
AeroScale: 1,902 posts
Joined: May 02, 2006
KitMaker: 1,953 posts
AeroScale: 1,902 posts
Posted: Saturday, February 28, 2009 - 09:54 AM UTC
Allen! If you run out of time I'll grant you another extension, don't worry!
I've been decalling tonight. Not many of them, compared with a Tomcat this is a breeze!
Build blog is here
Magnus
I've been decalling tonight. Not many of them, compared with a Tomcat this is a breeze!
Build blog is here
Magnus
Blueheeler
New South Wales, Australia
Joined: March 18, 2008
KitMaker: 347 posts
AeroScale: 223 posts
Joined: March 18, 2008
KitMaker: 347 posts
AeroScale: 223 posts
Posted: Saturday, February 28, 2009 - 09:50 PM UTC
Finally finished her, Photos in the campaign folder.
magnusf
Stockholm, Sweden
Joined: May 02, 2006
KitMaker: 1,953 posts
AeroScale: 1,902 posts
Joined: May 02, 2006
KitMaker: 1,953 posts
AeroScale: 1,902 posts
Posted: Saturday, February 28, 2009 - 11:24 PM UTC
Nick! Good work!
We're up to seven now.
`
Magnus
We're up to seven now.
`
Magnus
Phantom2
Östergötland, Sweden
Joined: April 18, 2006
KitMaker: 708 posts
AeroScale: 678 posts
Joined: April 18, 2006
KitMaker: 708 posts
AeroScale: 678 posts
Posted: Sunday, March 01, 2009 - 03:33 AM UTC
Hi all!
Time for a new update on the troublesome Tornado!
First I had to fix the problems caused by myself when I joined the front and aft fuselages.
It took a great deal of filling and sanding, but I believe it´s acceptable now.
Then I assembled the fin, and found it to be a tad too narrow to fit properly, easily fixed by a pair of spreaders made from sprue.
The fit could have been better where the fin meets the spine!
The glove vanes(?) at the leading edge of the wings was a really poor fit, almost non-existant!
This was the best I could do on the upper side.
Below I had to fill the cavities this caused with small pieces of plasticard, cut away the excess, then mucho filler and sanding followed!
The nose cone was added, plus some weight to avoid tailsitting.
Well, some sanding was needed here too!
When I tried to mount the hud I realized I had removed too much plastic so I had to build a base from plastic card again.
Worked good tough and It won´t be seen when finished!
Really can´t blame the kit for this!
Some filler around the edges help hide the filling!
Now she´s beginning to look like a proper "Tonka";
Here you can see how much filler I have been using, almost every join needs filler on this kit!
Rear seaters instrument console glued in place.
Pilot´s office;
Completed cockpit (seats are done but not fitted yet);
I have been sick and tired of this kit for a while, thus the slow progress!
But now I feel the painting is next and the build is starting to get that good feeling again!
More later!
Cheers!
Stefan E
magnusf
Stockholm, Sweden
Joined: May 02, 2006
KitMaker: 1,953 posts
AeroScale: 1,902 posts
Joined: May 02, 2006
KitMaker: 1,953 posts
AeroScale: 1,902 posts
Posted: Sunday, March 01, 2009 - 05:13 AM UTC
Stefan! That is really some impressive lack of fit! By the way, you seem to use up quite a lot of credit cards, doesn't your bank get curious when they end up in you builds at this rate?
Regarding Tornados: since I am one of those who exlusively do 1/72 I can tell you that for the GR-variants there is the absolutely exquisite Revell kit do build and for those longing for a "fighter" (sorry, I couldn't resist that one) Hasegawa has one from their heyday at the end of the eighties. No, I will not be converting to quarter scale!
Good work and good luck, I look forward to see it finished!
Magnus
Nito74
Lisboa, Portugal
Joined: March 04, 2008
KitMaker: 5,386 posts
AeroScale: 635 posts
Joined: March 04, 2008
KitMaker: 5,386 posts
AeroScale: 635 posts
Posted: Sunday, March 01, 2009 - 02:58 PM UTC
First update... tons of work to do on this one..
Posted: Monday, March 02, 2009 - 04:31 AM UTC
Quoted Text
Thanks Magnus. I did get some more done at the weekend and I have one side decaled and hoping to do the other side tonight. I'll see how it's going before asking for another extension. Allen! If you run out of time I'll grant you another extension, don't worry!
Cheers
magnusf
Stockholm, Sweden
Joined: May 02, 2006
KitMaker: 1,953 posts
AeroScale: 1,902 posts
Joined: May 02, 2006
KitMaker: 1,953 posts
AeroScale: 1,902 posts
Posted: Sunday, March 08, 2009 - 09:05 AM UTC
John!It looks as if you have your hands full!
Allen!! Keep on going!
I'm almost there. Some touch-ups and a few more details and then this very odd bird is finished!
Build blog is here
Magnus
Allen!! Keep on going!
I'm almost there. Some touch-ups and a few more details and then this very odd bird is finished!
Build blog is here
Magnus
Posted: Sunday, March 08, 2009 - 11:08 AM UTC
Well I'm getting there..... Two side are decalled and next up is the top and bottom with all the no step and stencil decals (now I know why I prefer WWII planes, Less stencilling ) here some pics so far
I'm happier with the painted fins and decals now (lees creases)
And the work continues........
I'm happier with the painted fins and decals now (lees creases)
And the work continues........
Nito74
Lisboa, Portugal
Joined: March 04, 2008
KitMaker: 5,386 posts
AeroScale: 635 posts
Joined: March 04, 2008
KitMaker: 5,386 posts
AeroScale: 635 posts
Posted: Sunday, March 08, 2009 - 04:44 PM UTC
You are right Magnus !
Just painted the engine parts and glued the backside.
Tail section is done too.
I still have a lot of filling and sanding to do...
Just painted the engine parts and glued the backside.
Tail section is done too.
I still have a lot of filling and sanding to do...
magnusf
Stockholm, Sweden
Joined: May 02, 2006
KitMaker: 1,953 posts
AeroScale: 1,902 posts
Joined: May 02, 2006
KitMaker: 1,953 posts
AeroScale: 1,902 posts
Posted: Wednesday, March 11, 2009 - 06:54 AM UTC
I've made it! It would have been really embarrassing not to finish my own campaign...
The Jaguar with arguably the most famous variable geometry aircraft in the background...
Build blog is here
Magnus
The Jaguar with arguably the most famous variable geometry aircraft in the background...
Build blog is here
Magnus
magnusf
Stockholm, Sweden
Joined: May 02, 2006
KitMaker: 1,953 posts
AeroScale: 1,902 posts
Joined: May 02, 2006
KitMaker: 1,953 posts
AeroScale: 1,902 posts
Posted: Wednesday, March 11, 2009 - 06:57 AM UTC
I'm checking in as number eight then!
`
Magnus[/quote]
`
Magnus[/quote]
LongKnife
Jönköping, Sweden
Joined: April 25, 2006
KitMaker: 831 posts
AeroScale: 688 posts
Joined: April 25, 2006
KitMaker: 831 posts
AeroScale: 688 posts
Posted: Wednesday, March 11, 2009 - 07:25 AM UTC
Magnus, are you sure all parts are from one box . It's wings from the forties, stab and fin from the fifties and fuselage from the sixties. She looks like one of Rowans "frankenplanes" in the Quiz. A really nice finish anyway!
Tony
Tony
Nito74
Lisboa, Portugal
Joined: March 04, 2008
KitMaker: 5,386 posts
AeroScale: 635 posts
Joined: March 04, 2008
KitMaker: 5,386 posts
AeroScale: 635 posts
Posted: Thursday, March 12, 2009 - 12:39 AM UTC
Just added the engine turbines and cover. Dry fitted the tail.
Will start the filling and sanding this weekend, and maybe start the wheels..
Posted: Tuesday, March 17, 2009 - 10:04 AM UTC
Still no further with the Tomcat but here the reason for my not getting to my bench
Sam (camogirl) seems to have taken the bench over to finish off some of her sideline projects for some shows over the next few weekends
magnusf
Stockholm, Sweden
Joined: May 02, 2006
KitMaker: 1,953 posts
AeroScale: 1,902 posts
Joined: May 02, 2006
KitMaker: 1,953 posts
AeroScale: 1,902 posts
Posted: Tuesday, March 17, 2009 - 06:58 PM UTC
Quoted Text
Still no further with the Tomcat but here the reason for my not getting to my bench
Sam (camogirl) seems to have taken the bench over to finish off some of her sideline projects for some shows over the next few weekends
I know about those things, if I turn my back to the workbench for too long I end up with a scrapbook invasion there. Photos, papers, ribbons - all over the place! There have also been instances of tool disappearances, they have magically crossed the floor and gone to sleep in Ulrika's toolbox!
You still have two weeks!
Magnus
Posted: Wednesday, March 18, 2009 - 04:18 AM UTC
Quoted Text
Ah I fully appreciated that to happen as I was told when we got engaged that what's hers is hers and what's mine is hers There have also been instances of tool disappearances, they have magically crossed the floor and gone to sleep in Ulrika's toolbox!
Quoted Text
It maybe two weeks but I only have time to model at a weekend so in theory that 4 days maximum. You still have two weeks!
wrenchy
Saskatchewan, Canada
Joined: April 23, 2006
KitMaker: 140 posts
AeroScale: 89 posts
Joined: April 23, 2006
KitMaker: 140 posts
AeroScale: 89 posts
Posted: Saturday, March 21, 2009 - 09:53 AM UTC
Well, I've got some colour on the Mig. I might actually get this thing done on time
magnusf
Stockholm, Sweden
Joined: May 02, 2006
KitMaker: 1,953 posts
AeroScale: 1,902 posts
Joined: May 02, 2006
KitMaker: 1,953 posts
AeroScale: 1,902 posts
Posted: Saturday, March 21, 2009 - 06:15 PM UTC
Quoted Text
Well, I've got some colour on the Mig. I might actually get this thing done on time
Cool Ryan! Good luck!
Magnus