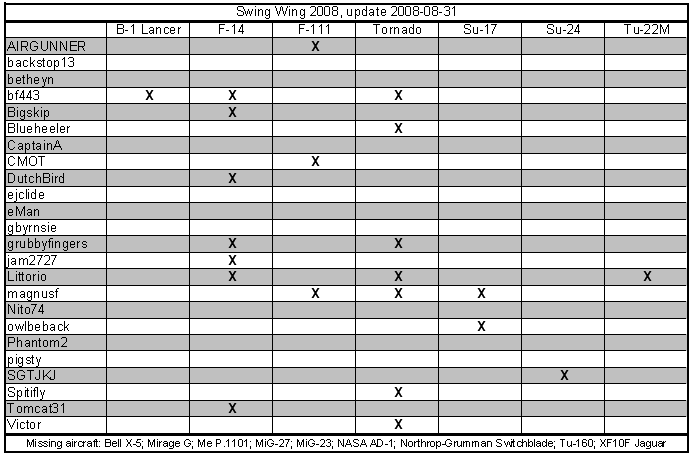
My MiG keeps coming and going from the table but here it is! Honest! This campaign entry will be known as
How to make a dogs dinner out of a sows ear: they dont call it a Flogger for nothing.
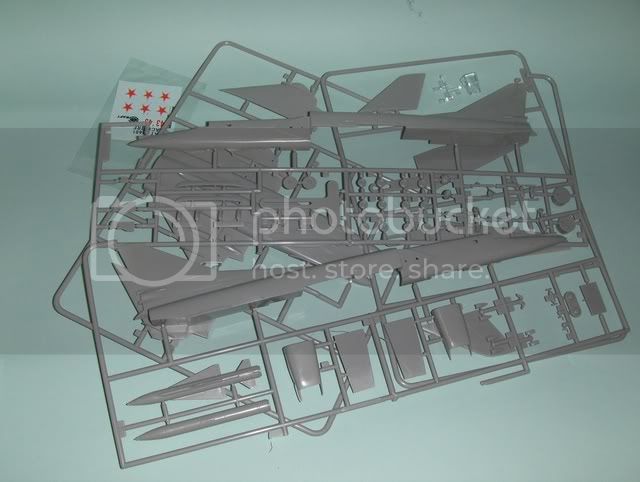
So, a MiG-23MS Flogger-E, the one sold to countries that couldnt quite be trusted. This one will be Libyan. The base kit is the
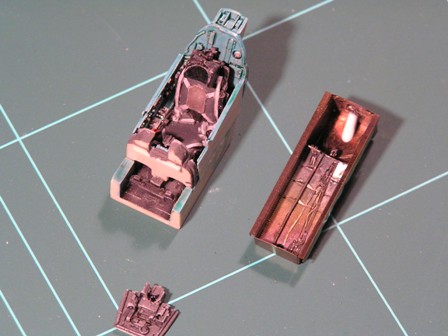
original Esci MiG-23S, which is reckoned to be no good for any more modern variant but will do for an early one. It will be considerably enhanced (I hope) with two sets from Eduard: external details, and the exhaust nozzle; and a replacement cockpit from Neomega. External details is a bit misleading it includes an entire nosewheel well and a lot of add-ons for the mainwheel wells too.
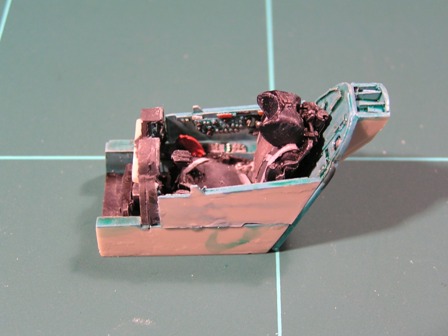
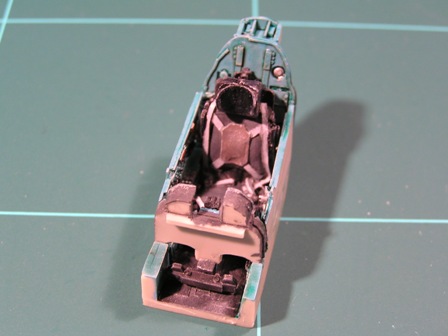
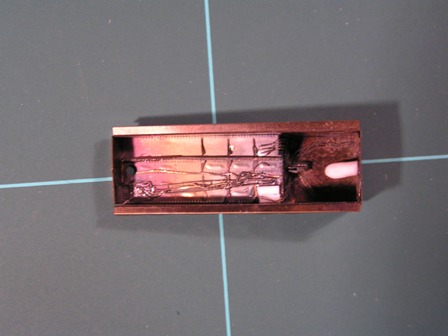
Here are the assembled cockpit with the coaming just visible, and the nosegear well. The general cockpit colour is Humbrol 109 (WWI blue) with two coats of Winsor & Newton emerald ink, which provides its own shading. Then some pale grey dry-brushed for the highlights. Other details follow photo references in World Air Power Journal vol.8 and International Air Power Review vol.14. You can see the high level of moulded detail, but what you cant see is how thin the side panels are; nor how long it took to persuade the rear panel to fit to the side panels, and them to fit to the instrument panel. The seat fits fine but Im sure the control column is in the wrong place yet its in the only place where it would fit. The instructions were no help. You get a scrap of paper about the size of the motto in a Christmas cracker, with a hazily reproduced illustration of the parts taking up most of the space and an assembly diagram that consists of all the pieces pointing at the cockpit floor. Compared with the quality of the resin, theyre awful. The headrest isnt gloss black, thats a fluke of the lighting. The seat is in one piece and is exquisite.
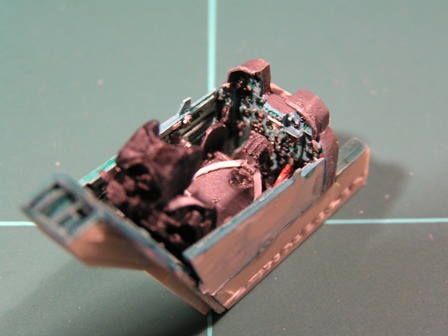
Another view of the nosegear well. Theres lots of wiring in there, some of which may eventually connect to the nosegear.
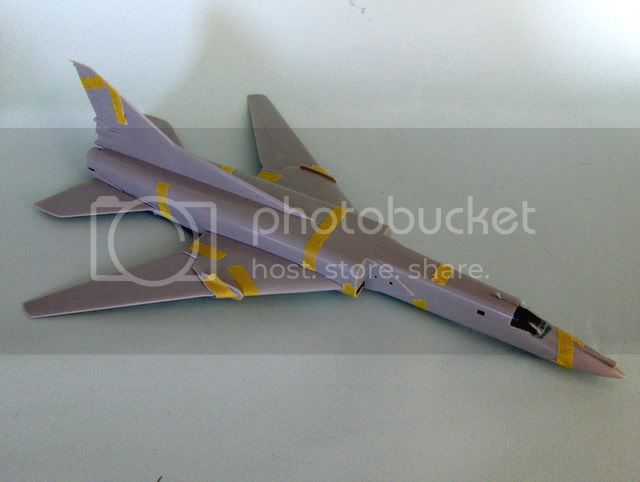
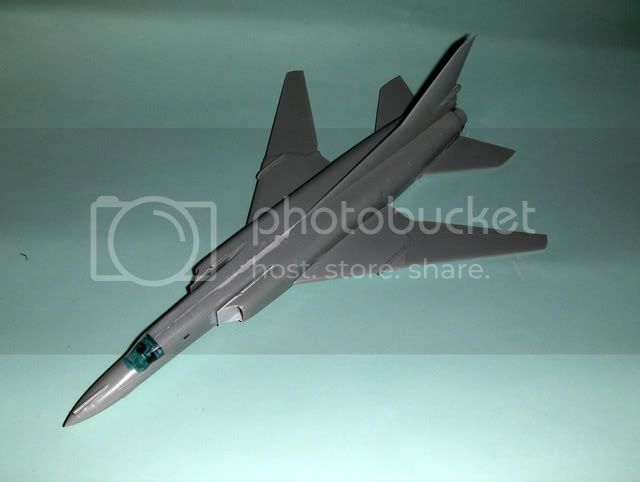
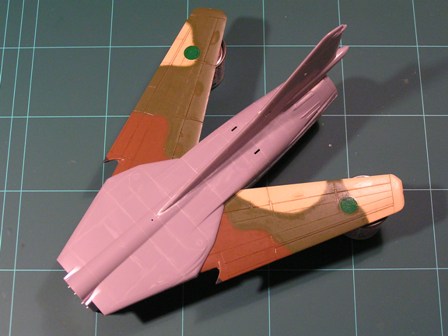
Top view of the main fuselage sub-assembly. The wings are fully painted, panel lines inked in, Klear and decals applied. Why? Because I had the idea that it would be nice to leave the wings mobile, but to do that Id want them fully painted so bare bits didnt show when they were extended. Then the black paint that adds some depth to the openings started to rub off and the openings themselves started to scratch the paintwork
its staying fully swept from now on. Colours: Humbrol 103 cream, 186 brown and 159 khaki drab; Citadel brown ink for the panel lines. Ill explain the airbrush effect a bit later, as I forgot to take progress pictures.
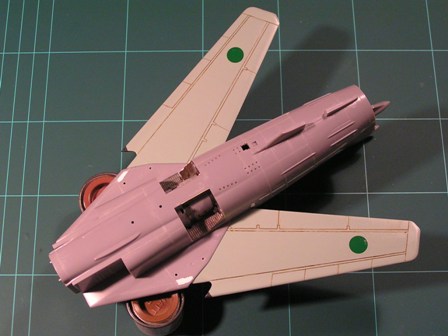
And the underside. You may just be able to make out a hole cut out among the pressure relief holes under the engine this will take some PE details later. Colour: White Ensign RLM 76, which is lovely to work with.
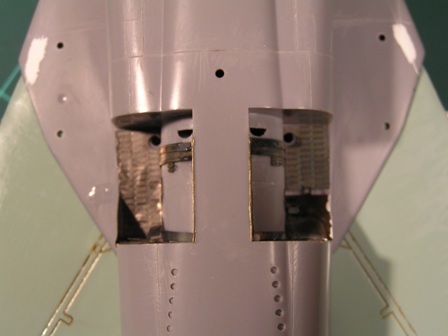
Close-up of the maingear wells, with the Eduard details. You hopefully cant quite see where I cut out the wrong corner and had to fill it again. The white stuff is correction fluid for filler.
That's it so far. More follows, I hope.


 !
!