Ok, I made up my mind... another A-model kit, the Su-9U.
I'll clear my workbench and get started next weekend.
The instrucions and colours are very similar to the Su-11 I'm doing for the NFS Campaign.
Air Campaigns
Want to start or join a group build? This is where to start.
Want to start or join a group build? This is where to start.
Hosted by Frederick Boucher, Michael Satin
Twin seat Trainer/Fighter Campaign
Nito74

Joined: March 04, 2008
KitMaker: 5,386 posts
AeroScale: 635 posts

Posted: Sunday, March 08, 2009 - 09:14 PM UTC
Phantom2

Joined: April 18, 2006
KitMaker: 708 posts
AeroScale: 678 posts

Posted: Monday, March 09, 2009 - 09:00 AM UTC
Quoted Text
Stefan. I got that kit also. I have been wanting to build it up, but haven't managed to start it up yet. Beware, some of the kit decals are off in color. There were some AM decals, but I haven't found them yet. I think the color is off on the tongue, the kit decals being orange instead of red. My Swiss Cheese for brains memory are telling me there was something else off regarding the kit decals. I read this after googling MiG 21 UM. But is is a really cool kit. hth
Hi Carl!
Yes, the Trumpeter decals are WAAAY off, as usual!
I managed to get a set from Tigerwings Decals, and that is a stunning FIVE-sheet set with all decals needed for this Mig!
The tounge in the Trumpeter kit is, as you said, orange instead of red, the figure on the fin is the wrong color and are identical instead of beeeing slightly different, TW got this correct, Trumpeter did not!
I´m happy I found that set, have a look at Hobby Easy, Hongkong where I bought mine!
I really intended to start with the Mig-21UM, but I took a look in the box of this little kit, and before I knew it, I had started building!
A friend of mine calls it a BBA, Build By Accident!
This is my first trainer-build for this Campaign;

What´s in the box, then?
Not very much, really, but what´s there is simply exquisite!
Four injection moulded grey sprues, two large and one small;

Here´s the very small clear sprue, along with two clear vacuumformed blind-flying hoods.

Some resin parts from CMK(?), very well moulded and very nice with good detail;

The decals are printed by Cartograph, and the etched parts come from Eduard, so quality are insured!

The pre-painted etch fret are made with Eduard´s usual finesse;

The other, unpainted, fret is filled with small parts;

More pics coming soon!
Cheers!


Stefan E

Posted: Tuesday, March 10, 2009 - 01:16 AM UTC
Nice progress and interesting to hear, Eetu. A truly long serving aircraft.

Emeritus

Joined: March 30, 2004
KitMaker: 2,845 posts
AeroScale: 1,564 posts

Posted: Thursday, March 12, 2009 - 08:18 AM UTC
Some more slight progress from me:
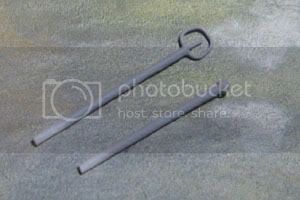
Control sticks, primed. Quite simple I know, but gets the job done with a closed cockpit in this scale. The ball at the tip of rear cockpit stick I made from milliput.
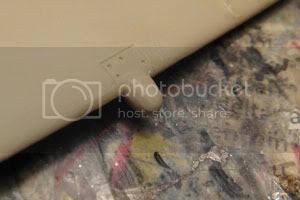
The peculiar landing light I mentioned earlier. It'll look more like the real thing after I cut off half/two thirds of and add a clear lens.
I don't know if it's correct (I highly doubt it), but the cockpit opening seem to be at different heights in the fuselage halves...
I got the first taste of this when I drilled holes to the cockpit floor and fuselage sides for pinning. Even though I was certain I got the holes positioned correctly, the cockpit floor sat crooked. That was easily solved: pin the floor from one side only.
When gluing in the rear shelf, it sat crooked as well.
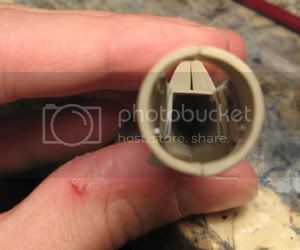
Yep, with the fuselage halves taped together and looked from the side, the sides of the cockpit openings aren't at the same level...
Weird, since the details on both sides seem to be at the same place, relative to the cockpit edge.
But no worries, I'll live with that this time.
...Because there's more crucial issues to take care of.
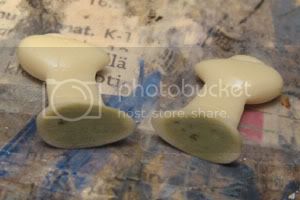
Like the wheel spats...
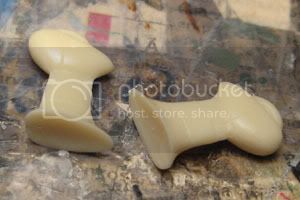
Pretty nice details, good casting. Everything's fine, everything's cool so far.
Then it get progressively uglier:
1) The pour stubs were tricky to remove, being located on the front edge, going over the top into the concave.
2) Why on earth are the gluing surfaces concave?
3) Why are spats designed to be glued to the bottoms of the wing too far back?
Looks like I got some work ahead of me if I'm willing to moun them properly...
For starters, I filled the concaves with milliput and sanded smooth.

Control sticks, primed. Quite simple I know, but gets the job done with a closed cockpit in this scale. The ball at the tip of rear cockpit stick I made from milliput.

The peculiar landing light I mentioned earlier. It'll look more like the real thing after I cut off half/two thirds of and add a clear lens.
I don't know if it's correct (I highly doubt it), but the cockpit opening seem to be at different heights in the fuselage halves...
I got the first taste of this when I drilled holes to the cockpit floor and fuselage sides for pinning. Even though I was certain I got the holes positioned correctly, the cockpit floor sat crooked. That was easily solved: pin the floor from one side only.
When gluing in the rear shelf, it sat crooked as well.

Yep, with the fuselage halves taped together and looked from the side, the sides of the cockpit openings aren't at the same level...

Weird, since the details on both sides seem to be at the same place, relative to the cockpit edge.
But no worries, I'll live with that this time.

...Because there's more crucial issues to take care of.
Like the wheel spats...

Pretty nice details, good casting. Everything's fine, everything's cool so far.
Then it get progressively uglier:
1) The pour stubs were tricky to remove, being located on the front edge, going over the top into the concave.
2) Why on earth are the gluing surfaces concave?
3) Why are spats designed to be glued to the bottoms of the wing too far back?
Looks like I got some work ahead of me if I'm willing to moun them properly...

For starters, I filled the concaves with milliput and sanded smooth.


magnusf

Joined: May 02, 2006
KitMaker: 1,953 posts
AeroScale: 1,902 posts

Posted: Thursday, March 12, 2009 - 08:54 PM UTC
I'm up and running as well!
I will be building this one:

Work has started:

Right now I am searching for photos of the seats (can anyone help?) and good paint mixing recipes for the blue/tan Israeli camo scheme, preferably acrylics!
The usual build blog is here!

Magnus
I will be building this one:

Work has started:

Right now I am searching for photos of the seats (can anyone help?) and good paint mixing recipes for the blue/tan Israeli camo scheme, preferably acrylics!
The usual build blog is here!

Magnus

Emeritus

Joined: March 30, 2004
KitMaker: 2,845 posts
AeroScale: 1,564 posts

Posted: Sunday, March 15, 2009 - 06:54 AM UTC
Got the cockpit painted. Perhaps I should paint some subtle paint chips before closing the fuselage?
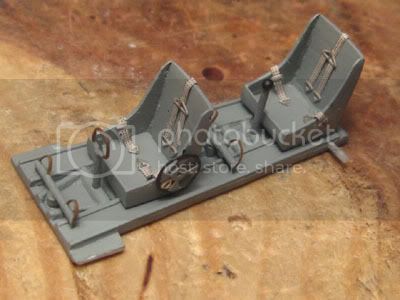
For the sake of consistency, I made both sets of seatbelts from Eduard's French harness sets with slight modifications, imitating the kit-supplied items.
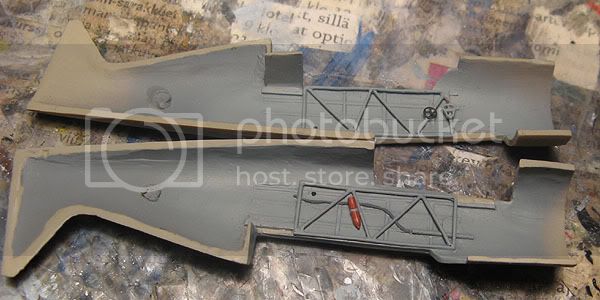
Not much extra done to the sidewalls. The only thing I added was the reddish orange bottle on the right side, made from a rocket left over from a LaGG-3 kit.
Hey, surprisingly this build is actually moving along pretty well! I sure hope it stays that way.

For the sake of consistency, I made both sets of seatbelts from Eduard's French harness sets with slight modifications, imitating the kit-supplied items.

Not much extra done to the sidewalls. The only thing I added was the reddish orange bottle on the right side, made from a rocket left over from a LaGG-3 kit.
Hey, surprisingly this build is actually moving along pretty well!
 I sure hope it stays that way.
Emeritus

Joined: March 30, 2004
KitMaker: 2,845 posts
AeroScale: 1,564 posts

Posted: Tuesday, March 17, 2009 - 09:24 PM UTC
Fuselage assembled, first puttying done.
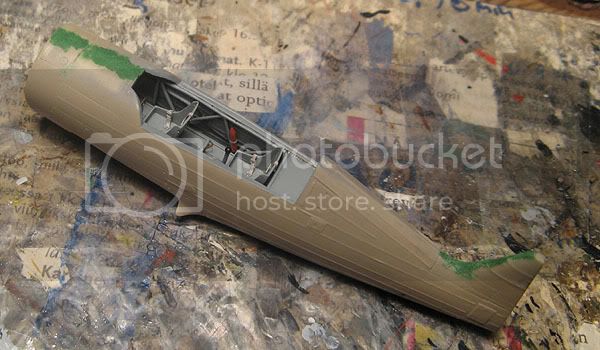
And didn't I just recently go around advicing people never to assume anything with limited-run kits. Seems like I don't remember that myself...
well, know we know! Don't glue that front seat to the floor following the instructions, it ends up way too forward.
Also, from this photo, I would draw the conclusion that the instrument panel should be almost at the same level as the back edge of the windscreen, and not like on this build-up photo.

Oh well, it doesn't matter that much, but I still find it slighlty puzzling how a manufacturer has good reference photos on it's website but can't get the instructions right...
I can't help but blame myself as well I guess.

And didn't I just recently go around advicing people never to assume anything with limited-run kits. Seems like I don't remember that myself...
well, know we know!
 Don't glue that front seat to the floor following the instructions, it ends up way too forward.
Also, from this photo, I would draw the conclusion that the instrument panel should be almost at the same level as the back edge of the windscreen, and not like on this build-up photo.

Oh well, it doesn't matter that much, but I still find it slighlty puzzling how a manufacturer has good reference photos on it's website but can't get the instructions right...
I can't help but blame myself as well I guess.

Emeritus

Joined: March 30, 2004
KitMaker: 2,845 posts
AeroScale: 1,564 posts

Posted: Sunday, March 22, 2009 - 07:39 AM UTC
It's starting to look like airplane. 
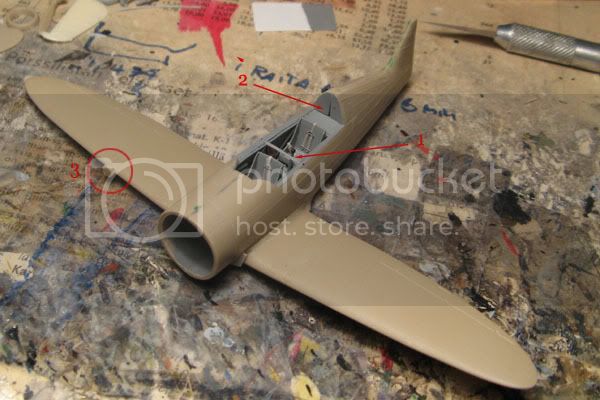
The wing fit surprisingly well for a limited-run kit, although I think I'll have to blend it in some more. Some mr. surfacer ought to do it.
Arrows:
1) The mount for the rear cockpit's instrument panel I made from styrene rod.
The mounting rod moulded to the panel part was too long and had to be shortened for it to fit between the fuselage halves, but I of course had to ruin it by trimming too much...
2) A gap between the fuselage halves behind the cockpit still to be filled
3) Landing light trimmed to correct length
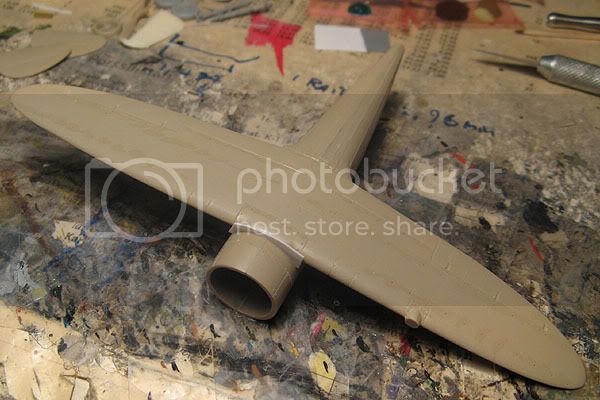
On the underside, there was a small gap between the wing and the fuselage. Instead of puttying it, I sanded the parts to widen the gap enough to accept a shim of styrene sheet.


The wing fit surprisingly well for a limited-run kit, although I think I'll have to blend it in some more. Some mr. surfacer ought to do it.
Arrows:
1) The mount for the rear cockpit's instrument panel I made from styrene rod.
The mounting rod moulded to the panel part was too long and had to be shortened for it to fit between the fuselage halves, but I of course had to ruin it by trimming too much...
2) A gap between the fuselage halves behind the cockpit still to be filled
3) Landing light trimmed to correct length

On the underside, there was a small gap between the wing and the fuselage. Instead of puttying it, I sanded the parts to widen the gap enough to accept a shim of styrene sheet.

Emeritus

Joined: March 30, 2004
KitMaker: 2,845 posts
AeroScale: 1,564 posts

Posted: Friday, March 27, 2009 - 10:19 AM UTC
It's on!
Quadruple posting time!
You guessed it, some more progress again.
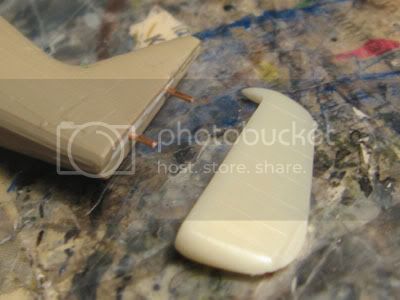
As the rudder was a resin part with a simple butt joint to the fuselage, I strengthened the joint by pinning the assembly with copper wire. Also notice the fuselage end filled with styrene sheet.
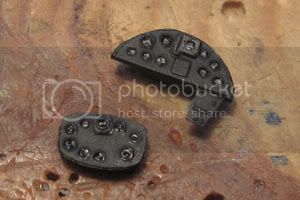
The instrument panel painted up and ready to be glued to cockpits. One of the two small separate gauges launched into oblivion so I glued the remaining one to the rear panel, as it's more visible in the finished model.
Another strange omission in the kit: the front instrument panel was only supplied one side lower console; the real thing had it on both sides. I didn't stress about it and proceeded with what as supplied.
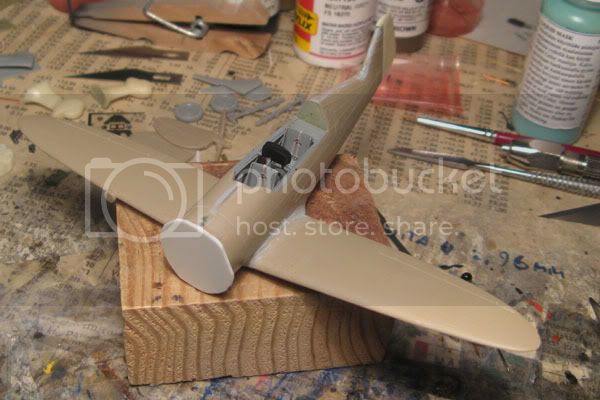
The instrument panels are in place, the gap between the fuselage halves behind the cockpits is filled with milliput, and to the front of the fuselage is glued a piece of styrene sheet...
...Because of this:
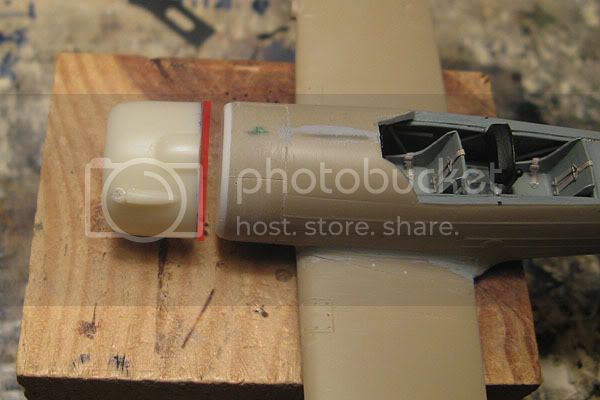
The front of the fuselage is rounded to more accurately accept the engine cowling (ie. have a gap between them) and also have something to mount the cowling to.
The cowling was another peculiar part. It was thicker on the top side, requiring sanding to bring the profile closer to round.
Length was another issue. The cowling was about 1.5mm (give or take) too long. After measuring and comparing to scale drawings, I drew the conclusion that it might represent the extended engine mounts that were ordered in 1943 to be installed on all Pyry's to improve the balance of the aircraft. Because my markings choice was before the modification, I cut the cowling down (indicated byt the transparent red rectangle in the pic). Fortunately this was easy, as there was a recessed line by which to cut. After loosing the excess length, I sanded the inside of the cowling edge to more scale thickness.
Btw, according to the drawings, the extra 10 cm doesn't appear on the cowling, but the fuselage, so regardless the aircraft one is building, the cowling needs to be cut down.
Next: Tackling the engine & cowling, stabilisers and landing gear.
Hey, I might even get this one finished this year!
:-H
Quadruple posting time!

You guessed it, some more progress again.

As the rudder was a resin part with a simple butt joint to the fuselage, I strengthened the joint by pinning the assembly with copper wire. Also notice the fuselage end filled with styrene sheet.

The instrument panel painted up and ready to be glued to cockpits. One of the two small separate gauges launched into oblivion so I glued the remaining one to the rear panel, as it's more visible in the finished model.
Another strange omission in the kit: the front instrument panel was only supplied one side lower console; the real thing had it on both sides. I didn't stress about it and proceeded with what as supplied.

The instrument panels are in place, the gap between the fuselage halves behind the cockpits is filled with milliput, and to the front of the fuselage is glued a piece of styrene sheet...
...Because of this:

The front of the fuselage is rounded to more accurately accept the engine cowling (ie. have a gap between them) and also have something to mount the cowling to.
The cowling was another peculiar part. It was thicker on the top side, requiring sanding to bring the profile closer to round.
Length was another issue. The cowling was about 1.5mm (give or take) too long. After measuring and comparing to scale drawings, I drew the conclusion that it might represent the extended engine mounts that were ordered in 1943 to be installed on all Pyry's to improve the balance of the aircraft. Because my markings choice was before the modification, I cut the cowling down (indicated byt the transparent red rectangle in the pic). Fortunately this was easy, as there was a recessed line by which to cut. After loosing the excess length, I sanded the inside of the cowling edge to more scale thickness.
Btw, according to the drawings, the extra 10 cm doesn't appear on the cowling, but the fuselage, so regardless the aircraft one is building, the cowling needs to be cut down.
Next: Tackling the engine & cowling, stabilisers and landing gear.
Hey, I might even get this one finished this year!

:-H
Danial

Joined: May 23, 2005
KitMaker: 693 posts
AeroScale: 16 posts

Posted: Monday, March 30, 2009 - 05:32 PM UTC
Its been a while since i enroll in a campaign so this will be my first contribution for 2009 in this campaign. My contribution will be Kinetic's F-16I Sufa. 
Will post up pics soon.

Will post up pics soon.

Phantom2

Joined: April 18, 2006
KitMaker: 708 posts
AeroScale: 678 posts

Posted: Tuesday, March 31, 2009 - 07:48 AM UTC
Hi all!
This kit started building itself (almost) straight out of the box, and here´s what the first hours of work yielded.

As I usually do, I started assembling everything I could before any painting had be done.
Here´s the spats and wheels;

Engine cowling;

After I had liberated the resin parts from the pouring plugs and very little flash, I glued the floor in the port fuselage half.

Then the bulkheads between the cockpits;

To get the thing a bit of gluing surface I used some small pieces of plastic stock, these will not be seen later.

I used the plastic instrument panels and glued the pre-painted Eduard parts on the back.

More coming soon!
Cheers!
Stefan
This kit started building itself (almost) straight out of the box, and here´s what the first hours of work yielded.

As I usually do, I started assembling everything I could before any painting had be done.
Here´s the spats and wheels;

Engine cowling;

After I had liberated the resin parts from the pouring plugs and very little flash, I glued the floor in the port fuselage half.

Then the bulkheads between the cockpits;

To get the thing a bit of gluing surface I used some small pieces of plastic stock, these will not be seen later.

I used the plastic instrument panels and glued the pre-painted Eduard parts on the back.

More coming soon!
Cheers!
Stefan

magnusf

Joined: May 02, 2006
KitMaker: 1,953 posts
AeroScale: 1,902 posts

Posted: Friday, April 24, 2009 - 08:07 AM UTC
Slowly nearing completion!

Ready for priming!

Bits and pieces...
The seat issue has been resolved (they were bakelite seats) but I have still to find a good recipe for the Israeli blue and tan scheme! Acrylics anyone?
Build blog is here!

Magnus

Ready for priming!

Bits and pieces...
The seat issue has been resolved (they were bakelite seats) but I have still to find a good recipe for the Israeli blue and tan scheme! Acrylics anyone?
Build blog is here!

Magnus

LongKnife

Joined: April 25, 2006
KitMaker: 831 posts
AeroScale: 688 posts

Posted: Tuesday, April 28, 2009 - 06:33 AM UTC
Nice things coming up here, both from Eetu, Stefan and Magnus. I'm especially looking forward to see the Miles. They don't come around too often.
Magnus, Israeli paint jobs are ellusive. I tried too look around when I did a Mustang for the Suez capaign, but I had to resort to "decent enough for me". Take a look at Serge batussovs pics from the Hatzerim museum and you'll see all shades possible. I guess I'm in for the same trying to find the right colour for an Avia mule later this year .
.
 Tony
Tony
Magnus, Israeli paint jobs are ellusive. I tried too look around when I did a Mustang for the Suez capaign, but I had to resort to "decent enough for me". Take a look at Serge batussovs pics from the Hatzerim museum and you'll see all shades possible. I guess I'm in for the same trying to find the right colour for an Avia mule later this year
 .
. Tony
TonyPosted: Wednesday, April 29, 2009 - 03:07 AM UTC
Really nice progress with all the trainers in this tread. Some really nice builds are emerging from the styrene and resin dust 
I had a chance to visit the IAF museum last month. The colours are very different from aircraft to aircraft. The powerful sun would have had a big impact on the shades over time. I only have two pictures with these shades - and they are very different. Almost to a point were one considers if it is really the same colours or two different schemes......
Hope this helps.
Sorry for the long loading time, but I thought Magnus might want the pictures in high resolution. I will delete them in a few days to avoid filling up the tread and making it slow to load.
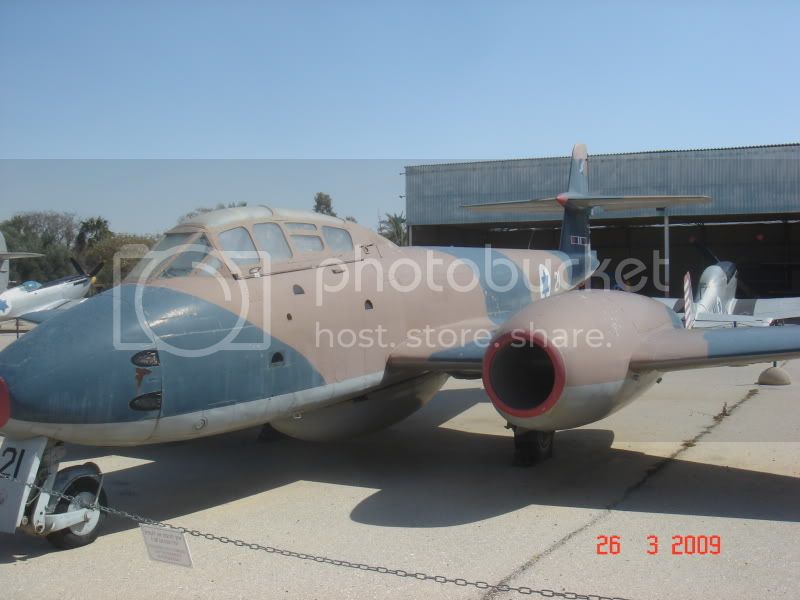
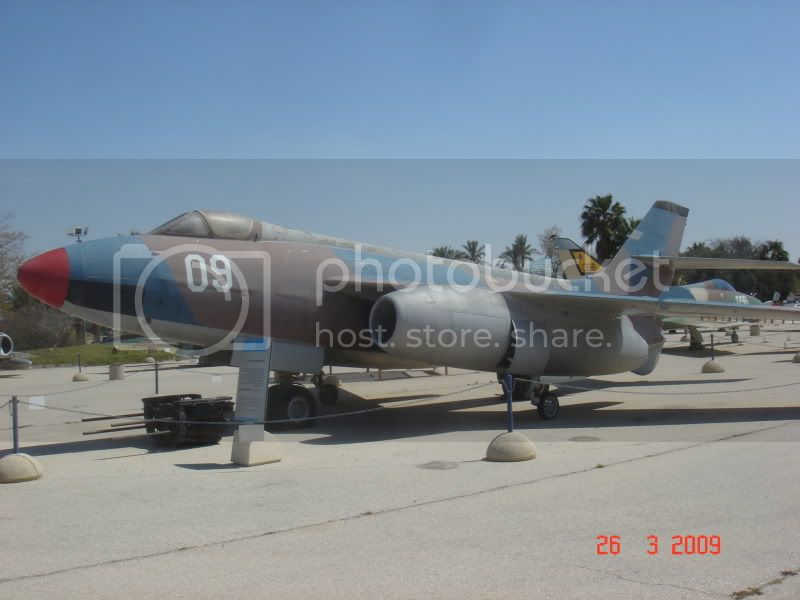

I had a chance to visit the IAF museum last month. The colours are very different from aircraft to aircraft. The powerful sun would have had a big impact on the shades over time. I only have two pictures with these shades - and they are very different. Almost to a point were one considers if it is really the same colours or two different schemes......
Hope this helps.

Sorry for the long loading time, but I thought Magnus might want the pictures in high resolution. I will delete them in a few days to avoid filling up the tread and making it slow to load.


guitarlute101

Joined: December 18, 2006
KitMaker: 1,121 posts
AeroScale: 1,063 posts

Posted: Saturday, May 09, 2009 - 12:44 AM UTC
Hi everyone,
I recently acquired several 1/72 Roden kits with Part photo etch sets. I'd like to do more Campaigns this year and would like to build this 1/72 two seat Camel trainer. Would this be an acceptable build for this campaign?
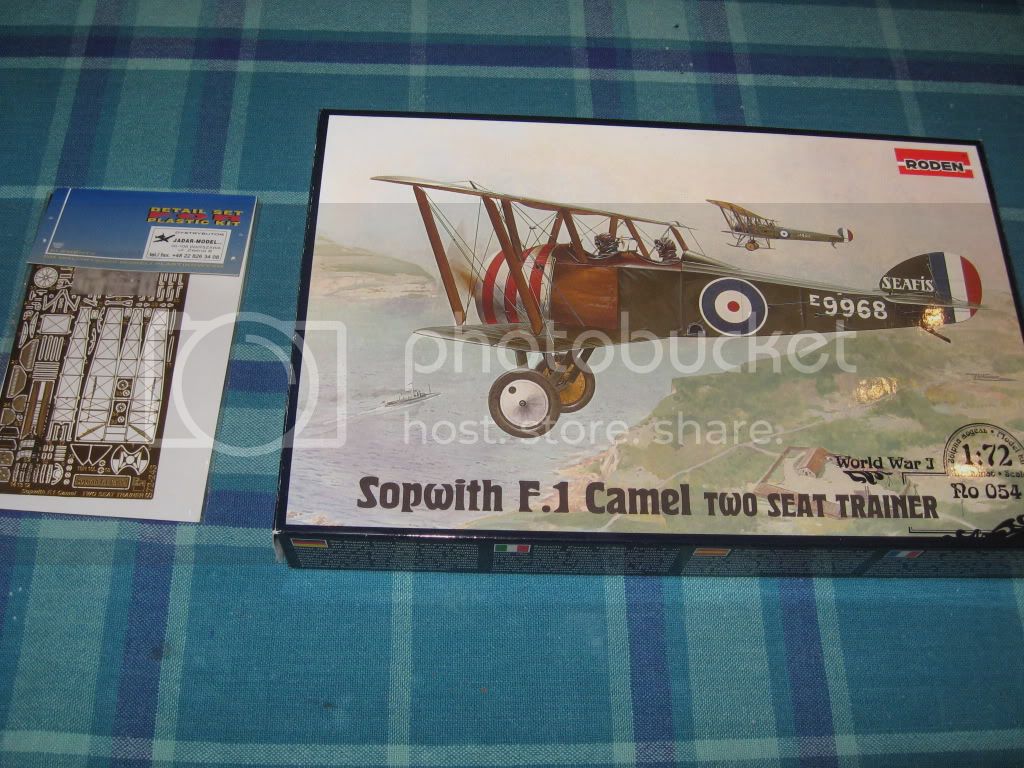
Please send me some comments.
Mark
I recently acquired several 1/72 Roden kits with Part photo etch sets. I'd like to do more Campaigns this year and would like to build this 1/72 two seat Camel trainer. Would this be an acceptable build for this campaign?

Please send me some comments.
Mark
Posted: Thursday, May 21, 2009 - 10:33 PM UTC
Hi Mark, I am not the campaign leader so cannot give the final go for your build. However, I am 99,999999% sure that this build will be okay for this campaign. Twin seats and a trainer. Right down the alley for this campaign, so I say go for it. 
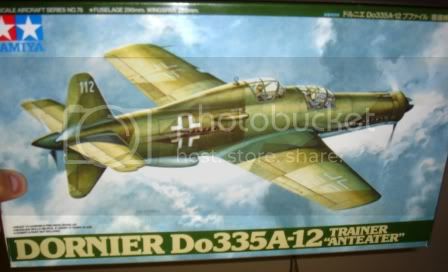
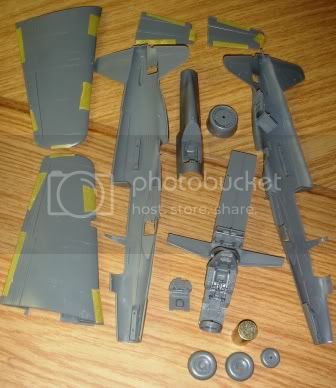
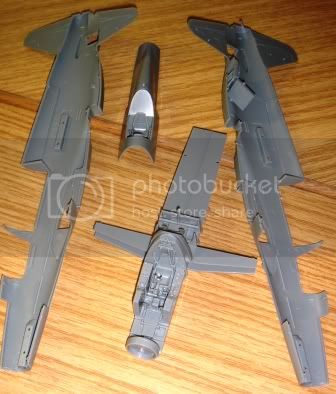
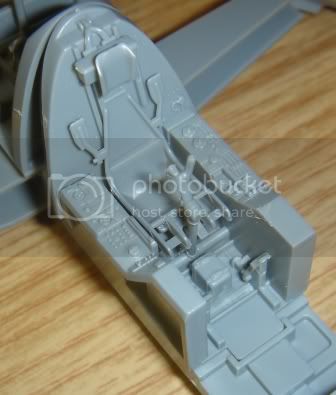
I have started my Dornier 335 trainer for this campaign. I always wanted to build one of these big pull/push propeller aircraft, so this campaign was a good excuse.
I am building the Tamiya 1/48 kit.
So far it just falls together in the usual Tamiya standard and it has some really nice details in the cockpit. The kit even includes a weight for the nose to avoid having a tailsitter. A nice touch.
More to follow...


Emeritus

Joined: March 30, 2004
KitMaker: 2,845 posts
AeroScale: 1,564 posts

Posted: Thursday, May 21, 2009 - 11:10 PM UTC
Looks nice so far. 
That level of cockpit detail out the kit, quite impressive. I hope you're adding seatbelts, though.
I think I'll have to build one easy & relaxing shake 'n' bake kit as well, after I'm done with my current builds.
I apologize for not for posting anything on my entry, but I'm kind of stuck with that VL Pyry. Temporarily out of motivation.
Long story short: After gluing on the stabilizers, I only then noticed that the peculiar issues with the cockpit opening wasn't limited to that, there was the same issue on the lower edge, causing the wing to go way out of kilter. Big time. And that I noticed AFTER gluing the wing in place, puttying and sanding the seam ready for priming. No other option than ripp off the wing and try again.
Now that shouldn't be hard to fix though: a shim of styrene sheet should get the wing sitting level, but at the moment the kits back in the box, waiting for my motivation level to rise again.
Don't they even test how the kit actually goes together before making the moulds?


That level of cockpit detail out the kit, quite impressive. I hope you're adding seatbelts, though.

I think I'll have to build one easy & relaxing shake 'n' bake kit as well, after I'm done with my current builds.
I apologize for not for posting anything on my entry, but I'm kind of stuck with that VL Pyry. Temporarily out of motivation.
Long story short: After gluing on the stabilizers, I only then noticed that the peculiar issues with the cockpit opening wasn't limited to that, there was the same issue on the lower edge, causing the wing to go way out of kilter. Big time. And that I noticed AFTER gluing the wing in place, puttying and sanding the seam ready for priming. No other option than ripp off the wing and try again.

Now that shouldn't be hard to fix though: a shim of styrene sheet should get the wing sitting level, but at the moment the kits back in the box, waiting for my motivation level to rise again.
Don't they even test how the kit actually goes together before making the moulds?

Posted: Friday, May 22, 2009 - 12:37 AM UTC
Thanks for the comment, Eetu.
I am currently also building a Tamiya FW 190 for the stripes in the sky campaign. I added the decal seatbelts Tamiya include in their kits on the FW 190. I though it would look OK viewing them through a closed cockpit, but I am not quite satisfied with the look although it is no catastrophe.
I am definently adding Eduard prepainted seatbelts to this one though as I am planning to leave the cockpits open.
Sorry to hear your build is struggeling you all the way. Better to wait for the motivation before starting again. There are plenty of other campaigns to participate in. After all it is a hobby and it is no fun to rush things.

Emeritus

Joined: March 30, 2004
KitMaker: 2,845 posts
AeroScale: 1,564 posts

Posted: Friday, May 22, 2009 - 01:35 AM UTC
Plenty of other campaigns? Know what, I'm already enlisted on four. 
(plus I still haven't finished that Blenheim I intended as an entry for the Twin Spinners last year...)
I agree, it's not fun to rush things or force oneself on a project. I'll get to it eventually. There's no hurry as the campaign runs until August the 31st.


(plus I still haven't finished that Blenheim I intended as an entry for the Twin Spinners last year...)
I agree, it's not fun to rush things or force oneself on a project. I'll get to it eventually. There's no hurry as the campaign runs until August the 31st.

Phantom2

Joined: April 18, 2006
KitMaker: 708 posts
AeroScale: 678 posts

Posted: Monday, May 25, 2009 - 11:49 PM UTC
Hi all!
Here´s the interior painted Interior Green and some of the etched parts assembled.


I glued the Instrument panels to the other fuselage half and added the etched parts here too.


The seats have got their belts, these seats are very small so it was a very fiddly chore to get them in place!


The seats mounted in the fuselage;

A careful drybrushing with aluminium and finally a black wash to give some depth to the details.

Yes, I did notice that the compass in the backseat was on the loose!
I caught it and glued it firmly to the fuselage side!

Not very clean, I know, but you can’t see very much anyway when the fuselage is glued together.

The fit was very good, but I got a tiny gap on the nose and between the seat openings.
Will be easy to fill with some plasticard!


Soon time to get the wings on!
Here´s the interior painted Interior Green and some of the etched parts assembled.


I glued the Instrument panels to the other fuselage half and added the etched parts here too.


The seats have got their belts, these seats are very small so it was a very fiddly chore to get them in place!


The seats mounted in the fuselage;

A careful drybrushing with aluminium and finally a black wash to give some depth to the details.

Yes, I did notice that the compass in the backseat was on the loose!
I caught it and glued it firmly to the fuselage side!

Not very clean, I know, but you can’t see very much anyway when the fuselage is glued together.

The fit was very good, but I got a tiny gap on the nose and between the seat openings.
Will be easy to fill with some plasticard!


Soon time to get the wings on!
Posted: Wednesday, May 27, 2009 - 01:41 AM UTC
I am making a little more progress on the Dornier 335. It is a huge aircraft which is not surprisingly as there are engines at both ends.  It is very unique looking with big think wings and a unique X tail.
I am still working on the cockpit and waiting for the harness for the cockpit. The ejection seat did not have a standard harness, but I am using a bomber harness as this seems to fit the best to the ejection seat harness.
I have used RLM 02 for the cockpit or "RLM grey" as Tamiya calls it. In this period (1943) RLM 66 was probably the norm but the pictures I have seen seem to indicate a lighter colour and the only restored Do 335 is painted RLM 02 in the cockpit, so this is the colour I am going for.
More to follow....
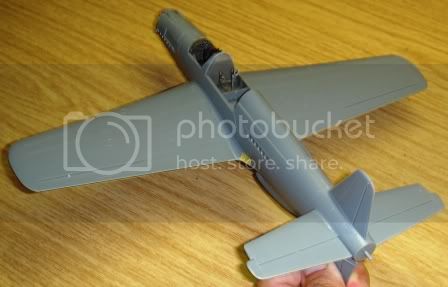
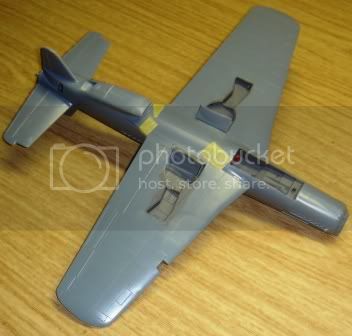
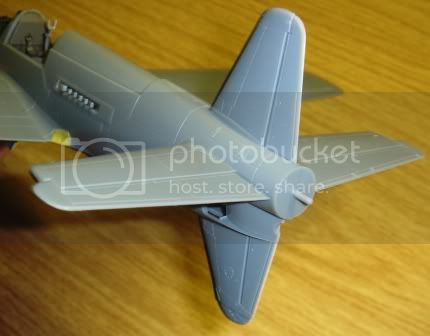
 It is very unique looking with big think wings and a unique X tail.
 I am still working on the cockpit and waiting for the harness for the cockpit. The ejection seat did not have a standard harness, but I am using a bomber harness as this seems to fit the best to the ejection seat harness.
I have used RLM 02 for the cockpit or "RLM grey" as Tamiya calls it. In this period (1943) RLM 66 was probably the norm but the pictures I have seen seem to indicate a lighter colour and the only restored Do 335 is painted RLM 02 in the cockpit, so this is the colour I am going for.
More to follow....


hkopper

Joined: March 01, 2008
KitMaker: 529 posts
AeroScale: 340 posts

Posted: Sunday, May 31, 2009 - 12:49 AM UTC
Just curious, I've been building a ME-110d since April (still a WIP) and was wondering if it will qualify for the campaign? Is it OK to enlist this plane? 

Posted: Sunday, May 31, 2009 - 11:24 AM UTC
Hermann, although I am not the campaign leader I can say with almost certainty that the plane will not qualify.
I asked the exact same question as I also wanted to enter a Bf 110 in this campaign. The answer was the Bf 110 is not truly in the spirit of the campaign as it is not a dedicated trainer or dual controls aircraft. I guess you will get the same answer.
I asked the exact same question as I also wanted to enter a Bf 110 in this campaign. The answer was the Bf 110 is not truly in the spirit of the campaign as it is not a dedicated trainer or dual controls aircraft. I guess you will get the same answer.
Posted: Wednesday, June 03, 2009 - 12:05 AM UTC
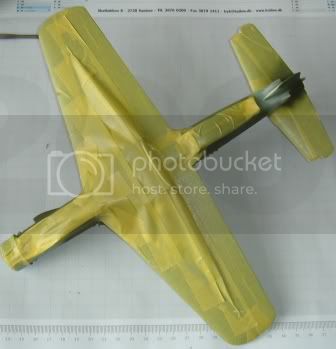
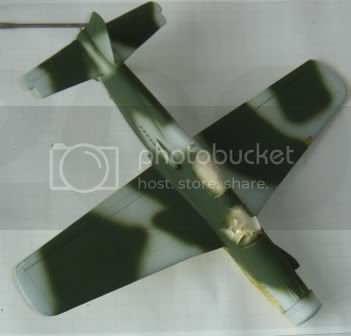
A little update on my Do 335. The main assembly is now finished and the painting has begun. I finished it with RLM 65 for the undersurfaces and RLM 70 and RLM 71 in a splinter pattern for the top sides.
More to follow soon...
More to follow soon...


Phantom2

Joined: April 18, 2006
KitMaker: 708 posts
AeroScale: 678 posts

Posted: Wednesday, June 03, 2009 - 07:28 AM UTC
Hejsan!
Wings and stab is glued to the fuselage.
Top side of the wing-root join was almost perfect!


On the underside I got some gaps.;


Although it will need some filling and sanding, I’m very satisfied wit the fit so far!
One of the very best short-run kits I’ve ever built!
After the wings were in place and the glue was dry, I took care of the gaps on the underside.
I filled the largest with plasticard, cut to shape, filled and sanded.
After some polishing it looked very good.
No filler or sanding on the top side whatsoever!
The right wing root had a small defect, the rear part was missing (short-shot?)
This is how I fixed it;
I cut and glued a piece of sprue where I wanted it.
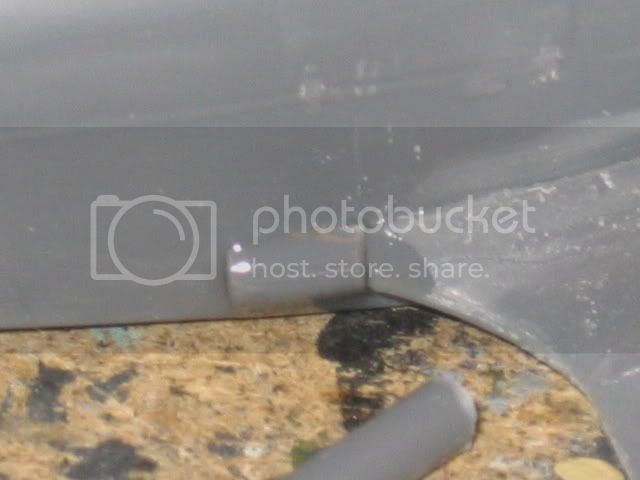
When the glue had set for a day, I could cut and sand the piece to the correct shape.


Being very careful to get them straight and square, I glued the spats to the wings.


Here comes the tail!
The elevator is only one piece and it has four very small attachments!
Very delicate and very, very easy to break!
I decided to reinforce the points and I also wanted the elevators to hang down a bit.
I cut off two of the small pins, drilled small holes in the elevator and stab, and glued a piece of steel wire to the stab.
Then I trimmed the lengths of the wires and glued the elevator in the wanted position.
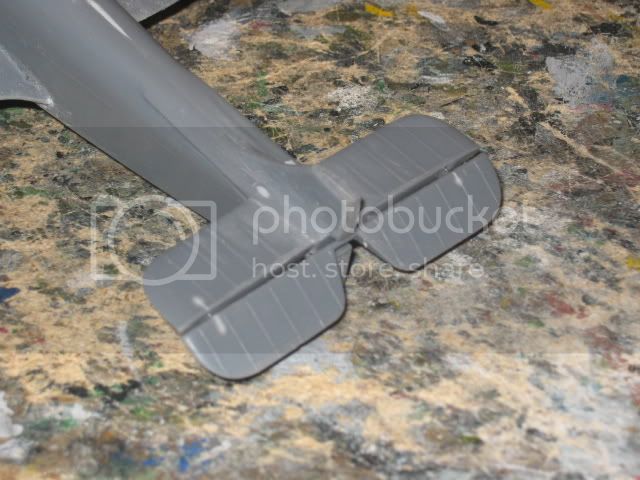

The resin rudder was easily glued to the fin.

Well, now it looks like an aeroplane!

Some small detail parts on the underside.


....and now I’m running out of parts!
Next stop; the paint shop!
Cheers!
Stefan E
Wings and stab is glued to the fuselage.
Top side of the wing-root join was almost perfect!


On the underside I got some gaps.;


Although it will need some filling and sanding, I’m very satisfied wit the fit so far!
One of the very best short-run kits I’ve ever built!
After the wings were in place and the glue was dry, I took care of the gaps on the underside.
I filled the largest with plasticard, cut to shape, filled and sanded.
After some polishing it looked very good.
No filler or sanding on the top side whatsoever!
The right wing root had a small defect, the rear part was missing (short-shot?)
This is how I fixed it;
I cut and glued a piece of sprue where I wanted it.

When the glue had set for a day, I could cut and sand the piece to the correct shape.


Being very careful to get them straight and square, I glued the spats to the wings.


Here comes the tail!
The elevator is only one piece and it has four very small attachments!
Very delicate and very, very easy to break!
I decided to reinforce the points and I also wanted the elevators to hang down a bit.
I cut off two of the small pins, drilled small holes in the elevator and stab, and glued a piece of steel wire to the stab.
Then I trimmed the lengths of the wires and glued the elevator in the wanted position.


The resin rudder was easily glued to the fin.

Well, now it looks like an aeroplane!

Some small detail parts on the underside.


....and now I’m running out of parts!
Next stop; the paint shop!

Cheers!
Stefan E
 |


