Air Campaigns
Want to start or join a group build? This is where to start.
Aluminium Campaign
Ruffus
_VISITCOMMUNITY
Guatemala
Joined: April 12, 2005
KitMaker: 343 posts
AeroScale: 111 posts
Posted: Wednesday, September 30, 2009 - 04:34 PM UTC

Quoted Text

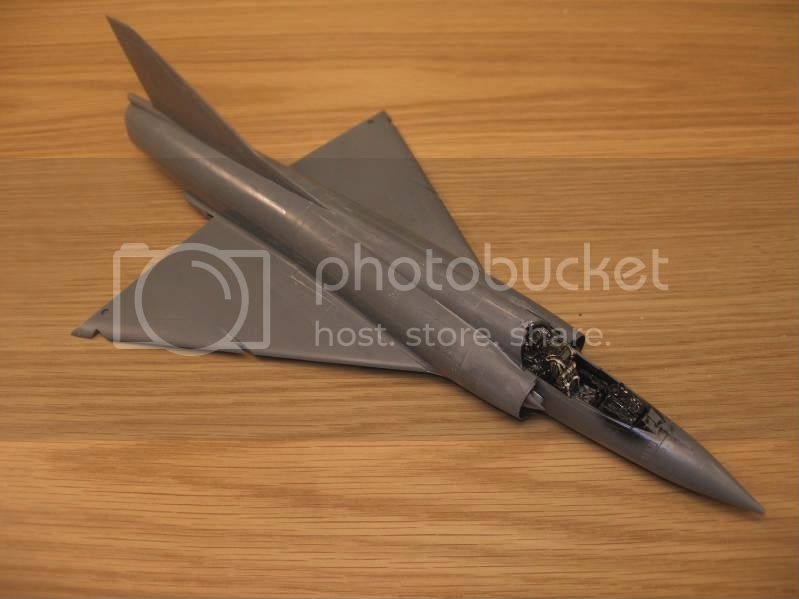
Funny, I found the same fit issue with my kit on the windscreen. I heated it a bit and popped it into place without glue. The slow cool down seems to have kept the windscreen into a somewhat managable shape.
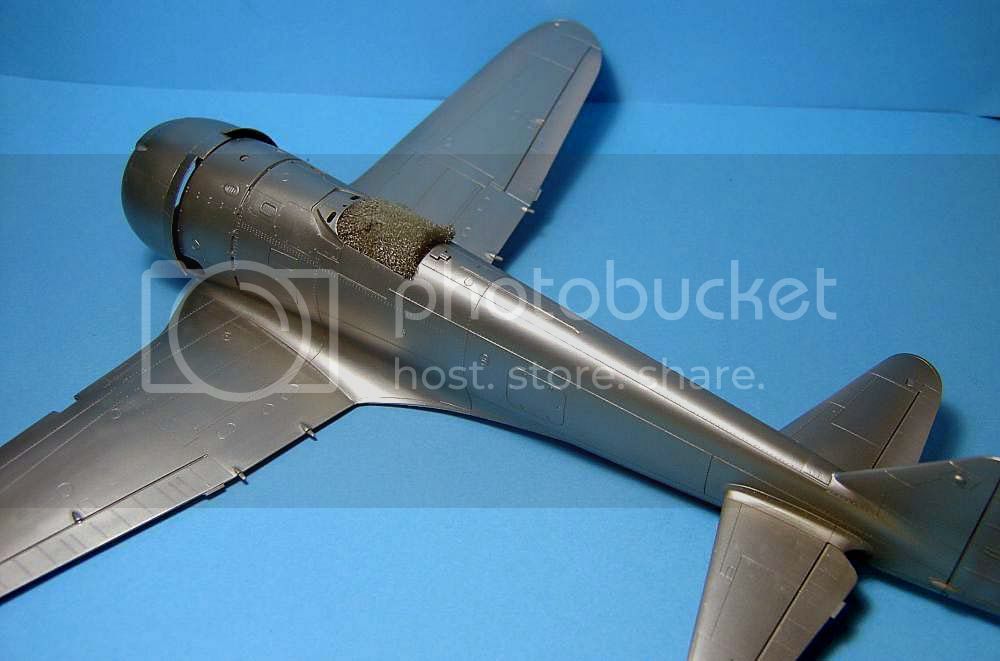
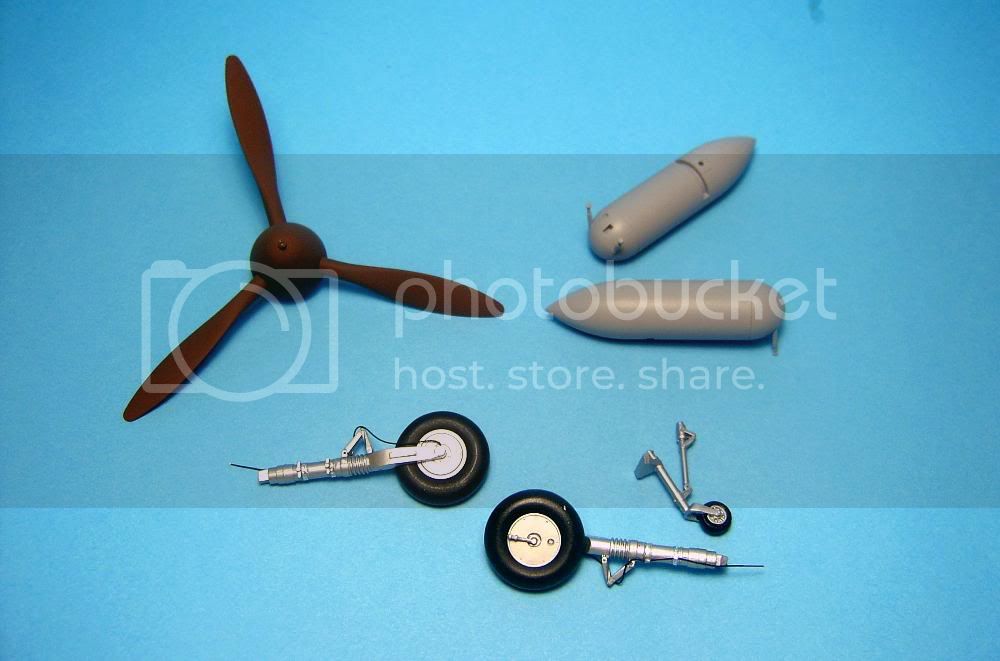
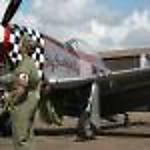
Here is my bird with a few decals on. All in all not so bad. A few tiny wrinkles here and there in the yellow/black ones but nothing that will show up in photos. I'll finish up the bottom side tonight and hopefully start on all the small bits next week.


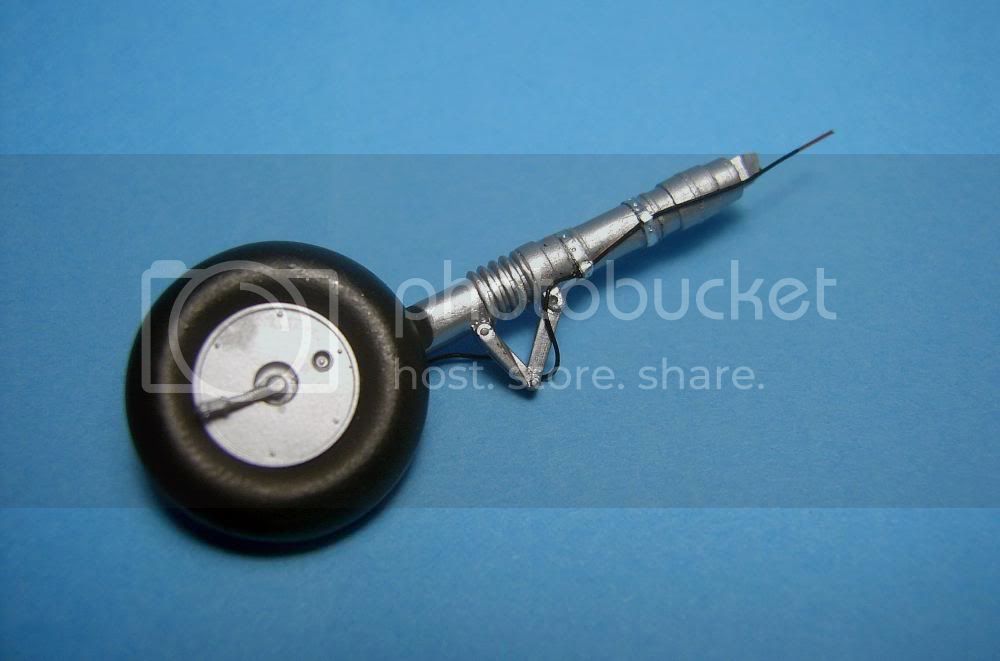
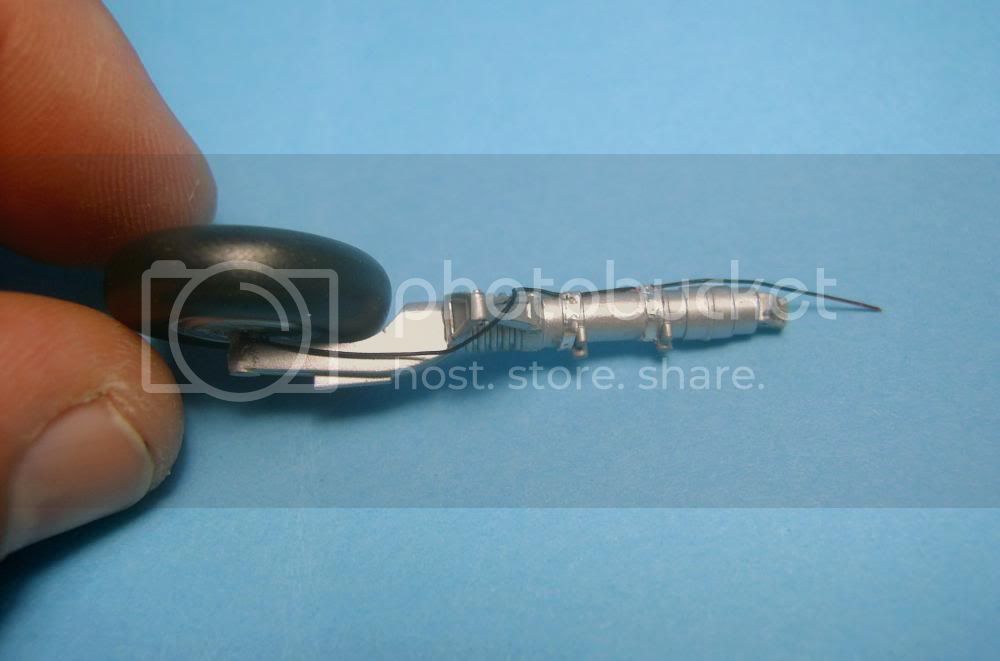
I'll try and get some better pic's when she's done. The flash is killing any detail I try to pick out because of the shine. Believe it or not I have used 5 different shades of metal paint here and there trying to highlight panels and flaps etc.

Hermon


I have never use Alclad, any advice?

Byron
AussieReg
Staff MemberAssociate Editor
AUTOMODELER
#007
_VISITCOMMUNITY
Victoria, Australia
Joined: June 09, 2009
KitMaker: 8,156 posts
AeroScale: 3,756 posts
Posted: Wednesday, September 30, 2009 - 07:44 PM UTC
Hi Byron,

Yes, I would greatly appreciate that. I have sent you a PM with my postal details today, and many thanks once again. If you are ever here in Australia I owe you a beer (or 6).

Cheers, Damian
VonCuda
_VISITCOMMUNITY
North Carolina, United States
Joined: November 28, 2005
KitMaker: 2,216 posts
AeroScale: 1,080 posts
Posted: Sunday, October 04, 2009 - 08:36 AM UTC
Byron, Alclad is the only way to go for metal finishes in my opinion. It goes through the airbrush flawlessly without having to thin it. It also dries in just a few minutes and is completely cured in a couple of hours. Once I started using Alclad I haven't touched my model masters metal paints at all.

Well, here is my finished bird. Everything is on including decals (which were a nightmare).
Due to the shinyness I still can't get my camera to pick out all of the different shades of metal that I used. Anyway, here it is.


Well, that's it for my entry. Now, where did our campaign leader wonder off too?
Hermon
AussieReg
Staff MemberAssociate Editor
AUTOMODELER
#007
_VISITCOMMUNITY
Victoria, Australia
Joined: June 09, 2009
KitMaker: 8,156 posts
AeroScale: 3,756 posts
Posted: Sunday, October 04, 2009 - 11:25 AM UTC
Very nice job Hermon. I have heard nothing but good reports about the Alclad system and will have to give it a go soon. How does it clean up from your airbrush afterwards? Any tips would be great.
Looks like the first three kits complete for this campaign will be the same. I wonder if this has happened before.
I just have to finish the cockpit and fit it and I'm done as well.

Cheers, D
VonCuda
_VISITCOMMUNITY
North Carolina, United States
Joined: November 28, 2005
KitMaker: 2,216 posts
AeroScale: 1,080 posts
Posted: Sunday, October 04, 2009 - 01:11 PM UTC
Damian, I just can't say enough good things about Alclad. It dries so fast that you can paint it on and a few minutes later you can mask off certain areas and paint a different shade or even enamel/acylic colors. Clean up of your airbrush is actually easier with Alclad than most other paints since there is very little residue left over. Check out this link. It covers about every question you can think of.
http://www.aircraftresourcecenter.com/tnt1/001-100/TNT009_Alclad/TNT009.htm

I don't know if this is the first time a campaign has started off with 3 finished models that are all the same. It sure is a great kit and a beautiful subject though.

Hermon
Ruffus
_VISITCOMMUNITY
Guatemala
Joined: April 12, 2005
KitMaker: 343 posts
AeroScale: 111 posts
Posted: Monday, October 05, 2009 - 07:48 PM UTC

Quoted Text

I don't know if this is the first time a campaign has started off with 3 finished models that are all the same. It sure is a great kit and a beautiful subject though.

Hermon


Maybe they can give us a special ribbon , you know, for originality. regarding the Alclad, I still prefer the aluminum method, I will use alclad in the wing tanks only.

Regards

Byron
Moeggo
_VISITCOMMUNITY
Wellington, New Zealand
Joined: March 15, 2005
KitMaker: 169 posts
AeroScale: 132 posts
Posted: Tuesday, November 10, 2009 - 10:24 PM UTC
Count me in too guys! I entered into a campaign before but missed the deadline... This I will Finish!!!!!

I just started a 1/32 Hasegawa Ki-44 Shoki (Tojo). I have been posting my build on ARC and LSP so far... If you don't mind, I will hit you at once were I am up too!
Moeggo
_VISITCOMMUNITY
Wellington, New Zealand
Joined: March 15, 2005
KitMaker: 169 posts
AeroScale: 132 posts
Posted: Tuesday, November 10, 2009 - 10:26 PM UTC
Update for 20/10/09
I was planning to build the kit out of the box as there no aftermarket goodies out, as its a new release but Scale Aviation had a small Eduard PE fret available for the kit in this months magazine.


As per the instructions, I started off with the cockpit assembly. Some of the PE was added. I'm not a big fan of the pre-painted PE from Eduard, so it will be painted over.


The next issue I had was the call out for the colour of the Cockpit, it said Khaki Green... I sprayed it and it just looked to dark... (sorry for the bad light!)


After doing a little research on net and posting a couple questions, I found a colour chip for IJA Nakajima interior green... I mixed a some Tamiya colour to get a close match, but its not perfect...


I also added some fuse wire for the control linkages and drilled out the seat. The rest of the interior details were again painted with Tamiya colour...


Moeggo
_VISITCOMMUNITY
Wellington, New Zealand
Joined: March 15, 2005
KitMaker: 169 posts
AeroScale: 132 posts
Posted: Tuesday, November 10, 2009 - 10:27 PM UTC
Update for 07/11/09
The fit on this kit is great! everything went together beautifully! The were a couple of spots that needed sanding, but that was my fault... I miss-lined the fuse halfs at the top at the rear and a couple spots where I had cut the sprue off too close to the part...


The cockpit came nicely with a heavy coat of Tamiya smoke and a flat finish..


She been primed in Mr Surfacer to show all the faults...


did a light sand with 2000 grit sandpaper and given her her a bit of colour now...


Moeggo
_VISITCOMMUNITY
Wellington, New Zealand
Joined: March 15, 2005
KitMaker: 169 posts
AeroScale: 132 posts
Posted: Tuesday, November 10, 2009 - 10:29 PM UTC
Update for 09/11/09
I got a second coat on her yesterday.. but I ran out of paint! its going to take a 10+ days to get some more out of Hong Kong as I can't find this stuff in New Zealand.... Oh well... Time to start on the engine and maybe a Wingnut SE.5a while I'm waiting...

Update for 11/11/09
Just order the paint this morning, so its going to be a couple of weeks waiting for it to arrive....

I started on the engine assembly over the last few nights cleaned up the mold lines and drilled out the holes in the cylinders for the ignition wiring etc...

I had a Google for pictures Japanese engines and Ha-109 engine, but really didn't come up with much. So I wasn't 100% sure on the colours to use. Hasegawa's instructions call out silver and steel as the two colours, which didn't look to lively, So I did the engine in 4 different shades of silver and black for the push rods... and a black oil wash to make the details pop!


AussieReg
Staff MemberAssociate Editor
AUTOMODELER
#007
_VISITCOMMUNITY
Victoria, Australia
Joined: June 09, 2009
KitMaker: 8,156 posts
AeroScale: 3,756 posts
Posted: Tuesday, November 10, 2009 - 11:34 PM UTC
Hi David, your build is looking fantastic. I love the finish and detail in the pit. Can't wait to see the end result !!

Cheers, D
Moeggo
_VISITCOMMUNITY
Wellington, New Zealand
Joined: March 15, 2005
KitMaker: 169 posts
AeroScale: 132 posts
Posted: Thursday, November 12, 2009 - 08:12 AM UTC
Cheers Damian!
Moeggo
_VISITCOMMUNITY
Wellington, New Zealand
Joined: March 15, 2005
KitMaker: 169 posts
AeroScale: 132 posts
Posted: Sunday, November 15, 2009 - 10:09 PM UTC
Still awaiting my order of paint... So I am still carrying on with small assemblies. I just finished the engine off, added copper wire for the ignition leads, the tabs are very small to mount the leads off them. So I drilled holes at the back of the tabs, as one the engine is installed you can't see it. Also, gave the engine flat coat to tone things down abit... Exhaust pipes were painted with Tamiya's Hull Red and the weather back with black and white pigments. Just about to start the two drop tanks and landing gears...


jaypee
_VISITCOMMUNITY
Scotland, United Kingdom
Joined: February 07, 2008
KitMaker: 1,699 posts
AeroScale: 1,384 posts
Posted: Wednesday, November 18, 2009 - 09:09 PM UTC
Wow spark her up!

My efforts are nowhere near as impressive. But I struggle on.
Here is the work so far on Kamide Koro's 1/144 Shorts Sc-1. Cleaned up and painted Humbrol polishable alu.
Also some panels clad in BMF chrome.

Shorts Sc-1 BMF appliedShorts Sc-1 BMF applied
JimMrr
_VISITCOMMUNITY
Ontario, Canada
Joined: January 03, 2007
KitMaker: 1,505 posts
AeroScale: 595 posts
Posted: Thursday, November 19, 2009 - 12:18 AM UTC
David, thats a nice Shoki youre building.....may I ask what type of paint you used on the fuselage for the aluminum finish?
Moeggo
_VISITCOMMUNITY
Wellington, New Zealand
Joined: March 15, 2005
KitMaker: 169 posts
AeroScale: 132 posts
Posted: Thursday, November 19, 2009 - 07:41 AM UTC

Quoted Text

David, thats a nice Shoki youre building.....may I ask what type of paint you used on the fuselage for the aluminum finish?


Mr Hobby Super Metallic
VonCuda
_VISITCOMMUNITY
North Carolina, United States
Joined: November 28, 2005
KitMaker: 2,216 posts
AeroScale: 1,080 posts
Posted: Friday, November 20, 2009 - 11:59 AM UTC
David, those engines look like 1/1 scale. I can never get that level of detail with mine no matter how hard I try. Very nice job.


Hermon
Moeggo
_VISITCOMMUNITY
Wellington, New Zealand
Joined: March 15, 2005
KitMaker: 169 posts
AeroScale: 132 posts
Posted: Saturday, November 21, 2009 - 09:25 PM UTC
Thanks Hermon!

update from the 18 Nov -

Looking at the engine, there is something that didn't seem right... I couldn't figure it what it is, till....

Reading a modeling magazine at work yesterday, I saw that Eduard has release a exterior PE for the Ki-44. I jumped onto Eduard website to what parts were included and then it hit me what the engine is missing....

The lead going to the back of each engine cylinder... time to pull the copper wire....


update from the 19 Nov

I sat up last night and add the extra leads to the back of each cylinder. Looks better now!


VonCuda
_VISITCOMMUNITY
North Carolina, United States
Joined: November 28, 2005
KitMaker: 2,216 posts
AeroScale: 1,080 posts
Posted: Sunday, November 22, 2009 - 06:34 AM UTC
Wow! Even better than before. You're going to end up with a show winner here David. As good as the engine looks the exhaust is the iceing on the cake. Looks like real rust.

As a side note, our campaign leader seems to have gone missing. Hasn't been to the forum since September. Anyone have any ideas on a campaign ribbon?


Hermon
PolarBear
_VISITCOMMUNITY
Västra Götaland, Sweden
Joined: February 23, 2005
KitMaker: 820 posts
AeroScale: 629 posts
Posted: Thursday, November 26, 2009 - 10:17 AM UTC
Oh no, not another campaign leader disappearing! I just got started on this campaign, and I notice that it is not really up to speed. Where are the rest of the 26 enlisted?! We probably need a new campaign leader that can gather the troops and get this baby rolling. Are you up for it, Hermon?

My entry

Those who enter campaigns might have noticed that I enjoy building Mirage IIICJ:s. The aircraft is extremely slender and has an interesting history. For this campaign, I decided to build the Eduard in 1/48 (I'm new to this gigantic scale) with Eduard PE and IsraDecal's decals. When I saw the incredible detailing set (resin and PE) from SBS, I just had to try it! Below, there are some detail pictures of the cockpit (unfortunately taken in bad light). Hot damn, it's fun to work in 1/48!


Certain details in the cockpit and on the seat will be added at a later stage.

Wheel wells and exhaust:


This is how the cockpit looks when attached. Many details will be added.


The body halves of my kit were bent like bananas (each pointing in one direction). Some good planing, some good advise from fellow builders, and some pointless force, and it went together rather well.


It will take a lot less filling and sanding than my previous (AML 1/72) models of the same aircraft. This is good, since this one shall be as bright and shiny as only an aluminium finish IDF Mirage IIICJ can be! Rumor has it the the 117 Squadron - The First Jet - had the shiniest Mirages of them all!

Cheers! // PolarBear
AussieReg
Staff MemberAssociate Editor
AUTOMODELER
#007
_VISITCOMMUNITY
Victoria, Australia
Joined: June 09, 2009
KitMaker: 8,156 posts
AeroScale: 3,756 posts
Posted: Thursday, November 26, 2009 - 11:16 AM UTC
Looking good Bjorn !!

I hope somebody can take the reins and drive this campaign if our leader is AWOL, it is my first campaign build.


Cheers, D

VonCuda
_VISITCOMMUNITY
North Carolina, United States
Joined: November 28, 2005
KitMaker: 2,216 posts
AeroScale: 1,080 posts
Posted: Thursday, November 26, 2009 - 01:34 PM UTC
[quote] We probably need a new campaign leader that can gather the troops and get this baby rolling. Are you up for it, Hermon?

Bjorn.....HAVE YOU LOST YOUR MIND?
I couldn't lead a fish to water in the middle of the Atlantic ocean. No no my Swedish friend. I seem to remember YOU leading an outstanding Suez campaign a while back. I vote PolarBear for our new Tzar!


BTW, It's strange watching you work in 1/48 scale. As amazing as your 1/72 and 1/144 projects have been in the past I'm anxious to see how this baby will turn out.


Hermon
Moeggo
_VISITCOMMUNITY
Wellington, New Zealand
Joined: March 15, 2005
KitMaker: 169 posts
AeroScale: 132 posts
Posted: Friday, November 27, 2009 - 03:18 PM UTC
Hey All, another small update! Enjoy

While waiting for the paint to arrive, I have been working on some of the smaller assembly's. The Prop is painted with Tamiya Red Brown, drop tanks have been sprayed with Mr Surfacer... a couple of spots to fix up.


Landing Gears are painted and I added brake hoses to them using copper wire and metal foil of a wine bottle for the clips/bands/


I have have drilled out the tail wheel fork also... (sorry for the bad pix!!)

SGTJKJ
#041
_VISITCOMMUNITY
Kobenhavn, Denmark
Joined: July 20, 2006
KitMaker: 10,069 posts
AeroScale: 3,788 posts
Posted: Saturday, November 28, 2009 - 02:29 AM UTC
Impressive details, David.

Looking forward to see more.
MikeMx
_VISITCOMMUNITY
England - North East, United Kingdom
Joined: May 22, 2008
KitMaker: 649 posts
AeroScale: 434 posts
Posted: Wednesday, December 02, 2009 - 11:44 PM UTC
Hi

Where do we post our pics for this campaign?

thanks
Mike