Air Campaigns
Want to start or join a group build? This is where to start.
Aluminium Campaign
alpha_tango
_VISITCOMMUNITY
Germany
Joined: September 07, 2005
KitMaker: 5,609 posts
AeroScale: 5,231 posts
Posted: Monday, May 03, 2010 - 02:52 AM UTC

Quoted Text

Thanks for the new ribbon, Damian. A well run campaign from your side.

Thanks for the time and effort put into the campaign


What he said!

Thanks mate!

all the best

Steffen
AussieReg
Staff MemberAssociate Editor
AUTOMODELER
#007
_VISITCOMMUNITY
Victoria, Australia
Joined: June 09, 2009
KitMaker: 8,156 posts
AeroScale: 3,756 posts
Posted: Tuesday, May 11, 2010 - 09:02 PM UTC
Thanks guys, it was a pleasure !!
vanize
_VISITCOMMUNITY
Texas, United States
Joined: January 30, 2006
KitMaker: 1,954 posts
AeroScale: 1,163 posts
Posted: Wednesday, May 12, 2010 - 04:57 AM UTC
Ok, I'm finally more or less recovered from my painting disaster. Believe it or not, I sanded off the entire original paint job save for the invasion stripes (stupid "Alclad gloss black base" paint )

So then, just weathering and details left:


vanize
_VISITCOMMUNITY
Texas, United States
Joined: January 30, 2006
KitMaker: 1,954 posts
AeroScale: 1,163 posts
Posted: Wednesday, May 12, 2010 - 05:01 AM UTC
Ha! just noticed I stuck the landing gear struts in backward - good thing they weren't glued!
05Sultan
#037
_VISITCOMMUNITY
California, United States
Joined: December 19, 2004
KitMaker: 2,870 posts
AeroScale: 258 posts
Posted: Wednesday, May 12, 2010 - 05:51 AM UTC
Heck, blame that on the Alclad fumes!
It did come out sweet finish.
Cheers!
Rick

Quoted Text

Ha! just noticed I stuck the landing gear struts in backward - good thing they weren't glued!

warreni
_VISITCOMMUNITY
South Australia, Australia
Joined: August 14, 2007
KitMaker: 5,926 posts
AeroScale: 2,201 posts
Posted: Wednesday, May 12, 2010 - 08:58 AM UTC

Quoted Text

Ha! just noticed I stuck the landing gear struts in backward - good thing they weren't glued!


You know something, the paint is so good many would not have noticed...
29Foxtrot
_VISITCOMMUNITY
Victoria, Australia
Joined: September 19, 2003
KitMaker: 708 posts
AeroScale: 674 posts
Posted: Tuesday, June 01, 2010 - 02:23 AM UTC
Hi all,

Having finally got some Alclad II for this bird, so I can get it closer too finished.


Masking tape removed.


Sitting on it's undercarriage.


Note: Sadly this bird has to stay in this state due to a prior commitment to model Expo (a Revell AG 72 scale Mk VIIc German submarine) and a return trip back to Adelaide.
vanize
_VISITCOMMUNITY
Texas, United States
Joined: January 30, 2006
KitMaker: 1,954 posts
AeroScale: 1,163 posts
Posted: Tuesday, June 15, 2010 - 07:51 AM UTC
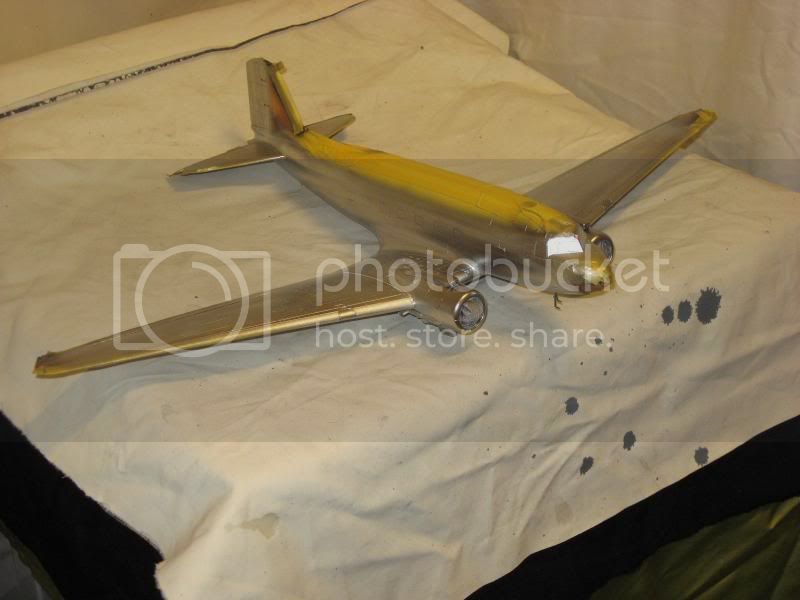
Well, I am still plugging at mine even though the campaign is long over by now.

More catastrophes have befallen this build than i have encountered in a single build in many many years. I shalln't embarrass myself by enumerating them at this point, and besides, I think i've managed to pull it out of the fire.

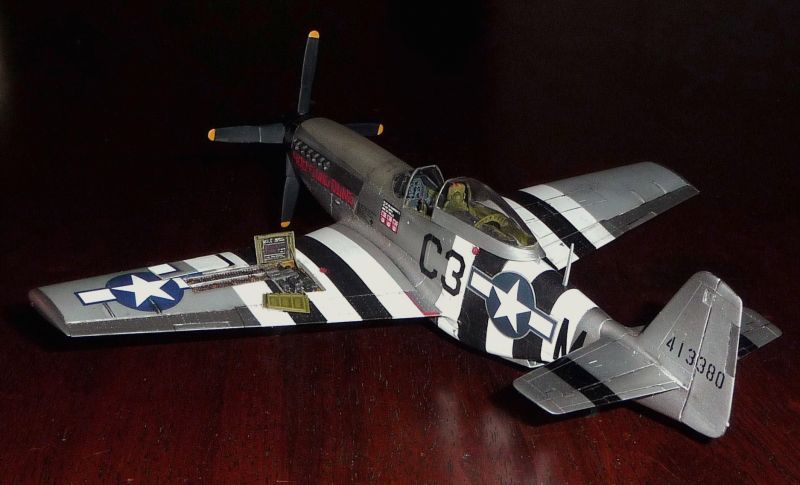
Only a few details left at this point - mainly the exhaust, gun sight, and some touch ups.

About the exhaust - I was going to use a set of Moskit exhausts, but it turns out they are not actually all that accurate. Also turn out the Ultracast P-51 shroud-less exhausts also suffer from the same inaccuracy (and they do not fit very well to boot, even though they are supposedly designed for the Tamiya kit I built!). So I gave up on aftermarket exhausts and have done what i can to get the kit parts looking acceptable (at least their shape is more or less accurate!)

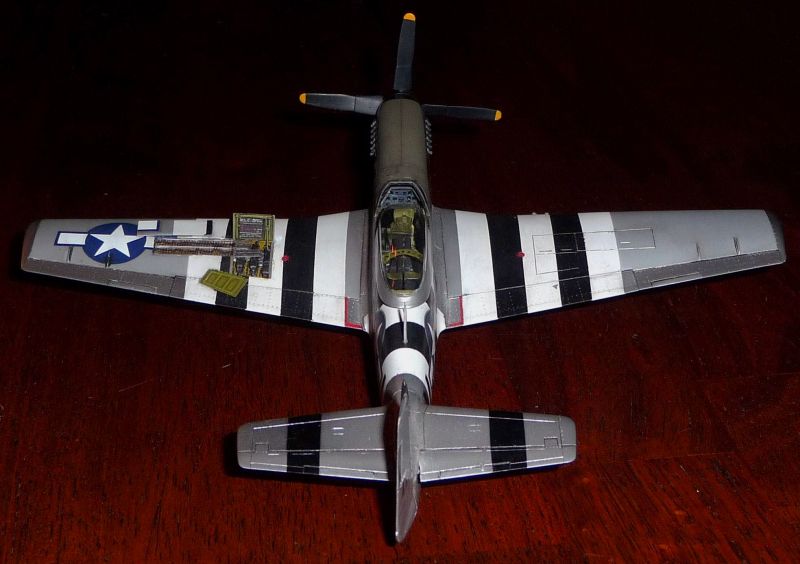
so I have another hour or two of work before i call her done for the purposes of this campaign (and at this point i don't even care if i get a ribbon - THIS ONE WILL GET FINISHED!!!), but here are some photos of the gun bay build up (that's what has held me up the longest other than various disaster recovery efforts):

The Aires gun bay was horrible in my opinion. In the end the only thing i used from the kit was the 50 cal gun bodies and the cover panels (which were warped but i managed to straighten them out after much cursing and breakage). I'm never buying another one of their gun bay sets - EVER!!!

the gun bay itself is scratch built after determining the Aires part wasn't particularly useful.


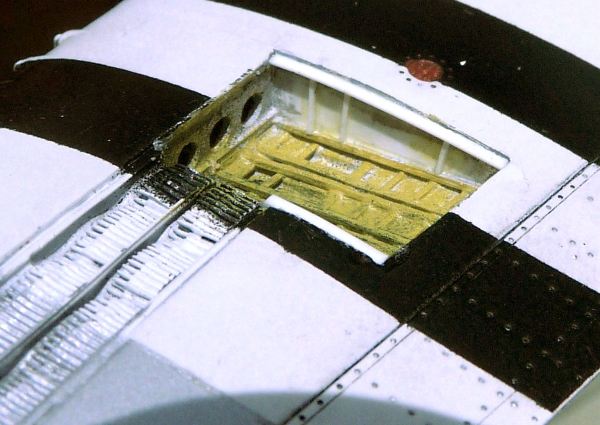
as you can see i started off using the aires ammo bays from the set:


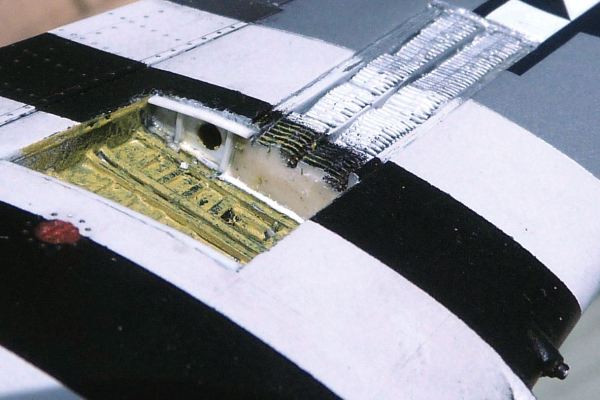
after a little more research though, is became clear that the ammo they cast was FAR too small to represent 50 cal rounds - it was more like they molded 1/48 scale pencils in the linkages. So I used a dremel tool to carefully grind off the top 1/4 cm on the ammo bays and used photo etched 50 cal rounds from true details. A bonus is that they are already brass colored!


I was going to show one of the ammo belts laid out in the bay but not yet loaded into the gun, but issues with the Aires parts for the ammo belt guides to the gun dissuaded me. I had to heavily modify the ammo guides to make them even remotely acceptable, and in the end i wish i had just made them from scratch. but they came out passable. the completed gun bay looks like this:

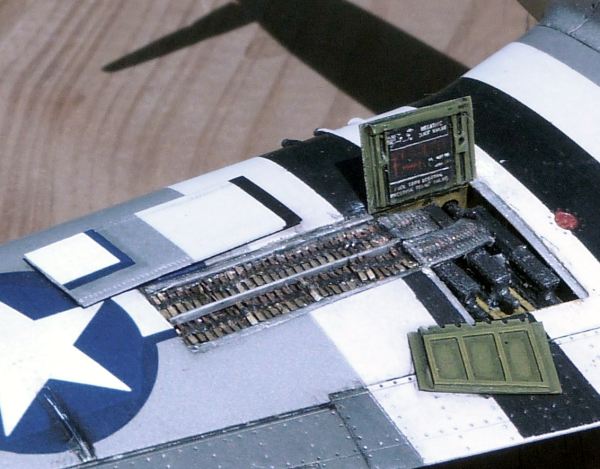
The gun cleaning/loading instructions on the hinged panel were cobbled together from various decal sheets to make something that had the same general look. It would have been nice if Aires had included a decal for this in the kit, as it exists on almost all P-51 gun bays and it is very difficult to sort out yourself.

I still need to get the bar that runs from the wing to the hinged panel fabricated and installed (another serious omission from the Aires kit)

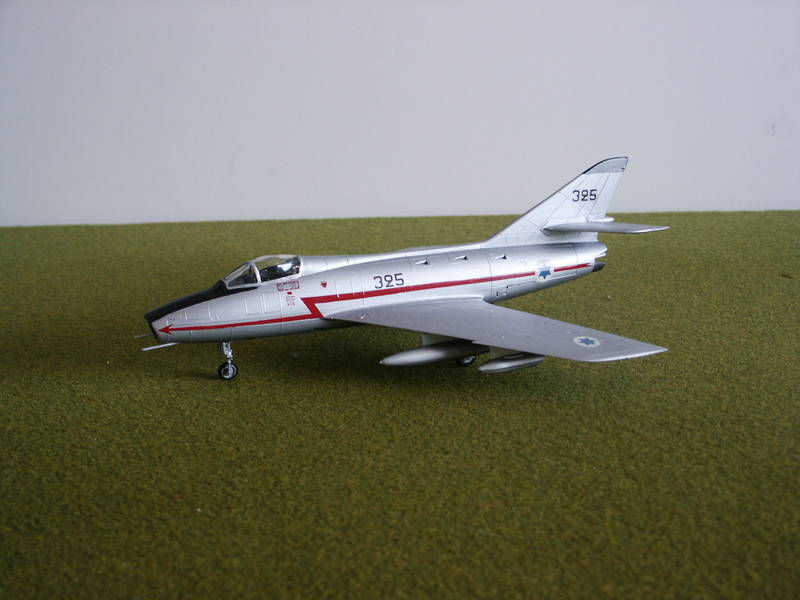
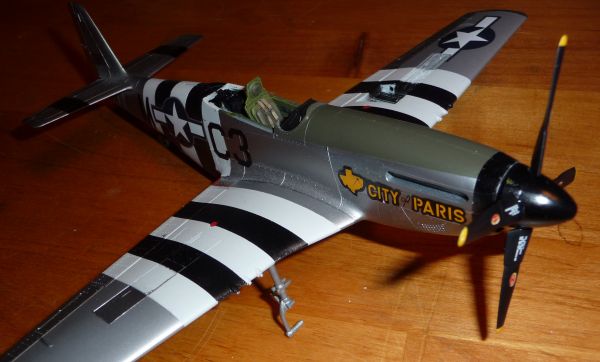
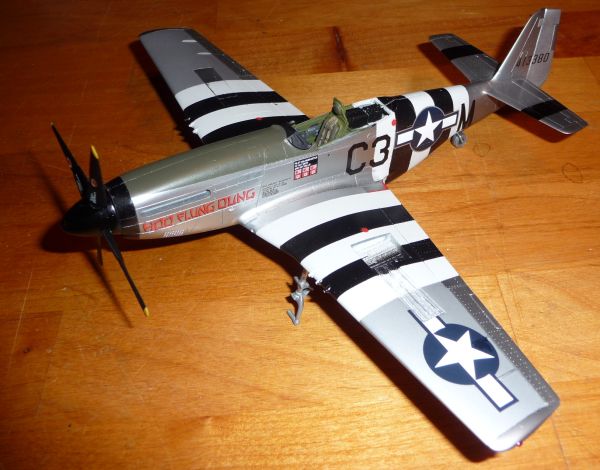
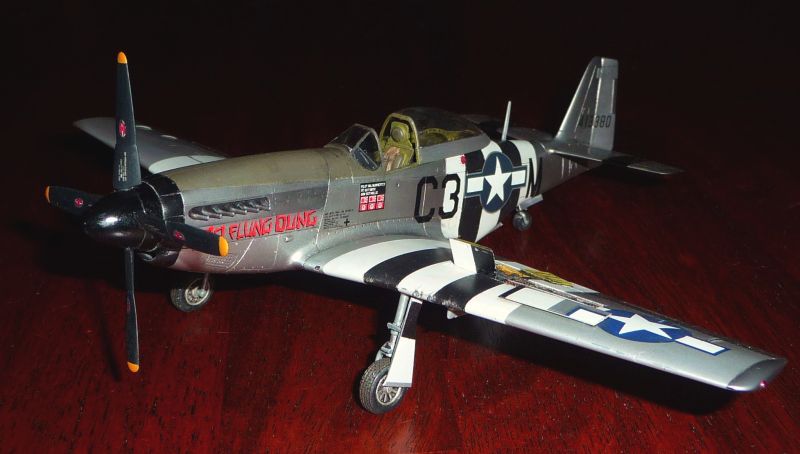
and here is the model as she looked this morning before i left for work.


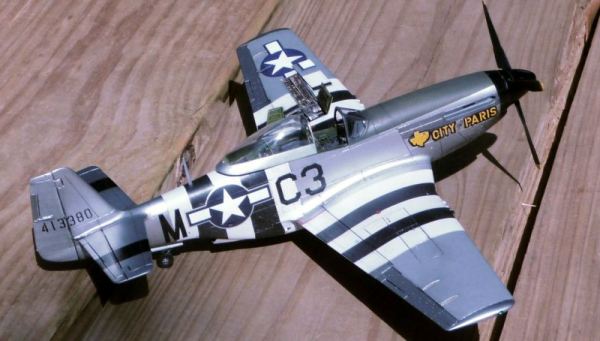
hopefully i can finish her up before i go to bed tonight... but no promises!
md72
#439
_VISITCOMMUNITY
Washington, United States
Joined: November 05, 2005
KitMaker: 4,950 posts
AeroScale: 3,192 posts
Posted: Tuesday, June 15, 2010 - 09:56 AM UTC
Vance,

Looks like a nice recovery from a troubled build. Great work!
AussieReg
Staff MemberAssociate Editor
AUTOMODELER
#007
_VISITCOMMUNITY
Victoria, Australia
Joined: June 09, 2009
KitMaker: 8,156 posts
AeroScale: 3,756 posts
Posted: Tuesday, June 15, 2010 - 11:51 AM UTC
Hey Vance, ssshhhh, don't tell anybody, but I'll throw a ribbon your way as an award for sheer perseverance !!

Your 'stang looks really nice now mate.

Cheers, D
vanize
_VISITCOMMUNITY
Texas, United States
Joined: January 30, 2006
KitMaker: 1,954 posts
AeroScale: 1,163 posts
Posted: Wednesday, June 16, 2010 - 02:04 AM UTC
awesome, thanks for the encouragement! I actually need it by now - i've come close to throwing in the towel on this one a few times.
AussieReg
Staff MemberAssociate Editor
AUTOMODELER
#007
_VISITCOMMUNITY
Victoria, Australia
Joined: June 09, 2009
KitMaker: 8,156 posts
AeroScale: 3,756 posts
Posted: Wednesday, June 16, 2010 - 02:22 AM UTC

Quoted Text

awesome, thanks for the encouragement! I actually need it by now - i've come close to throwing in the towel on this one a few times.


My friend, take that towel, wipe the sweat from your brow, and take a peek at your profile. There's a new shiny ribbon a-waitin'

A well deserved reward for a difficult build.

Cheers, D
vanize
_VISITCOMMUNITY
Texas, United States
Joined: January 30, 2006
KitMaker: 1,954 posts
AeroScale: 1,163 posts
Posted: Friday, June 18, 2010 - 03:00 AM UTC
Thanks Damian!

here are my final(ish) photos. i dthink thephotos wash out the NMF a bit unfortunately. i might still add a bit of weathering and an antenna, but i need to step away from this project for a while, which probably means it is done...

"Hoo Flung Dung/City of Paris" flown by Robert McWherter, 363rd Fighter Group

Tamiya 1/48 scale P-51 mustang backdated to early model w/o tail fin fillet. True details wheels (excessive bulge removed) and cockpit. Mostly scratch built gun bay with Aires guns.


MikeMx
_VISITCOMMUNITY
England - North East, United Kingdom
Joined: May 22, 2008
KitMaker: 649 posts
AeroScale: 434 posts
Posted: Sunday, July 25, 2010 - 06:22 AM UTC
Hi

My Super Mystere has been done a good while but I forgot to post the pics - is it too late now for this campaign?

thanks
Mike
05Sultan
#037
_VISITCOMMUNITY
California, United States
Joined: December 19, 2004
KitMaker: 2,870 posts
AeroScale: 258 posts
Posted: Sunday, July 25, 2010 - 02:11 PM UTC
I'd throw 'em up there, Mike. the hardware's only aluminum you know!
Besides, you might toss the Taskmaster Damian a note too.(AussieReg).
Cheers!
Rick
AussieReg
Staff MemberAssociate Editor
AUTOMODELER
#007
_VISITCOMMUNITY
Victoria, Australia
Joined: June 09, 2009
KitMaker: 8,156 posts
AeroScale: 3,756 posts
Posted: Sunday, July 25, 2010 - 02:52 PM UTC
No worries Mike, this Campaign was a stop-start affair from the get-go with the original Campaign Leader not even turning up to the party !!

Post a few pics here and in the Glaerry and your ribbon will be on its way.

Cheers, D
MikeMx
_VISITCOMMUNITY
England - North East, United Kingdom
Joined: May 22, 2008
KitMaker: 649 posts
AeroScale: 434 posts
Posted: Tuesday, July 27, 2010 - 03:26 AM UTC
Hi

I have put some pics of my Super Mystere on my profile pics but can't seem to post them on here. Here is a link to one of the pics as proof I've done it but if someone can tell me how to post pics here, that would be great!


thanks
Mike
MikeMx
_VISITCOMMUNITY
England - North East, United Kingdom
Joined: May 22, 2008
KitMaker: 649 posts
AeroScale: 434 posts
Posted: Wednesday, July 28, 2010 - 05:32 AM UTC
" TARGET="_blank">http:/[url=http://gallery.kitmaker.net/showphoto.php/photo/342241]/
AussieReg
Staff MemberAssociate Editor
AUTOMODELER
#007
_VISITCOMMUNITY
Victoria, Australia
Joined: June 09, 2009
KitMaker: 8,156 posts
AeroScale: 3,756 posts
Posted: Wednesday, July 28, 2010 - 11:15 AM UTC
Mike, when you look at your pic in the gallery, at the bottom there is a "linked thumbnail." To the immediate right of that is a small icon. Click on that icon and it will bring up a HTML code below it. Just copy and paste that whole HTML code into the thread post and here you are . . . .


Very nice work on the Mystere mate, ribbon incoming.

Cheers, D
MikeMx
_VISITCOMMUNITY
England - North East, United Kingdom
Joined: May 22, 2008
KitMaker: 649 posts
AeroScale: 434 posts
Posted: Wednesday, July 28, 2010 - 01:07 PM UTC
Thanks! I was fiddling round with the pics but didn't notice that.
Thanks for the comment - it didn't turn out too bad for an ancient kit - the red arrow type transfers were a total bugger to get on at all! The paint is Tamiya Aluminium aerosol and hand painted smaller areas. I've got a new air brush now so no more aerosols!

thanks
Mike