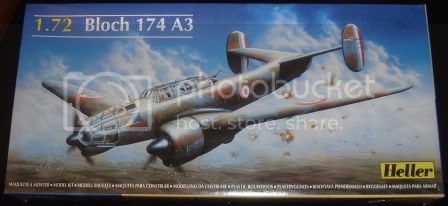
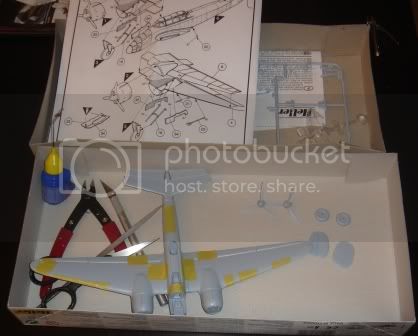
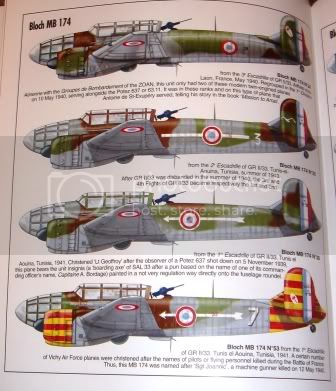
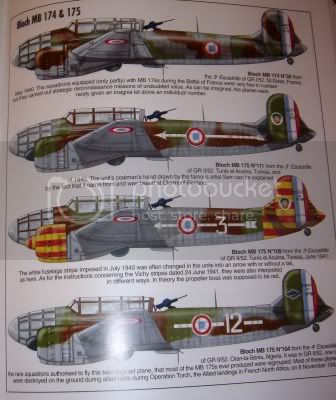
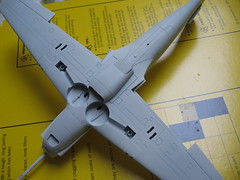
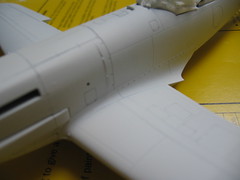
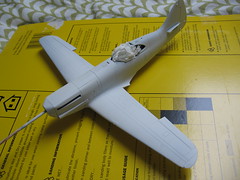
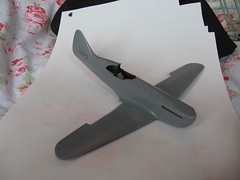
I started my build yesterday. I am going old school in this campaign with an old Heller 1/72 Bloch 174 kit. In the true spirit of the campaign the kit is of course also produced by a French company
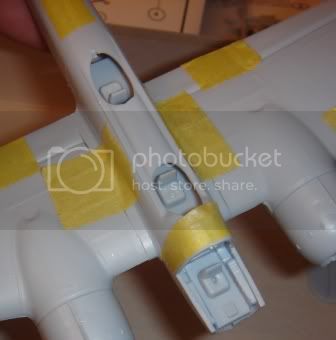
The kit is old without any cockpit details and with very few parts. I almost finished it last evening while listing to the EU parliament debate on TV.
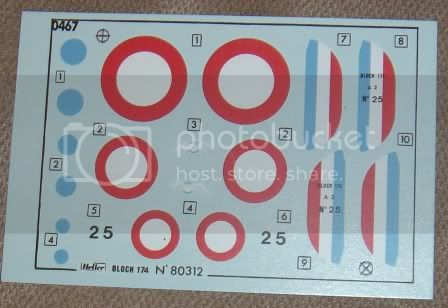
I will be painting it all by brush - true old school. I have not decided on the scheme yet, but there is only one scheme included in the kit, so I will probably go for that one although it is very tempting to make one of the Vichy machines with red and yellow stripes.
According to what I can find on the internet the cockpit is night blue, which seems to be very dark. The wheel bays seem to be a sandy khaki colour. Unless somebody has better information this is what I am going for.
Air Campaigns
Want to start or join a group build? This is where to start.
Hosted by Frederick Boucher, Michael Satin
La Marseillaise Campaign
Posted: Thursday, May 28, 2009 - 08:57 PM UTC
CMOT70
Victoria, Australia
Joined: August 23, 2007
KitMaker: 629 posts
AeroScale: 539 posts
Joined: August 23, 2007
KitMaker: 629 posts
AeroScale: 539 posts
Posted: Thursday, May 28, 2009 - 09:44 PM UTC
Quoted Text
I almost finished it last evening while listing to the EU parliament debate on TV.
Jesper you really party HARD!!!
Nice subject though, do Azur do this one in 1/48 i wonder?
Andrew
Posted: Thursday, May 28, 2009 - 11:46 PM UTC
He, he, thanks for the comment, Andrew.
While trying to find the colours for the cockpit and the wheel bay I came across an example of the Bloch 174 in 1/48, but cannot recall the name of the kit manufacturer, but there is a 1/48 example out there.
Sluff
Oulu, Finland
Joined: August 10, 2005
KitMaker: 77 posts
AeroScale: 34 posts
Joined: August 10, 2005
KitMaker: 77 posts
AeroScale: 34 posts
Posted: Saturday, May 30, 2009 - 05:06 AM UTC
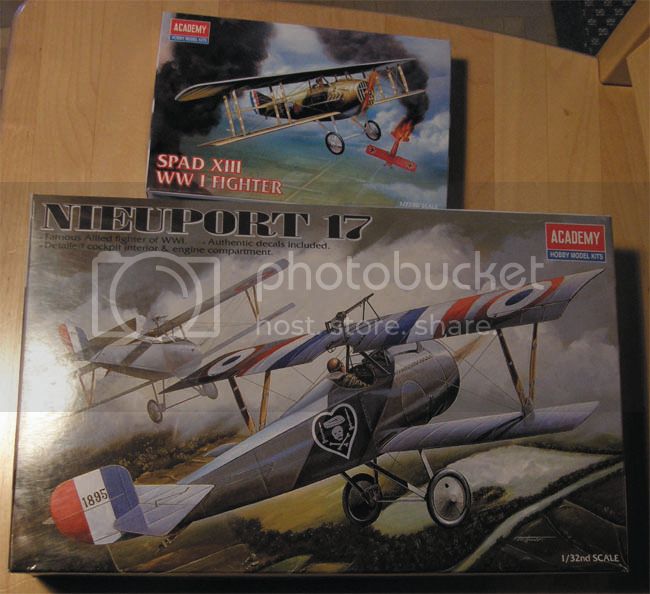
These are my two kits for this campaign:
Both from Academy, the Spad is from 1984 (!). I´ll build them oob. Both have quite crude detail, the Spad doesn't even have a cockpit. I'll be rigging both of 'em, if I manage to find thin enough fishing line for the Spad.
warreni
South Australia, Australia
Joined: August 14, 2007
KitMaker: 5,926 posts
AeroScale: 2,201 posts
Joined: August 14, 2007
KitMaker: 5,926 posts
AeroScale: 2,201 posts
Posted: Saturday, May 30, 2009 - 07:09 AM UTC
Quoted Text
These are my two kits for this campaign:
Both from Academy, the Spad is from 1984 (!). I´ll build them oob. Both have quite crude detail, the Spad doesn't even have a cockpit. I'll be rigging both of 'em, if I manage to find thin enough fishing line for the Spad.
Saved! I just sold the kit O was originally going to build but have the Academy Neiuport in the stash! Phew!!
Would the Concorde count for this campaign?
Simon_H
England - East Anglia, United Kingdom
Joined: May 06, 2009
KitMaker: 32 posts
AeroScale: 31 posts
Joined: May 06, 2009
KitMaker: 32 posts
AeroScale: 31 posts
Posted: Tuesday, June 02, 2009 - 03:50 AM UTC
A bit of time for modeling today!
So, a coat of Klear, then decals. The instructions with the Carpena decals are damn near illegible, so I used the guide on the kit and used the equivalent decal from the Carpena sheet. It looks about right. Also tried a new technique for me. I used a fine black pen to outline the control surfaces. Not bad. Now I know what I'm doing I'll do a better job of it on the next kit. Finally another coat of Klear to seal.
Posted: Tuesday, June 02, 2009 - 11:31 PM UTC
Looks good so far, Simon.
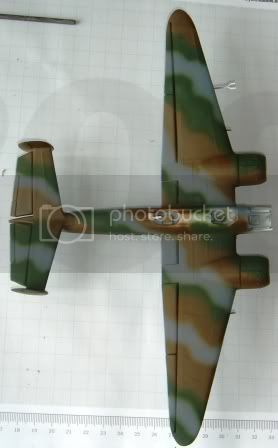
Here is a short update on my Bloch 174. The camouflage is on. The colours of the French camouflage has been a little difficult to determine, but as I understand they were often mixed locally, this explains some variantions.
The Bloch 174 has had many different patterns, but all of the patterns have been made up of medium grey, medium green and dark brown. I have applied my camouflage loosely based on some pictures of the aircraft although it seems there were no standard pattern.
It seems it is difficult to get it completely wrong.
jaypee
Scotland, United Kingdom
Joined: February 07, 2008
KitMaker: 1,699 posts
AeroScale: 1,384 posts
Joined: February 07, 2008
KitMaker: 1,699 posts
AeroScale: 1,384 posts
Posted: Tuesday, June 09, 2009 - 06:02 AM UTC
Made a start to the d.520 by tamiya.
Again a lovely engineered kit and my first attempt 1/48.
Previously built smer 1/50 mc.72
It really goes together so easy it means I'm going to hate kits that don't now.
There is a lot of scope for detailing the cockpit.
Sanded the instrument panel waffer thin, drilled out the faces and stuck the decal
on the back. a drop of future in each face gives the appearance of glass and refracts
light to bring the detail up. Really works a treat I will do this again.
The pit was given a coat of 2:1 black, royal blue. Then highlighted in royal blue
and finally dry brushed in a light grey.
Drilled out a bit on the seat to highlight the tubular steel construction. Added a PE
trim wheel and some levers. Didn't bother with scratching a radio set but I might
revisit that decision. Still plenty of room to build one and install it through the cockpit opening.
I got a bit excited and zipped the whole thing up and added the wings.
All this in about 4-5 hours. A bit different to spending hours deciding how to fit
a strut. This is like modeling crack. Tamiya have it sussed the quicker the kits
build the more people will buy.
Now the question is which profile to use. The boxing gives LeGloan's No 277.
An interesting character, in that he fought for France, Vichy and the Free French and
was an ace for both sides during the war.
This offers me the choice of doing a yellow tail and spinner of the Vichy Syrian theatre markings
On top of the
Photos to follow once I find where the rug rats have hidden the camera
Found a great build to follow of this if anyone else is considering the kit
http://www.rollmodels.net/nreviews/airplanes/d520/d520.php
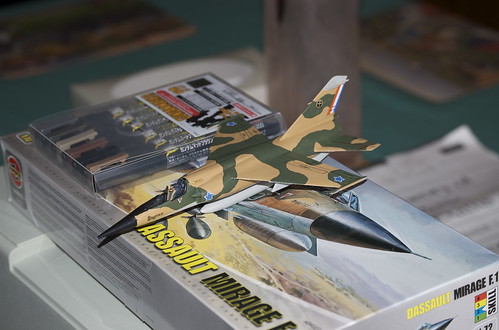
Nice work Simon and Jesper, I'm looking forward to getting some paint
on. That little mirage looks like really tidy work, did you use a rule for
drawing on the panel lines?
jaypee
Scotland, United Kingdom
Joined: February 07, 2008
KitMaker: 1,699 posts
AeroScale: 1,384 posts
Joined: February 07, 2008
KitMaker: 1,699 posts
AeroScale: 1,384 posts
Posted: Tuesday, June 09, 2009 - 10:19 PM UTC
LongKnife
Jönköping, Sweden
Joined: April 25, 2006
KitMaker: 831 posts
AeroScale: 688 posts
Joined: April 25, 2006
KitMaker: 831 posts
AeroScale: 688 posts
Posted: Tuesday, June 09, 2009 - 11:12 PM UTC
Quoted Text
It really goes together so easy it means I'm going to hate kits that don't now.
Your'e right JP. Well fitting kits are a blessing in disguise. Everytime I've finished a Tam or Hase kit I open the box one of my Artiplast Reggiane 2000. Then I close it again. But one day....one day....
Nice and busy office you got there. Tony.
Posted: Wednesday, June 10, 2009 - 10:44 PM UTC
Nice cockpit, JP. The Hasegawa and Tamiya kits are beautiful.
Sometimes it is good to tackle some of the older kits, but now I am really looking forward to start a decent kit after my 1/72 Heller "three plastic blob seats and the cockpit is finished" Bloch 174.
My build is progressing - pictures will follow soon.
Sometimes it is good to tackle some of the older kits, but now I am really looking forward to start a decent kit after my 1/72 Heller "three plastic blob seats and the cockpit is finished" Bloch 174.
My build is progressing - pictures will follow soon.
Simon_H
England - East Anglia, United Kingdom
Joined: May 06, 2009
KitMaker: 32 posts
AeroScale: 31 posts
Joined: May 06, 2009
KitMaker: 32 posts
AeroScale: 31 posts
Posted: Thursday, June 11, 2009 - 01:56 AM UTC
So I have made the final push on the Mirage. A matt cote to cover the sheen from the Klear, and all the bits and bobs. The main under carriage is a fiddly affair that caused some grief, as did trying to get a decent 'white' on the missiles. But its in a condition I call 'finished'!
So there you go. There are certainly 'issues' with this kit, and there were some huge 'issues' with my abilities. So it is far from being the best build I have produced. But on the plus side, I think the Mirage F.1 is a terrific looking jet, and so I am glad that this campaign gave me the excuse and incentive to add one to my shelf. A big thank you to the organiser!
FalkeEins
England - South East, United Kingdom
Joined: March 07, 2005
KitMaker: 868 posts
AeroScale: 690 posts
Joined: March 07, 2005
KitMaker: 868 posts
AeroScale: 690 posts
Posted: Thursday, June 11, 2009 - 05:16 AM UTC
Hi Simon,
..good work ! well done on finishing your build ..I haven't even got around to signing up yet !
BTW the answer for 'difficult' colours is Halfords Auto acrylic spray cans...and their primer is great for brush finishes ..as you've noted elsewhere
..good work ! well done on finishing your build ..I haven't even got around to signing up yet !
BTW the answer for 'difficult' colours is Halfords Auto acrylic spray cans...and their primer is great for brush finishes ..as you've noted elsewhere
Posted: Thursday, June 11, 2009 - 11:50 PM UTC
Good job on the Mirage, Simon. It is an attractive looking aircraft.
Thanks for participating
FalkeEins
England - South East, United Kingdom
Joined: March 07, 2005
KitMaker: 868 posts
AeroScale: 690 posts
Joined: March 07, 2005
KitMaker: 868 posts
AeroScale: 690 posts
Posted: Friday, June 12, 2009 - 03:41 AM UTC
Quoted Text
According to what I can find on the internet the cockpit is night blue, which seems to be very dark. The wheel bays seem to be a sandy khaki colour. Unless somebody has better information this is what I am going for.
Hi Jesper,
..you are doing a great job on that Bloch...not sure about "better info" but FWIW I do the have the Lela Presse book on the Bloch in my library. You can see some of the contents including some handbook drawings here...
http://www.avions-bateaux.com/en/catalogue-livre-catalogue_191.html
The book has some colour images of the flight instruments, cockpit consoles and radio gear. The instrument panel itself is black while the side consoles & radio set are blue-grey. (RLM 75 with a touch of insignia blue might be a good match) The cockpit walls appear to be much lighter than that . The control column is a P-38-type paddle-wheel while behind the pilot's seat on the starboard cockpit wall are three very prominent oxygen bottles.....
Posted: Saturday, June 13, 2009 - 11:01 AM UTC
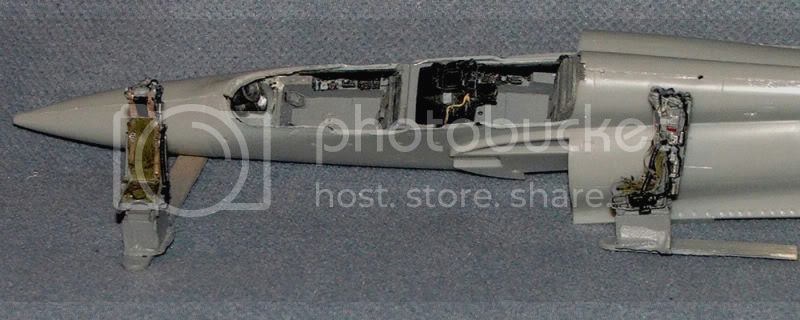
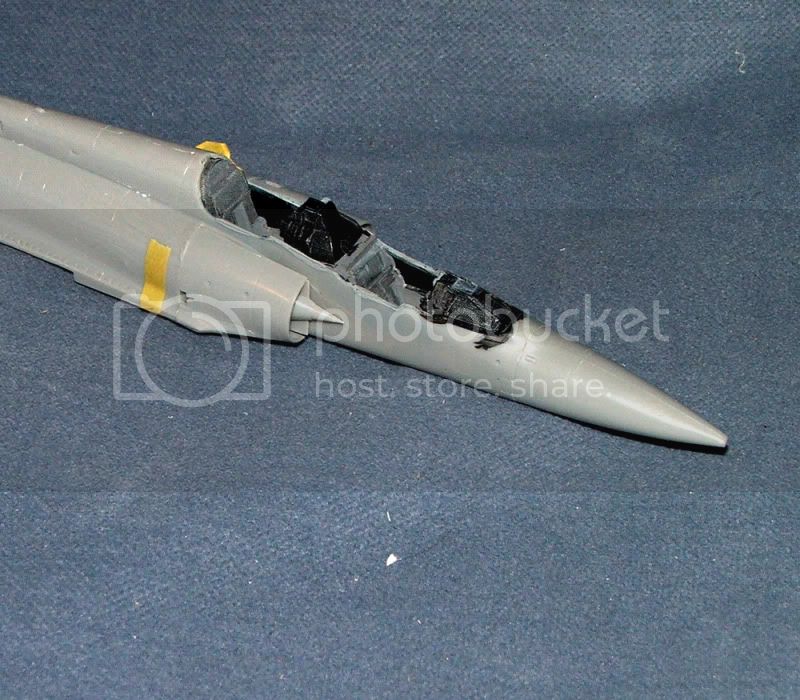
A nice simple Airfix kit. I bought this second hand, unfortunately bothe fuselages had broken around the intake area. Not to worry thought I, a touch of cement and card and Bob's your plume de ma tante.
All was not well though. I don't know where the kit had been stored prior to me getting my hands on it, but the nose section ended up exploding into five different parts, completely un-repairable, so into 'le bin' it went.
Out of the stash came another and this is the result so far.
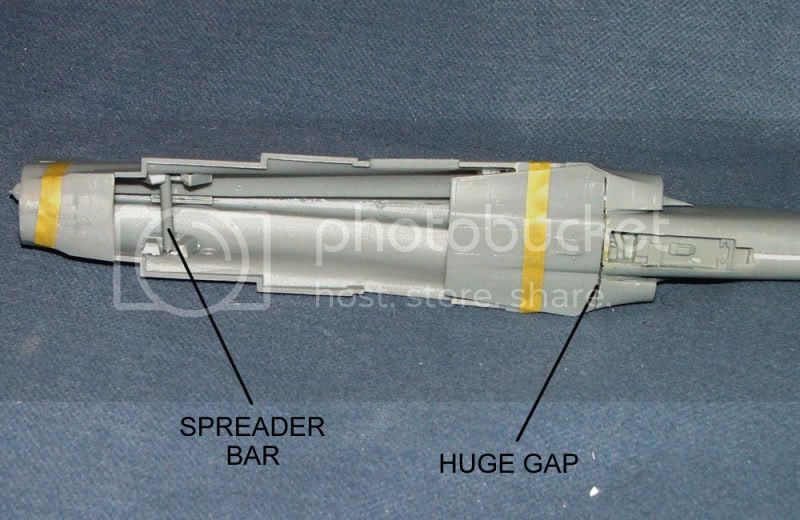
The fuselage fought the resin cockpit and kit wheelbay parts all the way. From the top it looks OK, but underneath theres a gap you could drive a train through. Seats worked out all right though, after the addition of some Eduard etch belts from the set for the 'Revell' kit would you believe?
Alors mes petit chous chous, onwards and upwards.
IAN
jaypee
Scotland, United Kingdom
Joined: February 07, 2008
KitMaker: 1,699 posts
AeroScale: 1,384 posts
Joined: February 07, 2008
KitMaker: 1,699 posts
AeroScale: 1,384 posts
Posted: Thursday, June 18, 2009 - 10:25 PM UTC
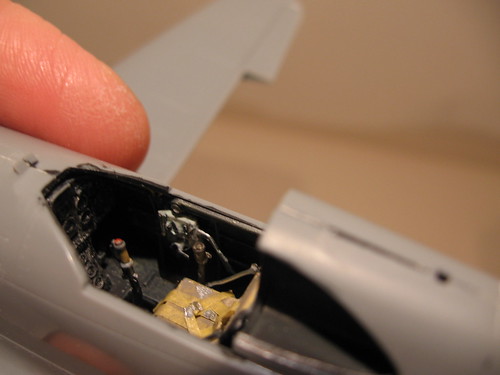
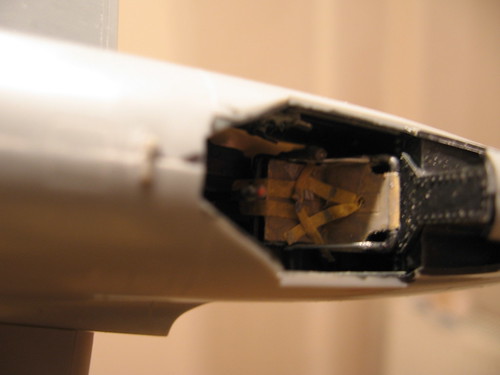
Ils sont fous, ces modélistes
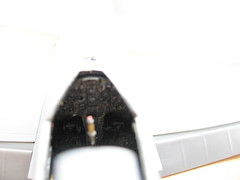
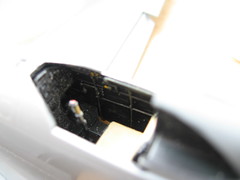
All evening spent researching, scratching and painting a radio set.
Doesn't even look that great. But thought I'd share it anyway.
Also added some seatbelts, the seat adjust lever?, and repainted
the seat khaki rather than tan. Next time I'll do this *before* I close
the fuselage
In the second photo there is light coming through the thin plastic.
Should have painted the underfloor area grey.
Posted: Friday, June 19, 2009 - 09:48 AM UTC
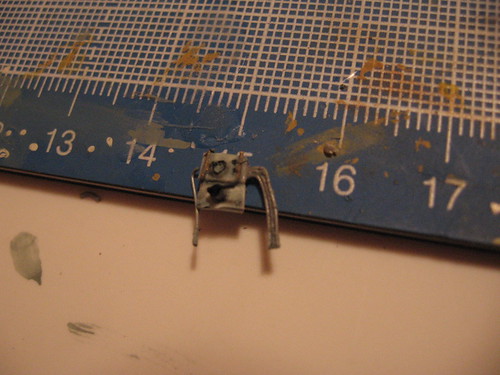
Progress so far.
Most of the etch is in, though you can't see it. No colour call outs for the etch by Renaissance, and there's a shortage of pickies when it comes to the N interior.
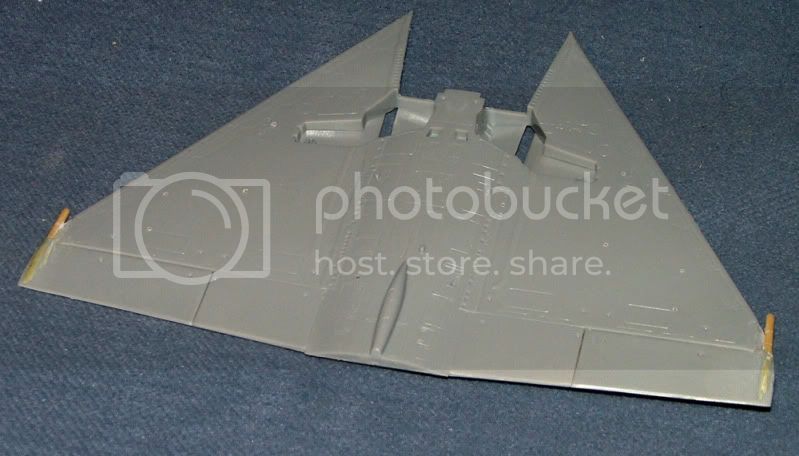
Second of the cavernous gaps to be filled underneath. Also, the spreader bars have been added so's the wings meet the fuselage..............
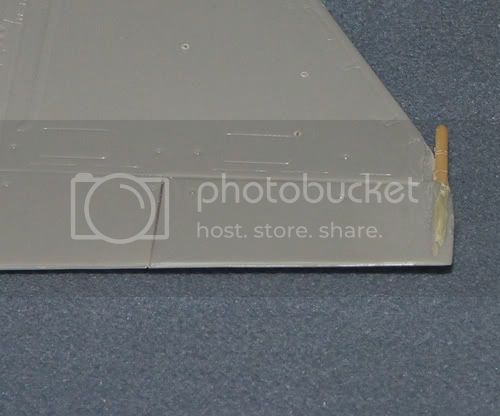
Onto the wings, the kit ECM pods have been replaced with the resin items and the fairing enlaged with miliput.
Here's a close-up.
IAN
Removed by original poster on 06/24/09 - 12:40:16 (GMT).
vanize
Texas, United States
Joined: January 30, 2006
KitMaker: 1,954 posts
AeroScale: 1,163 posts
Joined: January 30, 2006
KitMaker: 1,954 posts
AeroScale: 1,163 posts
Posted: Saturday, June 20, 2009 - 05:58 AM UTC
welcome to the campaign, todd.
nice to see builds progressing and congratulations to Andrew, Erik and Simon on finishing theirs.
warreni
South Australia, Australia
Joined: August 14, 2007
KitMaker: 5,926 posts
AeroScale: 2,201 posts
Joined: August 14, 2007
KitMaker: 5,926 posts
AeroScale: 2,201 posts
Posted: Sunday, June 21, 2009 - 11:26 AM UTC
Removed by original poster on 06/24/09 - 12:40:46 (GMT).
jaypee
Scotland, United Kingdom
Joined: February 07, 2008
KitMaker: 1,699 posts
AeroScale: 1,384 posts
Joined: February 07, 2008
KitMaker: 1,699 posts
AeroScale: 1,384 posts
Posted: Tuesday, June 23, 2009 - 08:39 PM UTC
Tood, good to see a flying tank.
Here is the d.520 ready for paint. goes together pretty well.
No real gaps a little step under the rear wing root.
Tried the tamiya callouts for colour but they are too harsh in contrast I'll tone them down a bit.
This plane did operate from ad hoc bases in the middle east after all.
Pics clickable for close ups.
There are two really great builds of this kit going on at master194.com. it is french modelling site. They look
amazing and a lot of research has gone into them. Badger150 and glouglou are the two builders' handles.
Take a peek.
warreni
South Australia, Australia
Joined: August 14, 2007
KitMaker: 5,926 posts
AeroScale: 2,201 posts
Joined: August 14, 2007
KitMaker: 5,926 posts
AeroScale: 2,201 posts
Posted: Tuesday, June 23, 2009 - 08:42 PM UTC
My, what a long prop shaft you have jaypee!
jaypee
Scotland, United Kingdom
Joined: February 07, 2008
KitMaker: 1,699 posts
AeroScale: 1,384 posts
Joined: February 07, 2008
KitMaker: 1,699 posts
AeroScale: 1,384 posts
Posted: Tuesday, June 23, 2009 - 08:46 PM UTC
That's the first time I've been told that