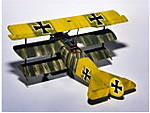
Eduard 1:48 Bristol F.2b Fighter
Attica, Greece / Ελλάδα
Joined: May 01, 2008
KitMaker: 1,437 posts
AeroScale: 1,241 posts
Posted: Saturday, January 09, 2010 - 06:49 AM UTC
Colorado, United States
Joined: January 25, 2004
KitMaker: 11,669 posts
AeroScale: 11,011 posts
Posted: Saturday, January 09, 2010 - 09:58 AM UTC
Greetings Nick,
First of all I can tell this has been a bit of a struggle for you. But you are doing better and better with each attempt. Decals are easy to touch up. I built the Roden version and she was a challenge. But now that you are at the point where it all starts to come together there may be a trick or two that will help.
Drill holes for the four fuselage to lower wing struts and replace the kit items with brass rod. I used an accelerator and super glue. Accelerators are available at any hobby store and just a tiny drop will make a any super glue joint bond like rock immediately.
Here is the thread and it may have a few thing you can use to help yourself along.
". . .The most important thing is to know why you build and then get the most that you can out of building." via D.D.
Attica, Greece / Ελλάδα
Joined: May 01, 2008
KitMaker: 1,437 posts
AeroScale: 1,241 posts
Posted: Saturday, January 09, 2010 - 10:29 AM UTC
Quoted Text
Greetings Nick,
First of all I can tell this has been a bit of a struggle for you. But you are doing better and better with each attempt. Decals are easy to touch up. I built the Roden version and she was a challenge. But now that you are at the point where it all starts to come together there may be a trick or two that will help.
Drill holes for the four fuselage to lower wing struts and replace the kit items with brass rod. I used an accelerator and super glue. Accelerators are availabl at any hobby store and just a tiny drop will make a any super glue joint bond like rock immediately.
Here is the thread and it may have a few thing you can use to help yourself along.
Thanks for the reply Mr. Steffen


Is there any reason to change the kit's struts to the lower wing???
Just ask

Cheers Nick

Colorado, United States
Joined: January 25, 2004
KitMaker: 11,669 posts
AeroScale: 11,011 posts
Posted: Saturday, January 09, 2010 - 04:01 PM UTC
Certainly Nick there are many good reasons. Lets take a look at them.
1. You spent some real money purchasing this kit and you want it to last.
Brass rod does this well because small plastic kit parts are not meant take small bumps and drops, heat or cold.
2. If a part or parts becomes over-stressed then it will break or if deformed by heat or too much glue it will loose its strength.
We are talking about 4 major assembly joints that become stronger when you replace kit plastic with brass rod. Heat, cold, stress does not effect the plumb and square sit of the finished wing. Imagine all of the tight rigging you will do, being undone or ruined because a one or two plastic part breaks.
The life of your build becomes very long as it will stay intact.
3. brass is very forgiving and can take slight adjustments after being set in place. You can't do that with plastic. I even put brass wire into the ends of some of my wing struts before rigging. Yes it takes a bit more patience but I have 30 year old kits that are still square and plumb because I used brass rod & wire for struts locators.
". . .The most important thing is to know why you build and then get the most that you can out of building." via D.D.
Alberta, Canada
Joined: January 19, 2008
KitMaker: 6,743 posts
AeroScale: 6,151 posts
Posted: Saturday, January 16, 2010 - 01:57 AM UTC
How is the repair job coming Nick , any new progress ?
Attica, Greece / Ελλάδα
Joined: May 01, 2008
KitMaker: 1,437 posts
AeroScale: 1,241 posts
Posted: Saturday, January 16, 2010 - 03:03 AM UTC
I have finished the decal part and painted some details
I tried to fix the problem and it was easy but until now I haven't finished it cause of boring

Cheers Nick
Arizona, United States
Joined: December 12, 2008
KitMaker: 1,423 posts
AeroScale: 1,319 posts
Posted: Sunday, January 17, 2010 - 03:30 AM UTC
Hi Nick:
I am looking forward to some pics of your model with the repair and your progress. As Stephen said, you have a lot of time and effort into this model, you just need to recharge your batteries to get the project moving forward. You have tackled a difficult kit and have made good progrss. I am hesitant to start the Aurora kit, let alone the Eduard. Work a little at a time and before you know it, it will be finished.
Best
Mark
We few, we happy few........
New South Wales, Australia
Joined: March 26, 2009
KitMaker: 366 posts
AeroScale: 309 posts
Posted: Sunday, January 17, 2010 - 07:22 AM UTC
Hang in there Nick, sometimes it all gets a little daunting. Many times during a build I have to just walk away, have a break for a day or two. You have spent so much time and put a lot of effort into your build, it will be great to see it finished.
Des.
Check my site for 1:32 scale WW1 aircraft model build logs, build techniques, how to make turnbuckles and eyelets plus much more, plenty of photos of my finished models
Alberta, Canada
Joined: January 19, 2008
KitMaker: 6,743 posts
AeroScale: 6,151 posts
Posted: Sunday, January 17, 2010 - 07:54 AM UTC
The guy's are right Nick , hang in there . You have come so far with this build with a lot of hard work into it !
We have all had projects which are overwhelming . Happened with me with the Pfalz D.III build . Start this back in August of last year .
Your thread is very enjoyable watching you progress , if you need a break no worries . We will be here to support you !


Keep at her , I'm looking forward to seeing it progress
Cheers Nick !
Attica, Greece / Ελλάδα
Joined: May 01, 2008
KitMaker: 1,437 posts
AeroScale: 1,241 posts
Posted: Sunday, January 17, 2010 - 09:35 AM UTC
Indiana, United States
Joined: May 14, 2007
KitMaker: 3,117 posts
AeroScale: 2,270 posts
Posted: Sunday, January 17, 2010 - 09:46 AM UTC
Nick, it is almost finished. You are building a very difficult kit and it you are going to get through it. I hope you take this build as an example for future builds. My goal is to build each model a little better than the last, and learn from each build. I think you will be building some great kits in the future.

An observation, people who are afraid of rigging build jets.
"Treat 'em Rough", Current Builds--Wingnut Rumpler
I am frequently seen with blood shot eyes from staying up past my nap time to get the right colour scheme on my latest WWI model?
Attica, Greece / Ελλάδα
Joined: May 01, 2008
KitMaker: 1,437 posts
AeroScale: 1,241 posts
Posted: Thursday, January 21, 2010 - 04:23 AM UTC
Alberta, Canada
Joined: January 19, 2008
KitMaker: 6,743 posts
AeroScale: 6,151 posts
Posted: Thursday, January 21, 2010 - 01:50 PM UTC
Don't worry about the rigging Nick , if you need help we would be glad to aid you .
Start off slowly , do one or two lines a day and work your way up from there and in no time at all you will have her finished .

We're all very impressed with your courage , keep up the good work !
New South Wales, Australia
Joined: March 26, 2009
KitMaker: 366 posts
AeroScale: 309 posts
Posted: Thursday, January 21, 2010 - 05:19 PM UTC
Like Terri said, we are here to help you in any way possible. Rigging has turned a lot of people away from WW1 aircraft but with the experience you are gaining I'm sure you will overcome the rigging nightmare. Patience is the key factor with rigging, as Terri said, just do a few lines a day and before you know it, it will be all done.
I have confidence in you Nick, you have perservered this long, just a little bit longer and you will have won.
Des.
Check my site for 1:32 scale WW1 aircraft model build logs, build techniques, how to make turnbuckles and eyelets plus much more, plenty of photos of my finished models
Attica, Greece / Ελλάδα
Joined: May 01, 2008
KitMaker: 1,437 posts
AeroScale: 1,241 posts
Posted: Friday, January 22, 2010 - 04:43 AM UTC
Attica, Greece / Ελλάδα
Joined: May 01, 2008
KitMaker: 1,437 posts
AeroScale: 1,241 posts
Posted: Thursday, January 28, 2010 - 01:54 AM UTC
West Virginia, United States
Joined: December 18, 2006
KitMaker: 1,121 posts
AeroScale: 1,063 posts
Posted: Thursday, January 28, 2010 - 02:16 AM UTC
You're doing great, Nick. I'm glad to see you are determined to finish the kit. The skills you learn with it will aways help with the next build you do.
Mark
Attica, Greece / Ελλάδα
Joined: May 01, 2008
KitMaker: 1,437 posts
AeroScale: 1,241 posts
Posted: Thursday, January 28, 2010 - 02:39 AM UTC
Thank you very much mr. Mark
Of course, there is no way to leave it uncompleted!!
It's almost finished
Cheers Nick
Arizona, United States
Joined: December 12, 2008
KitMaker: 1,423 posts
AeroScale: 1,319 posts
Posted: Thursday, January 28, 2010 - 03:50 AM UTC
Good to see you posting pictures of your progress Nick. The repair job is noteworthy, and you are making good progress on the fuselage. The weathering on the guns is a nice touch as is the detail in the cockpit. I encourage you to continue on, and concur with the others who have stated to take it slow and easy on the rigging. Study the rigging runs and go from there. Rig the struts first and then take it from there. If you get frustrated, get up, walk around, check emails, and then come back to it.
Mark
We few, we happy few........
Attica, Greece / Ελλάδα
Joined: May 01, 2008
KitMaker: 1,437 posts
AeroScale: 1,241 posts
Posted: Thursday, January 28, 2010 - 08:49 AM UTC
Scotland, United Kingdom
Joined: February 07, 2008
KitMaker: 1,699 posts
AeroScale: 1,384 posts
Posted: Thursday, January 28, 2010 - 10:19 AM UTC
I concur. Smashing job on rescuing those markings. It is things like that
make normal people give. Thank the gods you are not normal
Keep it up Nik.
The cockpit looks great. This is actually quite a big plane, can't imagine what size
the WNW 1/32 scales out to.
Alberta, Canada
Joined: January 19, 2008
KitMaker: 6,743 posts
AeroScale: 6,151 posts
Posted: Thursday, January 28, 2010 - 02:02 PM UTC
Nick ! I'm so proud of you for continuing on with this build and not tossing in the towel !
You did a super on the decal issue
New South Wales, Australia
Joined: March 26, 2009
KitMaker: 366 posts
AeroScale: 309 posts
Posted: Thursday, January 28, 2010 - 02:55 PM UTC
A pat on the back for you Nick for perservering, it's great to see you forging ahead - good job so far and nice repair work to your decals.
Des.
Check my site for 1:32 scale WW1 aircraft model build logs, build techniques, how to make turnbuckles and eyelets plus much more, plenty of photos of my finished models
AussieReg
 Associate Editor
#007
Victoria, Australia
Joined: June 09, 2009
KitMaker: 8,156 posts
AeroScale: 3,756 posts
Posted: Thursday, January 28, 2010 - 03:09 PM UTC
Nick, super effort in not dropping this project (literally). The repair job looks great, I can't wait to see the end result.
Cheers, D
ON the bench
Revell 1/24 '53 Corvette (building as '54)
Revell 1/24 BMW 507 Coupe and Cabrio
Italeri 1/48 Me262 B-1a/U1 Nightfighter
Monogram 1/24 '57 Chevy Nomad
Dragon 1/350 USS Frank Knox DD-742
Thessaloniki, Greece / Ελλάδα
Joined: April 15, 2008
KitMaker: 90 posts
AeroScale: 89 posts
Posted: Friday, January 29, 2010 - 06:25 AM UTC
Very good work Nick, keep on rockin mate.
http://www.facebook.com/pages/Agioplanes/353328611448659