_GOTOBOTTOM
Early Aviation
Discuss World War I and the early years of aviation thru 1934.
Dual Build
Eduard 1:48 Pfalz D.IIIa
Merlin
Staff MemberSenior Editor
AEROSCALE
#017
_VISITCOMMUNITY
United Kingdom
Joined: June 11, 2003
KitMaker: 17,582 posts
AeroScale: 12,795 posts
Posted: Saturday, June 27, 2009 - 10:16 AM UTC


As promised in our quick look at Eduard's new Pfalz D.IIIa Dual Combo, our Dynamic Duo of Terri Werner and Mark Hamrick are set to get cracking in the kit. So, with their masks and capes firmly in place, it's time to hit the Bat-phone...

JackFlash
_VISITCOMMUNITY
Colorado, United States
Joined: January 25, 2004
KitMaker: 11,669 posts
AeroScale: 11,011 posts
Posted: Saturday, June 27, 2009 - 08:29 PM UTC
Not since the Royal Fokker Build have we stickied a tandem foray. But after a high level meeting of the minds Aeroscale Admin has pased down the word. The pressure is on and I have committed to be the support team. My library is open for queries and we are brewing duty coffee on the stove in the Early Aviation hangar. So we begin.

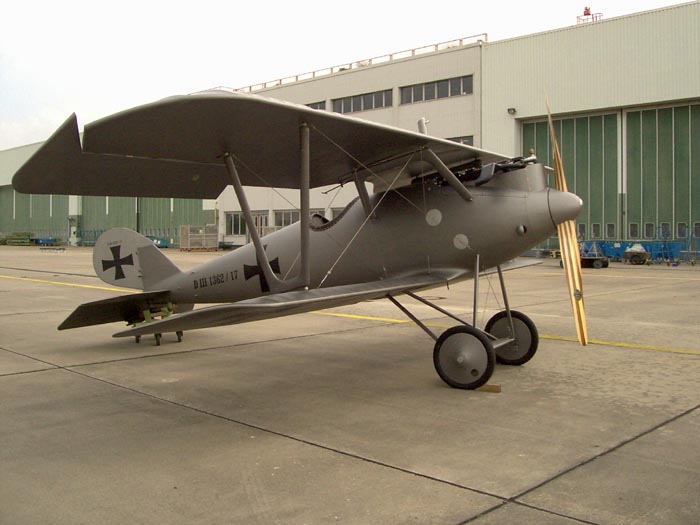
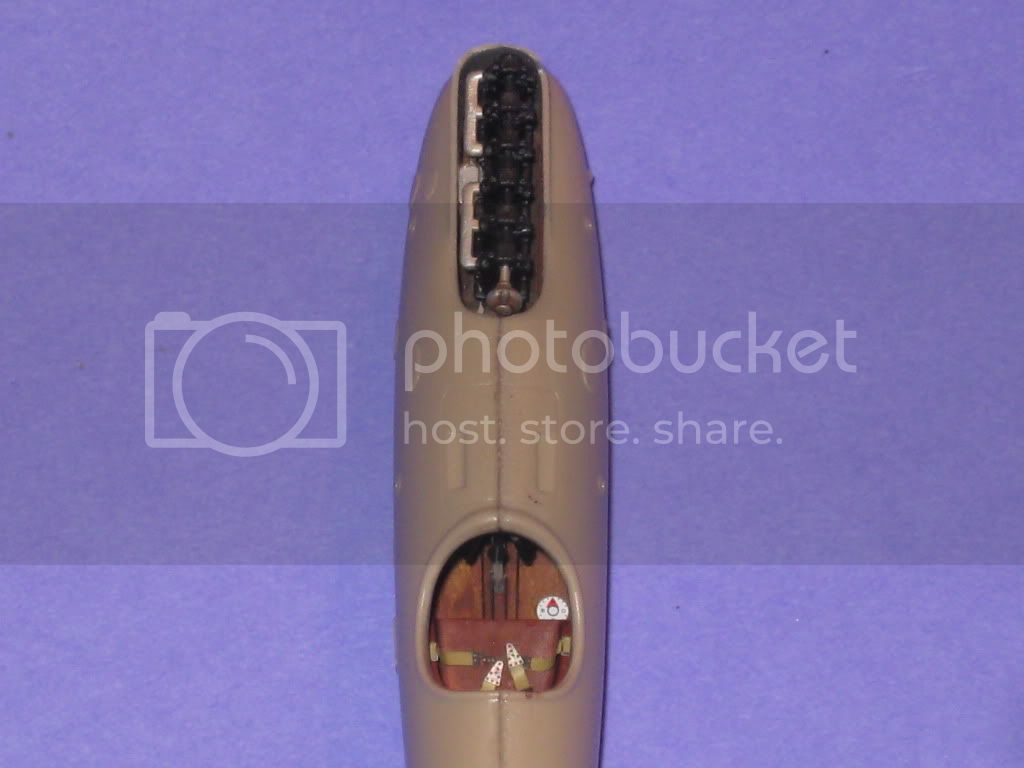
The shark-like profile of the Pfalz D.III appeared on the Western Front in late summer / early autumn 1917. Manufactured by the Pfalz Werke in Bavaria it was saddled with the obsolete Mercedes D.III 170hp inline six. The Albatros Werke fighters had been using the Merc. D.IIIa 170hp motor since the beginning of 1917 and were now having their D.Va types installed with a D IIIaü 180hp. Several concerns arose as the Pfalz D.III began its service life. First, the guns could not be accessed in-flight to clear jambs as they were buried beneath the forward turtle deck ahead of the cockpit and the access panels were impractical to remove in-flight to clear stoppages. Second, the tail surface was minimal in area for operational use. Thirdly, as mentioned previously the type was underpowered with its Mercedes D IIIa 170hp. Finally ‘greenwood’ was used in the Pfalz D.III manufacture. After some machines arrived at the front it was noticed that the tail unit would develop a definite twist to the left or right.

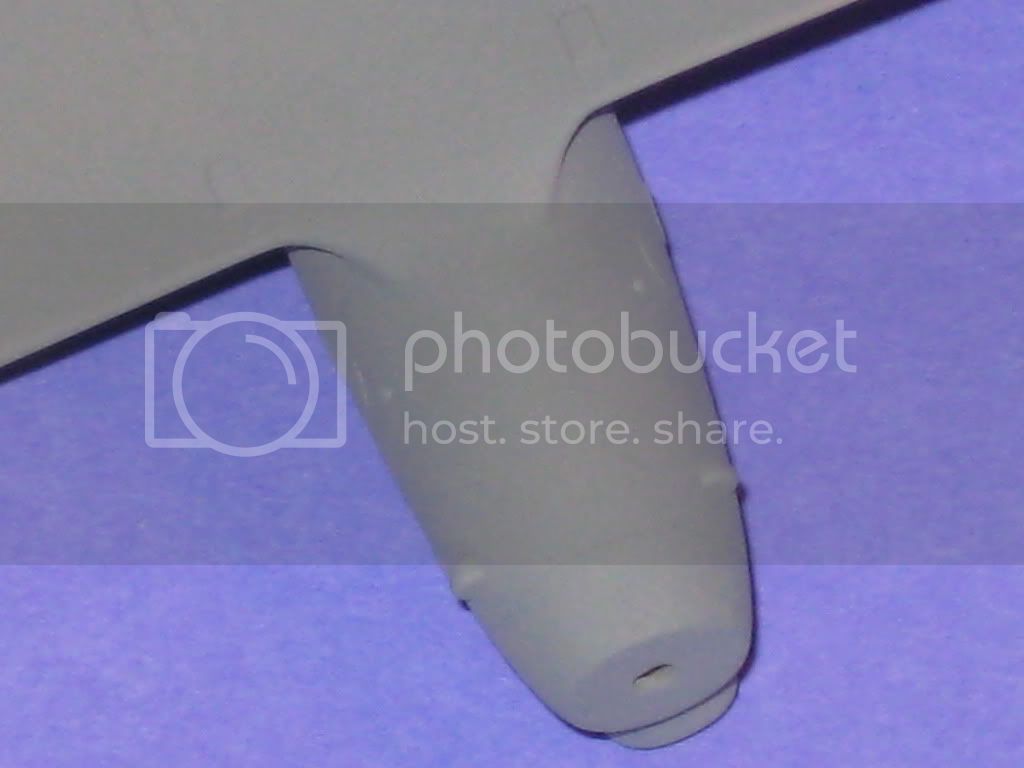
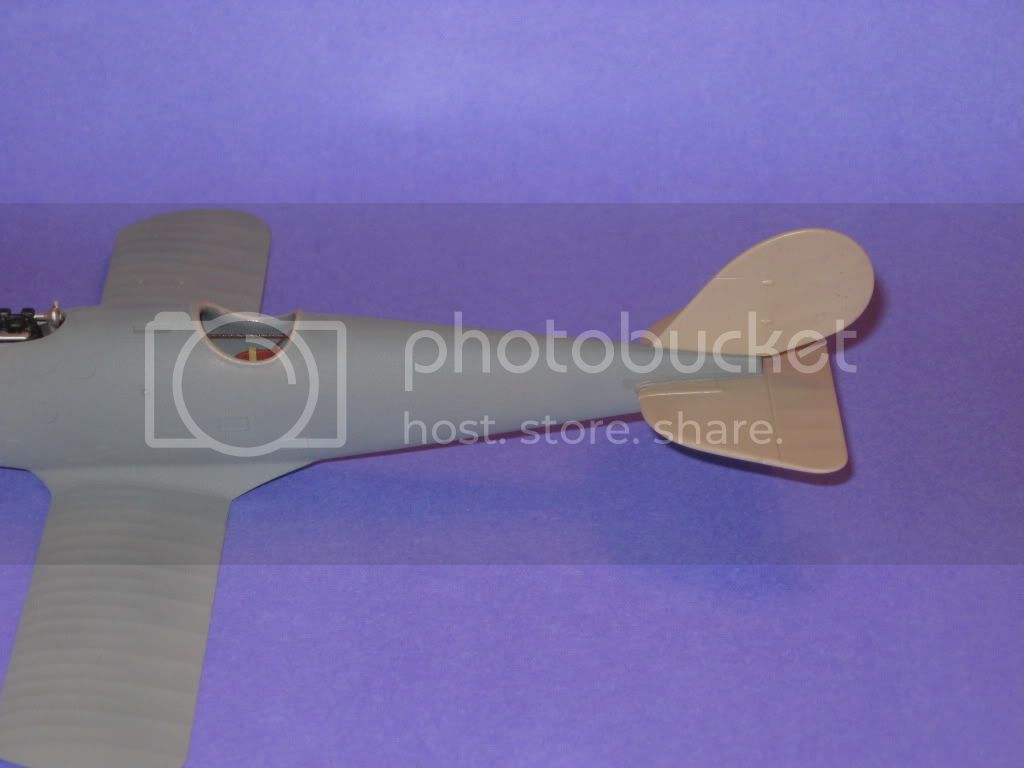
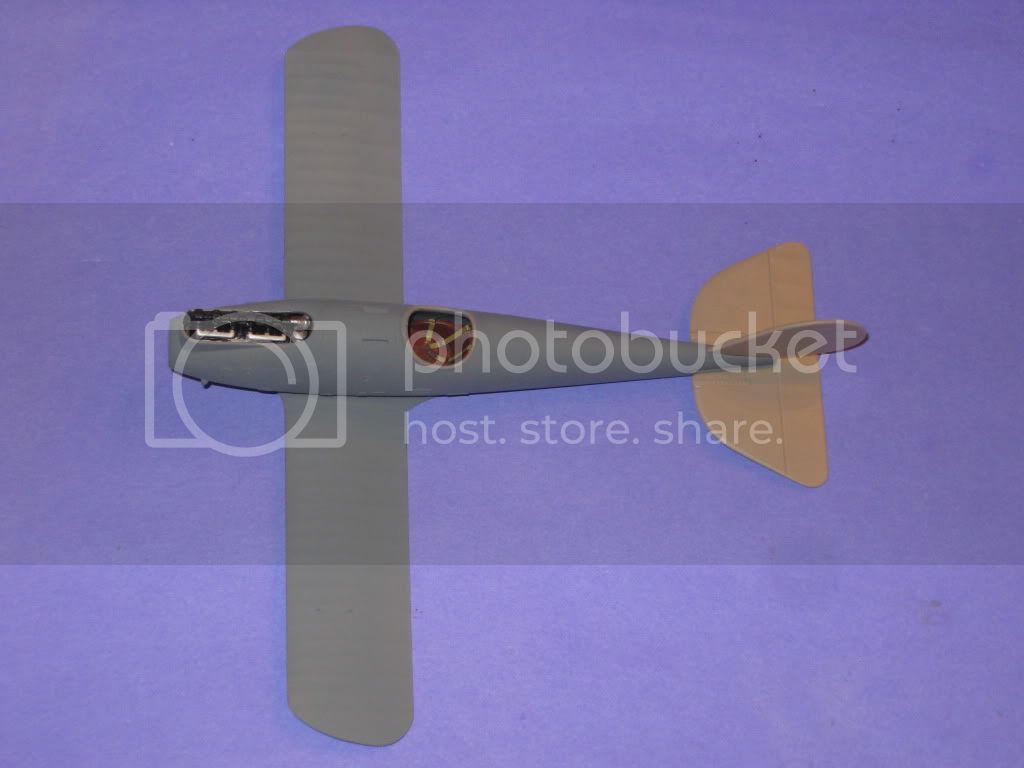
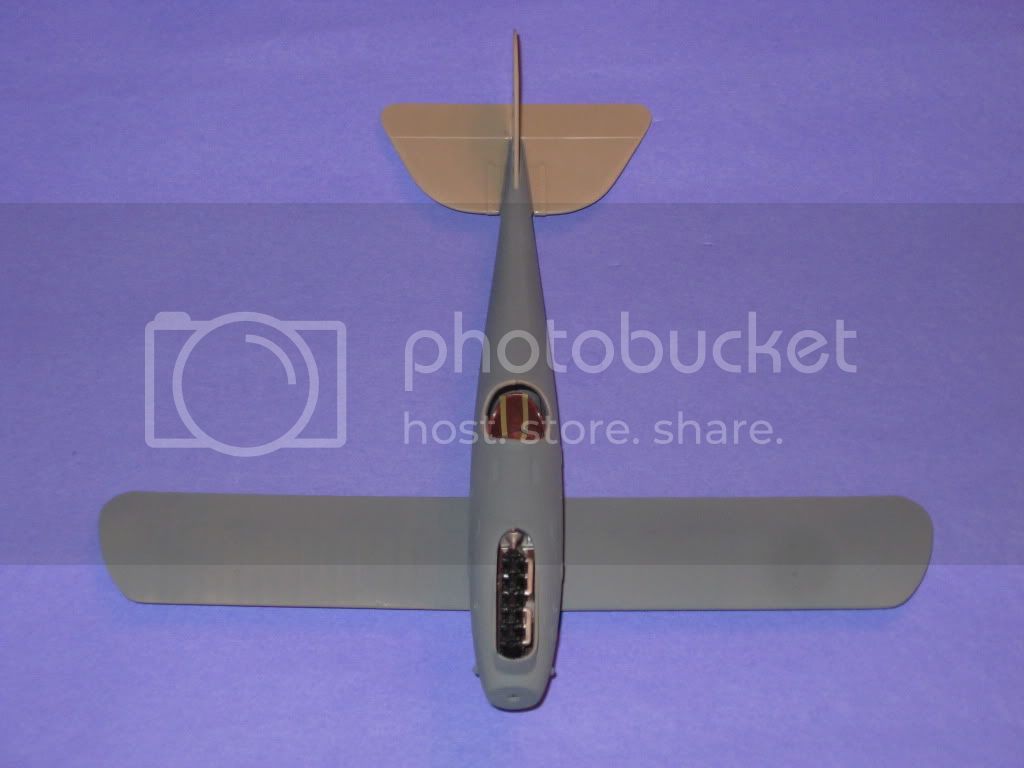
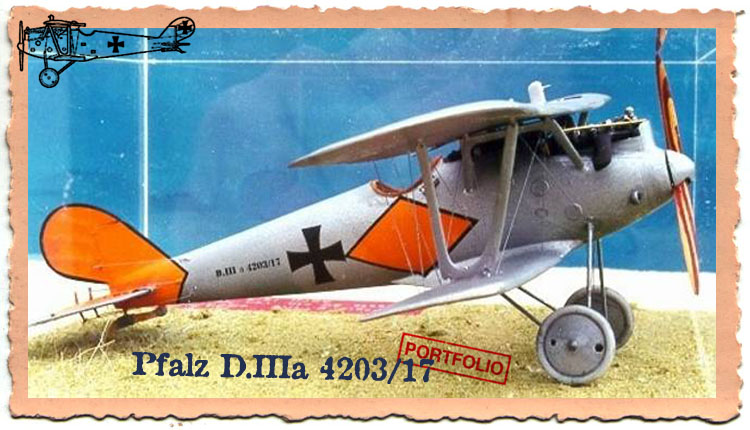
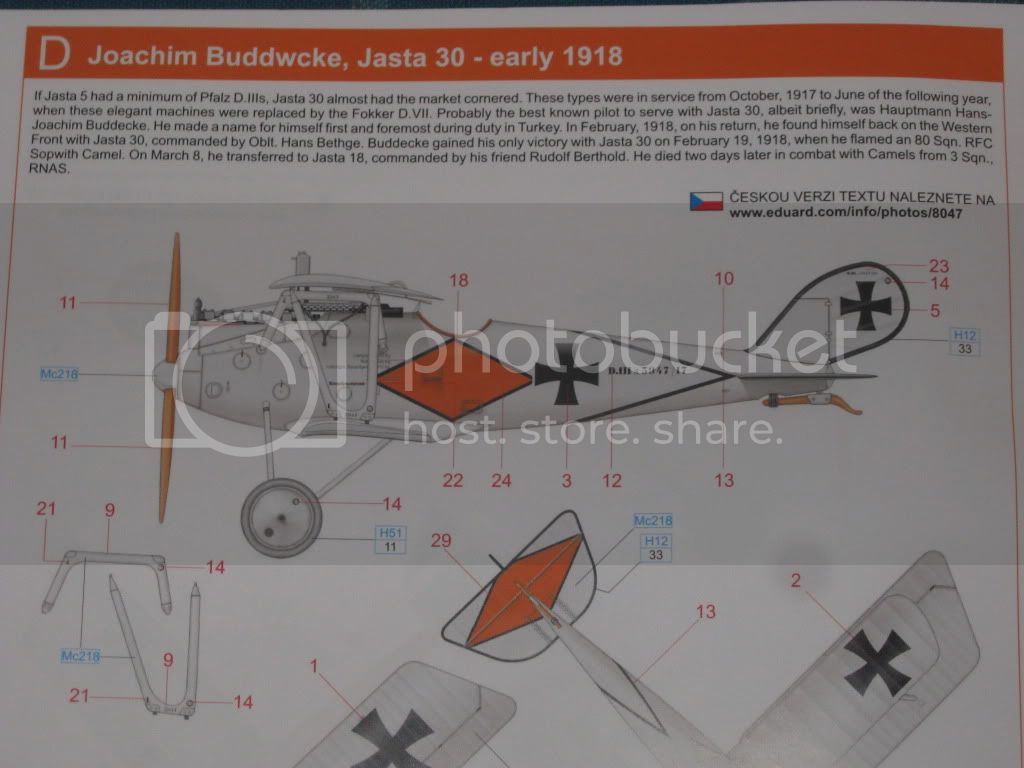
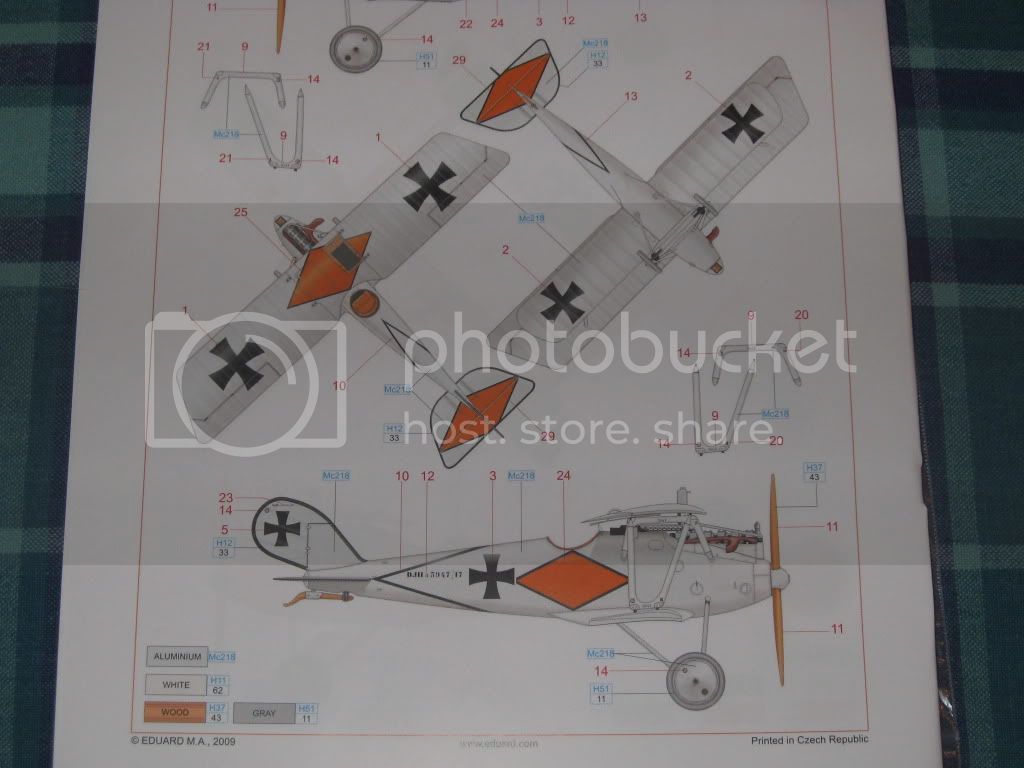
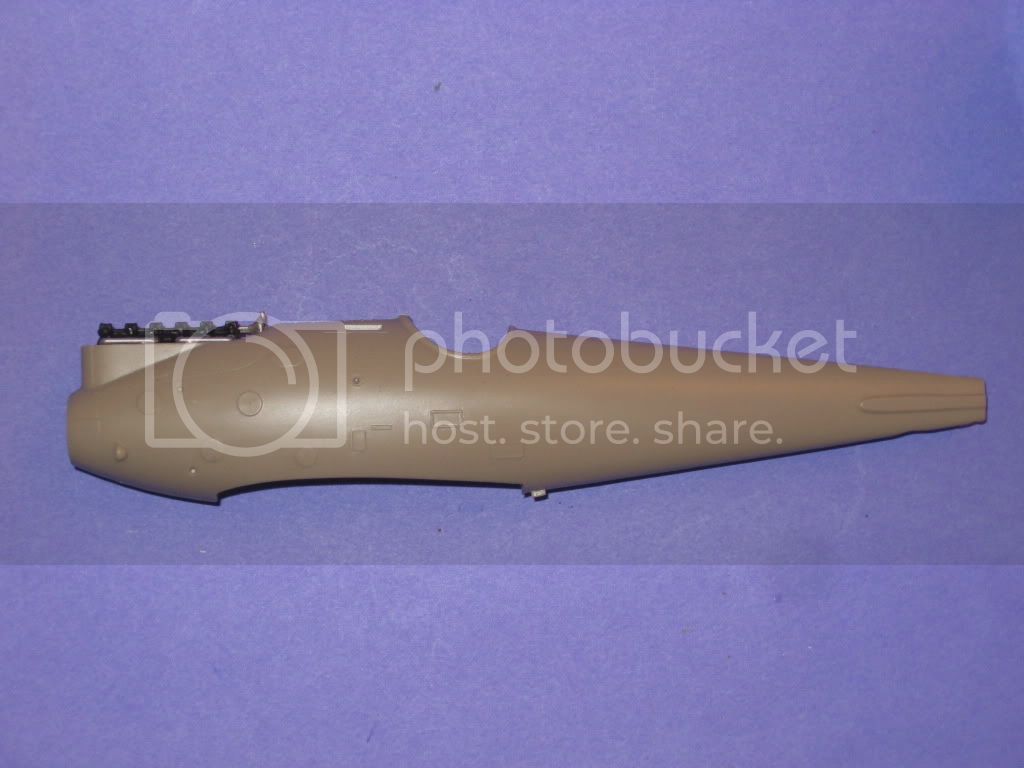
*Note The defining visual difference between early and late versions for the purpose of this review is that the early Pfalz D.IIIa types had angled lower wing tips. The late Pfalz D.IIIa versions had rounded lower wing tips. Another variation in the early or late versions was the ends of the cabane struts either being rounded or at a point. While there were actually other differences some of the model companies did not represent these in their molds and expected the modeler to modify their own efforts accordingly. As early as 1998 you couldn’t throw a paint tin in a hobby shop without hitting some author doing a build up of this ‘Bird of Prey’ for a magazine, club newsletter or internet posting.

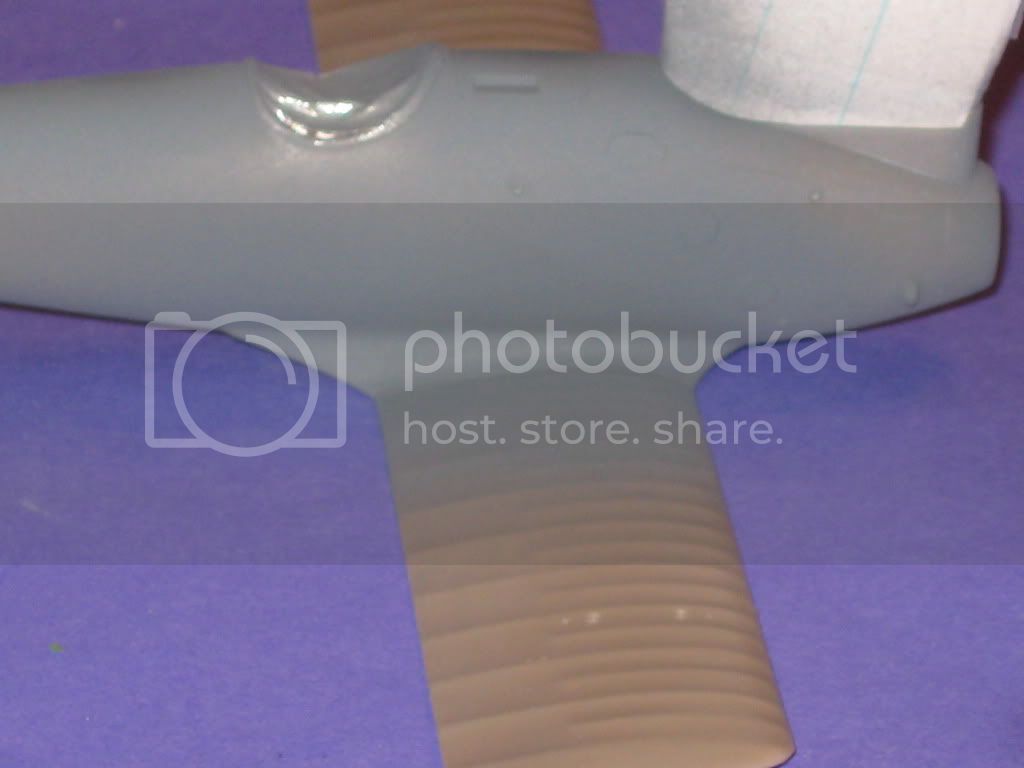
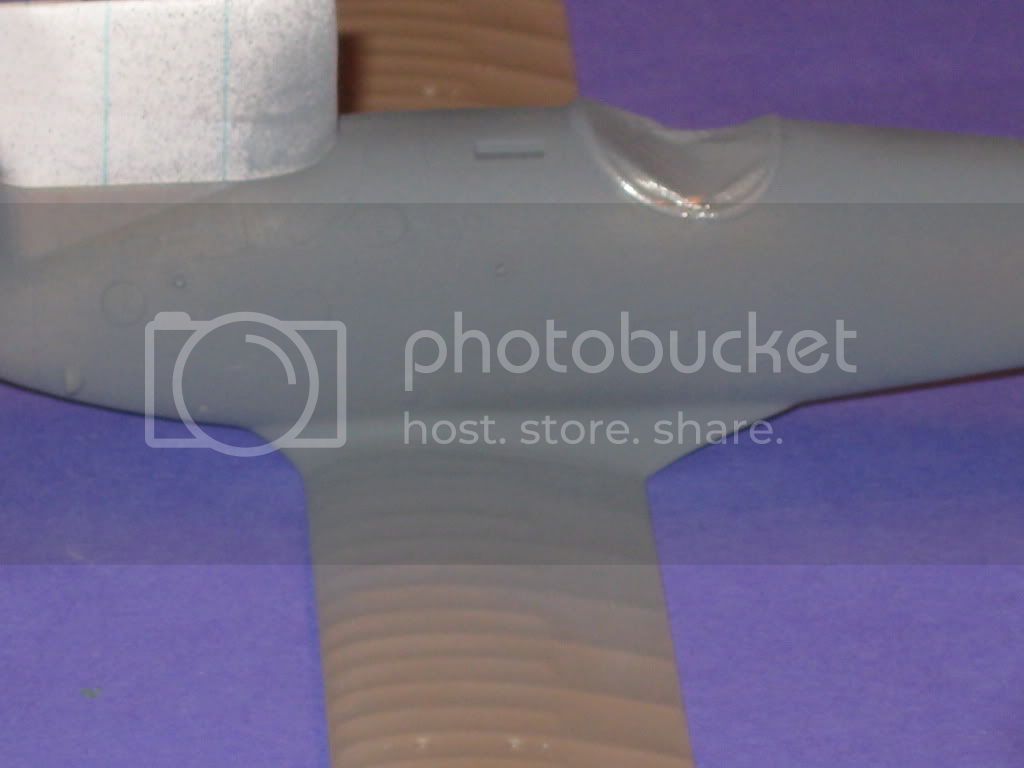
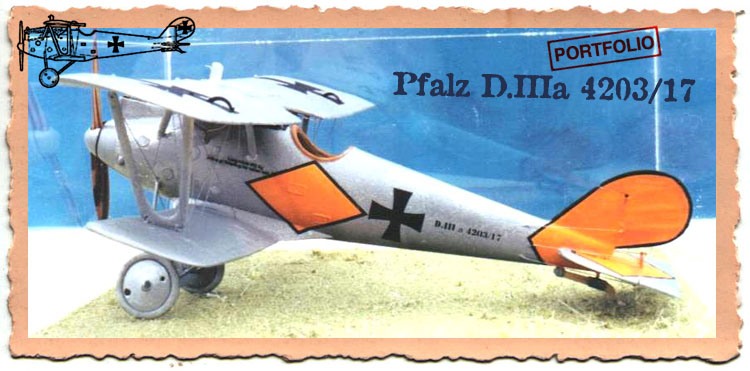
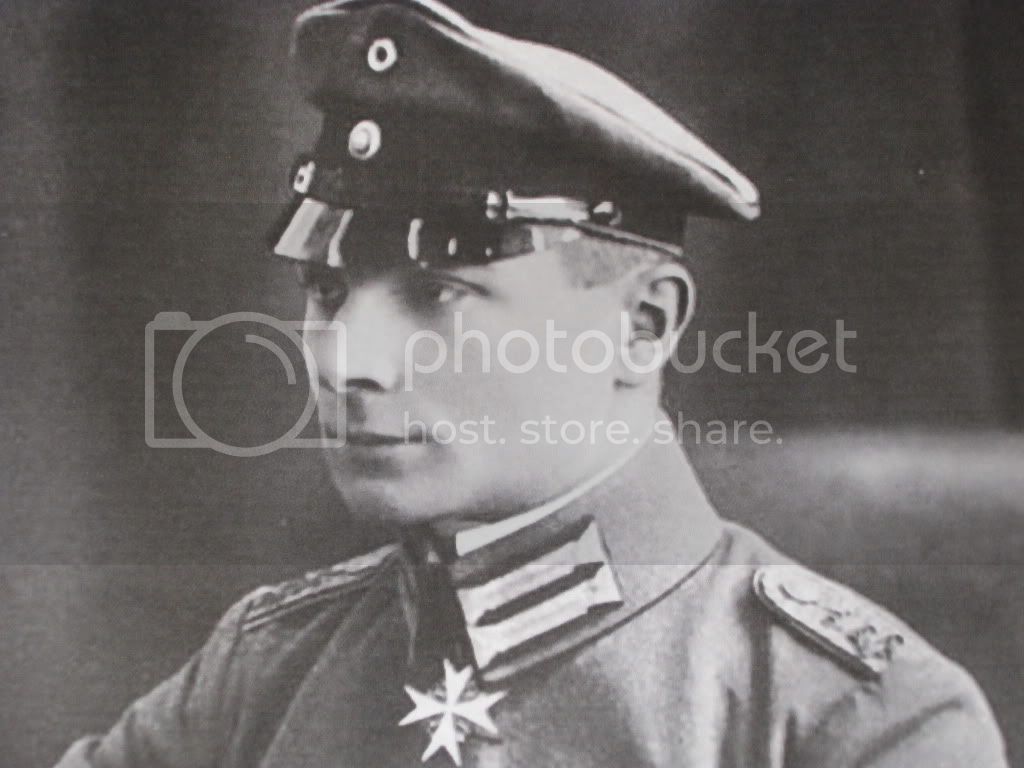
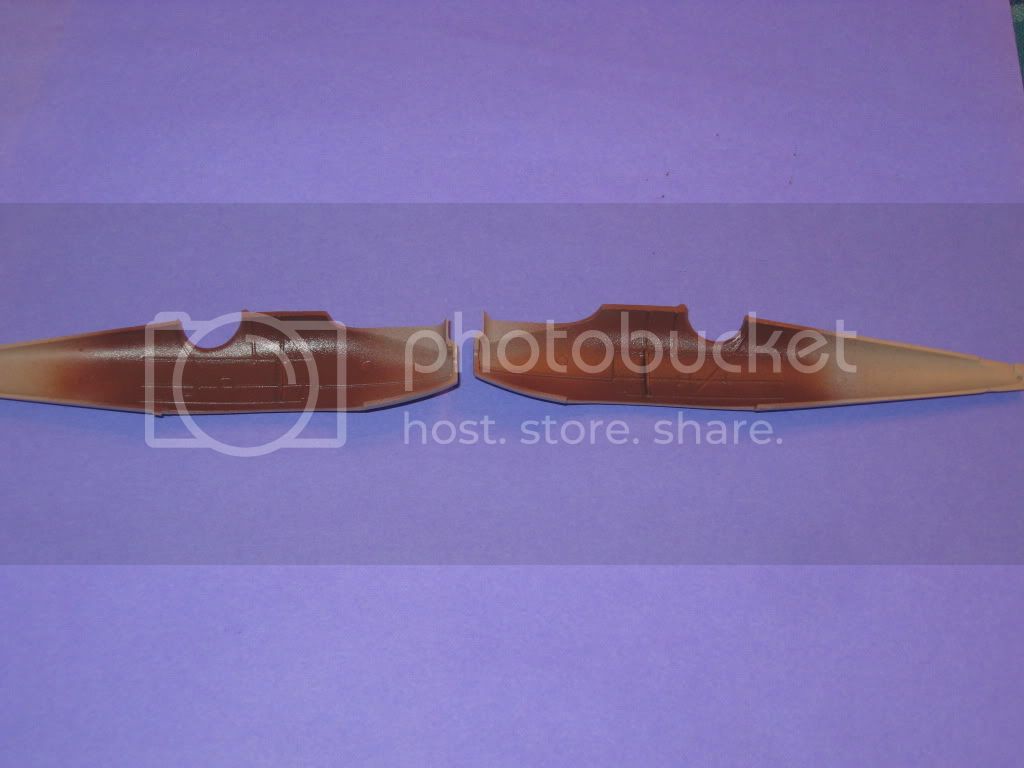
Eduard had issued kits # 8005, 8044, 8045 & 8046. Now the Dual Combo #8047. This was actually the first kit where Eduard began using its LED mold manufacture (computer guided lasers). The very first mold where Eduard stepped away from the early slush low pressure injected molding.

Listed References:
Colors by Greg Van Wyngarden, Over the Front Journal Vol 2 #4,Pp.371-5, 1987.
German Army Air Service in WWI by R. Rimell, Osprey Vintage Warbirds #2, 1985.
German Fighter Units June 1917-1918 by A. Imrie, Osprey, Airwar #17,1978.
Lafayette Foundation Archive, Denver CO. USA
Pfalz by P. Grosz & E. Krüger, WWI Aero Pub. inc. 1964.
Pfalz D.III by R. Rimell, Datafile WWI a/c Part 1, Windsock, Albatros Pub. Ltd. Pp.20-31, 1990.
Pfalz D.III by P. Gray, Profile Pub. #43, 1965.
Pfalz D.III Technical evaluation by ‘Flight’ Cross & Cockade USA Vol.1 #4, Pp. 29-53,1960.
Pfalz D.III 1370/17 evaluation by ‘Flight’ Cross & Cockade USA Vol. 2 #3 1961.
Pfalz D.IIIa by P. Grosz, Windsock Datafile #21, Albatros Pub. Ltd. 1989.
Pictorial History of the German Army Air Service by A. Imrie, Ian Allen Pub. 1971.
Scale Model Aircraft in Plastic Card by H.Woodman, Model & Allied Pub., 1975.
Scratchbuilding Techniques by Alan Clark, Scale Models Int. Pp174-5, 1990.
Spandau Machine Gun by David Watts, WWI Aero,1998.
World War One in Plastic by Brad Hansen, Great Auk Pub. 1979.

For some reference photos from Flight see my 1/32 Roden build Click here.

For further images see here.

Good luck to the builders.

JackFlash
_VISITCOMMUNITY
Colorado, United States
Joined: January 25, 2004
KitMaker: 11,669 posts
AeroScale: 11,011 posts
Posted: Monday, June 29, 2009 - 03:50 PM UTC
For some Pfalz D type builds please see my portfolio. here.

The Jasta 30 profiles have always been a favorite.


". . .Pfalz D.IIIa 4203/17 Pilot’s right full side view. This kit was done before the ‘Eduard’ Pfalz. D.IIIa kit was available. It started as an ‘Eduard’ 1/48 kit # 8005 Pfa. D.III. I modified it by introducing some of ‘Tom’s Modelworks’ resin pieces and ‘DML/ Dragon’ Spandaus to the build to bring it up to D.IIIa specs. The decals are from the old Aeromaster’s Pfalz sheet. Pt. I. . ."
JackFlash
_VISITCOMMUNITY
Colorado, United States
Joined: January 25, 2004
KitMaker: 11,669 posts
AeroScale: 11,011 posts
Posted: Monday, June 29, 2009 - 04:01 PM UTC
Since the box contents will be separated between Terri & Mark I thought you should see what you get when you crack the box open.

JackFlash
_VISITCOMMUNITY
Colorado, United States
Joined: January 25, 2004
KitMaker: 11,669 posts
AeroScale: 11,011 posts
Posted: Monday, June 29, 2009 - 04:12 PM UTC
I am actually proud to say that it was my research that got Eduard to see that Degelow's Pfalz D.IIIa was from his earlier time in Jasta 7 not in Jasta 40.

Marking Options:
Carl Degelow, Jasta 7 - March, 1918


Rudolf Berthold, Commander of JG 2 - 1918. The red & blue division should be further forward on this profile.


Jasta 5 - Spring, 1918


Joachim Buddecke, Jasta 30 - early 1918


Hans-Georg von der Marwitz, Jasta 30 - Spring 1918

thegirl
_VISITCOMMUNITY
Alberta, Canada
Joined: January 19, 2008
KitMaker: 6,743 posts
AeroScale: 6,151 posts
Posted: Monday, June 29, 2009 - 05:33 PM UTC
Thanks Stephen for the introduction and getting started .

I have started painting the interior halves . Dan San Abbott has pointed out as well with Stephen the interior was not left in it's natural wood state but is painted pale grey/blue . This includes the side walls , frame work , floor and instrument panel . Metal fixings are in a RLM 02 grey colour . No write material is available on this but from looking a photo's and taking other peoples thoughts into consideration , some folks would disagree with this .

I meet the subject both ways and painted the side walls pale grey/blue using vallejo . The frame work is pick out in wood ( I like the contrast ) as well as the floor .


I still have to add a clear coat and a few washes to bring better life into the parts and add depth to them followed a dusting of pastel chalk . ( never could do straight lines )
guitarlute101
_VISITCOMMUNITY
West Virginia, United States
Joined: December 18, 2006
KitMaker: 1,121 posts
AeroScale: 1,063 posts
Posted: Tuesday, June 30, 2009 - 03:13 PM UTC


I'd like to thank Rowan for giving Terri and I the oppurtunity to do the Dual build. I'll be modelling Hans-Joachim Buddecke's Plaz D.IIIa for my half of the build.

Here's a little history.

Hans-Joachim Buddecke was born in Berlin on August 22, 1890. Buddecke was the third aviator, after Max Immelmann and Oswald Boelcke, to earn the Blue Max (Pour le Mérite) during WW1. He was killed in action on March 10, 1918 while serving in Jasta 18 during an aerial combat above Lens, France falling to Sopwith Camels of Naval 3, RNAS.


I'll be modelling the Pfalz D.IIIa he flew while stationed briefly with Jasta 30.


Build pictures to follow soon.

Mark
guitarlute101
_VISITCOMMUNITY
West Virginia, United States
Joined: December 18, 2006
KitMaker: 1,121 posts
AeroScale: 1,063 posts
Posted: Wednesday, July 01, 2009 - 05:28 AM UTC


The structural details are molded on the inside of the fuselage sides. I painted the fuselage interior brown..........................


.............then masked the raised details with Jammydog tape...............................


..............painted the interior light grey, then removed the masking tape..............


I started on the cockpit flooring, flight controls and some engine controls that will be mounted on the fuselage sides................................................


more soon,

Mark
guitarlute101
_VISITCOMMUNITY
West Virginia, United States
Joined: December 18, 2006
KitMaker: 1,121 posts
AeroScale: 1,063 posts
Posted: Wednesday, July 01, 2009 - 07:19 AM UTC

Here's a little more work on the cockpit components.


I added control wires made from guitar strings.


Mark
guitarlute101
_VISITCOMMUNITY
West Virginia, United States
Joined: December 18, 2006
KitMaker: 1,121 posts
AeroScale: 1,063 posts
Posted: Wednesday, July 01, 2009 - 04:19 PM UTC


And here's the engine and cockpit.......................


Port and starboard sides................


And here's the engine and cockpit installed..............................


more soon,

Mark
Kornbeef
_VISITCOMMUNITY
England - South East, United Kingdom
Joined: November 06, 2005
KitMaker: 1,667 posts
AeroScale: 1,551 posts
Posted: Wednesday, July 01, 2009 - 11:13 PM UTC
Wow, flying ahead there Mark, wonderful attention to detail as always. I dont know enough about this A/C to comment on the interior colouring but it looks beautiful either way.


Come on Terri catch up there ...:-P

K
guitarlute101
_VISITCOMMUNITY
West Virginia, United States
Joined: December 18, 2006
KitMaker: 1,121 posts
AeroScale: 1,063 posts
Posted: Thursday, July 02, 2009 - 01:03 AM UTC

Thanks Keith. I just had a lot of time to work on it yeserday. Tuesdays and Wednesdays are my "weekend".

The kit goes together extremely well so far. I did a test fit of the fuselage halves and they match up nicely.

There are many opinions out there on the interior color. There are no surviving examples of the Pfalz and there are no descriptions of the interior color in any of the contemporary reports. There is no definite answer on the color because there is no hard evidence available. The kit instructions call for "grey" overall on the sides.

Mark
thegirl
_VISITCOMMUNITY
Alberta, Canada
Joined: January 19, 2008
KitMaker: 6,743 posts
AeroScale: 6,151 posts
Posted: Thursday, July 02, 2009 - 02:04 AM UTC
Go Mark Go , very nice so far . Like how you did the wood grain . It's nice to have that extra time to be able to sit in front of the wook bench . I did the same thing yesterday and was able to get a bit done on a few projects .

So with out further ado ( mustn't keep Keith waiting ) here are some pic's .......

First up is the floor with seat and flight controls added with ammo bin ............


Side walls with details added .............................


Still have some painting on the engine to do and two gauges to add in the cockpit along with seat belts . I want to do a little more weathering first though . I did have to redo the hand grips for the troddle grip was on the wrong side . This should be on the left hand side and Eduard does have this molded on the kit part . The left side you will see is different from the right . Also there should be a bulk head where the frame work ends in the cockpit and the seat belts attach to this . But Eduard didn't inclued this in the kit .
guitarlute101
_VISITCOMMUNITY
West Virginia, United States
Joined: December 18, 2006
KitMaker: 1,121 posts
AeroScale: 1,063 posts
Posted: Thursday, July 02, 2009 - 04:02 AM UTC
Very, very nice, Terri. 
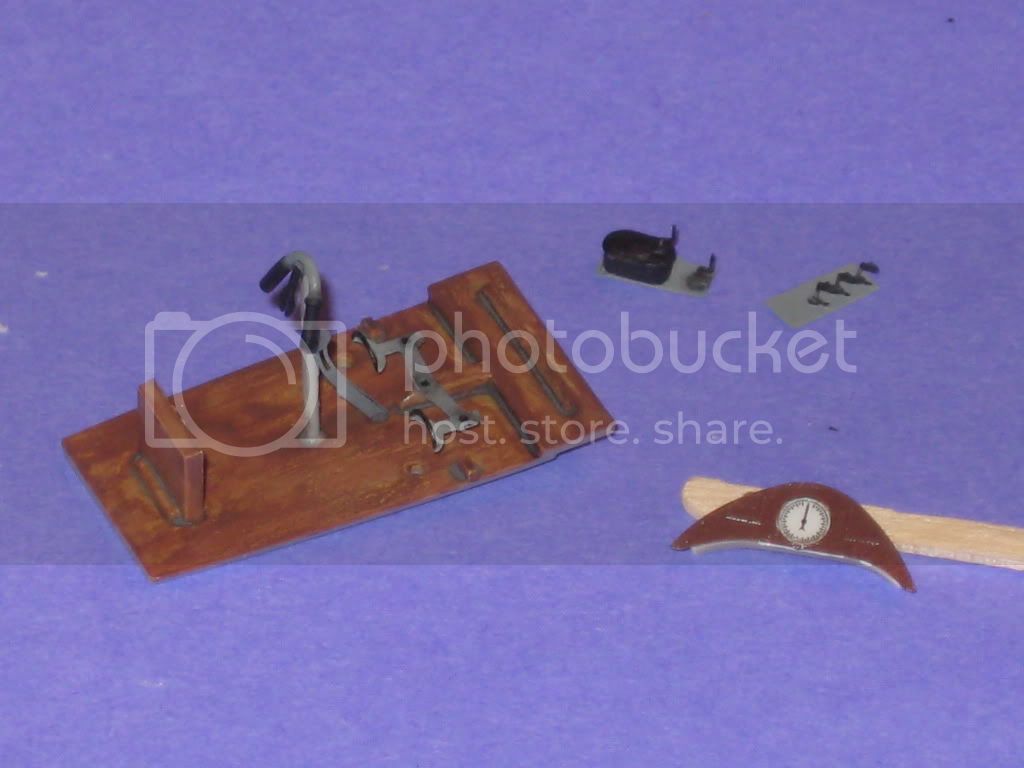
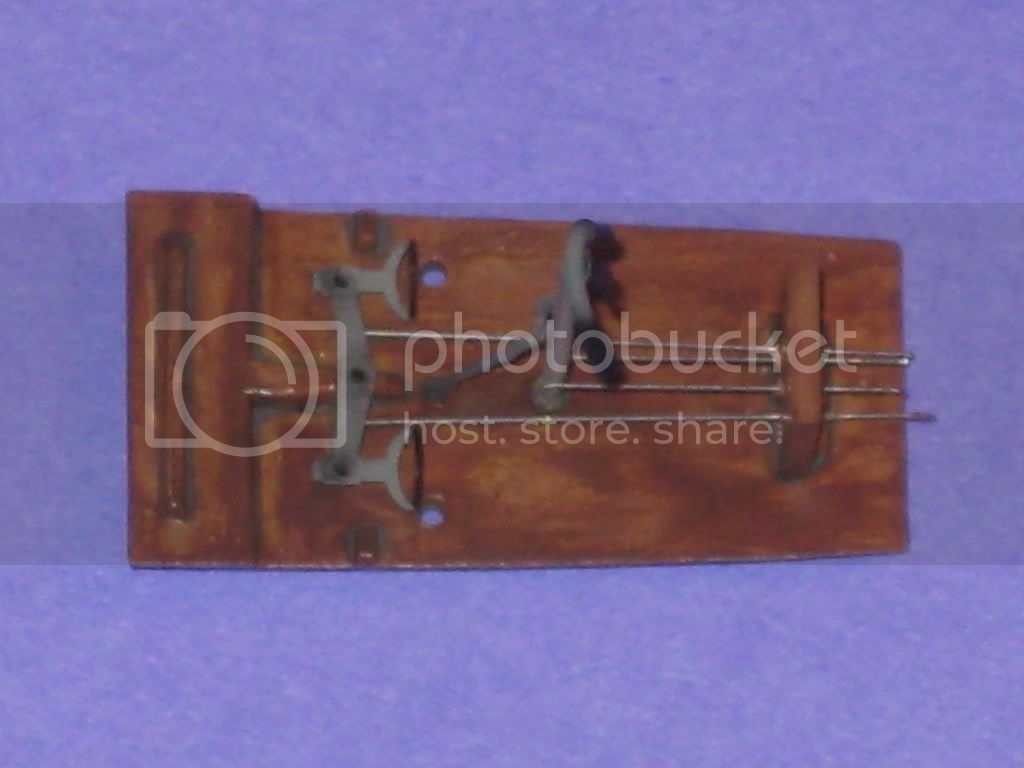
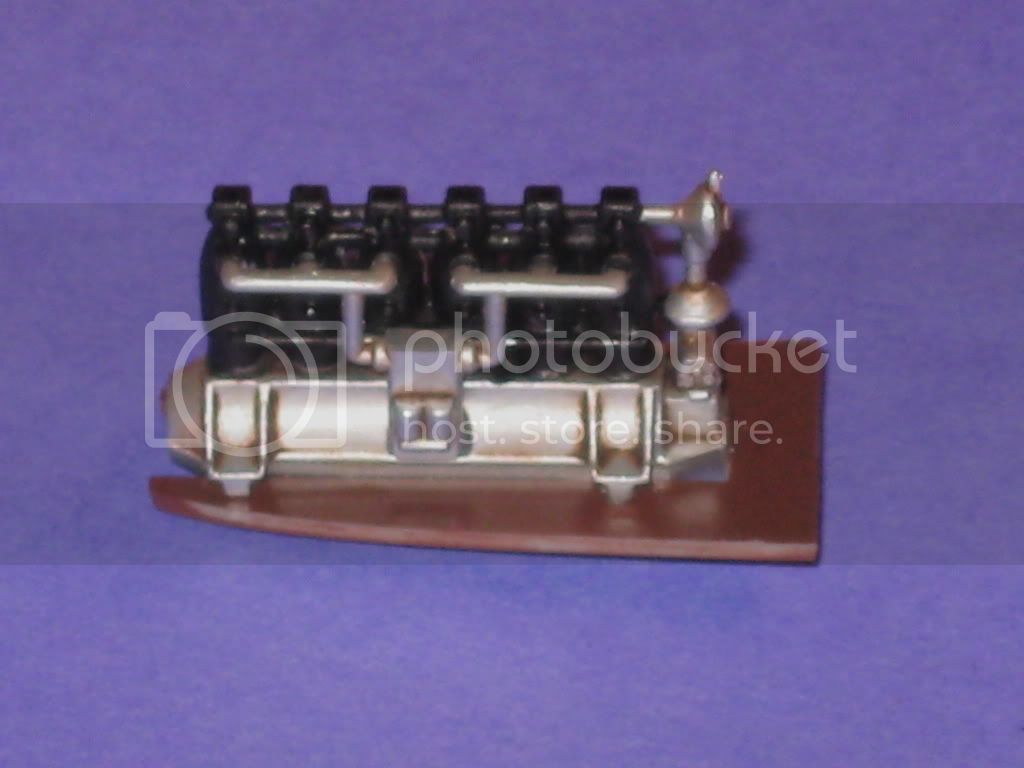
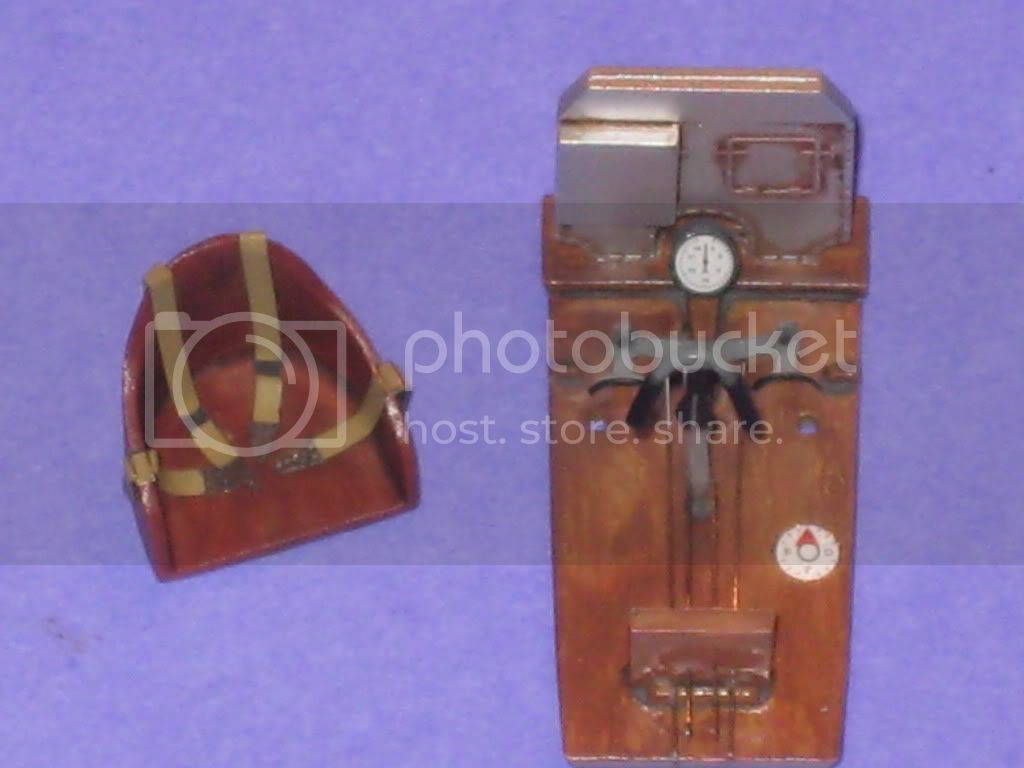
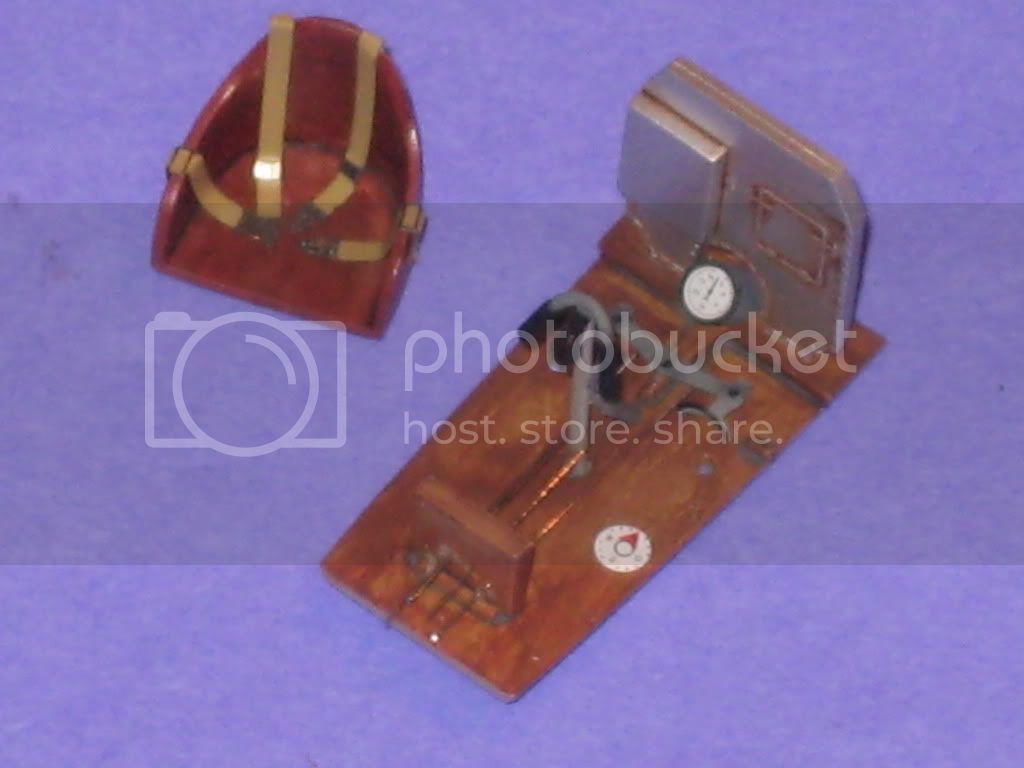
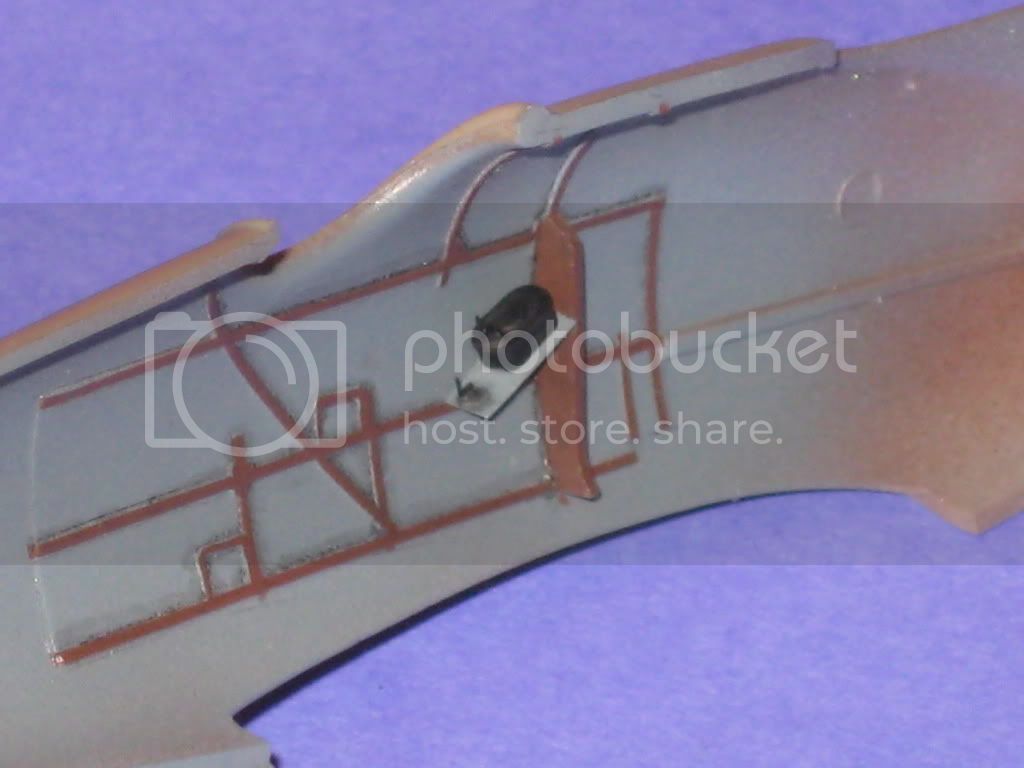
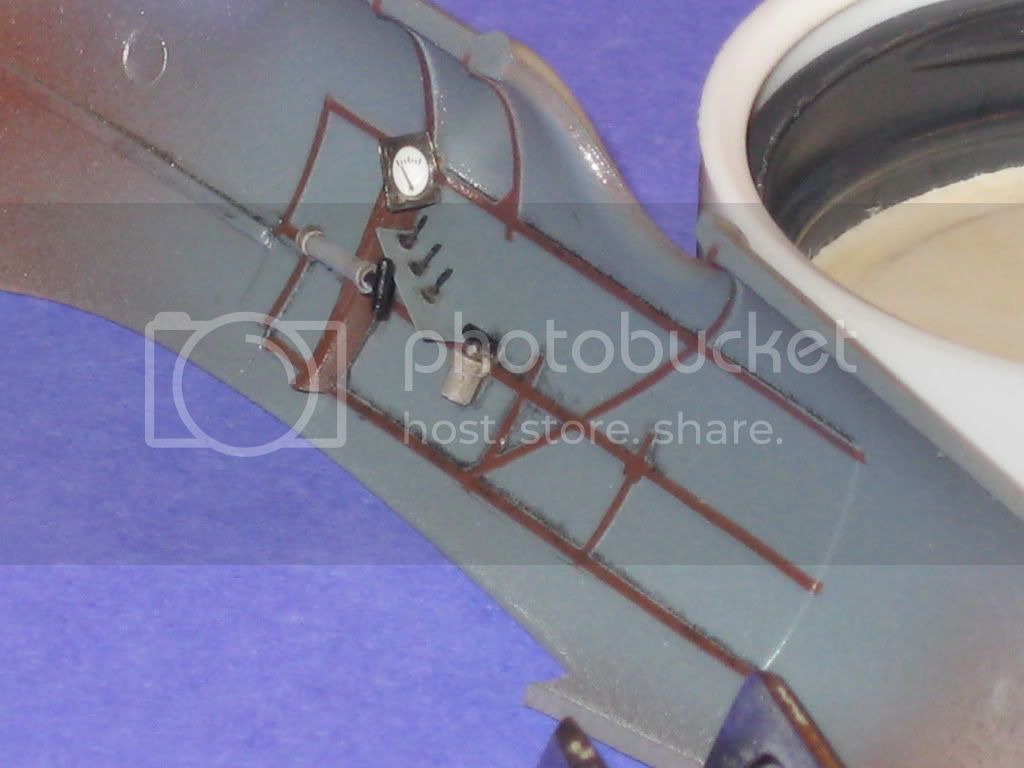
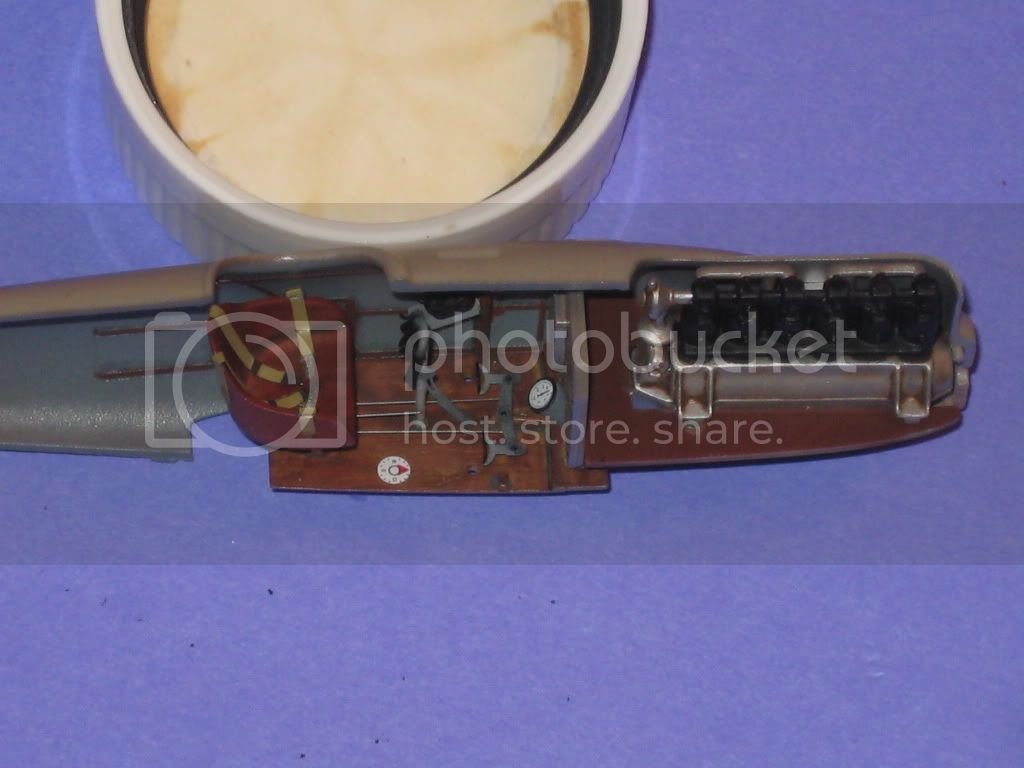
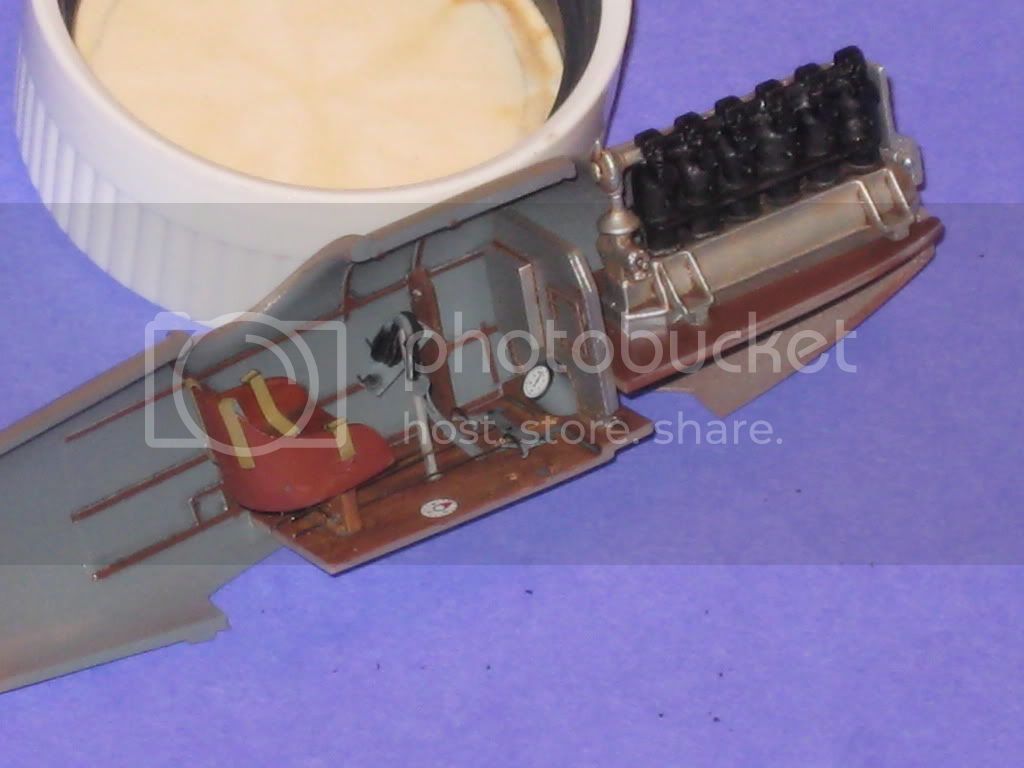
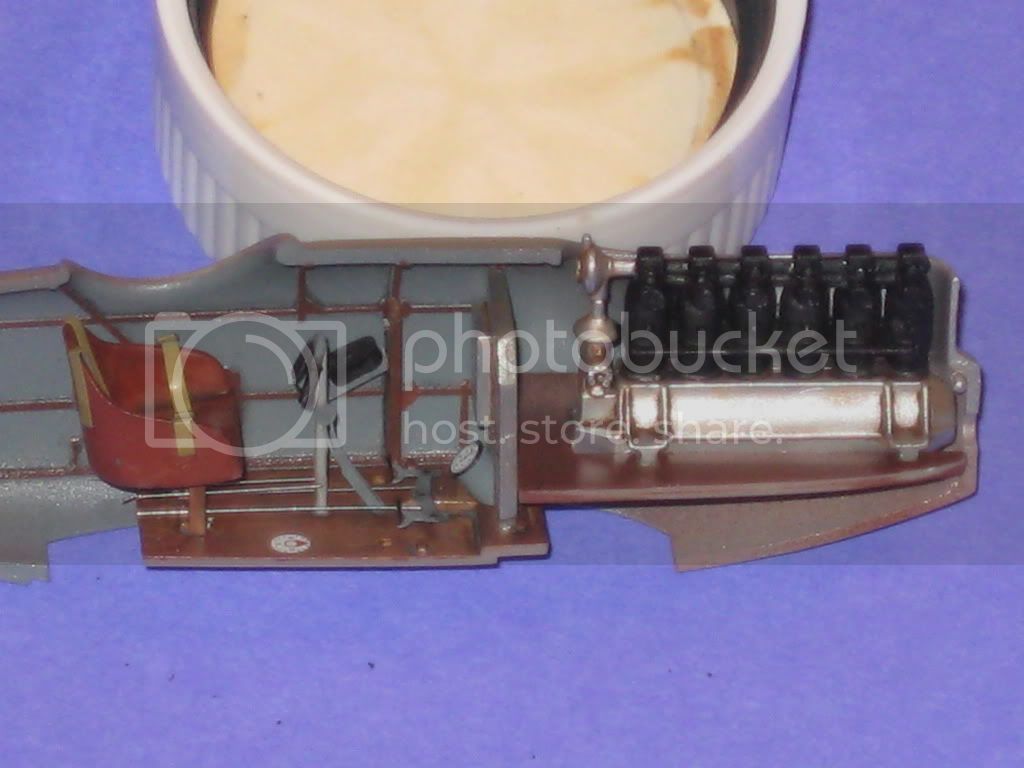
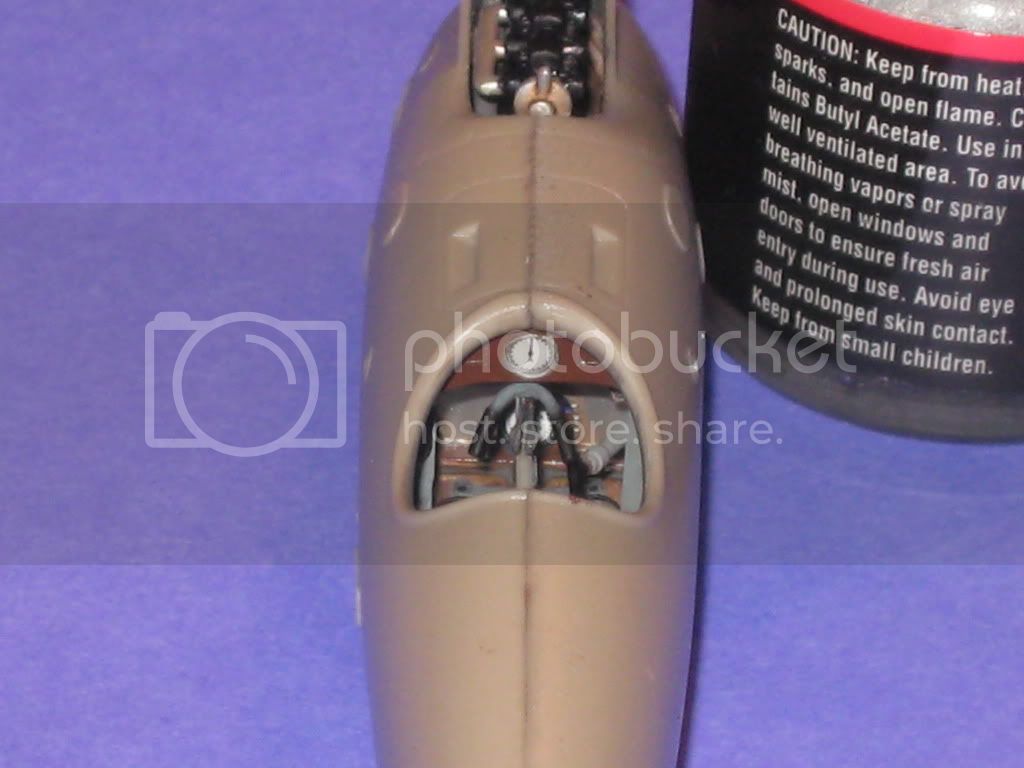
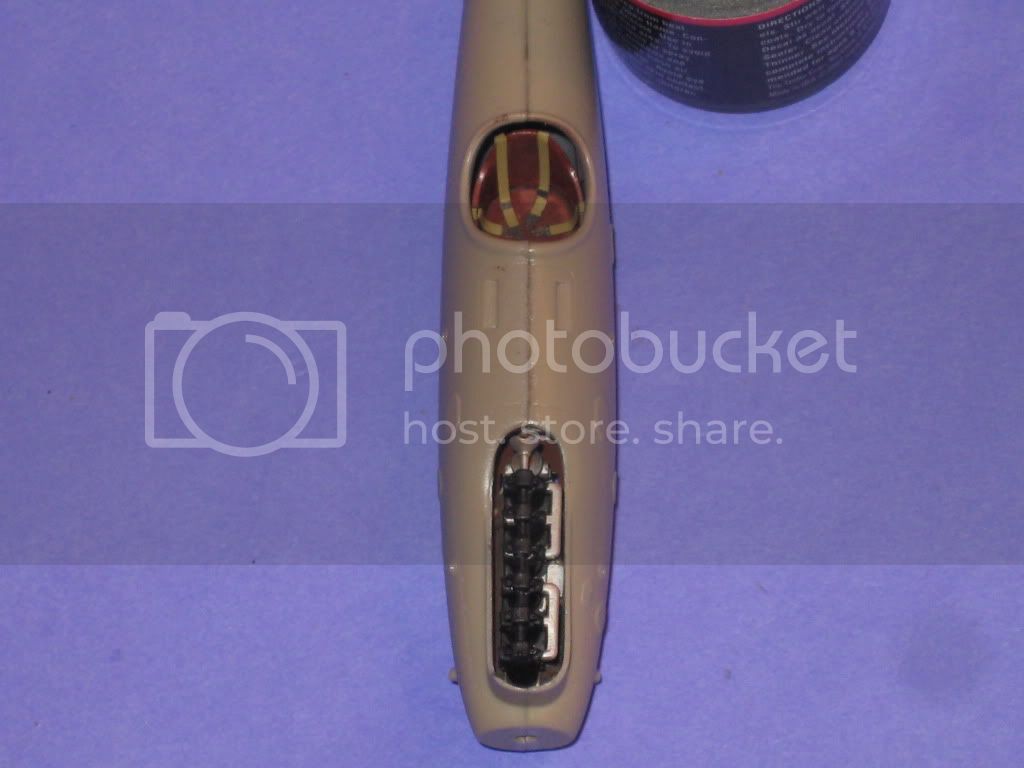
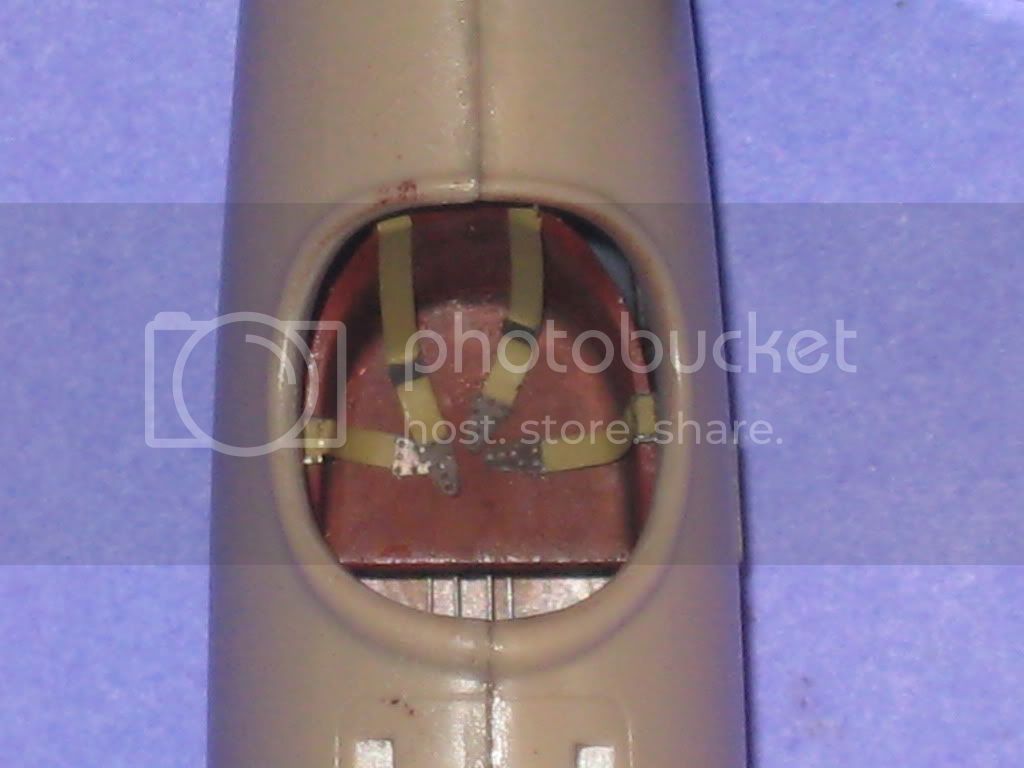
I like how the interior goes together so well and so quickly.
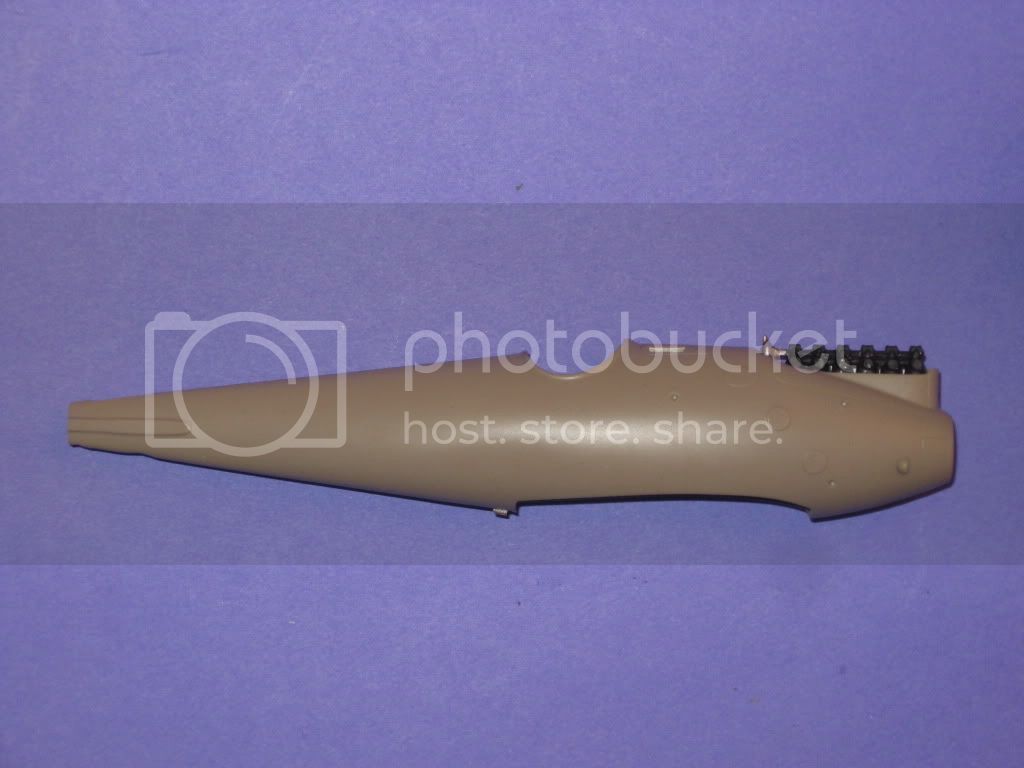
I've closed up the fuselage. Nice fit with no problems.


I also put the lower wing on. I drew a "T" on grid paper. I lined up the wing leading edge with the horizontal line and the fuselage seam with the vertical line, then glued it.


more soon.

Mark
JackFlash
_VISITCOMMUNITY
Colorado, United States
Joined: January 25, 2004
KitMaker: 11,669 posts
AeroScale: 11,011 posts
Posted: Thursday, July 02, 2009 - 05:53 AM UTC
Greetings all!

Team Pfalz is off to a decent start. To both builders - what about this build do you find most or least 
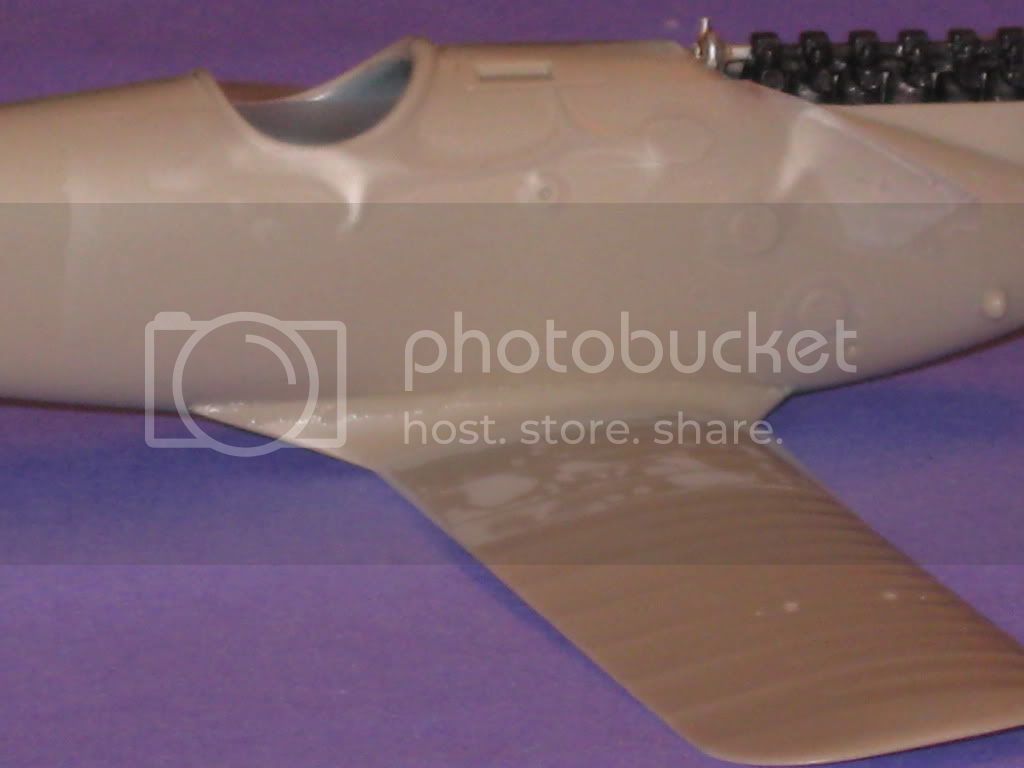
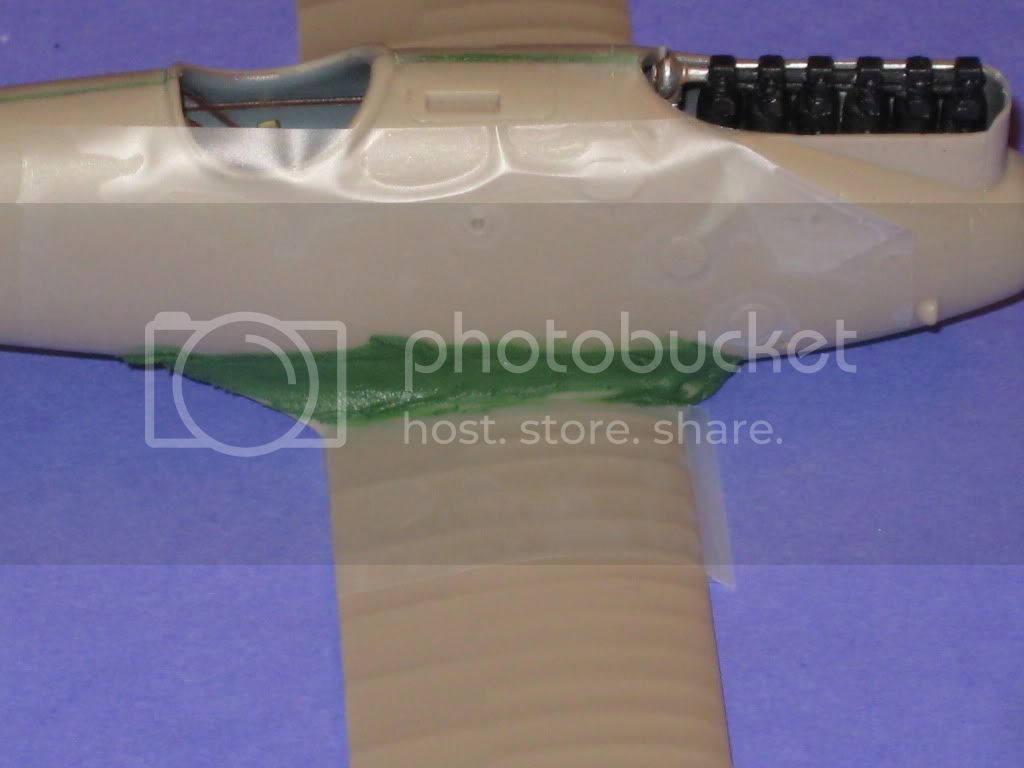
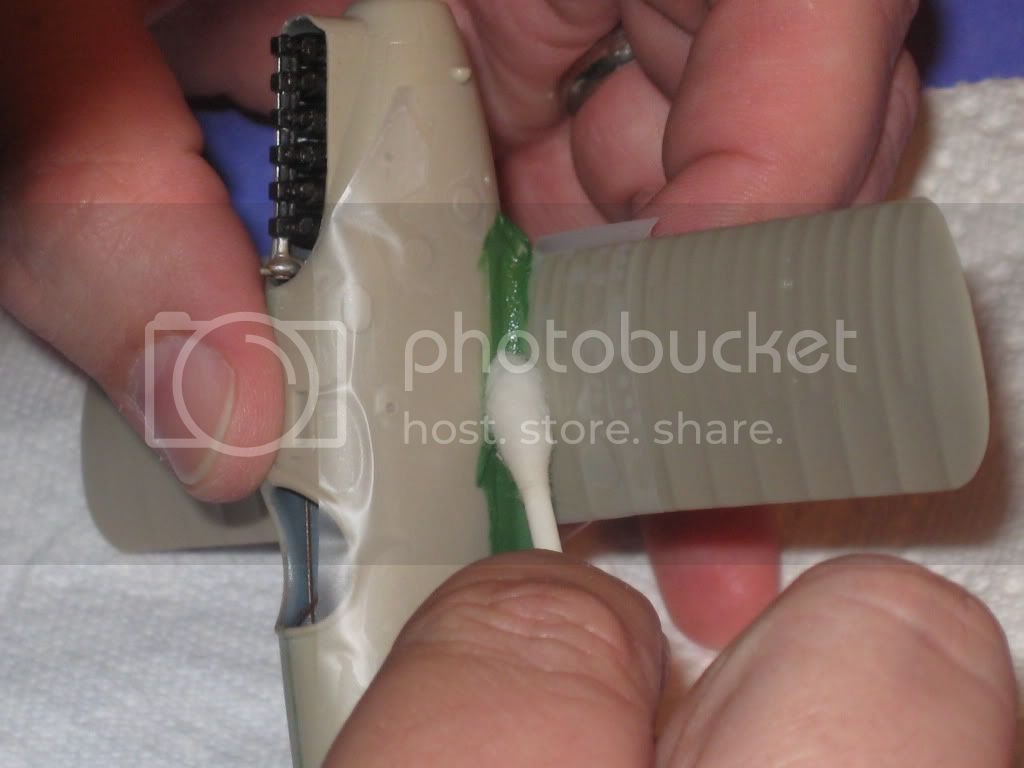
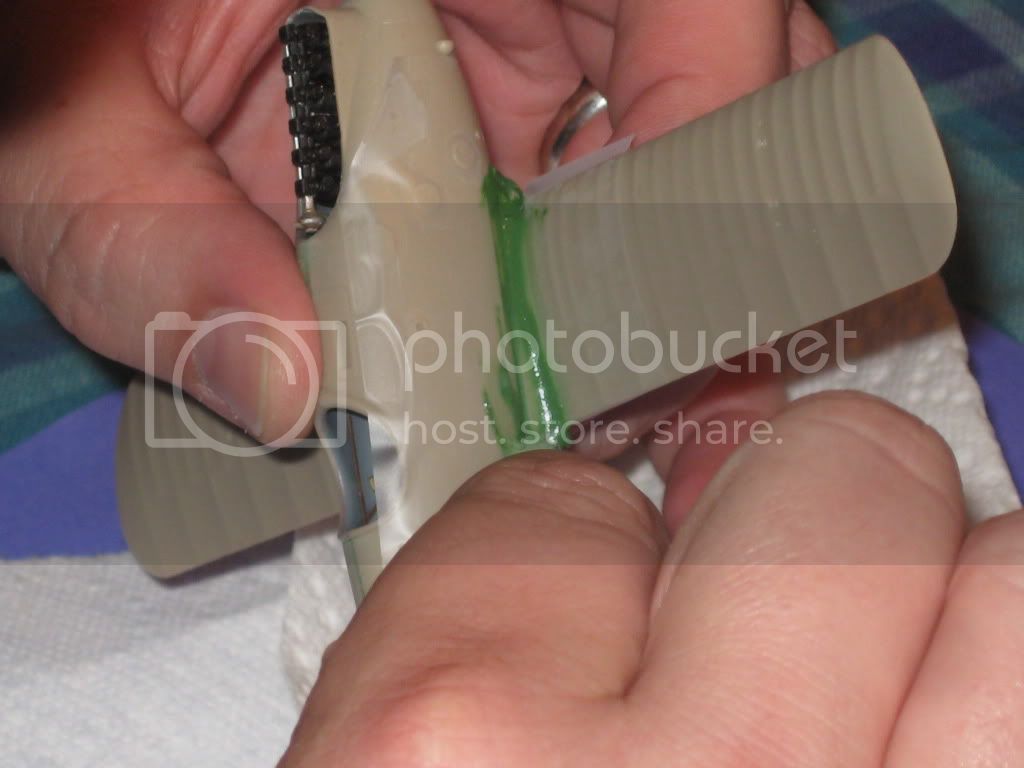
appealing as far as the kit plastic goes?
thegirl
_VISITCOMMUNITY
Alberta, Canada
Joined: January 19, 2008
KitMaker: 6,743 posts
AeroScale: 6,151 posts
Posted: Friday, July 03, 2009 - 02:26 AM UTC
While so far like Mark has said the kit falls together . Easy to follow instructions and nothing complex . It's a great starter kit for the beginner just getting into WWI subjects or if you want a simple build . The cockpit has good detail even with out the PE set however ; there are a few things which I think could have been added such as the rear bulk head behind the pilots seat . When you look into it , there is this empty hole there . Better seat support detail and a smaller seat , kit item is too wide . and the floor is to long . I do like how Eduard include the bell crank holes in the floor . A more accurate rudder bar, but that is just a small thing nothing major and something must modelers wouldn't be aware of . Tom's Modelworks has the correct one on the German interior set . All are easy fixes to do .
guitarlute101
_VISITCOMMUNITY
West Virginia, United States
Joined: December 18, 2006
KitMaker: 1,121 posts
AeroScale: 1,063 posts
Posted: Friday, July 03, 2009 - 02:50 AM UTC
Stephen,

Terri hit all of them on the head. I think the only other challenge to modellers will be blending the fuselage and lower wing with putty.

Mark
guitarlute101
_VISITCOMMUNITY
West Virginia, United States
Joined: December 18, 2006
KitMaker: 1,121 posts
AeroScale: 1,063 posts
Posted: Friday, July 03, 2009 - 04:45 AM UTC

Speaking of blending the fuselage and lower wing, here's how I did it. First I masked off the wing and fuselage up to the point where I wanted the putty to go. I was out of Tamiya masking tape so I used regular clear tape. (I don't recommend clear tape because it leaves behind spots of sticky residue when you peel it off.)


Then I applied Tamiya "Green Putty" to the seam......................


Then I used "Q tips" dipped in acetone to wipe off excess putty . Don't soak the Q tip too much, the acetone can eat away a little of the plasic if you scrub too hard.


And here it is with the tape removed......................


After it dried overnight, I masked off the cockpit and engine and sprayed the seams with grey primer (Tamiya grey) to check to see how they turned out.


.............sanded any out any imperfections..................................


Resprayed primer and there you have it..........................................


I'll be painting the fuselage silver so any seams will show if I'm not careful.

Mark.
tachikawa
_VISITCOMMUNITY
Washington, United States
Joined: June 07, 2008
KitMaker: 40 posts
AeroScale: 31 posts
Posted: Friday, July 03, 2009 - 05:27 AM UTC
Ummm...question here? So the interior side walls were wooden then painted over with gray except for some of the framework?

Glenn
JackFlash
_VISITCOMMUNITY
Colorado, United States
Joined: January 25, 2004
KitMaker: 11,669 posts
AeroScale: 11,011 posts
Posted: Friday, July 03, 2009 - 05:55 AM UTC

Quoted Text

Ummm...question here? So the interior side walls were wooden then painted over with gray except for some of the framework? Glenn


My opinion is they used what was available in the stores of the factory. We have seen images that give impressions of variations. Interior walls of the wood lath fuselage shells could be silbergraü and the support formers could be varnished wood. Or it all could be silbergraü or it all could be varnished wood. These items were built up on jigs and interior pieces were painted before assembly. The blue gray was seen on the Pfalz D.XII. I am of the opinion that slibergraü was used on the Pfalz D.III and most if not all of the Pfalz D.IIIa types.
guitarlute101
_VISITCOMMUNITY
West Virginia, United States
Joined: December 18, 2006
KitMaker: 1,121 posts
AeroScale: 1,063 posts
Posted: Friday, July 03, 2009 - 07:03 AM UTC
Glenn,

One of the theories is that the interior of the fuselage "shell" was painted before attached to the framework. The way Terri and I did it is just one possibility. The interior could have been all varnished wood or all grey (including the framework and instument panels). I picked the grey interior/varnished framework variation to give the interior some differing color to the sidewalls. Like I said in a prevoius post there are no surviving examples or contemporary reports of the interior color to give us a definite answer. The best we have are educated guesses.

Here's a little more progress. The wing blended into the fuselage.................


Rudder and tailplane installed....................


Mark
JackFlash
_VISITCOMMUNITY
Colorado, United States
Joined: January 25, 2004
KitMaker: 11,669 posts
AeroScale: 11,011 posts
Posted: Friday, July 03, 2009 - 01:55 PM UTC

Quoted Text

Glenn, One of the theories is that the interior of the fuselage "shell" was painted before attached to the framework. . . .


Slight qualification Mark. We have images of the Pfalz D. XII assembly lines and this is precisely how they did it. Since the earlier Pfalz D.III & IIIa types were made in the same manner we assume these sequences to be self evident. Also we have images in the public domain that show the cockpit interior edges that support our assumptions.
thegirl
_VISITCOMMUNITY
Alberta, Canada
Joined: January 19, 2008
KitMaker: 6,743 posts
AeroScale: 6,151 posts
Posted: Friday, July 03, 2009 - 02:39 PM UTC
Looking good Mark !

Glenn , it's really up to the modeler on how they want to interrupt the cockpit colours . Until there is actual proof and just not from photo's ( nothing wrong with photo's they give us great guide lines to go by ) however, supplies at the time could have been running low hence giving us different solutions for the colours we see in the photo's . Time on the production run could have restored to cutting corners .......................etc , etc .................We just really don't know ! Mark and Stephen views are very note worthy . So really there is no right or wrong just your imagination ..............................

The Silbergrau which is matt silver-grey it was a mix of pale grey , carbon black and zinc oxide . Aluminium powder was added to this giving it that colour . It was also found to have good waterproofing qualities


I'm building one for the stripes in the sky campaign and the cockpit is done up in wood grain has a nice warm feeling to it .
JackFlash
_VISITCOMMUNITY
Colorado, United States
Joined: January 25, 2004
KitMaker: 11,669 posts
AeroScale: 11,011 posts
Posted: Friday, July 03, 2009 - 05:34 PM UTC
I thought you might appreciate an image of a recent replica built by a new company in Germany.

The initial roll out took place in early 2005. The rudder cross is slightly out of position but the over-all finish can thoroughly be appreciated.

Arron Weaver of Over the Front fame is quoted as saying.
". . .Pfalz is in business again for several years now. Their business is as a contractor of components to Airbus and other clients. They supplied the metal conduit tubing for the electrical, fire safety, hydraulic, and other systems for the new Airbus 380.

Sorry, no more new series-built Pfalz D.III/IIIas from the parent company. It is meant as an historical object to show the company's proud past. . ."
thegirl
_VISITCOMMUNITY
Alberta, Canada
Joined: January 19, 2008
KitMaker: 6,743 posts
AeroScale: 6,151 posts
Posted: Saturday, July 04, 2009 - 05:48 PM UTC
Now that is one beautiful aircraft !

Was able to get some more time in front of the work bench and progress continues ...........
Rest of the cockpit is now finished and the halves joined together . For the seem in the wing root area I went a different approach to it . When the surfaces where mated using a touch and flow tenax was run into it . pressing hard until the glue had set . Following this Vallejo plastic putty was applied . When this was dry I wipe off any access putty with Tamiya thinner and q-tips . The rudder was also flared in as well using the same method . The rear stabilizer control surface was drop down a few degrees . It really pays to get a tight fit with the wing root to the fuselage by do so you will have less to fill and sand . The fuselage seems required no putty was need at all . They did get a light sanding and then re polished to a shine once more . Over all I'm really impressed on how well the parts fit still. The molds are over 10 years old now and still holding up to the test of time .


More to come ........................................
 _GOTOTOP