

NO WAY HARM!
Don't give up on your build! All any of us can do is give it our best when we take on a build. The first kit I built last year after not having built an aircraft since the early 80's looked pretty good to me at the time, just two builds later I can see the many errors that I actually made on it... but I don't like it any less! It was an important step in getting better at building better models.
Time and again I have been reminded that the true reason to build is for the pure joy of it! I think we all strive for the one true perfect build, but does it really exist? Don't see it as a waste of resources but as a valid use of the best materials that you can get your grubby mits on!!!
I'm looking forward to seeing your build!
Air Campaigns
Want to start or join a group build? This is where to start.
Want to start or join a group build? This is where to start.
Hosted by Frederick Boucher, Michael Satin
OFFICIAL: Afterburner Decals Campaign

SellSword

Joined: February 15, 2010
KitMaker: 167 posts
AeroScale: 141 posts
Posted: Tuesday, March 08, 2011 - 10:27 AM UTC

DutchBird

#068

Joined: April 09, 2003
KitMaker: 1,144 posts
AeroScale: 123 posts

Posted: Tuesday, March 08, 2011 - 10:39 AM UTC
Quoted Text
NO WAY HARM!
Don't give up on your build! All any of us can do is give it our best when we take on a build. The first kit I built last year after not having built an aircraft since the early 80's looked pretty good to me at the time, just two builds later I can see the many errors that I actually made on it... but I don't like it any less! It was an important step in getting better at building better models.
Time and again I have been reminded that the true reason to build is for the pure joy of it! I think we all strive for the one true perfect build, but does it really exist? Don't see it as a waste of resources but as a valid use of the best materials that you can get your grubby mits on!!!
I'm looking forward to seeing your build!
Ray,
I am definitely not giving up on my build. But I think the decal set too beautiful to completely use it when I have a partial alternative available. I will build the aircraft and try and get the best result possible. Hence my decision to use the other goodies. And who know, perhaps the paint job turns out that good that I will decide to use the set...
Cheers,
Harm

StefanBuysse

Joined: December 18, 2010
KitMaker: 32 posts
AeroScale: 27 posts
Posted: Monday, March 14, 2011 - 07:34 AM UTC
Hi,
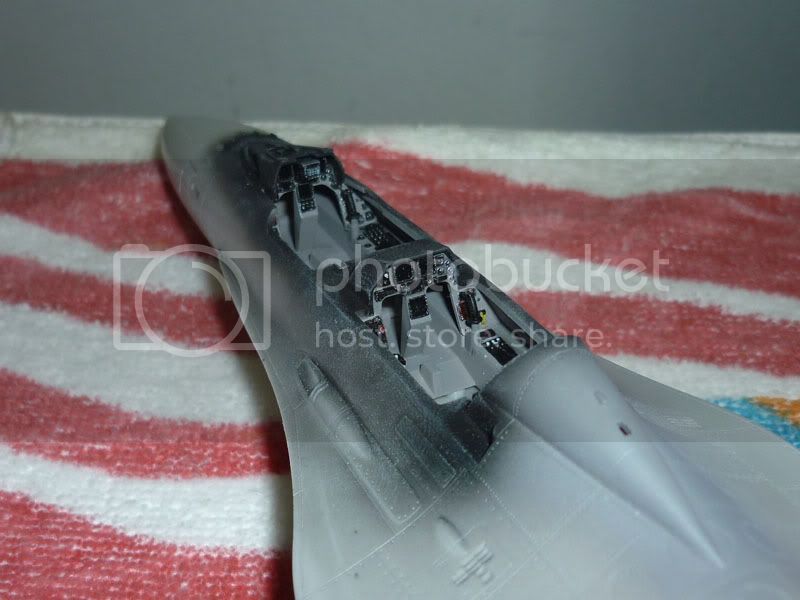
Here's the pilot in his office.
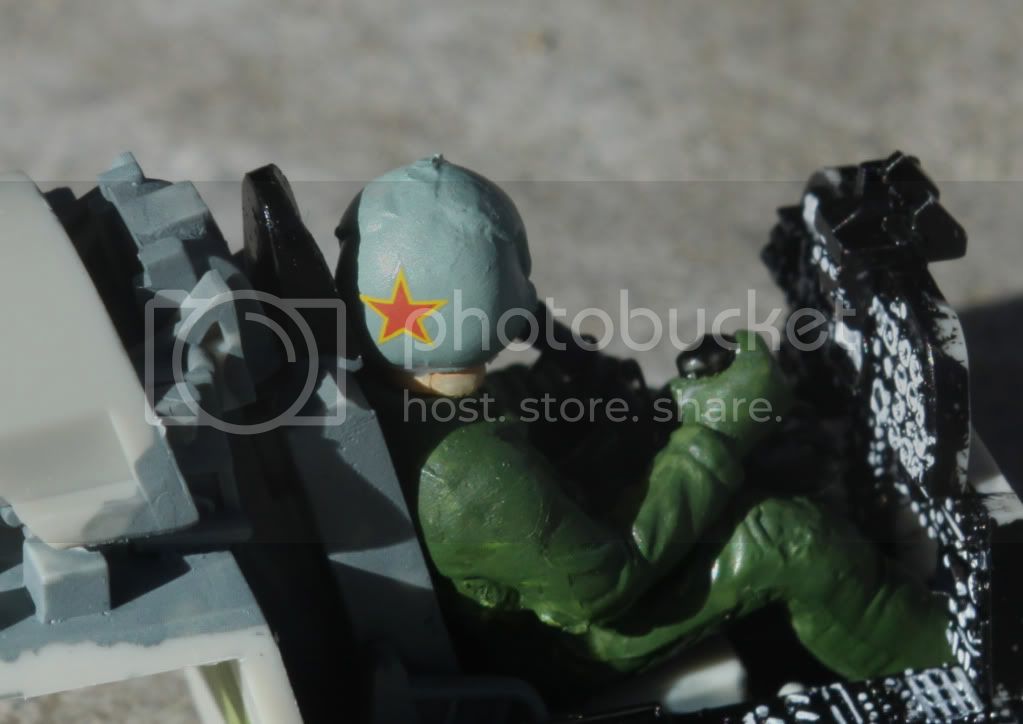
Cheers, Stefan.
Here's the pilot in his office.
Cheers, Stefan.

litespeed


Joined: October 15, 2009
KitMaker: 1,976 posts
AeroScale: 1,789 posts
Posted: Monday, March 14, 2011 - 08:30 AM UTC
Excellent Stefan, I like it!
All the best.
tim
All the best.
tim

warreni

Joined: August 14, 2007
KitMaker: 5,926 posts
AeroScale: 2,201 posts

Posted: Monday, March 14, 2011 - 07:12 PM UTC
Hi all. Here is an in progress shot for my F-16 grey jet..
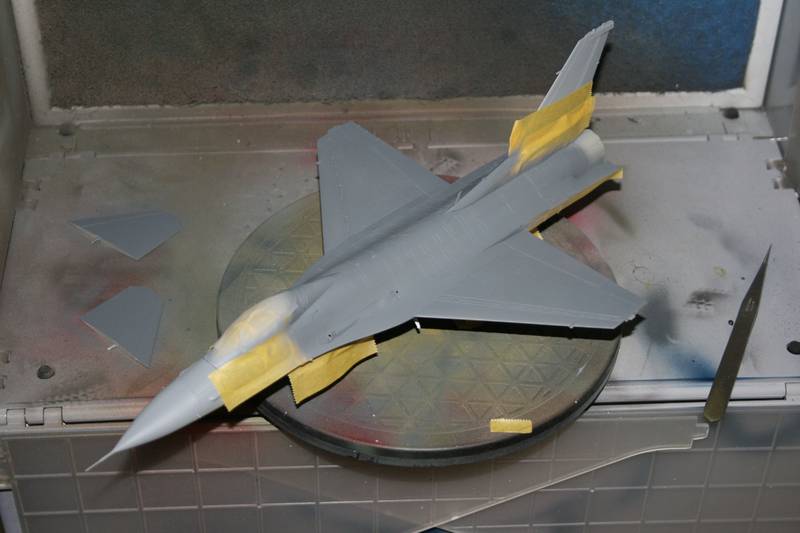
Should be finished soon.
Should be finished soon.

madcat911

Joined: April 09, 2007
KitMaker: 112 posts
AeroScale: 31 posts
Posted: Tuesday, March 15, 2011 - 05:51 AM UTC
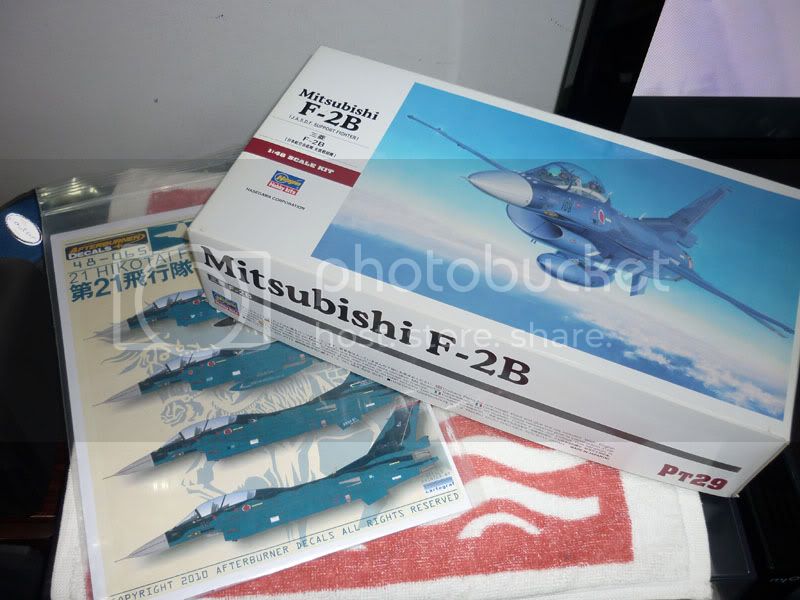
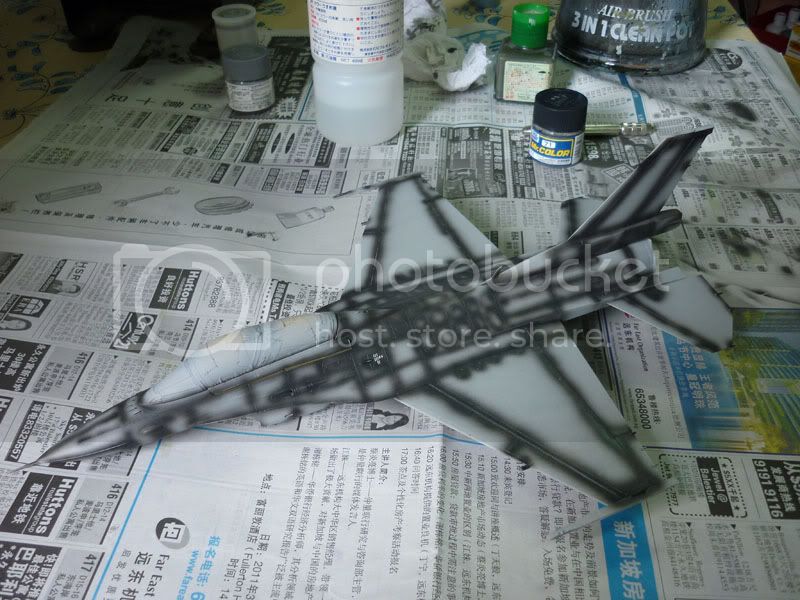
Here is my entry for this campaign. I'll be building a Hasegawa F-2B and using ABD's 21st Hikotai sheet. As some of you might know, the 21st Hikotai is stationed at Matsushima AFB in Miyagi, Japan. The airbase was hit by last week's tsunami and it destroyed several of the F-2s on the ground there. Thus, this build will also be a tribute to those directly affected by the Japanese quake.
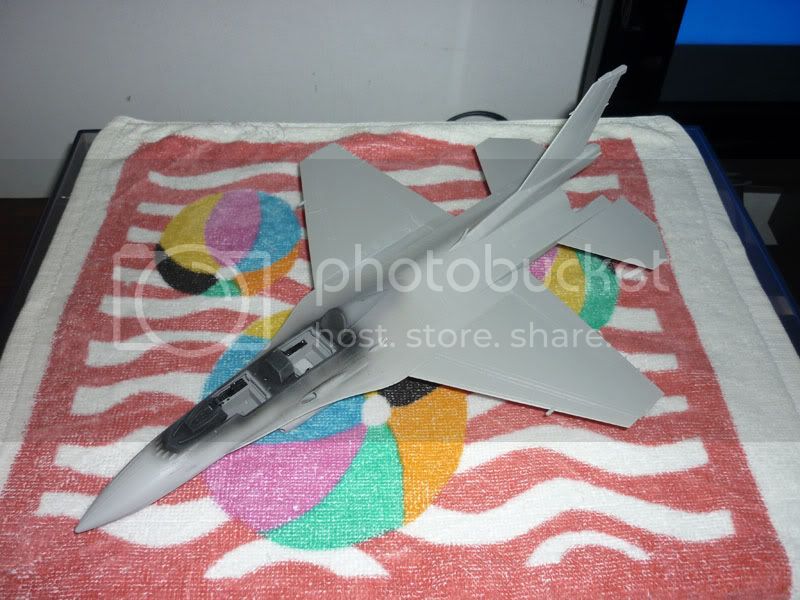
On to the build. Except for the decals which were donated by Tim, this will be an OOB build. So far, I have painted the cockpit and intakes and have closed up the fuselage.
Mark
On to the build. Except for the decals which were donated by Tim, this will be an OOB build. So far, I have painted the cockpit and intakes and have closed up the fuselage.
Mark
warreni
Joined: August 14, 2007
KitMaker: 5,926 posts
AeroScale: 2,201 posts
Posted: Tuesday, March 15, 2011 - 07:31 AM UTC
Funny how they call it a Mitsubishi F-2 when it is obviously just a modified F-16...
litespeed
Joined: October 15, 2009
KitMaker: 1,976 posts
AeroScale: 1,789 posts
Posted: Tuesday, March 15, 2011 - 07:54 AM UTC
Quoted Text
Funny how they call it a Mitsubishi F-2 when it is obviously just a modified F-16...
It is odd!
All the best.
tim
warreni
Joined: August 14, 2007
KitMaker: 5,926 posts
AeroScale: 2,201 posts
Posted: Thursday, March 17, 2011 - 04:48 PM UTC
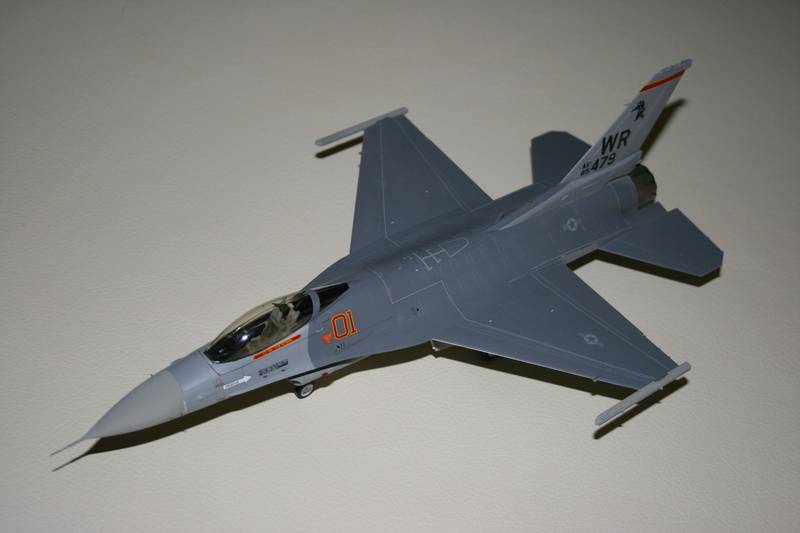
Oops.. I is finished...
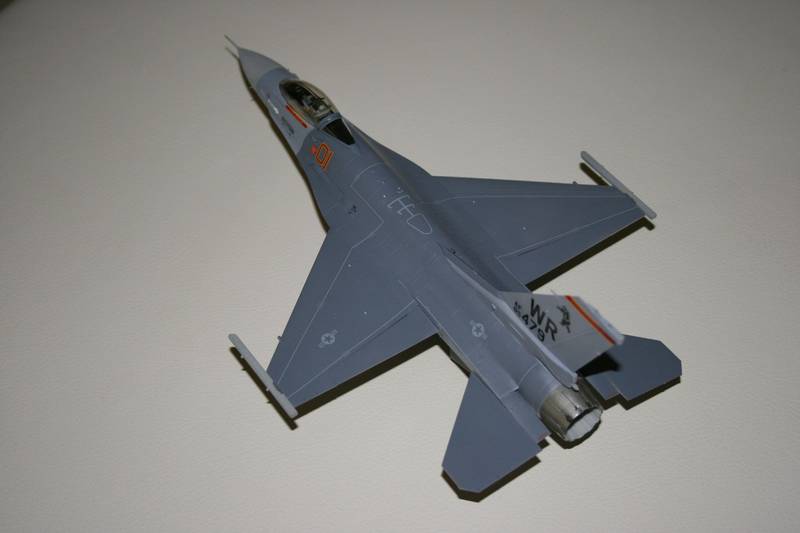
The oops is because this is supposed to be cross-entered in the Fighting Falcon Campaign, but it hasn't even started yet..
Anyway, kit is a 1/48 Tamiya F-16C/N Aggressor kit. I also got the upgrade kit from Tamiya and of course used the Bentwater Aggressors decal sheet from Afterburner.
The kit went together like a charm. Upgrade kit was fine except that it is hard to bend the PE as it is made of stainless Steel (I think). I didn't try annealing it.
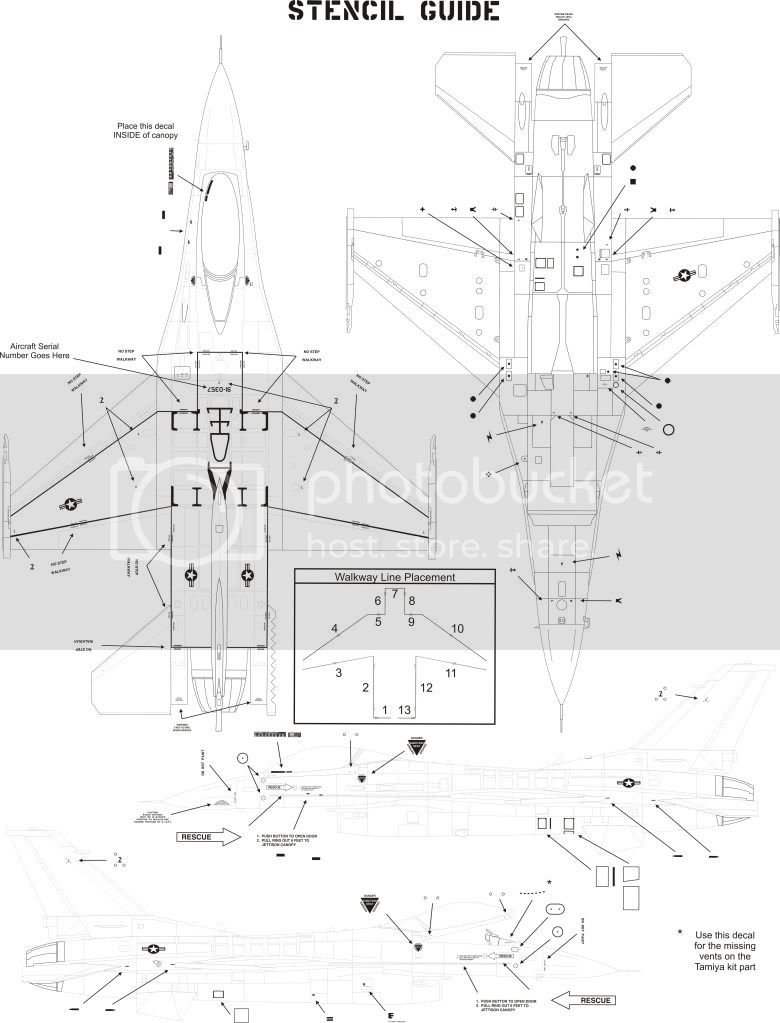
The decals.. Hmmm.. The decals themselves are made by Cartograf in Italy and are great. Go on without a drama. Respond well to Micro-Set to snuggle down into panel lines etc.. However, I don't like criticising something I got for nix, but the instructions are not very good. None of the decals are numbered on the sheet except for the seperate sheet of walkway decals, and some of the decals are not mentioned on the placement guides at all... So you have to go over the colour sheets and make sure you have them all.
There are two full sets of stencils and markings for lots of electric jets. But I have some stencils left over as I have no idea where they go on the jet as they are not shown anywhere.
But be that as it may it was a nice build with very little Mr Surfacer needed, if any, and as I mentioned the decals themselves are great.
Thanks to the Boss for sending me the decals in the first place.
The oops is because this is supposed to be cross-entered in the Fighting Falcon Campaign, but it hasn't even started yet..
Anyway, kit is a 1/48 Tamiya F-16C/N Aggressor kit. I also got the upgrade kit from Tamiya and of course used the Bentwater Aggressors decal sheet from Afterburner.
The kit went together like a charm. Upgrade kit was fine except that it is hard to bend the PE as it is made of stainless Steel (I think). I didn't try annealing it.
The decals.. Hmmm.. The decals themselves are made by Cartograf in Italy and are great. Go on without a drama. Respond well to Micro-Set to snuggle down into panel lines etc.. However, I don't like criticising something I got for nix, but the instructions are not very good. None of the decals are numbered on the sheet except for the seperate sheet of walkway decals, and some of the decals are not mentioned on the placement guides at all... So you have to go over the colour sheets and make sure you have them all.
There are two full sets of stencils and markings for lots of electric jets. But I have some stencils left over as I have no idea where they go on the jet as they are not shown anywhere.
But be that as it may it was a nice build with very little Mr Surfacer needed, if any, and as I mentioned the decals themselves are great.
Thanks to the Boss for sending me the decals in the first place.
AfterburnerDecals
Joined: October 13, 2010
KitMaker: 29 posts
AeroScale: 28 posts
Posted: Friday, March 18, 2011 - 07:33 PM UTC
Quoted Text
Oops.. I is finished...
The oops is because this is supposed to be cross-entered in the Fighting Falcon Campaign, but it hasn't even started yet..
Anyway, kit is a 1/48 Tamiya F-16C/N Aggressor kit. I also got the upgrade kit from Tamiya and of course used the Bentwater Aggressors decal sheet from Afterburner.
The kit went together like a charm. Upgrade kit was fine except that it is hard to bend the PE as it is made of stainless Steel (I think). I didn't try annealing it.
The decals.. Hmmm.. The decals themselves are made by Cartograf in Italy and are great. Go on without a drama. Respond well to Micro-Set to snuggle down into panel lines etc.. However, I don't like criticising something I got for nix, but the instructions are not very good. None of the decals are numbered on the sheet except for the seperate sheet of walkway decals, and some of the decals are not mentioned on the placement guides at all... So you have to go over the colour sheets and make sure you have them all.
There are two full sets of stencils and markings for lots of electric jets. But I have some stencils left over as I have no idea where they go on the jet as they are not shown anywhere.
But be that as it may it was a nice build with very little Mr Surfacer needed, if any, and as I mentioned the decals themselves are great.
Thanks to the Boss for sending me the decals in the first place.
I hate hearing that...we are pretty proud of the instructions actually.
Which markings are left over?
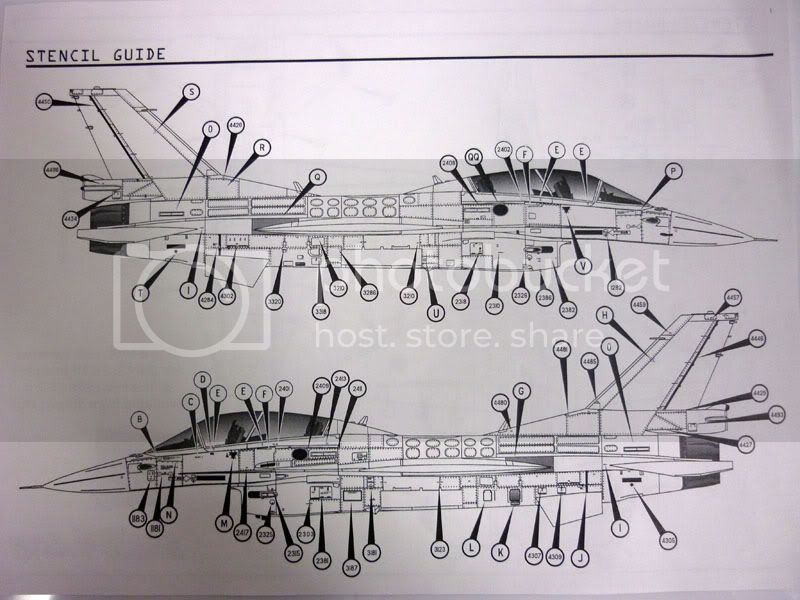
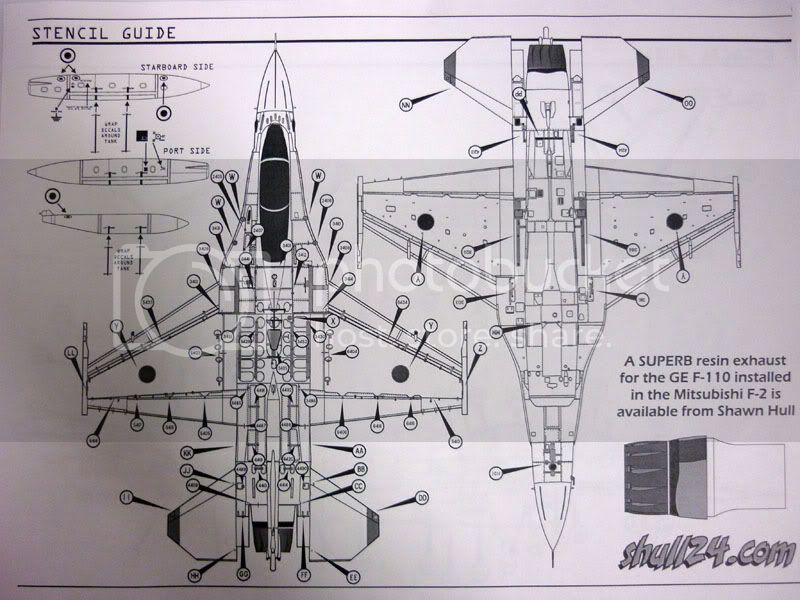
We don't number them normally, and that's a conscious space saving decision. The F-2s and the new F-4 stencils are exceptions, because they are very complex....vipers just don't have that many markings, and these jets in particular aren't what you'd normally term "complicated"...its crew names, bort numbers and tail flashes. The stencil placement guide has every stencil applied to an F-16 shown, so I'd be interested to know which ones are giving grief?
Superb build man! Love seeing the sheets used instead of being foiled someplace.

litespeed
Joined: October 15, 2009
KitMaker: 1,976 posts
AeroScale: 1,789 posts
Posted: Friday, March 18, 2011 - 11:02 PM UTC
Wow that was quick, excellent looking F-16 Warren. When I was trying to decide which Afterburner decals release to keep for my project, I was really taken with the markings you have chosen because of the red bort numbers and the boxing[?] bear. Well done.
Mark looking good, realy looking forward to seeing your finished F-2B in those lovely blue colours.
All the best
tim
Mark looking good, realy looking forward to seeing your finished F-2B in those lovely blue colours.
All the best
tim
markske
Joined: April 14, 2007
KitMaker: 71 posts
AeroScale: 58 posts

Posted: Saturday, March 19, 2011 - 05:20 AM UTC
Made a start with my F-111.


Mark
Mark
warreni
Joined: August 14, 2007
KitMaker: 5,926 posts
AeroScale: 2,201 posts
Posted: Saturday, March 19, 2011 - 09:54 AM UTC
[quote
I hate hearing that...we are pretty proud of the instructions actually.
Which markings are left over?
We don't number them normally, and that's a conscious space saving decision. The F-2s and the new F-4 stencils are exceptions, because they are very complex....vipers just don't have that many markings, and these jets in particular aren't what you'd normally term "complicated"...its crew names, bort numbers and tail flashes. The stencil placement guide has every stencil applied to an F-16 shown, so I'd be interested to know which ones are giving grief?
Superb build man! Love seeing the sheets used instead of being foiled someplace. [/quote]
OK. There is absolutely nothing wrong with the decals themselves. They are some of the best decals I have ever used and would love to do more.
I will get a list together and PM you with it.
madcat911
Joined: April 09, 2007
KitMaker: 112 posts
AeroScale: 31 posts
Posted: Monday, March 21, 2011 - 10:32 PM UTC
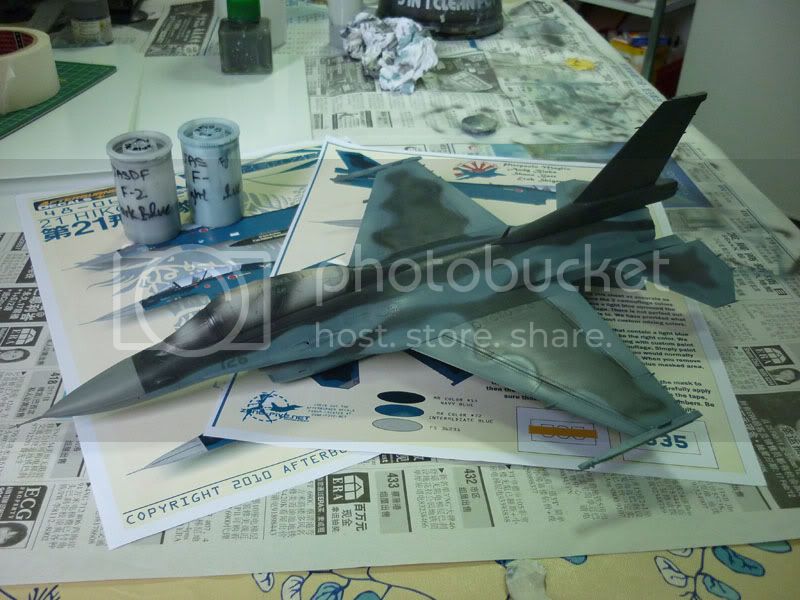
Pre-shade with Gunze Midnight Blue.
Camo colours are custom mixed and applied.
Mark
Camo colours are custom mixed and applied.
Mark
DutchBird
#068
Joined: April 09, 2003
KitMaker: 1,144 posts
AeroScale: 123 posts
Posted: Tuesday, March 22, 2011 - 06:16 AM UTC
Mark,
this looks good... Just wondering whether it is the lighting, because there seems to be a greenish hue over the aircraft - while the blues are really blue in reality.
http://www.amv83.fr/Asm/Sig/japon/F2/3%20Hikotai/3sqnSpetial2010-1.jpg
Cheers,
Harm
this looks good... Just wondering whether it is the lighting, because there seems to be a greenish hue over the aircraft - while the blues are really blue in reality.
http://www.amv83.fr/Asm/Sig/japon/F2/3%20Hikotai/3sqnSpetial2010-1.jpg
Cheers,
Harm
madcat911
Joined: April 09, 2007
KitMaker: 112 posts
AeroScale: 31 posts
Posted: Thursday, March 24, 2011 - 12:55 AM UTC
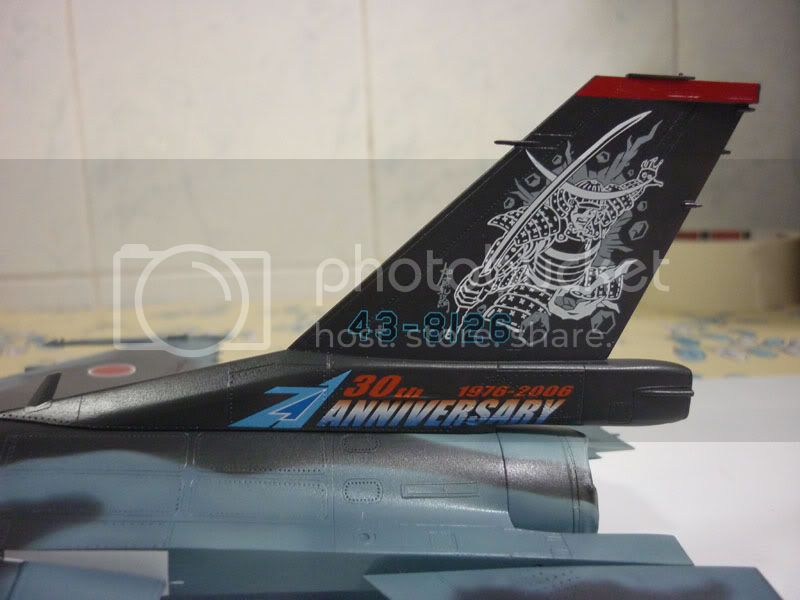
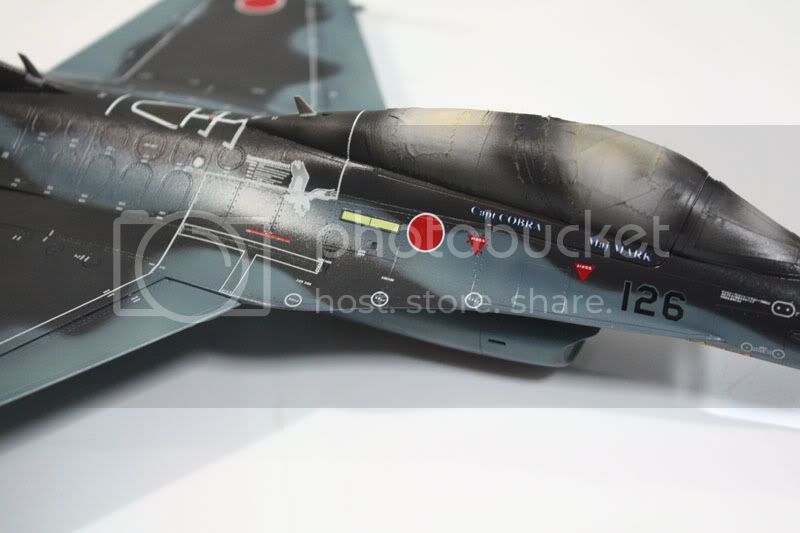
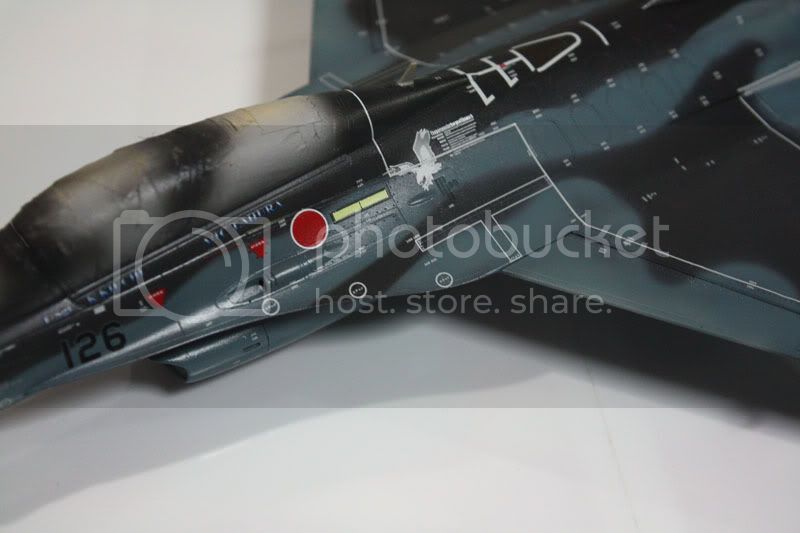
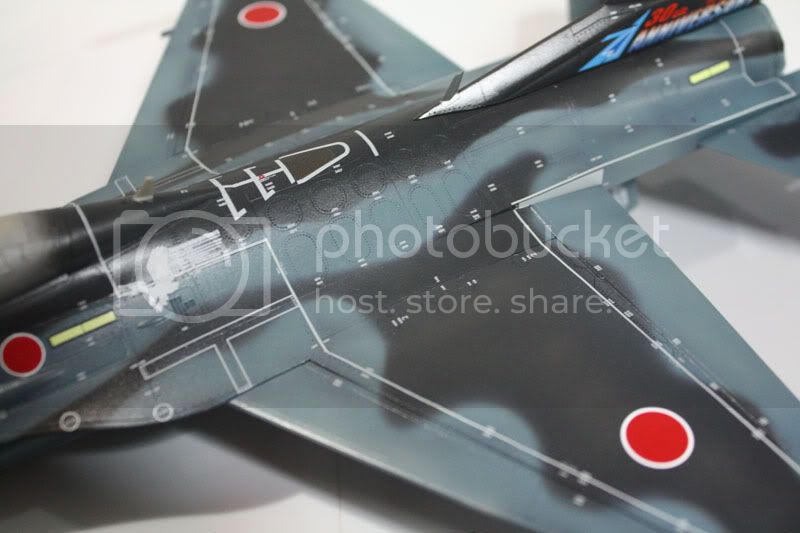
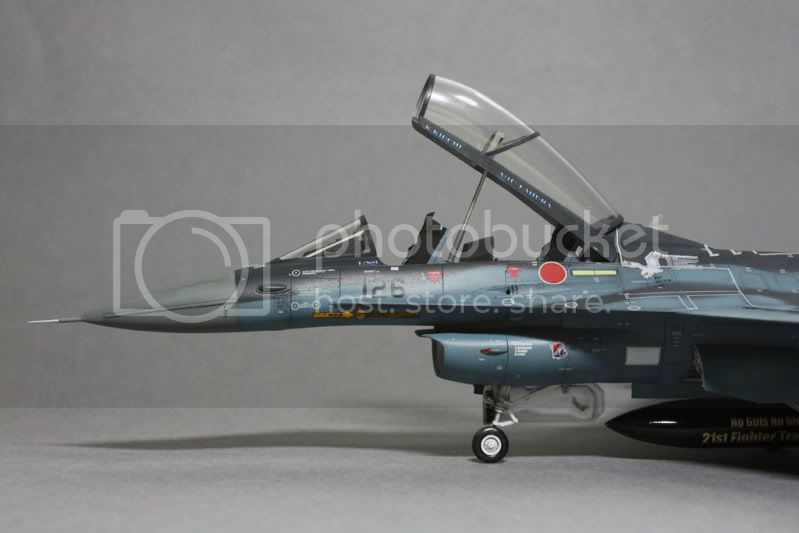
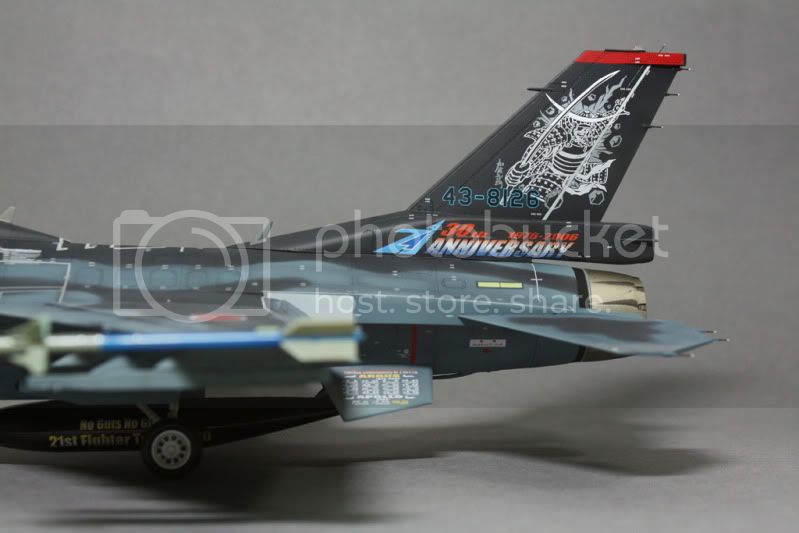
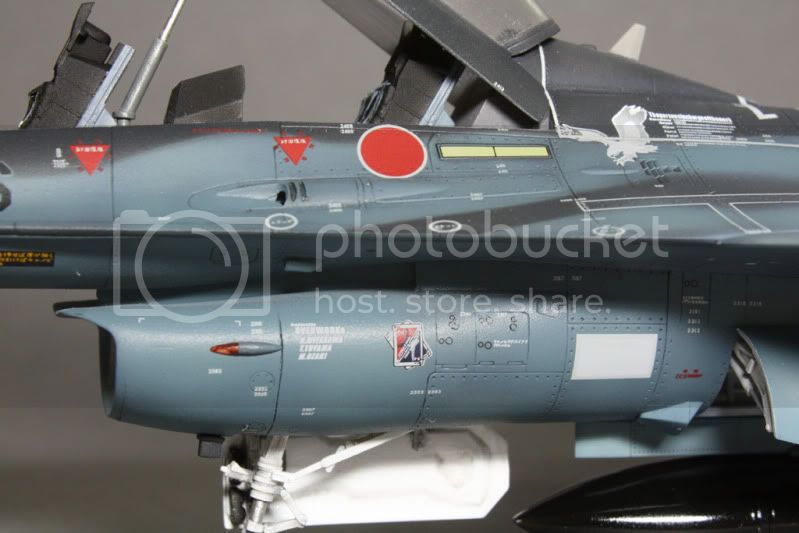
Started applying the decals from Afterburner. They worked great! Now for the gazillion stencils that adorn the rest of the jet.
Mark
Mark
madcat911
Joined: April 09, 2007
KitMaker: 112 posts
AeroScale: 31 posts
Posted: Tuesday, March 29, 2011 - 12:57 AM UTC
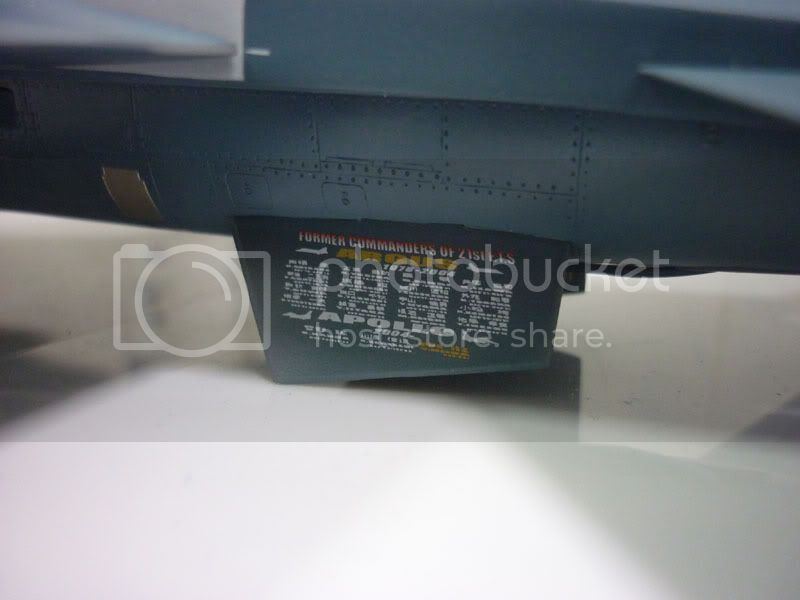
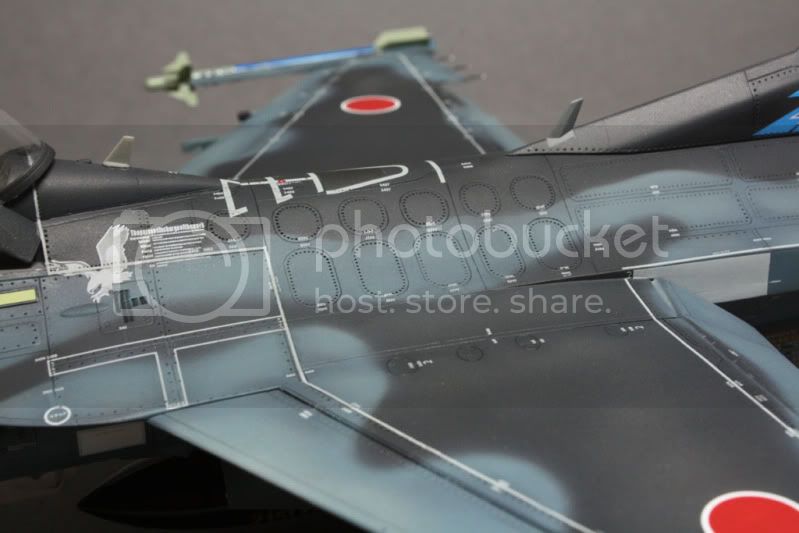
Stencils galore. Still not done yet though.
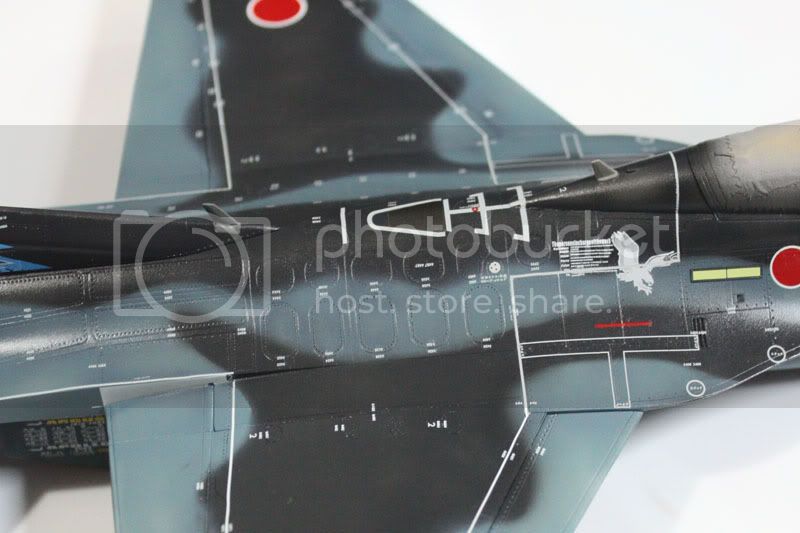
Mark
Mark
madcat911
Joined: April 09, 2007
KitMaker: 112 posts
AeroScale: 31 posts
Posted: Friday, April 01, 2011 - 03:19 AM UTC
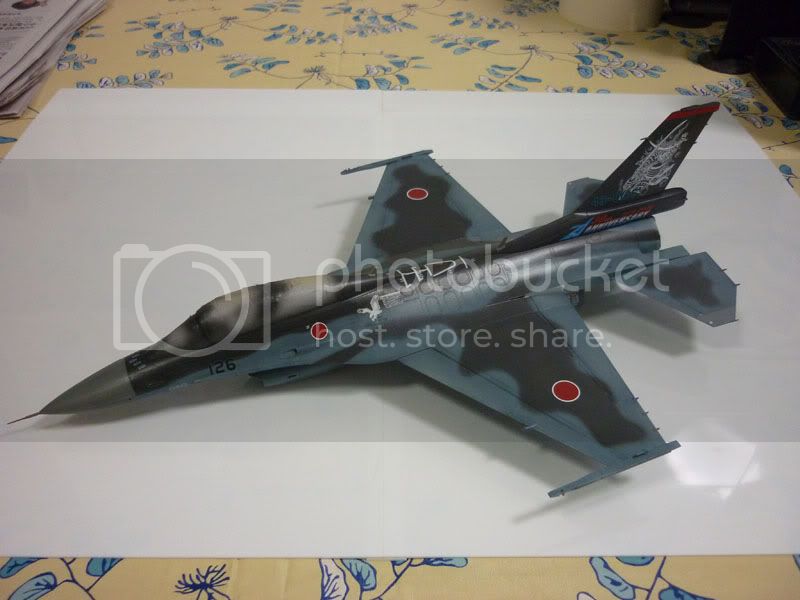
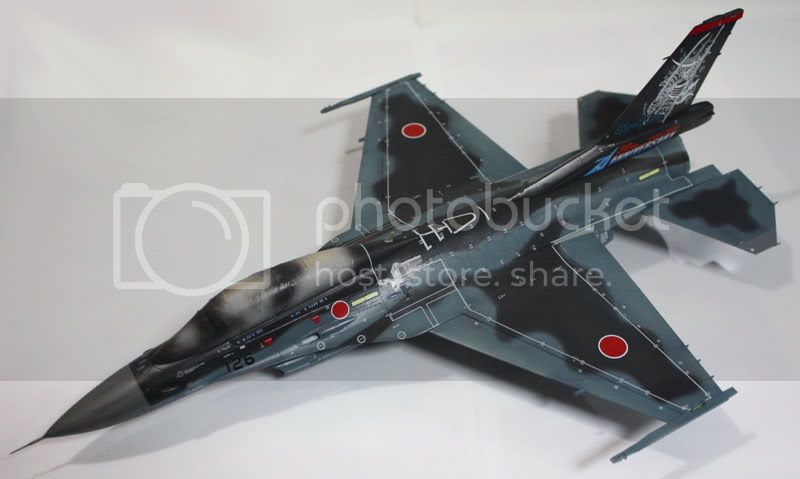
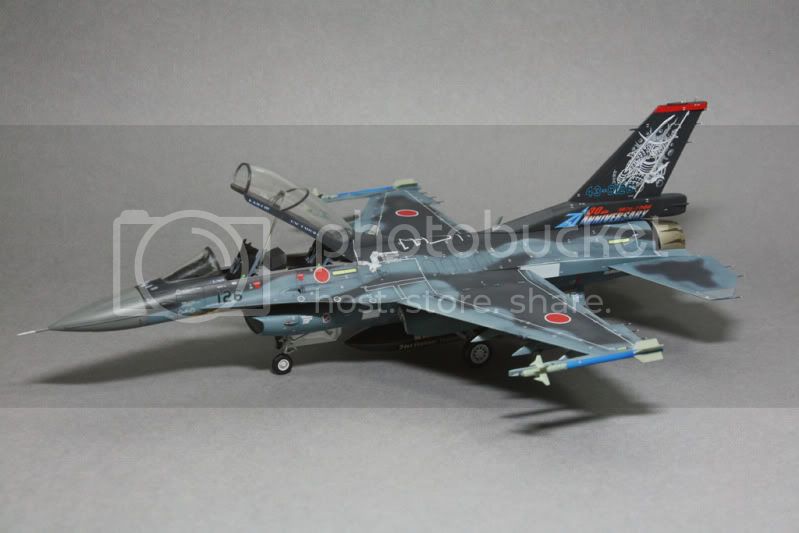
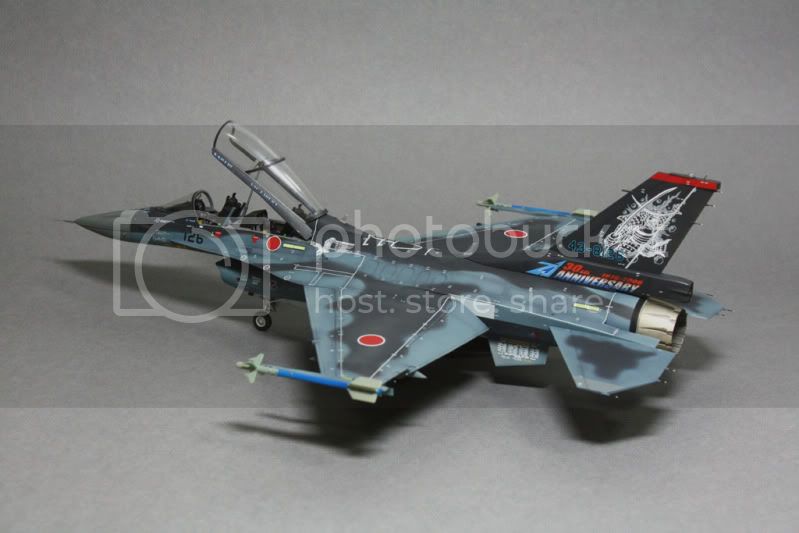
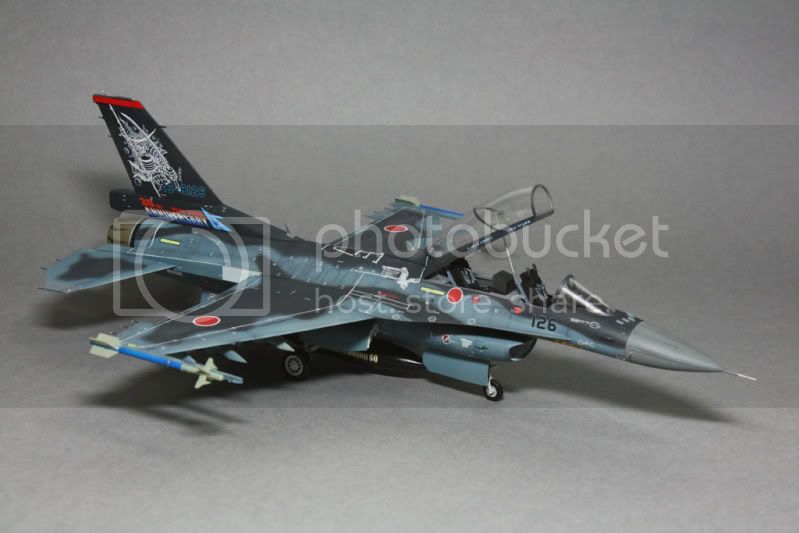
All done with this build. I added tape and photoetch seatbelts to the ejection seats and also static discharge wicks made of toothbrush bristles. Since this is a display aircraft, I gave it a very light loadout of 2 AAM-3s and a centre-line fuel tank. Weathering is light because of this reason too.
Critique, comments and feedback welcome!
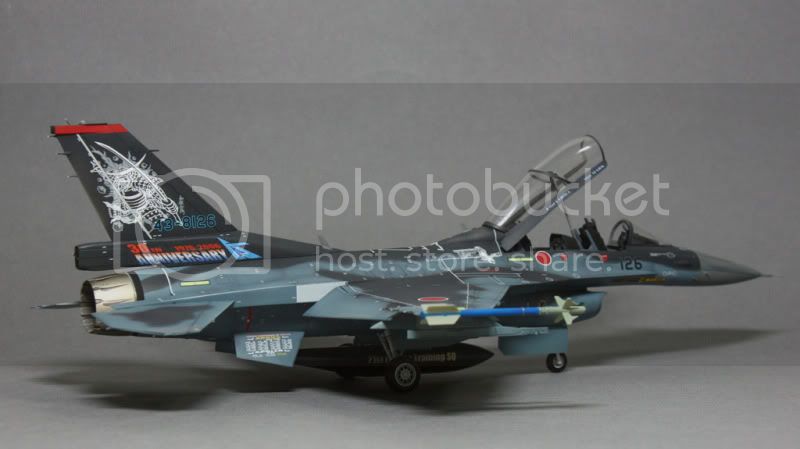
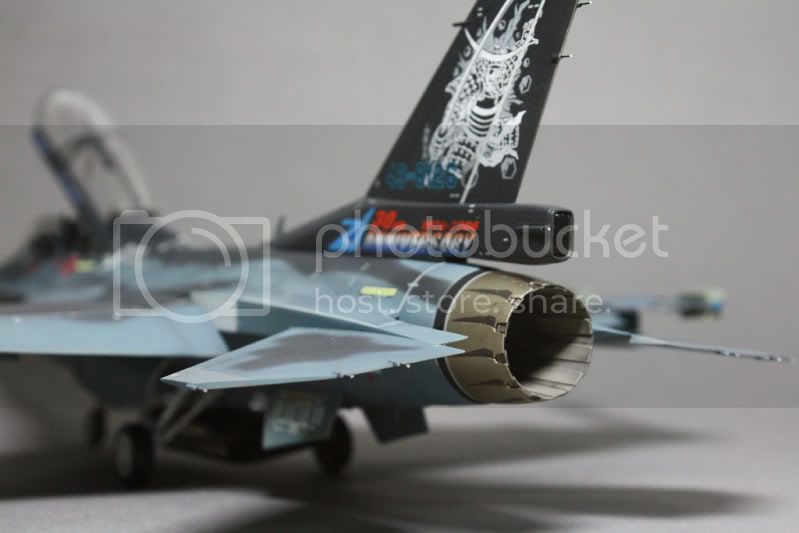
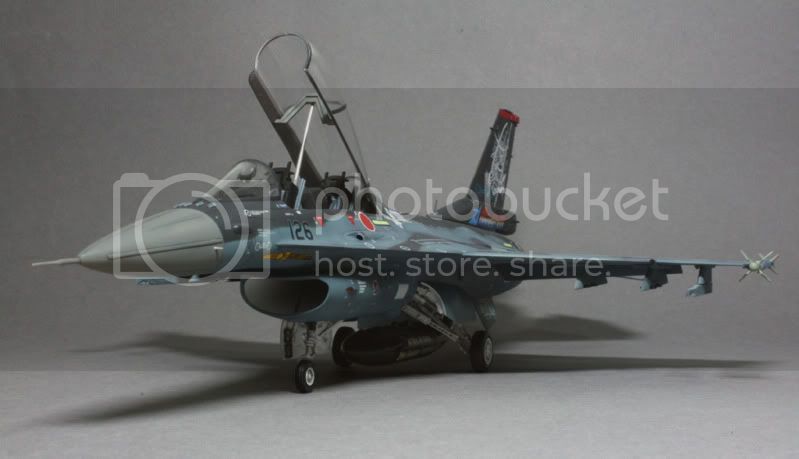


Mark
Critique, comments and feedback welcome!
Mark

mpatman
Joined: March 09, 2006
KitMaker: 248 posts
AeroScale: 160 posts

Posted: Friday, April 01, 2011 - 07:54 AM UTC
G'day Mark,
Sweet looking F-2! All those stencils make it look great, lots of work there....
Mark
Sweet looking F-2! All those stencils make it look great, lots of work there....
Mark
warreni
Joined: August 14, 2007
KitMaker: 5,926 posts
AeroScale: 2,201 posts
Posted: Friday, April 01, 2011 - 09:53 AM UTC
Nice F-16, sorry, F-2 Mark..  Don't you just lurv stencils?? I know I don't..
Don't you just lurv stencils?? I know I don't.. litespeed
Joined: October 15, 2009
KitMaker: 1,976 posts
AeroScale: 1,789 posts
Posted: Friday, April 01, 2011 - 09:59 AM UTC
Mark, your F-2B looks oustanding and congratulations on finishing  .
.
Just love the combination of the two blue camouflage scheme and the red Hinomaru. I am sure Mr Afterburner Decals will be very pleased with your efforts.
All the best.
tim
.Just love the combination of the two blue camouflage scheme and the red Hinomaru. I am sure Mr Afterburner Decals will be very pleased with your efforts.
All the best.
tim
DutchBird
#068
Joined: April 09, 2003
KitMaker: 1,144 posts
AeroScale: 123 posts
Posted: Friday, April 01, 2011 - 10:51 AM UTC
This one looks really sweet Mark...
I have it's cousin planned.
FTR - it seems that if you love stencils, you have to build modern Japanese (or Flankers - judging by the Begemot stencil sheet).
Harm
I have it's cousin planned.
FTR - it seems that if you love stencils, you have to build modern Japanese (or Flankers - judging by the Begemot stencil sheet).
Harm

Keeperofsouls2099
Joined: January 14, 2009
KitMaker: 2,798 posts
AeroScale: 2,443 posts
Posted: Friday, April 01, 2011 - 03:22 PM UTC
Good finish Sir nice Bird 

StefanBuysse
Joined: December 18, 2010
KitMaker: 32 posts
AeroScale: 27 posts
Posted: Monday, April 11, 2011 - 10:46 AM UTC
Quoted Text
Excellent Stefan, I like it!
All the best.
tim
Thanks for the kind words, Tim.
After I posted that shot of the pilot in the cockpit, the build ran into some difficulties. On the rear fuselage, I had succeeded in my intention to build it carefully so that the gaps were small enough to leave without putty.
When I assembled the multi-piece forward fuselage, something went wrong.
I don't know why, but the instrument panel got squeezed loose.
When the dust cleared, the forward fuselage was together, but the IP and the IP cover were not entirely where they should be. I was a bit worried about htat because I want to close the canopy. After some triming of the IP cover, I believe I'll be able to close the canopy.
The model is resting upside down now after having had the landing gear added.
Pictures soon.
Cheers, Stefan.
SGTJKJ
#041

Joined: July 20, 2006
KitMaker: 10,069 posts
AeroScale: 3,788 posts

Posted: Monday, April 11, 2011 - 12:23 PM UTC
Great build, Mark. It looks fantastic. As already pointed out the stencilling must have been slow work, but definitely worth the effort!
Thanks for sharing
Thanks for sharing

 |

WEB HOSTING BY


Copyright ©2021 AeroScale and Kitmaker Network, a subsidiary of Silver Star Enterprises
All Rights Reserved. Please read our Conditions of Use and Privacy Policy.
All Rights Reserved. Please read our Conditions of Use and Privacy Policy.