OFFICIAL: Afterburner Decals Campaign
Alberta, Canada
Joined: March 08, 2009
KitMaker: 394 posts
AeroScale: 360 posts
Posted: Saturday, July 09, 2011 - 02:56 AM UTC
Quoted Text
I was wondering how I was going to mask such a small circle. Just in time, a friend sold me a product he had imported from the USA: "Silly Putty".
Yes Stefan. Silly Putty is wonderful stuff. Very useful for many masking applications or as a part holding base. It retains its elasticity for ages and it comes cheap in the right toy store.
Nice job on the F-5E. Fusing in the windscreen won't be all that difficult, although a tad frustrating. I'd use thick CA, sparingly and with caution so as not to smoke the windscreen.
Current Projects: 1/144 R5D-3 (MiniCraft)
1/48 Ford Flivver (Williams Bro.)
1/72 UC-64A Norseman (MatchBox)
MAAC No.51187
IPMS CANADA No. 3369

#041
Kobenhavn, Denmark
Joined: July 20, 2006
KitMaker: 10,069 posts
AeroScale: 3,788 posts
Posted: Saturday, July 09, 2011 - 10:18 AM UTC
Nice start, Stefan. Looking forward to see the adversary F-5 with colours on.
I am now getting ready to start my build for this campaign. Stefan agreed to generously share half his decal sheet with me.

So I am also building a F-5 with the remaining half of the decal sheet for the F-5 adversaries.
My basis will be an old kit, but apart from the strange weapons load it looks decent. More to follow as I start cutting plastic.
Campaign'oholic - 252+ campaigns completed
#057
Bayern, Germany
Joined: May 11, 2010
KitMaker: 248 posts
AeroScale: 123 posts
Posted: Monday, July 11, 2011 - 01:18 AM UTC
Finally the canopy's on. Gator Grip galore.
Here you go, fine view of the office:

Details will follow. Got to work a little.
Stay tuned.
If thou art pained by any external thing, it is not this that disturbs thee, but thy own judgment about it.
Marcus Aurelius
#057
Bayern, Germany
Joined: May 11, 2010
KitMaker: 248 posts
AeroScale: 123 posts
Posted: Monday, July 11, 2011 - 01:52 AM UTC
Some more shots.
Front office:

Didn't fiddle with the HUD and recorders a lot I'm afraid but I'm desperately running out of time.
Back office:

Bad thing about a good macro lens is you notice I can't paint straight lines worth a penny.
Backside of rear dash:

Replaced the casing of all the instruments on the back and wired them. Not highly visible but busy enough.
Thanks for watching.
If thou art pained by any external thing, it is not this that disturbs thee, but thy own judgment about it.
Marcus Aurelius
#057
Bayern, Germany
Joined: May 11, 2010
KitMaker: 248 posts
AeroScale: 123 posts
Posted: Monday, July 11, 2011 - 02:19 AM UTC
A minor mistake I realized only now:
I construced this instrument board

but only later realized it was a pic of Hellenic Airforce jet and what I mistook for the ARN addition (which looks kind of similar) was in fact a handheld GPS pad.
(I'm talking 'bout the small box with the grayish screen and white oval keys).
Swell....
Always be shure to check your refrence

If thou art pained by any external thing, it is not this that disturbs thee, but thy own judgment about it.
Marcus Aurelius
#041
Kobenhavn, Denmark
Joined: July 20, 2006
KitMaker: 10,069 posts
AeroScale: 3,788 posts
Posted: Monday, July 11, 2011 - 05:18 AM UTC
Fantastic cockpit, Leo. Very nice details. It almost looks like one could jump in there and fire up the engines.

Looking forward to see more.
Campaign'oholic - 252+ campaigns completed
litespeed
 News Reporter
England - North West, United Kingdom
Joined: October 15, 2009
KitMaker: 1,976 posts
AeroScale: 1,789 posts
Posted: Monday, July 11, 2011 - 11:36 AM UTC
I agree with Jesper, Leo, great looking cockpit. Looking forward to seeing your Phantom finished. Keep up the excellent work.
All the best.
tim
#057
Bayern, Germany
Joined: May 11, 2010
KitMaker: 248 posts
AeroScale: 123 posts
Posted: Monday, July 11, 2011 - 07:31 PM UTC
Thanks guys means a lot to me!!
Got two questons for all of you:
1) what kind of data link pod would my phantom be carrying for the gunsmoke '85 meet? I mean they had to have a means of traking planes and hits back then like on the ranges nowadays. So... some kind of ACMI pod? ALN/ALQ ?
2) how on earth do all of you manage to keep the insides of the glazing dustfree when it's glued on? My whole model got a thorough cleaning before I glued it on and I really sealed the seam between fuselage and canopy with gator grip.
But soon as I did a light polishing sanding on the seams and the glazing got statically charged some dustcrumbs krept from who knows where and attached themselves on the inside of the glazing


If thou art pained by any external thing, it is not this that disturbs thee, but thy own judgment about it.
Marcus Aurelius
#041
Kobenhavn, Denmark
Joined: July 20, 2006
KitMaker: 10,069 posts
AeroScale: 3,788 posts
Posted: Wednesday, July 13, 2011 - 08:49 AM UTC
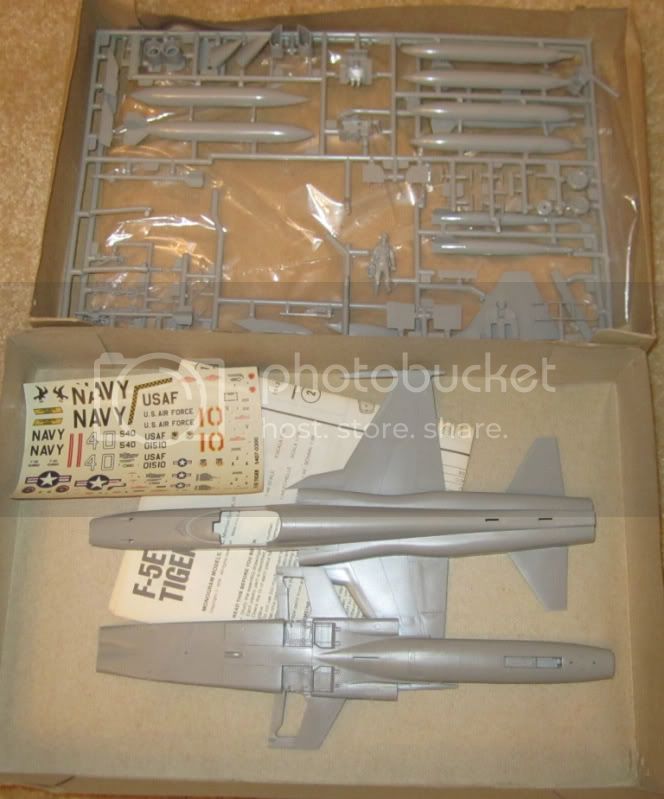
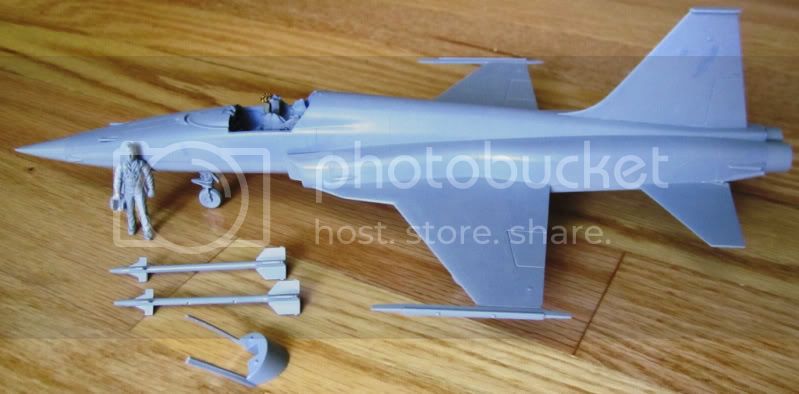
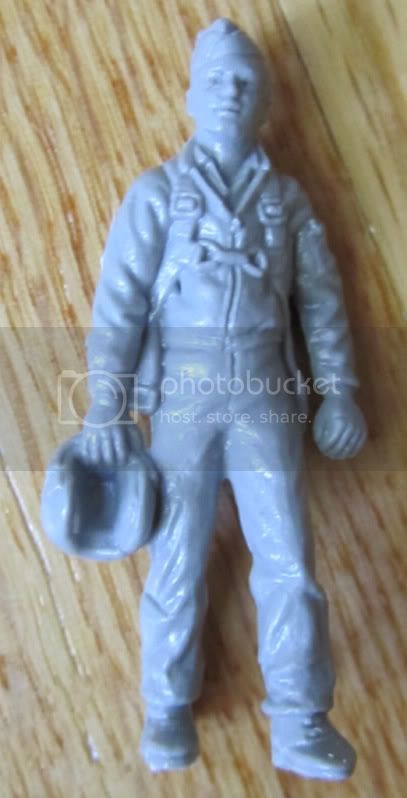
I have made some more progress on my F-5. Basic construction is finished. The details are a little soft, but overall it is a decent kit.
The inclusion of a pilot figure is nice for a diorama. It is not resin quality, but compared to existing Eduard or ICM standard it is a very nice figure.
More to follow when paint starts hitting the fuselage
Campaign'oholic - 252+ campaigns completed
litespeed
News Reporter England - North West, United Kingdom
Joined: October 15, 2009
KitMaker: 1,976 posts
AeroScale: 1,789 posts
Posted: Thursday, July 14, 2011 - 11:11 AM UTC
Hi all
Leo: I tend to put my canopies on after I have painted the kit. I make sure they fit well before painting. I always attach my canopies by running some Johnsons Kleer into the joint once sometimes twice.
I have made some good progress over the last few days. I left the kit alone for a week to allow the melted plastic to set in the air intakes. The cracked plastic in the wing root was very easy to fix with some very fluid cryo.
Most of the seams are filled with just a little light filler. Just needs rubbing down. The fit of the kit has been pretty good so far. The only bits that needed attention was inside the air intakes.
Next is sorting out those airbags where the wings fold back
All the best.
tim


#041
Kobenhavn, Denmark
Joined: July 20, 2006
KitMaker: 10,069 posts
AeroScale: 3,788 posts
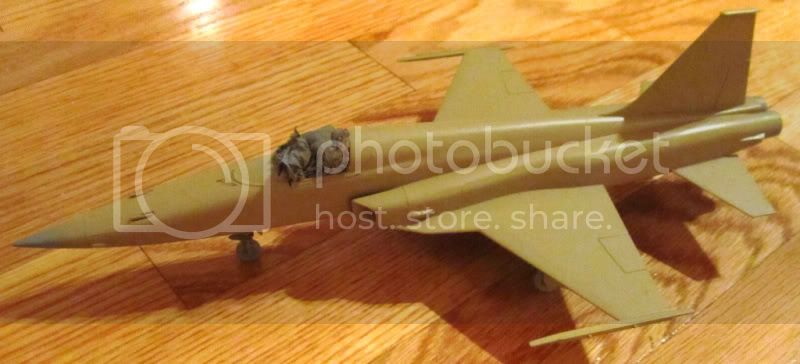
Posted: Sunday, July 17, 2011 - 11:39 AM UTC
A little more progress on my F-5. I am making the Snake type camouflage for "Red 66".
Work are progressing past this photo, so more updates follow soon.
Campaign'oholic - 252+ campaigns completed
#041
Kobenhavn, Denmark
Joined: July 20, 2006
KitMaker: 10,069 posts
AeroScale: 3,788 posts
Posted: Tuesday, July 19, 2011 - 01:52 AM UTC
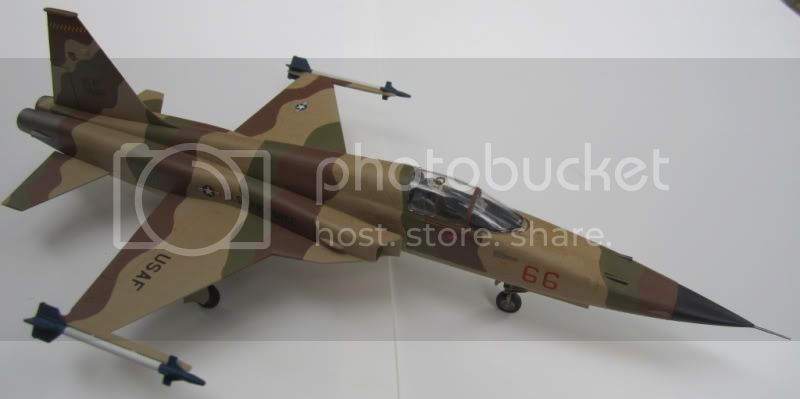
A little more progress on my F-5. I am building "Red 66" with a Snake camouflage although the Afterburner instructions call it a Flogger scheme. Anyway I found a picture of the aircraft during my research so I am going according to the photo.
I was very much in doubt whether I should handbrush or airbrush the scheme. The edges of the camouflage are quite sharp although not razor sharp, so I was planning to go for masking with soft putty to get semi hard lines. However, I changed my mind and went for handbrushing as the lines are really quite sharp.
First colour is on. Next is the green and then the details.
More to follow

Campaign'oholic - 252+ campaigns completed
#041
Kobenhavn, Denmark
Joined: July 20, 2006
KitMaker: 10,069 posts
AeroScale: 3,788 posts
Posted: Thursday, July 21, 2011 - 12:43 AM UTC
I have made alittle more progress. The basic camouflage colours are now on. This adversary scheme is very attractive. I cannot wait to get the decals on.
More to follow.

Campaign'oholic - 252+ campaigns completed
AussieReg
Associate Editor #007
Victoria, Australia
Joined: June 09, 2009
KitMaker: 8,156 posts
AeroScale: 3,756 posts
Posted: Thursday, July 21, 2011 - 01:06 AM UTC
Nice camo Jesper, looking good !
Some really great work going on in this campaign so far guys.
I'm soooooo far behind with my builds right now it's getting ludicrous, but I'm still planning to get this done.
Cheers, D
ON the bench
Revell 1/24 '53 Corvette (building as '54)
Revell 1/24 BMW 507 Coupe and Cabrio
Italeri 1/48 Me262 B-1a/U1 Nightfighter
Monogram 1/24 '57 Chevy Nomad
Dragon 1/350 USS Frank Knox DD-742
#041
Kobenhavn, Denmark
Joined: July 20, 2006
KitMaker: 10,069 posts
AeroScale: 3,788 posts
Posted: Thursday, July 21, 2011 - 04:58 AM UTC
Thanks for the comment, Damian. The camouflage on my bird is slightly more hard edged than the original, but I am happy with it none the less.
Next some detail painting and then the decals. I choose this bird because of the cool camo and the possibility of combining camouflage with full colour "high visibility" markings on the original.
More to follow
Campaign'oholic - 252+ campaigns completed
litespeed
News Reporter England - North West, United Kingdom
Joined: October 15, 2009
KitMaker: 1,976 posts
AeroScale: 1,789 posts
Posted: Thursday, July 21, 2011 - 06:02 AM UTC
Hi Jesper.
Your F-5 is looking very good. It will look even better when you start adding the decals. Looking forward to seeing the Bort numbers on the forward fuselage.
All the best
tim
#057
Bayern, Germany
Joined: May 11, 2010
KitMaker: 248 posts
AeroScale: 123 posts
Posted: Thursday, July 21, 2011 - 07:38 PM UTC
Great camo, Jesper!
I'd still need some help with the pod my Phantom would be carrying for Gunsmoke '85. Anybody know which one?
If thou art pained by any external thing, it is not this that disturbs thee, but thy own judgment about it.
Marcus Aurelius
#041
Kobenhavn, Denmark
Joined: July 20, 2006
KitMaker: 10,069 posts
AeroScale: 3,788 posts
Posted: Friday, July 22, 2011 - 11:28 PM UTC
Thanks for the comments, guys. I am working on painting the details now.
More to follow soon.
Campaign'oholic - 252+ campaigns completed
#041
Kobenhavn, Denmark
Joined: July 20, 2006
KitMaker: 10,069 posts
AeroScale: 3,788 posts
Posted: Wednesday, July 27, 2011 - 11:48 PM UTC
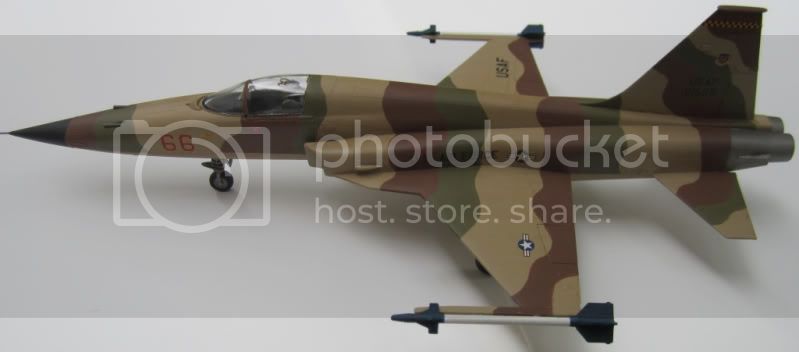
A few details painted on my F-5. The After burner decals are getting closer

Campaign'oholic - 252+ campaigns completed
Belgium
Joined: December 18, 2010
KitMaker: 32 posts
AeroScale: 27 posts
Posted: Saturday, July 30, 2011 - 09:44 AM UTC
Hi,
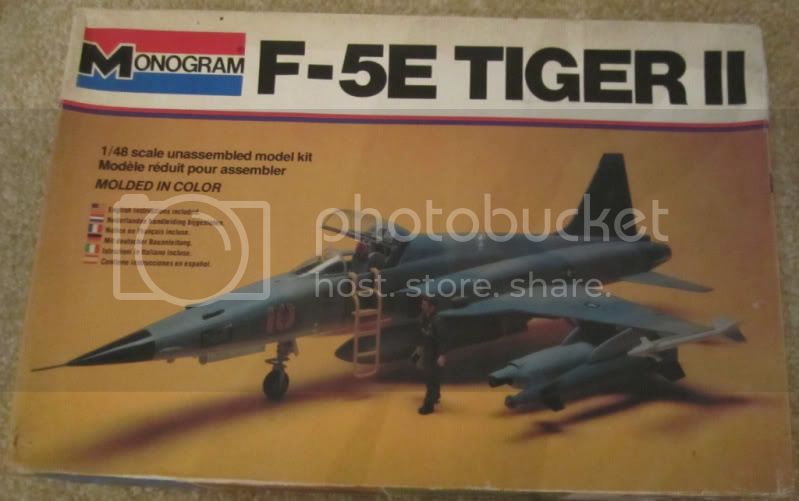
That looks great, Jesper. I never had one of those Monogram F-5E's but I've heard good things about them.
Leo,
I'm pretty sure that, for 1985, the simple ACMI pod like the one in the Hasegawa weapons set is correct.
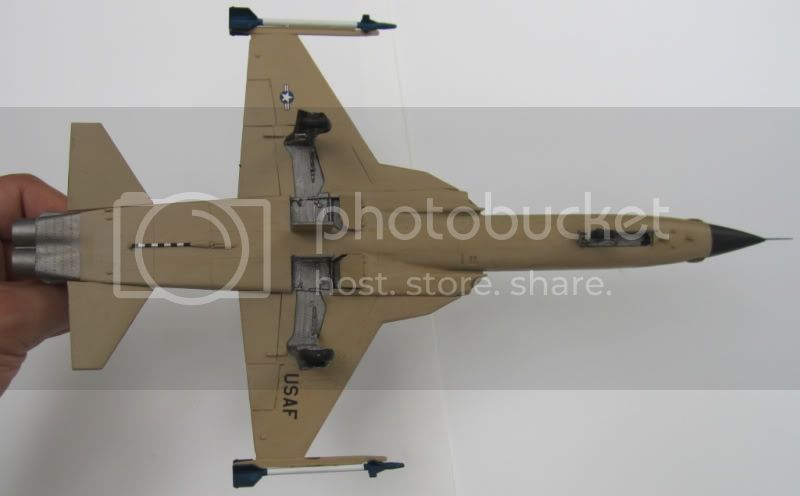
My own F-5E has its first coat of colour: FS 35414. I'm about to start masking befoe I spray on the FS 35164. I noticed that in the instructions, the side views and the top view do not quite match up. After looking at a reference picture, I believe that the sideviews are correct for the New Blue Scheme.
Just over a month to go, guys!

Cheers, Stefan.
#041
Kobenhavn, Denmark
Joined: July 20, 2006
KitMaker: 10,069 posts
AeroScale: 3,788 posts
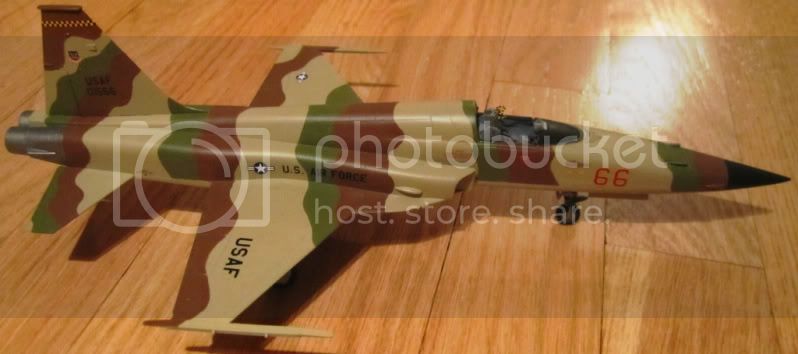
Posted: Friday, August 05, 2011 - 06:22 PM UTC
Thanks for the comment, Stefan. The Monogram/Revell F-5 is a nice kit although it shows its age in the overall fit and the raised panel lines. However, still a very enjoyable build.
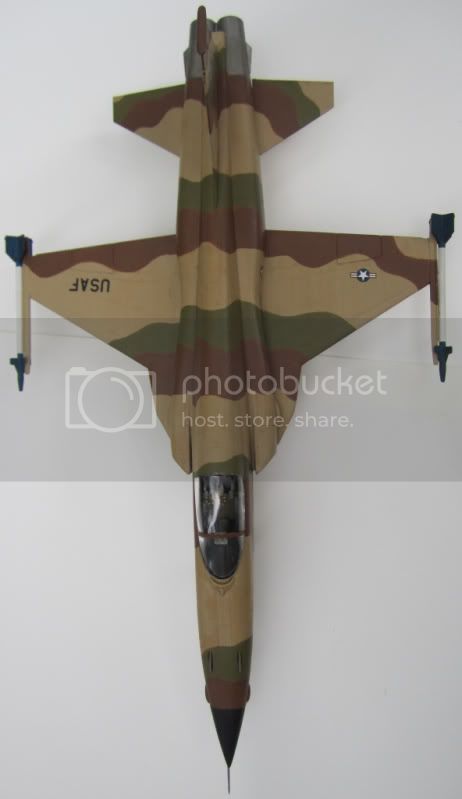
The decals are now on my F-5. They went on great and really adds a splash of colour. Based on my references weathering is pratically zero, so this will soon be finished.
More to follow.
Campaign'oholic - 252+ campaigns completed
litespeed
News Reporter England - North West, United Kingdom
Joined: October 15, 2009
KitMaker: 1,976 posts
AeroScale: 1,789 posts
Posted: Sunday, August 07, 2011 - 05:31 AM UTC
Looking very good Jesper.
Well I reworked the areas where the inflatable seals for the wings are situated, using the images that Allen supplied [see Cats out the bag campaign]. The majority of the fill is laminated plastic card and a fair bit of filler. Looks a lot better. Thanks for the suggestion Allen.
I applied some paint to the airframe and done some very light weathering. I was waiting for some resin seats from Quickboost, but impatience got the better of me so I painted it without the canopy. As luck would have it the seats turned up in the post after I applied the paint. Very good looking seats though.
All the best
tim


#041
Kobenhavn, Denmark
Joined: July 20, 2006
KitMaker: 10,069 posts
AeroScale: 3,788 posts
Posted: Sunday, August 07, 2011 - 06:18 AM UTC
Campaign'oholic - 252+ campaigns completed
litespeed
News Reporter England - North West, United Kingdom
Joined: October 15, 2009
KitMaker: 1,976 posts
AeroScale: 1,789 posts
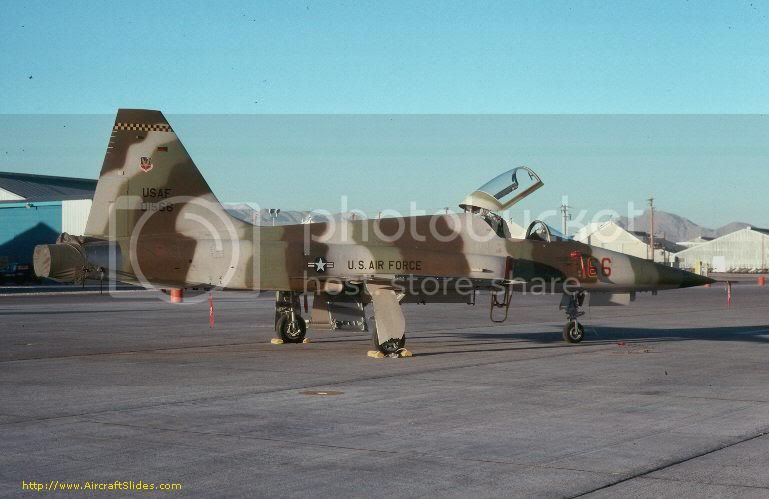
Posted: Sunday, August 07, 2011 - 11:55 AM UTC
Excellent F-5 Jesper, I like the image of the real thing as well.
Don't forget to post an image or two in the Campaign Gallery and thank you for participating.
All the best.
tim
AussieReg
Associate Editor #007
Victoria, Australia
Joined: June 09, 2009
KitMaker: 8,156 posts
AeroScale: 3,756 posts
Posted: Monday, August 08, 2011 - 02:00 AM UTC
Hey folks, just confirming that I am still alive and doing my bestest to get this done in time ! Basic assembly is complete, my 9yo boy Josh has requested this one be in flight-mode and all weaponed up, so here's where I'm at . . . .

I will be painting the seat and pilot next so the glass can go on, then it's paint time !
Cheers, D
ON the bench
Revell 1/24 '53 Corvette (building as '54)
Revell 1/24 BMW 507 Coupe and Cabrio
Italeri 1/48 Me262 B-1a/U1 Nightfighter
Monogram 1/24 '57 Chevy Nomad
Dragon 1/350 USS Frank Knox DD-742