OFFICIAL: Afterburner Decals Campaign
Florida, United States
Joined: January 14, 2009
KitMaker: 2,798 posts
AeroScale: 2,443 posts
Posted: Thursday, April 14, 2011 - 02:46 PM UTC
Alright I started and will be doing a duel build log found
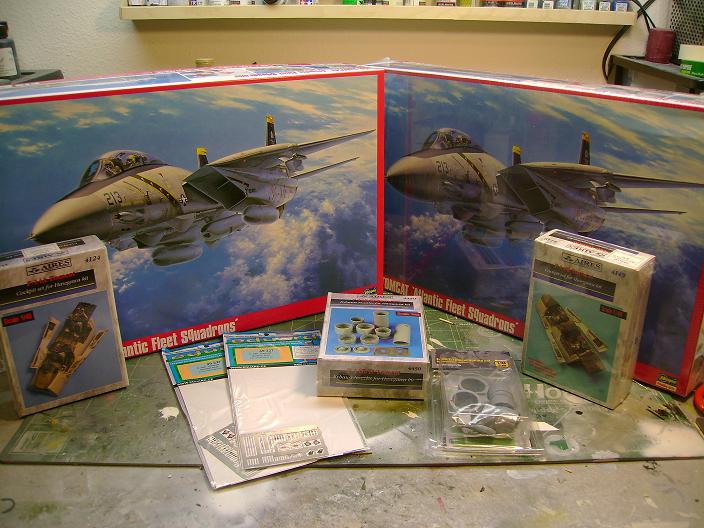
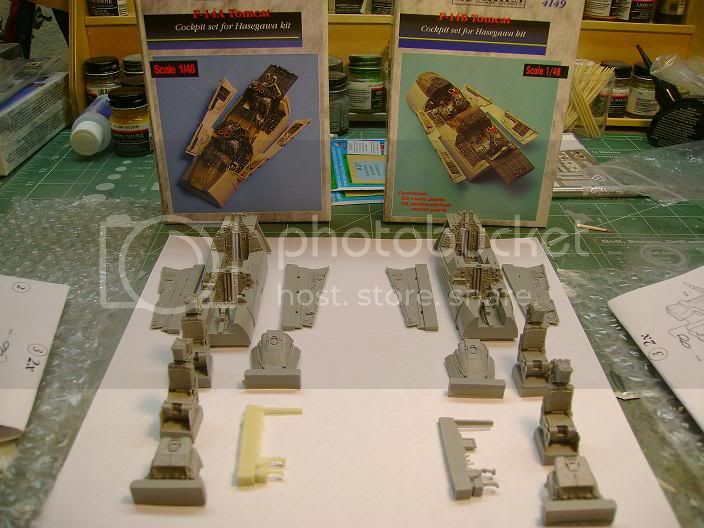
Here Heres the kits and stuff.....
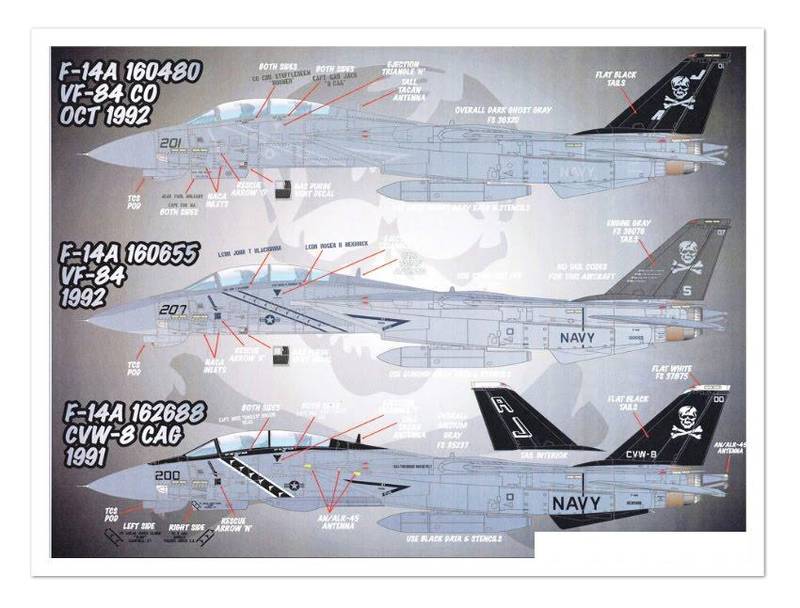
I will be using the bird on the bottom from After burner.....
Cheers

"From time to time, the tree of liberty must be watered with the blood of
tyrants and patriots."
- Thomas Jefferson
IPMS#47611
New South Wales, Australia
Joined: April 15, 2006
KitMaker: 158 posts
AeroScale: 70 posts
Posted: Wednesday, April 20, 2011 - 10:25 AM UTC
Hi all,
I will be building a Hasegawa F2B with Afterburner anniversary decals for this campaign. I opened the box a couple of days ago and started to clean up the intake area. Pics will follow.
Cheers
Florida, United States
Joined: January 14, 2009
KitMaker: 2,798 posts
AeroScale: 2,443 posts
Posted: Thursday, April 28, 2011 - 01:20 PM UTC
"From time to time, the tree of liberty must be watered with the blood of
tyrants and patriots."
- Thomas Jefferson
IPMS#47611
Florida, United States
Joined: January 14, 2009
KitMaker: 2,798 posts
AeroScale: 2,443 posts
Posted: Monday, May 02, 2011 - 03:51 PM UTC
"From time to time, the tree of liberty must be watered with the blood of
tyrants and patriots."
- Thomas Jefferson
IPMS#47611
litespeed
 News Reporter
England - North West, United Kingdom
Joined: October 15, 2009
KitMaker: 1,976 posts
AeroScale: 1,789 posts
Posted: Friday, May 06, 2011 - 10:58 PM UTC
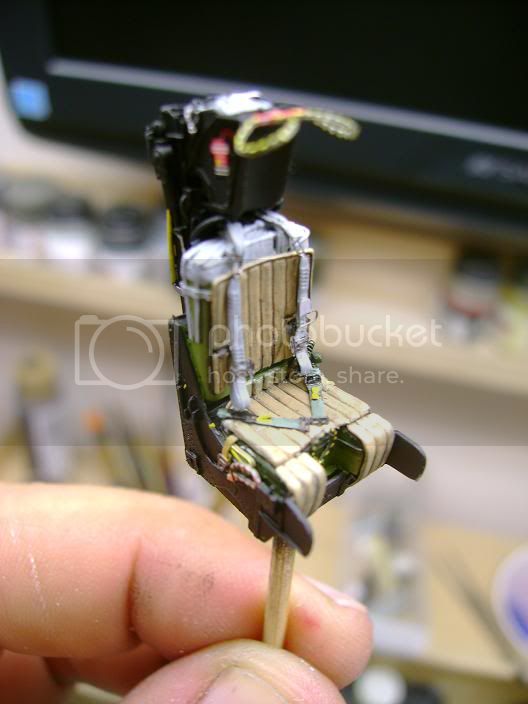
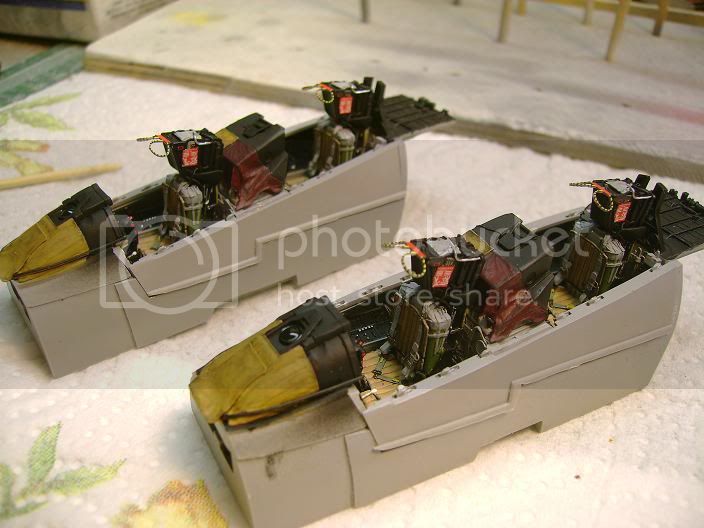
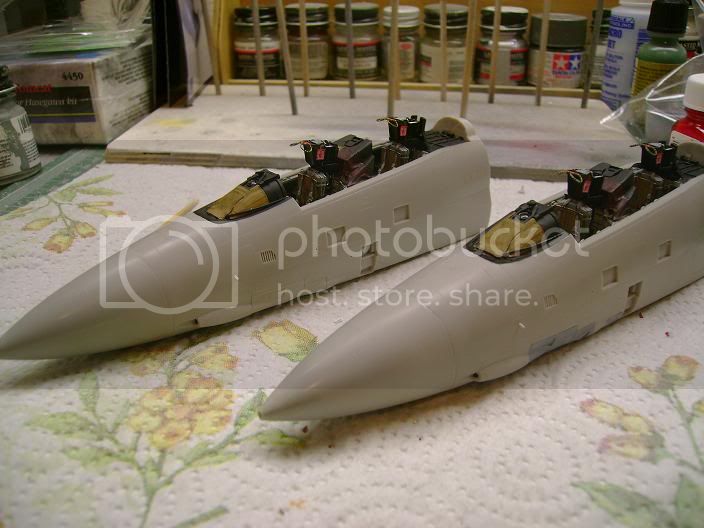
Great stuff Justin, your table is looking like a Grumman production line. Those cockpits look superb.
All the best.
tim
Florida, United States
Joined: January 14, 2009
KitMaker: 2,798 posts
AeroScale: 2,443 posts
Posted: Saturday, May 14, 2011 - 02:29 PM UTC
I've made more progress found
HERE 
"From time to time, the tree of liberty must be watered with the blood of
tyrants and patriots."
- Thomas Jefferson
IPMS#47611
AussieReg
 Associate Editor
#007
Victoria, Australia
Joined: June 09, 2009
KitMaker: 8,156 posts
AeroScale: 3,756 posts
Posted: Monday, May 16, 2011 - 11:09 AM UTC
Well folks I FINALLY got a start on my Tamiya F-16 for this campaign. Just a few sub-assemblies at this stage so nothing worthy of pics just yet.
Cheers, D
ON the bench
Revell 1/24 '53 Corvette (building as '54)
Revell 1/24 BMW 507 Coupe and Cabrio
Italeri 1/48 Me262 B-1a/U1 Nightfighter
Monogram 1/24 '57 Chevy Nomad
Dragon 1/350 USS Frank Knox DD-742
Belgium
Joined: December 18, 2010
KitMaker: 32 posts
AeroScale: 27 posts
Posted: Monday, May 23, 2011 - 10:54 AM UTC
Hi,
Awesome work on the F-14's, Justin.
Well done on the F-2B, Mark.
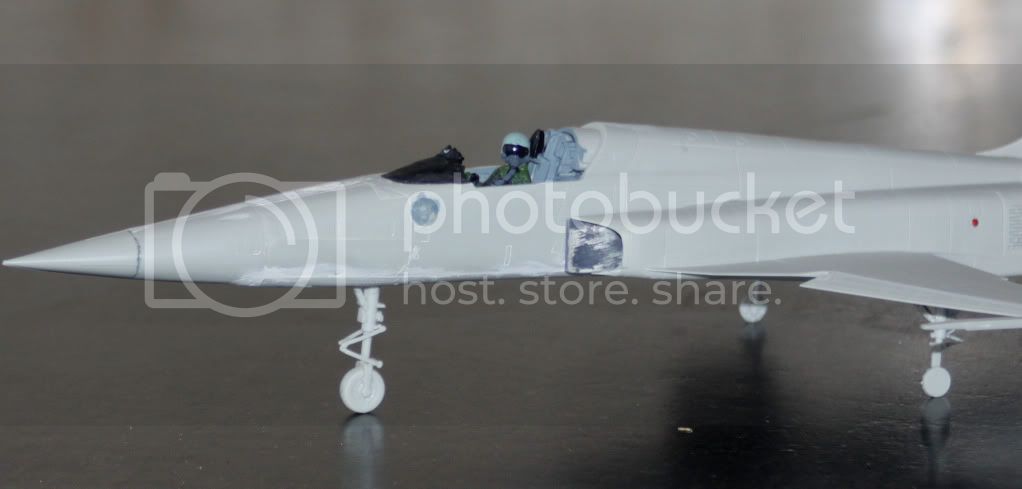
Here's a picture of the F-5E, showing the nose gear in the raised position.
It should be our last look at the pilot before the masked canopy goes on.
Although I have a couple of Tamiya F-16's in the stash and even more Afterburner decals for them, I have not built one yet.
They look a bit complex, but I hear great things about them. I'll try my first one in this Air Campaign, starting with a NM ANG Block 30.
That roadrunner is sooo cool.
Cheers, Stefan.
New York, United States
Joined: January 29, 2004
KitMaker: 3,836 posts
AeroScale: 1,036 posts
Posted: Friday, May 27, 2011 - 08:01 AM UTC
It feels like bible camp…Only I’m not crying pretending I’m somewhere else.
Happy Modeling
Joe
South Australia, Australia
Joined: August 14, 2007
KitMaker: 5,926 posts
AeroScale: 2,201 posts
Posted: Friday, May 27, 2011 - 09:40 AM UTC
Nice Growler Joe.

You may be right, I may be crazy.
litespeed
 News Reporter
England - North West, United Kingdom
Joined: October 15, 2009
KitMaker: 1,976 posts
AeroScale: 1,789 posts
Posted: Friday, May 27, 2011 - 10:36 AM UTC
Outstanding Growler Joe, excellent shading and weathering.
All the best.
tim

#057
Bayern, Germany
Joined: May 11, 2010
KitMaker: 248 posts
AeroScale: 123 posts
Posted: Friday, June 17, 2011 - 08:33 AM UTC
Hi all.
I'll be in with an 73-1176 out of Seymour Johnson. She's an F-4E, ARN101 and TISEO equipped, Euro one livery.
She took part in Gunsmoke'85 and carries a beautifully marked travelpod.
I'll be using Quickboost bangseats, a resin napalm pod slightly modified (hope that works), resin ARN equipment and TISEO, true details weels and resin pylons.
The kit's Hasegawa cobbled together from spare parts. Will try to source some G-Factor landing gear as it got none.
Here's as of today:

Hope I'll be done in time.
Cheers all.
We need a cool banner btw. Anybody know how to do this?
Greetings from Bavaria
If thou art pained by any external thing, it is not this that disturbs thee, but thy own judgment about it.
Marcus Aurelius
Bayern, Germany
Joined: January 02, 2011
KitMaker: 279 posts
AeroScale: 239 posts
Posted: Friday, June 17, 2011 - 10:47 AM UTC
@ Leo: Nice! Remember that the original stands in the Flugwerft Oberschleissheim. A F-4E with Spangdahlem markings and European One camo.
Servus,
Sebastian
LtCol Henry Blake: "Radar, whatever it is: sign it, cancel it or order five more!"

#057
Bayern, Germany
Joined: May 11, 2010
KitMaker: 248 posts
AeroScale: 123 posts
Posted: Monday, June 20, 2011 - 06:48 PM UTC
Man, I totally forgot! How about a nice museum session then sometime followed by a visit at our LHS?
This is were I stand right now, three days worth of modelling:


Most of the fuselage glued together and the TISEO faired in roughly.
More on my gueing technique with this venerable kit later. Got to go to work...
Thanks for watching.
If thou art pained by any external thing, it is not this that disturbs thee, but thy own judgment about it.
Marcus Aurelius

#057
Bayern, Germany
Joined: May 11, 2010
KitMaker: 248 posts
AeroScale: 123 posts
Posted: Friday, June 24, 2011 - 05:36 AM UTC
As you can see in my last post the spine seam's not glued (which is one of the most annoying and tiresome seams in the history of modelling IMHO) but the wings are. I tried some new approach to this kit.
First I separated the panels that make up half of the lower fuselage

from the wing like so:

That set the panels free and got me a nice easy fit of the lower fuselage and sparrow bays.
This sorted out the first bad fitting part of the kit.
For the second - the fuselage to wing joint and spine seam:
I first glued the wing to fuselage joint having lots of leeway space to get a tight fit.
Only then I finally glued the spine seam.
There's still alot to learn about this kit (there's some guy over at ARC that built a hundred thirty!!!) but this being my third Hase Phantom I kind of managed to steer around many a pitfall.
Been checking seams and scratching FOD covers for most of the last two days. So stay tuned for some glue-gunk and mr.surfacer party.

If thou art pained by any external thing, it is not this that disturbs thee, but thy own judgment about it.
Marcus Aurelius
Texas, United States
Joined: June 29, 2010
KitMaker: 5,854 posts
AeroScale: 372 posts
Posted: Friday, June 24, 2011 - 05:53 AM UTC
I don't know that I will be able to complete this campaign, too much rl going on. Can anyone use the remainder of my F-15 decals for this campaign? I only removed the decals for one aircraft.

#057
Bayern, Germany
Joined: May 11, 2010
KitMaker: 248 posts
AeroScale: 123 posts
Posted: Sunday, June 26, 2011 - 08:11 PM UTC
Hi all.
Managed to get a little work done:

Faired in the hunchback and the Arnie-Brick on the spine.
Oh, and powered trough scratching FOD-covers. Here a close up:

(For those interested on how:
Put the intakes tipdown on some 0.8 sheet, sprayed around with some black and thus had the perfect outline of each trunk. I cut that out and sanded the raw covers to shape. I then doubled up the inside with a small slip of 0.8 sheet and dremeled out the recess on the front side. Then some ribs with lengths of tiny rod, a gazillion coats of surfacer and WOALAH: covers.)
Also refined the gun muzzle cover but forgot to take pics.
Not much progress I'm afraid but I'm - as always with this kit - stuck with cleaning up seam lines. What a grind.
If thou art pained by any external thing, it is not this that disturbs thee, but thy own judgment about it.
Marcus Aurelius
litespeed
 News Reporter
England - North West, United Kingdom
Joined: October 15, 2009
KitMaker: 1,976 posts
AeroScale: 1,789 posts
Posted: Monday, June 27, 2011 - 01:26 AM UTC
Great stuff Leo, I really like what you are doing at the moment. A great example of a build guide we need to see more off in these campaigns. The FOD covers look excellent and a good way of disguising the lack of ducting in that cavernous fuselage. Keep up the good work.
All the best.
tim

#057
Bayern, Germany
Joined: May 11, 2010
KitMaker: 248 posts
AeroScale: 123 posts
Posted: Monday, June 27, 2011 - 06:55 AM UTC
Thanks Tim!
Years ago I scratched seamless intakes. But I didn't feel like it this time.
And honestly: I leaned toward the AMS-Resin Intakes but I would have had to wait three weeks for them and times getting fewer.
Next up is more seam work and I'll tackle that anorexic rear instrument panel.
Greetings.
If thou art pained by any external thing, it is not this that disturbs thee, but thy own judgment about it.
Marcus Aurelius
Bayern, Germany
Joined: January 02, 2011
KitMaker: 279 posts
AeroScale: 239 posts
Posted: Monday, July 04, 2011 - 06:53 AM UTC
Well, those FOD covers are really nice! Schee! Are you going to paint them in bright red

?
Fast and nice progress so far btw!
Servus,
Sebastian
LtCol Henry Blake: "Radar, whatever it is: sign it, cancel it or order five more!"
Belgium
Joined: December 18, 2010
KitMaker: 32 posts
AeroScale: 27 posts
Posted: Monday, July 04, 2011 - 10:10 AM UTC
Looks very promising, Leo.

I've started working on the F-5E again. At the tempo that was going, the first of September was appraoching fast!
I hope to have her in primer by the week-end.
Cheers, Stefan.
litespeed
 News Reporter
England - North West, United Kingdom
Joined: October 15, 2009
KitMaker: 1,976 posts
AeroScale: 1,789 posts
Posted: Monday, July 04, 2011 - 12:37 PM UTC
Hi all
Started my Academy 1/48 F-14A over the weekend. Completed the cockpit minus the seats. The radar scopes are a bit too green and need toning down. Gluing the port wing to the fuselage was a bit of a problem. In trying to get a tight fit, the clamp broke and cracked the plastic on the wing root. Filled the hole left by the broken plastic with sprue and filler. Also I think I may have used too much liquid glue on the lip of the engine air intake. I removed the clamps holding the parts together and they had left a imprint on the plastic. A bit more filler there as well!!!
I used some plasticard to fill in the gap where the wings fold into on the fuselage. Rest of the kit is going together pretty well. Not a great start, but the problems are minor and easily fixed.
All the best.
tim


#057
Bayern, Germany
Joined: May 11, 2010
KitMaker: 248 posts
AeroScale: 123 posts
Posted: Tuesday, July 05, 2011 - 11:25 PM UTC
@Middle-F: Oh yeah, Babe, bright red with white codes or RBF (still to be sourced, you got some in your stash?)
@Stefan: Thanks man, hope they still look the part when painted.
@Tim: Outch, that really makes me ache!! You got my sincerest heartfelt pity! But power through, I'll be watching!
Here's where I'm at:
the promised pic of the muzzle cover:

the travel pod:

The underlying pic is from Jake Melampy's book and just for discussion purposes.
The napalm container I used as abase was much too bulbous and round so I spent some time at the sink with a sanding stick under running water (resin, yannow). Then some carrying handles and a hinged access pannel scribed in and I hope it looks the part.
More to follow.
If thou art pained by any external thing, it is not this that disturbs thee, but thy own judgment about it.
Marcus Aurelius

#057
Bayern, Germany
Joined: May 11, 2010
KitMaker: 248 posts
AeroScale: 123 posts
Posted: Wednesday, July 06, 2011 - 12:49 AM UTC
Now, the upper part of the rear dashboard (you call it that?) is missing from the kit. Should look like this (again from Jakes book for discussion and refrence purposes only):

The lower greay part is in the kit, the upper one attached to the canopy not. My excuse for a scratch replacement:

Please be kind, I'm usually a kitsticker only.
Greetings.
If thou art pained by any external thing, it is not this that disturbs thee, but thy own judgment about it.
Marcus Aurelius
Belgium
Joined: December 18, 2010
KitMaker: 32 posts
AeroScale: 27 posts
Posted: Saturday, July 09, 2011 - 02:31 AM UTC
Hi,
Here is the F-5E in primer.
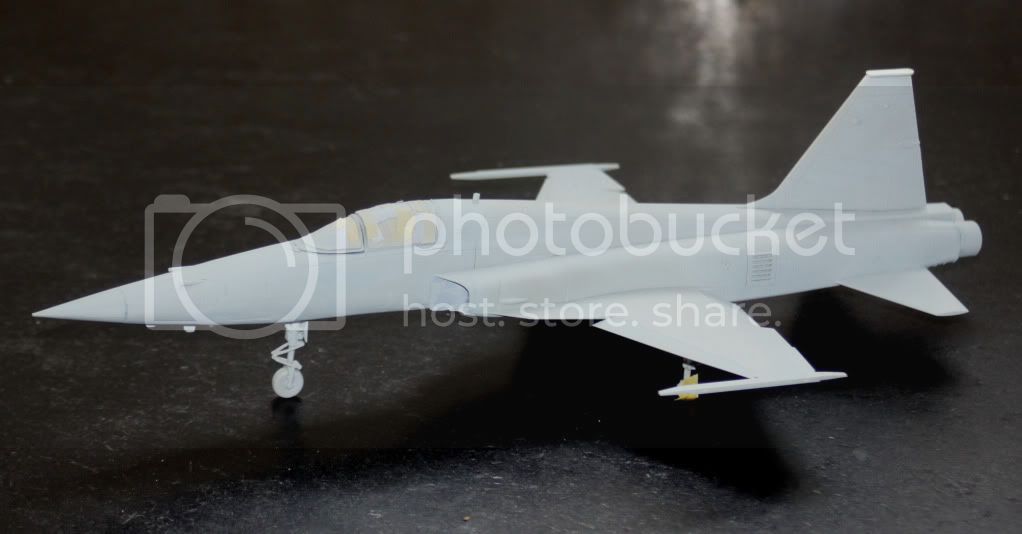
Although I had found the installation of the windscreen a bit fiddly, I had no idea there was such a big gap between the windscreen and the fuselage.
I had drilled out the oil check gauges in the rear fuselage and inserted a clear bit with the inside painted red. I was wondering how I was going to mask such a small circle. Just in time, a friend sold me a product he had imported from the USA: "Silly Putty".
The idea is that you can use like Bluetac.
I pinched off minimal quantities and used them as masks.
Cheers, Stefan.









 ?
?


