1/48 Testors SR-71 Blackbird
AussieReg
 Associate Editor
#007
Victoria, Australia
Joined: June 09, 2009
KitMaker: 8,156 posts
AeroScale: 3,756 posts
Posted: Friday, October 28, 2011 - 10:47 AM UTC
Awesome work Justin, great repair work and excellent detailing. This is turning into a really good tutorial thread.
Magnificent thumbprint in the last pic as well mate !
Cheers, D

ON the bench
Revell 1/24 '53 Corvette (building as '54)
Revell 1/24 BMW 507 Coupe and Cabrio
Italeri 1/48 Me262 B-1a/U1 Nightfighter
Monogram 1/24 '57 Chevy Nomad
Dragon 1/350 USS Frank Knox DD-742
Florida, United States
Joined: January 14, 2009
KitMaker: 2,798 posts
AeroScale: 2,443 posts
Posted: Friday, October 28, 2011 - 12:34 PM UTC

thanks guys.
D thats from a burrito break my bad the whole thing will be cleaned when im done anyways

The rescribe really isnt the hard part its a lot easier than i thought it would be.That being said I now have a monogram P-61 in the stash and a F-106 and F-102 on the way all kits I shied away from because the were raised panel lines watch for build logs on all.
More to come thanks for watching
"From time to time, the tree of liberty must be watered with the blood of
tyrants and patriots."
- Thomas Jefferson
IPMS#47611
England - East Midlands, United Kingdom
Joined: November 06, 2005
KitMaker: 753 posts
AeroScale: 311 posts
Posted: Friday, October 28, 2011 - 02:07 PM UTC
Great progress and determination Justin.....keep going mate and you WILL get there.
Given your exposure of the 'warts and all' faults of this now old kit, I think I shall take the coward's way out and just wait for Paul Fisher's resin bits to improve the engines and do it as an 'in flight' model. Short of a former SR-71 crew chief turning up at my house pulling it to bits, I'm sure my end result will LOOK like a SR-71.
Can't wait to see where you go with this project! Thanks for the pics and updates.
Gary
Florida, United States
Joined: January 14, 2009
KitMaker: 2,798 posts
AeroScale: 2,443 posts
Posted: Friday, October 28, 2011 - 03:30 PM UTC
thanks for watching I did this partly as an exercise of my modeling skills becoming to dependent on the hasemiya kits and some little things I wanted to work on.Its definitely a test but im enjoying it.I like to model I dont just want to throw a kit together paint it and say done I like a challenge every now and then.Im not going to start counting rivets but I want it to be to my standard.mostly what I look at when im building is, I will sit my pc.on the desk and stare at it from every angle and try to pick apart my work and correct it.making myself better.guess you could say im a nut thanks for watching

"From time to time, the tree of liberty must be watered with the blood of
tyrants and patriots."
- Thomas Jefferson
IPMS#47611
Florida, United States
Joined: January 14, 2009
KitMaker: 2,798 posts
AeroScale: 2,443 posts
Posted: Thursday, November 03, 2011 - 12:38 PM UTC
"From time to time, the tree of liberty must be watered with the blood of
tyrants and patriots."
- Thomas Jefferson
IPMS#47611
Georgia, United States
Joined: August 22, 2005
KitMaker: 331 posts
AeroScale: 135 posts
Posted: Friday, November 04, 2011 - 04:38 AM UTC
Good looking build Justin. One of these days I'll get started on mine.
Support your Local Hobby Store.
Still boycotting Dragon Sytrene tracks. Ick-poo!
Current project:
Looking for my mind, I lost it somewhere.
Florida, United States
Joined: January 14, 2009
KitMaker: 2,798 posts
AeroScale: 2,443 posts
Posted: Friday, November 04, 2011 - 11:53 AM UTC
thanks viper keep watching its going to get interesting

"From time to time, the tree of liberty must be watered with the blood of
tyrants and patriots."
- Thomas Jefferson
IPMS#47611
AussieReg
 Associate Editor
#007
Victoria, Australia
Joined: June 09, 2009
KitMaker: 8,156 posts
AeroScale: 3,756 posts
Posted: Friday, November 04, 2011 - 03:27 PM UTC
Great progress Justin, this is coming together very nicely indeed sir !
Cheers, D
ON the bench
Revell 1/24 '53 Corvette (building as '54)
Revell 1/24 BMW 507 Coupe and Cabrio
Italeri 1/48 Me262 B-1a/U1 Nightfighter
Monogram 1/24 '57 Chevy Nomad
Dragon 1/350 USS Frank Knox DD-742
Florida, United States
Joined: January 14, 2009
KitMaker: 2,798 posts
AeroScale: 2,443 posts
Posted: Thursday, November 10, 2011 - 12:06 AM UTC
Well now that my wife is free and clear of the hospital I should be able to find some time by the weekend and post more progress soon

"From time to time, the tree of liberty must be watered with the blood of
tyrants and patriots."
- Thomas Jefferson
IPMS#47611
Georgia, United States
Joined: August 22, 2005
KitMaker: 331 posts
AeroScale: 135 posts
Posted: Thursday, November 10, 2011 - 07:35 AM UTC
Quoted Text
Well now that my wife is free and clear of the hospital I should be able to find some time by the weekend and post more progress soon 
Take care of the wife first and then go build.
Support your Local Hobby Store.
Still boycotting Dragon Sytrene tracks. Ick-poo!
Current project:
Looking for my mind, I lost it somewhere.
Attica, Greece / Ελλάδα
Joined: May 19, 2010
KitMaker: 17 posts
AeroScale: 16 posts
Posted: Thursday, November 17, 2011 - 09:43 AM UTC
Florida, United States
Joined: January 14, 2009
KitMaker: 2,798 posts
AeroScale: 2,443 posts
Posted: Thursday, November 17, 2011 - 01:21 PM UTC
thank you sir and thanks for watching

"From time to time, the tree of liberty must be watered with the blood of
tyrants and patriots."
- Thomas Jefferson
IPMS#47611
Florida, United States
Joined: January 14, 2009
KitMaker: 2,798 posts
AeroScale: 2,443 posts
Posted: Tuesday, November 29, 2011 - 03:06 AM UTC
So I've searched literately hundreds of pictures and cannot find a good picture of the rear wheel bays (more specifically the parts with the heat shields)if any one has a pic of these I would greatly appreciate it


"From time to time, the tree of liberty must be watered with the blood of
tyrants and patriots."
- Thomas Jefferson
IPMS#47611
Florida, United States
Joined: January 14, 2009
KitMaker: 2,798 posts
AeroScale: 2,443 posts
Posted: Tuesday, November 29, 2011 - 05:57 AM UTC
Update I have found the pic's and these will start a whole new adventure

"From time to time, the tree of liberty must be watered with the blood of
tyrants and patriots."
- Thomas Jefferson
IPMS#47611
England - East Midlands, United Kingdom
Joined: November 06, 2005
KitMaker: 753 posts
AeroScale: 311 posts
Posted: Tuesday, November 29, 2011 - 01:11 PM UTC
I love what you are doing with this spectacular looking but, in truth, dog of a kit.
Keep the pics coming mate!
Best regards
Gary
Florida, United States
Joined: January 14, 2009
KitMaker: 2,798 posts
AeroScale: 2,443 posts
Posted: Monday, December 12, 2011 - 12:20 AM UTC
Just an update wife is back to her old self again so I've had a chance to do some work on the sr-71 I will post pics over the next couple days

"From time to time, the tree of liberty must be watered with the blood of
tyrants and patriots."
- Thomas Jefferson
IPMS#47611
Georgia, United States
Joined: August 22, 2005
KitMaker: 331 posts
AeroScale: 135 posts
Posted: Monday, December 12, 2011 - 03:22 PM UTC
Quoted Text
Just an update wife is back to her old self again...
Barking out orders for Justin to:
Take out the trash
Mow the yard
Sweep and mop the floors
Cook dinner
Wash the minivan...
Yeah, I live with a woman too hence the slow building.
Support your Local Hobby Store.
Still boycotting Dragon Sytrene tracks. Ick-poo!
Current project:
Looking for my mind, I lost it somewhere.
New York, United States
Joined: January 29, 2004
KitMaker: 3,836 posts
AeroScale: 1,036 posts
Posted: Monday, December 12, 2011 - 03:33 PM UTC
Great mods Justin, like all the rivet and panel work.
Happy Modeling,
Joe
It feels like bible camp…Only I’m not crying pretending I’m somewhere else.
Happy Modeling
Joe
Florida, United States
Joined: January 14, 2009
KitMaker: 2,798 posts
AeroScale: 2,443 posts
Posted: Tuesday, December 13, 2011 - 12:47 AM UTC
Thanks joe

"From time to time, the tree of liberty must be watered with the blood of
tyrants and patriots."
- Thomas Jefferson
IPMS#47611
England - East Midlands, United Kingdom
Joined: November 06, 2005
KitMaker: 753 posts
AeroScale: 311 posts
Posted: Wednesday, December 14, 2011 - 02:49 AM UTC
Justin......the suspense is killing us mate!
Looking forward to your next update when you get the chance.
Regards
Gary
Florida, United States
Joined: January 14, 2009
KitMaker: 2,798 posts
AeroScale: 2,443 posts
Posted: Wednesday, December 14, 2011 - 01:33 PM UTC
ok so I guess I can post some progress.
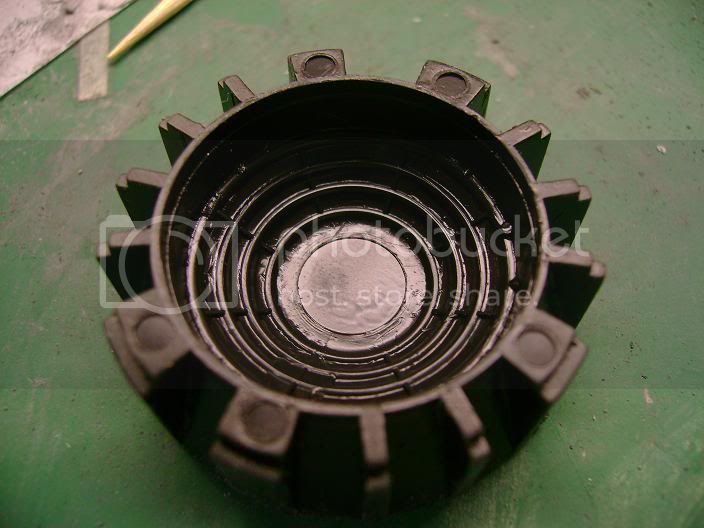
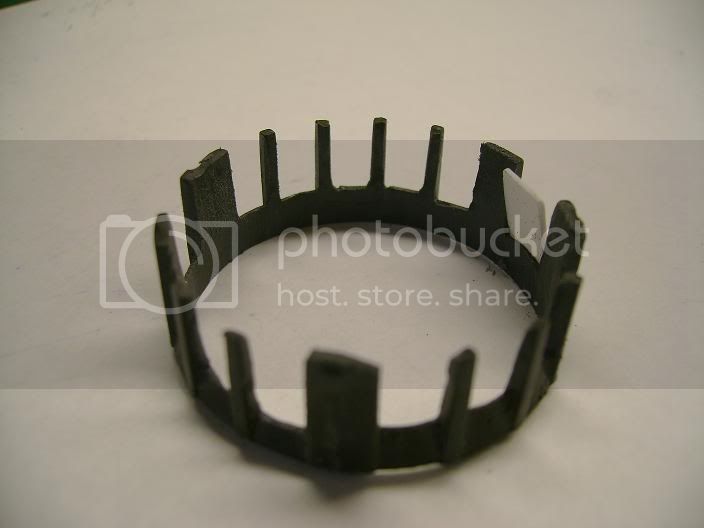
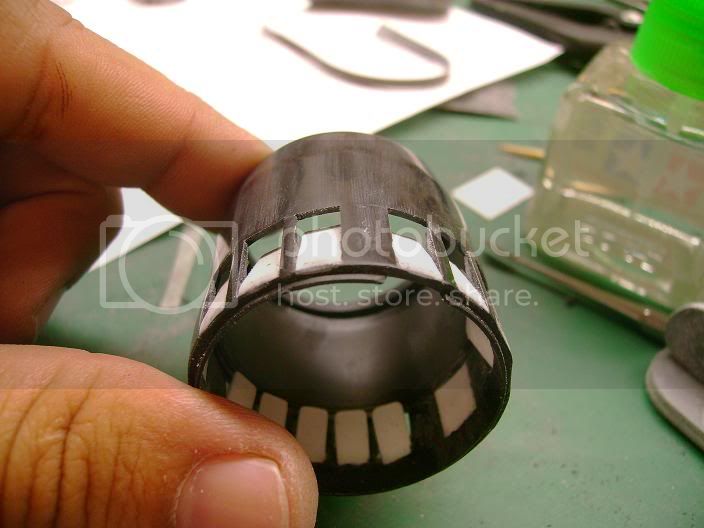
I mated the bottom parts of the fuselage together and re scribed.
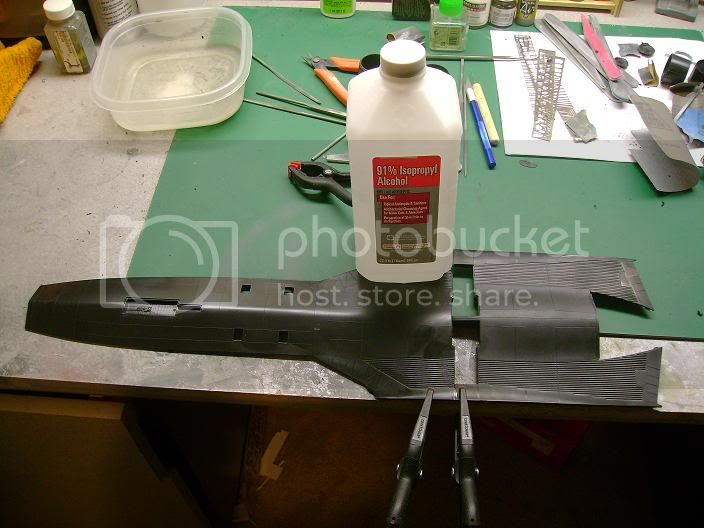
only to discover the horribly inaccurate wheel bays

just glad I can cut out the heat shields and re use them


so.............I CUT EVERYTHING OUT AND STARTED FROM SCRATCH!!!!!!!!


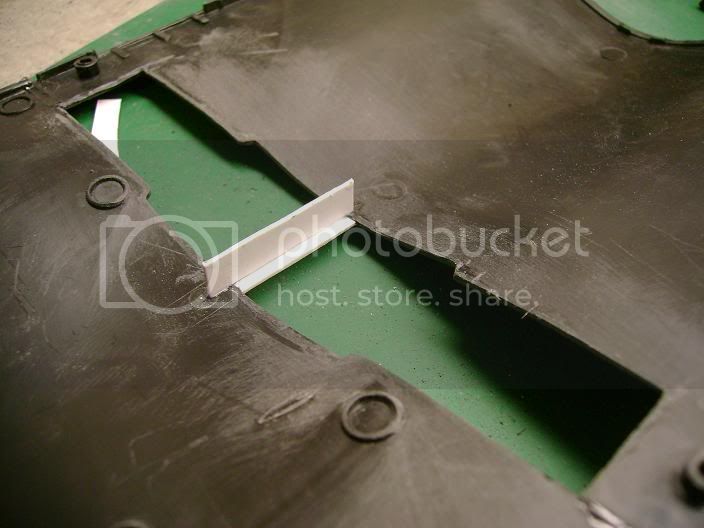
Ive made the wheel bays them selves and will be putting in all the plumbing,heat shields,and structure next...
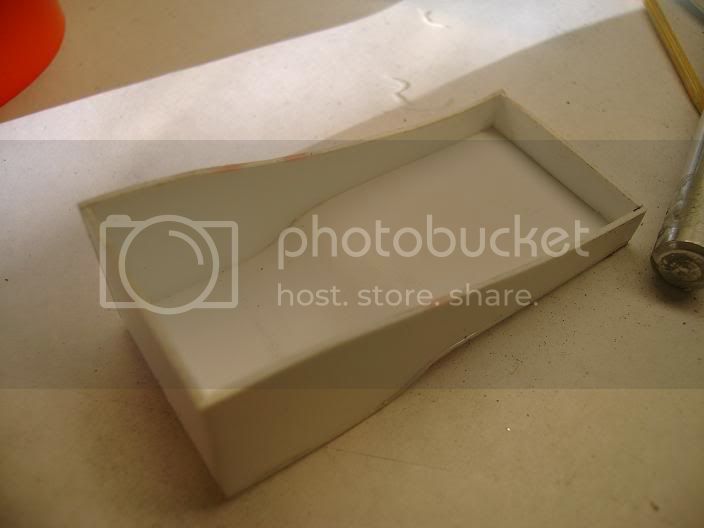
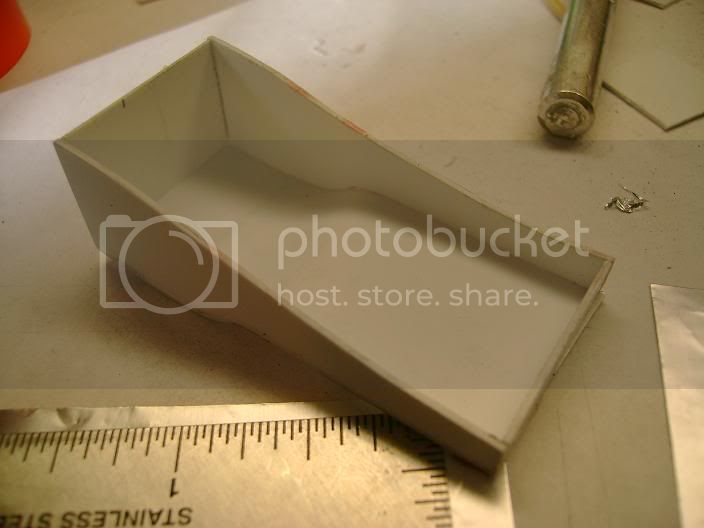
now your up to speed

thanks for looking
"From time to time, the tree of liberty must be watered with the blood of
tyrants and patriots."
- Thomas Jefferson
IPMS#47611
Florida, United States
Joined: November 13, 2005
KitMaker: 189 posts
AeroScale: 129 posts
Posted: Wednesday, December 14, 2011 - 06:07 PM UTC
This gets more interesting with every update. Can't wait for the next one.
Florida, United States
Joined: January 14, 2009
KitMaker: 2,798 posts
AeroScale: 2,443 posts
Posted: Friday, December 16, 2011 - 01:10 PM UTC
Thanks wasn't my intention but I think to myself each time something comes up should I leave it?then the other part kicks in while your doing it you might as well fix it.i had to make a serious styrene order including some corrugated sheets and some rod for the landing gear and I'm not even close to figuring out the front bay yet

I'm in this one for the long hall it will be worth it when I'm done

"From time to time, the tree of liberty must be watered with the blood of
tyrants and patriots."
- Thomas Jefferson
IPMS#47611
New York, United States
Joined: June 14, 2010
KitMaker: 702 posts
AeroScale: 29 posts
Posted: Saturday, December 17, 2011 - 11:34 AM UTC
The Blackbird is coming along nicely Justin, great work on it so far!
Can't wait to see more
Jeff
Florida, United States
Joined: January 14, 2009
KitMaker: 2,798 posts
AeroScale: 2,443 posts
Posted: Sunday, December 18, 2011 - 04:13 AM UTC
Thank you sir

"From time to time, the tree of liberty must be watered with the blood of
tyrants and patriots."
- Thomas Jefferson
IPMS#47611


 thanks guys.


 I will probably cast the air flap section as well so I've only done one side for now.my wife goes in for surgery on monday so this is the las update for probably a week or so....







 just glad I can cut out the heat shields and re use them


 thanks for looking



 I'm in this one for the long hall it will be worth it when I'm done


