Cold War (1950-1974)
Discuss the aircraft modeling subjects during the Cold War period.
Discuss the aircraft modeling subjects during the Cold War period.
Hosted by Tim Hatton
1/48 Testors SR-71 Blackbird
richter111

Joined: October 16, 2010
KitMaker: 7 posts
AeroScale: 3 posts

Posted: Friday, December 23, 2011 - 01:13 PM UTC
Looking good, I have this kit and the YF-12 I am about 1/3 rd of the way into the YF-12 and have picked up quite a few ideas looking here

Keeperofsouls2099

Joined: January 14, 2009
KitMaker: 2,798 posts
AeroScale: 2,443 posts

Posted: Saturday, December 24, 2011 - 12:23 AM UTC
Thanks for watching  I received my shipment of styrene yesterday and so far have added the ribbing to the inside of the gear bays just need to re work the landing gear and make it sturdy enough then start adding all the plumbing and what not.post pics soon
 I received my shipment of styrene yesterday and so far have added the ribbing to the inside of the gear bays just need to re work the landing gear and make it sturdy enough then start adding all the plumbing and what not.post pics soon

Keeperofsouls2099

Joined: January 14, 2009
KitMaker: 2,798 posts
AeroScale: 2,443 posts

Posted: Tuesday, January 03, 2012 - 06:40 AM UTC
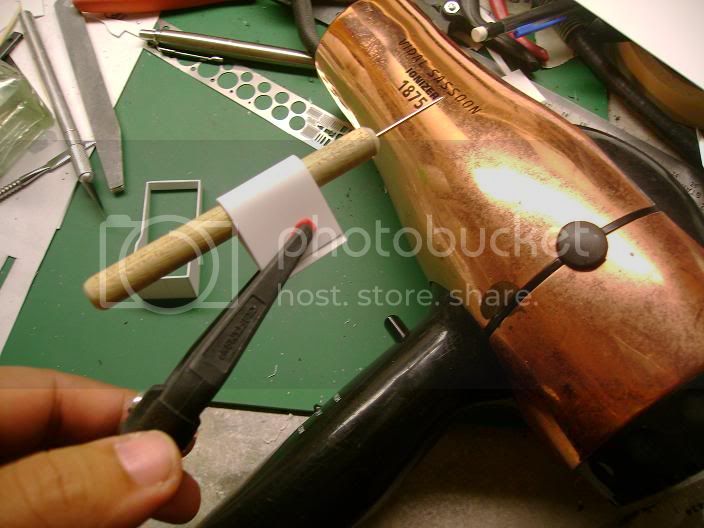
finally an update but you will be able to see what is taking so long.I had to bend and use a pc.of corrugated styrene to simulate the ribs on the inside.I also re worked there shape a bit to fit more into scale.I softened up the sheets with my wife's hair dryer 
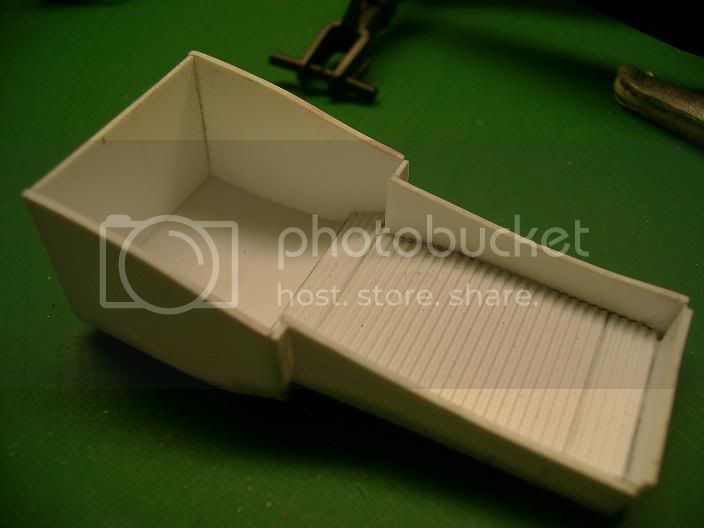
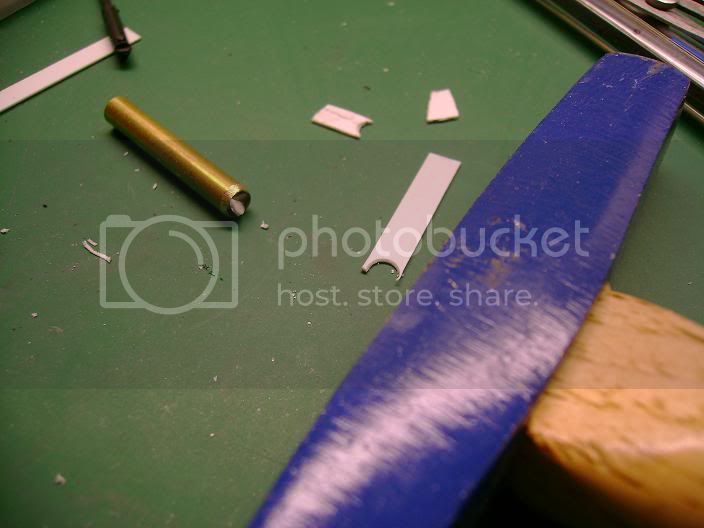
I came to need disc so I made my own hole punch with a pc.of brass tubing and sanded the end sharp and walah DISC!
now for the part that is taking to long lol.the wheel bay heat shields are under scale but im still thinking of replacing these I haven't decided yet.I completely redesigned the struts and so on.
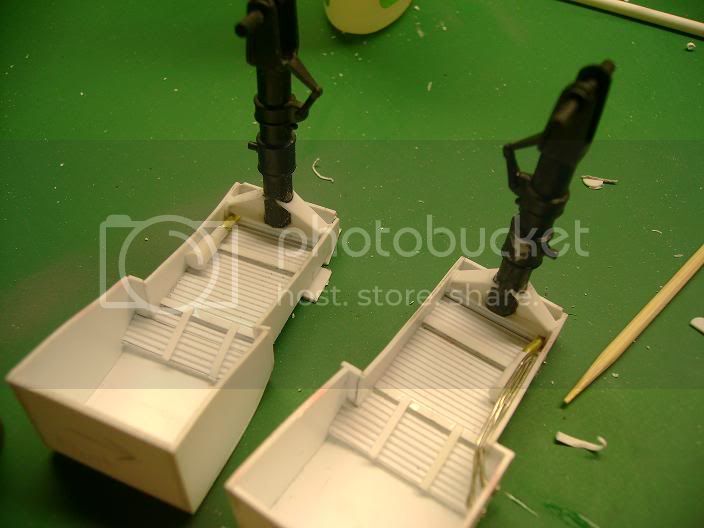
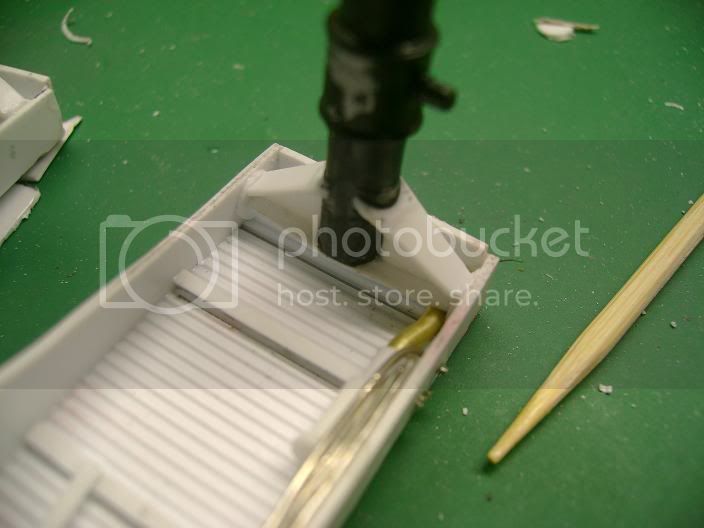

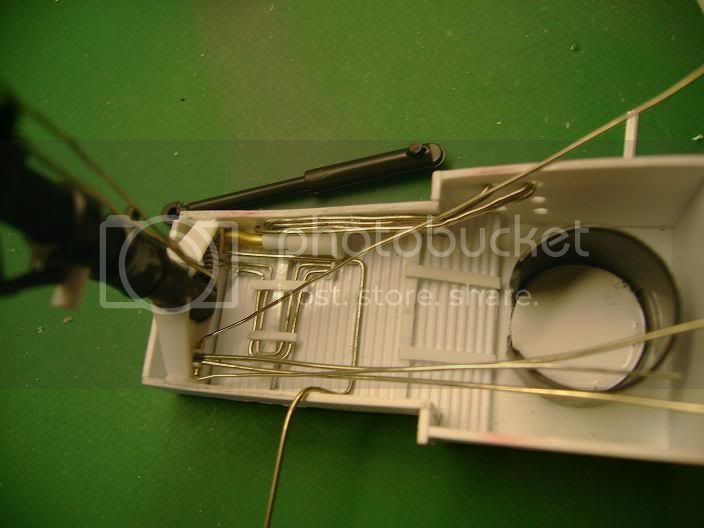
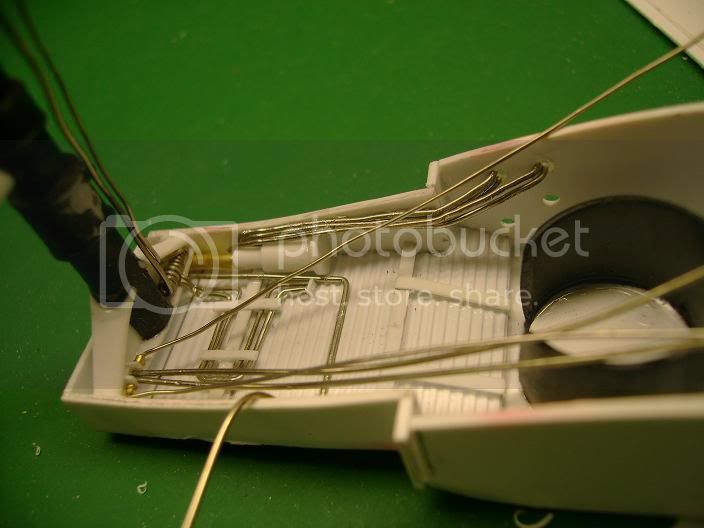
that's all on this shot more soon


I came to need disc so I made my own hole punch with a pc.of brass tubing and sanded the end sharp and walah DISC!

now for the part that is taking to long lol.the wheel bay heat shields are under scale but im still thinking of replacing these I haven't decided yet.I completely redesigned the struts and so on.


that's all on this shot more soon

nimrod77

Joined: January 18, 2012
KitMaker: 42 posts
AeroScale: 41 posts

Posted: Tuesday, January 17, 2012 - 11:42 PM UTC
truly amazing work! I'm building one of these and am updating a bit as you are.
Your work is inspirational!
I was considering building new main wheel wells as you have, but wussed out. Might have to reconsider that now
Have you got a plan for the nose on the kit? I've built a custom one here.
Watching with interest!
Your work is inspirational!
I was considering building new main wheel wells as you have, but wussed out. Might have to reconsider that now

Have you got a plan for the nose on the kit? I've built a custom one here.
Watching with interest!

Keeperofsouls2099

Joined: January 14, 2009
KitMaker: 2,798 posts
AeroScale: 2,443 posts

Posted: Wednesday, January 18, 2012 - 12:37 AM UTC
Hi thanks for the kind words it's a big undertaking for sure.i think I'm nuts but once I started cutting I couldn't stop.your link seams to be missing sir but yes I plan to correct the nose as I have read as well that it is incorrect.thanks for showing interest 

redcap

Joined: November 06, 2005
KitMaker: 753 posts
AeroScale: 311 posts

Posted: Wednesday, January 18, 2012 - 01:14 AM UTC
Justin,
This MODEL MAKING and not 'kit assembly' at it's very best. Fabulous work so far and I look forward to where you go next with this.
Cheers!
Gary
This MODEL MAKING and not 'kit assembly' at it's very best. Fabulous work so far and I look forward to where you go next with this.
Cheers!
Gary

Keeperofsouls2099

Joined: January 14, 2009
KitMaker: 2,798 posts
AeroScale: 2,443 posts

Posted: Wednesday, January 18, 2012 - 12:34 PM UTC
Thank you sir I'm almost done with one side  Pics soon
 Pics soon
Posted: Wednesday, January 18, 2012 - 02:05 PM UTC
Justin, it looks like $#@%. My advice is to throw the whole thing in the bin and start again !! 
Seriosly mate, awesome work. As Gary said, this is true modeling, not just assembly. Keep the progress pics coming so that I can steal more of your ideas.
Cheers, D

Seriosly mate, awesome work. As Gary said, this is true modeling, not just assembly. Keep the progress pics coming so that I can steal more of your ideas.
Cheers, D

nimrod77

Joined: January 18, 2012
KitMaker: 42 posts
AeroScale: 41 posts

Posted: Wednesday, January 18, 2012 - 07:16 PM UTC
Quoted Text
Hi thanks for the kind words it's a big undertaking for sure.i think I'm nuts but once I started cutting I couldn't stop.your link seams to be missing sir but yes I plan to correct the nose as I have read as well that it is incorrect.thanks for showing interest
Oppps, Here's the link http://s362974870.onlinehome.us/forums/air/index.php?showtopic=237255&st=0&p=2261221&fromsearch=1&#entry2261221
Cheers!

Keeperofsouls2099

Joined: January 14, 2009
KitMaker: 2,798 posts
AeroScale: 2,443 posts

Posted: Thursday, January 19, 2012 - 12:19 AM UTC
Thank you lots of pics I don't have and informative ways of tackling them.thanks for sharing 
Auss thanks

Auss thanks

zipper104

Joined: December 14, 2010
KitMaker: 6 posts
AeroScale: 5 posts

Posted: Friday, January 20, 2012 - 12:05 AM UTC
Hi all, my very first post here.
My name is Riccardo and I leave in northern Italy not far from Milan.
I have the same project in (very slow) progress now and I am following you with great interest.
Are you considering to rise up also the cockpit too?
The wronger part of the model is the too flat nose area.
I made it this way:
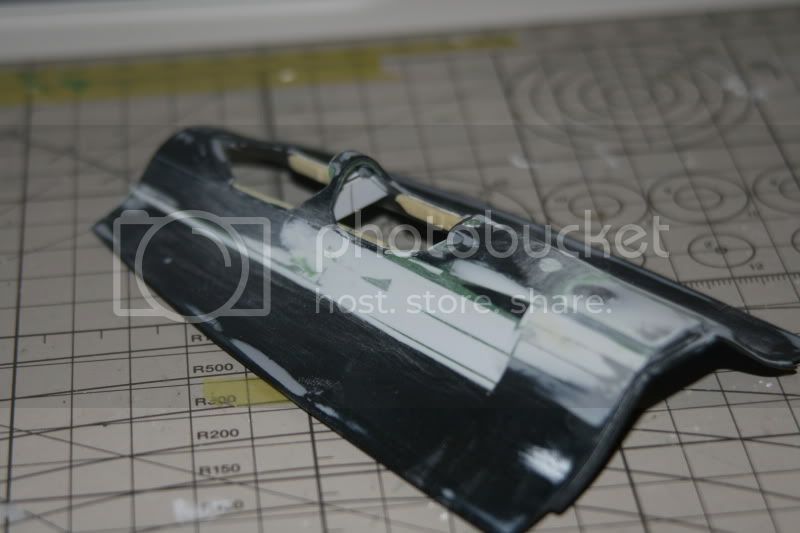
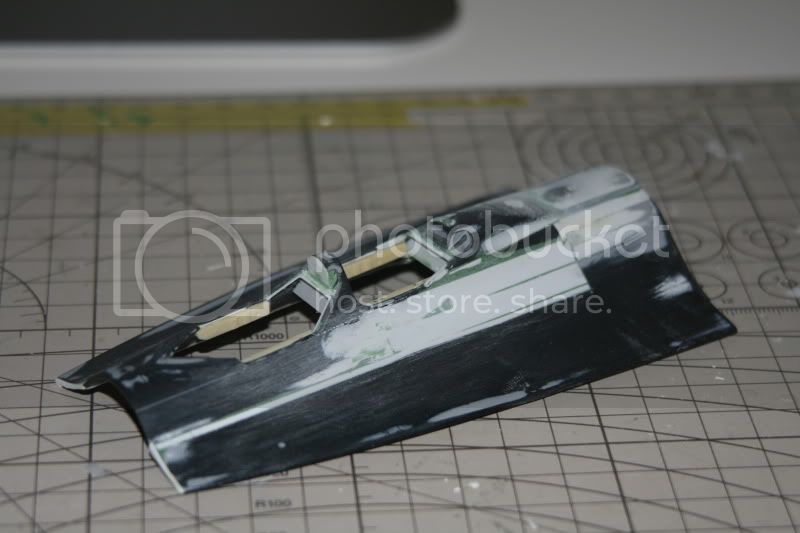
I have also already scratchbuild the nose weel bay:
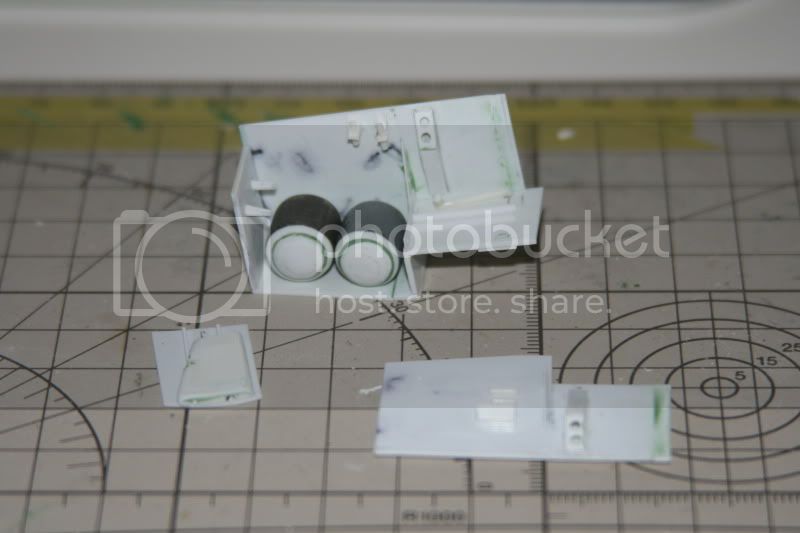
I am now stopped due to other projects I want to finish before going on with the 71.
Cheers all!
Riccardo
My name is Riccardo and I leave in northern Italy not far from Milan.
I have the same project in (very slow) progress now and I am following you with great interest.
Are you considering to rise up also the cockpit too?
The wronger part of the model is the too flat nose area.
I made it this way:


I have also already scratchbuild the nose weel bay:

I am now stopped due to other projects I want to finish before going on with the 71.
Cheers all!
Riccardo

Keeperofsouls2099

Joined: January 14, 2009
KitMaker: 2,798 posts
AeroScale: 2,443 posts

Posted: Friday, January 20, 2012 - 12:20 AM UTC
Thanks for sharing I imagine I will have to raise it when I scratch the front wheel bay Im not going to pay to much attention to the pit because my canopy will be closed to get that over all sinister look.good work so far on your wheel by so far 


Keeperofsouls2099

Joined: January 14, 2009
KitMaker: 2,798 posts
AeroScale: 2,443 posts

Posted: Friday, January 20, 2012 - 01:14 PM UTC
well I finished one lol.....completely rebuilt.I compressed the landing gear as 3 out of 5 planes that Ive looked at after sitting for awhile are.I took out and scratched the heat shields I left the actuator loose so i can straiten the landing gear once it is installed pics.....

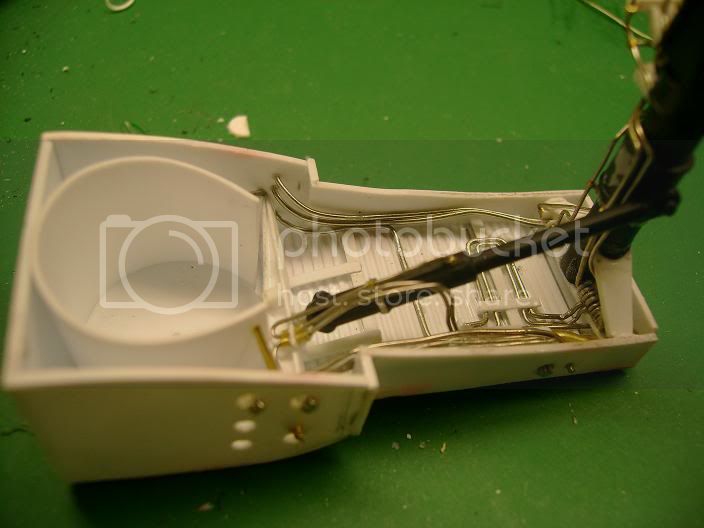
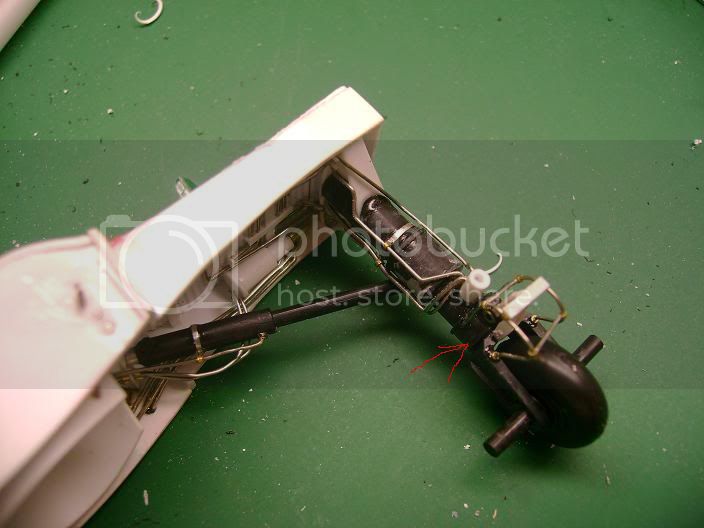
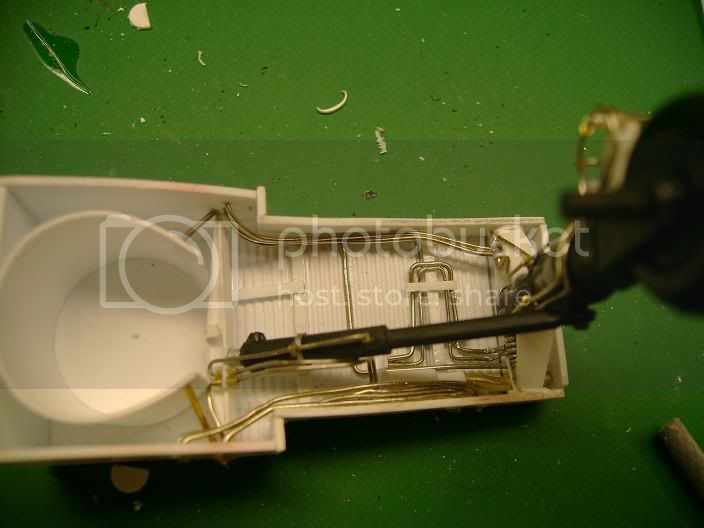
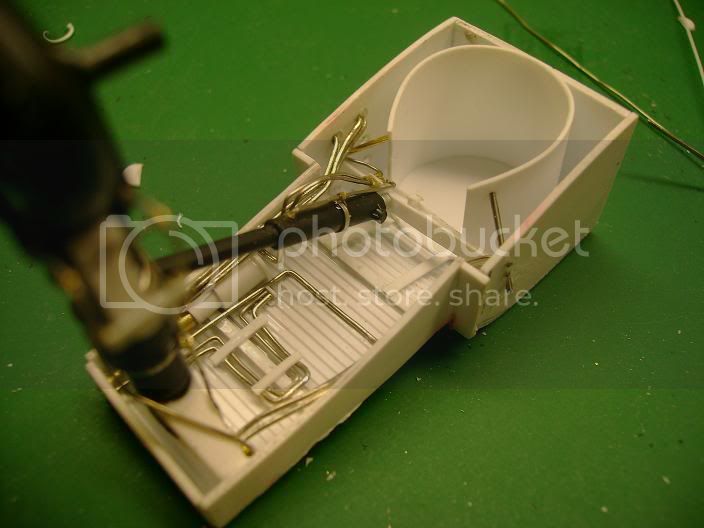

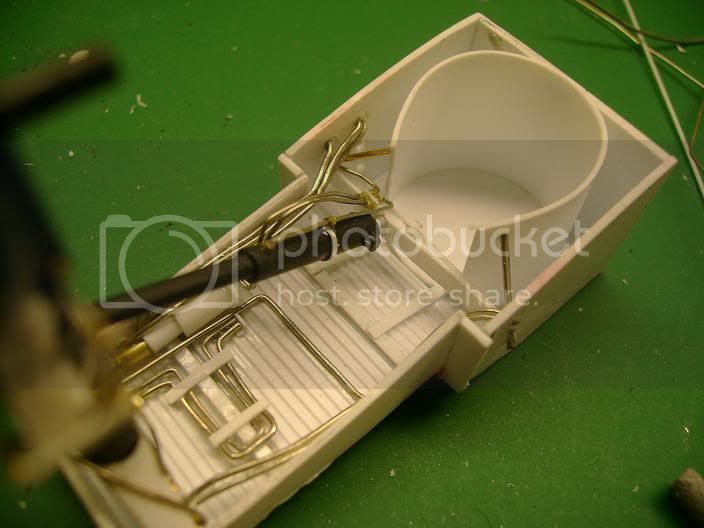
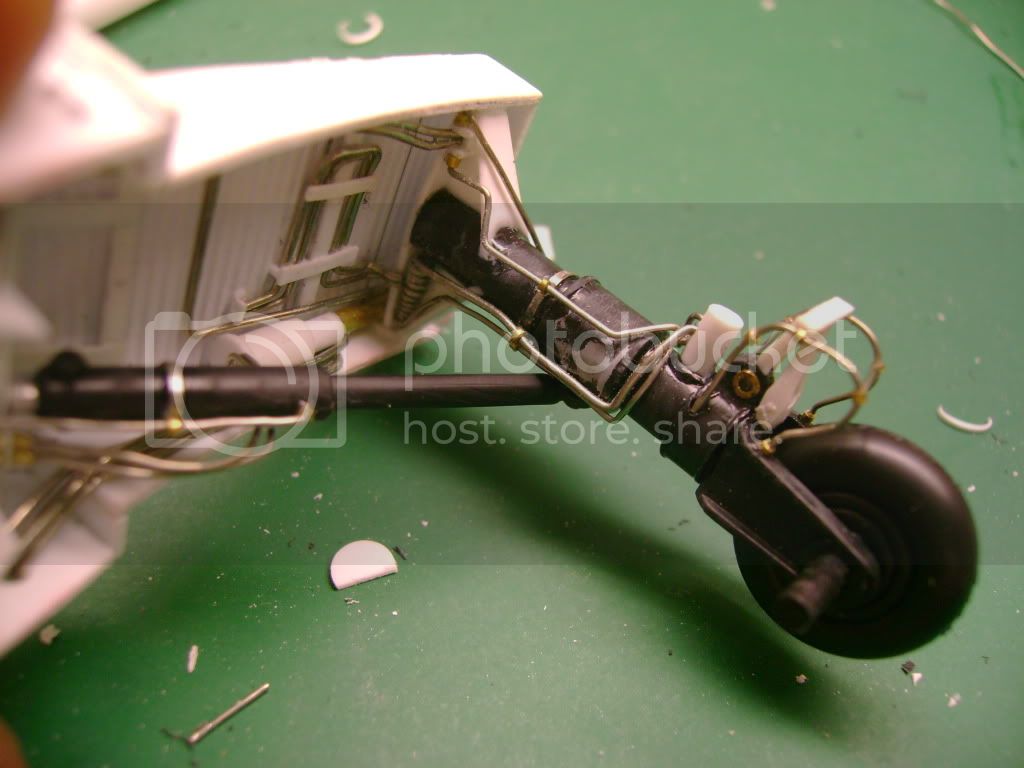
more soon


more soon

Posted: Friday, January 20, 2012 - 01:20 PM UTC
No good, still looks like %&$#@ ! 


Keeperofsouls2099

Joined: January 14, 2009
KitMaker: 2,798 posts
AeroScale: 2,443 posts

Posted: Friday, January 20, 2012 - 02:46 PM UTC
Thanks auss 

redcap

Joined: November 06, 2005
KitMaker: 753 posts
AeroScale: 311 posts

Posted: Friday, January 20, 2012 - 03:00 PM UTC
Jewel-like workmanship....love it!
Cheers Justin.
Gary
Cheers Justin.
Gary

Keeperofsouls2099

Joined: January 14, 2009
KitMaker: 2,798 posts
AeroScale: 2,443 posts

Posted: Friday, January 20, 2012 - 05:04 PM UTC
Ty sir 

ShawnM

Joined: November 24, 2008
KitMaker: 564 posts
AeroScale: 510 posts

Posted: Saturday, January 21, 2012 - 09:41 AM UTC

well done, that gear looks awesome!
Im watching close as I got this kit for xmas and plan to go whole hog as well.

Keeperofsouls2099

Joined: January 14, 2009
KitMaker: 2,798 posts
AeroScale: 2,443 posts

Posted: Saturday, January 21, 2012 - 10:52 AM UTC
Ty sir careful once you start you will be obsessed !
nimrod77

Joined: January 18, 2012
KitMaker: 42 posts
AeroScale: 41 posts

Posted: Saturday, January 21, 2012 - 05:56 PM UTC
Quoted Text
latest Work:I began by adding some vents to the sides of Part#19 that were left out.and cut out the elevon's as these will be in the down position on my build..
Hey again Justin,
Where did you find your references for this scoop? I should add this to my build!
Cheers!

Keeperofsouls2099

Joined: January 14, 2009
KitMaker: 2,798 posts
AeroScale: 2,443 posts

Posted: Sunday, January 22, 2012 - 04:55 AM UTC
I found them in a few pics I will post a pic as soon as I get to my computer 

Girolamo

Joined: July 05, 2011
KitMaker: 6 posts
AeroScale: 5 posts

Posted: Sunday, January 22, 2012 - 08:35 AM UTC
NIce detailng job!
Well done.
Best
Girolamo
Well done.
Best
Girolamo

Keeperofsouls2099

Joined: January 14, 2009
KitMaker: 2,798 posts
AeroScale: 2,443 posts

Posted: Sunday, January 22, 2012 - 10:20 AM UTC
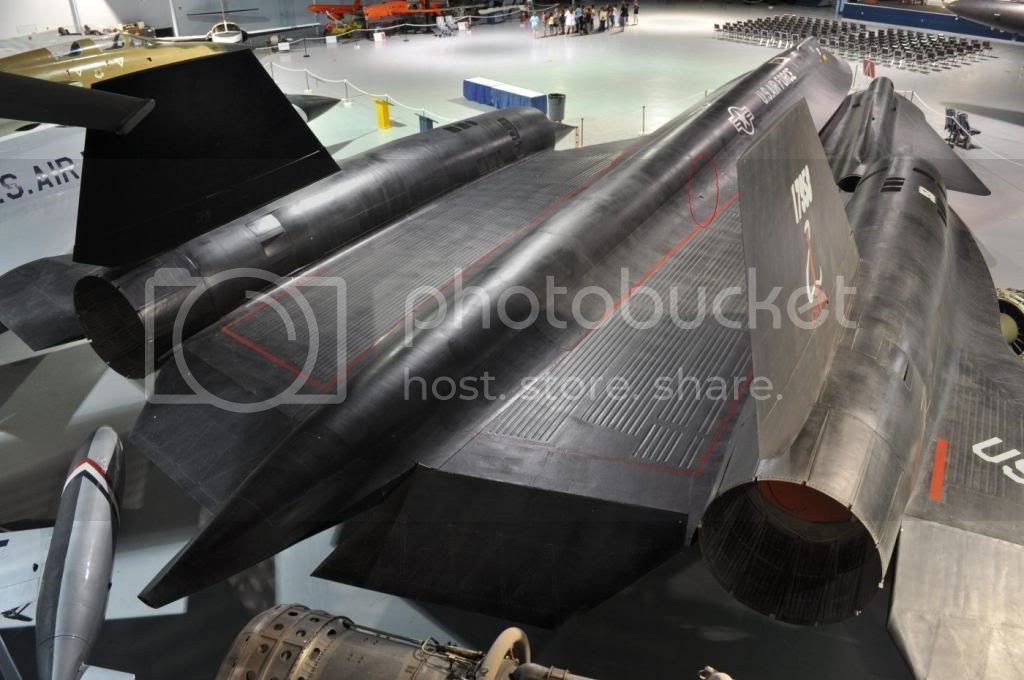
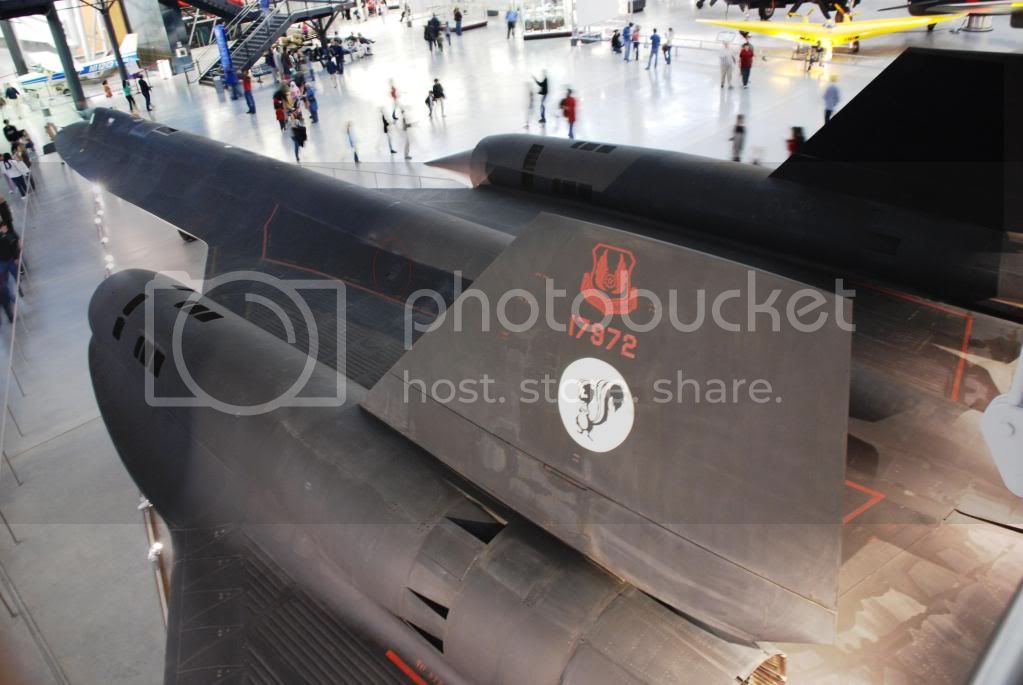
ty sir and heres the pics of the vents I promised circled in red....


nimrod77

Joined: January 18, 2012
KitMaker: 42 posts
AeroScale: 41 posts

Posted: Sunday, January 22, 2012 - 08:24 PM UTC
Thanks very much mate! What references are you using for your re-scribing efforts?
Almost a mini group build.
Almost a mini group build.

Keeperofsouls2099

Joined: January 14, 2009
KitMaker: 2,798 posts
AeroScale: 2,443 posts

Posted: Monday, January 23, 2012 - 12:21 AM UTC
All the pics I have most of the line drawings I've found are all different so I'm drawing my own conclusions going over the many pictures.the only problem I'm having so far is the camera boxes as I havnt been able to find a decent pic of these yet.i read where a pilot said you can't really see them on the bottom of the plane so these are going to be a guessing game 

 |


 ">
">

