OFFICIAL Matchbox Flying Nostalgia Campaign
AussieReg
 Associate Editor
#007
Victoria, Australia
Joined: June 09, 2009
KitMaker: 8,156 posts
AeroScale: 3,756 posts
Posted: Thursday, March 08, 2012 - 09:34 AM UTC
Lovely little Fury Jessica, nicely done ! Now how about you get cracking on the Gladiator

Hi Nick, I'm looking forward to some progress shots of the Wellesley once you get started.
Cheers, D
ON the bench
Revell 1/24 '53 Corvette (building as '54)
Revell 1/24 BMW 507 Coupe and Cabrio
Italeri 1/48 Me262 B-1a/U1 Nightfighter
Monogram 1/24 '57 Chevy Nomad
Dragon 1/350 USS Frank Knox DD-742
British Columbia, Canada
Joined: September 03, 2009
KitMaker: 6,965 posts
AeroScale: 6,247 posts
Posted: Thursday, March 08, 2012 - 09:48 AM UTC
The Gladiator became an open cockpit aircraft and I don't have anything I can replace it with. Nor can I complete it without violating the OOTB rule, so it doesn't get to play in this pool.
I may do a Norseman or Twotter though...
When once you have tasted flight you will walk the Earth with your eyes turned skyward.
For there you have been, and there you will always long to return.
-Leonardo Da Vinci
Attica, Greece / Ελλάδα
Joined: May 01, 2008
KitMaker: 1,437 posts
AeroScale: 1,241 posts
Posted: Friday, March 09, 2012 - 03:15 AM UTC
Wisconsin, United States
Joined: September 11, 2009
KitMaker: 1,917 posts
AeroScale: 563 posts
Posted: Friday, March 09, 2012 - 06:18 AM UTC
Yikes! Someone should have warned me how ugly a Wellesley is before I saw it here!

Just kidding. Have fun there. I'll continue lurking around but no kits in my stash for this campaign-- I built the Matchbox 1/72 F4U-4 with my youngest daughter maybe 2 years ago. A decent enough kit, and of course we didn't paint it, so it's in that nifty two-tone blue finish.
-Sean H.
Current: model railroad layout
Stalled a while ago:
. 1950's Chrome, WW II Twins
Last completed: Police Car
AussieReg
Associate Editor #007
Victoria, Australia
Joined: June 09, 2009
KitMaker: 8,156 posts
AeroScale: 3,756 posts
Posted: Friday, March 09, 2012 - 10:15 PM UTC
Hey Nick, don't pay any attention to Sean, he's just jealous because he can't play with us !
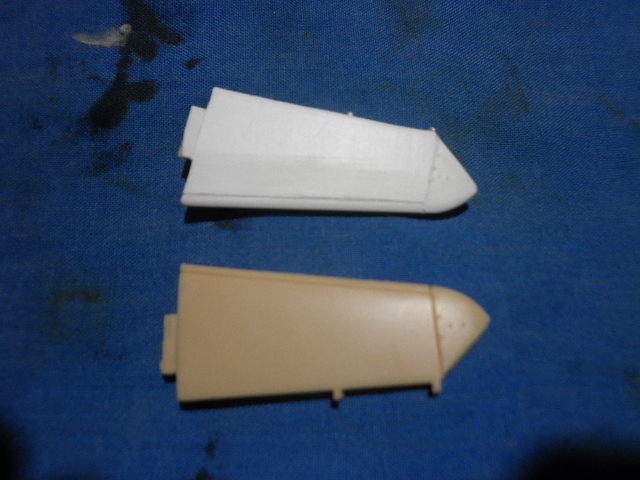
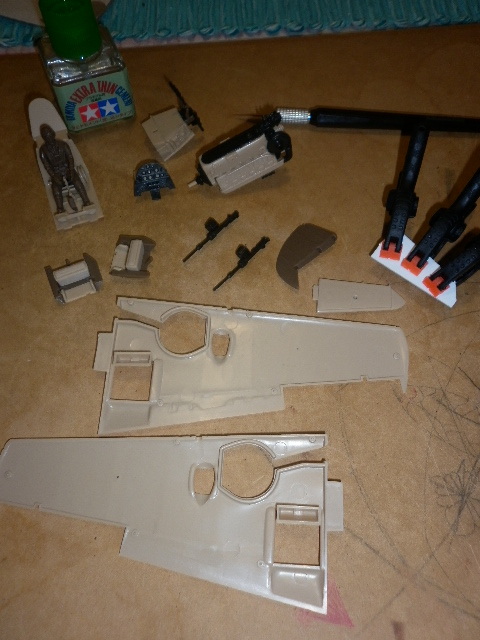
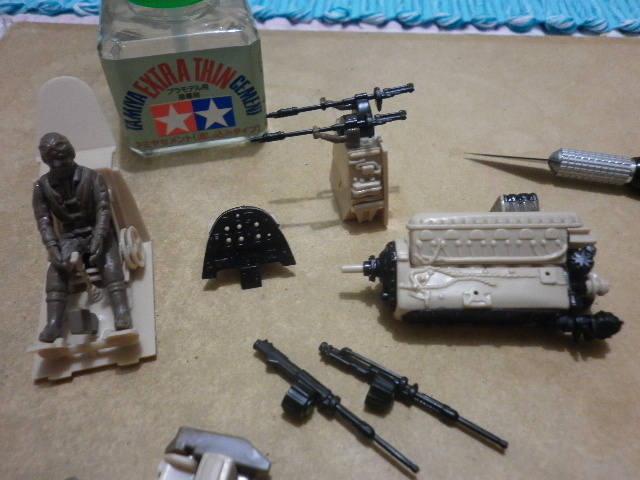
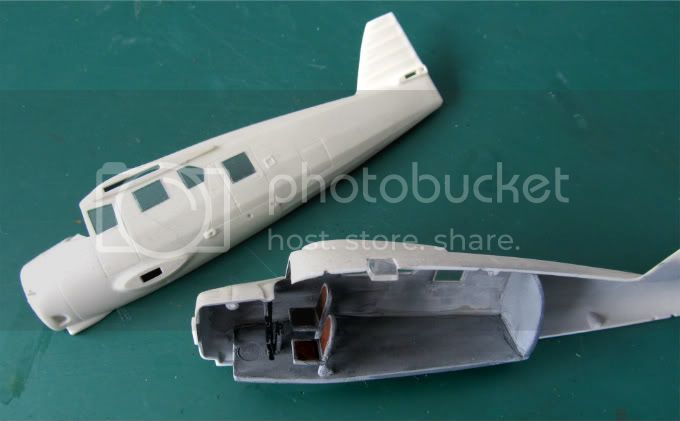
Just a couple of progress shots from me, sub-assemblies and the first stage of my "replace the missing part" adventure. I've roughly shaped a piece of 0.040" Evergreen sheet and laminated it to the other half of the stabilizer, and once it's dry I will carve and sand it into shape and engrave the matching panel lines. That's the plan anyway, only time will tell
Carry on everybody, you all have work to do !
Cheers, D
ON the bench
Revell 1/24 '53 Corvette (building as '54)
Revell 1/24 BMW 507 Coupe and Cabrio
Italeri 1/48 Me262 B-1a/U1 Nightfighter
Monogram 1/24 '57 Chevy Nomad
Dragon 1/350 USS Frank Knox DD-742
#439
Washington, United States
Joined: November 05, 2005
KitMaker: 4,950 posts
AeroScale: 3,192 posts
Posted: Saturday, March 10, 2012 - 06:06 AM UTC
Progress is being made.
What exactly was the point of the Wellesly? was it supposed to scare other planes out of the sky???
Hanger Queens in Waiting:
Monogram 1/72 F8F-1
Corsair the Sky Pirate - 1/72 Ace A-7D
Century Series - Airfix 1/72 F-105G
Anti Shipping - Academy 1/72 PBJ-1D
Academy 1/72 F-84E
British Columbia, Canada
Joined: September 03, 2009
KitMaker: 6,965 posts
AeroScale: 6,247 posts
Posted: Saturday, March 10, 2012 - 06:45 AM UTC
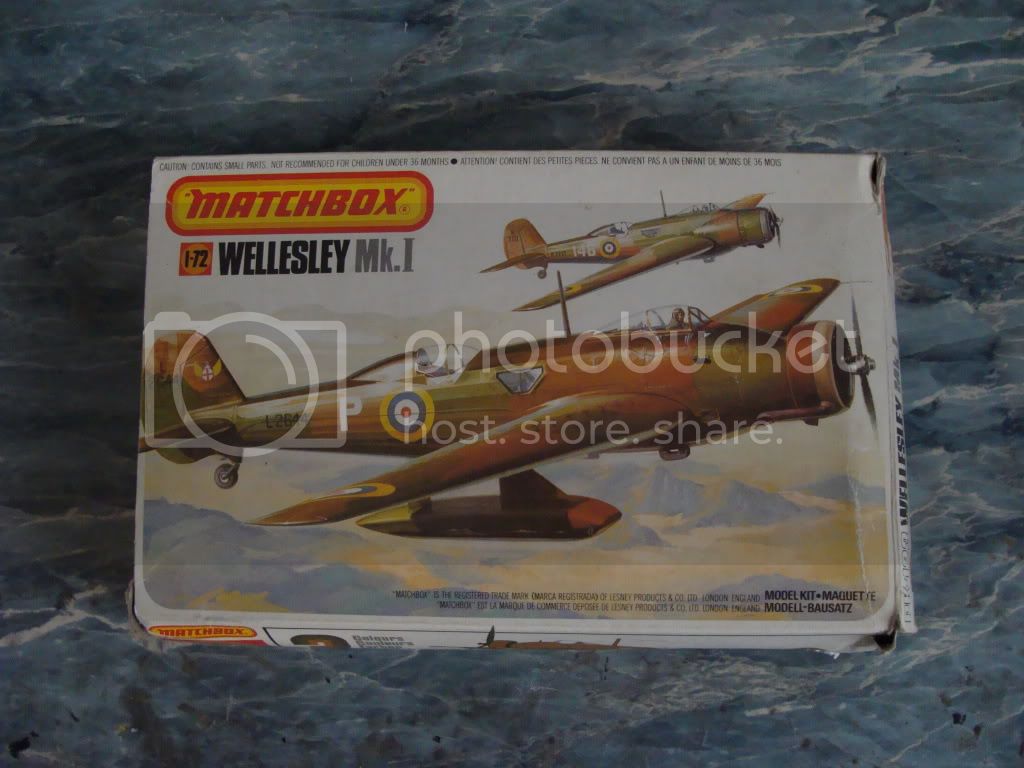
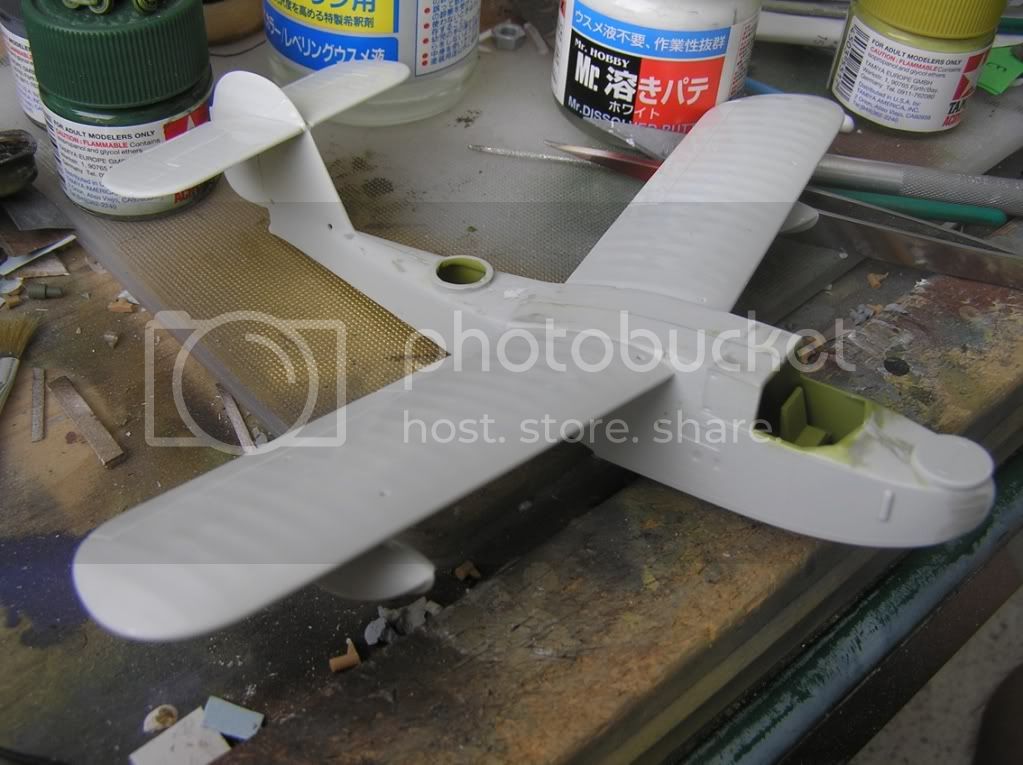
The Welelsley was designed in those heady days of the early 1930s when designers didn't know what was impossible. They also didn't know what was inadvisable. Its structure was Barnes Walis' opportunity to prove that his geodetic design was applicable to an entire aircraft. Its high aspect ratio wing was a way to get the same wing area as a biplane onto a monoplane design. The bomb panniers were used because nobody knew what sort of structural penalty was involved with putting a bomb bay in a geodetic fuselage, and they didn't want to find out by the airplane folding up on itself in flight. The single engine was the result of the RAF's conservative thinking when they wrote the original specification "Bombers have always had one engine so that's what this one is going to have!"
At the time it was introduced, it was incredibly advanced. It's just that the pace of aircraft development was so fast that it, like so many of its contemporaries, was rendered obsolete in such a short time.
When once you have tasted flight you will walk the Earth with your eyes turned skyward.
For there you have been, and there you will always long to return.
-Leonardo Da Vinci
#439
Washington, United States
Joined: November 05, 2005
KitMaker: 4,950 posts
AeroScale: 3,192 posts
Posted: Saturday, March 10, 2012 - 07:51 AM UTC
Quoted Text
"Bombers have always had one engine so that's what this one is going to have!"
I ran into that attitude just over 30 years ago at an information presentation for potential Naval Aviators. Some Marine captain was adamant that a naval aircraft could not function and deliver weapons without 2 engines and 2 operators. Seemed to be ignorant of the previous 60 years of Naval Aviation. The RAF at least had the benefit of much less experience....
Hanger Queens in Waiting:
Monogram 1/72 F8F-1
Corsair the Sky Pirate - 1/72 Ace A-7D
Century Series - Airfix 1/72 F-105G
Anti Shipping - Academy 1/72 PBJ-1D
Academy 1/72 F-84E
AussieReg
Associate Editor #007
Victoria, Australia
Joined: June 09, 2009
KitMaker: 8,156 posts
AeroScale: 3,756 posts
Posted: Saturday, March 10, 2012 - 08:52 PM UTC
ON the bench
Revell 1/24 '53 Corvette (building as '54)
Revell 1/24 BMW 507 Coupe and Cabrio
Italeri 1/48 Me262 B-1a/U1 Nightfighter
Monogram 1/24 '57 Chevy Nomad
Dragon 1/350 USS Frank Knox DD-742
Slovakia
Joined: October 15, 2010
KitMaker: 825 posts
AeroScale: 476 posts
Posted: Sunday, March 11, 2012 - 12:25 AM UTC
Well in comparison to Guido, Im not even close to the endline. I made onlz small progress this weekend. I run into some fit problems with the engine, which will be sorted out with putty and file.
England - East Midlands, United Kingdom
Joined: March 23, 2003
KitMaker: 2,124 posts
AeroScale: 788 posts
Posted: Sunday, March 11, 2012 - 12:54 AM UTC
is it time to start this campaign already?
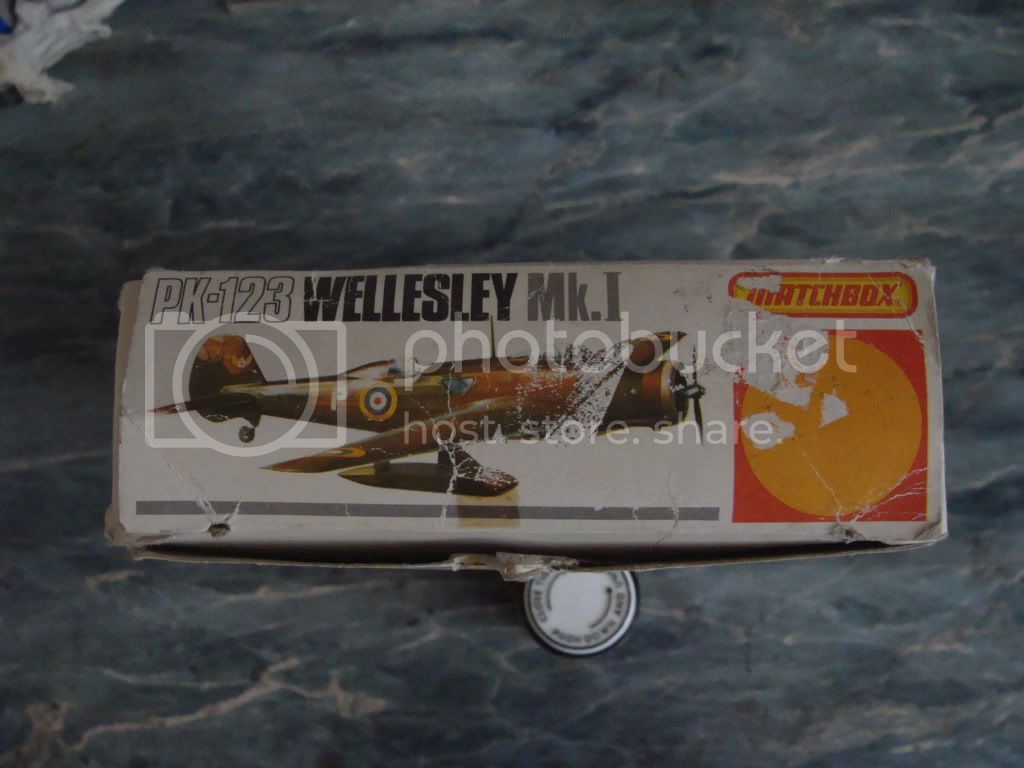
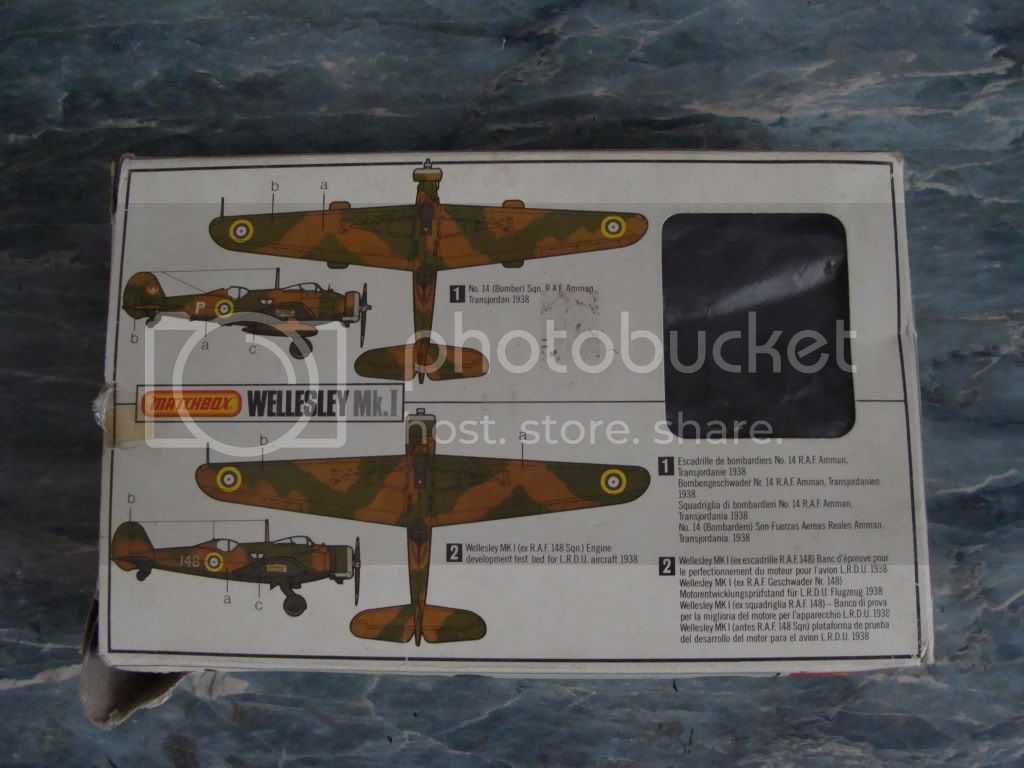
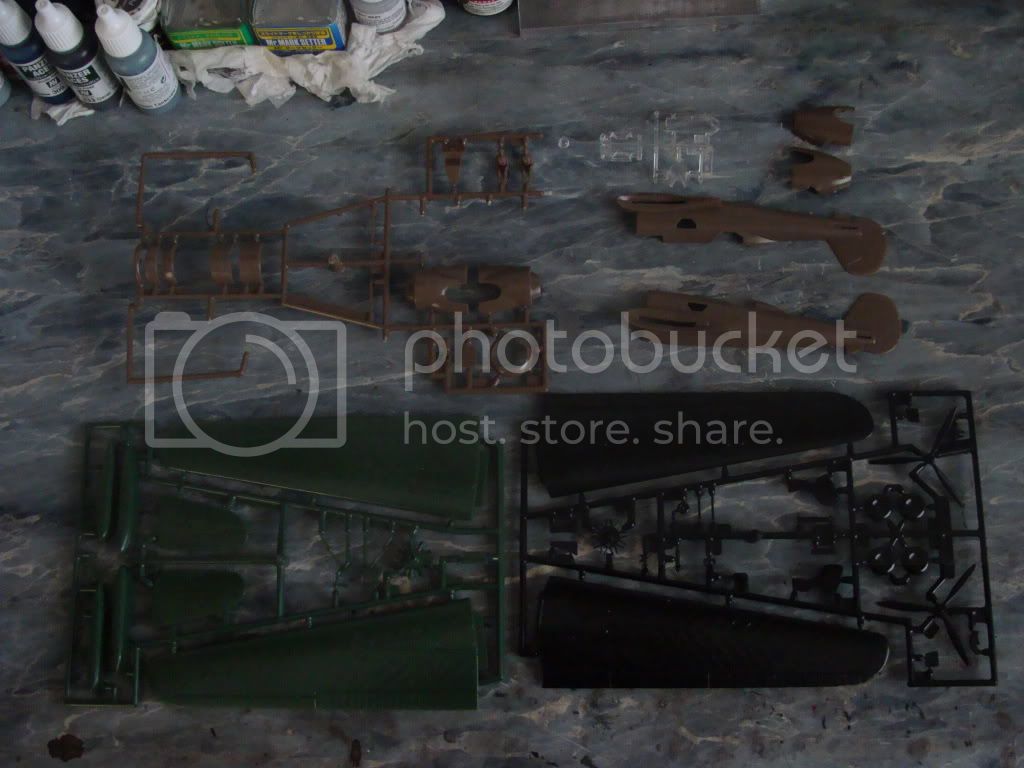
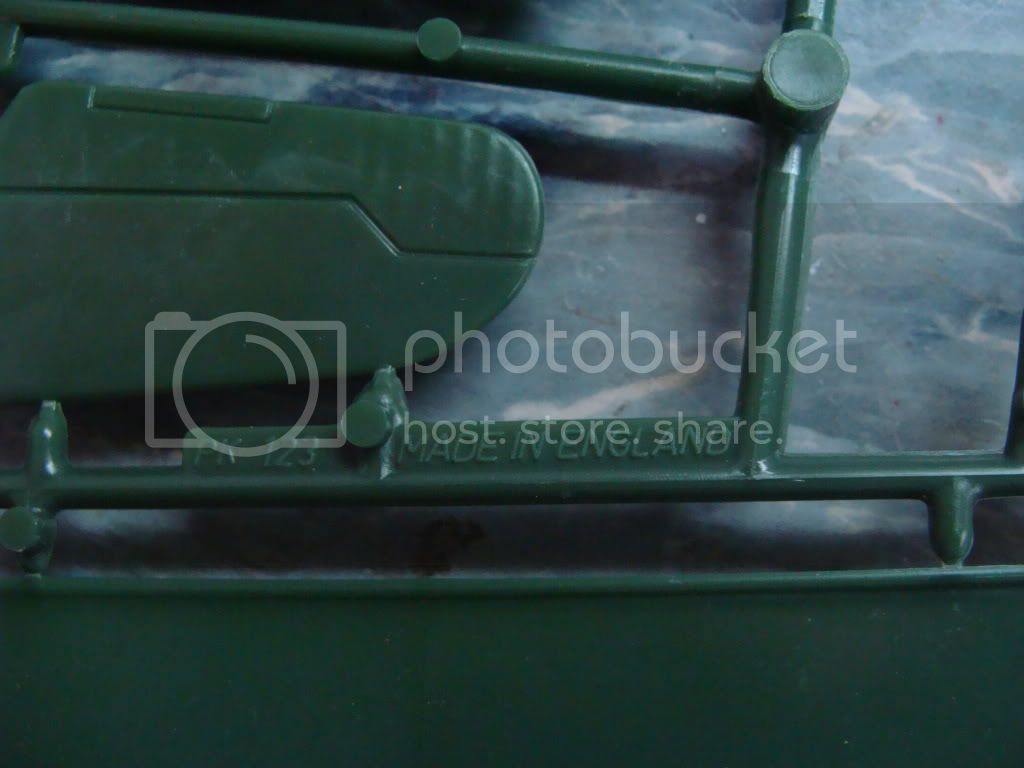
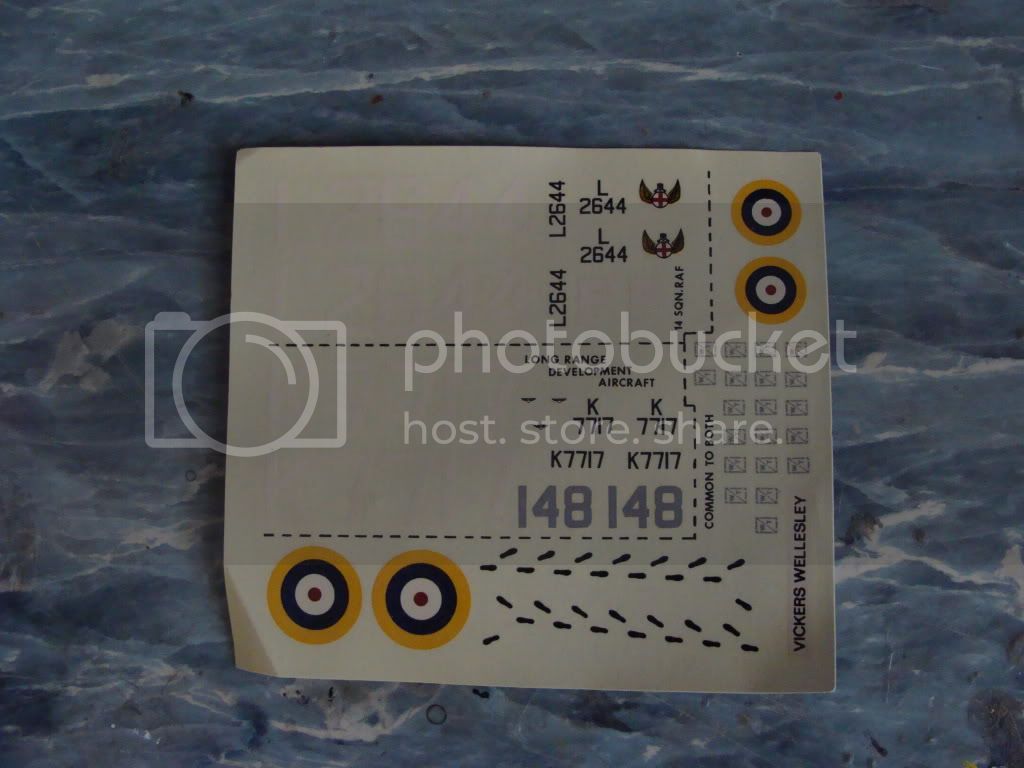
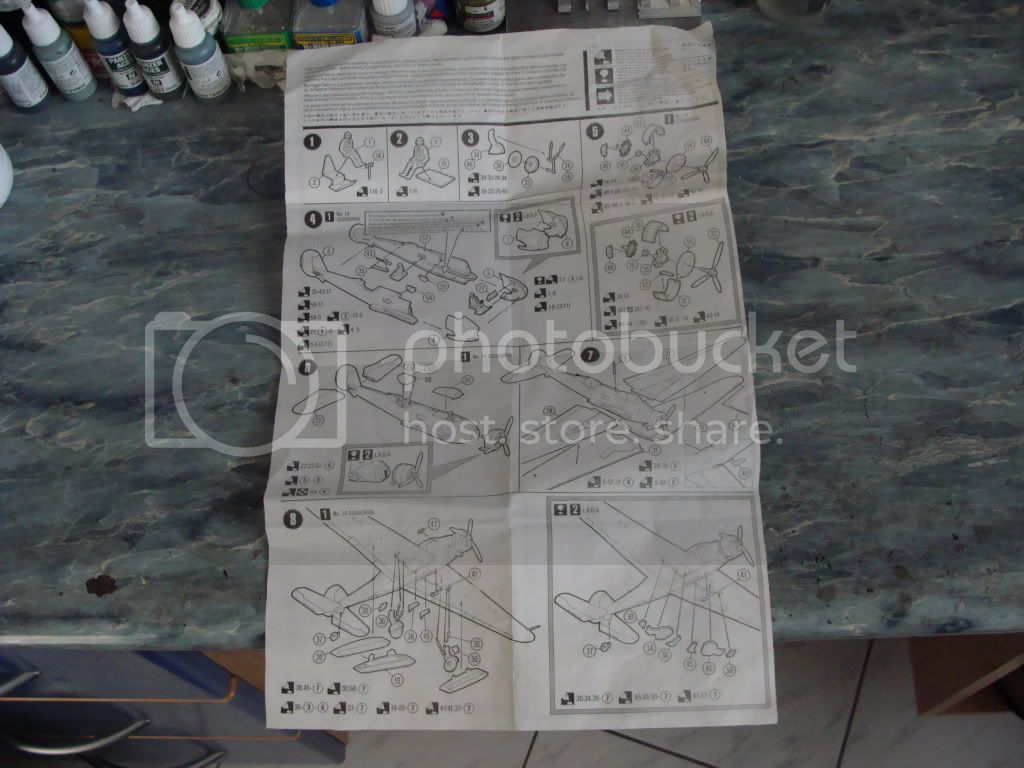
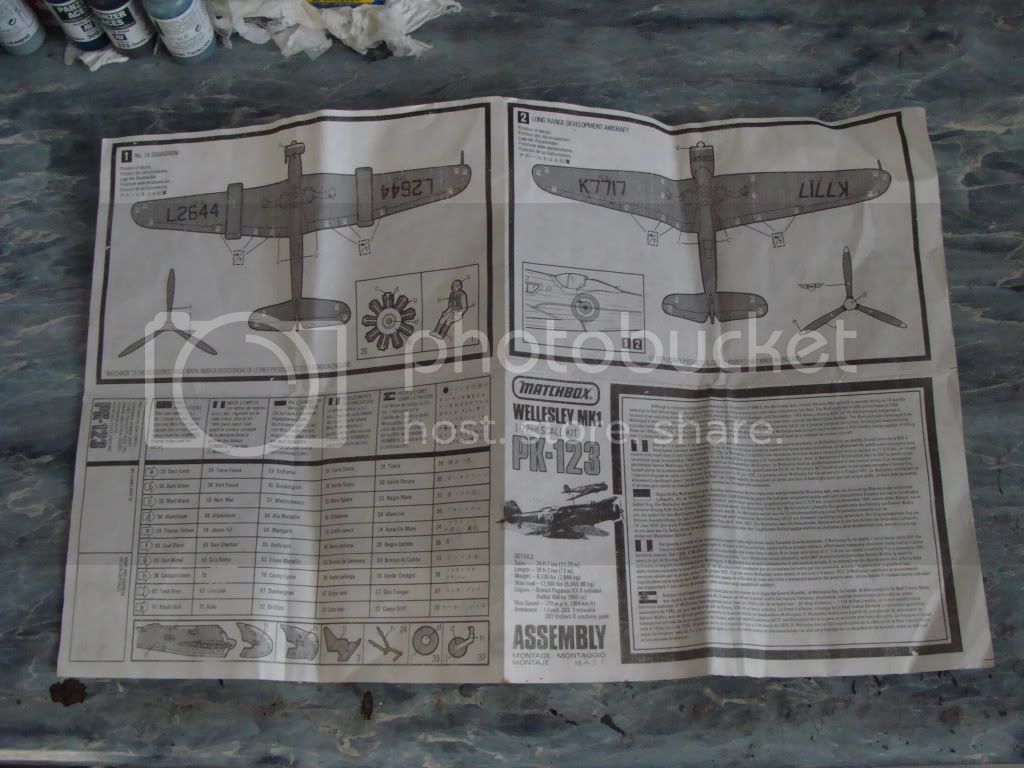
right, just had a frantic stash dash and I've decided to go with this-

had a pleasant surprise when I opened the the box, in that there were two sets of transfers

the stand is also present and correct and although the box has a date of 1983 the kit itself looks like it was moulded yesterday.

right I'm off to blast the interior of this in RLM 02 and hopefully later I'll have something actually stuck together!
ipms member 10318, click the IPMS-UK link under the avatar to see!
ACCIDENT PRONE? ME? NAAAAH!
SCREW YOU PHOTOBUCKET! ------------------------------------------------>>>>
Kuching, Malaysia
Joined: June 19, 2002
KitMaker: 216 posts
AeroScale: 128 posts
Posted: Sunday, March 11, 2012 - 03:04 AM UTC
Alberta, Canada
Joined: March 08, 2009
KitMaker: 394 posts
AeroScale: 360 posts
Posted: Sunday, March 11, 2012 - 10:06 AM UTC
So, I've painted the Norseman's interior as far as it go's. Gave it somewhat of a wash to make it look used and painted on some seat cushion. Glued in all the little side windows and 'Futured' both sides of them. The Future left them clear enough.
Was planning to glue the fuse halves together,but, found they won't close. So I'll have to sand the floors edge a bit first.
I'm amazed that some are already done, and done so well.. This is a very fun campaign.
Current Projects: 1/144 R5D-3 (MiniCraft)
1/48 Ford Flivver (Williams Bro.)
1/72 UC-64A Norseman (MatchBox)
MAAC No.51187
IPMS CANADA No. 3369
AussieReg
Associate Editor #007
Victoria, Australia
Joined: June 09, 2009
KitMaker: 8,156 posts
AeroScale: 3,756 posts
Posted: Sunday, March 11, 2012 - 10:57 AM UTC
Ken and Guy, great progress fellas, looking good !
Quoted Text
I'm amazed that some are already done, and done so well.. This is a very fun campaign.
That was the idea from day 1, a simple distraction from the detailed and complex builds that we all stress over, and a chance to maybe have another go at the kits we fumbled around with in our early days.
Cheers, D
ON the bench
Revell 1/24 '53 Corvette (building as '54)
Revell 1/24 BMW 507 Coupe and Cabrio
Italeri 1/48 Me262 B-1a/U1 Nightfighter
Monogram 1/24 '57 Chevy Nomad
Dragon 1/350 USS Frank Knox DD-742
Attica, Greece / Ελλάδα
Joined: May 01, 2008
KitMaker: 1,437 posts
AeroScale: 1,241 posts
Posted: Monday, March 12, 2012 - 02:55 AM UTC
Hello everyone
@ Mr. Sean: Thank you very much ! I really like this aircraft
@ Mr. Damian: Thank you very much

Cheers Nick

#305
Christchurch, New Zealand
Joined: February 01, 2006
KitMaker: 1,673 posts
AeroScale: 1,517 posts
Posted: Monday, March 12, 2012 - 10:11 PM UTC
AussieReg
Associate Editor #007
Victoria, Australia
Joined: June 09, 2009
KitMaker: 8,156 posts
AeroScale: 3,756 posts
Posted: Wednesday, March 14, 2012 - 12:08 AM UTC
Chris, great work mate, I just saw the other progress shots in your build log thread. It's a large piece of work ! How about a side-by-side shot with the big 190 for comparison ?
Phil, welcome aboard sir, and excellent choice of kits as well.
I've done some more sub-assemblage (?) and hopefully a couple of hours this weekend will see some paint thrown at it.
Cheers, D
ON the bench
Revell 1/24 '53 Corvette (building as '54)
Revell 1/24 BMW 507 Coupe and Cabrio
Italeri 1/48 Me262 B-1a/U1 Nightfighter
Monogram 1/24 '57 Chevy Nomad
Dragon 1/350 USS Frank Knox DD-742
Ontario, Canada
Joined: March 25, 2010
KitMaker: 514 posts
AeroScale: 244 posts
Posted: Friday, March 16, 2012 - 01:20 PM UTC
Ohio, United States
Joined: June 24, 2006
KitMaker: 20 posts
AeroScale: 16 posts
Posted: Friday, March 16, 2012 - 01:47 PM UTC
The Norseman is my all time favorite Matchbox kit! I will watch with interest.
#439
Washington, United States
Joined: November 05, 2005
KitMaker: 4,950 posts
AeroScale: 3,192 posts
Posted: Friday, March 16, 2012 - 03:30 PM UTC
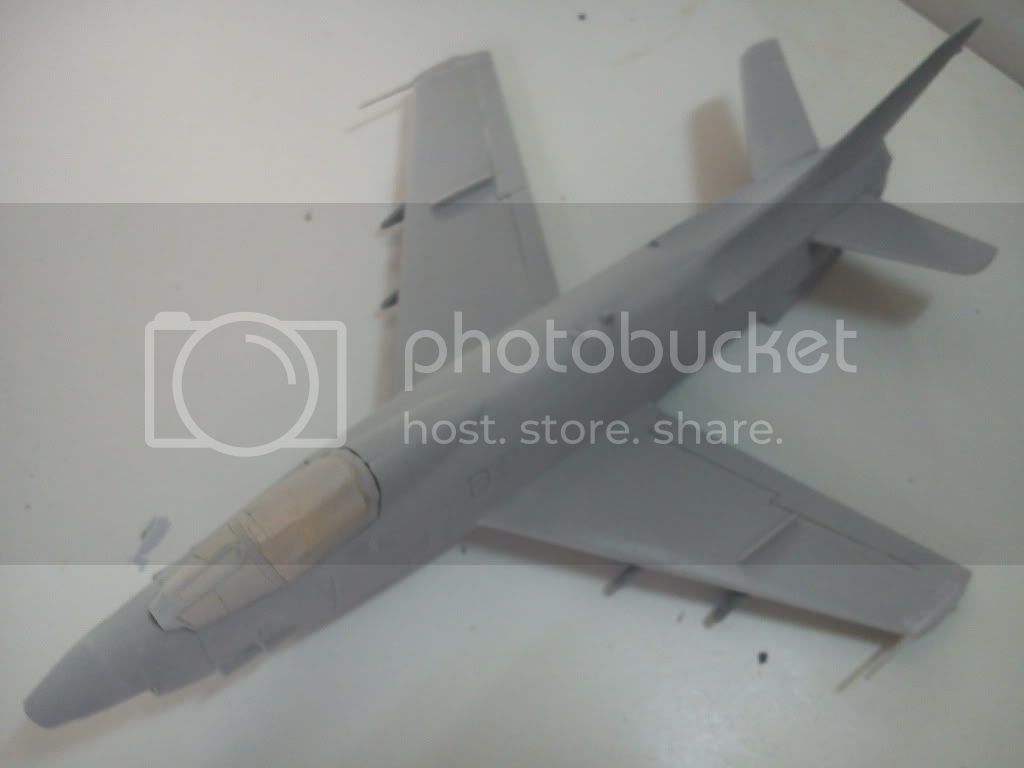
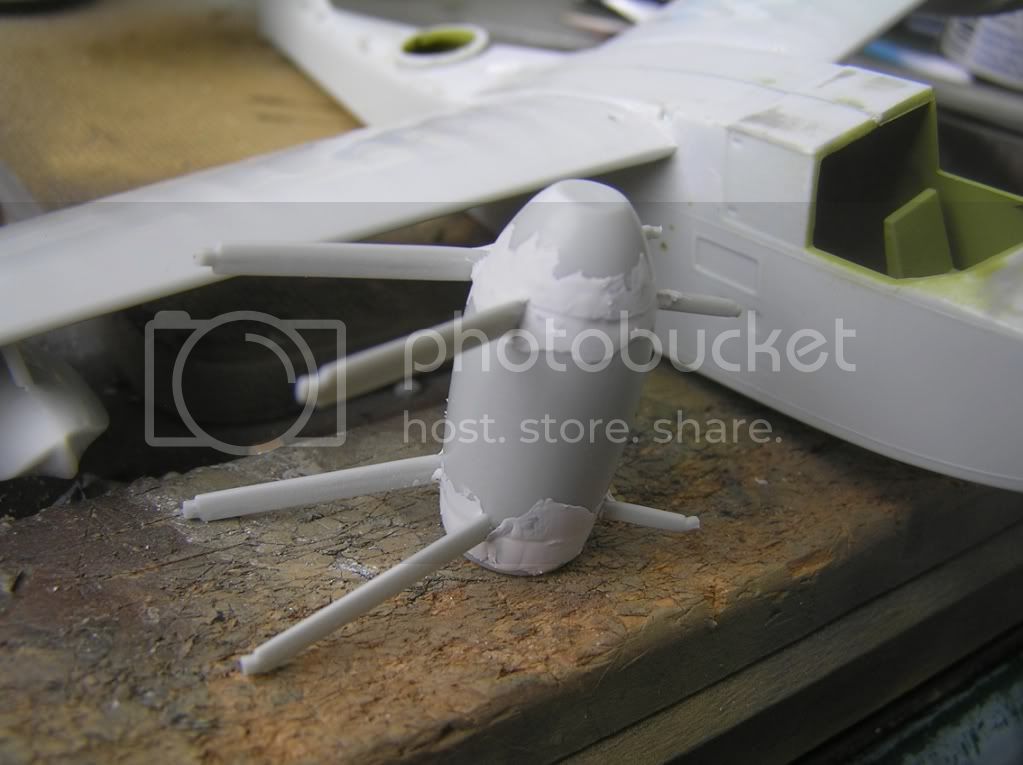
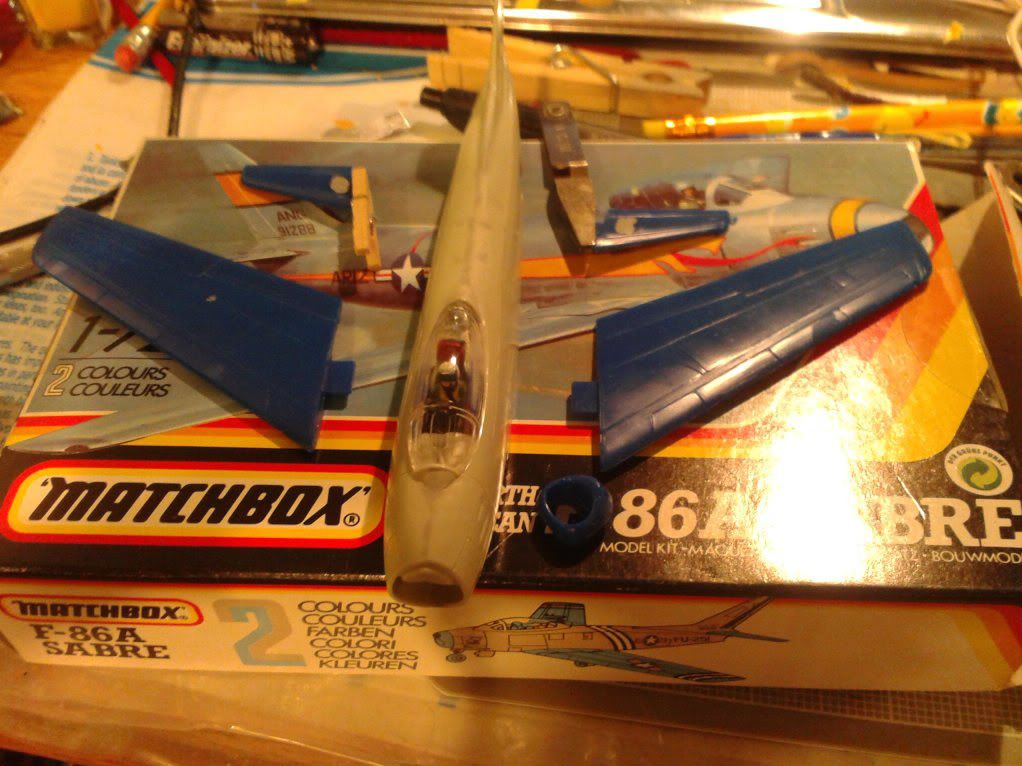
Progress. Got the fuselage and wings together just a little bit of filling and sanding. Not as much as I expected.
Hanger Queens in Waiting:
Monogram 1/72 F8F-1
Corsair the Sky Pirate - 1/72 Ace A-7D
Century Series - Airfix 1/72 F-105G
Anti Shipping - Academy 1/72 PBJ-1D
Academy 1/72 F-84E
AussieReg
Associate Editor #007
Victoria, Australia
Joined: June 09, 2009
KitMaker: 8,156 posts
AeroScale: 3,756 posts
Posted: Tuesday, March 20, 2012 - 12:15 AM UTC
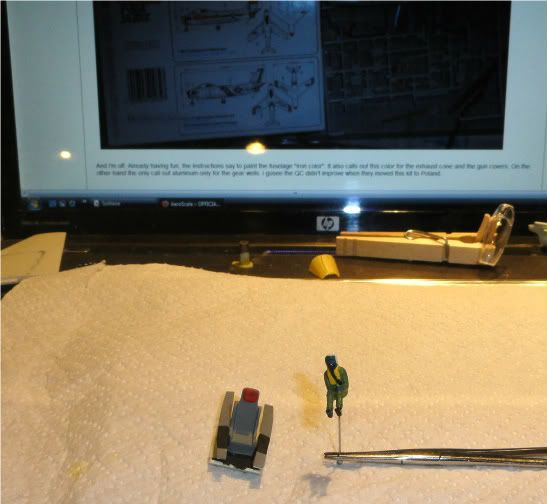
You folks are all going along very nicely indeed. Not much progress at my end though, all I have had time to do is put some attire on the pilot ! My first attempt at figure painting, so please be gentle with me !
Stage 1, XF-18 Medium Blue, X-18 Semi-Gloss Black, and XF-64 Red Brown, all acrylics and all brush painted. I find that if I thin the paint by about 20% it brushes quite nicely.
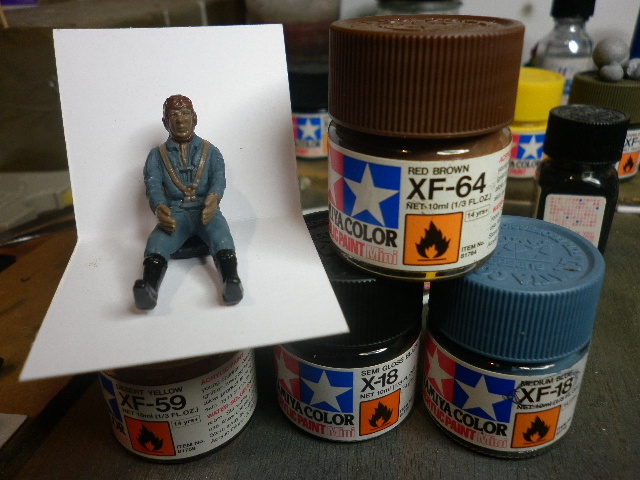
Stage 2, XF-59 Desert Yellow for the preserver, and Gunze H44 Flesh for the face and hands.
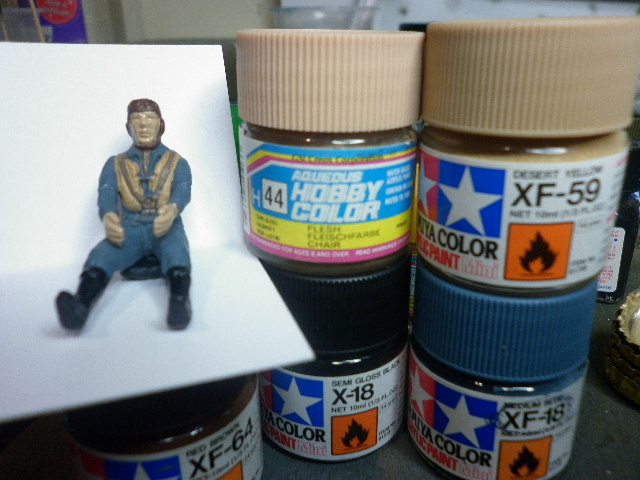
The colour selection might not be quite correct, but it works ok for me. Next stage is a pale blue shirt and black tie and goggles, perhaps some more Red Brown for the belts and straps, then touch-ups (plenty of them) and a wash of thin flat black enamel. If he still looks like cr4p then he can go to the boys for nerf-gun target practise
Cheers, D
ON the bench
Revell 1/24 '53 Corvette (building as '54)
Revell 1/24 BMW 507 Coupe and Cabrio
Italeri 1/48 Me262 B-1a/U1 Nightfighter
Monogram 1/24 '57 Chevy Nomad
Dragon 1/350 USS Frank Knox DD-742
#439
Washington, United States
Joined: November 05, 2005
KitMaker: 4,950 posts
AeroScale: 3,192 posts
Posted: Tuesday, March 20, 2012 - 03:28 AM UTC
Well, I think I'll leave my driver 'under glass', it's not great but it's not totally horrible either.
I am surprised at the quality of the pilot figures in these old Matchbox kits in general. It's not the featureless praying pilot (sitting with his hands clasped in front of his face) that I was expecting. Jessie and D have really brought them to life.

Hanger Queens in Waiting:
Monogram 1/72 F8F-1
Corsair the Sky Pirate - 1/72 Ace A-7D
Century Series - Airfix 1/72 F-105G
Anti Shipping - Academy 1/72 PBJ-1D
Academy 1/72 F-84E
#041
Kobenhavn, Denmark
Joined: July 20, 2006
KitMaker: 10,069 posts
AeroScale: 3,788 posts
Posted: Wednesday, March 21, 2012 - 08:10 AM UTC
A lot of interesting builds in this tread. Very good progress.
Naseby, I had terrible problems with that Walrus engine as well. You are doing a much better job than me.
Trevor, nice progress on the Dornier. Those trenches needs a little filling up. Otherwise a 1/72 crewman might break his foot in one of them
A little progress on my Hellcat. Pictures to follow soon.
Campaign'oholic - 252+ campaigns completed
Ontario, Canada
Joined: November 14, 2009
KitMaker: 270 posts
AeroScale: 264 posts
Posted: Wednesday, March 21, 2012 - 02:44 PM UTC
Finally got a few minutes at the bench, so I broke out the He115 and opened it up
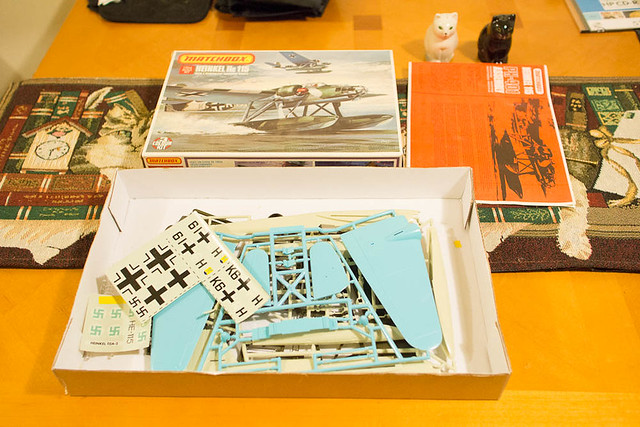 Matchbox He115 1/72
 by
mawz_models, on Flickr
I've glued up the wings, stabs & floats since this picture.
Hoping to get a little paint done tomorrow, which will get me to fuselage assembly.
Australian Capital Territory, Australia
Joined: March 04, 2012
KitMaker: 16 posts
AeroScale: 8 posts
Posted: Wednesday, March 21, 2012 - 05:04 PM UTC
Ordered myself a 1983 release of a 1/72 Brewster Buffalo for this campaign which arrived today.
Shouldn't be too hard, though not sure whether to do it in RNZAF (488 SQN) or NEIAF markings. Grrr....