Air Campaigns
Want to start or join a group build? This is where to start.
OFFICIAL: Pin-ups 2 Campaign
ltb073
_VISITCOMMUNITY
New York, United States
Joined: March 08, 2010
KitMaker: 3,662 posts
AeroScale: 174 posts
Posted: Sunday, May 13, 2012 - 03:37 AM UTC

Quoted Text

A coat of future would insure you not pulling up paint.Also good dry times I usually give mine a good day between steps for the paint to cure really good.pre cleaning to get all the oils off before painting.another good one is to put the tape on your pants and pull it off to remove some of the tack first


Thanks for the tips Justin I will try and remember them for My next build
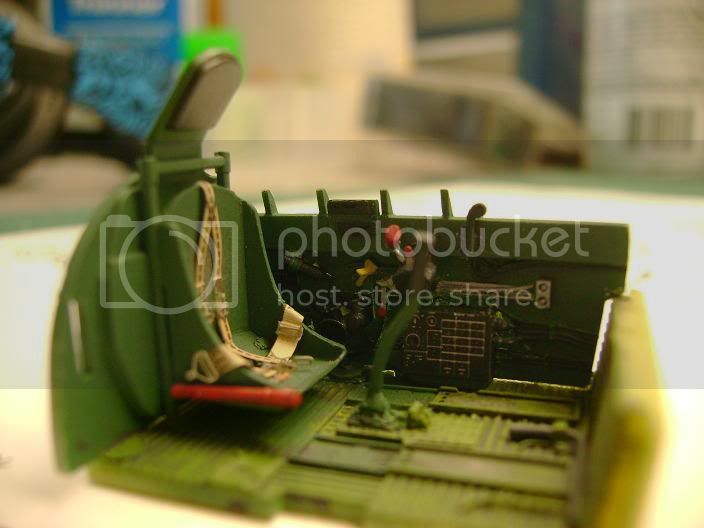
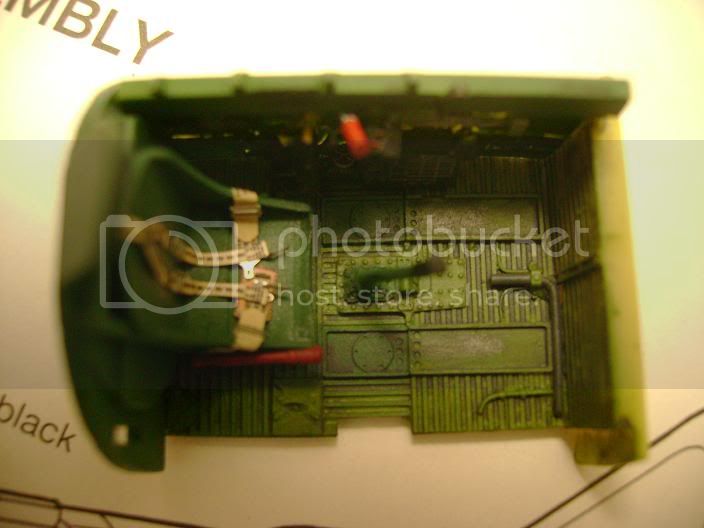
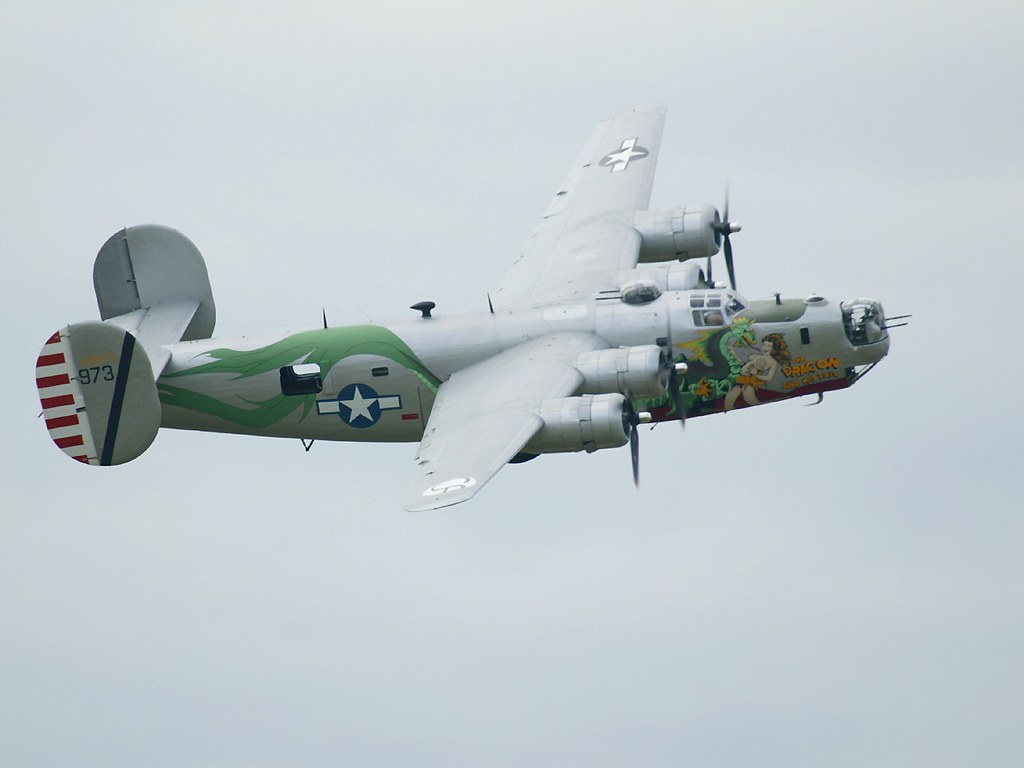
I cleaned up the lines a bit added the decals and coated it with Futures then an wash of burnt umber
Photobucket
Photobucket
Photobucket
Photobucket
Any other comments or suggestions before I call this one finished
3 Wingy Thingy Builds in a row are making me a little batty
Keeperofsouls2099
_VISITCOMMUNITY
Florida, United States
Joined: January 14, 2009
KitMaker: 2,798 posts
AeroScale: 2,443 posts
Posted: Sunday, May 13, 2012 - 07:54 AM UTC
Look boss a plane! Good job and worthy of a ribbon don't forget to post in the gallery so you can get your reward
tinbanger
_VISITCOMMUNITY
Ontario, Canada
Joined: February 04, 2008
KitMaker: 2,507 posts
AeroScale: 1,814 posts
Posted: Monday, May 14, 2012 - 01:50 PM UTC
Hi All
Here is my entry.

Keeperofsouls2099
_VISITCOMMUNITY
Florida, United States
Joined: January 14, 2009
KitMaker: 2,798 posts
AeroScale: 2,443 posts
Posted: Tuesday, May 15, 2012 - 12:25 PM UTC
well I guess its time for your fearless leader to post some progress.I started with the aires cockpit detailed the instrument panel with an eduard set and then filled the gauges in with testor's clear parts cement.after cockpit was painted and weathered heres the results....


then it came to the body and attaching the wings...
since this is going to be a alclad bird everything has to be perfect.I installed the master gun barrels,opened the front vents,removed the rocket hangers(this one will be fuel tanks only)and opened the ammo chutes...


which brings us to where im at.I started drilling the holes in the motor for the wires and snapped my last drill bit(on order)
I managed to finish it out with my hobby knife and im just installing the wires now.Come on people lets get those pin-ups flying.over and out
RedwingNev
_VISITCOMMUNITY
England - East Midlands, United Kingdom
Joined: February 07, 2004
KitMaker: 911 posts
AeroScale: 415 posts
Posted: Tuesday, May 15, 2012 - 05:38 PM UTC
Niiiice work on that cockpit Justin
Keeperofsouls2099
_VISITCOMMUNITY
Florida, United States
Joined: January 14, 2009
KitMaker: 2,798 posts
AeroScale: 2,443 posts
Posted: Tuesday, May 15, 2012 - 11:01 PM UTC
Thank you sir
ViperAtl
_VISITCOMMUNITY
Georgia, United States
Joined: August 22, 2005
KitMaker: 331 posts
AeroScale: 135 posts
Posted: Wednesday, May 16, 2012 - 02:02 AM UTC
Justin, Why use the kit engine when detailing other parts. Get a Vector or Aires engine for this bird. You have plenty of time for it hit your front door.
Keeperofsouls2099
_VISITCOMMUNITY
Florida, United States
Joined: January 14, 2009
KitMaker: 2,798 posts
AeroScale: 2,443 posts
Posted: Wednesday, May 16, 2012 - 11:49 AM UTC
Normally I would do this but I have 4 kits in the stash that plan on going nuts with including a blackbird that's sitting on side lines that mocks me every time I sit at my bench.on this build you can't really see that much of the engine anyways so I opted not
flyboy92187
_VISITCOMMUNITY
Wisconsin, United States
Joined: March 30, 2011
KitMaker: 199 posts
AeroScale: 150 posts
Posted: Thursday, May 17, 2012 - 05:12 AM UTC
I cracked the box on my Tornado, and to my delight they had decals for a Gulf War Desert Pink variant, complete with a pinup. I will post some pics once I have some decent progress done!
wespe66
_VISITCOMMUNITY
Frederiksborg, Denmark
Joined: June 27, 2011
KitMaker: 122 posts
AeroScale: 121 posts
Posted: Thursday, May 17, 2012 - 07:39 PM UTC
It may be a bit late, but here we go: I'm starting up the build of the Hasegawa P-400/P-39D Airacobra in 1/48 scale.


Here is the kit:


And here is the after market stuff (AMS) I plan to use:


The AMS is
Eduard flaps (Big-Ed)
Eduard interior & exterior (Big-Ed)
Eduard placards (Big-Ed)
Eduard paintmask (Big-Ed)
Squadron vac-form canopy (maybe I discard this)
Quickboost resin gun barrels
Aires wheel bays
True Details wheels
Miracle Masks (ordered, but not received yet)
Xtracrylic paint

I was a bit disapointed with the kit pin-up girl, so I bought the Super Scale decal set (MS48-1171). But the colors where not optimal on the Super Scale decals either, so I have asked Mal to do the pin-up (and other stuff) as masks for me. That way I can decide the colors myself :-)

I also bought the Montex masks for painting the national insignia, but I prefer to use Miracle Masks instead when possible. This also allows me to paint the text.

The only other thing I need now is some 6-stack resin P-39D exhausts. I originally bought the 12-stack P-400 exhausts, but I have changed my mind and want to do the P-39D instead.

Well, I'm looking foreward to getting this build started.

Regards
Kenneth
Keeperofsouls2099
_VISITCOMMUNITY
Florida, United States
Joined: January 14, 2009
KitMaker: 2,798 posts
AeroScale: 2,443 posts
Posted: Thursday, May 17, 2012 - 11:25 PM UTC
Looks like you have your work cut out for you.look forward to your progress
Keeperofsouls2099
_VISITCOMMUNITY
Florida, United States
Joined: January 14, 2009
KitMaker: 2,798 posts
AeroScale: 2,443 posts
Posted: Friday, May 18, 2012 - 12:48 PM UTC
My new bits arrive tomorrow and then I will continue with my build Good luck with the mask I've been trying to get some done for awhile with no avail so I just gave up and I do fine with out them
Keeperofsouls2099
_VISITCOMMUNITY
Florida, United States
Joined: January 14, 2009
KitMaker: 2,798 posts
AeroScale: 2,443 posts
Posted: Sunday, May 20, 2012 - 09:31 AM UTC
progress now that i have bits engine is complete......


mykroft
_VISITCOMMUNITY
Ontario, Canada
Joined: November 14, 2009
KitMaker: 270 posts
AeroScale: 264 posts
Posted: Monday, May 21, 2012 - 05:56 AM UTC
I'm going to be a little ambitious and instead of doing great nose art I'm going to do a rare case of fuselage art.

So here's the Minicraft B-24J "The Dragon & His Tail"


Minicraft B-24J 1/72 by mawz_models, on Flickr
Keeperofsouls2099
_VISITCOMMUNITY
Florida, United States
Joined: January 14, 2009
KitMaker: 2,798 posts
AeroScale: 2,443 posts
Posted: Monday, May 21, 2012 - 12:49 PM UTC
Sweet plane art Can't wait
bdanie6
_VISITCOMMUNITY
New Hampshire, United States
Joined: November 09, 2008
KitMaker: 615 posts
AeroScale: 459 posts
Posted: Monday, May 21, 2012 - 03:28 PM UTC
@Sal, don't sweat the D-Day stripes! The order to paint them onto the planes did not leave maintenance with enough time to be to neat about them. Most air groups painted the 18 inch wide stripes on with paint brushes. Some groups with bombers actually used mops and brooms. Later, after things had calmed down a bit, units cleaned up their stripe edges, some groups even started removing the stripes from the top of the fuselages and wings.

@Adam, please be aware that the Minicraft decals for the Dragon are wrong! Mini printed the dragon in 2 shades of grey, whereas the it was actually 2 shades of green.


still looking forward to all the builds here, and can't wait to get started on my own.

Later
mykroft
_VISITCOMMUNITY
Ontario, Canada
Joined: November 14, 2009
KitMaker: 270 posts
AeroScale: 264 posts
Posted: Tuesday, May 22, 2012 - 08:12 AM UTC

Quoted Text


@Adam, please be aware that the Minicraft decals for the Dragon are wrong! Mini printed the dragon in 2 shades of grey, whereas the it was actually 2 shades of green.


still looking forward to all the builds here, and can't wait to get started on my own.

Later


Minicraft is pretty clear that they checked period colour images and that the dragon should be grey. The colour shot you've got is from a Warbird done up with the more common portrayal, not the original version. Some Kodachrome slides have shown up recently showing the original art in colour


In fact it was Hasegawa & the Collins Warbird guys who got it wrong by painting it green.
heliman
_VISITCOMMUNITY
New York, United States
Joined: June 14, 2010
KitMaker: 702 posts
AeroScale: 29 posts
Posted: Tuesday, May 22, 2012 - 12:35 PM UTC
I finally cleared the bench to join the campaign..sorry for the late start! The kit is the Monogram P- 61 Black Widow. This kit was the 1st kit my dad and I built , hopefully my skills are a lil better !

Heres the kit.. Yikes


I almost forgot how much flash these older kits were known for, but was able to add a bit of color today! I "primed" the bare plastic w/ ghost gray and painted w/ interior green.


Enjoy!

Jeff
Dimitar
_VISITCOMMUNITY
Sofiya, Bulgaria
Joined: November 08, 2011
KitMaker: 414 posts
AeroScale: 126 posts
Posted: Tuesday, May 22, 2012 - 10:45 PM UTC
It's really nice to see this GB taking a boost.
Justin, you did one hell of a job detailing the engine!
Sal, congratulation for being the first to finish its build. The P-38 turned out very nice. I'm waiting for the Eduard release later this year and I'm sure I'll get and build one.
Richard, Michael, I'm waiting to see your builds. A pink ODS Tornado is a very nice idea, taking into account that they were heavily weathered!
Kenneth, great subject also, one of the most provocative nose arts ever, can't wait to see it finished!
Jeff, about your P-61, what pin up are you planning for her? Are you gonna rescribe this model?
Finally, about my favorite B-24... It's sad that Hasegawa has mistaken the colors (besides of all the other necessary updates needed to create a real Dragon and His Tail). I was about to buy the model, but now... Any ideas if someone is making a correct decal sheet for it, or I should go after Minicraft kit?
heliman
_VISITCOMMUNITY
New York, United States
Joined: June 14, 2010
KitMaker: 702 posts
AeroScale: 29 posts
Posted: Wednesday, May 23, 2012 - 01:02 PM UTC
Dimitar- I planned to build "Times a Wastin " for the pin-up, but found a nice set from SB that includes 7 different beautiful " airframes"!

Ugh, rescribe the whole plane...I'm having enough trouble w/ flash and parts fit, prolly wont attempt that!
bdanie6
_VISITCOMMUNITY
New Hampshire, United States
Joined: November 09, 2008
KitMaker: 615 posts
AeroScale: 459 posts
Posted: Wednesday, May 23, 2012 - 03:37 PM UTC
@Dimitar, SuperScale International Decals did the Dragon about 20 years ago in 1/48 scale. They talked to the artist who did the actual art work, so their decals are the most accurate. Unfortunately they have never reprinted that one set. Last I heard a set went on eBay for $300.00 and that was about 4 months ago. Sorry
Later
flyboy92187
_VISITCOMMUNITY
Wisconsin, United States
Joined: March 30, 2011
KitMaker: 199 posts
AeroScale: 150 posts
Posted: Thursday, May 24, 2012 - 05:33 AM UTC
I have had some time to put in work on my Tornado, it is mostly assembled, I preshaded, and hit it with its main coat. This weekend I should be able to clear coat it, and hopefully get decalling.


Keeperofsouls2099
_VISITCOMMUNITY
Florida, United States
Joined: January 14, 2009
KitMaker: 2,798 posts
AeroScale: 2,443 posts
Posted: Thursday, May 24, 2012 - 12:04 PM UTC
Wow it's pink
flyboy92187
_VISITCOMMUNITY
Wisconsin, United States
Joined: March 30, 2011
KitMaker: 199 posts
AeroScale: 150 posts
Posted: Friday, May 25, 2012 - 07:38 AM UTC
yup! Gotta love the desert pink scheme. The picture really makes it look more pink than it is though...
Keeperofsouls2099
_VISITCOMMUNITY
Florida, United States
Joined: January 14, 2009
KitMaker: 2,798 posts
AeroScale: 2,443 posts
Posted: Monday, May 28, 2012 - 06:33 AM UTC
Getting ready to lay down some alclad pics soon