Erm mine is still pretty much as it was last time. Did get the black stripes sprayed and also the yellow on the cowling/tail, O/D anti glare panel and tail and the stripes on the tail. Ive just got the point of putting on Miracle Masks for the stars and bars on mine. Everything on mine will be airbrushed except the codes and nose art. Will try and get a pic up of so far later on today.
Guilty of not posting any up date pics or commenting on others builds as with work, animals and house at the moment Ive literally been logging on to reply to the campaign Im running and that's been all Ive been able to do time wise. Have not sat at the bench in over a week. I really need to find a way to pause time so I can cram more into my day
Air Campaigns
Want to start or join a group build? This is where to start.
Want to start or join a group build? This is where to start.
Hosted by Frederick Boucher, Michael Satin
OFFICIAL: Pin-ups 2 Campaign
Posted: Wednesday, July 25, 2012 - 10:05 PM UTC

Keeperofsouls2099

Joined: January 14, 2009
KitMaker: 2,798 posts
AeroScale: 2,443 posts

Posted: Thursday, July 26, 2012 - 01:28 AM UTC
When you figure it out let me know I've been trying for years 

Posted: Thursday, July 26, 2012 - 10:18 PM UTC
Still working on the pausing time thing nothing so far (we need one of those thingys from Harry Potter)
Here's some pics might get the masks on and the star and bars sprayed this weekend depending on my mood as really not having a good July at the moment.
The blue at the back of the fuselage is as far as I got with the miracle mask before life got in the way again.
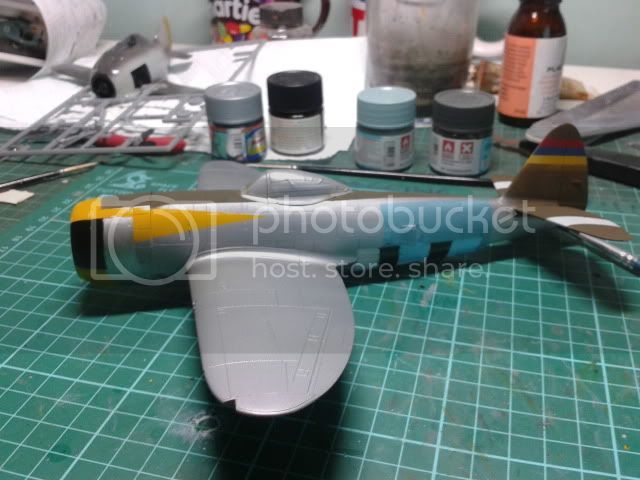
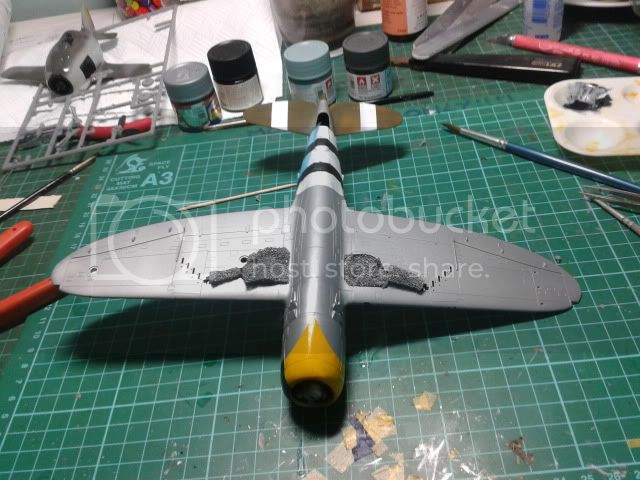
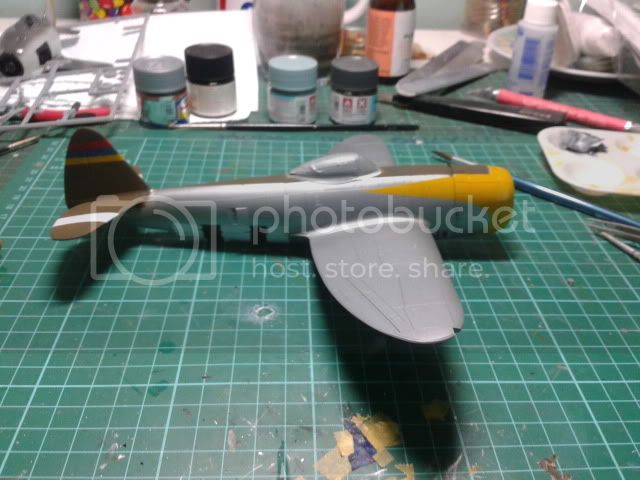
Here's some pics might get the masks on and the star and bars sprayed this weekend depending on my mood as really not having a good July at the moment.
The blue at the back of the fuselage is as far as I got with the miracle mask before life got in the way again.


mpatman

Joined: March 09, 2006
KitMaker: 248 posts
AeroScale: 160 posts

Posted: Tuesday, July 31, 2012 - 12:42 PM UTC
Hi everyone,
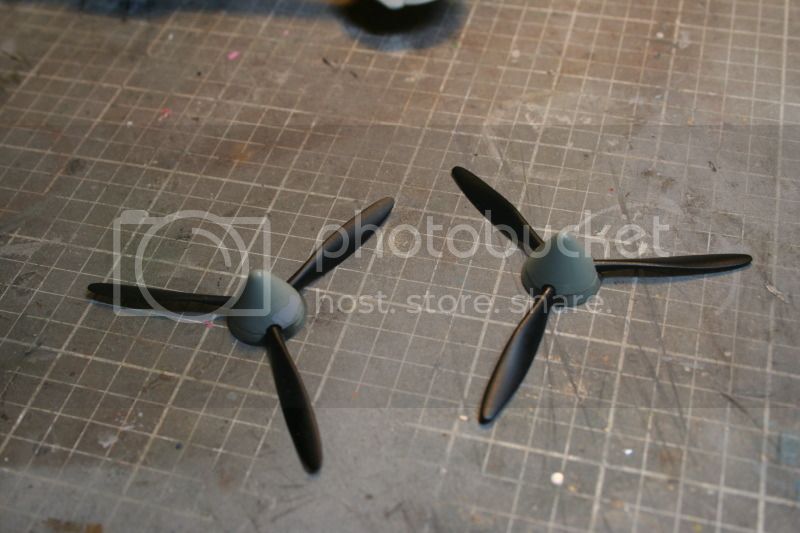
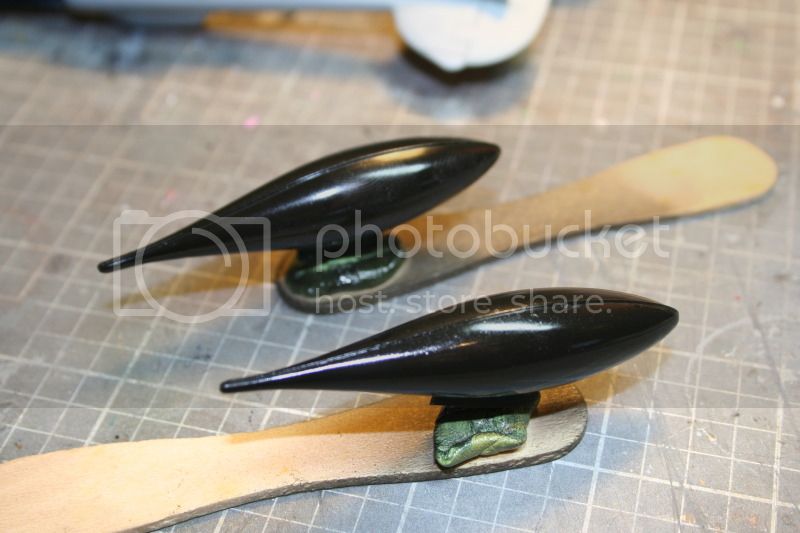
Here is what I have done in the past 3 weeks since I started. I have been waiting on a Legend cockpit for my Academy P-38 and it finally arrived yesterday. In the meantime I have been busy building some of the sub-assemblies.
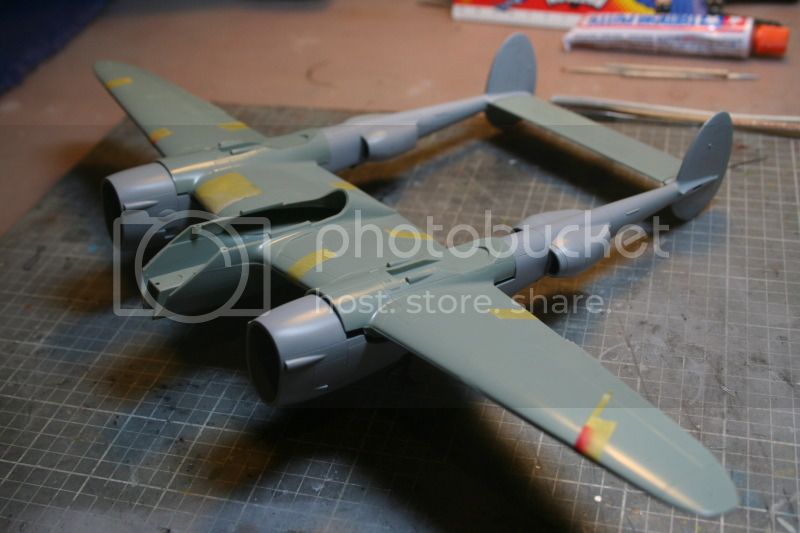
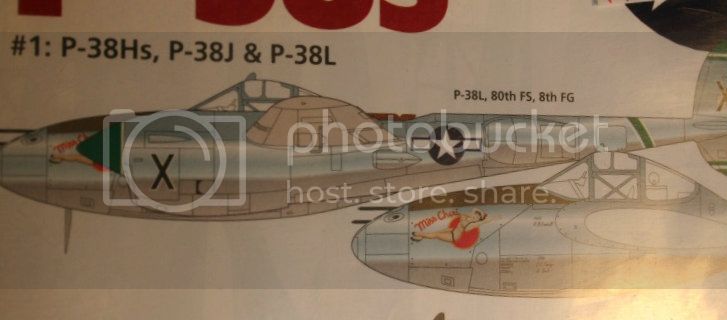
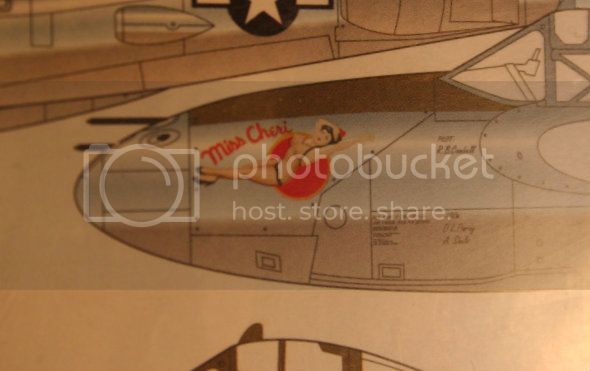
Planed markings for the campaign
Cheers,
Mark
Here is what I have done in the past 3 weeks since I started. I have been waiting on a Legend cockpit for my Academy P-38 and it finally arrived yesterday. In the meantime I have been busy building some of the sub-assemblies.


Planed markings for the campaign


Cheers,
Mark
Posted: Tuesday, July 31, 2012 - 08:35 PM UTC
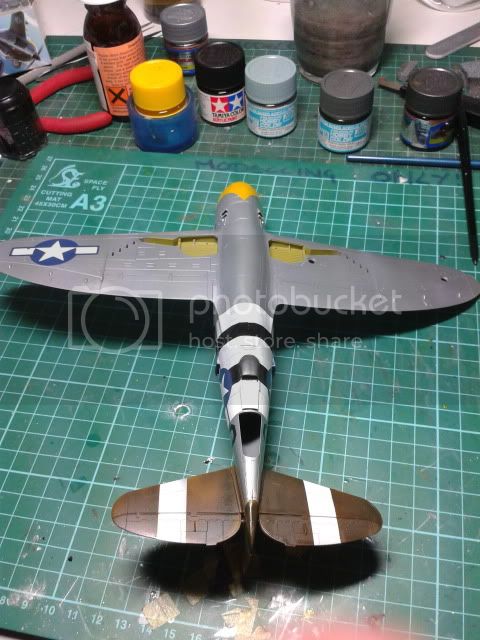
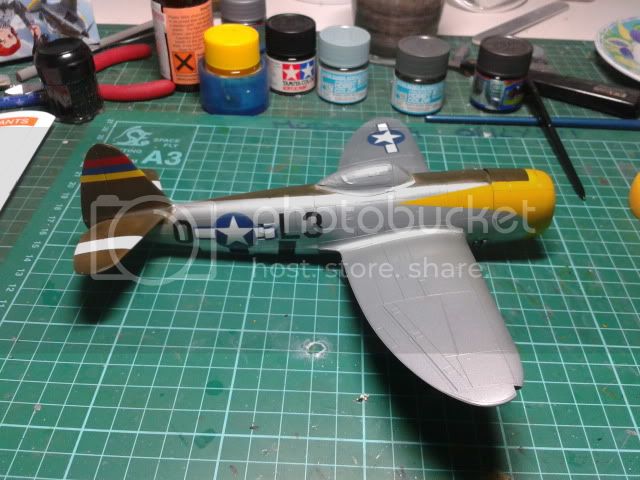
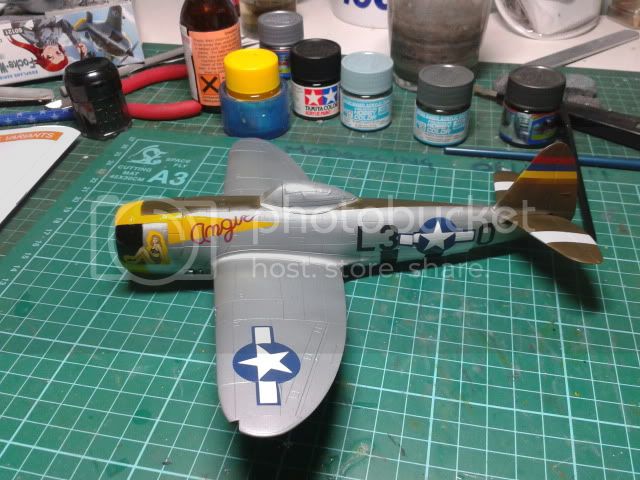
Here we go sprayed star and bars and just got the nose art, name and code onto the model. Just need to apply the tail code decals and stencil decals then its just a case of weathering and putting the last few bits and bobs onto the kit.


wespe66

Joined: June 27, 2011
KitMaker: 122 posts
AeroScale: 121 posts

Posted: Tuesday, July 31, 2012 - 09:08 PM UTC
Hi,
Some beautiful work you guys have done here!
I have been away for a while - partly because of family stuff (vacation), but also because I - like others - suffer a bit from modelling burn-out.
Shortly after my last post (June 9) a disaster (in 1/48 scale, that is) happened to me. The thin superglue, that was supposed to fix the nose weight on the P-39, ran inside the model and out of the air intakes. This almost completely destroyed my work so far
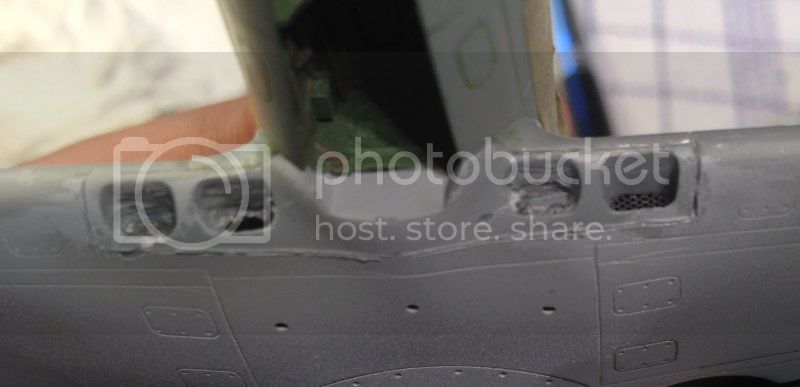
I nearly gave it up, but decided to try to fix it somehow. The air intakes had to be cut open, so the superglue could be removed and new grilles installed.
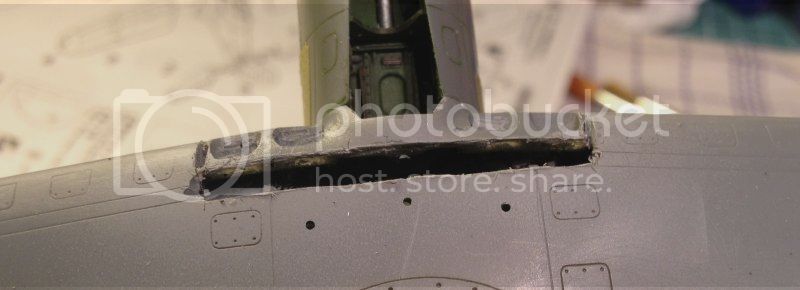
Then a piece of plastic card was glued in, it was puttied and sanded, and lost panel lines restored.
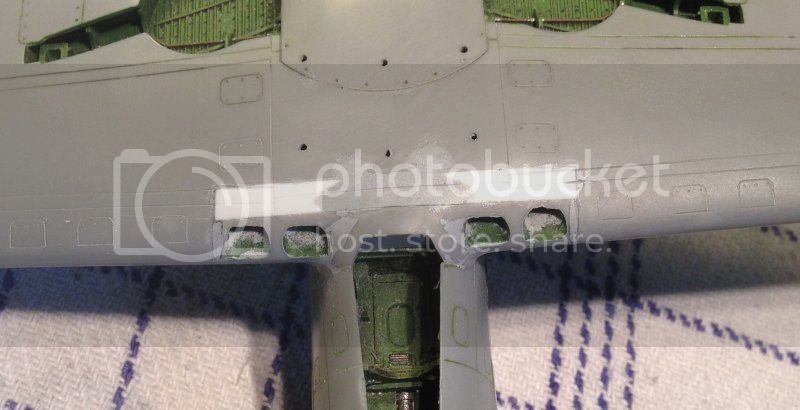
The repair is far from perfect, but as long as you don't look too close inside the airtakes, I think it will be acceptable.
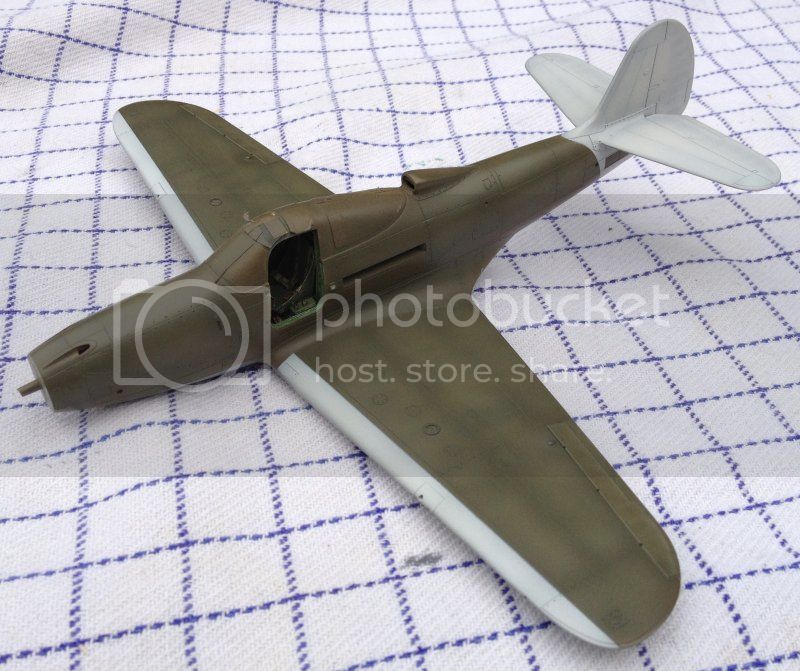
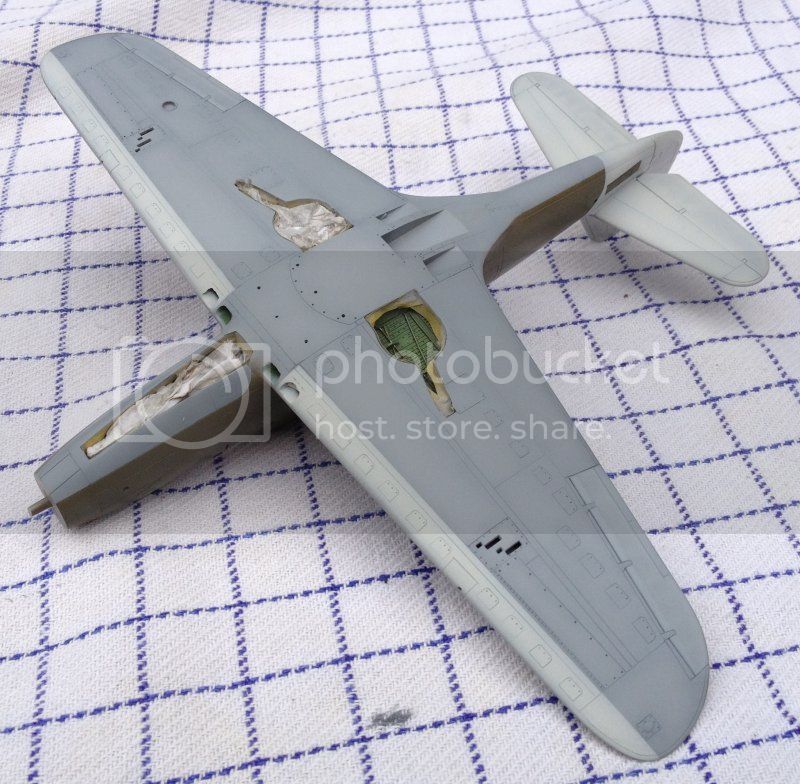
This is where I am now - major paintwork has been done, and I'm now waiting for the paint masks.
Cheers
Some beautiful work you guys have done here!
I have been away for a while - partly because of family stuff (vacation), but also because I - like others - suffer a bit from modelling burn-out.
Shortly after my last post (June 9) a disaster (in 1/48 scale, that is) happened to me. The thin superglue, that was supposed to fix the nose weight on the P-39, ran inside the model and out of the air intakes. This almost completely destroyed my work so far


I nearly gave it up, but decided to try to fix it somehow. The air intakes had to be cut open, so the superglue could be removed and new grilles installed.

Then a piece of plastic card was glued in, it was puttied and sanded, and lost panel lines restored.

The repair is far from perfect, but as long as you don't look too close inside the airtakes, I think it will be acceptable.
This is where I am now - major paintwork has been done, and I'm now waiting for the paint masks.


Cheers

Keeperofsouls2099

Joined: January 14, 2009
KitMaker: 2,798 posts
AeroScale: 2,443 posts

Posted: Tuesday, July 31, 2012 - 11:21 PM UTC
Looking great guys there coming together.nice repair work on the p-39.  Nice paint Sam
 Nice paint Sam

Keeperofsouls2099

Joined: January 14, 2009
KitMaker: 2,798 posts
AeroScale: 2,443 posts

Posted: Thursday, August 02, 2012 - 12:36 PM UTC

Posted: Sunday, August 12, 2012 - 09:03 AM UTC
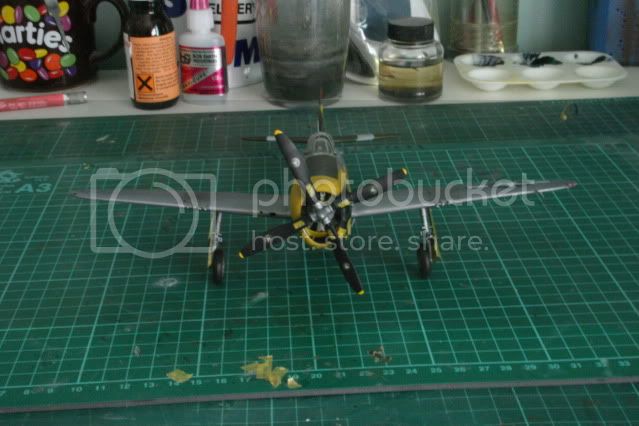
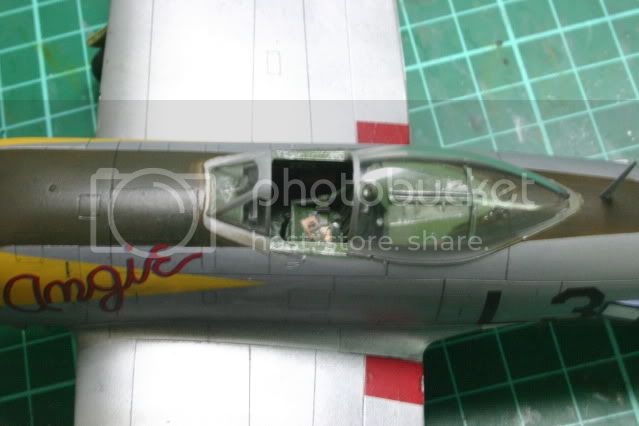
Thats it Im calling 'Angie' finished (just need to add the transmitter wire and it is done) will get a better pic in the photobay to use for the campaign gallery 




Keeperofsouls2099

Joined: January 14, 2009
KitMaker: 2,798 posts
AeroScale: 2,443 posts

Posted: Sunday, August 12, 2012 - 11:09 AM UTC
Great job!glad you pulled through congratulations on your finish 

StefanBuysse

Joined: December 18, 2010
KitMaker: 32 posts
AeroScale: 27 posts

Posted: Wednesday, August 15, 2012 - 10:35 PM UTC
Hi,
Nice work here so far.
Here is my P-40L "Trixie".
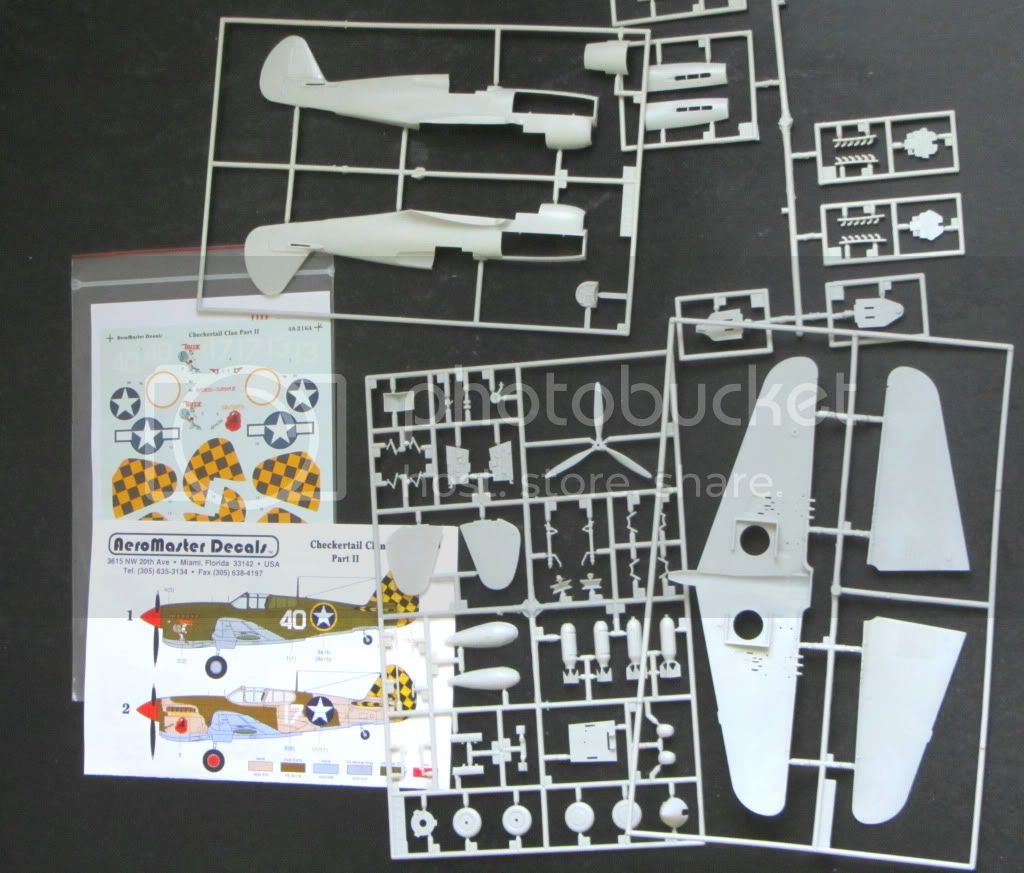
After not finishing my Skyhawk for the Marine Corps campaign, I seem to have suffered some "Building Campaign block".
This 1/48 AMTech P-40 should be a good cure.
The most complicated part should be the modification on the carburator intake for this type of P-40.
I'll follow the guidance of Scott Van Aken of Modeling Madness who also built Trixie.
Cheers, Stefan.
Nice work here so far.
Here is my P-40L "Trixie".

After not finishing my Skyhawk for the Marine Corps campaign, I seem to have suffered some "Building Campaign block".
This 1/48 AMTech P-40 should be a good cure.
The most complicated part should be the modification on the carburator intake for this type of P-40.
I'll follow the guidance of Scott Van Aken of Modeling Madness who also built Trixie.
Cheers, Stefan.
Posted: Friday, August 17, 2012 - 06:06 PM UTC
Cool build, Sam. Very nice NMF and great pinup 
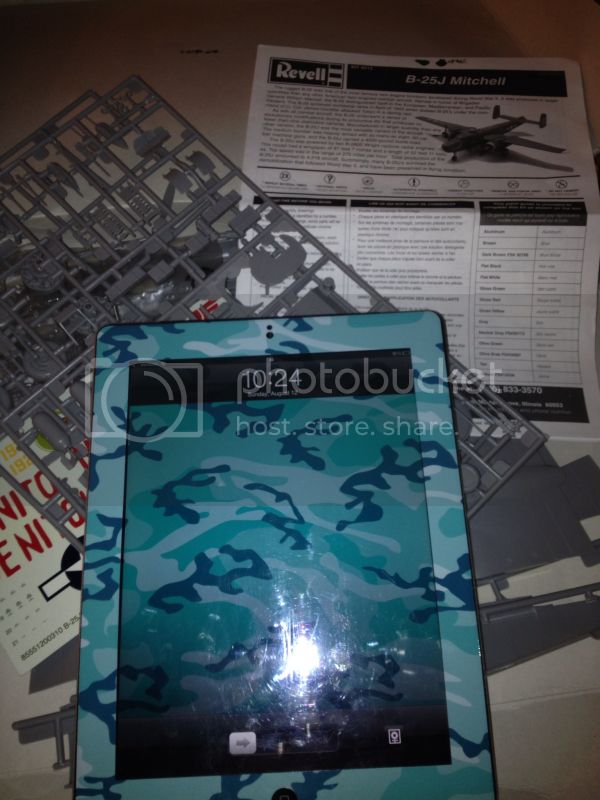
I am entering with the Monogram 1/48 B-25. Very nice nose art. What can i say, i am a sucker for blondes.
The kit has gotten mixed reviews, but looks good. Time will tell.
More to follow
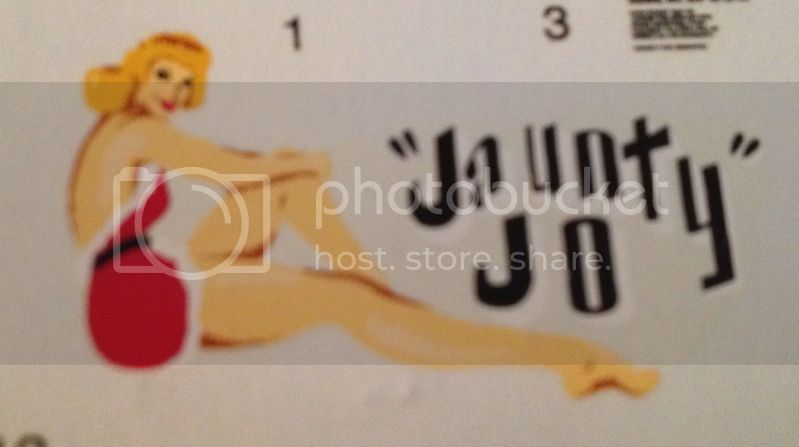

I am entering with the Monogram 1/48 B-25. Very nice nose art. What can i say, i am a sucker for blondes.

The kit has gotten mixed reviews, but looks good. Time will tell.
More to follow


Keeperofsouls2099

Joined: January 14, 2009
KitMaker: 2,798 posts
AeroScale: 2,443 posts

Posted: Friday, August 17, 2012 - 11:16 PM UTC
Very nice look forward to your progress 

Posted: Friday, August 17, 2012 - 11:57 PM UTC
That Jo sure gets around! 


Posted: Saturday, August 18, 2012 - 04:04 AM UTC
Thanks for the comments, guys. I will keep you updated. I have a good feeling this build will be very enjoyable. 


Keeperofsouls2099

Joined: January 14, 2009
KitMaker: 2,798 posts
AeroScale: 2,443 posts

Posted: Friday, August 24, 2012 - 10:40 PM UTC
Bump 

ViperAtl

Joined: August 22, 2005
KitMaker: 331 posts
AeroScale: 135 posts

Posted: Sunday, August 26, 2012 - 06:19 AM UTC
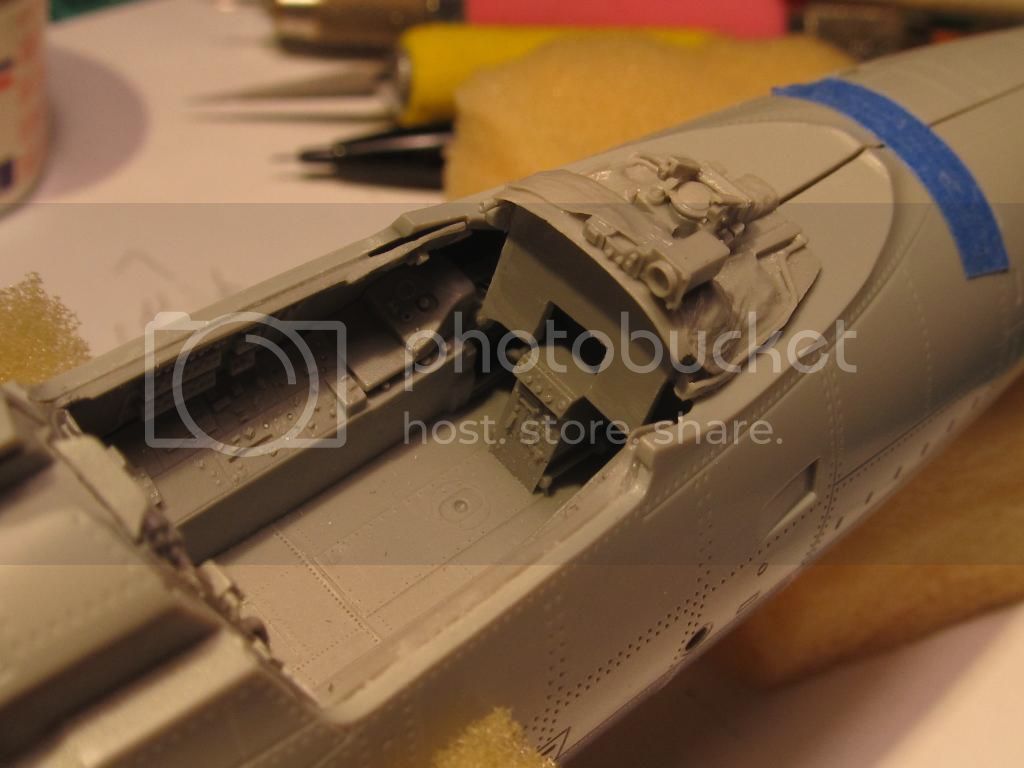
OK now, after being sidetracked by a other projects I'm back on with my Thud buildup. Currently I'm still fitting and setting the Aires detail parts and prepping for painting before closing up the fuselage.
Here's the cockpit tub during a test fit.
I've also started a build log here: F-105D Pin Ups II
For more in progress pics:
F-105D
BTW - My last entry in the first Pin-Ups campaign, the P-38J, received a First Place at the recent IPMS/USA Nationals in Orlando in the Out of Box category.
Here's the cockpit tub during a test fit.

I've also started a build log here: F-105D Pin Ups II
For more in progress pics:
F-105D
BTW - My last entry in the first Pin-Ups campaign, the P-38J, received a First Place at the recent IPMS/USA Nationals in Orlando in the Out of Box category.

Keeperofsouls2099

Joined: January 14, 2009
KitMaker: 2,798 posts
AeroScale: 2,443 posts

Posted: Sunday, August 26, 2012 - 08:25 AM UTC
gratz on your win and I look forward to your progress.which by the way is coming out very good to start out with 

Posted: Thursday, August 30, 2012 - 03:49 AM UTC
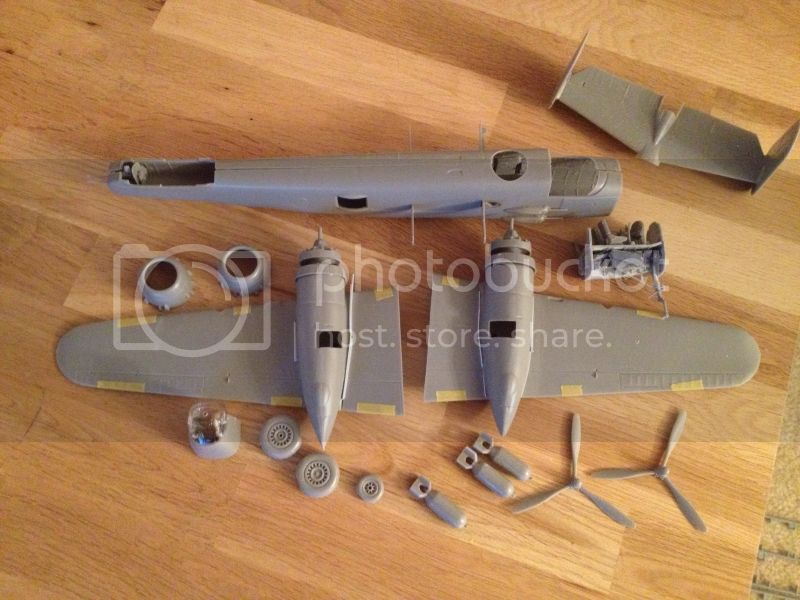
A little more progress on my B-25. The main sub assemblies are done. So far the only problems have been large gaps around the engine nacelles.
Next is the painting of the interior.
More to follow
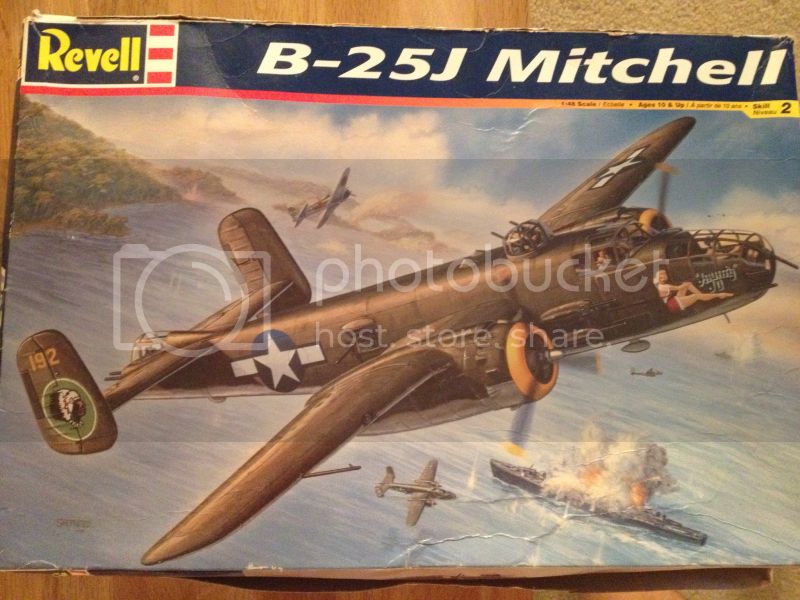
Next is the painting of the interior.
More to follow


Posted: Thursday, August 30, 2012 - 04:15 AM UTC
Hi Jesper.
I am doing the same kit and no gaps where you have them!

I am doing the same kit and no gaps where you have them!

Posted: Friday, August 31, 2012 - 08:37 AM UTC
Wow, Richard. That is strange. Maybe the mould gets worn and changes a little depending on when the kit was produced.
Do you then have a gap at the top of the engine housing? That is the only way I can imagine one could avoid the gaps.
Do you then have a gap at the top of the engine housing? That is the only way I can imagine one could avoid the gaps.
Posted: Friday, August 31, 2012 - 01:33 PM UTC
Hi Jesper
Here again are my build photos so far.
I am away in Toronto, when i get home i will post more photos.


Here again are my build photos so far.
I am away in Toronto, when i get home i will post more photos.


Posted: Friday, August 31, 2012 - 01:41 PM UTC
Jesper
This kit is a tail sitter,I used 4 OZ of fishing weights to fix!
Rear crew steps supplied with kit are meant to hide this problem!
I used Mr Surfacer 500 to fill small gaps.

This kit is a tail sitter,I used 4 OZ of fishing weights to fix!
Rear crew steps supplied with kit are meant to hide this problem!
I used Mr Surfacer 500 to fill small gaps.


Keeperofsouls2099

Joined: January 14, 2009
KitMaker: 2,798 posts
AeroScale: 2,443 posts

Posted: Tuesday, September 04, 2012 - 10:53 AM UTC
Hows progress coming?not much time left so get your butts in gear  not as many completed builds this time around.Of course not much interest either isn't life in the fast lane grand
  so much knowledge and ideas not enough time
  I think I will move my bench to the beach and sell coconuts
  regardless it does seem as though the site has slowed down as of late.my self included
 not as many completed builds this time around.Of course not much interest either isn't life in the fast lane grand
  so much knowledge and ideas not enough time
  I think I will move my bench to the beach and sell coconuts
  regardless it does seem as though the site has slowed down as of late.my self included
Posted: Tuesday, September 04, 2012 - 11:56 AM UTC
Hi All
Jesper here are the B-25 close up photos,as you can see joint is small with a little Mr Surfacer added and light sanding required.


Jesper here are the B-25 close up photos,as you can see joint is small with a little Mr Surfacer added and light sanding required.


 |


