

Thanks Greg, Mikael,Keith, and Chris. Nice to see you over here at Aeroscale Chris!
This build is still going very slowly; I have made some headway in the last several days, hope to post an update by end week.
Cheers,
Lance
Early Aviation
Discuss World War I and the early years of aviation thru 1934.
Discuss World War I and the early years of aviation thru 1934.
Hosted by Jim Starkweather
KotS GB 2012 Albatros D.V - lcarroll

lcarroll

Joined: July 26, 2010
KitMaker: 1,032 posts
AeroScale: 1,025 posts

Posted: Wednesday, June 13, 2012 - 07:25 AM UTC
lcarroll
Joined: July 26, 2010
KitMaker: 1,032 posts
AeroScale: 1,025 posts
Posted: Thursday, June 14, 2012 - 12:32 AM UTC
Still no update photos but getting mighty close. The wings and control surfaces got painted/futured in preparation for decals, half of which got done yesterday. Also finally closed up the fuselage after hours of going through the plans, references, and my own "project plan" to ensure it was time. Woke up this morning with a nagging thought that something was forgotten prior to closing her up. I was wrong; one thing was not overlooked, several were...DOHHHHHH!!
I can still get them done but not as easily. I had planned to have several of the round access doors on the lower nose/engine compartment open and the cooling louvres on the nose opened up or, more likely, "scratched". Both of these would have been easier with full access to the inside of the engine bay.
I'll get some photos of the lozenge work soon and get an update posted.
Cheers,
Lance
lcarroll
Joined: July 26, 2010
KitMaker: 1,032 posts
AeroScale: 1,025 posts
Posted: Friday, June 29, 2012 - 10:56 AM UTC
Well, here it is 15 days later and still no update. I could call this the "Tale of Two Lawn Mowers" or "be careful what you wish for". Truth is my tiny part-time job turned into 8 days straight (wish I had fully retired and may very soon) and the rain-grass combo had me going full time until my big Mower fell apart, which is another story!
I have the lozenge and rib tapes on the lower wings etc. and am working on the edge tapes. Once complete and `futured`I`ll get some photos out. I found the WNW Lozenge a little brittle and even with some Microset on the edges I had a lot of repairs to do after handling it to get the tapes on. It`s pretty fiddly work for sure and a bit frustrating to keep going back for repairs.
I`ll be adding a bit to the fuel tank and engine areas, Kornbeef`s additions on his DV Build brought out the thief in me! Also, just recieved the Windsock `Building the WNW DV and DVa` Book and I want to go through it thoroughly while I still have reasonable access to the front fuselage area.
Will get some update photos out soon.
Cheers,
Lance

JackFlash

Joined: January 25, 2004
KitMaker: 11,669 posts
AeroScale: 11,011 posts
Posted: Friday, June 29, 2012 - 11:55 AM UTC
Quoted Text
". . .Also, just recieved the Windsock `Building the WNW DV and DVa` Book and I want to go through it thoroughly while I still have reasonable access to the front fuselage area. Will get some update photos out soon.
Cheers
Lance"

Hhhhhmmmm, maybe we could get you to do a review? You did so well with the last book "Albatros at War Datafile 151" by Colin A. Owers, Windsock pub.Ltd.
See the review here.
lcarroll
Joined: July 26, 2010
KitMaker: 1,032 posts
AeroScale: 1,025 posts
Posted: Saturday, June 30, 2012 - 01:18 AM UTC
Stephen,
Love to do a Review as long as a reasonable time frame, (say 3-4 weeks latest?) is acceptable. Build is going slowly due to real life tasks etc. and I want to keep it moving as best I can.
PM on the way.
Cheers,
Lance
Love to do a Review as long as a reasonable time frame, (say 3-4 weeks latest?) is acceptable. Build is going slowly due to real life tasks etc. and I want to keep it moving as best I can.
PM on the way.
Cheers,
Lance
JackFlash
Joined: January 25, 2004
KitMaker: 11,669 posts
AeroScale: 11,011 posts
Posted: Saturday, June 30, 2012 - 06:21 AM UTC
Excellent! Looking forward to it!
lcarroll
Joined: July 26, 2010
KitMaker: 1,032 posts
AeroScale: 1,025 posts
Posted: Wednesday, July 11, 2012 - 04:35 AM UTC
An update at last!
The Saga of the lawn mowers continues so progress has been slow; I'm taking a few minutes to update this thread while I wait for the grass to dry, and then it's a day in the great outdoors in uncharacteristically severe hot and humid weather. Good for the soul I hear.
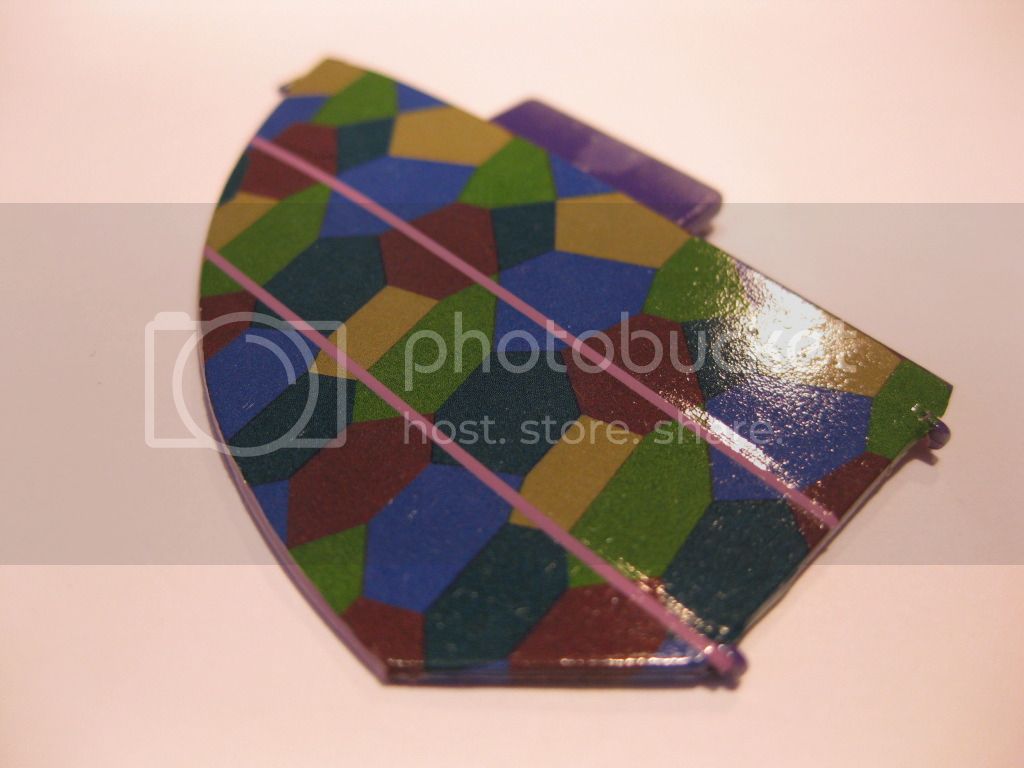
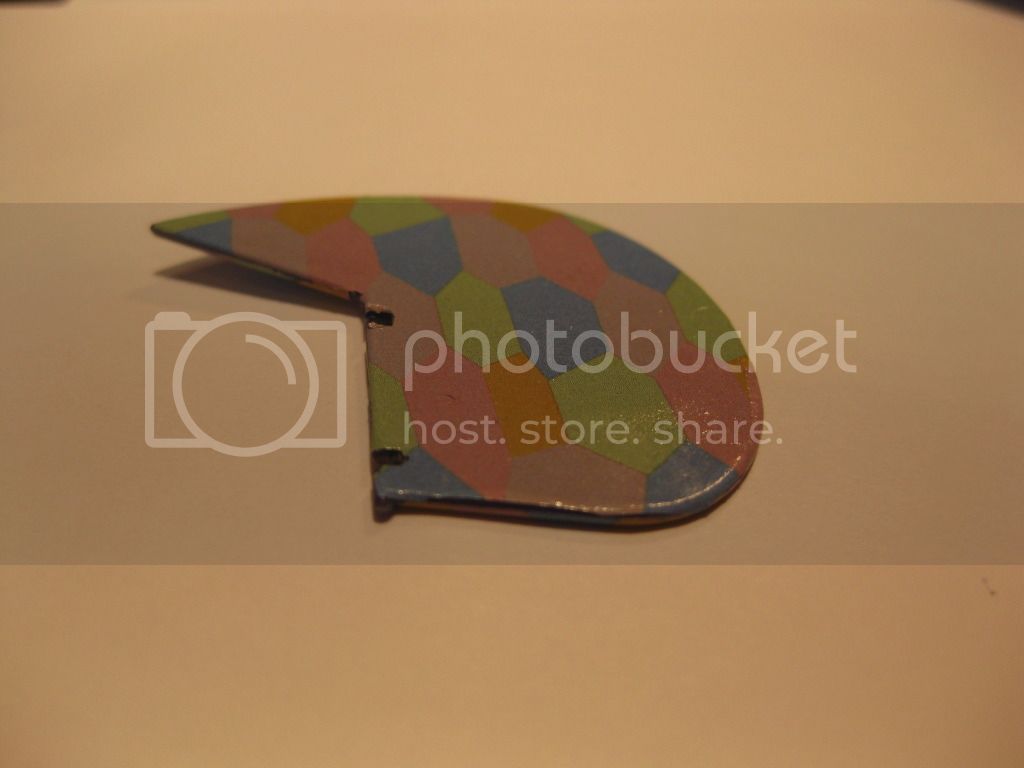
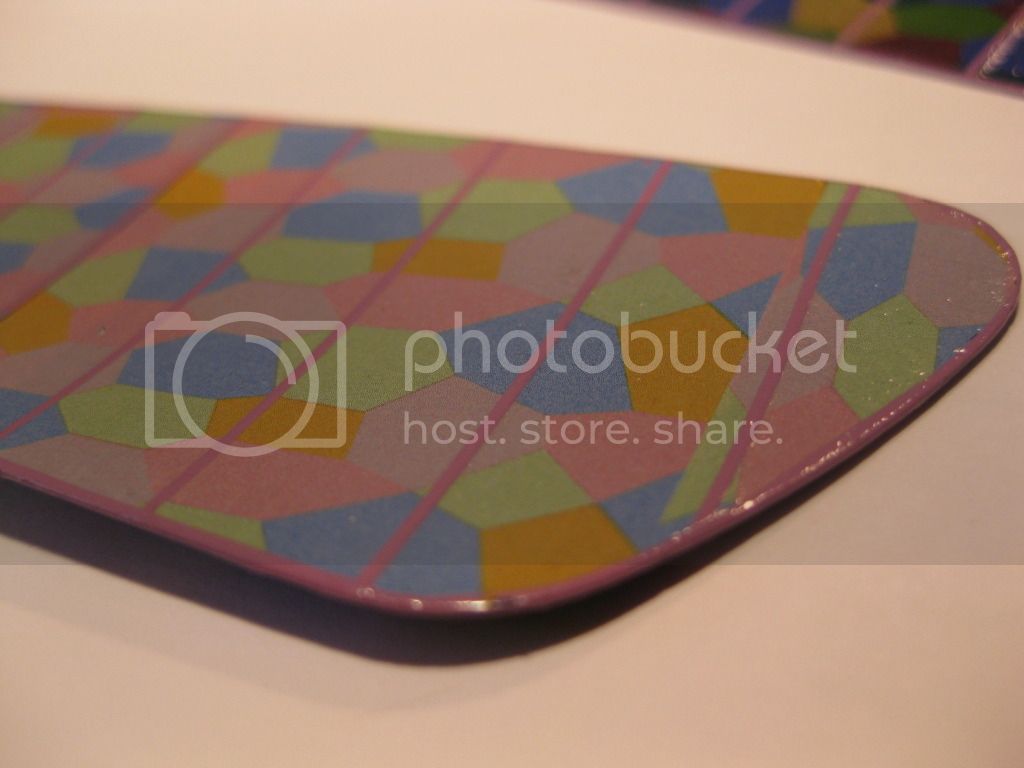
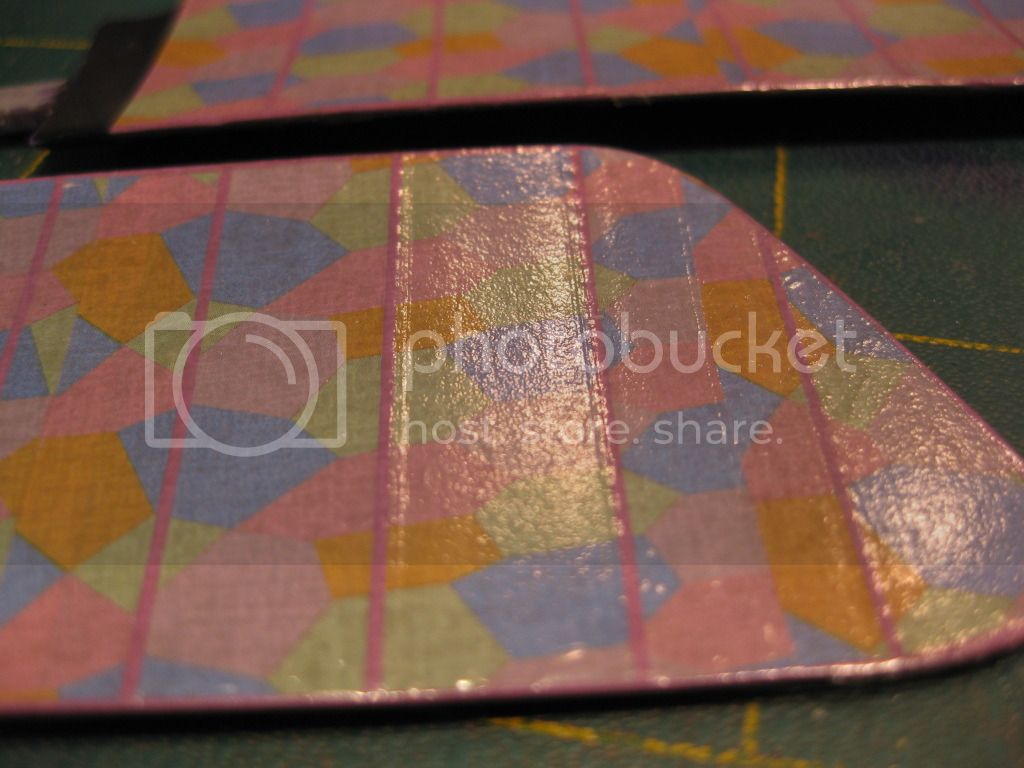
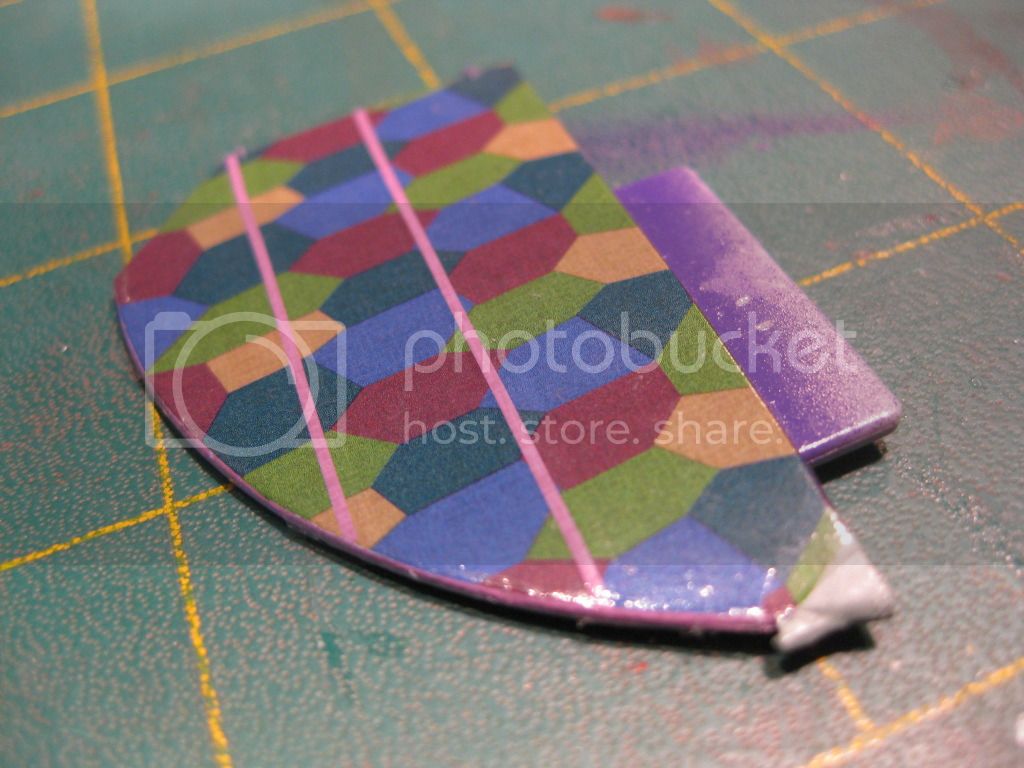
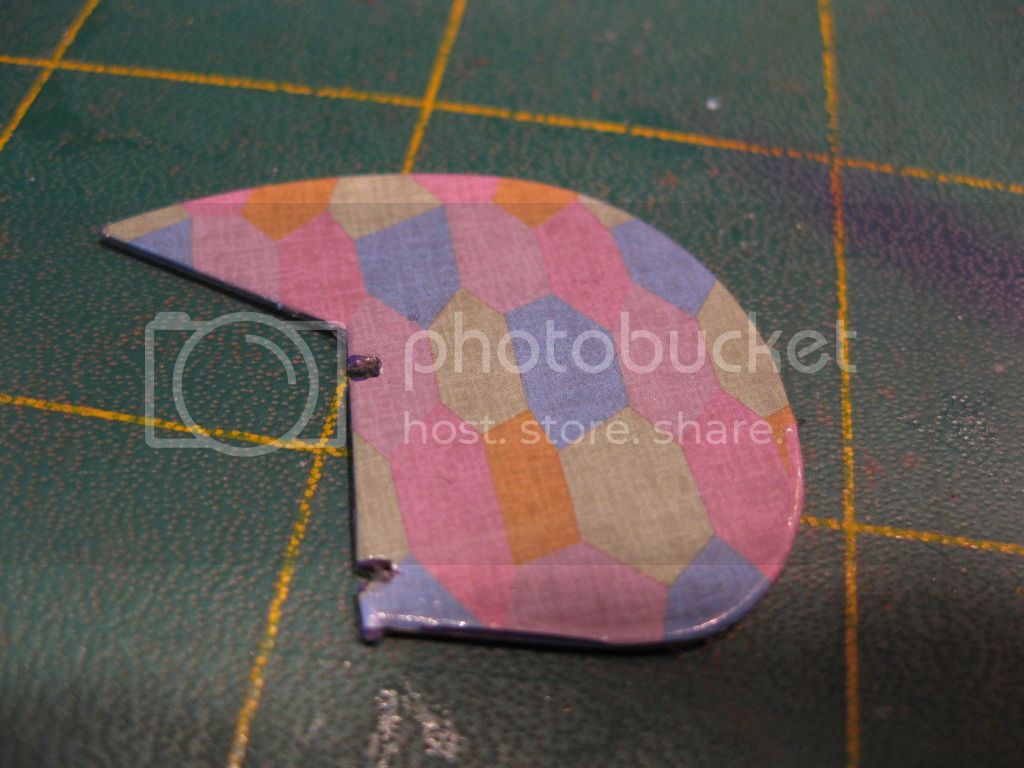
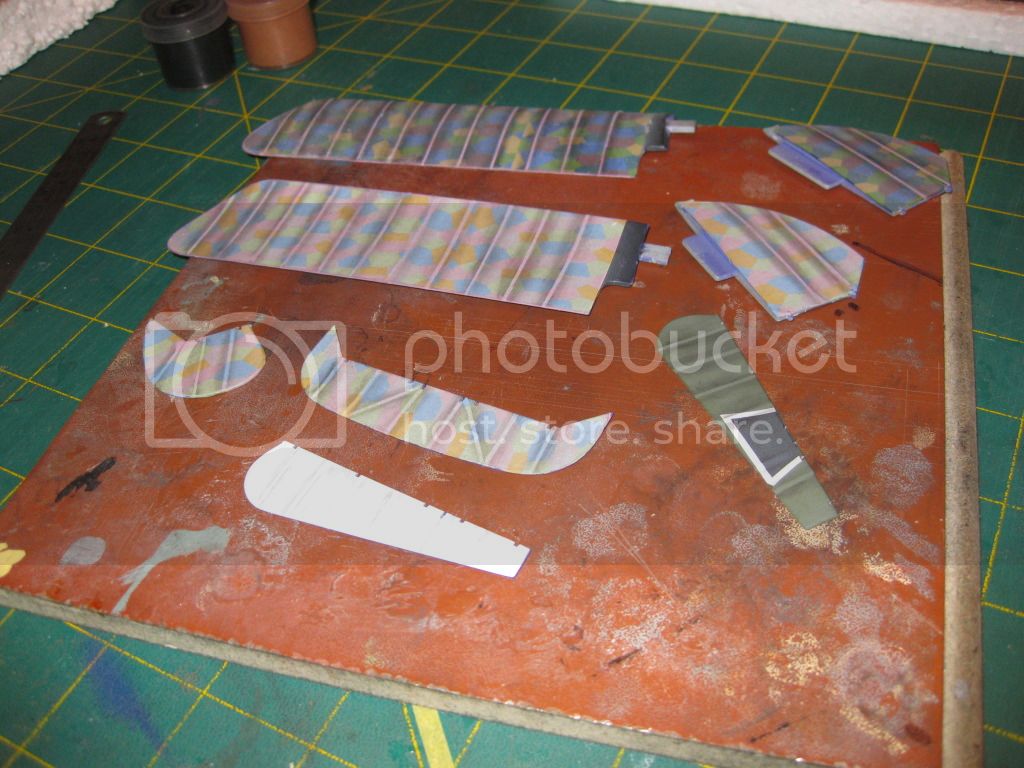
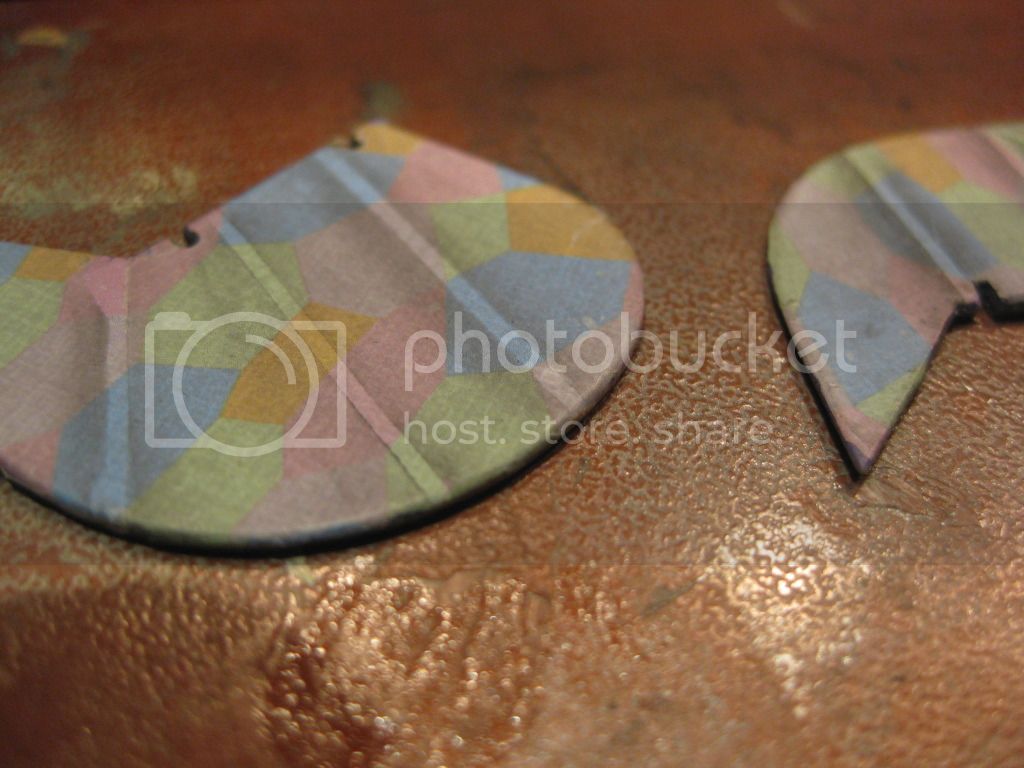
The lozenge and tapes are complete on the lower wing. As mentioned earlier I found the WNW lozenge a little brittle and the tapes required a lot of Microset to get the curves done on the edges. This after a long session of repairs to the split and/or cracked fabric portions. I included a test piece to trial the Microsculpt texture decals on.
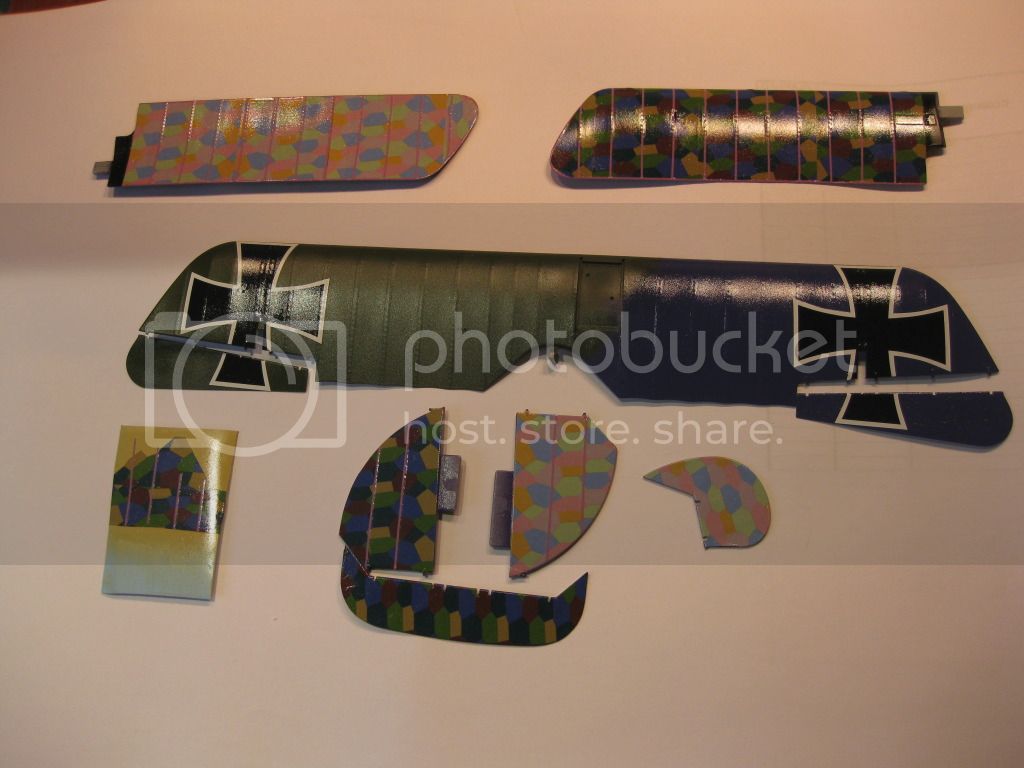
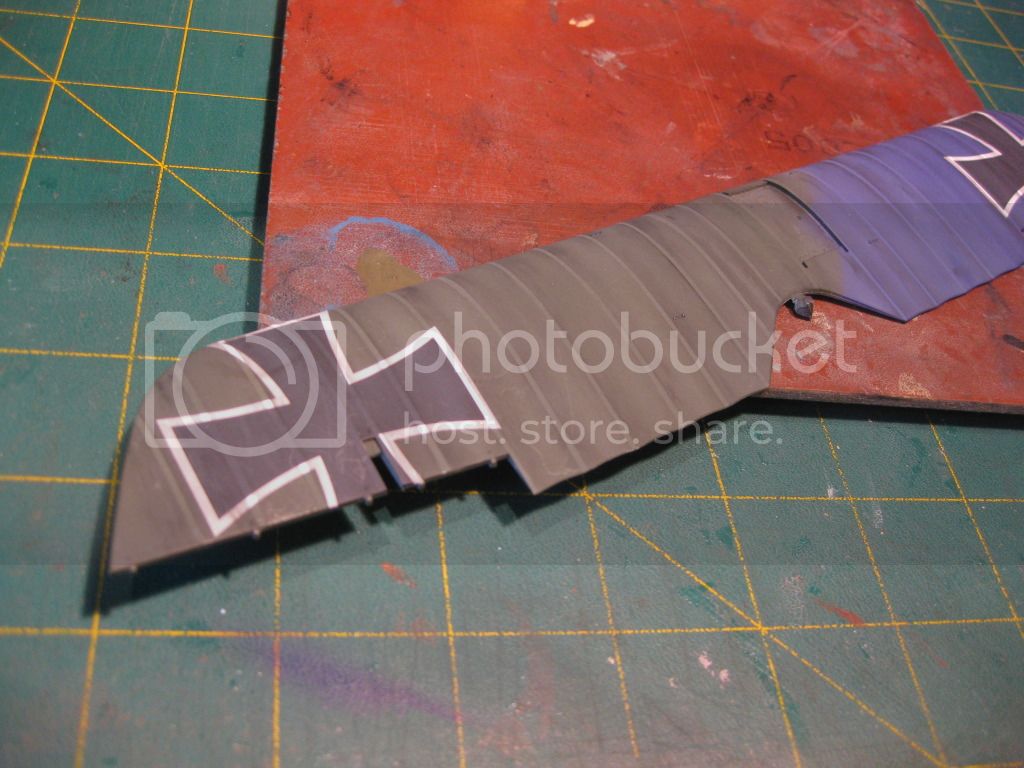
A few shots of the various Lozenged surfaces. This one has 5 Colour Lozenge top and bottoms on the lower wings and horizontal tail surfaces only, the upper wing in green/mauve (Tamiya X16 Purple slightly modified with X4 Blue, and darkened XF67 Nato Green, and the rudder in 5 colour lower surface Lozenge.
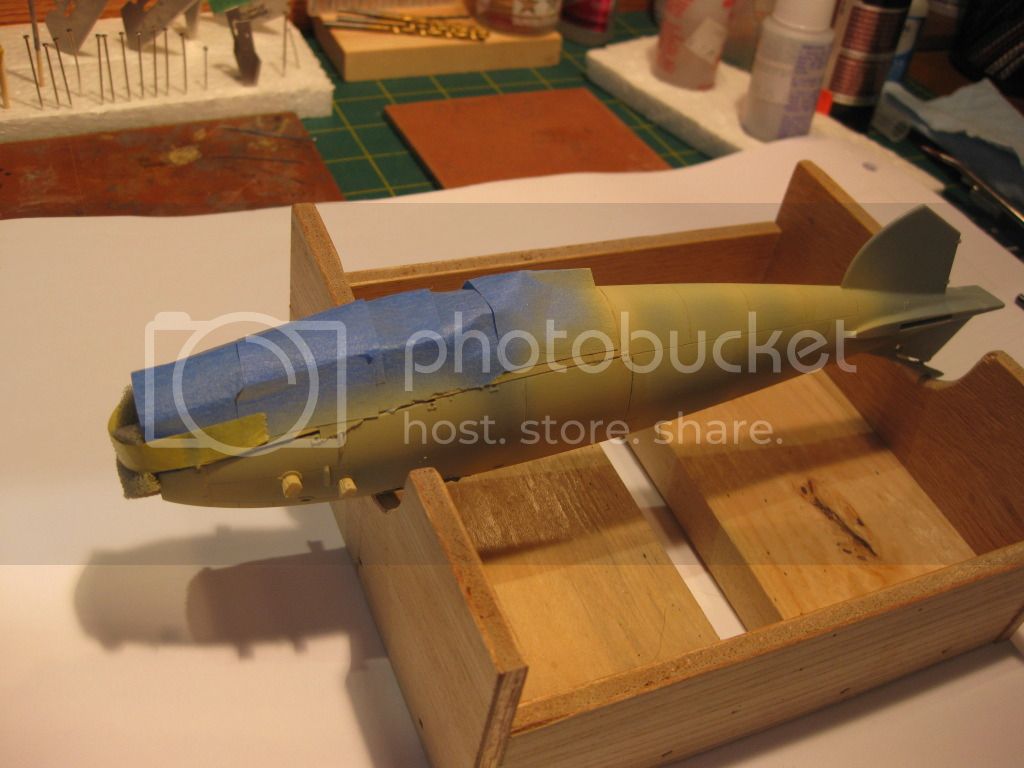
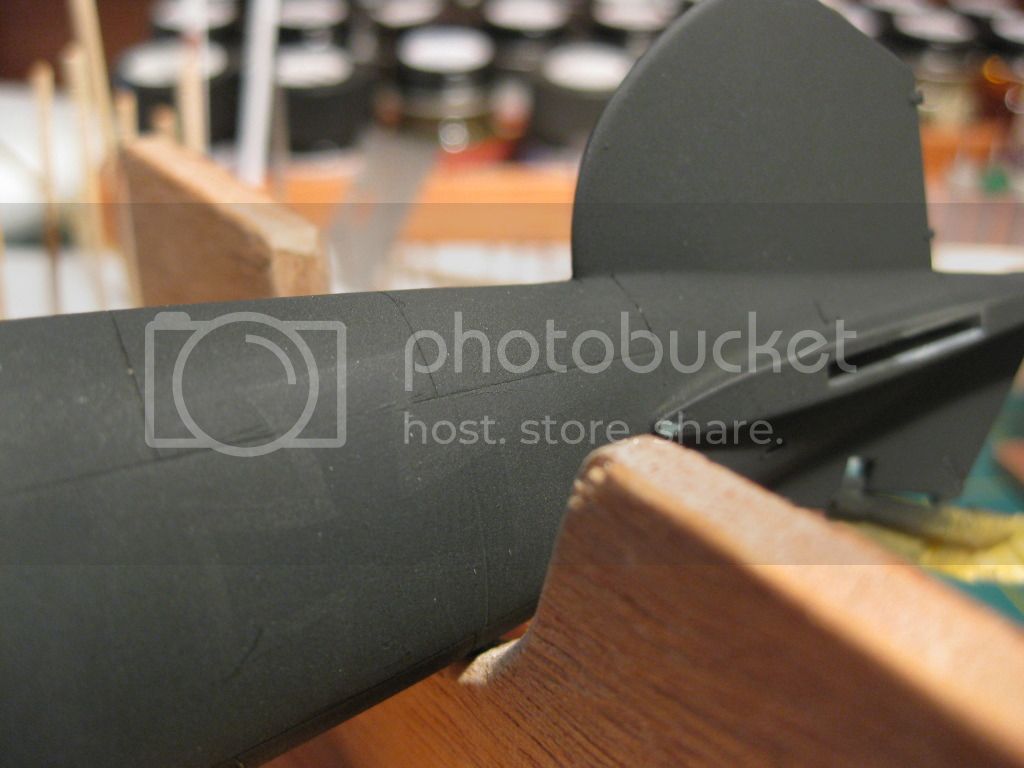
The fuselage has a coat of wood base where I plan some "chipping" and future in place for the fuselage cross which will show through the overall black finish. The round access panels were drilled out and will be displayed either open or with PE doors. The cooling louvres were attempted opened up with a new tool I purchased from RB Productions, great little gizmo and I'm really pleased with the results. I used it to touch up the panel lines as well.

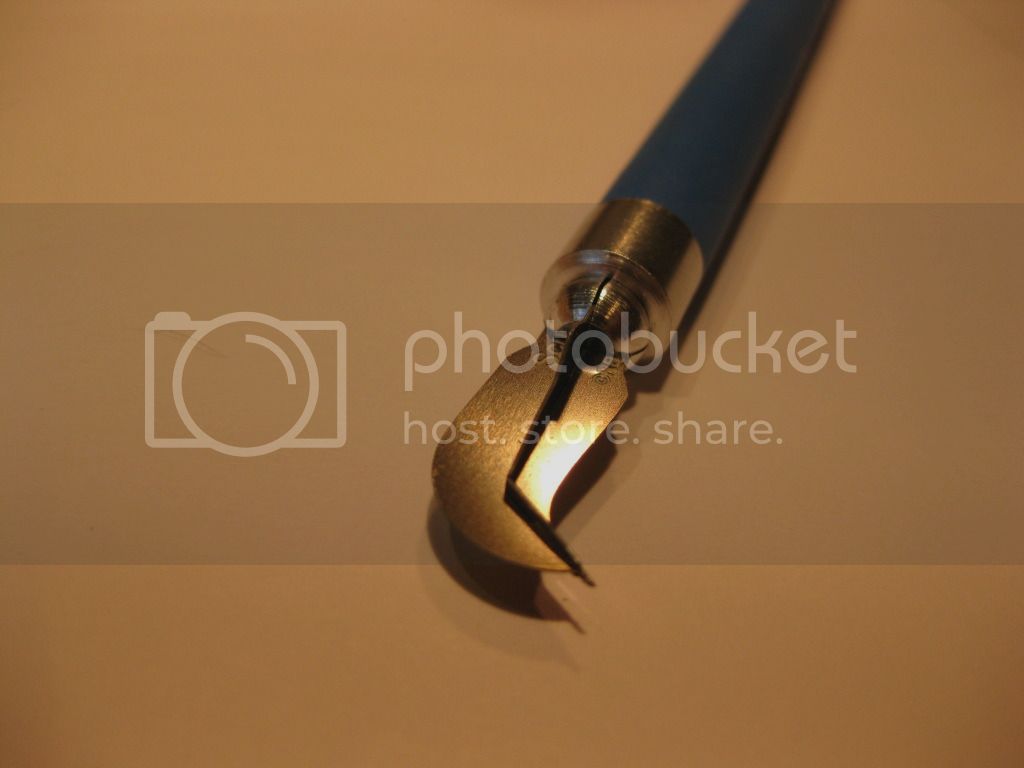
And Radu's highly recommended RB-T019 "Scribe-R" Tool used to open up the cooling louvres and panel lines. This is the best scribing tool I've ever used.
Now it's time to try the Microsculpt on the test Lozenge piece. If I don't like the effect I'll be using a very diluted coat of buff or grey spray before before a flat clear overcoat and then some pigment/pastel after shading on the ribs etc....my first attempt at that technique.
I'm not happy with the "fractured" nature of this project; lots of potential to miss or forget things when there's a week or more gap between sessions so any observations, hints, or "DHOOOOOOS!!!" seen by other eyes are most welcome.
Cheers,
Lance

The Saga of the lawn mowers continues so progress has been slow; I'm taking a few minutes to update this thread while I wait for the grass to dry, and then it's a day in the great outdoors in uncharacteristically severe hot and humid weather. Good for the soul I hear.
The lozenge and tapes are complete on the lower wing. As mentioned earlier I found the WNW lozenge a little brittle and the tapes required a lot of Microset to get the curves done on the edges. This after a long session of repairs to the split and/or cracked fabric portions. I included a test piece to trial the Microsculpt texture decals on.
A few shots of the various Lozenged surfaces. This one has 5 Colour Lozenge top and bottoms on the lower wings and horizontal tail surfaces only, the upper wing in green/mauve (Tamiya X16 Purple slightly modified with X4 Blue, and darkened XF67 Nato Green, and the rudder in 5 colour lower surface Lozenge.
The fuselage has a coat of wood base where I plan some "chipping" and future in place for the fuselage cross which will show through the overall black finish. The round access panels were drilled out and will be displayed either open or with PE doors. The cooling louvres were attempted opened up with a new tool I purchased from RB Productions, great little gizmo and I'm really pleased with the results. I used it to touch up the panel lines as well.
And Radu's highly recommended RB-T019 "Scribe-R" Tool used to open up the cooling louvres and panel lines. This is the best scribing tool I've ever used.
Now it's time to try the Microsculpt on the test Lozenge piece. If I don't like the effect I'll be using a very diluted coat of buff or grey spray before before a flat clear overcoat and then some pigment/pastel after shading on the ribs etc....my first attempt at that technique.
I'm not happy with the "fractured" nature of this project; lots of potential to miss or forget things when there's a week or more gap between sessions so any observations, hints, or "DHOOOOOOS!!!" seen by other eyes are most welcome.
Cheers,
Lance

tinbanger
Joined: February 04, 2008
KitMaker: 2,507 posts
AeroScale: 1,814 posts

Posted: Wednesday, July 11, 2012 - 09:03 AM UTC
Nice job Lance.
I to have the Scribe-R Tool, really works well.

I to have the Scribe-R Tool, really works well.


Kornbeef

Joined: November 06, 2005
KitMaker: 1,667 posts
AeroScale: 1,551 posts

Posted: Wednesday, July 11, 2012 - 10:43 AM UTC
I might have to lay my hands on one of those tools.
Oh and good work Lance, I know how stopping and starting ruins the flow all too well.
Keith
Oh and good work Lance, I know how stopping and starting ruins the flow all too well.
Keith
lcarroll
Joined: July 26, 2010
KitMaker: 1,032 posts
AeroScale: 1,025 posts
Posted: Wednesday, July 11, 2012 - 01:36 PM UTC
Reasonably priced Keith and you get two spare "blades". I've "retired" my numerous others.
Let me know what you think.
Cheers,
Lance
Let me know what you think.
Cheers,
Lance

OEFFAG_153

Joined: February 19, 2010
KitMaker: 1,473 posts
AeroScale: 1,450 posts
Posted: Thursday, July 12, 2012 - 08:41 AM UTC
Hi Lance,
Good to see that you're "at it" again between mwing the lawn... Your lozenge is looking very good, will be interesting to see how your texturing will go.
Mikael
Good to see that you're "at it" again between mwing the lawn... Your lozenge is looking very good, will be interesting to see how your texturing will go.
Mikael

Scrodes
Joined: July 22, 2012
KitMaker: 771 posts
AeroScale: 763 posts
Posted: Sunday, July 22, 2012 - 03:22 PM UTC
Quoted Text
An update at last!...
And Radu's highly recommended RB-T019 "Scribe-R" Tool used to open up the cooling louvres and panel lines. This is the best scribing tool I've ever used.
I'm glad you liked it - you're a hard man to buy for! I LOVE that tool though, so that was a easy choice.
Now that you've twisted my arm into signing up - I'll be following your threads far more closely Lance:-)
Cheers!
Matt

Jessie_C

Joined: September 03, 2009
KitMaker: 6,965 posts
AeroScale: 6,247 posts

Posted: Sunday, July 22, 2012 - 03:25 PM UTC
Hi Matt! Welcome to the best modelling website on the internet 
lcarroll
Joined: July 26, 2010
KitMaker: 1,032 posts
AeroScale: 1,025 posts
Posted: Monday, July 23, 2012 - 01:57 PM UTC
Quoted Text
Quoted TextAn update at last!...
And Radu's highly recommended RB-T019 "Scribe-R" Tool used to open up the cooling louvres and panel lines. This is the best scribing tool I've ever used.
I'm glad you liked it - you're a hard man to buy for! I LOVE that tool though, so that was a easy choice.
Now that you've twisted my arm into signing up - I'll be following your threads far more closely Lance:-)
Cheers!
Matt
I have to add; Matt is my Nephew, a "Road Cop" with an off-duty penchant for modelling (WWII A/C) and altho we have a 40 year or so "age spread" we speak the same lingo. He has threads posted on Hyperscale, hopefully on Aeroscale in the near future. The Scribe-R was a Birthday gift he thoughtfully sent.
Welcome to the "quality" Site, Matt.
Cheers,
Lance
lcarroll
Joined: July 26, 2010
KitMaker: 1,032 posts
AeroScale: 1,025 posts
Posted: Wednesday, July 25, 2012 - 02:15 AM UTC
After 8 straight days of running off to work (Need to stop this rat race and "act my age!")I finally have some time to post another update. I hope to make some reasonable progress this week between bouts of grass cutting and returning to work in 7 days.
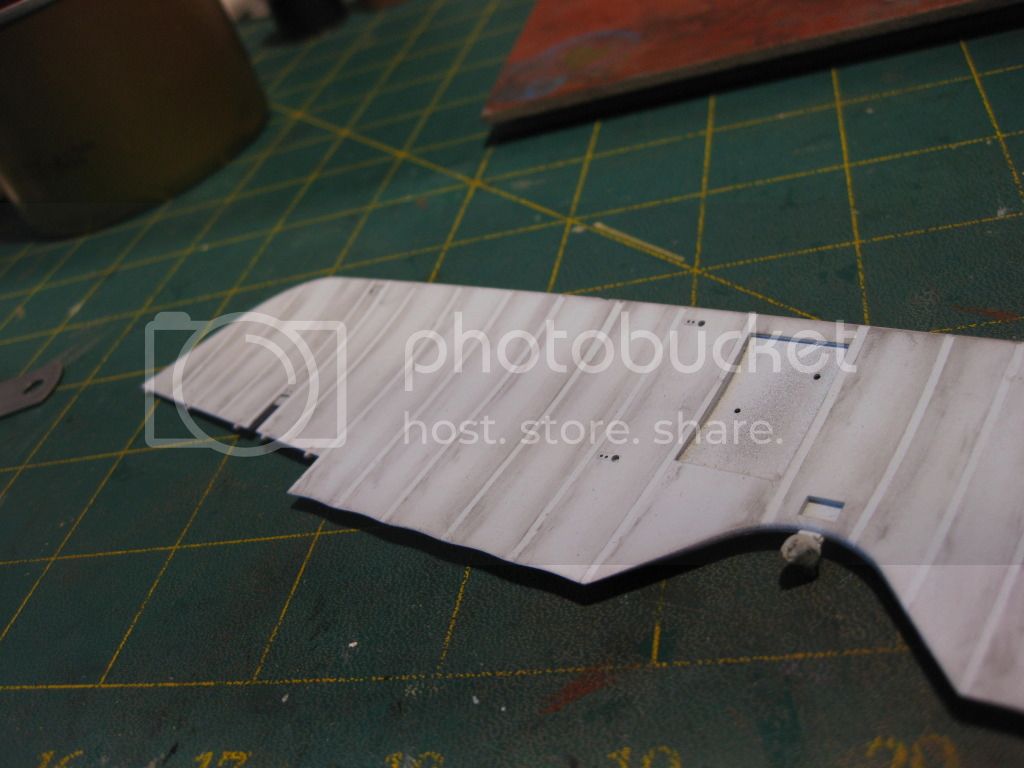
The next step, applying Microsculpt to the Lozenge surfaces, was completed last week. I liked the effect it produced on the test piece so elected to use it overall. Though very delicate I found it easy to work with; again I used Microset to ease the process. I'll now be giving it a coat or two of flat finish (Model Master Acryl Flat) to provide a base for some pastel shading of the ribs on the various Lozenged components and the top wing as well.
The photos will hopefully show the "Linen Textured" effect.I still find the upper Lozenge a little stark and dark overall however the final semi-gloss top coat will hopefully tone it down.
Last, the fuelage got it's base coat of Tamiya Nato Black #XF-69. The fuselage cross's show through nicely and I like the tone of this particular black.(Dust, fluff, and white globular chunks on the finish courtesy of the Machro function of the camera and lack of dusting prior to photos!)
Now the challenge is to get some tonal contrast on the fuselage finish prior to final weathering, decals, and top coating.
More to follow in a day or two, hopefully........
Cheers,
Lance

Mgunns
Joined: December 12, 2008
KitMaker: 1,423 posts
AeroScale: 1,319 posts

Posted: Friday, July 27, 2012 - 02:00 AM UTC
Hello Lance:
I like the effect of Micro Sculpt on the lozenge, I will try that on future builds. I like the black texture too on the fuselage. I am looking forward to the next installment.
I too have been busy, the Nieuport is beckoning though. I will try to get it finished by the 31 August deadline. Funny how quickly that is nearing!
Best
Mark
lcarroll
Joined: July 26, 2010
KitMaker: 1,032 posts
AeroScale: 1,025 posts
Posted: Friday, July 27, 2012 - 07:07 AM UTC
Nice to hear from you again Mark!
No doubt you like me have to take advantage of the Summer weather while it lasts. I'm getting a little nervous about the approaching deadline as well, thought I'd have this finished well before.
Enjoy the Summer while you can and don't tumble off that Harley!
Cheers,
Lance
No doubt you like me have to take advantage of the Summer weather while it lasts. I'm getting a little nervous about the approaching deadline as well, thought I'd have this finished well before.
Enjoy the Summer while you can and don't tumble off that Harley!
Cheers,
Lance
lcarroll
Joined: July 26, 2010
KitMaker: 1,032 posts
AeroScale: 1,025 posts
Posted: Sunday, July 29, 2012 - 05:49 AM UTC
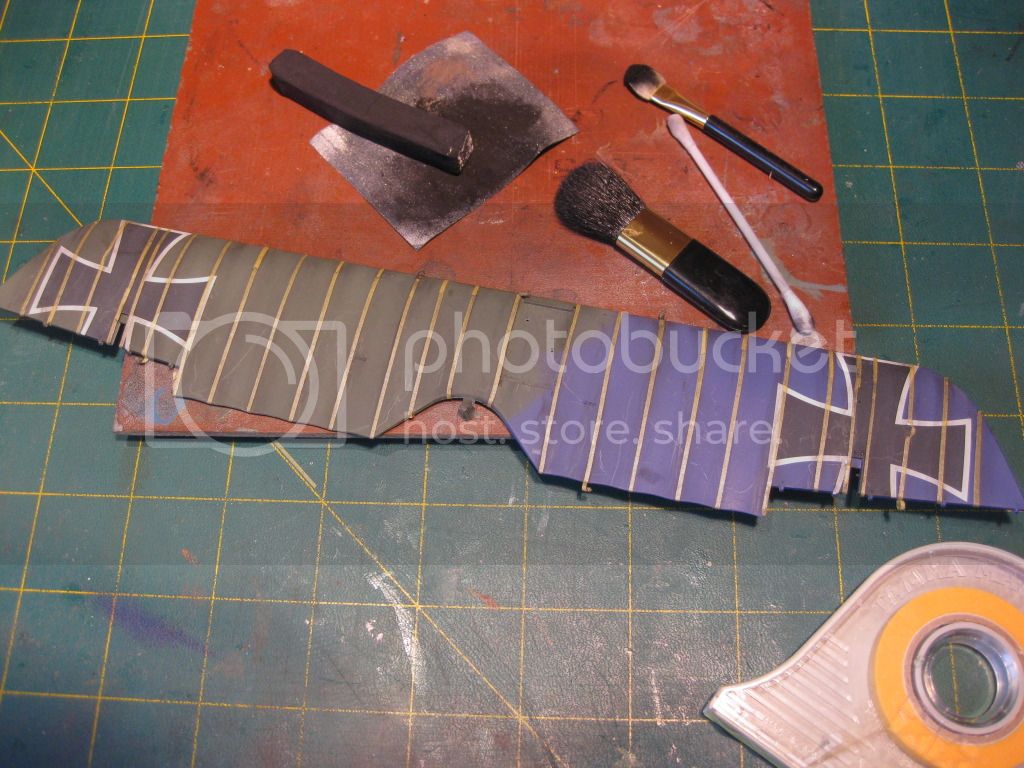
A bit more progress to report...........the pastel weathering/highlighting experiment is done.
All flying surfaces were sprayed with two coats of Modelmaster Acryl Flat to provide a rough surface for the pastels to stick to. After drying for approx. 48 hours Tamiya Tape strips were applied over all rib locations.
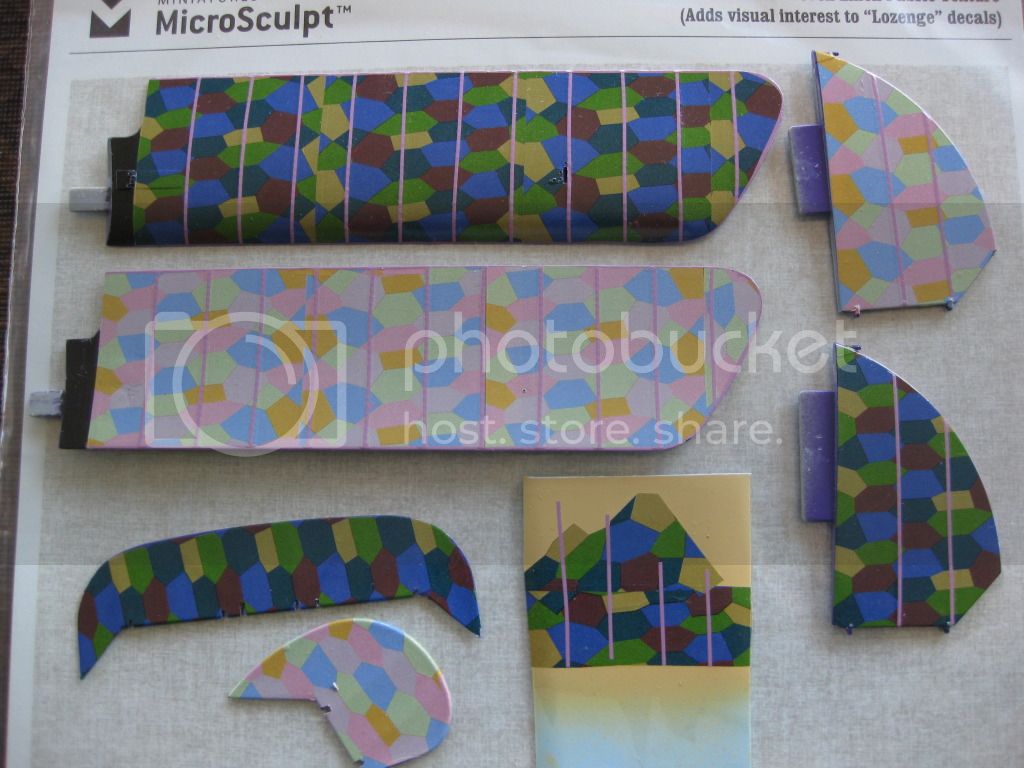
My set of chalk pastels is a very basic "beginner's" set thus I only had black for the shading. Grey would have worked much better on the light blue upper wing undersurface however it did produce a reasonable effect. I'm very pleased with the overall results; I'm sure like any technique more practice will improve the results. I sanded the chalk to get a powder and applied it with a make-up sponge applicator and Q-Tips. It was rubbed with clean dry cloths to blend it in. The huge make-up brush was handy to brush off the left over powder and to sweep it up for use as the exercise progressed.
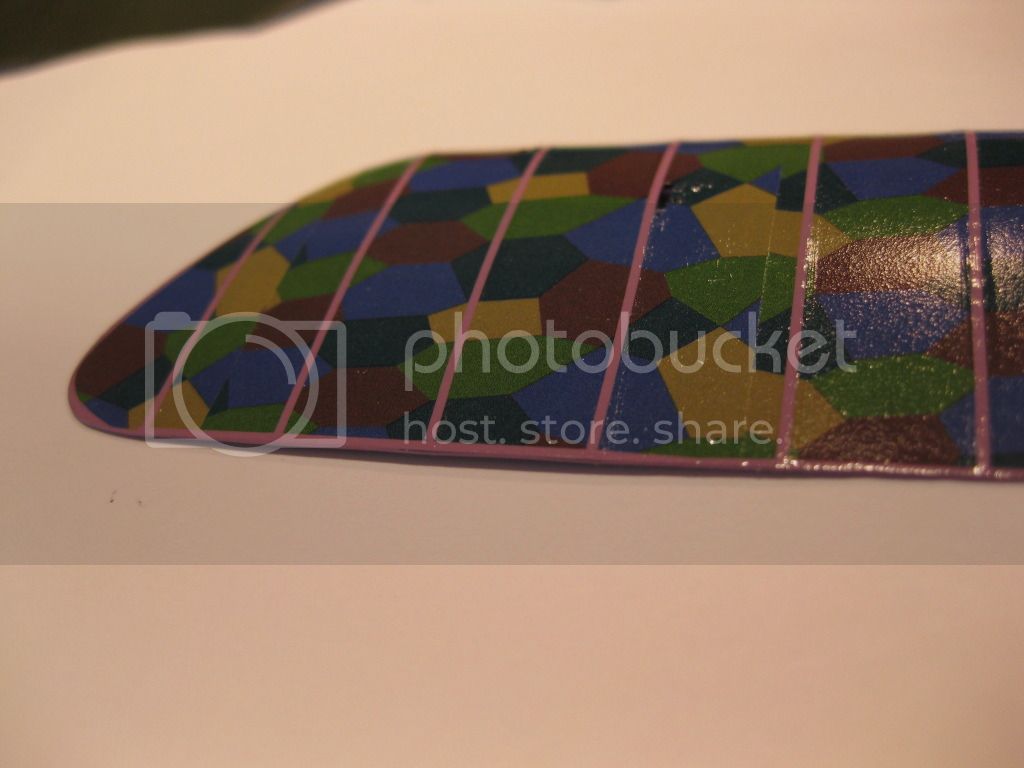
The top wing with tapes still in place:
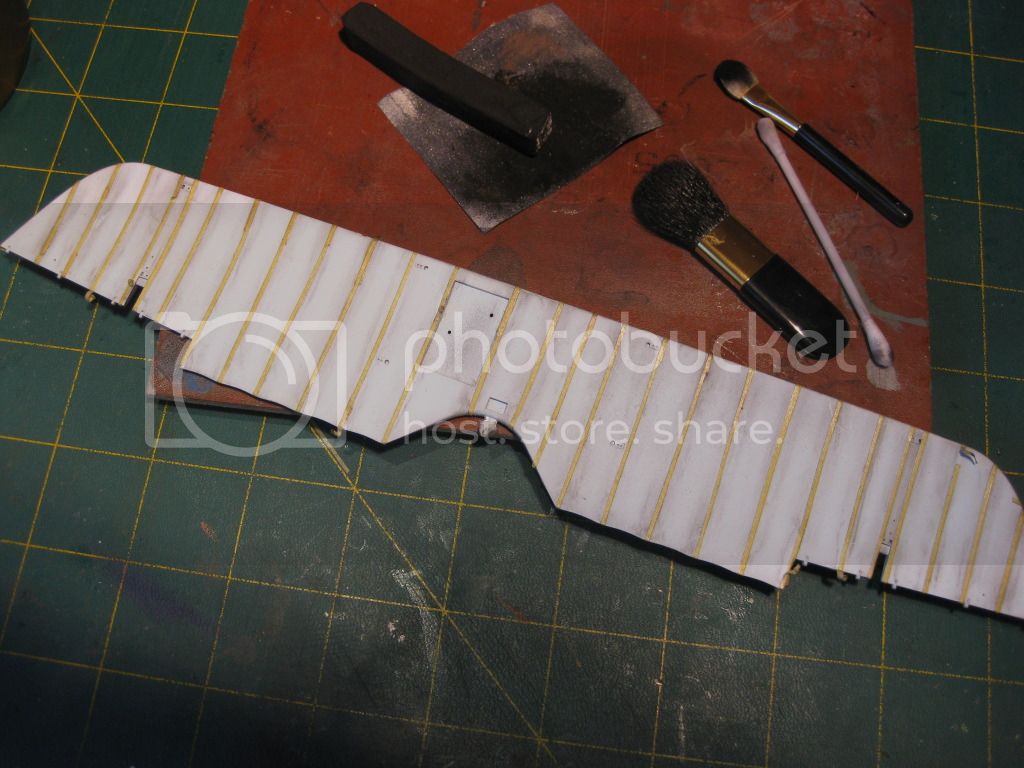
And the various components after shading and tape removal:

The next step is a sealer coat of Acryl Semi Gloss which should reduce the contrast further and hopefully smooth out the visual effect. I will have to spray a little future on the bottoms of the two lower wings, apply the crosses, and repeat the process a little as I didn't think to do them before the weathering/shading.
Once that's all complete I can get at the fuselage.............I'm still not sure how I'm going to get some tonal contrast there, maybe just masking some panels and spraying a different tint of the basic NATO Black. I'm open to ideas everyone, is there a better way??
Cheers,
Lance
All flying surfaces were sprayed with two coats of Modelmaster Acryl Flat to provide a rough surface for the pastels to stick to. After drying for approx. 48 hours Tamiya Tape strips were applied over all rib locations.
My set of chalk pastels is a very basic "beginner's" set thus I only had black for the shading. Grey would have worked much better on the light blue upper wing undersurface however it did produce a reasonable effect. I'm very pleased with the overall results; I'm sure like any technique more practice will improve the results. I sanded the chalk to get a powder and applied it with a make-up sponge applicator and Q-Tips. It was rubbed with clean dry cloths to blend it in. The huge make-up brush was handy to brush off the left over powder and to sweep it up for use as the exercise progressed.
The top wing with tapes still in place:
And the various components after shading and tape removal:
The next step is a sealer coat of Acryl Semi Gloss which should reduce the contrast further and hopefully smooth out the visual effect. I will have to spray a little future on the bottoms of the two lower wings, apply the crosses, and repeat the process a little as I didn't think to do them before the weathering/shading.
Once that's all complete I can get at the fuselage.............I'm still not sure how I'm going to get some tonal contrast there, maybe just masking some panels and spraying a different tint of the basic NATO Black. I'm open to ideas everyone, is there a better way??
Cheers,
Lance
Jessie_C
Joined: September 03, 2009
KitMaker: 6,965 posts
AeroScale: 6,247 posts
Posted: Sunday, July 29, 2012 - 06:22 AM UTC
Quoted Text
Once that's all complete I can get at the fuselage.............I'm still not sure how I'm going to get some tonal contrast there, maybe just masking some panels and spraying a different tint of the basic NATO Black. I'm open to ideas everyone, is there a better way??
Do you have any white chalk? You could mask off a panel or two and rub in varying amounds of chalk to give it a little tone. Perhaps mix back and white chalk to get grey shades...
OEFFAG_153
Joined: February 19, 2010
KitMaker: 1,473 posts
AeroScale: 1,450 posts
Posted: Tuesday, July 31, 2012 - 06:50 AM UTC
Hi Lance, great to see you back on tis project. The pastel is working well, and the texture decals does look the buisness!
Take care with the clear varnish over the pastel though I did it once and the pastel layer just vanished...
Best Regards
Mikael
Take care with the clear varnish over the pastel though I did it once and the pastel layer just vanished...
Best Regards
Mikael
lcarroll
Joined: July 26, 2010
KitMaker: 1,032 posts
AeroScale: 1,025 posts
Posted: Wednesday, August 01, 2012 - 03:05 PM UTC
Quoted Text
Hi Lance, great to see you back on tis project. The pastel is working well, and the texture decals does look the buisness!
Take care with the clear varnish over the pastel though I did it once and the pastel layer just vanished...
Best Regards
Mikael
Mikael,
Exactly what happened to the fuselage. The wings worked very nicely, the much more subtle work on the fuselage simply disappeared when oversprayed! No harm done however I'm now going to have to put something more permanent on the fuselage, more to follow.
Cheers,
Lance
JackFlash
Joined: January 25, 2004
KitMaker: 11,669 posts
AeroScale: 11,011 posts
Posted: Wednesday, August 01, 2012 - 05:39 PM UTC
Very nice work Lance!
lcarroll
Joined: July 26, 2010
KitMaker: 1,032 posts
AeroScale: 1,025 posts
Posted: Thursday, August 02, 2012 - 02:13 PM UTC
Stephen, Mikael, (and Jessica for the "seed" of an idea!)
Thanks for the kind comments. No real progress since last report; I've done some tidying up and additions to the engine compartment before I get going (again) on the fuselage finish. I had the effect I wanted using white chalk blended in/rubbed and buffed along the panel lines and really liked the results. When I oversprayed with the final top coat it totally vanished as cautioned by Mikael. I plan to repeat that step and not over coat it this time, as it's rubbed in and shouldn't be suceptible to wearing off.
I'll get on with it soon and provide photos once done.
Cheers,
Lance
JackFlash
Joined: January 25, 2004
KitMaker: 11,669 posts
AeroScale: 11,011 posts
Posted: Thursday, August 02, 2012 - 03:13 PM UTC
Maybe an acrylic clear coat would preserve the pastel chaulk? Definately try it on a test piece.
lcarroll
Joined: July 26, 2010
KitMaker: 1,032 posts
AeroScale: 1,025 posts
Posted: Friday, August 03, 2012 - 02:27 PM UTC
Quoted Text
Maybe an acrylic clear coat would preserve the pastel chaulk? Definately try it on a test piece.
Stephen,
That's what I used (Model Master Acryl Semi Gloss); I suspect the white pastel was too subtle as the top coat made it totally vanish. I'll be trying it again as soon as I get this work shift completed (Monday I hope)
Cheers,
Lance
 |

WEB HOSTING BY


Copyright ©2021 AeroScale and Kitmaker Network, a subsidiary of Silver Star Enterprises
All Rights Reserved. Please read our Conditions of Use and Privacy Policy.
All Rights Reserved. Please read our Conditions of Use and Privacy Policy.