OFFICIAL: Looney Toons Campaign

#047
England - East Anglia, United Kingdom
Joined: September 13, 2005
KitMaker: 2,016 posts
AeroScale: 475 posts
Posted: Saturday, April 13, 2013 - 06:13 PM UTC
Hello guys

Lee that cockpit looks great mate are you sure that's 1/72!!!
Mike, spot on, those leading edges look superb ,what paint did you use?
Keep them coming
Andy
Major Caryle,
"Shall we have a go at the far end now,sir?"
Lt Colonel "Johnny" Frost,
"Having a go,is hardly text book terminology Harry"
Major Caryle,
"But you'll let us try sir?"
A Bridge Too Far
Lottery Campaign "Oh de Vichy"
United States
Joined: December 26, 2008
KitMaker: 288 posts
AeroScale: 195 posts
Posted: Sunday, April 14, 2013 - 03:05 AM UTC
Thanks Andy! I stuck with my Usual Suspects when it came to painting the 767. The gloss white and dark blue tail are Testors enamels in the small bottles, Xtracolor Boeing Grey for the wings (I have to ration my remaining tinlets!) and Alclad Aluminum for the leading edges. The best part with using this combination (which is why I do) comes from the act that the model is gloss and ready for decals. No need for another gloss clear coat for me to screw up!

Have fun modeling!
Mike

United States
Joined: February 01, 2009
KitMaker: 1,233 posts
AeroScale: 663 posts
Posted: Sunday, April 14, 2013 - 04:35 AM UTC
Lee----That interior work is rockin'!!! Love a Tornado!!!
Mike----Great progress. Very smooth application of the white top-coat.
Best wishes, Ian
It is a fact that under equal conditions, large-scale battles and whole wars are won by troops which have a strong will for victory, clear goals before them, high moral standards, and devotion to the banner under which they go into battle.
-Georgy Zhukov
United States
Joined: February 01, 2009
KitMaker: 1,233 posts
AeroScale: 663 posts
Posted: Sunday, April 14, 2013 - 07:58 AM UTC
Well, I finally got started on my Hasegawa 48th scale E-model Hornet. Began work on the cockpit and also got the Steel Beach Resin ECS pipes installed. A Black Box SJU-17 seat will be added to the cockpit as well.
Best wishes, Ian



It is a fact that under equal conditions, large-scale battles and whole wars are won by troops which have a strong will for victory, clear goals before them, high moral standards, and devotion to the banner under which they go into battle.
-Georgy Zhukov
Sør-Trøndelag, Norway
Joined: October 23, 2012
KitMaker: 189 posts
AeroScale: 142 posts
Posted: Sunday, April 14, 2013 - 08:21 AM UTC
I decided to join up! I've got a Bf109E on my workbench, but it should be done in a week or so which means I have a month to build my entry. (Plenty of time!

)
I pln to built the Revell P-47D 1:72 scale OOB, as the US profile included have a big, burly bull which should cover the stipulations. (I.e.
This kit ) I'll post the obligatory "before" pictures before I start.
Building the world, one piece at the time.

#041
Kobenhavn, Denmark
Joined: July 20, 2006
KitMaker: 10,069 posts
AeroScale: 3,788 posts
Posted: Wednesday, April 17, 2013 - 08:20 AM UTC
Great looking cockpit, Lee. Outstanding details!
Looking forward to see more.

Campaign'oholic - 252+ campaigns completed
United States
Joined: December 26, 2008
KitMaker: 288 posts
AeroScale: 195 posts
Posted: Saturday, April 20, 2013 - 03:00 AM UTC
Hi fellow modelers!
I am part way through the decaling on my B767 for this Campaign and I thought I would shoot a few quick photos to share. You can now see that my entry does meet the spirit of this cool campaign! The good news is that I have most of the difficult decals on the model. The bad news is that the decals are not well designed in that they do not fit a curved surface very well. After a LOT of pushing and tugging, many of the decals ended up with permanant wrinkles or defects on the surface. You can see them in a few of my photos. Otherwise the decals were a bit tougher and easier to position then I had expected based on reviews of this company's decals. I am now planning on stopping the decal application and try and minimize the worst of the wrinkles by slicing with a knife and covering the area with paint. Then I'll finish the rest of the decals. Anyway, enjoy the progress so far!
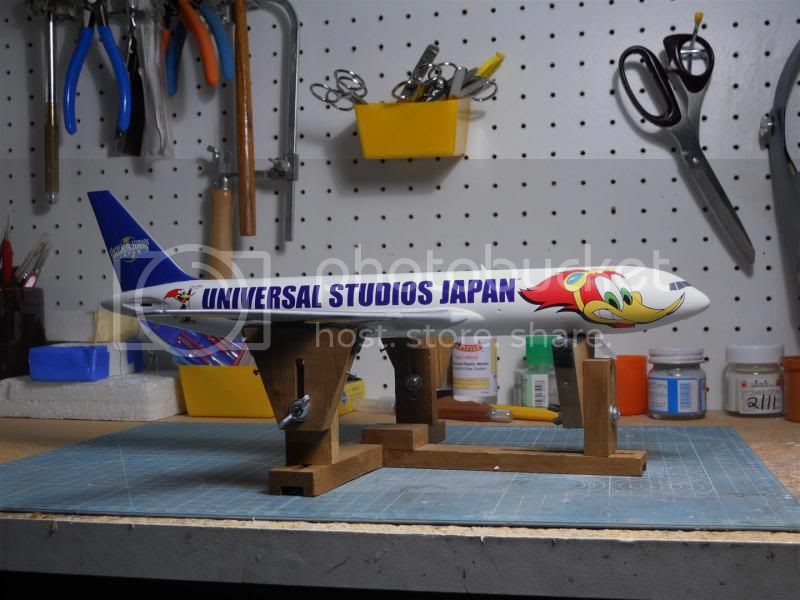
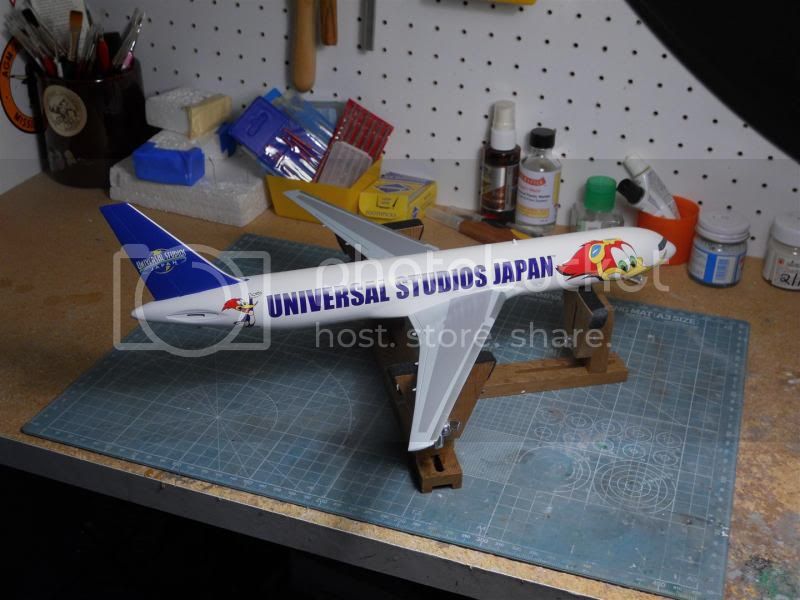
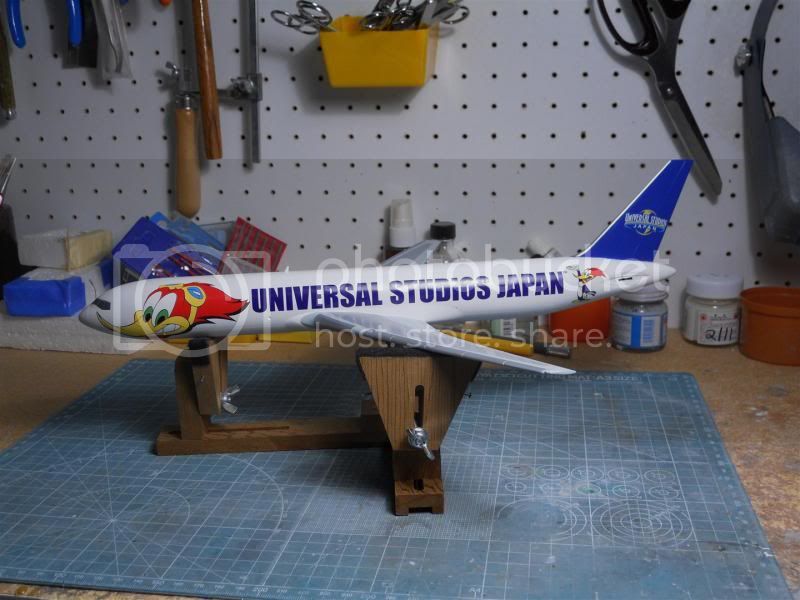
Have fun modeling!
Mike

British Columbia, Canada
Joined: September 03, 2009
KitMaker: 6,965 posts
AeroScale: 6,247 posts
Posted: Saturday, April 20, 2013 - 03:13 AM UTC
Don't forget the ever-useful boiling water trick to subdue troublesome decals.
When once you have tasted flight you will walk the Earth with your eyes turned skyward.
For there you have been, and there you will always long to return.
-Leonardo Da Vinci
United States
Joined: December 26, 2008
KitMaker: 288 posts
AeroScale: 195 posts
Posted: Sunday, April 21, 2013 - 03:00 AM UTC
Quoted Text
Don't forget the ever-useful boiling water trick to subdue troublesome decals.
Yup, that is definitely a useful technique! In this case, the decals actually applied OK and did lay down but the large area decals would not lay flat, There would be a host of wrinkles or "hills" that when wet could be moved around but not eliminated. I could push the fold from one part of the decal to another and then it would reappear somewhere else. When the decal dried, the folds were then permanently fixed in place. I tried t fix some yesterday by slittling the dried fold and the decal tended to splinter and flake off making it worse. Ah well, such is the life of a modeler!

Have fun modeling!
Mike

Oklahoma, United States
Joined: February 05, 2013
KitMaker: 13 posts
AeroScale: 10 posts
Posted: Sunday, April 21, 2013 - 12:21 PM UTC
Being new to this forum and just looking around I find some really exceptional talent here. There are some really beautiful plane here. You guys are inspirational.
United States
Joined: February 01, 2009
KitMaker: 1,233 posts
AeroScale: 663 posts
Posted: Sunday, April 21, 2013 - 12:32 PM UTC
Mike----Your build is exceptional but that paint/decal scheme is really awesome. What great markings!!!!!!!
Best wishes, Ian
It is a fact that under equal conditions, large-scale battles and whole wars are won by troops which have a strong will for victory, clear goals before them, high moral standards, and devotion to the banner under which they go into battle.
-Georgy Zhukov

#047
England - East Anglia, United Kingdom
Joined: September 13, 2005
KitMaker: 2,016 posts
AeroScale: 475 posts
Posted: Wednesday, April 24, 2013 - 02:03 AM UTC
Mike,that is bloddy brilliant mate, a real Toon


Ian,love the Hornet, I must do my 1/32 Academy "chippy ho" one day.
Eirik ,welcome aboard my friend,look forward to see some pics
stay tooned

Andy
Major Caryle,
"Shall we have a go at the far end now,sir?"
Lt Colonel "Johnny" Frost,
"Having a go,is hardly text book terminology Harry"
Major Caryle,
"But you'll let us try sir?"
A Bridge Too Far
Lottery Campaign "Oh de Vichy"

#041
Kobenhavn, Denmark
Joined: July 20, 2006
KitMaker: 10,069 posts
AeroScale: 3,788 posts
Posted: Wednesday, April 24, 2013 - 02:43 AM UTC
Nice build, Mike. No doubt that fulfills the campaign requirements!


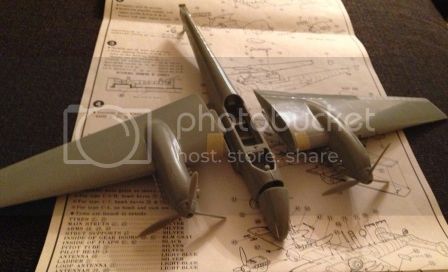
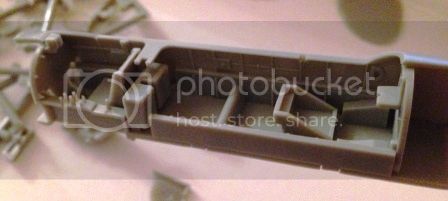
I am making slow but steady progress on my Bf 110. It is the old Fujimi kit and so far it has been great.
The fit is excellent and the cockpit not that bad - considering the age of the kit. I have a few Eduard Bf 110s in the stash so I will see if there are some extra parts that can be used to dress up the cokpit a little.
More to follow

Campaign'oholic - 252+ campaigns completed
United States
Joined: December 26, 2008
KitMaker: 288 posts
AeroScale: 195 posts
Posted: Saturday, April 27, 2013 - 03:31 AM UTC
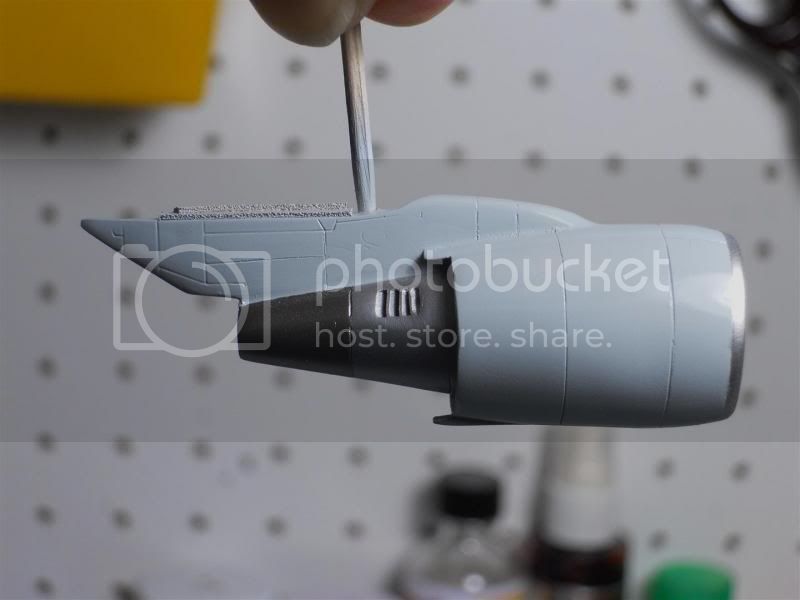
Thanks for the great comments everyone, I really appreciate the feedback! While I am making slow progress in finishing out the decal step as different decals need to be layered on top of one another, I had been working on completing the engines. You might recall that I had shown resin engines in the first photo of my build. The reason I went with resin engines is that the "power eggs" supplied in the Revell kit are very inaccurate and are a blend of two different engine types. I went with the Braz copies of the correct engine and they looked like this after assembly:


I used brass wire to get a firm attachment on the wing. I also color code the asemblies to make sure I place the correct engine on the wing!
Here is how they look painted and ready for assembly:

Have fun modeling!
Mike

United States
Joined: February 01, 2009
KitMaker: 1,233 posts
AeroScale: 663 posts
Posted: Saturday, April 27, 2013 - 09:12 AM UTC
Mike----Good looking engines
Jesper----110 looks like it is coming along well.
I did some more work on my E-model "Rhino". The flaps are installed, as are the slats. The wings will be folded so I got those done and started on the pylons. Also got the tanks together and I will be using two GBU-38 Mini-JDAMS from Kinetics for ordnance, in addition to the AIM-9X's which I have not gotten to yet.
Regards, Ian



It is a fact that under equal conditions, large-scale battles and whole wars are won by troops which have a strong will for victory, clear goals before them, high moral standards, and devotion to the banner under which they go into battle.
-Georgy Zhukov
United States
Joined: December 26, 2008
KitMaker: 288 posts
AeroScale: 195 posts
Posted: Sunday, April 28, 2013 - 03:39 AM UTC
Ian
I like the way your Super Hornet is looking! I usually build in 1/72 for my non-airliner builds but the Hasegawa kit looks really tempting in your build.
Have fun modeling
Mike

England - West Midlands, United Kingdom
Joined: August 01, 2012
KitMaker: 960 posts
AeroScale: 391 posts
Posted: Monday, April 29, 2013 - 01:42 PM UTC
Wow, the Woody Woodpecker scheme is fantastic. My progress is slow on the ancient Revell Brewster Buffalo.
Sør-Trøndelag, Norway
Joined: October 23, 2012
KitMaker: 189 posts
AeroScale: 142 posts
Posted: Tuesday, April 30, 2013 - 11:47 AM UTC
Work caught up with me but yesterday the Messerschmitt was done and I cracked open the P-47D-30-RA.
Obligatory starting picture w/phone:
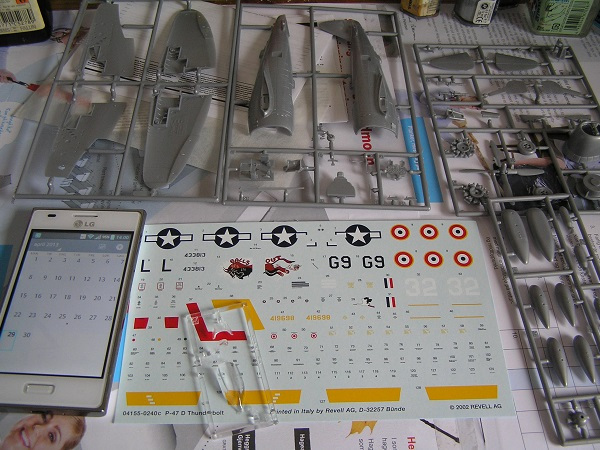
Gonna make a fine counterpoint to the P-51D I built in january.

Building the world, one piece at the time.

#041
Kobenhavn, Denmark
Joined: July 20, 2006
KitMaker: 10,069 posts
AeroScale: 3,788 posts
Posted: Monday, May 06, 2013 - 07:51 AM UTC
Nice progress, Ian.
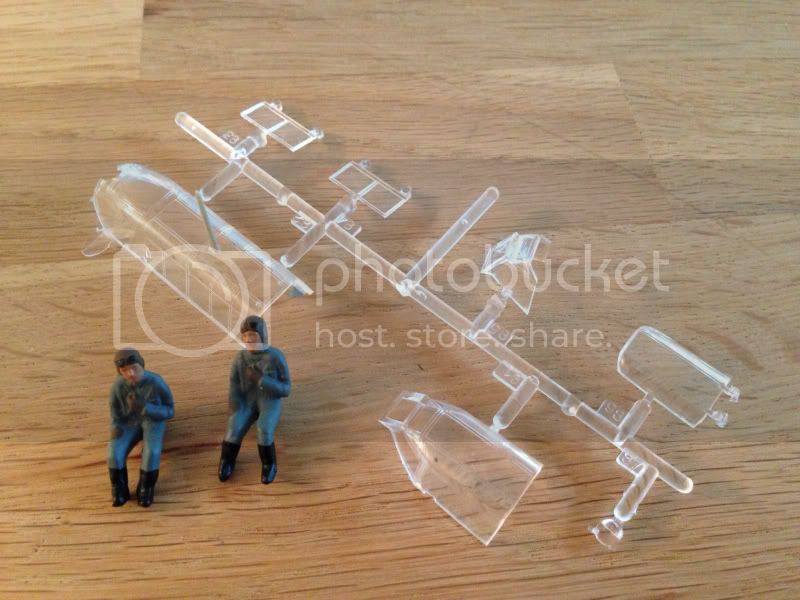
I have almost finished the construction. I will close up the canopy and then painting can begin.
More to follow soon


Campaign'oholic - 252+ campaigns completed
Istanbul, Turkey / Türkçe
Joined: December 16, 2004
KitMaker: 1,163 posts
AeroScale: 255 posts
Posted: Wednesday, May 08, 2013 - 03:53 AM UTC
Hello all,
I was building a BF109 for Anything Goes campaign when I realized the decals I was planning to use fitted this campaign right here. As a result, I decided to migrate to this topic.
The kit I am building is Hasegawa's Bf109F-4 kit, reissued as the "Priller Edition" with Priller's figure and new Cartograf decals. I will be throwing some aftermarket goodies as well.
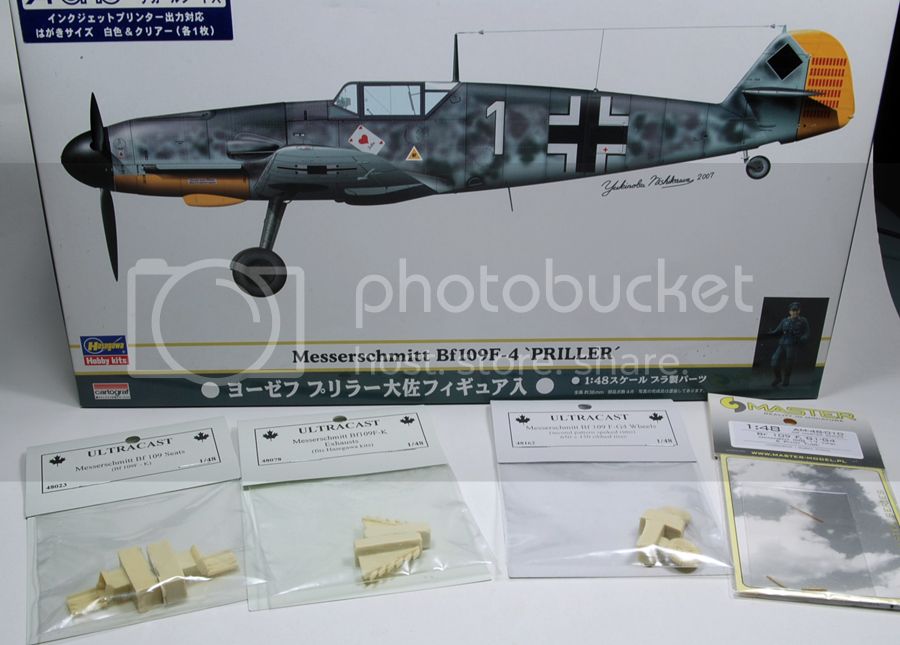
The decals come from Cutting Edge, a decal sheet I bought years ago. I will be building this particular plane with the British Lion getting shot at the buttocks.

First step was replacing the seat with Ultracast's resin item. This is a nice addition as the seat is very visible through the canopy.
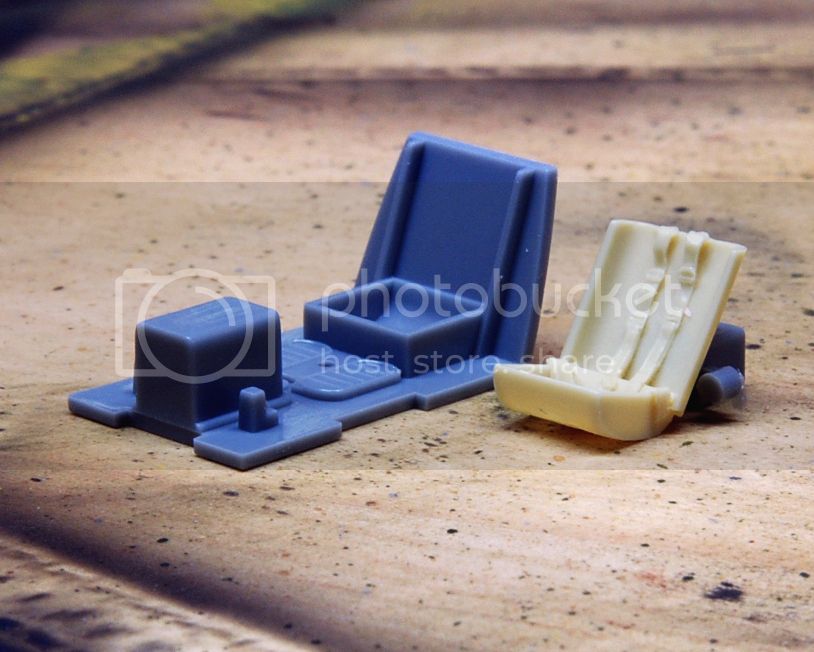
The kit goes together without a lot of issues, though I did have to fiddle around with the engine covers a little. Primed and ready for paint.

Starting to paint the whites and the RLM 04 Yellow sections. The Gunze RLM04 really looks nice in my opinion, especially when you spray it over some white.

Some minor detailing was done. Cables for the landing gear and replacing the gun barrel in the propeller hub with a needle.
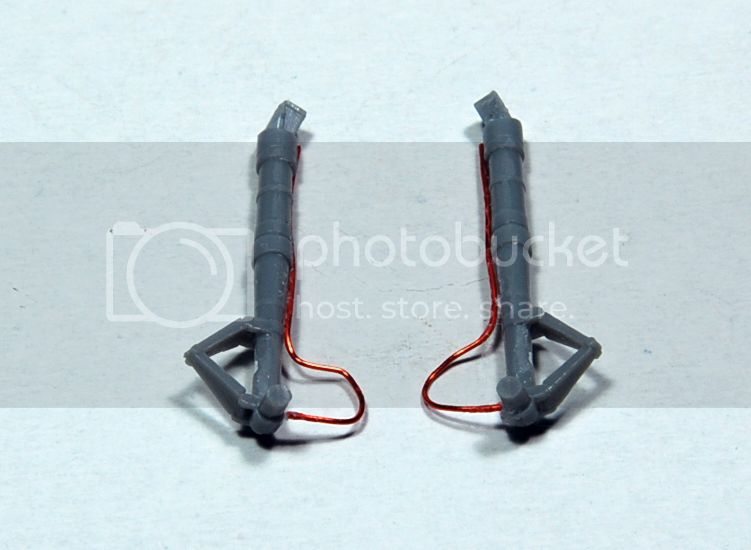

Proud Supporter of Armorama Campaigns
England - South East, United Kingdom
Joined: August 15, 2012
KitMaker: 408 posts
AeroScale: 365 posts
Posted: Wednesday, May 08, 2013 - 04:21 AM UTC
Busy Busy Busy - busier than a Beirut bricklayer! OK, the Tonka is built and primed, as are all the under wing stores. I've tried something different with the shading, which may or may not work. Instead of pre shading every line and rivet (which is a pain in 1/72) I have washed the entire plane and stores with a dirty grey wash, and then wiped it all clean. We will find out if it worked or not, when I air brush the desert pink on, in the next day or so.

On the workbench
National Pride - 1/72 BAe Nimrod MR2.P
Tiger Meet! - 1/72 Panavia Tornado ECR (Luftwaffe)
Airfix III - 1/72 Hawker Hunter FGA.9
Hairy Brush - 1/72 P-51D Mustang
Mustang 75 - 1/72 P-51D "Ferocious Frankie"
Sør-Trøndelag, Norway
Joined: October 23, 2012
KitMaker: 189 posts
AeroScale: 142 posts
Posted: Thursday, May 09, 2013 - 02:34 PM UTC
With three days off from work I got cracking.
The Situation yesterday morning:
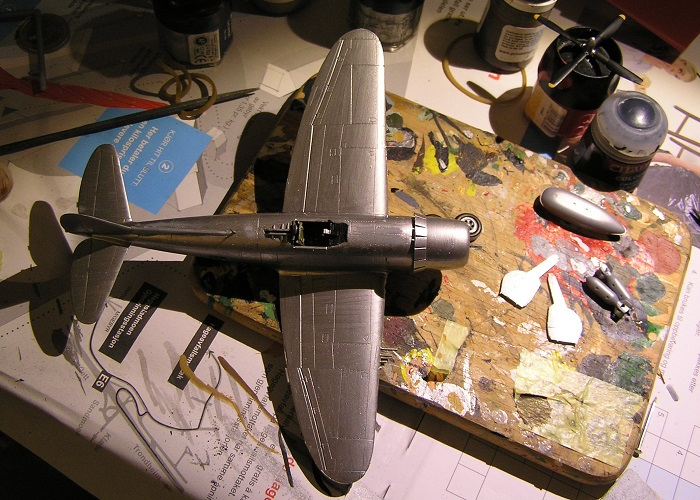
Today I've finished the paintjob, and started applying decals. They are a bit of a hasle, since they have to work in three curvatures but plenty of Tensol seems to do the trick. Another problem is the fact that the paint&decal drawing doesn't confirm to the actual plane. So a few educated guesses is needed. The nose-art decals also need presise paint underneath to blend in, and I decided to mask and paint all the red areas to get the same nuance everywhere.
The plastic is a bit soft, but all in all not a bad kit for being 14 years old.
Building the world, one piece at the time.
Sør-Trøndelag, Norway
Joined: October 23, 2012
KitMaker: 189 posts
AeroScale: 142 posts
Posted: Friday, May 10, 2013 - 05:07 AM UTC
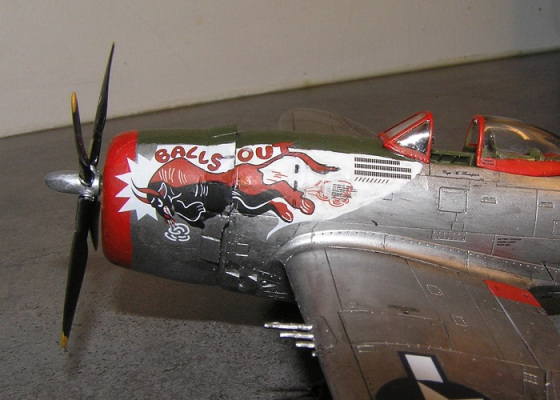
Finished the P-47 today. Posted 2 pictures in the gallery, but here's a few more.
Nose art (decals took some time!)
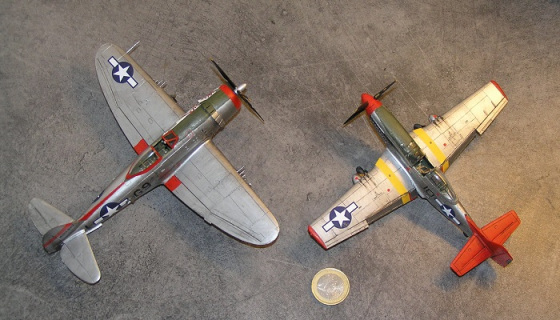
A comparison picture with a P-51
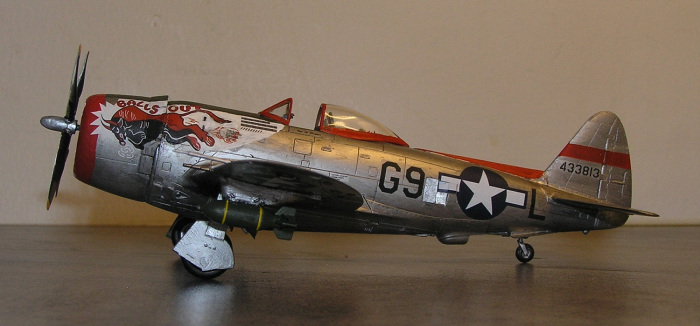
Not a pretty plane, but quite charming never the less
Building the world, one piece at the time.

#041
Kobenhavn, Denmark
Joined: July 20, 2006
KitMaker: 10,069 posts
AeroScale: 3,788 posts
Posted: Friday, May 10, 2013 - 12:52 PM UTC
Nice build, Eirik. Super cool decal.
I have made a little more progress on my Bf 110. The final camouflage color is coming on. Underneath all that masking tape there is actually an aircraft

More to follow

Campaign'oholic - 252+ campaigns completed

#041
Kobenhavn, Denmark
Joined: July 20, 2006
KitMaker: 10,069 posts
AeroScale: 3,788 posts
Posted: Friday, May 10, 2013 - 02:13 PM UTC
Photo for previous post.

Campaign'oholic - 252+ campaigns completed


 )
)


