OFFICIAL: Club Med Campaign
Lisboa, Portugal
Joined: March 04, 2008
KitMaker: 5,386 posts
AeroScale: 635 posts
Posted: Wednesday, October 09, 2013 - 11:44 AM UTC
Thanks Brent !!
Here's my progress so far.

Some cool photos,


Active Builds: 0
Active Campaigns: 0
Indiana, United States
Joined: January 13, 2009
KitMaker: 419 posts
AeroScale: 378 posts
Posted: Wednesday, October 09, 2013 - 11:53 AM UTC
OK, John. I think your Folgore needs a stable mate. After much consideration, I've decided to complete a MC. 200 Saetta (Arrow) for the club Med campaign.
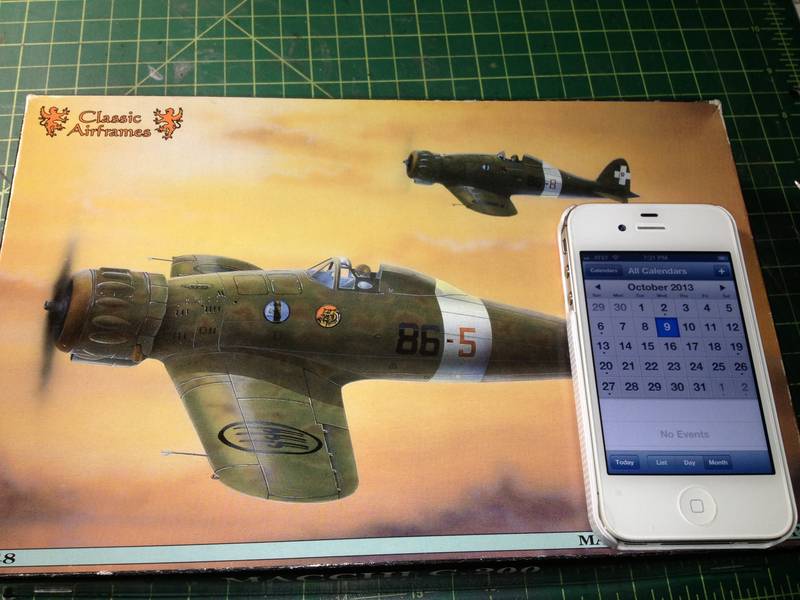
CA only included one vac. canopy, so I carefully trimmed it out. Since it cut out cleanly I decided this was the omen I was looking for. Work commences in earnest immediately!

Cheers,
Fred

Current Builds:
Hawk 75/Saetta: Club Med Campaign
Me410: FROG Campaign
Mystery Build (insert here)
Removed by original poster on 10/10/13 - 00:39:31 (GMT).
Indiana, United States
Joined: January 13, 2009
KitMaker: 419 posts
AeroScale: 378 posts
Posted: Wednesday, October 09, 2013 - 12:41 PM UTC
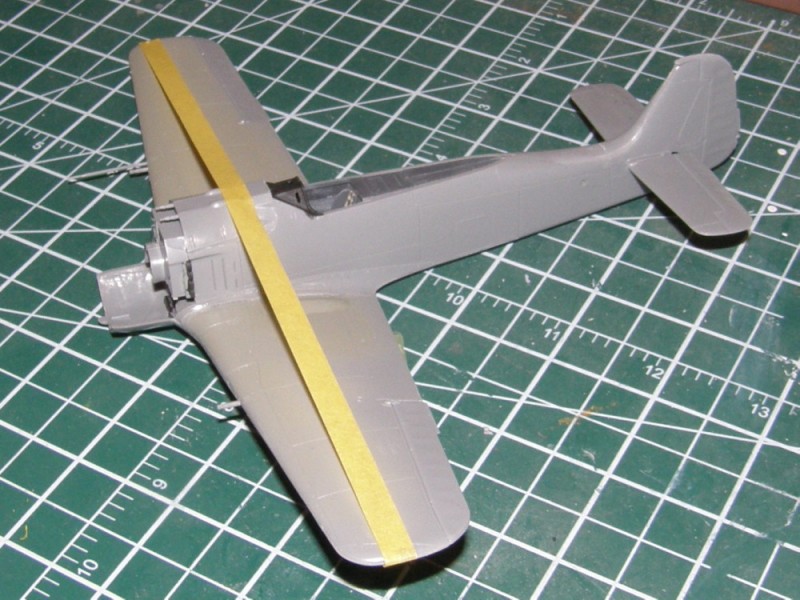
Couple of extra thoughts on your Folgore before you start adding the camo. Take a closer look at the folgore photos. You'll notice that the Italians liked to carry the topside color over the leading edge of the wing and tail surface and have it crisply follow the contour of the the leading edge. Also, you may want to carry the topside color completely along the _sides_ of the radiator.
FWIW.
Cheers,
Fred
Current Builds:
Hawk 75/Saetta: Club Med Campaign
Me410: FROG Campaign
Mystery Build (insert here)
Lisboa, Portugal
Joined: March 04, 2008
KitMaker: 5,386 posts
AeroScale: 635 posts
Posted: Wednesday, October 09, 2013 - 01:45 PM UTC
Thanks Fred !!
I'll try to follow it as close as possible since the Italeri 's painting guide isn't very detailed and I found some different camo schemes.
Thanks again !!

Active Builds: 0
Active Campaigns: 0
England - West Midlands, United Kingdom
Joined: August 01, 2012
KitMaker: 960 posts
AeroScale: 391 posts
Posted: Thursday, October 10, 2013 - 12:57 PM UTC
I'm glad to see the RA so well represented. Anyone for a tri-color Savoia-Marchetti SM.79 Sparviero?
I'm undecided now, but am considering doing something Greek or Egyptian.
Ciao Guys and Gals.
Indiana, United States
Joined: January 13, 2009
KitMaker: 419 posts
AeroScale: 378 posts
Posted: Friday, October 11, 2013 - 01:05 AM UTC
Well I've spent 2 nights cleaning, trimming plastic parts, carefully removing resin from casting blocks, dry fitting and doing background research.
This isn't my first CA kit. but it is far and away the crudest. Its really a Jekyll and Hyde Monster. Wonderful PE and decals assuring you a beautiful build lies just over the horizon while the resin cast into giant blocks laughs at how much time you'll need to remove them. Worst of all the actual plastic is really really poor (even by limited run kit standards).
I started working with the cowl first and that is where I realized that the cowl will not meet my expectations. It just doesn't have the correct shape or surface texture to a Saetta. The engine cylinders too are nothing like those of the Fiat motor.
Late last night I succumbed and ordered the Tamiya reboxing of the Italeri kit. I figure I can use the PE and some of the resin from the CA kit. I feel bad setting the CA kit aside but I really wasn't happy with a couple of the shortcomings of it.
Already read the reviews of the Italeri molds. Most are positive but some are critical of the vertical stab shape. I'm even prepared to splice the CA stab (or even one from a Tauro kit I have if need be but I think the result of kit switch will be a more enjoyable experience overall. Two nights of pushing a boulder uphill with the nagging feeling that I won't be satisfied with the net result was silly.

Cheers,
Fred
Current Builds:
Hawk 75/Saetta: Club Med Campaign
Me410: FROG Campaign
Mystery Build (insert here)
England - West Midlands, United Kingdom
Joined: August 01, 2012
KitMaker: 960 posts
AeroScale: 391 posts
Posted: Friday, October 11, 2013 - 02:25 AM UTC
Quoted Text
Well I've spent 2 nights cleaning, trimming plastic parts, carefully removing resin from casting blocks, dry fitting and doing background research.
This isn't my first CA kit. but it is far and away the crudest. Its really a Jekyll and Hyde Monster. Wonderful PE and decals assuring you a beautiful build lies just over the horizon while the resin cast into giant blocks laughs at how much time you'll need to remove them. Worst of all the actual plastic is really really poor (even by limited run kit standards).
I started working with the cowl first and that is where I realized that the cowl will not meet my expectations. It just doesn't have the correct shape or surface texture to a Saetta. The engine cylinders too are nothing like those of the Fiat motor.
Late last night I succumbed and ordered the Tamiya reboxing of the Italeri kit. I figure I can use the PE and some of the resin from the CA kit. I feel bad setting the CA kit aside but I really wasn't happy with a couple of the shortcomings of it.
Already read the reviews of the Italeri molds. Most are positive but some are critical of the vertical stab shape. I'm even prepared to splice the CA stab (or even one from a Tauro kit I have if need be but I think the result of kit switch will be a more enjoyable experience overall. Two nights of pushing a boulder uphill with the nagging feeling that I won't be satisfied with the net result was silly.
Cheers,
Fred
Fred, I'm looking forward to following your progress on your MC. 200 Saetta. I have only one of those in my pile, a rather plain Smer 1/50 scale; a real flash monster.
Lisboa, Portugal
Joined: March 04, 2008
KitMaker: 5,386 posts
AeroScale: 635 posts
Posted: Saturday, October 12, 2013 - 07:24 AM UTC
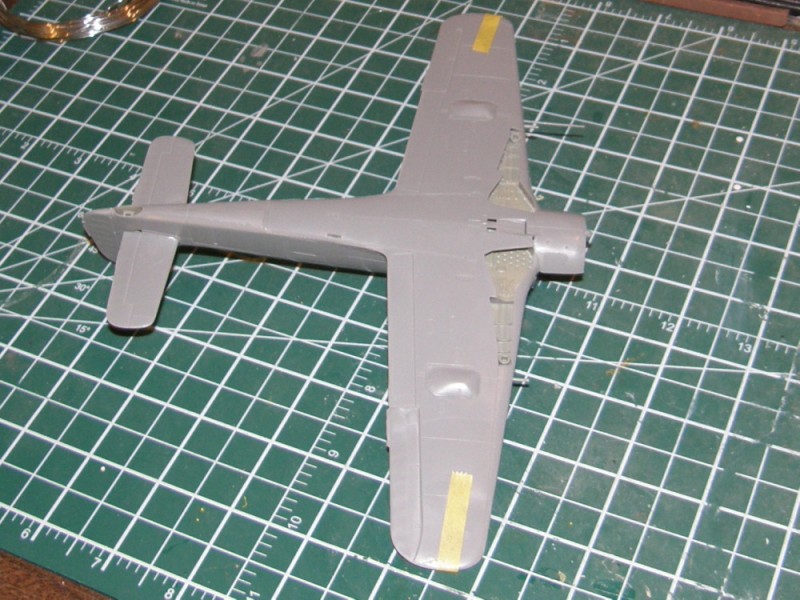
Here's my update:

Active Builds: 0
Active Campaigns: 0
England - West Midlands, United Kingdom
Joined: August 01, 2012
KitMaker: 960 posts
AeroScale: 391 posts
Posted: Saturday, October 12, 2013 - 01:44 PM UTC
John,
Great progress, you are certainly moving your kit to completion quickly.
Lisboa, Portugal
Joined: March 04, 2008
KitMaker: 5,386 posts
AeroScale: 635 posts
Posted: Saturday, October 12, 2013 - 02:38 PM UTC
Thanks Brent !
Wheels & Nose are next .

Active Builds: 0
Active Campaigns: 0
Lisboa, Portugal
Joined: March 04, 2008
KitMaker: 5,386 posts
AeroScale: 635 posts
Posted: Sunday, October 13, 2013 - 12:35 PM UTC
today's work

Active Builds: 0
Active Campaigns: 0
England - West Midlands, United Kingdom
Joined: August 01, 2012
KitMaker: 960 posts
AeroScale: 391 posts
Posted: Monday, October 14, 2013 - 02:33 PM UTC
A funny thing happened on the way to the forum.... I planned on doing a RHAF PZL P24G but after some research I didn't feel my current skills and time were ready for a short run kit. I opened the drawer to look for something else RHAF. Several choices presented themselves. The Blenheim Mk IV and Avro Anson 1 were tempting as were other choices both Greek and Spanish.
The Battle was won in the end as I looked over the sleek lines of The Fairey creation. I made my decision; a RHAF Fairy Battle would be my choice for the Club Med Campaign.


Indiana, United States
Joined: January 13, 2009
KitMaker: 419 posts
AeroScale: 378 posts
Posted: Wednesday, October 16, 2013 - 03:57 AM UTC
Getting a little antsy to start on this campaign. My Saetta is on route but may not get here before the end of the month.
Was going to reach for a Hurricane MKIIC to compliment the Saetta but I only have a MkI in the stash. Instead, as a way to fill out my winter building dance card just a bit further, I'm going to build a Hawk 75 in french livery.
Having hand masked vichy stripes in the past, I'd like to try something cool I read about. That is: transferring decals to fisket paper and cut out the decals to make masks. We'll see it that is any easier.
Anyway... it looks like a twofer for this campaign. A Saetta and a Hawk75.
Cheers,
Fred
Current Builds:
Hawk 75/Saetta: Club Med Campaign
Me410: FROG Campaign
Mystery Build (insert here)
British Columbia, Canada
Joined: September 03, 2009
KitMaker: 6,965 posts
AeroScale: 6,247 posts
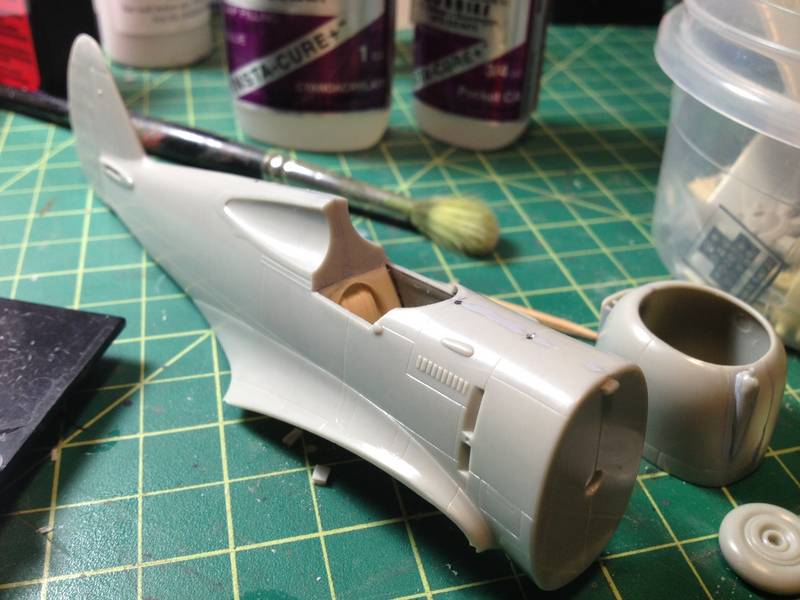
Posted: Wednesday, October 16, 2013 - 01:28 PM UTC
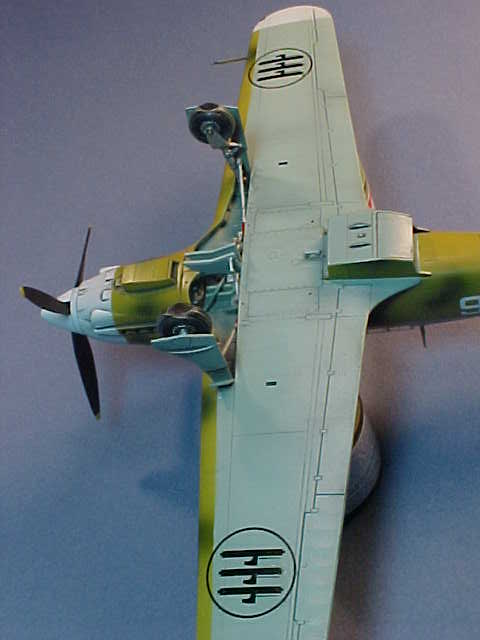
Turkish Wurgers didn't have the wing root guns, so I had to chisel them out of the wheel well piece. I've got the basic paint on the interior
And that quickly the fuselage is closed up
The only aftermarket parts I intend to use for the build may be seen in the first photo: Ultracast's
wheels and
seat.
When once you have tasted flight you will walk the Earth with your eyes turned skyward.
For there you have been, and there you will always long to return.
-Leonardo Da Vinci
British Columbia, Canada
Joined: September 03, 2009
KitMaker: 6,965 posts
AeroScale: 6,247 posts
Posted: Wednesday, October 16, 2013 - 06:43 PM UTC
When once you have tasted flight you will walk the Earth with your eyes turned skyward.
For there you have been, and there you will always long to return.
-Leonardo Da Vinci
England - West Midlands, United Kingdom
Joined: August 01, 2012
KitMaker: 960 posts
AeroScale: 391 posts
Posted: Thursday, October 17, 2013 - 01:40 AM UTC
Lisboa, Portugal
Joined: March 04, 2008
KitMaker: 5,386 posts
AeroScale: 635 posts
Posted: Thursday, October 17, 2013 - 04:07 AM UTC
Working on the wheels

Very basic pair of wheels from Italeri.
Nice work Jessica !
Frederic & Brent, good choices there, will be looking forward to see them on the bench !
Active Builds: 0
Active Campaigns: 0
England - West Midlands, United Kingdom
Joined: August 01, 2012
KitMaker: 960 posts
AeroScale: 391 posts
Posted: Thursday, October 17, 2013 - 09:36 AM UTC
Thus far we have aircraft from Turkey, Greece, France, Italy, Spain, RN Naval Operations, and Malta based aircraft under construction.
England - West Midlands, United Kingdom
Joined: August 01, 2012
KitMaker: 960 posts
AeroScale: 391 posts
Posted: Thursday, October 17, 2013 - 01:42 PM UTC
I started construction on the Airfix Fairey Battle and it has significantly more detail than the Airfix 1957 Stuka release which I'm also building. There are even dials on the instrument panel! I feel like I'm walking through a manufacturing history lesson. Way back when I first started model building I built Aurora, Revell, and Monogram kits. Monogram kits were the most detailed at the time. I didn't pick up the hobby again until two years ago. Yes, I know that there are more detailed kits now with etched parts etc. but I'm having fun building these older kits.
England - East Midlands, United Kingdom
Joined: February 07, 2004
KitMaker: 911 posts
AeroScale: 415 posts
Posted: Friday, October 18, 2013 - 09:34 PM UTC
Impressive number of gorgeous WW2 Italian birds in this campaign

And Jessie - I think after all those AModel etc kits that you grapple with, that you deserve a nice Tamiya shake n bake
"Nelson be damned.......Lets get the hell out of here!"
Indiana, United States
Joined: January 13, 2009
KitMaker: 419 posts
AeroScale: 378 posts
Posted: Saturday, October 19, 2013 - 02:00 AM UTC
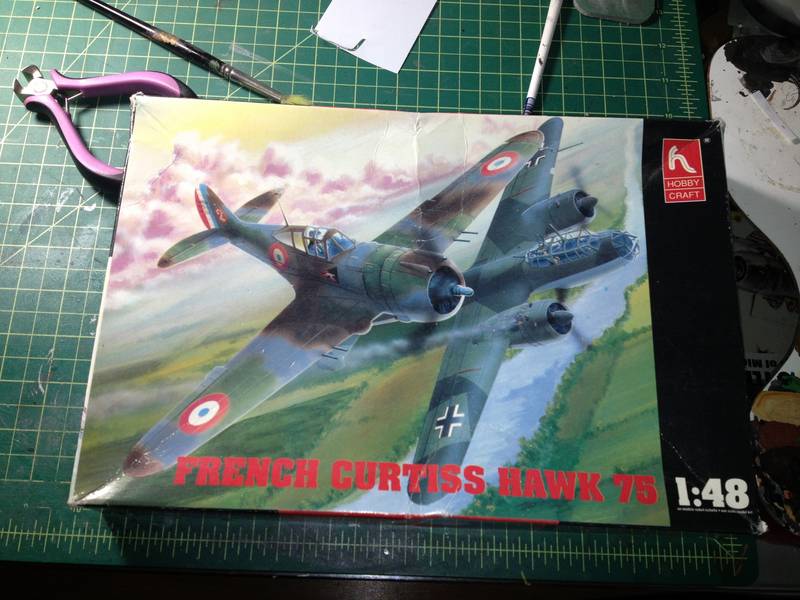
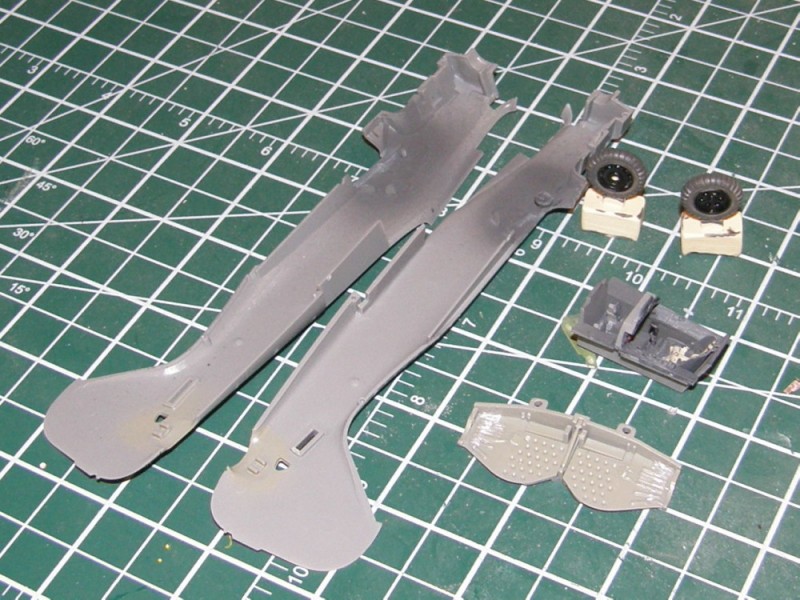
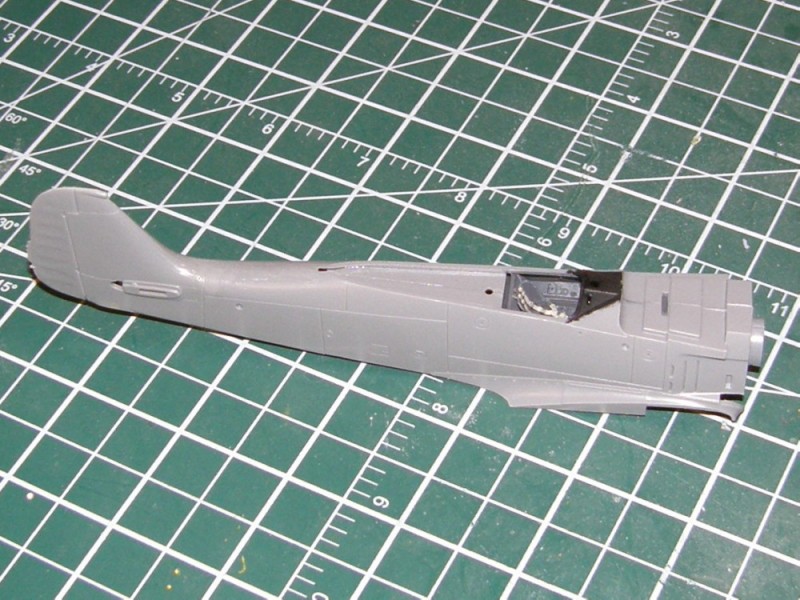
Humble beginnings...
...but beginnings nonetheless. This Hobbycraft offering looks to be a pretty straight forward build in most respects. The office suite is sparse so I'm adding a Legends resin cockpit I had been saving for this kit.
One of the nice things about building these little single engined planes is that you can luxuriate over every seam, almost like a jeweler. I find the big multi engined planes to be wonderfully impressive and want more on my shelf but sometimes the sheer number of joints and glazings that need to be properly tended to can feel overwhelming. (I type this as my A-26 stares back at me from next to the computer

Cheers,
Fred
Current Builds:
Hawk 75/Saetta: Club Med Campaign
Me410: FROG Campaign
Mystery Build (insert here)
Lisboa, Portugal
Joined: March 04, 2008
KitMaker: 5,386 posts
AeroScale: 635 posts
Posted: Saturday, October 19, 2013 - 05:54 AM UTC
My progress so far.

Active Builds: 0
Active Campaigns: 0

#323
Arizona, United States
Joined: February 13, 2013
KitMaker: 791 posts
AeroScale: 213 posts
Posted: Saturday, October 19, 2013 - 06:37 AM UTC
Robbie: "Would 60 Gallons be sufficient ?"
Forbidden Planet - 1956
Indiana, United States
Joined: January 13, 2009
KitMaker: 419 posts
AeroScale: 378 posts
Posted: Saturday, October 19, 2013 - 07:38 AM UTC
That's not always a bad idea. My resin cockpit didn't come with instructions and after a lot of trial fitting I determined that assembling the fuse first then installing the cockpit in sections was the safest way to ensure everything would fit snuggly.
Good luck!
Cheers,
Fred
Current Builds:
Hawk 75/Saetta: Club Med Campaign
Me410: FROG Campaign
Mystery Build (insert here)