

World War II
Discuss WWII and the era directly before and after the war from 1935-1949.
Discuss WWII and the era directly before and after the war from 1935-1949.
Hosted by Rowan Baylis
P-61 Black widow group build

Jessie_C


Joined: September 03, 2009
KitMaker: 6,965 posts
AeroScale: 6,247 posts

Posted: Thursday, December 26, 2013 - 09:14 AM UTC
Isn't it partially visible if you look into the radar operator's compartment?
Joel_W

Joined: December 04, 2010
KitMaker: 11,666 posts
AeroScale: 7,410 posts
Posted: Thursday, December 26, 2013 - 09:28 AM UTC
Quoted Text
Isn't it partially visible if you look into the radar operator's compartment?
Jessica,
I thought so to until I dry fitted all the interior sections, and you have to look straight at the radar op's bulkhead, which is impossible.
I decided not to take any chances and just air brushed it flat black and glued it in place. That will ensure that it won't be visible.
Joel

Joel_W
Joined: December 04, 2010
KitMaker: 11,666 posts
AeroScale: 7,410 posts
Posted: Sunday, December 29, 2013 - 04:45 AM UTC
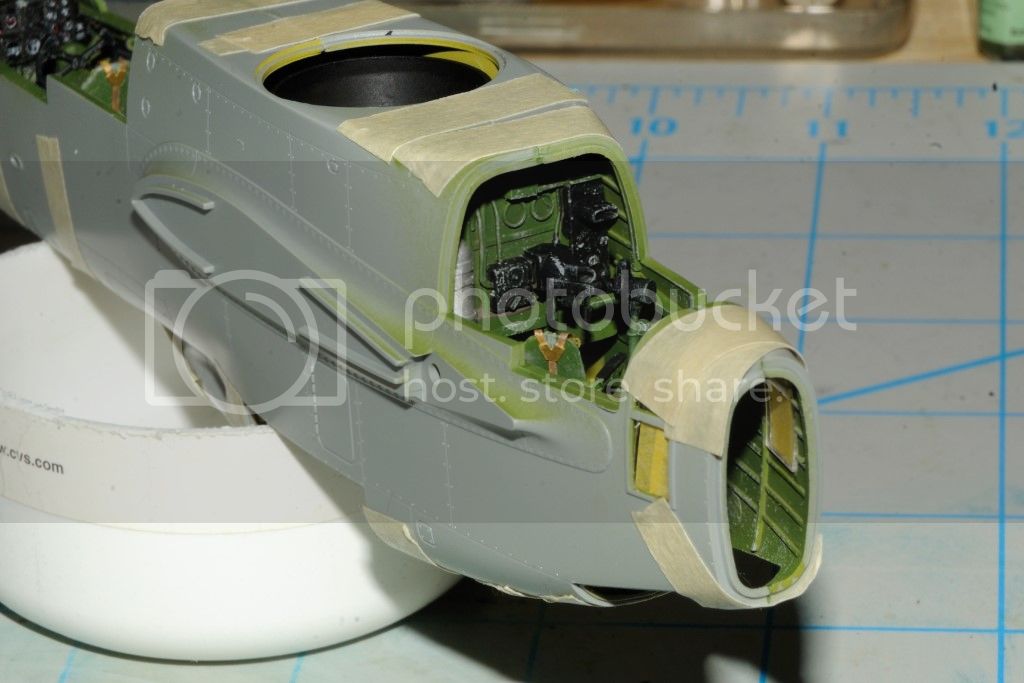
Well, I've finally finished the interior of the fuselage the best I can. Not perfect by a long shot, but better then any of my previous efforts.
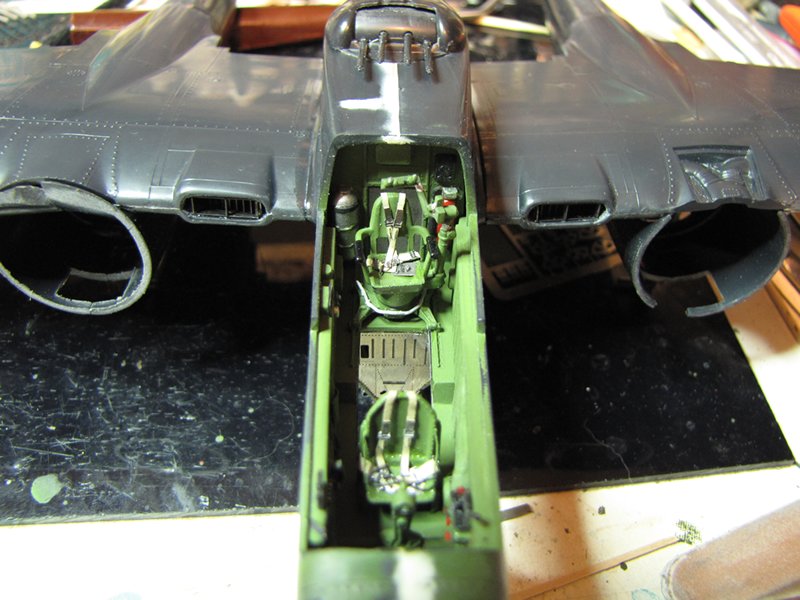
I decided to paint and install that funnel type tube under the fuselage top turret gun, and of course once the fuselage is glued up, it can't be seen. You can see in the photograph below that the bulkheads on either side will block any view of it. So just leave it out. Honestly, I can't see why they even included it in the 1st place.
I bought Terry Dean's 2 piece weight set, and it's worth every penny. Actually, they were more then reasonable. $6.33 for two complete sets, plus shipping clear across the country. One weight slides into the front of the fuselage and butts up against the back of the IP. The 2nd weight slides into the small opening below the main floor. both needed a little file work to get them to fit. I fitted both after I glued up the fuselage sections. I really think that the one that goes behind the IP would be much easier to install before as you have to file off enough of the lead to get past one set of pins. DO NOT DROP the completed fuselage on your toes, and this baby is now really heavy.
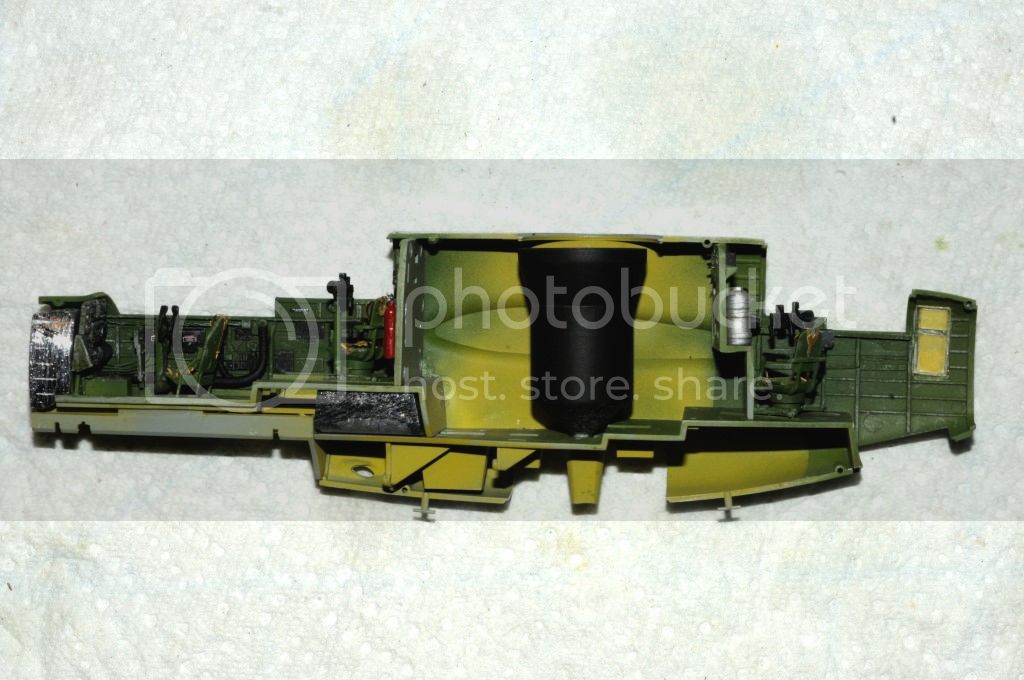
The various interior sections are complex, and do line up quite well with the mounting raised guides on the fuselage sides. They also line up quite well to each other. With that being said, it's nearly impossible (at least for me) once you glue them up to one side to get them to all line up perfectly to the other side when you're trying to mate the two halves together. I fought the good fight, but I'm sure that a section end or two is on not over one of those mounting brackets. This caused some gaps that will have to be death with after the glue has dried.
This isn't the 1st time I've had these type of issues. From now on, my new procedure will be to remove those mounting guide brackets from one side prior to interior painting.
Joel


Keeperofsouls2099
Joined: January 14, 2009
KitMaker: 2,798 posts
AeroScale: 2,443 posts
Posted: Sunday, December 29, 2013 - 02:30 PM UTC
Just thought I would stop by and see how things are going? I work retail so its been crazy lately but week after next I'm on vacation expect some build progress from me 

Joel_W
Joined: December 04, 2010
KitMaker: 11,666 posts
AeroScale: 7,410 posts
Posted: Monday, December 30, 2013 - 01:12 AM UTC
Quoted Text
Just thought I would stop by and see how things are going? I work retail so its been crazy lately but week after next I'm on vacation expect some build progress from me
Justin, Welcome back, even if it's only for a "look see". Looking forward to your expertise in getting through with these builds. Believe me, this kit is a handful. Tons of details, but some real issues as well.
Been in Retail management for 41 years. last 25 years in the Drug Store industry. 35 yrs. as a store manager, so I know exactly what your life has been like during the holiday season. 3 years ago, I stepped down to an Assistant, then to a Supervisor. Less money, but less hours, way less stress, etc. Nov 18th my Social Security benefits started, Dec 1st I semi retired, for me that's just 4 days, 32 hours, no Sundays (NFL Football), but I still do one or two over nights (24 hr store). Full retirement in 2-3 years.
Joel
Joel_W
Joined: December 04, 2010
KitMaker: 11,666 posts
AeroScale: 7,410 posts
Posted: Wednesday, January 01, 2014 - 08:24 AM UTC
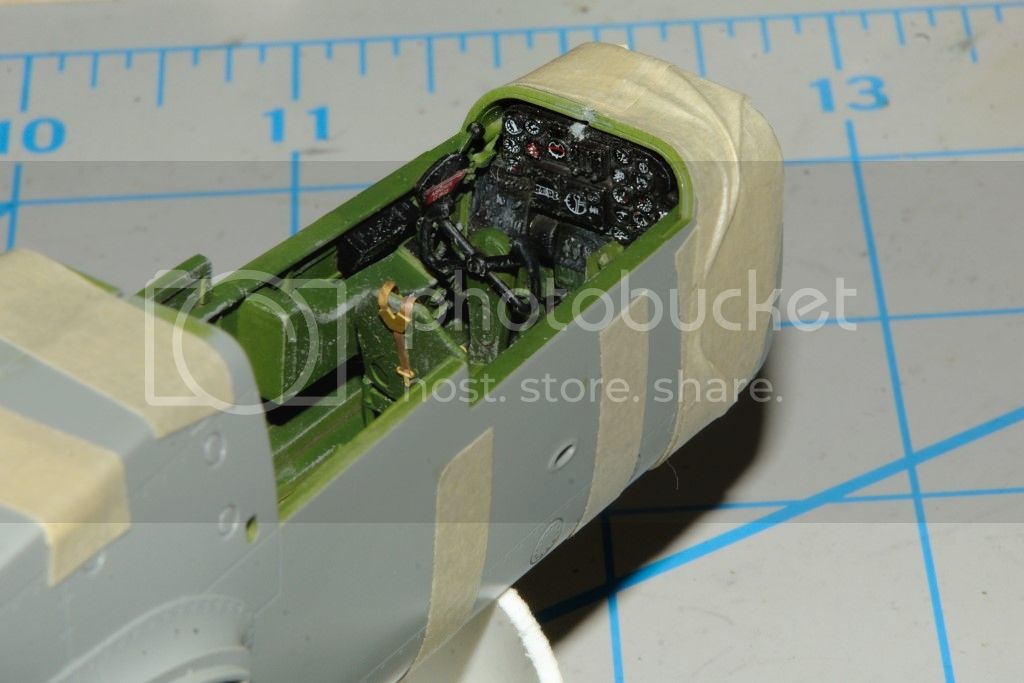
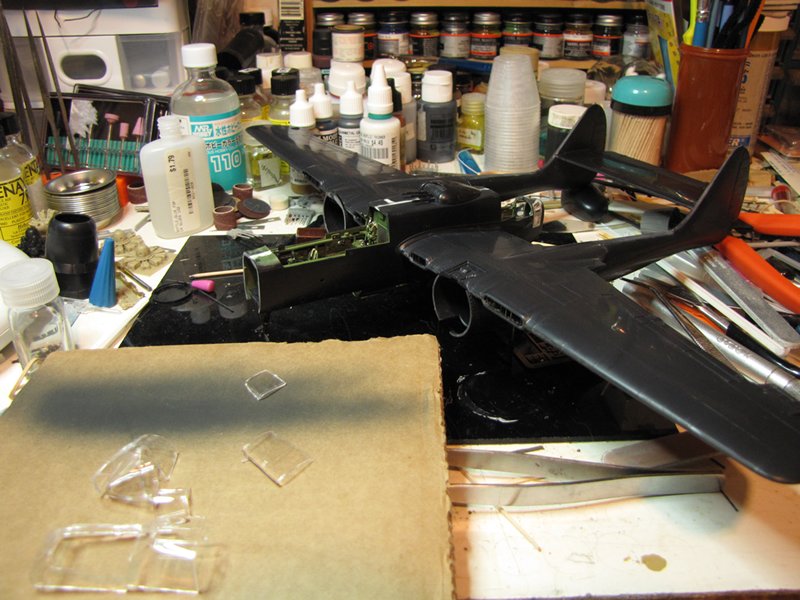
Been working on installing all the glass, and I must say that I've been very disappointed in the overall fit of much of it. The main cockpit glass is just to tall and to wide. Leaving a lot of filing and sanding to get it close, but no matter how much I did, I couldn't get it to really fit well. Also, the top of the fuselage directly behind the cockpit glass and in front of the gun turret has a slight concave bow to it, which further complicates the fit issue. Rather then adding layers of Green stuff, I used a piece of .010 sheet behind the glass right up to the turret, sanded to shape and then blended it in with Green stuff.

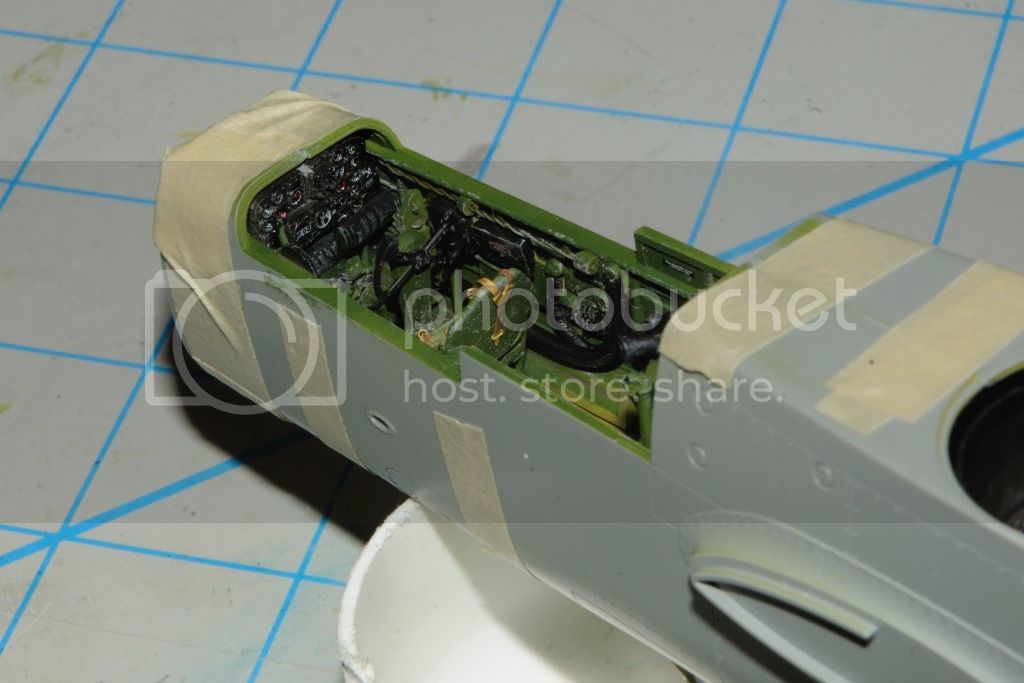
The front of the cockpit turret had a really nasty lip that slowly decreased as it worked its way to the sides of the fuselage. Here, I used a series of small pieces of .010 sheet to create a step effect. Sanded to basic shape, then blended in with Green stuff.
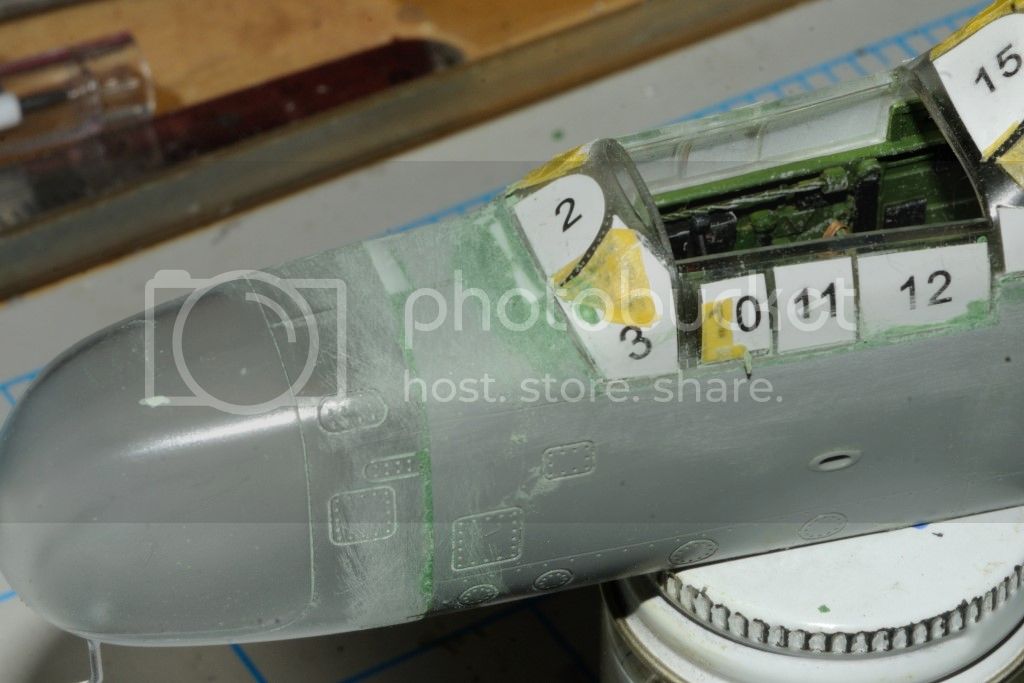
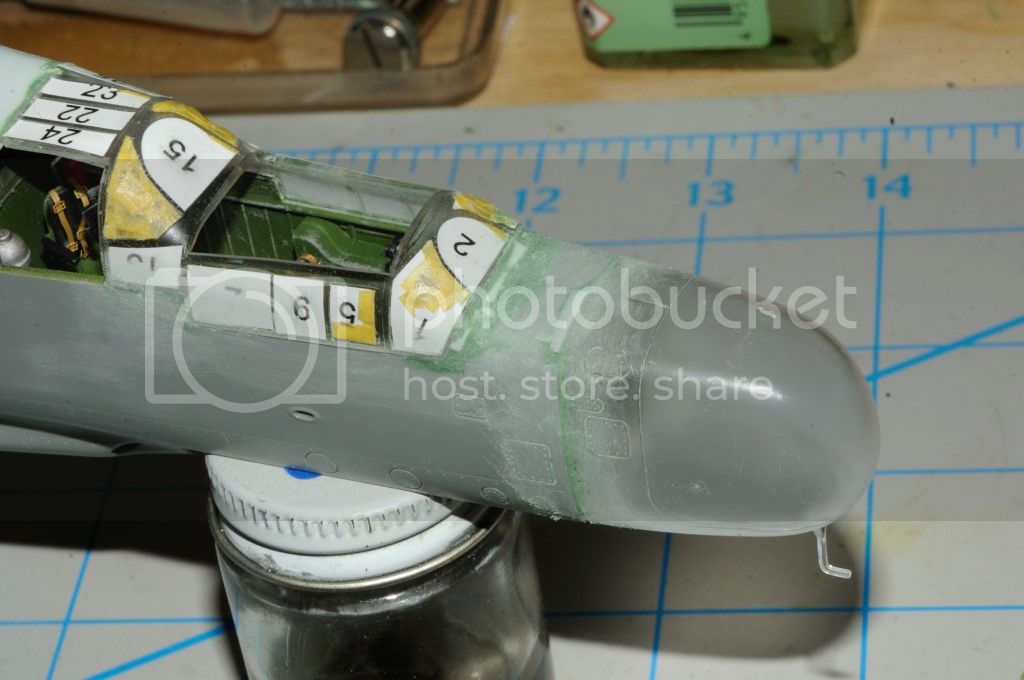
You can also see a small piece of .010 plastic sheet used to shim the front radar glass.
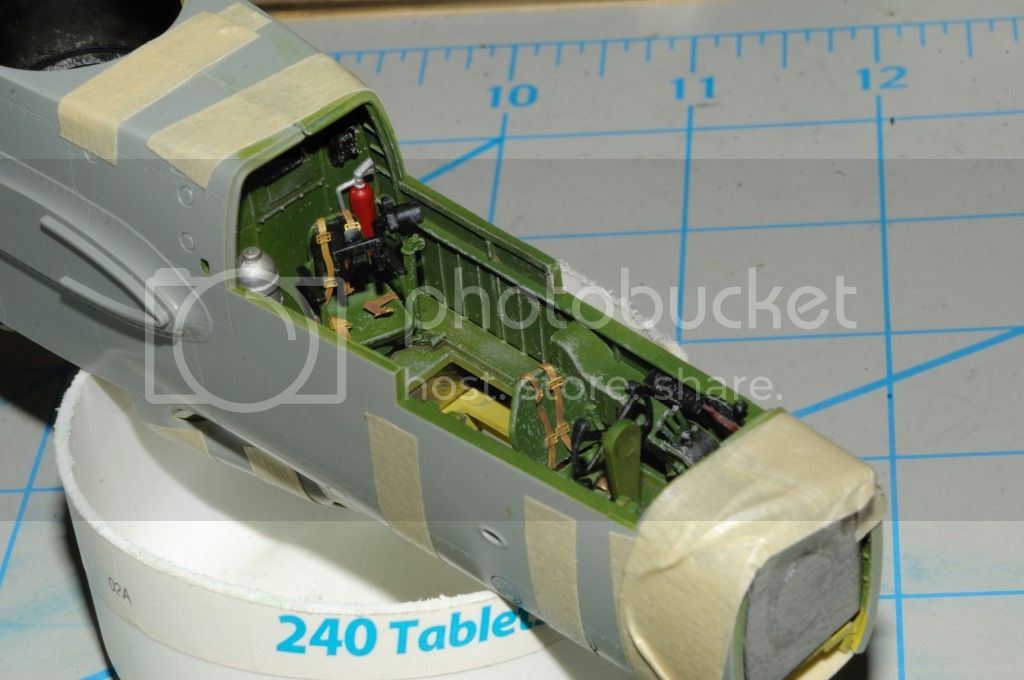
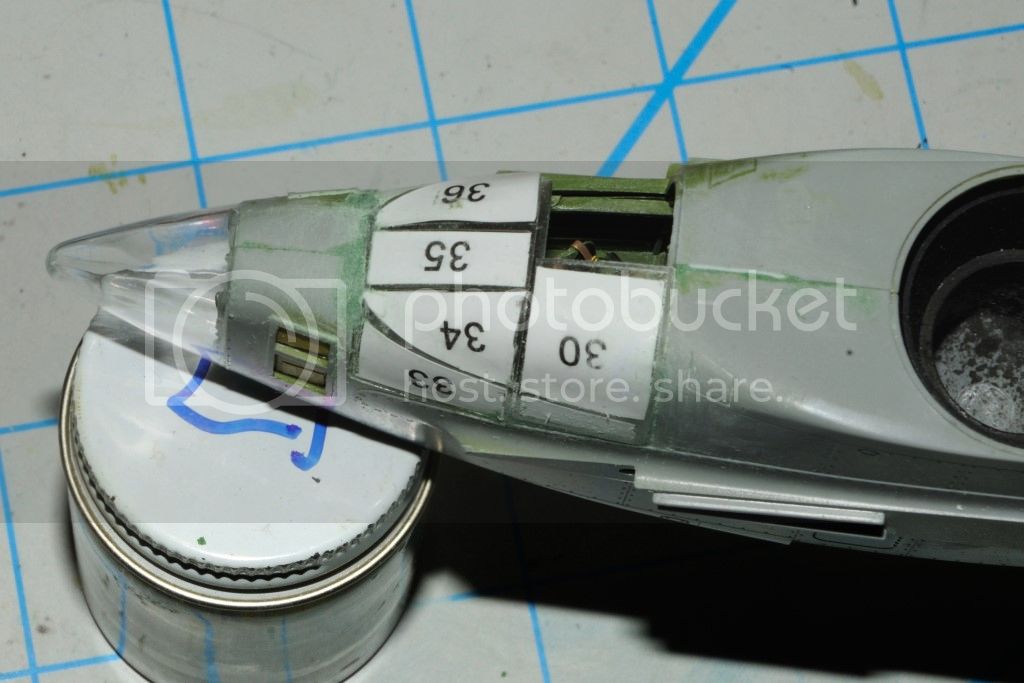
The Gunners compartment glass isn't too bad with just some sanding and blending with Green stuff. You can also see in the photo below one of the fuselage shims I used. I really don't like using Green stuff to fill voids, canyons, or large reshaping/defining. Rather I use plastic, or CCA thick glue, then finish off with Green stuff. I usually thin the final application with Thin liquid cement. That's the stage I'm at right now.
Joel

The front of the cockpit turret had a really nasty lip that slowly decreased as it worked its way to the sides of the fuselage. Here, I used a series of small pieces of .010 sheet to create a step effect. Sanded to basic shape, then blended in with Green stuff.


You can also see a small piece of .010 plastic sheet used to shim the front radar glass.
The Gunners compartment glass isn't too bad with just some sanding and blending with Green stuff. You can also see in the photo below one of the fuselage shims I used. I really don't like using Green stuff to fill voids, canyons, or large reshaping/defining. Rather I use plastic, or CCA thick glue, then finish off with Green stuff. I usually thin the final application with Thin liquid cement. That's the stage I'm at right now.

Joel
Jessie_C
Joined: September 03, 2009
KitMaker: 6,965 posts
AeroScale: 6,247 posts
Posted: Wednesday, January 01, 2014 - 10:00 AM UTC
It appears as though the masks have also been giving you some troubles. If that's the worst fit of the build, it's not a terrible kit by any means. Just wait until I get my Monogram kit to the same stage 
Joel_W
Joined: December 04, 2010
KitMaker: 11,666 posts
AeroScale: 7,410 posts
Posted: Wednesday, January 01, 2014 - 10:45 AM UTC
Quoted Text
It appears as though the masks have also been giving you some troubles. If that's the worst fit of the build, it's not a terrible kit by any means. Just wait until I get my Monogram kit to the same stage
Jess, yep. They're over sized, under sized, to long, to short, you name it. Most will be replaced with strips of Tamiya tape. I used the masks to protect the glass from the sanding process. Although, once painted the glass is only part of the whole, and won't stand out like it does now.
Speaking of your Monogram build, I'm assuming that the glass fits better. No word yet from Terry about the wts. Will email him again tonight. You can only go so far without them.
Over all, it's a great kit, loaded with details. Just that there is so much glass, it became a major issue. Most kits seem to have the same issues to some degree.
Joel

AussieReg

#007

Joined: June 09, 2009
KitMaker: 8,156 posts
AeroScale: 3,756 posts
Posted: Wednesday, January 22, 2014 - 01:43 AM UTC


cjattard

Joined: October 22, 2012
KitMaker: 23 posts
AeroScale: 23 posts
Posted: Monday, February 24, 2014 - 02:53 AM UTC
I have just started on my F-15 Reporter conversion. The resin kit took 2 months to arrive to my place. I intend to make 2 models, one will use the Airmodel kit which will be updated as it is not as accurate as the resin kit and there are enough markings for two I have in mind to build. 
Joel_W
Joined: December 04, 2010
KitMaker: 11,666 posts
AeroScale: 7,410 posts
Posted: Monday, February 24, 2014 - 04:16 AM UTC
Quoted Text
I have just started on my F-15 Reporter conversion. The resin kit took 2 months to arrive to my place. I intend to make 2 models, one will use the Airmodel kit which will be updated as it is not as accurate as the resin kit and there are enough markings for two I have in mind to build.
Carmel,
looking forward to following both your builds. Your work here is amazing, and I'm sure that both of these aircraft builds will be right up there them.
Joel

tinbanger
Joined: February 04, 2008
KitMaker: 2,507 posts
AeroScale: 1,814 posts

Posted: Monday, February 24, 2014 - 04:54 AM UTC
Quoted Text
I have just started on my F-15 Reporter conversion. The resin kit took 2 months to arrive to my place. I intend to make 2 models, one will use the Airmodel kit which will be updated as it is not as accurate as the resin kit and there are enough markings for two I have in mind to build.
Hi Carmel
Looking forward to your build, I am doing mine as the "8" ball.

Joel_W
Joined: December 04, 2010
KitMaker: 11,666 posts
AeroScale: 7,410 posts
Posted: Monday, February 24, 2014 - 05:17 AM UTC
Hey guys, I'm really glad to see that the P-61 unofficial Group build has come back to life. Now only if Justin would find the time to join us.
Joel
Joel
tinbanger
Joined: February 04, 2008
KitMaker: 2,507 posts
AeroScale: 1,814 posts
Posted: Monday, February 24, 2014 - 06:48 AM UTC
Quoted Text
Hey guys, I'm really glad to see that the P-61 unofficial Group build has come back to life. Now only if Justin would find the time to join us.
Joel
Hi Joel
I have a few more build to do before I can get going but as no time limit I do not want to rush, the resin conversion kit cost more than the donor kit!

Keeperofsouls2099
Joined: January 14, 2009
KitMaker: 2,798 posts
AeroScale: 2,443 posts
Posted: Thursday, July 31, 2014 - 01:41 PM UTC
I apologize to everyone especially Joel W. unfortunately a turn of life events caused matters which were not in my control. but now things are starting to become normal some so its time to get back to the bench and finish the project I said I would because I am after all a man of my word. it took me quite awhile to dig this thread up. so I look forward to building beside my old friends again and I will try to shock and amaze you again
tinbanger
Joined: February 04, 2008
KitMaker: 2,507 posts
AeroScale: 1,814 posts
Posted: Thursday, July 31, 2014 - 02:52 PM UTC
Hi Justin
I still have my conversion build to do on this blog!
Soon I hope!
I still have my conversion build to do on this blog!
Soon I hope!
AussieReg
#007
Joined: June 09, 2009
KitMaker: 8,156 posts
AeroScale: 3,756 posts
Posted: Thursday, July 31, 2014 - 03:49 PM UTC
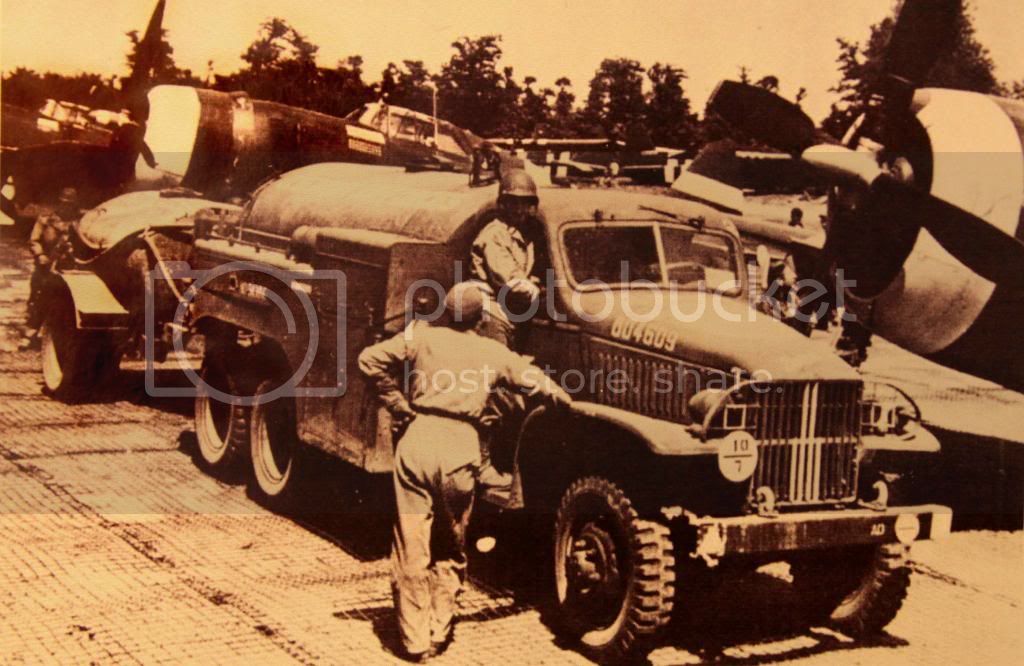
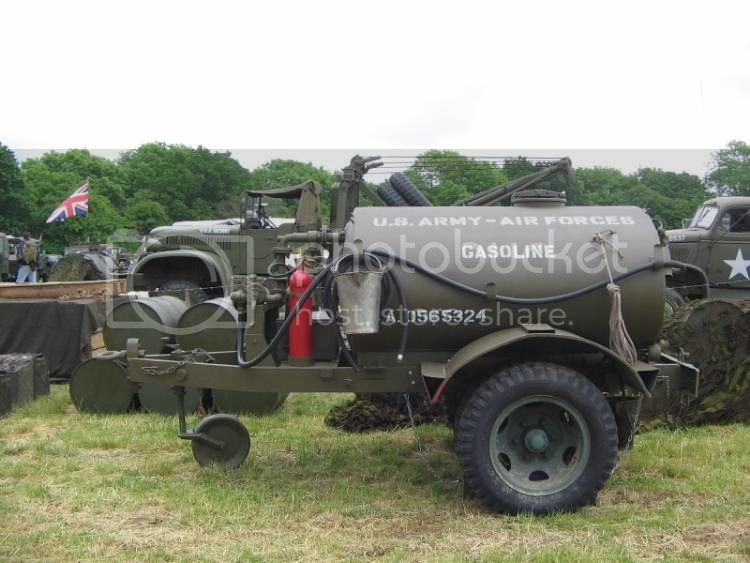
Likewise, I am still planning to do a dio based roughly this pic
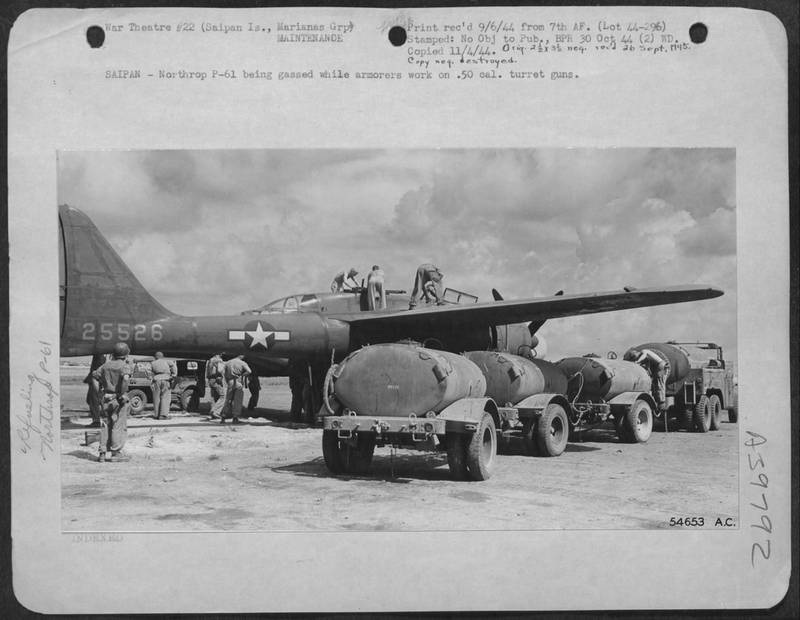
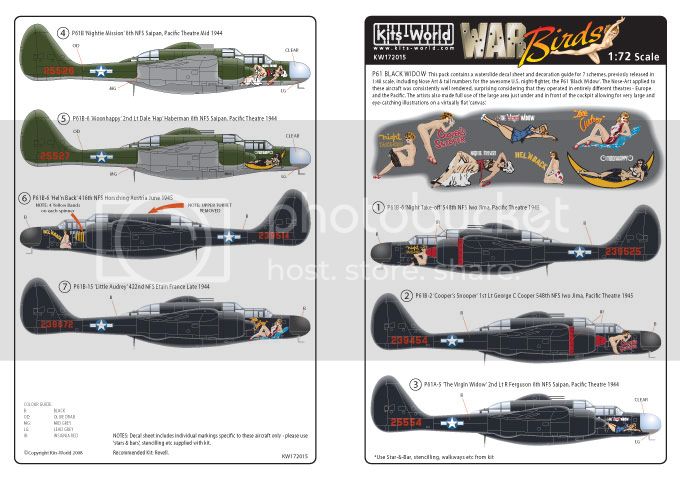
The actual aircraft is "Nightie Mission" and the markings are available from Kitsworld Decals

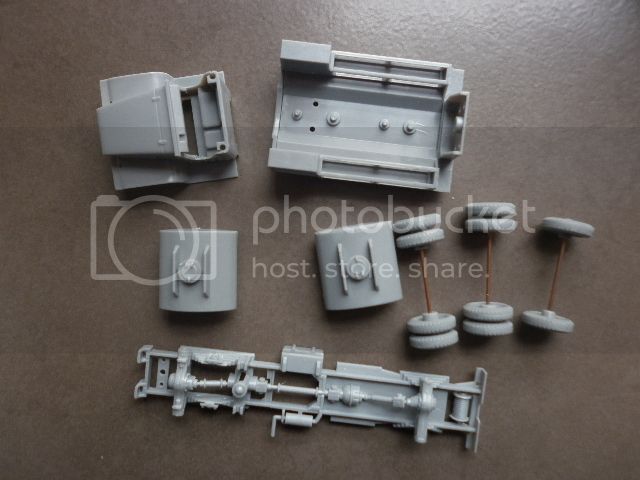
I have picked up several 1/72 truck kits and a jeep, and made a small start on the basic assembly of one of the trucks. The fuel truck kit differs from the one in the picture in that the kit version has 2 tanks and open sides, where in the picture it has a single large tank and toolbox sides, but I haven't been able to find a kit of the correct version. The hard part for me will be scratchbuilding the fuel trailers as they don't seem to be available in 1/72. Luckily, in this kit the 2 fuel tanks are separate so I just need to scratch up the chassis and accessories. I have picked up 3 kits so I can make the truck and 4 trailers, one will be sitting off to the side. I have also picked up a cargo truck, so I am certainly taking a couple of liberties !

It's really great to see our leader back, and some new life breathing in this thread !
Cheers, D
EDIT: I remembered that I asked about the fuel trailers in an Armorama thread a while back and kindly got pointed to some instructions for the CMK 1/35 Resin version of the A-3 fuel trailer. Some really nice images were posted as well. You gotta love the kind nature of the folks all over the Kitmaker network !


The actual aircraft is "Nightie Mission" and the markings are available from Kitsworld Decals


I have picked up several 1/72 truck kits and a jeep, and made a small start on the basic assembly of one of the trucks. The fuel truck kit differs from the one in the picture in that the kit version has 2 tanks and open sides, where in the picture it has a single large tank and toolbox sides, but I haven't been able to find a kit of the correct version. The hard part for me will be scratchbuilding the fuel trailers as they don't seem to be available in 1/72. Luckily, in this kit the 2 fuel tanks are separate so I just need to scratch up the chassis and accessories. I have picked up 3 kits so I can make the truck and 4 trailers, one will be sitting off to the side. I have also picked up a cargo truck, so I am certainly taking a couple of liberties !


It's really great to see our leader back, and some new life breathing in this thread !
Cheers, D
EDIT: I remembered that I asked about the fuel trailers in an Armorama thread a while back and kindly got pointed to some instructions for the CMK 1/35 Resin version of the A-3 fuel trailer. Some really nice images were posted as well. You gotta love the kind nature of the folks all over the Kitmaker network !


Dragon164

#226
Joined: February 20, 2012
KitMaker: 1,909 posts
AeroScale: 508 posts

Posted: Thursday, July 31, 2014 - 06:51 PM UTC
I have my Monogram P-61 to finish still, and the longer it sits the more damaged it gets.
Cheers Rob.
Cheers Rob.

Keeperofsouls2099
Joined: January 14, 2009
KitMaker: 2,798 posts
AeroScale: 2,443 posts
Posted: Thursday, July 31, 2014 - 11:11 PM UTC
Great guys its nice to see im not the only rider in the storm lol
Joel_W
Joined: December 04, 2010
KitMaker: 11,666 posts
AeroScale: 7,410 posts
Posted: Friday, August 01, 2014 - 03:25 AM UTC
Justin,
Welcome back. It sure is nice to have you building again. I for one have missed you.
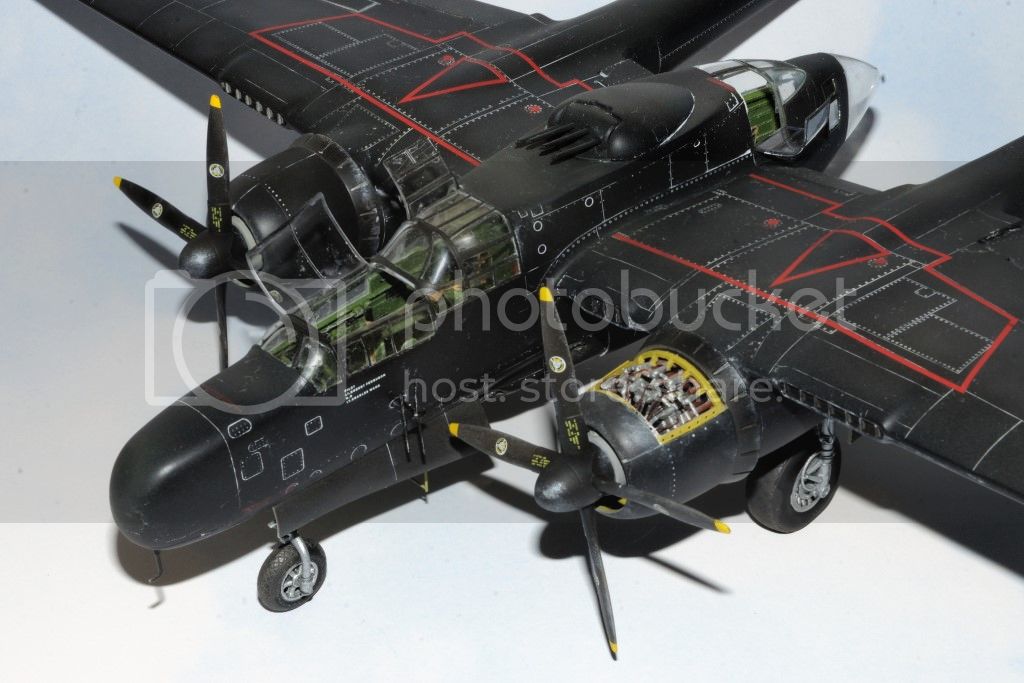
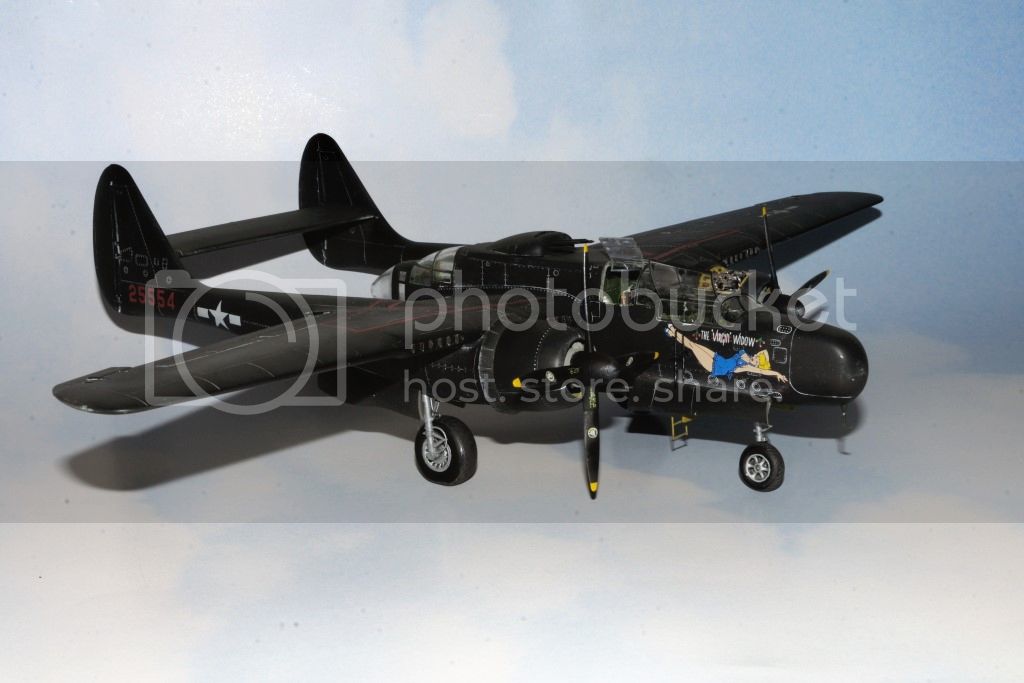
I finished my Widow.
Joel
Welcome back. It sure is nice to have you building again. I for one have missed you.
I finished my Widow.
Joel


Keeperofsouls2099
Joined: January 14, 2009
KitMaker: 2,798 posts
AeroScale: 2,443 posts
Posted: Friday, August 01, 2014 - 05:34 AM UTC
Hey joel nice to see you again.I followed in the shadows amazing turn out man shes a beaut!
Joel_W
Joined: December 04, 2010
KitMaker: 11,666 posts
AeroScale: 7,410 posts
Posted: Friday, August 01, 2014 - 07:14 AM UTC
Quoted Text
Hey joel nice to see you again.I followed in the shadows amazing turn out man shes a beaut!
Justin,
Thanks. Of course with aname and avatar of KeeperofSouls, following in the shadows seems like the normal thing to do.

Joel
Keeperofsouls2099
Joined: January 14, 2009
KitMaker: 2,798 posts
AeroScale: 2,443 posts
Posted: Friday, August 01, 2014 - 07:24 AM UTC
Lol yes sir:)
Dragon164
#226
Joined: February 20, 2012
KitMaker: 1,909 posts
AeroScale: 508 posts
Posted: Saturday, August 02, 2014 - 09:07 AM UTC
My P-61 was built for the Devil's in the Dark campaign but was not finished  my first campaign failure.
Here is where it was when I stopped working on it:
Here is where it is now.

I am hoping that I have not lost too many of the small parts.
Cheers Rob.
my first campaign failure. Here is where it was when I stopped working on it:
Here is where it is now.
I am hoping that I have not lost too many of the small parts.
Cheers Rob.
AussieReg
#007
Joined: June 09, 2009
KitMaker: 8,156 posts
AeroScale: 3,756 posts
Posted: Saturday, August 02, 2014 - 11:46 AM UTC
Quoted Text
Here is where it is now.
Ummmmmmm, oops!
 |

WEB HOSTING BY


Copyright ©2021 AeroScale and Kitmaker Network, a subsidiary of Silver Star Enterprises
All Rights Reserved. Please read our Conditions of Use and Privacy Policy.
All Rights Reserved. Please read our Conditions of Use and Privacy Policy.