OFFICIAL: Battle of Britain 75 Campaign
MichaelSatin
 Campaigns Administrator
Colorado, United States
Joined: January 19, 2008
KitMaker: 3,909 posts
AeroScale: 2,904 posts
Posted: Wednesday, July 01, 2015 - 11:32 PM UTC
Peter,
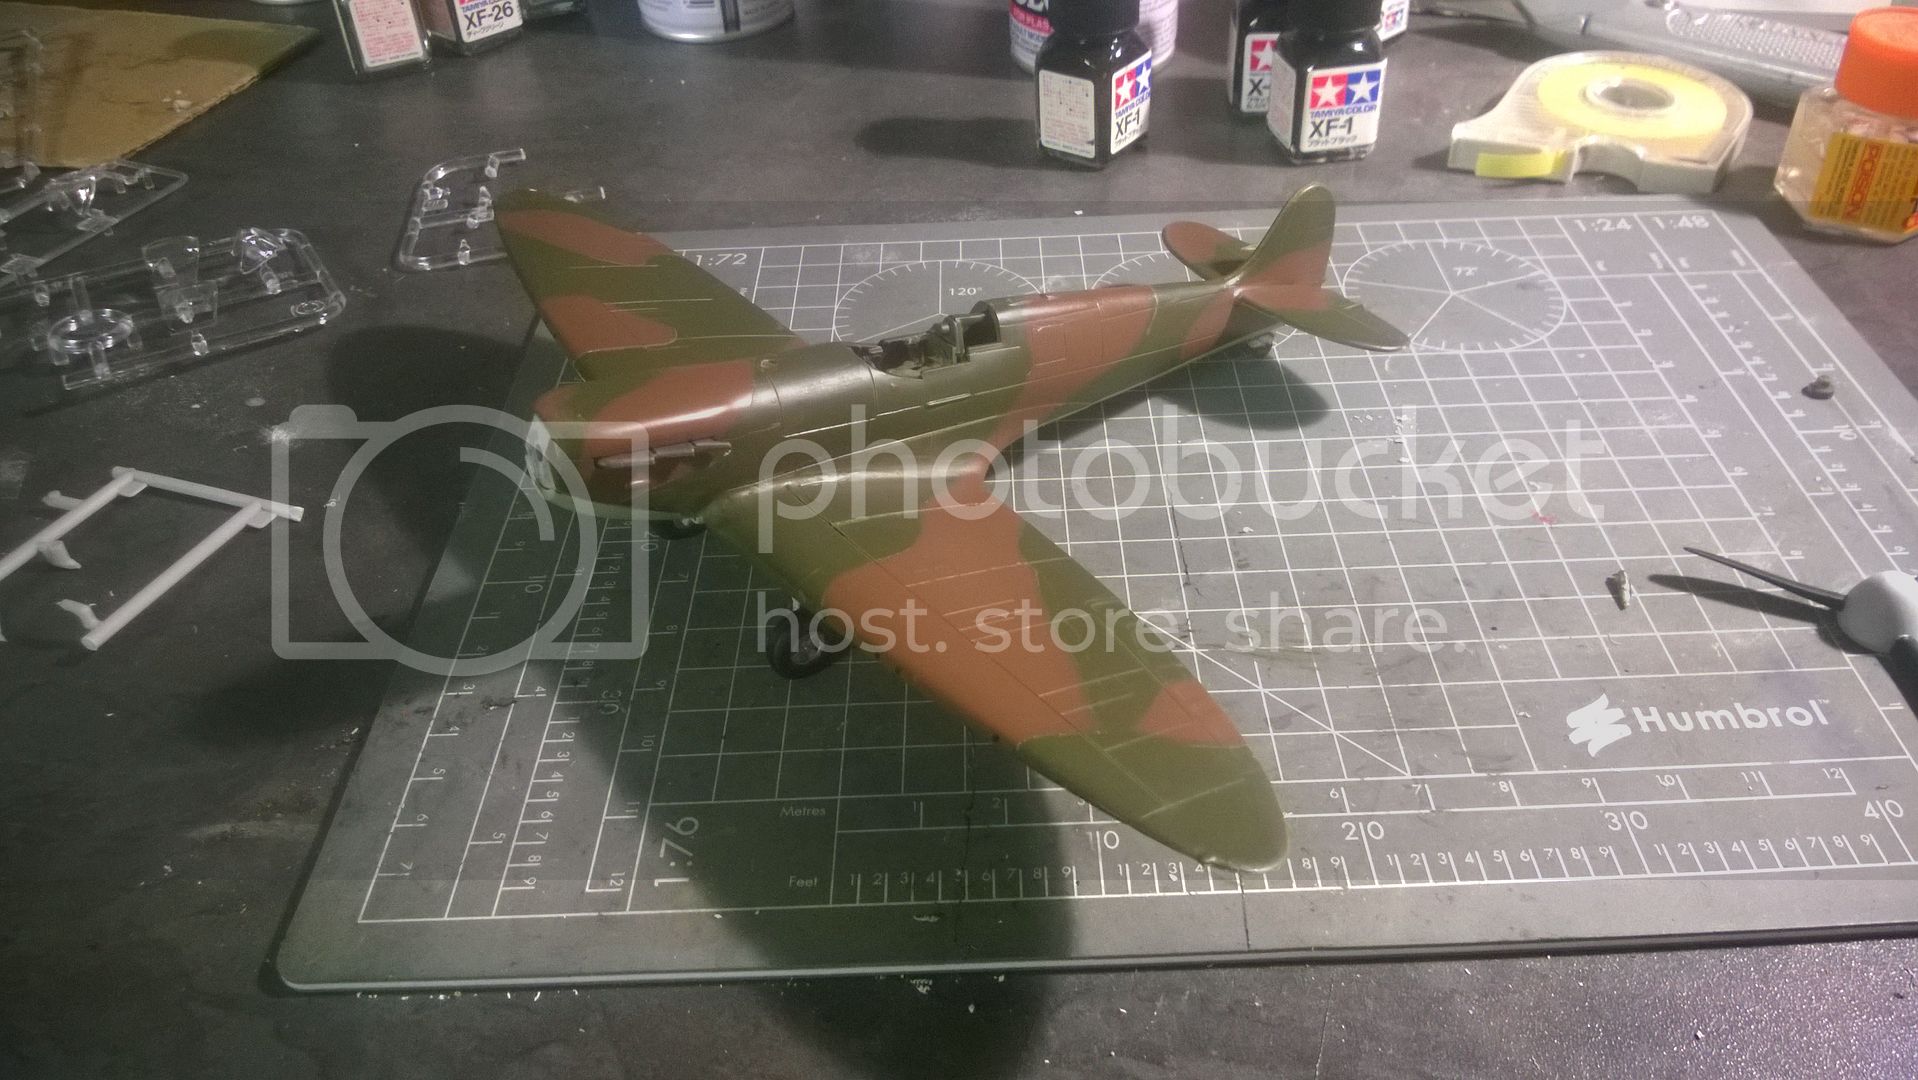
Thank you! But actually I've been unhappy about the Dark Earth. I used Tamiya's recommended mix of XF-52 and 64, way too red and dark. So I mixed my own using XF-52:2 + XF-49:1 and a touch of XF-51. Much happier with that:
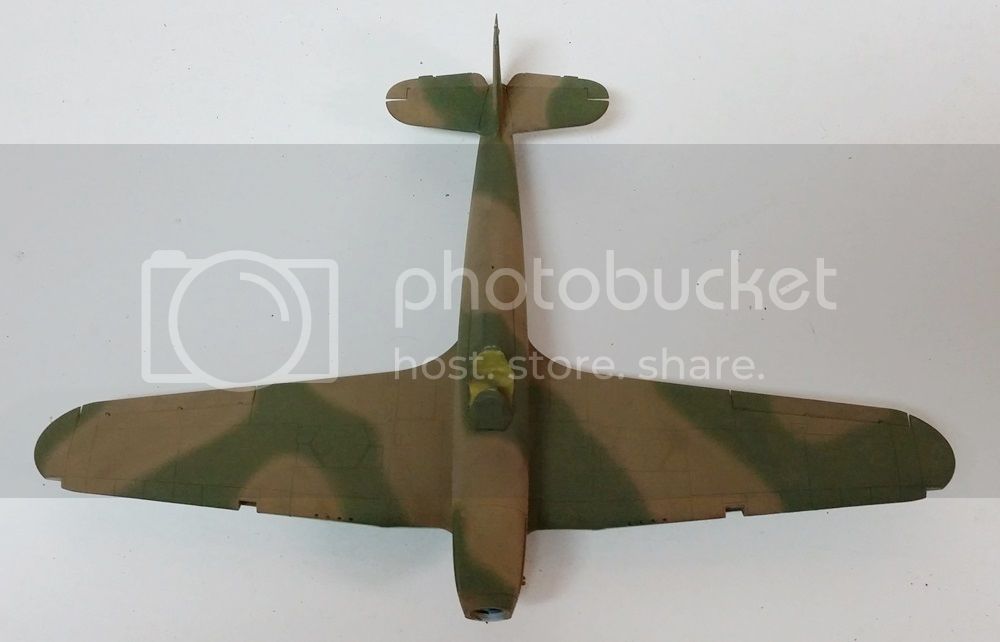
It actually looks better in real life than this pic. Gloss coat next!
Michael

On the bench:
Sorta depends on your definition of "on the bench"...
England - East Midlands, United Kingdom
Joined: March 23, 2003
KitMaker: 2,124 posts
AeroScale: 788 posts
Posted: Thursday, July 02, 2015 - 12:32 AM UTC
hello all! im chucking my hat into the ring with (hopefully) two builds.
the first is an old tool airfix hurricane plus some valiant wings resin and p/e upgrades-

and one from the other side!

im going to try to build these at the same time, to hopefully get them both done in time!
ipms member 10318, click the IPMS-UK link under the avatar to see!
ACCIDENT PRONE? ME? NAAAAH!
SCREW YOU PHOTOBUCKET! ------------------------------------------------>>>>
MichaelSatin
 Campaigns Administrator
Colorado, United States
Joined: January 19, 2008
KitMaker: 3,909 posts
AeroScale: 2,904 posts
Posted: Saturday, July 04, 2015 - 01:08 AM UTC
And here's my finished 1/48 new tool Airfix Hurricane in the markings of Flt. Lt. Frank Carey, 43 Sqn., Summer 1940:
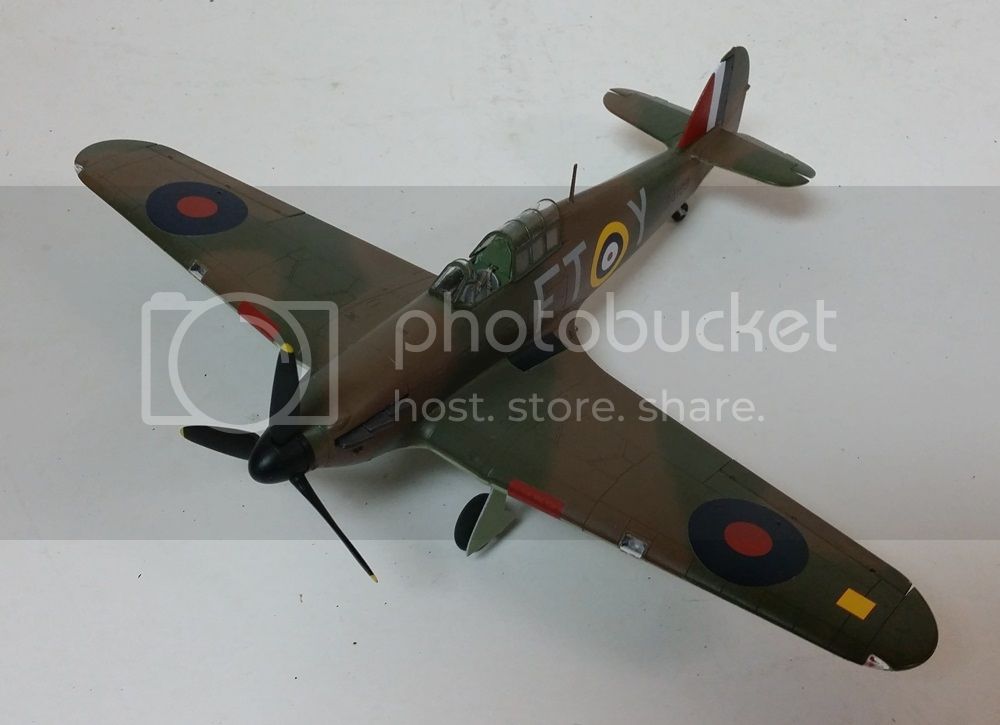
A really excellent kit! The broken antenna masts are my fault. In all I think this is clearly the best 1/48 Hurricane out there right now. Airfix is definitely back!
Happy 4th of July all!
Michael

On the bench:
Sorta depends on your definition of "on the bench"...

#306
Victoria, Australia
Joined: June 27, 2010
KitMaker: 3,959 posts
AeroScale: 598 posts
Posted: Sunday, July 05, 2015 - 03:41 AM UTC
Quoted Text
And here's my finished 1/48 new tool Airfix Hurricane in the markings of Flt. Lt. Frank Carey, 43 Sqn., Summer 1940:
A really excellent kit! The broken antenna masts are my fault. In all I think this is clearly the best 1/48 Hurricane out there right now. Airfix is definitely back!
Happy 4th of July all!
Michael

Great work Michael! Totally agree-the new "Airfix" just keeps on getting better and better! Now, hopefully they re-tool their 1/24 range!

Stay home and build models!
In 1/72
Gloster Gladiator MkII for the Bi-planes Campaign
In 1/350
Airfix 1:350 Type 45 Destroyer
MichaelSatin
 Campaigns Administrator
Colorado, United States
Joined: January 19, 2008
KitMaker: 3,909 posts
AeroScale: 2,904 posts
Posted: Sunday, July 05, 2015 - 03:57 AM UTC
Quoted Text
Great work Michael! Totally agree-the new "Airfix" just keeps on getting better and better! Now, hopefully they re-tool their 1/24 range! 
Thanks Russell! I'm not holding my breath on the 1/24 stuff, but who knows. The Hurricane's not too bad but the Spit needs a rework. Now if they'd only go into 1/32. An up to date 1/32 Hurri... sigh.
Michael

On the bench:
Sorta depends on your definition of "on the bench"...

#306
Victoria, Australia
Joined: June 27, 2010
KitMaker: 3,959 posts
AeroScale: 598 posts
Posted: Sunday, July 05, 2015 - 05:35 AM UTC
Quoted Text
Quoted Text
Great work Michael! Totally agree-the new "Airfix" just keeps on getting better and better! Now, hopefully they re-tool their 1/24 range! 
Thanks Russell! I'm not holding my breath on the 1/24 stuff, but who knows. The Hurricane's not too bad but the Spit needs a rework. Now if they'd only go into 1/32. An up to date 1/32 Hurri... sigh.
Michael 
Can't see Airfix venturing into 1/32 territory, Michael, what with Tamiya holding the crown in that scale...

You're right though, lots of opportunity for Airfix to re-tool the 1/24 range. I've got their Tiffy in the stash, and looking to add the Mozzy when it's re-released this year.
The only other competitor I can think of for Airfix in 1/24 scale is Trumpy, but with Trumpy's range being hit'n'miss, I'm sticking to 1/72 for the time being in the hope that Airfix give the Tiffy treatment to all their 1/24 range...

Fingers crossed anyway

Stay home and build models!
In 1/72
Gloster Gladiator MkII for the Bi-planes Campaign
In 1/350
Airfix 1:350 Type 45 Destroyer
England - East Midlands, United Kingdom
Joined: March 23, 2003
KitMaker: 2,124 posts
AeroScale: 788 posts
Posted: Sunday, July 12, 2015 - 12:59 AM UTC
ipms member 10318, click the IPMS-UK link under the avatar to see!
ACCIDENT PRONE? ME? NAAAAH!
SCREW YOU PHOTOBUCKET! ------------------------------------------------>>>>
Ontario, Canada
Joined: February 04, 2008
KitMaker: 2,507 posts
AeroScale: 1,814 posts
Posted: Friday, July 31, 2015 - 08:45 PM UTC
Phil
I see that you are useing a Douglas Bader Pilot!


" The Die Hards"
43rd MIDDLESEX REGIMENT
MACHINE GUN CORPS
XXX CORP
The most effective way to do it, is to do it.
- Amelia Earhart
Ontario, Canada
Joined: February 04, 2008
KitMaker: 2,507 posts
AeroScale: 1,814 posts
Posted: Friday, July 31, 2015 - 08:48 PM UTC
An update on my entry:

Primed and some touch up required.

" The Die Hards"
43rd MIDDLESEX REGIMENT
MACHINE GUN CORPS
XXX CORP
The most effective way to do it, is to do it.
- Amelia Earhart
TimReynaga
 Associate Editor
California, United States
Joined: May 03, 2006
KitMaker: 2,500 posts
AeroScale: 318 posts
Posted: Sunday, August 02, 2015 - 01:41 AM UTC
Hi guys! Thought I’d play too - This kit is the 1/72 scale Airfix Messerschmitt Bf-109E from 1975. This poor fitting, rivet studded little beauty is rarely built these days, but I thought I’d give it a go.
Here is the start picture:
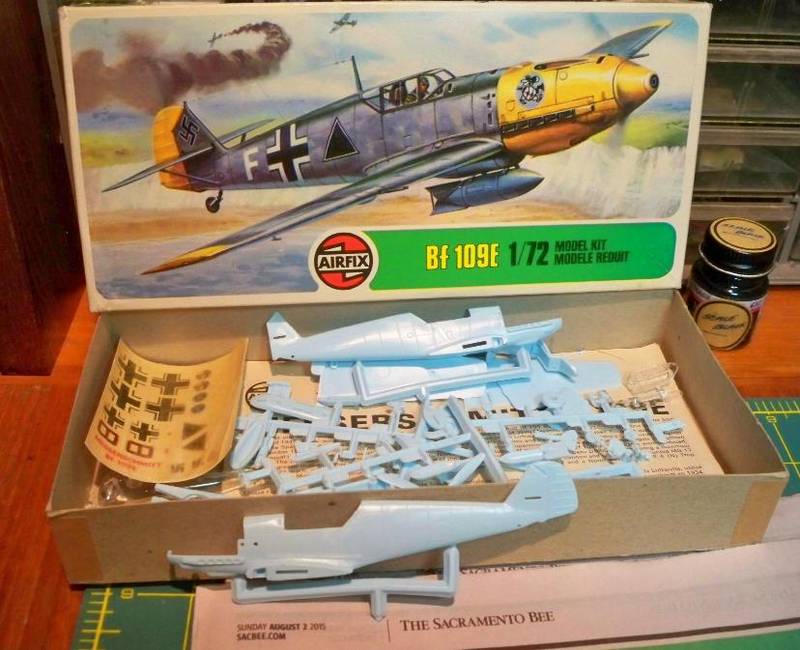
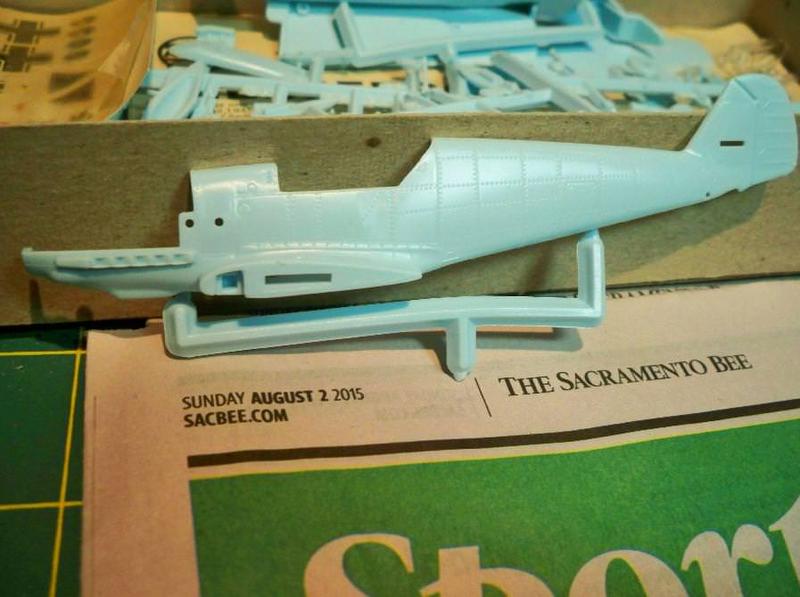
The overall dimensions look ok on this one, but some of the fit is not very good. Huge gaps at the back of the canopy, and a front windscreen that just sits too low will be a challenge.
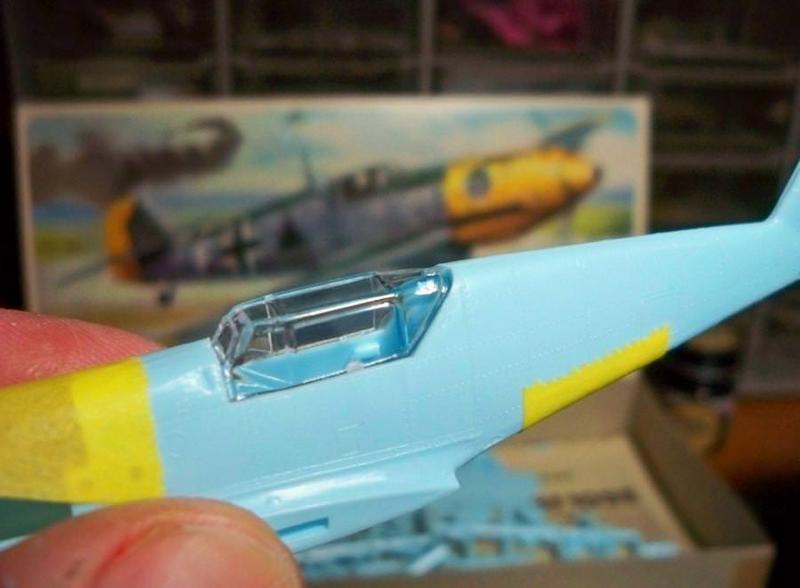
Yeah, there are numerous better 109E kits out there (like almost all of them), but this dinosaur should be fun!

TimReynaga
 Associate Editor
California, United States
Joined: May 03, 2006
KitMaker: 2,500 posts
AeroScale: 318 posts
Posted: Sunday, August 02, 2015 - 09:12 AM UTC
As I begin what will be an out-of-the-box build, I wonder if Airfix’s scheme is accurate?
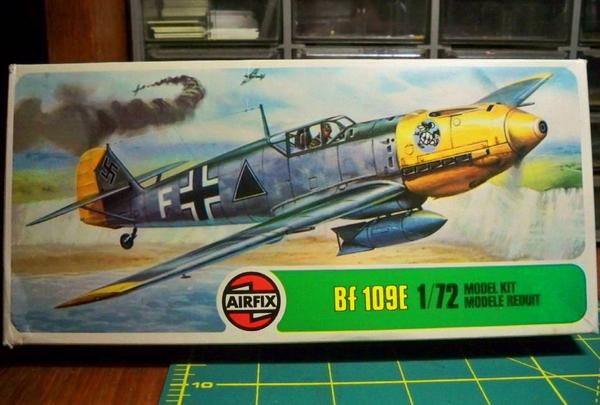
The hatchet and pistol-toting Mickey Mouse indicates that the Messerschmitt is Adolf Galland’s aircraft, and the background appears to be the white cliffs of Dover – but would the top German fighter ace of the Battle of Britain really have been carrying a bomb? I like the bright colors, but I suspect that the scheme may be imaginary...


#424
Queensland, Australia
Joined: April 23, 2015
KitMaker: 4,648 posts
AeroScale: 1,938 posts
Posted: Sunday, August 02, 2015 - 10:31 AM UTC
Hi Tim,
On the old Monogram kit from the seventies, Galland's (if it accurately portrays it) plane had the Mickey Mouse under the cockpit. I don't think there was much yellow either. If I remember what I read correctly, the main unit to use the 109 in the Jabo role was SKG 210.
But I am getting older... So my memories may be off.
The interesting thing I noted about your kit was the attachment points for the landing gear in the fuselage.
Happy Building!
Gary
"Artillery adds dignity, to what would otherwise be an ugly brawl."
Frederick The Great
Wisconsin, United States
Joined: September 11, 2009
KitMaker: 1,917 posts
AeroScale: 563 posts
Posted: Monday, August 03, 2015 - 05:55 PM UTC
...Sean enters the fracas...
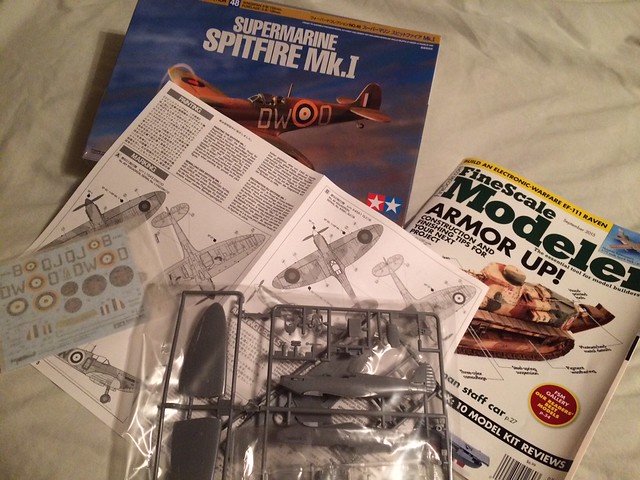
Hey, ladies and gents, I'm planning on keeping this one relatively simple with an OOB build. I bought Tamiya's 1/72 Spitfire Mk. 1. At $18, it's $6 per fret (2 gray, one clear). The parts count is nice and low.

My 1/72 collection doesn't have this icon, and I am eager to do the green/brown camo. I had wanted to apply the black/white underneath scheme too, but the instruction say that came after the BoB, so not this time.

 Battle of Britain group build starting
 by
windysean, on Flickr
The FSM issue in the pic is to verify the month this was taken.
Cheers!
-Sean H.
Current: model railroad layout
Stalled a while ago:
. 1950's Chrome, WW II Twins
Last completed: Police Car
North-West, South Africa
Joined: September 12, 2012
KitMaker: 88 posts
AeroScale: 39 posts
Posted: Tuesday, August 04, 2015 - 03:15 PM UTC
Morning
I have not posted in a while and had many mishaps with this kit. I'll call her the putty queen from now on, almost nothing fit perfectly together

, I don't know if it's because of our warm climate but absolutley nothing would fit, even the wheels seem to be off canter. Anyway enough moaning, I have some pics, I seem to have lost some pics so this is all I have for now
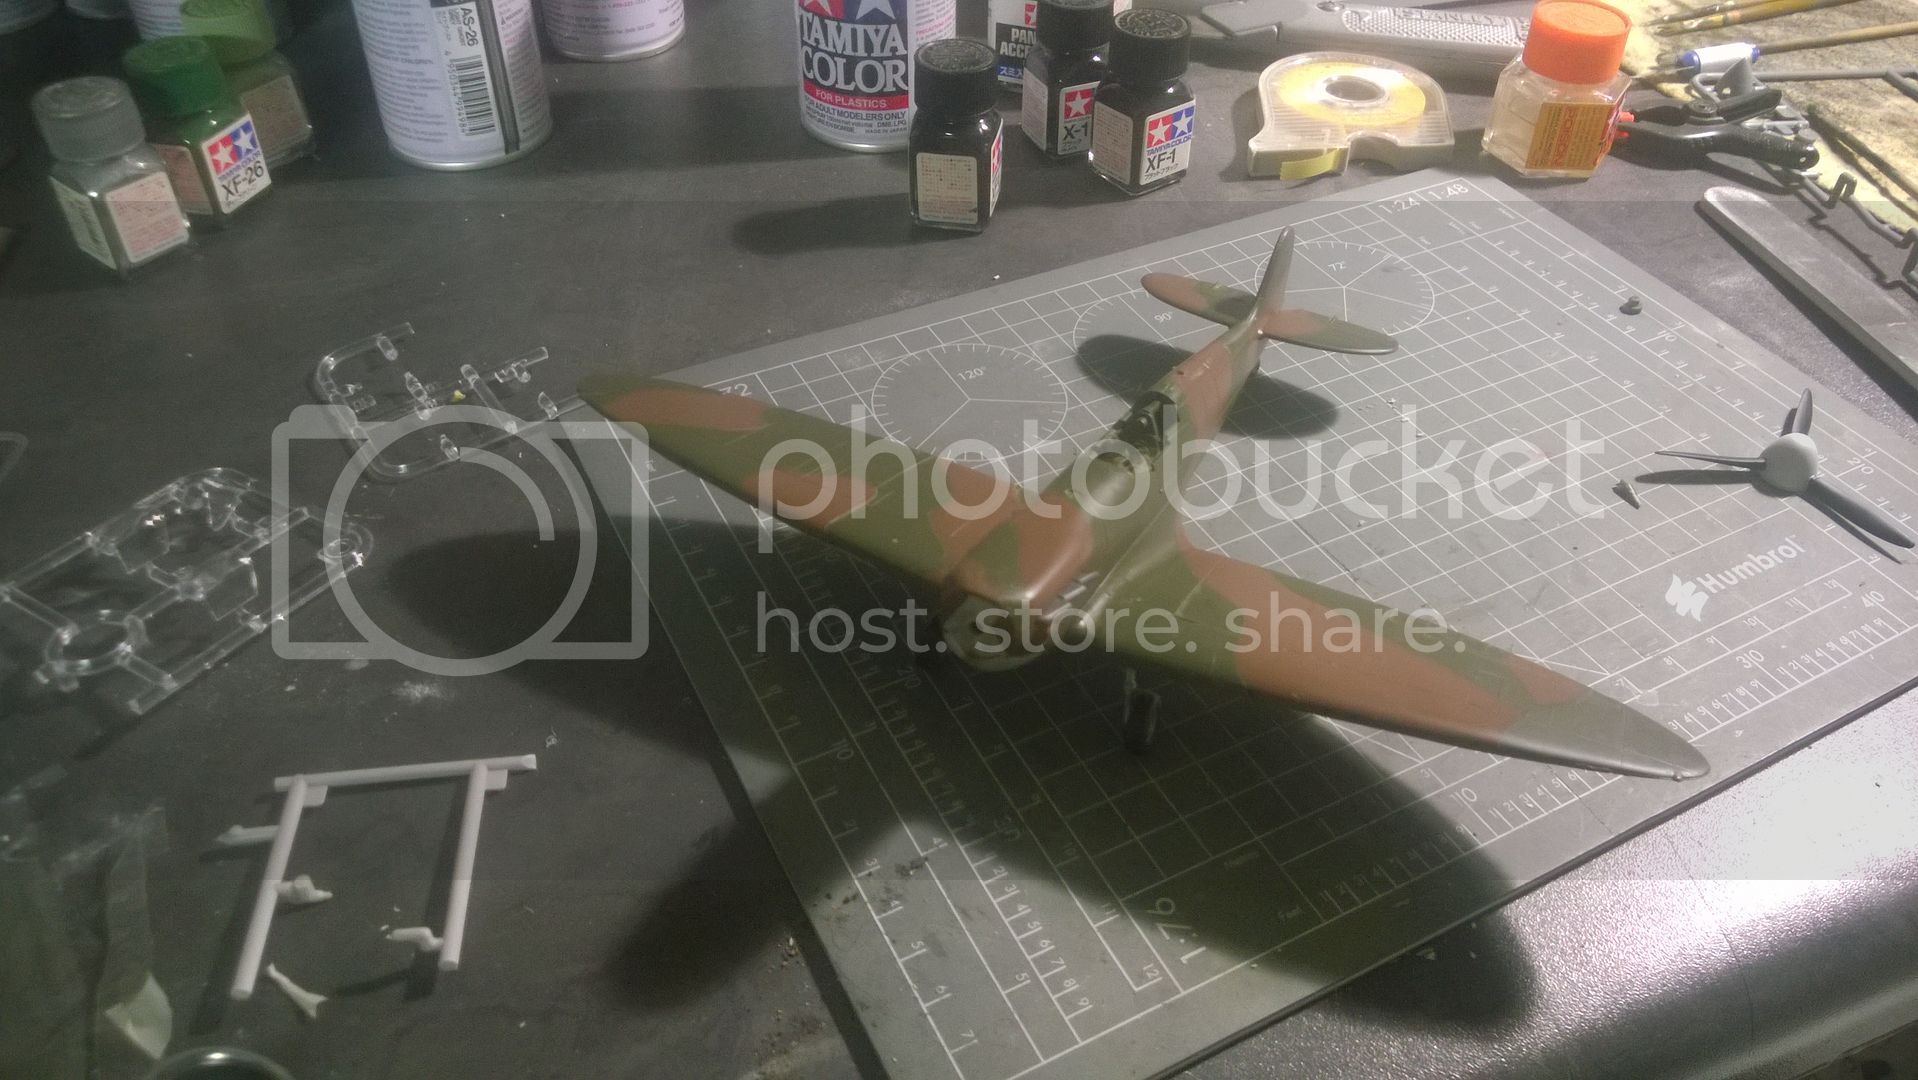
I am building the Tamiya Spit Vb in the Sailor Malan colours at the same time and what a pleasure,

Bayern, Germany
Joined: January 17, 2006
KitMaker: 673 posts
AeroScale: 492 posts
Posted: Thursday, August 06, 2015 - 10:01 PM UTC

Hi guys, there are some very beautiful high quality builds in this campaign already. I am getting a bit of a late start as the summer is not my normal "building season"; however, I have a couple of weeks vacation and can spend some quality time at the bench in addition to my other summer activities.
As you can see by the picture I will be building a Trumpeter 1/32 scale Bf109 E3; actually I started this build on 03 August and have just gotten around to posting a few pictures. This is the 3rd 1/32 scale 109 I have built, the other two being Eduard's Bf109 E4 and Cyber Hobby's Bf109 E3. Though I don't plan to "compare and contrast" the Trumpeter kit with the other two, some assessment will be unavoidable.
I plan to paint the kit to represent an aircraft flown by Heinz Bär of JG51. I don't really like the basic color scheme of the plane represented in the kit, so some research is in order to see just what paint scheme Bär's aircraft had during the late August-early October 1940 timeframe.
Bayern, Germany
Joined: January 17, 2006
KitMaker: 673 posts
AeroScale: 492 posts
Posted: Thursday, August 06, 2015 - 10:32 PM UTC


Like most of my aircraft builds, work begins with the cockpit, and right away there are a few glaring errors. It looks like Trumpeter confused the BF109 F with the Bf109 E. The two worst errors are having the cannon cover between the rudder pedals for the engine mounted cannon and having the fuel control box on the port side of the cockpit, both these being correct for the Bf109 F2 onwards; but very incorrect for any "E" series 109. There are a few other mistakes, but they are not really apparent when the fuselage is closed up. I decided to just correct the two bad errors by plugging the holes, scratch building the oil line cover, standard in all "E"'s, from a piece of scrap resin and relocating the fuel control box to it's correct location on the starboard side of the cockpit. I did a massive amount of scratch building for the Cyber Hobby 109 I just don't have the motivation to go through the same thing for this build to correct all the niggling errors in this kit's cockpit; again, most of which can't be seen well - if at all - any way.
The two photos show the cockpit in the initial stages of construction. I have to give Trumpeter some good marks for some nice PE parts that come with the kit. The PE looks good and is easy to work with.
MichaelSatin
 Campaigns Administrator
Colorado, United States
Joined: January 19, 2008
KitMaker: 3,909 posts
AeroScale: 2,904 posts
Posted: Thursday, August 06, 2015 - 10:38 PM UTC
Nice work everyone (special kudos to Tim for being a masochist!)
Ernest: it sounds like so far your experience is that if one wants an accurate 1/32 109E, Eduard is the way to go.
Michael

On the bench:
Sorta depends on your definition of "on the bench"...
Bayern, Germany
Joined: January 17, 2006
KitMaker: 673 posts
AeroScale: 492 posts
Posted: Thursday, August 06, 2015 - 10:45 PM UTC


Final post for today shows the engine and radio equipment after initial construction. Trumpeter does a lot better with both of these. According to my research sources, the radio equipment looks pretty accurate and is well moulded. I plan to do a bit of scratch building to add some detail to this area and will leave the access plate off the final build so some of the work can be seen.
The engine is a nice representation of a DB601 engine and the quality is right up there with the other two kits. Unfortunately this build will be buttoned up, so none of the nice detail will be seen. I am already feeling the pressure not to let my AMS run wild here, and just do a basic construction and paint job on both the engine and MG tray as almost none of the detail will be seen at all. Cowling fit issues also have me a bit worried, and if this kit is like the Eduard kit, I am in for some scraping and trimming to get things nice and tight - we shall see how many naughty words are in the future when I get to that point!
Bayern, Germany
Joined: January 17, 2006
KitMaker: 673 posts
AeroScale: 492 posts
Posted: Tuesday, August 11, 2015 - 11:12 AM UTC
Michael, first off - very, very nice work on your Airfix Hurricane, it looks quite good.
As to the 1/32 109 kits, I think the Eduard and CyberHobby kits are pretty equal in quality and accuracy. Both need very little extra work to produce an excellent replica of a BF109 E. The Trumpeter kit limps slightly behind the other two, but it is a good solid kit, whose few warts can be removed as the builder desires. All the scratch building on the Cyber Hobby kit was my choice, as I wanted to take a crack at producing a very accurate DB601 engine with all the piping and wiring. The kit would have been just fine without any of the extra work I put into it, but I sometimes suffer from advanced AMS!
Sincerely,
Ernest
Quoted Text
Nice work everyone (special kudos to Tim for being a masochist!)
Ernest: it sounds like so far your experience is that if one wants an accurate 1/32 109E, Eduard is the way to go.
Michael 
Bayern, Germany
Joined: January 17, 2006
KitMaker: 673 posts
AeroScale: 492 posts
Posted: Tuesday, August 11, 2015 - 11:26 AM UTC
North-West, South Africa
Joined: September 12, 2012
KitMaker: 88 posts
AeroScale: 39 posts
Posted: Tuesday, August 18, 2015 - 03:13 PM UTC
Hi
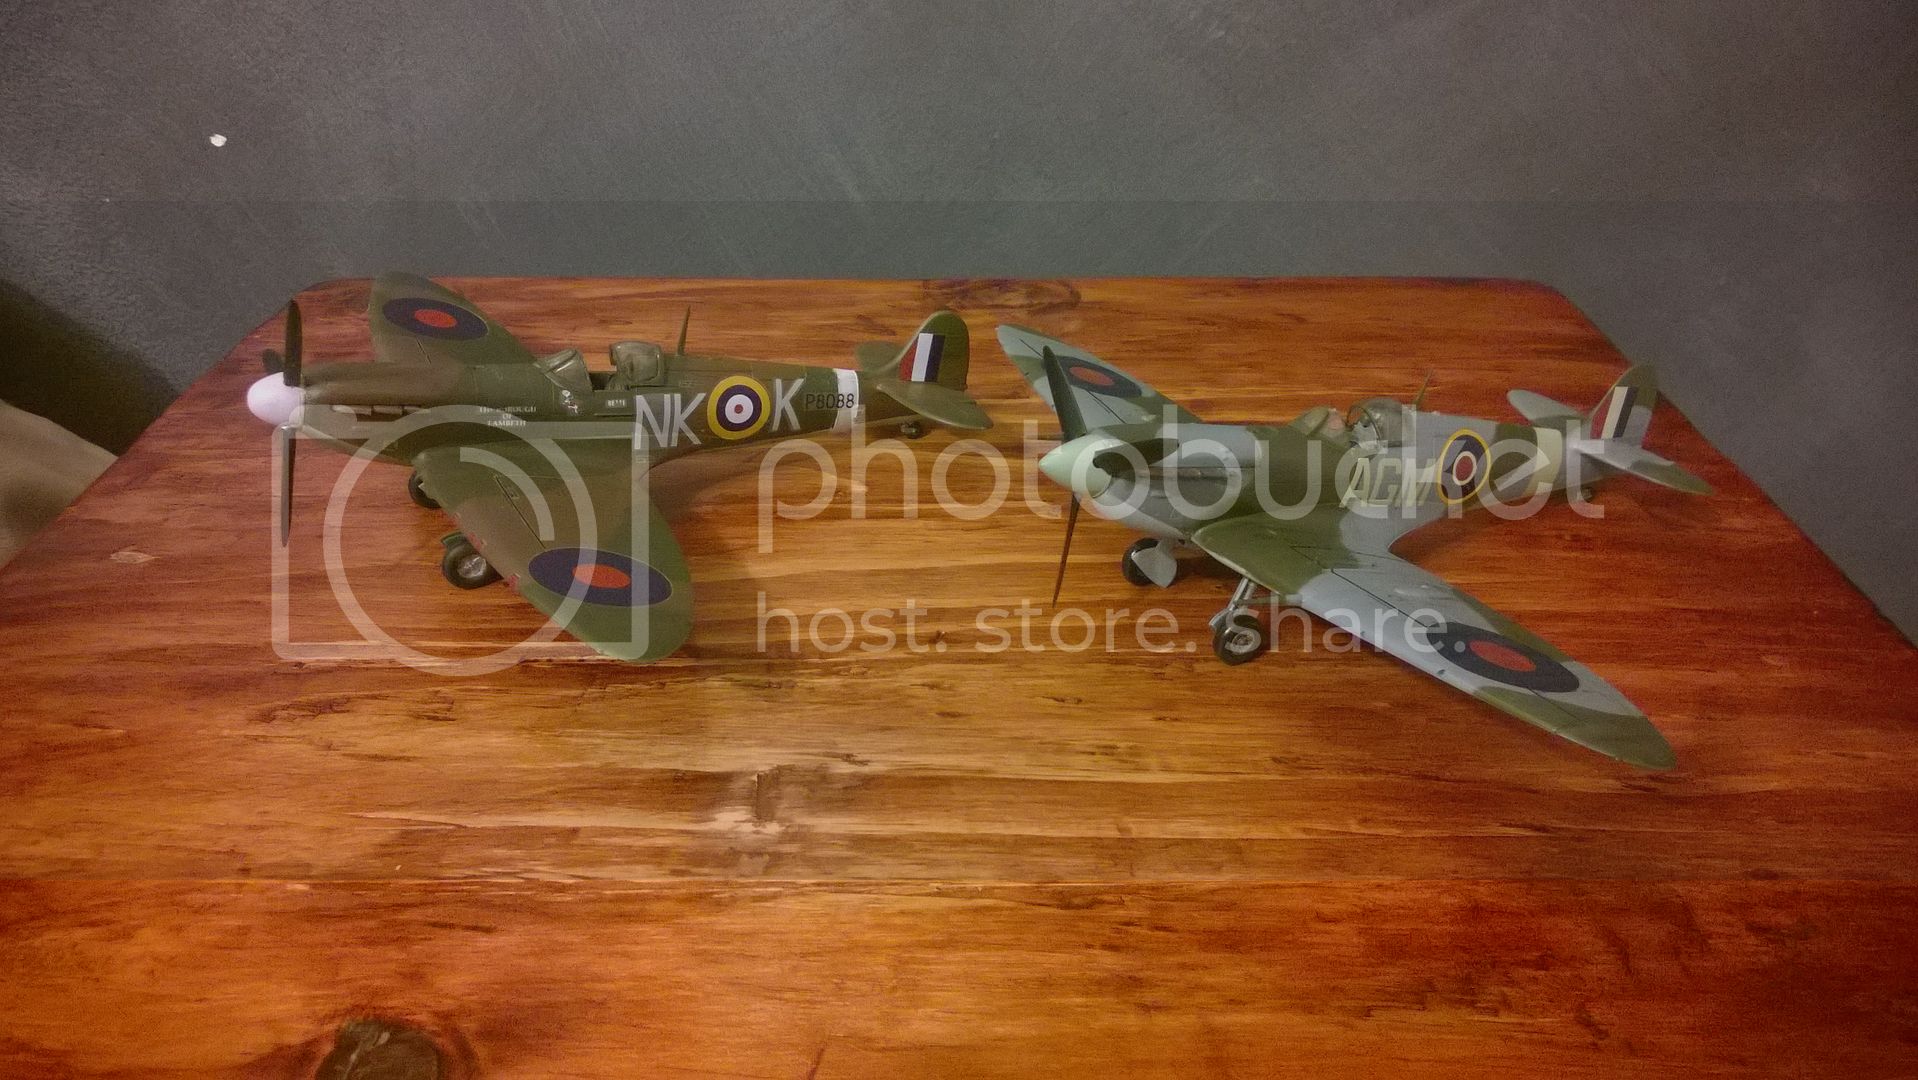
Pics uploaded to the gallery, here is a pic with Sailour Malan's spitfire that I built at the same time.
I'm going to call this the "Tale of two Spitfires". The Tamiya kit (Malan) what a pleasure to build and finish, even the decals, the Airfix(Battle of Britain) was a headache, filled to the brim with putty, as a result it is noticeably heavier.
Bayern, Germany
Joined: January 17, 2006
KitMaker: 673 posts
AeroScale: 492 posts
Posted: Wednesday, August 19, 2015 - 06:17 PM UTC
Hi Robert, those are two very nice Spitfires. It looks like you nailed the colors for both of them and I really like how smooth the paint finishes look.
Ernest
Quoted Text
Hi
Pics uploaded to the gallery, here is a pic with Sailour Malan's spitfire that I built at the same time.
I'm going to call this the "Tale of two Spitfires". The Tamiya kit (Malan) what a pleasure to build and finish, even the decals, the Airfix(Battle of Britain) was a headache, filled to the brim with putty, as a result it is noticeably heavier.

Bayern, Germany
Joined: January 17, 2006
KitMaker: 673 posts
AeroScale: 492 posts
Posted: Wednesday, August 19, 2015 - 06:28 PM UTC
Its been a few days since my last post. I have made a lot of progress on the build and finally uploaded some of the "in progress" photos I took. This, and the next post will show some of the work.
The first photo shows the fuselage about ready to be closed up. I installed the radio equipment after I took the picture having added a few pieces of copper wire as I had planned to leave the access plate off. Once the fuselage was together I found there was far too little light to see much of any thing and I ended up deciding to put the access plate on as the hassle of cutting the decal for the access plate and fuselage just was not worth to me given the lack of visibility.

Here we have a very mundane shot of the aircraft after priming.

Finally, and overall shot with the RLM 02 paint applied.

Bayern, Germany
Joined: January 17, 2006
KitMaker: 673 posts
AeroScale: 492 posts
Posted: Wednesday, August 19, 2015 - 06:35 PM UTC
MichaelSatin
 Campaigns Administrator
Colorado, United States
Joined: January 19, 2008
KitMaker: 3,909 posts
AeroScale: 2,904 posts
Posted: Wednesday, August 19, 2015 - 06:40 PM UTC
Very nice work everyone! Today is the anniversary of Churchill's speech which honored
The Few.
Michael

On the bench:
Sorta depends on your definition of "on the bench"...


