

Steve,
One thing that I mentioned to you about pre or post shading every recessed panel line is that the end result often looks unrealistic as it has that checkerboard appearance. At least that's my personal view.
Perhaps one thing to consider is not doing all the panel lines. That way a more realistic random effect will be achieved.
Joel
Cold War (1950-1974)
Discuss the aircraft modeling subjects during the Cold War period.
Discuss the aircraft modeling subjects during the Cold War period.
Hosted by Tim Hatton
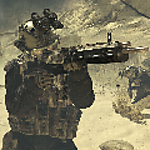
Italeri 1/32 Mirage IIIc
Joel_W

Joined: December 04, 2010
KitMaker: 11,666 posts
AeroScale: 7,410 posts
Posted: Tuesday, December 06, 2016 - 04:40 AM UTC


SteveAndrews

Joined: August 16, 2010
KitMaker: 693 posts
AeroScale: 551 posts
Posted: Tuesday, December 06, 2016 - 05:07 PM UTC
Hi Jelger and Joel
Jelger thanks very much, I'm pleased you like it.
Joel, yes that sounds like good advice. I'm personally not quite convinced about my efforts yet, but I'm reserving judgment. In natural light the shading looks about right but lights and camera can make it disappear altogether or jump right out. In the end I'll at least try and keep the weathering consistent over the whole model so it gives an impression of age and use.
It's all an adventure.
Happy modelling
Steve
Joel_W
Joined: December 04, 2010
KitMaker: 11,666 posts
AeroScale: 7,410 posts
Posted: Tuesday, December 06, 2016 - 09:54 PM UTC
Steve,
Weathering is really a subjective adventure for us modelers. I've been around for a long time, and I seen the start of weathering back in the mid 70s, followed by one trend after another in a grand quest to real that magical realistic effect that one's trying to achieve. Now it's Black Basing. And I've already gone to a modified method of it to achieve the results I'm looking for.
Joel
SteveAndrews
Joined: August 16, 2010
KitMaker: 693 posts
AeroScale: 551 posts
Posted: Wednesday, December 07, 2016 - 12:42 AM UTC
Hey Joel
Yes, I agree. It's really all about achieving a look that satisfies our own tastes. And, with that in mind I've been giving the wheels a little attention. Some detail painting, a pin wash of black oil and then ground pigment applied to the tyres got the effect I was after. To get a used feel on the tyres I simply sprinkled ground pastels on a sheet of paper and rolled the tyre through it. Then I brushed of the excess.


Yes, I agree. It's really all about achieving a look that satisfies our own tastes. And, with that in mind I've been giving the wheels a little attention. Some detail painting, a pin wash of black oil and then ground pigment applied to the tyres got the effect I was after. To get a used feel on the tyres I simply sprinkled ground pastels on a sheet of paper and rolled the tyre through it. Then I brushed of the excess.
Joel_W
Joined: December 04, 2010
KitMaker: 11,666 posts
AeroScale: 7,410 posts
Posted: Wednesday, December 07, 2016 - 02:08 AM UTC
Steve,
Love the way your weathering tires. I'm so impressed that I'm publically stating that I'm "stealing" your method.
Joel
Love the way your weathering tires. I'm so impressed that I'm publically stating that I'm "stealing" your method.
Joel
SteveAndrews
Joined: August 16, 2010
KitMaker: 693 posts
AeroScale: 551 posts
Posted: Wednesday, December 07, 2016 - 04:03 PM UTC
Hey Joel
Please feel free. Its a small Xmas gift :-)
I've benefitted so much from other modeler's generosity with tips and techniques that I'm very happy to offer a little in return
Happy modelling.
Steve
Please feel free. Its a small Xmas gift :-)
I've benefitted so much from other modeler's generosity with tips and techniques that I'm very happy to offer a little in return
Happy modelling.
Steve
SteveAndrews
Joined: August 16, 2010
KitMaker: 693 posts
AeroScale: 551 posts
Posted: Tuesday, December 13, 2016 - 02:51 AM UTC
It seems like breaking the rules is in fashion these days: our politicians tell us lies and we elect them; summer lasts until October, and u and r are no longer letters but words. So, just because Im a dedicated follower of fashion, I decided to gloss coat a natural metal finish. Did it improve the look or make it worse? You tell me.


One thing you cant deny - it's a silver machine
https://www.youtube.com/watch?v=yao_T2adl14
One thing you cant deny - it's a silver machine
https://www.youtube.com/watch?v=yao_T2adl14
Joel_W
Joined: December 04, 2010
KitMaker: 11,666 posts
AeroScale: 7,410 posts
Posted: Tuesday, December 13, 2016 - 03:57 AM UTC
Steve,
OK, you asked.
1st off the white balance of the pictures look to warm which doesn't help compared to the previous set. There the NMF has the look and feel of a well cared for NM operational aircraft. The last set has areas that looks like polished Aluminum, and other areas that looks like polished Aluminum pope, while the gray strips on the fuselage looks like glossy paint. Now that could all be from your direct lighting.
The good news is finally those gray wing panels are starting to look more in the NM finish camp then the paint camp.
If you glossed it in preparation for decaling, my 1st choice is always Testors Model Master Sealer, as it's as neutral of a clear as you can get. I've also used Alcad 2's clears and they do work well, but take much longer to properly dry.
Joel
SteveAndrews
Joined: August 16, 2010
KitMaker: 693 posts
AeroScale: 551 posts
Posted: Tuesday, December 13, 2016 - 05:21 PM UTC
Hi Joel
I did, and thanks for the honest reply. The lighting is different. I was trying to isolate the background a bit more and turned off my bright 'daylight' lamp, so the warmer tint comes from a more standard bulb.
The smaller panels in grey are actually painted on the real thing (or at least it looks that way to me),so in that sense I guess you could say they are authentic. The larger ones are not, and well... its a journey!
I have to confess that I really don't like gloss coats. I find it hard to judge how much paint is going down and how smoothly. If it hadn't been for those wing panels then I might have skipped the whole process. I have a plan B for the Spitfire, but that's for next years blog.
You are tempting me to try new products as well. Maybe we need a modelers lab somewhere on the site?
Thanks again for taking the time to reply.
With warm(er) wishes
Steve

litespeed


Joined: October 15, 2009
KitMaker: 1,976 posts
AeroScale: 1,789 posts
Posted: Thursday, December 15, 2016 - 02:06 AM UTC
Quoted Text
I decided to gloss coat a natural metal finish. Did it improve the look or make it worse? You tell me.
Steve the look of the natural metal finish looks very good indeed. I really like the effect you have achieved so far. However I am really not convinced with the two shades of grey on the panels on the upper wing surface. It looks a bit too much like the panels are painted and not natural metal. I have looked at many images of the Mirage III featuring a natural metal finish and although there is a slight variation in the panel tones I have yet to see one similar to the way you have painted yours. I am curious do you have any photographic evidence of this you can add to your log? Sorry to be over critical Steve, but you did ask!
I am really enjoying your log and the banter with Joel. Looking forward to the decaling and seeing some colour on your silver machine.
tim

SteveAndrews
Joined: August 16, 2010
KitMaker: 693 posts
AeroScale: 551 posts
Posted: Thursday, December 15, 2016 - 07:37 PM UTC
Hi Tim
We'll first let me say thanks for joining in.
I admit those wing panels are inspired by artistic license. There is also a shot of the underside on page 16 of this blog that gives me some hope I haven't drifted off into a total fantasy world.
I want to do some work with oils and maybe Mr Colour buffable metallic paints to see if I can adapt the look. Even so it might not ever get to the point where it looks like true NMF. It's an experiment, and it might be a bad one. At the very least I'll have a good looking model (I hope), even if its not quite authentic. I can live with that but I know its going to irk some folks. Joel is being gentle with me - thanks Joel!
As for the decals I've already made a start and I'll post some pics soon.
Thanks again for dropping in. Its good to have you along.
With warm wishes
Steve
SteveAndrews
Joined: August 16, 2010
KitMaker: 693 posts
AeroScale: 551 posts
Posted: Saturday, December 17, 2016 - 08:13 PM UTC
Decals, dee-cals or transfers? Call them what you will, those things we slide on to simulate markings can really make a kit pop. The decals supplied with the Mirage are lovely Cartograf items. The colours are strong and the details are well defined. What isn't quite so good is that a few of the larger ones don't fit. Given the problems encountered with the rest of the kit Im willing to believe that this is down to specifications supplied by Italeri. Whatever the reason its another frustration to add to the long list already complied. Once I realised the problem I became more cautious and tried to compare the decal with the kit area it was supposed to fit. The biggest and hardest to fix are those around the engine intakes. The decal needs to fit a complex curve and has cut outs for the gun ports. I tried one, and everything was wrong. After a few minutes of fiddling, I abandoned the attempt and decided I would have to mask and paint.
Knowing that I would be masking around the front I didn't attempt any more of the decals there, and I switched my attention to the rear. Armed with a wide brush and Micro-Set and Micro-Sol I got to work. Here are the results so far, and by the way the Sol is working so some of the decals are still in the wrinkly phase:


Knowing that I would be masking around the front I didn't attempt any more of the decals there, and I switched my attention to the rear. Armed with a wide brush and Micro-Set and Micro-Sol I got to work. Here are the results so far, and by the way the Sol is working so some of the decals are still in the wrinkly phase:
litespeed
Joined: October 15, 2009
KitMaker: 1,976 posts
AeroScale: 1,789 posts
Posted: Tuesday, December 20, 2016 - 10:28 PM UTC
Quoted Text
Decals, dee-cals or transfers? Call them what you will, those things we slide on to simulate markings can really make a kit pop.
The Cartograf decals certainly make this kit pop Steve and really add many focal points to your build.
Quoted Text
What isn't quite so good is that a few of the larger ones don't fit. Given the problems encountered with the rest of the kit Im willing to believe that this is down to specifications supplied by Italeri.
You are certainly having to fight this kit all the way to the finish line. A real pity. Despite that your build is looking stunning. I think I will be acquiring one in the new year.
All the best and happy Christmas

tim
SteveAndrews
Joined: August 16, 2010
KitMaker: 693 posts
AeroScale: 551 posts
Posted: Wednesday, December 21, 2016 - 12:40 AM UTC
Hey Tim
Thanks very much. If you want a challenge this is certainly the ideal kit. Budget a few psychiatrists sessions into the price, and it'll be a happy experience.
Roses are red
Violets are blue
I'm schizophrenic
And so am I
Right, onwards!
Happy modelling and happy Christmas too.
Steve
Thanks very much. If you want a challenge this is certainly the ideal kit. Budget a few psychiatrists sessions into the price, and it'll be a happy experience.
Roses are red
Violets are blue
I'm schizophrenic
And so am I
Right, onwards!
Happy modelling and happy Christmas too.
Steve
SteveAndrews
Joined: August 16, 2010
KitMaker: 693 posts
AeroScale: 551 posts
Posted: Wednesday, December 21, 2016 - 12:41 AM UTC
Theres a point in most big negotiations when someone just feels like giving in and saying OK, you win! I looked at the Mirages decals again and had one of those moments. Then I thought about all the time Id spent on her and decided to press on. With a base coat of clear down I felt confident using more aggressive masking products, which was good because the tape I use is flexible but very stick. After some time spent getting the curve right I masked an area to prevent overspray and launched at it with Tamiya XF-7 mixed with Tamiya Clear and thinners. It took a few layers to get a rich colour and theres a small difference in tone between the paint and the decals, but generally Im pleased with the result. It makes me wish Id sprayed more of the red areas.
Got to love that rouge. Attention!
https://www.youtube.com/watch?v=7HdCkki5K_w


Drat. I just saw some pesky overspray in the shot above.
Got to love that rouge. Attention!
https://www.youtube.com/watch?v=7HdCkki5K_w
Drat. I just saw some pesky overspray in the shot above.
SteveAndrews
Joined: August 16, 2010
KitMaker: 693 posts
AeroScale: 551 posts
Posted: Wednesday, January 04, 2017 - 11:38 PM UTC
New Year resolutions. Did you make any.? A new year is usually a time to start things, but Im happy because I have finished something. After a year of work the Mirage is done. Sure there are things I could do to make it better, but there always are, and Im stopping here. Shes weathered with oils and resplendent in her decals.
I bought this kit because the subject and scale appealed to me. I had no idea it was going to be a test of my modelling skills, patience and perseverance. I have to say that it is one of the worst kits I have ever owned. I wont go over all its faults; they are catalogued here, but suffice to say this would have been a bad kit in 1970, in 2017 its almost a con. My advice is don't buy it.
There are so many imperfections and compromises involved in the end result that it pains me to even think about them, but, - and its a big but - to my eye the end result isn't half bad. Its close to what I hoped for when I started. Its a long way from perfect of course, but given the kit problems and my own mess-ups, I do like the result.
So here we are in January 2017, and its journeys end for the lovely French lady of the skies. Heres what a year of work resulted in. Oh and here as well, is some suitably Francais music to help you watch. I wish you a year of peace, fun and creativity.
https://www.youtube.com/watch?v=PKeelQHm2o8


 [/URL]
 [/URL]
 [/URL]

]
I bought this kit because the subject and scale appealed to me. I had no idea it was going to be a test of my modelling skills, patience and perseverance. I have to say that it is one of the worst kits I have ever owned. I wont go over all its faults; they are catalogued here, but suffice to say this would have been a bad kit in 1970, in 2017 its almost a con. My advice is don't buy it.
There are so many imperfections and compromises involved in the end result that it pains me to even think about them, but, - and its a big but - to my eye the end result isn't half bad. Its close to what I hoped for when I started. Its a long way from perfect of course, but given the kit problems and my own mess-ups, I do like the result.
So here we are in January 2017, and its journeys end for the lovely French lady of the skies. Heres what a year of work resulted in. Oh and here as well, is some suitably Francais music to help you watch. I wish you a year of peace, fun and creativity.
https://www.youtube.com/watch?v=PKeelQHm2o8
[/URL][/URL][/URL]]
litespeed
Joined: October 15, 2009
KitMaker: 1,976 posts
AeroScale: 1,789 posts
Posted: Thursday, January 05, 2017 - 01:24 AM UTC
Quoted Text
to my eye the end result isn't half bad.
Steve you are being very modest. I think it looks stunning and well done on completing your build. The weathered natural metal surface is excellent as is the cockpit detail. The decals really add lots of colour and interest too. You must get it up in the gallery.
Well done once again.
tim

KelticKnot

Joined: May 11, 2015
KitMaker: 768 posts
AeroScale: 656 posts
Posted: Thursday, January 05, 2017 - 02:26 AM UTC
Well done Steve, the end result is amazing.
The pains you had to go through to fix a 'state ofthe art' kit don't show in the end result and that's maybe the best praise you can get.
That windscreen fix !!!
I think the grey wing panels work well too. Now that the markings pop, the panels don't draw your eye.
Congratulations on a great build!
The pains you had to go through to fix a 'state ofthe art' kit don't show in the end result and that's maybe the best praise you can get.
That windscreen fix !!!
I think the grey wing panels work well too. Now that the markings pop, the panels don't draw your eye.
Congratulations on a great build!

SteveAndrews
Joined: August 16, 2010
KitMaker: 693 posts
AeroScale: 551 posts
Posted: Thursday, January 05, 2017 - 01:10 PM UTC
Hi Paul and Tim
Thanks for the verdict on the end result. It has been great to share the adventure with you. The Mirage is now sitting proudly in my display cabinet and I am resisting the urge to take it out and tweak various bits.
I'll figure out how to post some images in the gallery.
Next up - the Spitfire!
Happy modelling guys, and thanks again for all your encouragement.
Steve

spaarndammer

Joined: January 28, 2007
KitMaker: 1,945 posts
AeroScale: 388 posts
Posted: Thursday, January 05, 2017 - 01:22 PM UTC
Wow! That turned in a very beautiful model! I enjoyed your build very much, with all the solutions that you found to tackle the beast.
The painted red on the intakes is excellent, the curves looks very good.
My deepest respect for your perseverance!

Jelger
The painted red on the intakes is excellent, the curves looks very good.
My deepest respect for your perseverance!
Jelger
SteveAndrews
Joined: August 16, 2010
KitMaker: 693 posts
AeroScale: 551 posts
Posted: Thursday, January 05, 2017 - 07:19 PM UTC
Hi Jelger
Thanks a million. It was a journey in all sorts of ways, but its good to get a completed kit out of it in the end. The painted areas look a lot better then the decals - I'm going to try and work this way on the Spitfire as much as I can.
Thanks for checking in and seeing it through to the end.
With warm wishes
Steve

Logan

Joined: September 30, 2004
KitMaker: 523 posts
AeroScale: 18 posts

Posted: Thursday, January 05, 2017 - 07:24 PM UTC
HI
I've been following since the beginning and to quote the old adage, you've made a silk purse out of a sow's ear.
Well done.
Tom
I've been following since the beginning and to quote the old adage, you've made a silk purse out of a sow's ear.
Well done.
Tom
SpaceXhydro

Joined: March 13, 2015
KitMaker: 418 posts
AeroScale: 114 posts
Posted: Thursday, January 05, 2017 - 07:59 PM UTC
Wow, this looks amazing! great work Steve.
SteveAndrews
Joined: August 16, 2010
KitMaker: 693 posts
AeroScale: 551 posts
Posted: Friday, January 06, 2017 - 12:37 AM UTC
Hey Tom and Hyder
Its been great fun and a right pain at times. Thanks for taking the time to drop by and for your kind words. I have to say, the support from guys here really helped me along, so thanks for keeping me company.
Happy modelling
S
Its been great fun and a right pain at times. Thanks for taking the time to drop by and for your kind words. I have to say, the support from guys here really helped me along, so thanks for keeping me company.
Happy modelling
S

DougCohen
Joined: May 27, 2009
KitMaker: 1,293 posts
AeroScale: 1,072 posts
Posted: Friday, January 06, 2017 - 04:46 AM UTC
Steve this is a beauty and you should be very pleased.
Doug
Doug

 |

WEB HOSTING BY


Copyright ©2021 AeroScale and Kitmaker Network, a subsidiary of Silver Star Enterprises
All Rights Reserved. Please read our Conditions of Use and Privacy Policy.
All Rights Reserved. Please read our Conditions of Use and Privacy Policy.