Michael,
That is one beauty of a kit, you are doing an awesome job with it. Like Gary said the cockpit is fantastic.
Ian,
The Phantom is coming along real nice. nice job with the decals.
Air Campaigns
Want to start or join a group build? This is where to start.
Want to start or join a group build? This is where to start.
Hosted by Frederick Boucher, Michael Satin
OFFICIAL: The Sign of the Four Campaign
Posted: Sunday, August 07, 2016 - 03:06 AM UTC

SaxonTheShiba

Joined: February 01, 2009
KitMaker: 1,233 posts
AeroScale: 663 posts

Posted: Sunday, August 07, 2016 - 03:20 AM UTC
Gary----Thanks for the kind words. Getting closer to completion.
Jeff---Thanks! The powerplant on your Lamborghini looks AWESOME! Nicely done indeed.
Best wishes,
Ian
Jeff---Thanks! The powerplant on your Lamborghini looks AWESOME! Nicely done indeed.
Best wishes,
Ian
Posted: Sunday, August 07, 2016 - 05:21 AM UTC
Hi Everyone,
Getting closer with Wick's machine. On the B&W photos I've found, it's mottled to the point of looking dirty. The mottling looks impossibly small to reproduce, but by thinning my paint to ultra-thin, and dropping my air pressure very low, I had my airbrush spitting out tiny little droplets.

For the mottling, I used a different shade of RLM02 than that used on the wings, but the same shade of RLM71 used elsewhere.
One of the joys of all these in-the-field painting modifications is that I'll be free to use fewer of those pesky little stencils.
Gaz
Getting closer with Wick's machine. On the B&W photos I've found, it's mottled to the point of looking dirty. The mottling looks impossibly small to reproduce, but by thinning my paint to ultra-thin, and dropping my air pressure very low, I had my airbrush spitting out tiny little droplets.

For the mottling, I used a different shade of RLM02 than that used on the wings, but the same shade of RLM71 used elsewhere.
One of the joys of all these in-the-field painting modifications is that I'll be free to use fewer of those pesky little stencils.
Gaz
MichaelSatin


Joined: January 19, 2008
KitMaker: 3,909 posts
AeroScale: 2,904 posts

Posted: Sunday, August 07, 2016 - 05:51 AM UTC

bomber14

Joined: February 02, 2015
KitMaker: 330 posts
AeroScale: 286 posts

Posted: Wednesday, August 10, 2016 - 12:18 AM UTC
Quoted Text
Nice work going on here!
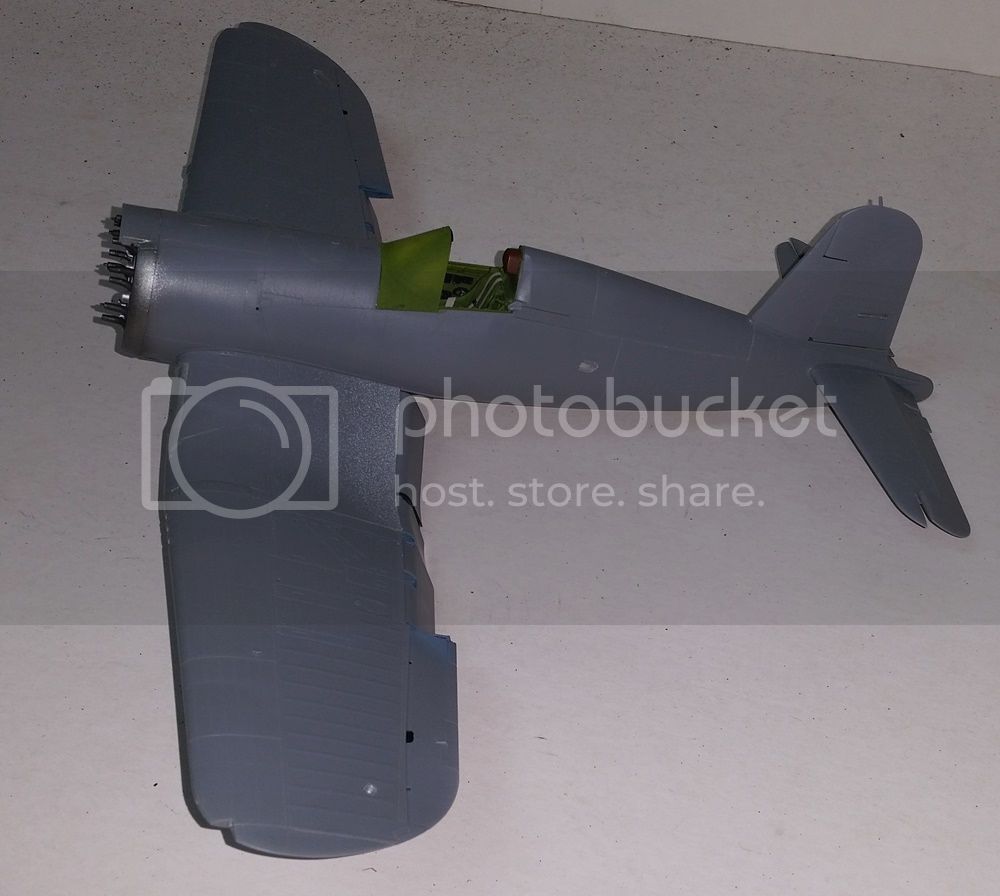
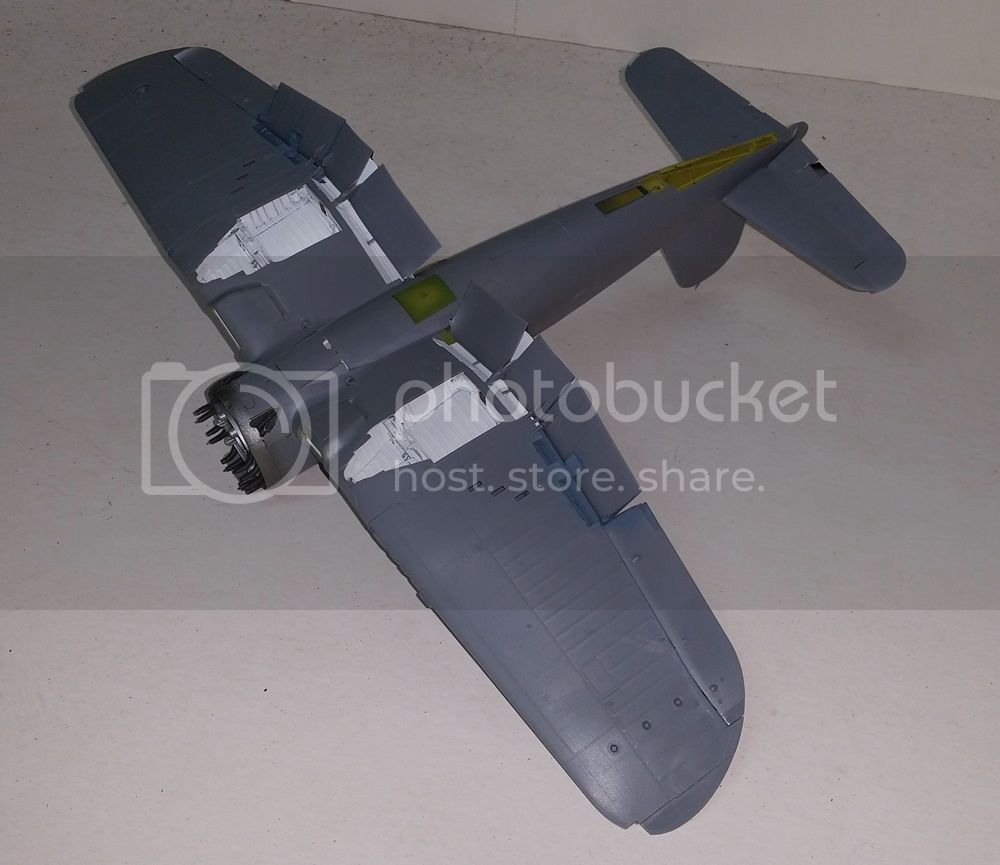
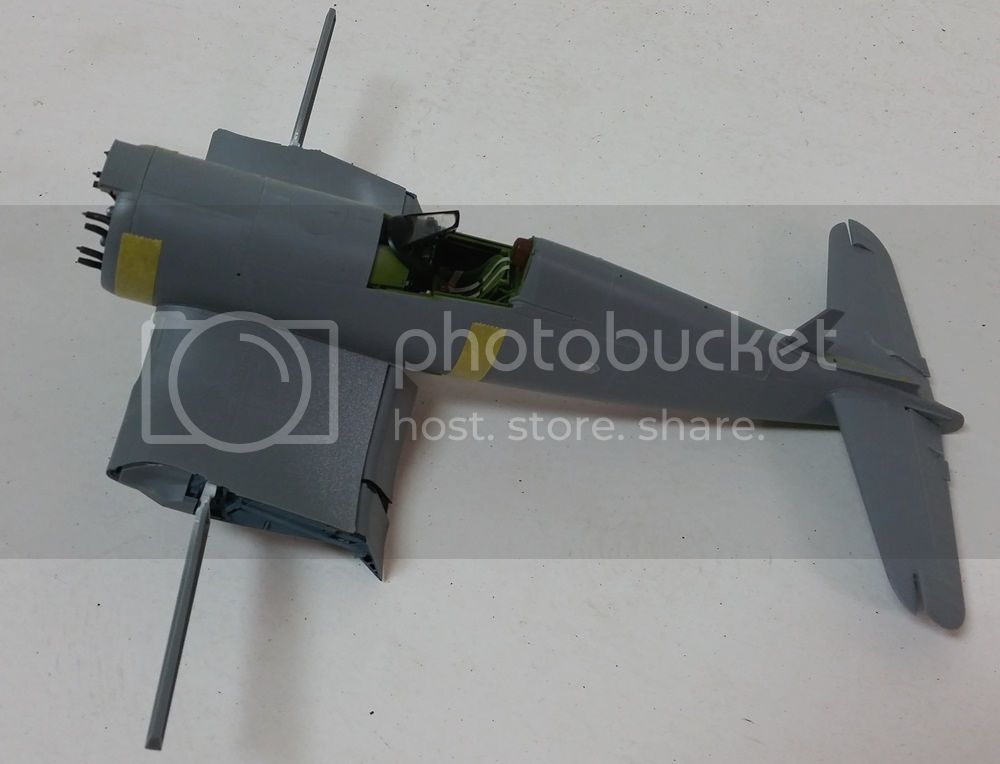
Here's where I am at the end of today's session on the 1/32 Tamiya F4U-1A:
That central wing section has more to it that you think! And I know flaps aren't normally down, but I like the way they look. So there.
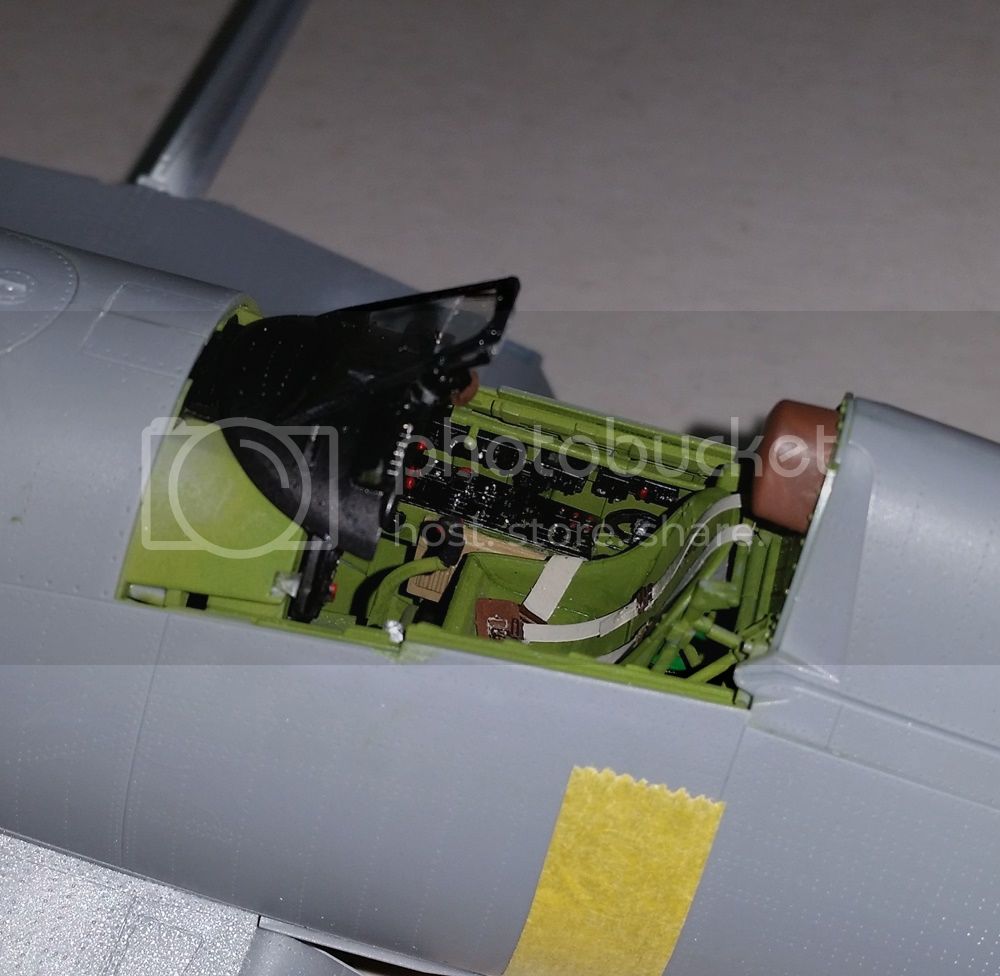
The cockpit with the armored glass installed. Typical excellent Tamiya details and fit so far!
On to the outer wings tomorrow (hopefully).
Michael
michael i would say your perfectly fine with the flaps down. of all the photos of the corsair i'd say it's about 50/50 flaps up/down. one of the reasons i am doing an in-flight is because i didn't feel like cutting the flaps out of that old kit.
i was also of the impression that flaps down were the norm.
joe

bomber14

Joined: February 02, 2015
KitMaker: 330 posts
AeroScale: 286 posts

Posted: Wednesday, August 10, 2016 - 12:33 AM UTC
Quoted Text
Joe,
As far as I know there aren't any subcodes. It's just a matter of what the supplier churned out with a certain batch. Just like when you paint a room in your house, you always buy extra because if you run back to the hardware store for more paint, it's possible to get a different batch from the same supplier and notice a difference when the new paint is laid down.
There is no "exact" Color. Best we can do is approximate enough to be happy.
Best wishes,
Gaz
gary, jesper, damian- i agree that at the time of near the end of the war paints were less likely to match or be combined. but i am referring to model kit directions calling for a color like rlm 65 or 76 on both the sides and bottom but both the box art and directions showing a more sky looking color on the sides and the correct blue on the bottom.
also just last evening i was flipping through a luftwaffe color book i had stacked away and found a paint chip samples in it. it had, if i remember correctly, an rlm 65A and rlm 65B chip. i will see if i can photograph and post it.
joe
supaderpa

Joined: March 28, 2016
KitMaker: 157 posts
AeroScale: 7 posts

Posted: Thursday, August 11, 2016 - 11:26 AM UTC
Alright flyboys, time to get a little grounded with this new-fangled rolley contraption that makes loud "BOOM" noises from a tube.
Dragon's T-34/85 is a pretty straightforward build; the instructions are kinda vague in some places but the fitting is generally pretty good.
Started on the basics, the hull and turret sans all the little detail bits. No engineering degree needed here
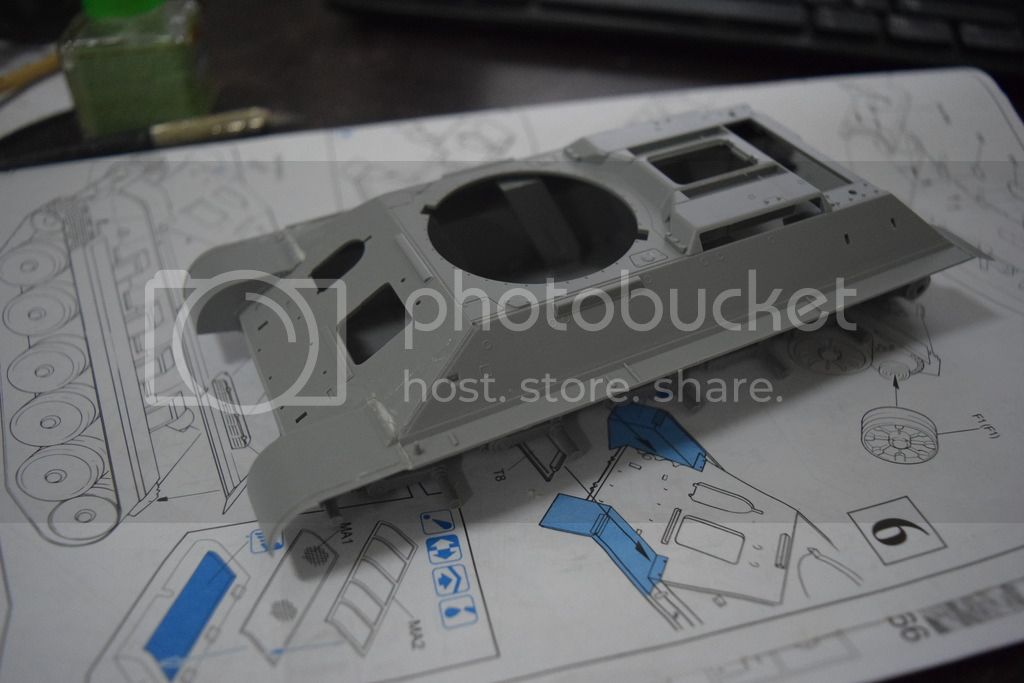
The instructions has you cut off the old front sharp-angled mudguards and swap them for new curved ones which are also plastic. Okay maybe this wasn't as simple as I thought...
I guess they could have molded the upper hull without the old fenders which would have made this so much easier...
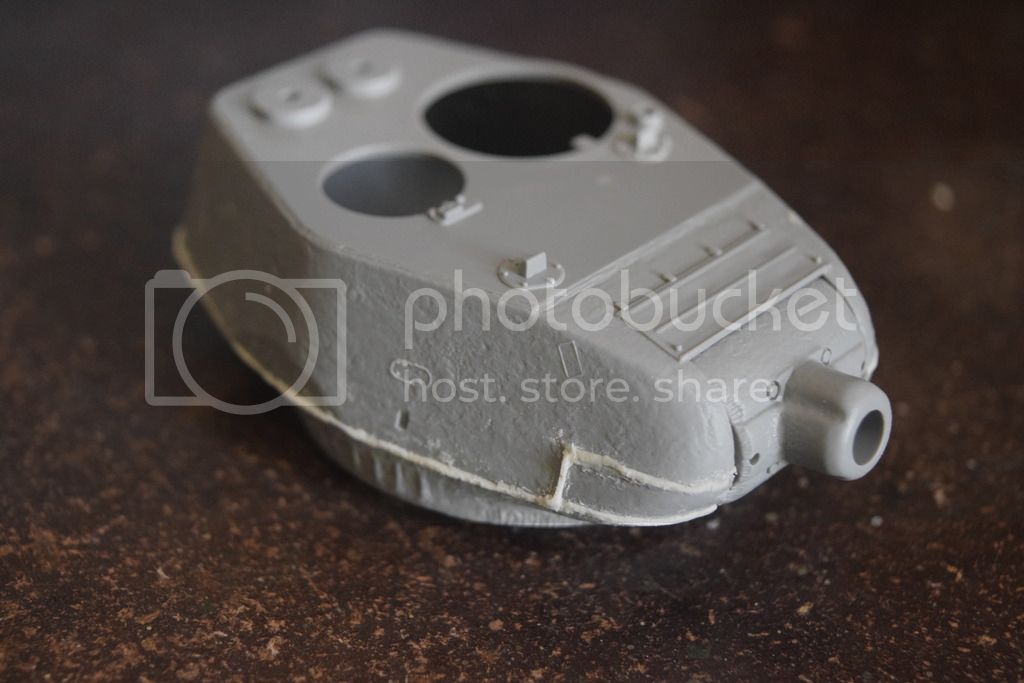
The turret is really well done here. Great casting texture and fit. Used some putty here to create weld lines.
That's all for now. More to come soon.
Dragon's T-34/85 is a pretty straightforward build; the instructions are kinda vague in some places but the fitting is generally pretty good.
Started on the basics, the hull and turret sans all the little detail bits. No engineering degree needed here


The instructions has you cut off the old front sharp-angled mudguards and swap them for new curved ones which are also plastic. Okay maybe this wasn't as simple as I thought...
I guess they could have molded the upper hull without the old fenders which would have made this so much easier...

The turret is really well done here. Great casting texture and fit. Used some putty here to create weld lines.
That's all for now. More to come soon.
Posted: Thursday, August 11, 2016 - 01:51 PM UTC
Hey Bryan,
We gotta stop meeting like this! Will be nice to see this tank come together, too!
Gaz
We gotta stop meeting like this! Will be nice to see this tank come together, too!
Gaz
Posted: Thursday, August 11, 2016 - 09:48 PM UTC
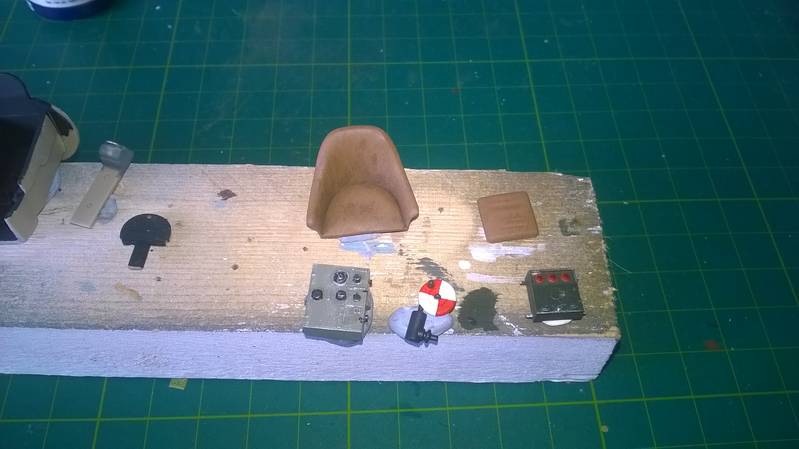
Only a short update from me.
Here are the radio sets, aerial winding gear and seats painted up. The red and white on the winder were quite tricky to mask.
I'll be away for a week on holiday but I look forward to seeing how everyone's builds have progressed when I get back.
Here are the radio sets, aerial winding gear and seats painted up. The red and white on the winder were quite tricky to mask.

I'll be away for a week on holiday but I look forward to seeing how everyone's builds have progressed when I get back.

supaderpa

Joined: March 28, 2016
KitMaker: 157 posts
AeroScale: 7 posts

Posted: Thursday, August 11, 2016 - 10:52 PM UTC
Quoted Text
Hey Bryan,
We gotta stop meeting like this! Will be nice to see this tank come together, too!
Gaz
Ah well, you know..I'm here..there.. and nowhere...
Would definitely like to try flying propeller thingies one day, they certainly do have their charm.
Posted: Saturday, August 13, 2016 - 04:41 AM UTC
Hi fellow Campaigners!
Time to call this Bf109 E4 complete.
My subject is Helmut Wick's aircraft.

By now, 109's in the north of France had their sides heavily mottled to reduce their visibility. In historical photos, Wick's aircraft looks quite dirty.

I took these photos in a mixture of natural and electric lighting.

I found some Bf109E walk-arounds at Cybermodeller and used them to help me determine my colors.

This is the most effort I've put into the aerial on a model. I will now make it a staple.

Above the fuselage cross, there is a white spot which is the insulator for the aerial lead as it passes into the fuselage. I'd never seen this detail before I looked at the walk-around of the Duxford 109.

Looking at close-ups of the Duxford 109 I also discovered that the camouflage was applied with a soft-edged technique. I had always believed that this was hard-masked.

I really enjoyed this Tamiya build! I hope that they will eventually churn out more 109 variants.

Michael, Thank you for hosting the campaign! I couldn't find a gallery in which to upload my photos.
Cheers!
Gaz
Time to call this Bf109 E4 complete.
My subject is Helmut Wick's aircraft.

By now, 109's in the north of France had their sides heavily mottled to reduce their visibility. In historical photos, Wick's aircraft looks quite dirty.

I took these photos in a mixture of natural and electric lighting.

I found some Bf109E walk-arounds at Cybermodeller and used them to help me determine my colors.

This is the most effort I've put into the aerial on a model. I will now make it a staple.

Above the fuselage cross, there is a white spot which is the insulator for the aerial lead as it passes into the fuselage. I'd never seen this detail before I looked at the walk-around of the Duxford 109.

Looking at close-ups of the Duxford 109 I also discovered that the camouflage was applied with a soft-edged technique. I had always believed that this was hard-masked.

I really enjoyed this Tamiya build! I hope that they will eventually churn out more 109 variants.

Michael, Thank you for hosting the campaign! I couldn't find a gallery in which to upload my photos.
Cheers!
Gaz
Posted: Saturday, August 13, 2016 - 07:42 AM UTC
Very nice build Gaz, and the antenna wires look great. Those little touches really add to the final result.
There is a link to the gallery in the first post of this thread.
Cheers, D
There is a link to the gallery in the first post of this thread.
Cheers, D
Posted: Saturday, August 13, 2016 - 01:10 PM UTC
Damian,
Thanks on both counts!
Gaz
Thanks on both counts!
Gaz

SaxonTheShiba

Joined: February 01, 2009
KitMaker: 1,233 posts
AeroScale: 663 posts

Posted: Saturday, August 13, 2016 - 04:55 PM UTC
Nicely done Gaz! I really like that camo scheme.
Best wishes,
Ian
Best wishes,
Ian

bomber14

Joined: February 02, 2015
KitMaker: 330 posts
AeroScale: 286 posts

Posted: Saturday, August 13, 2016 - 05:01 PM UTC
great looking build Gaz. ireally like the weathering especially around the yellow cowl. what did you use as a wash? and the insulator for the aerial lead on the fuselage. i tried using a piece of sliced rod before but didn't like the way it looked.
joe
joe
MichaelSatin


Joined: January 19, 2008
KitMaker: 3,909 posts
AeroScale: 2,904 posts

Posted: Saturday, August 13, 2016 - 06:44 PM UTC
Posted: Sunday, August 14, 2016 - 03:00 AM UTC
Ian,
Thank you very much!
Joe,
I've recently learned the value of artist oils over acrylic. On the cowling I used white artist oil paint from a tube heavily thinned with turpenoid. Then I just swirled it around with a soft brush. Because artist oils dry so slowly, it's easy to thin it more if your initial application looks too heavy. I learned this technique over at Armorama. I also used it on the propeller blades.
For the insulator I just used a little pva glue. Left overnight to dry then painted with white acrylic. Magnified, I'm sure it would look like nothing but a blob of glue. But at this scale, I'm not sure I could do much better.
Michael,
Thank you very much!
Gaz
Thank you very much!
Joe,
I've recently learned the value of artist oils over acrylic. On the cowling I used white artist oil paint from a tube heavily thinned with turpenoid. Then I just swirled it around with a soft brush. Because artist oils dry so slowly, it's easy to thin it more if your initial application looks too heavy. I learned this technique over at Armorama. I also used it on the propeller blades.
For the insulator I just used a little pva glue. Left overnight to dry then painted with white acrylic. Magnified, I'm sure it would look like nothing but a blob of glue. But at this scale, I'm not sure I could do much better.
Michael,
Thank you very much!
Gaz
Posted: Monday, August 15, 2016 - 01:00 AM UTC
Gary,
Excellent JOB! like others have said very nice camo and small details add a lot to it. The insulators look very good. I always enjoy when I see those added it makes a big difference.
Excellent JOB! like others have said very nice camo and small details add a lot to it. The insulators look very good. I always enjoy when I see those added it makes a big difference.
Posted: Monday, August 15, 2016 - 10:45 AM UTC
Jeff,
Thank you very much! What's best about stuff like that is that you don't have to pay extra and still get bonuses for the eyes.
Gaz
Thank you very much! What's best about stuff like that is that you don't have to pay extra and still get bonuses for the eyes.
Gaz
Tobar

Joined: October 17, 2002
KitMaker: 192 posts
AeroScale: 70 posts

Posted: Wednesday, August 17, 2016 - 09:52 AM UTC

One quick pic...
Here is my Wildcat with the tri-color paint scheme.. I will clean up some of the over spray, apply a clear coat, decals, seal... then try to use a 'frost' coating of flat white to age the entire model...

Posted: Wednesday, August 17, 2016 - 10:25 AM UTC
Thomas,
Looks great! Can't wait to see more.
Gaz
Looks great! Can't wait to see more.
Gaz

supaderpa

Joined: March 28, 2016
KitMaker: 157 posts
AeroScale: 7 posts

Posted: Wednesday, August 17, 2016 - 04:43 PM UTC
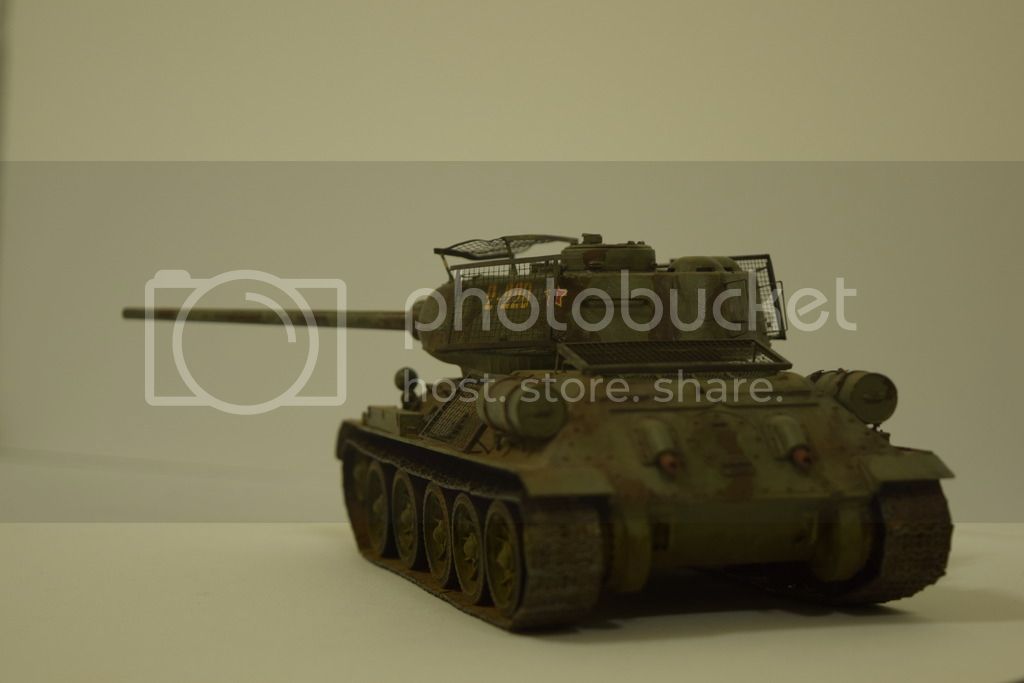
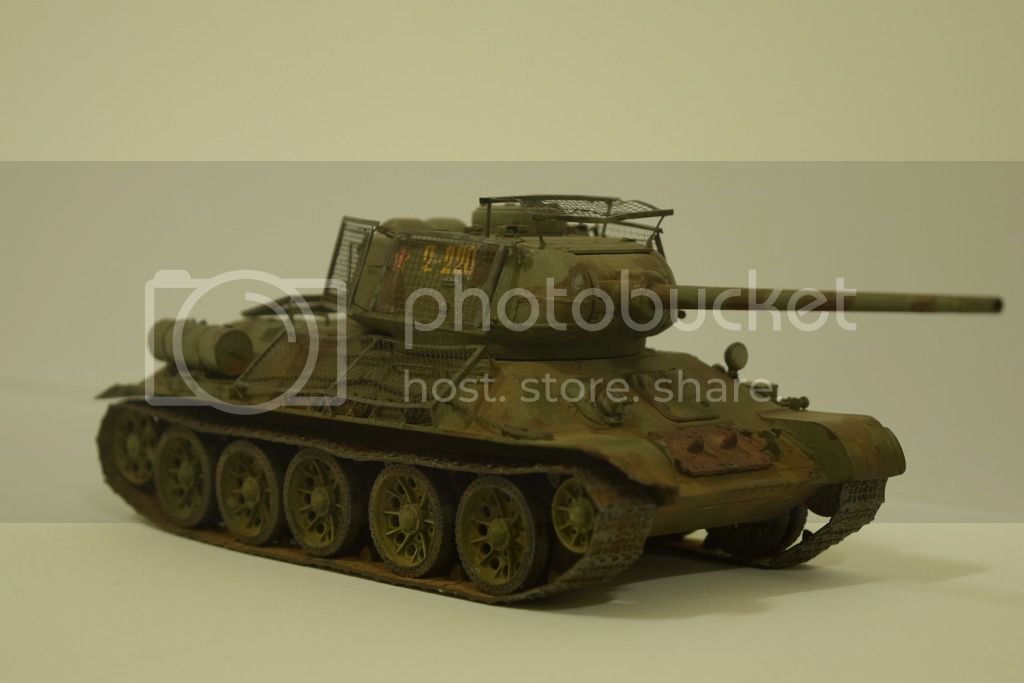
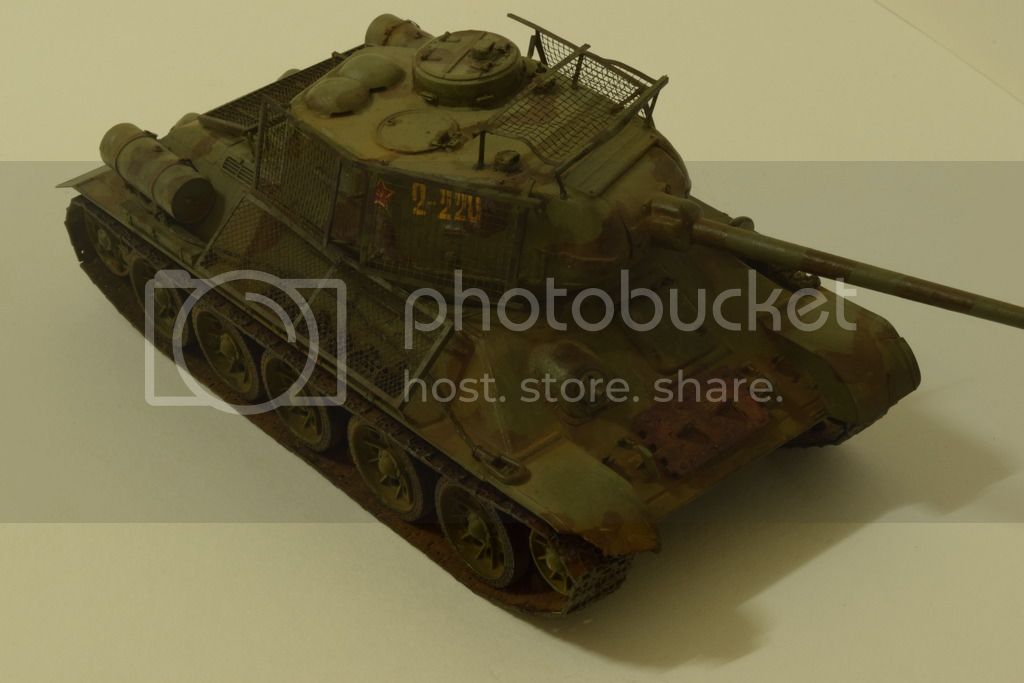
So over the weekend I completed assembly of the model and proceeded with the paintjob. Nothing complicated here, just some good ol' olive drab mixed with a bit of J.A Green and lightened a touch with some flat white. I also added some patches of red brown for a simple camo scheme. Not sure if late war T-34/85's had any such camo though the instructions did show such a scheme albeit as an "unidentified unit". Eh who cares, as long as it breaks up the monotone.
Weathering was done with thinned oils and pastels to give it a dusty and well-travelled look. Chipping is minimal and mostly concentrated around the bedspring armour.
I guess the next step would be to source some Russian figures and scratchbuild some external luggage or something.
Weathering was done with thinned oils and pastels to give it a dusty and well-travelled look. Chipping is minimal and mostly concentrated around the bedspring armour.
I guess the next step would be to source some Russian figures and scratchbuild some external luggage or something.


goodn8

Joined: October 12, 2008
KitMaker: 709 posts
AeroScale: 651 posts

Posted: Wednesday, August 17, 2016 - 08:18 PM UTC
WOW!
Awsome work and action here, looks like a really fun campaign.
Ian: phantastic looking Phantom - love those birds!
Gaz: Beautiful 109 alongside your main challenge (the fantastic B-29). Always love the Me`s.
Bryan: great looking (..uuhm, how do you call these tubed kind of vehicles? ) whatever!
Top build, paint job & weathering - very well done!
Thomas: good progress on that Wildcat, wait to see more.
Since this a funny campaign with a wide diversity of nice kits and fantastic builds I cannot resist to paticipate. So I singned up and will take (another) Phantom F-4F (1/72 Revell) which I chose for the Phantom-Campg. but it's only about 5-10% started. It's actual unassembled.

Thomas
Awsome work and action here, looks like a really fun campaign.
Ian: phantastic looking Phantom - love those birds!
Gaz: Beautiful 109 alongside your main challenge (the fantastic B-29). Always love the Me`s.
Bryan: great looking (..uuhm, how do you call these tubed kind of vehicles?
 ) whatever!
Top build, paint job & weathering - very well done!

Thomas: good progress on that Wildcat, wait to see more.
Since this a funny campaign with a wide diversity of nice kits and fantastic builds I cannot resist to paticipate. So I singned up and will take (another) Phantom F-4F (1/72 Revell) which I chose for the Phantom-Campg. but it's only about 5-10% started. It's actual unassembled.

Thomas

Posted: Wednesday, August 17, 2016 - 11:13 PM UTC
Bryan,
Your T-34 looks great! Love the dusty look. Track sag is good, too.
Gaz
Your T-34 looks great! Love the dusty look. Track sag is good, too.
Gaz

LinusB

Joined: March 21, 2016
KitMaker: 247 posts
AeroScale: 105 posts

Posted: Thursday, August 18, 2016 - 08:43 AM UTC
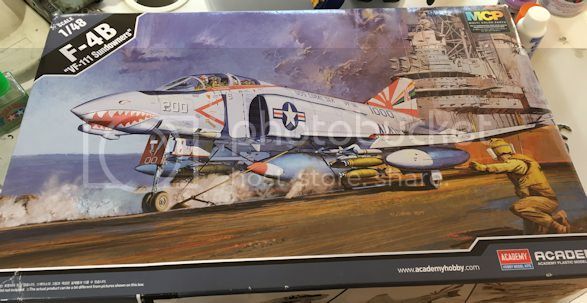
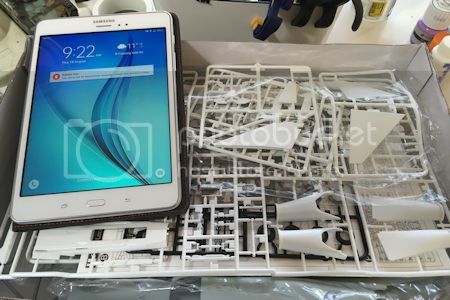
Am starting on my F4-B


 |


