HI Steve,
I've been checking in occasionally to watch your progress. Your details look great.
For me, every kit has an expiration date or an I've-had-enough point. Adding or repairing detail is all well and good until I've reached either of the two points. It's probably the same with all but the most dedicated to a perfect finish.
Best of luck on this one. I was really happy to cross the finish line with mine.
Gaz
Cold War (1950-1974)
Discuss the aircraft modeling subjects during the Cold War period.
Discuss the aircraft modeling subjects during the Cold War period.
Hosted by Tim Hatton
Best Starfighter Ever?
Posted: Monday, October 15, 2018 - 08:52 AM UTC
Posted: Monday, October 15, 2018 - 09:24 PM UTC
Steve,
They say a picture is worth a thousand words and it certainly saves you from having to describe that array of pipework you have started in the wheel bay. Looks great so far.
cheers
Michael
They say a picture is worth a thousand words and it certainly saves you from having to describe that array of pipework you have started in the wheel bay. Looks great so far.
cheers
Michael
Joel_W

Joined: December 04, 2010
KitMaker: 11,666 posts
AeroScale: 7,410 posts

Posted: Tuesday, October 16, 2018 - 06:35 AM UTC
Steve,
The copper lines in the wheel well looks great. But they seam to end all of a sudden. Is there a bulkhead or a closed gear door there to fool our eye?
Joel
The copper lines in the wheel well looks great. But they seam to end all of a sudden. Is there a bulkhead or a closed gear door there to fool our eye?
Joel

SteveAndrews

Joined: August 16, 2010
KitMaker: 693 posts
AeroScale: 551 posts

Posted: Tuesday, October 16, 2018 - 07:49 AM UTC
Hi guys
Great to have you looking in.
Gaz, nice to see you, and yes I know what you mean about motivation. Mine's on an up right now, so all that fiddling about is rewarding. I wonder if I'll be saying that next week???
Michael, too true! And, thanks for the encouragement.
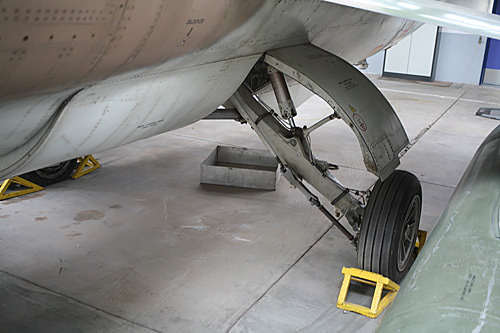
Joel, yes there's a pair of big doors that are almost fully closed when the Starfighter is on the ground so I'm stopping where my little test fit tells me the darkness will be. I might add a few sketchy details just in case but there's nothing really visible. You can see the barely open forward door here:
Thanks again for dropping in guys, and happy modelling.
Steve.
Great to have you looking in.
Gaz, nice to see you, and yes I know what you mean about motivation. Mine's on an up right now, so all that fiddling about is rewarding. I wonder if I'll be saying that next week???
Michael, too true! And, thanks for the encouragement.
Joel, yes there's a pair of big doors that are almost fully closed when the Starfighter is on the ground so I'm stopping where my little test fit tells me the darkness will be. I might add a few sketchy details just in case but there's nothing really visible. You can see the barely open forward door here:

Thanks again for dropping in guys, and happy modelling.
Steve.

SteveAndrews

Joined: August 16, 2010
KitMaker: 693 posts
AeroScale: 551 posts

Posted: Monday, October 29, 2018 - 09:53 AM UTC
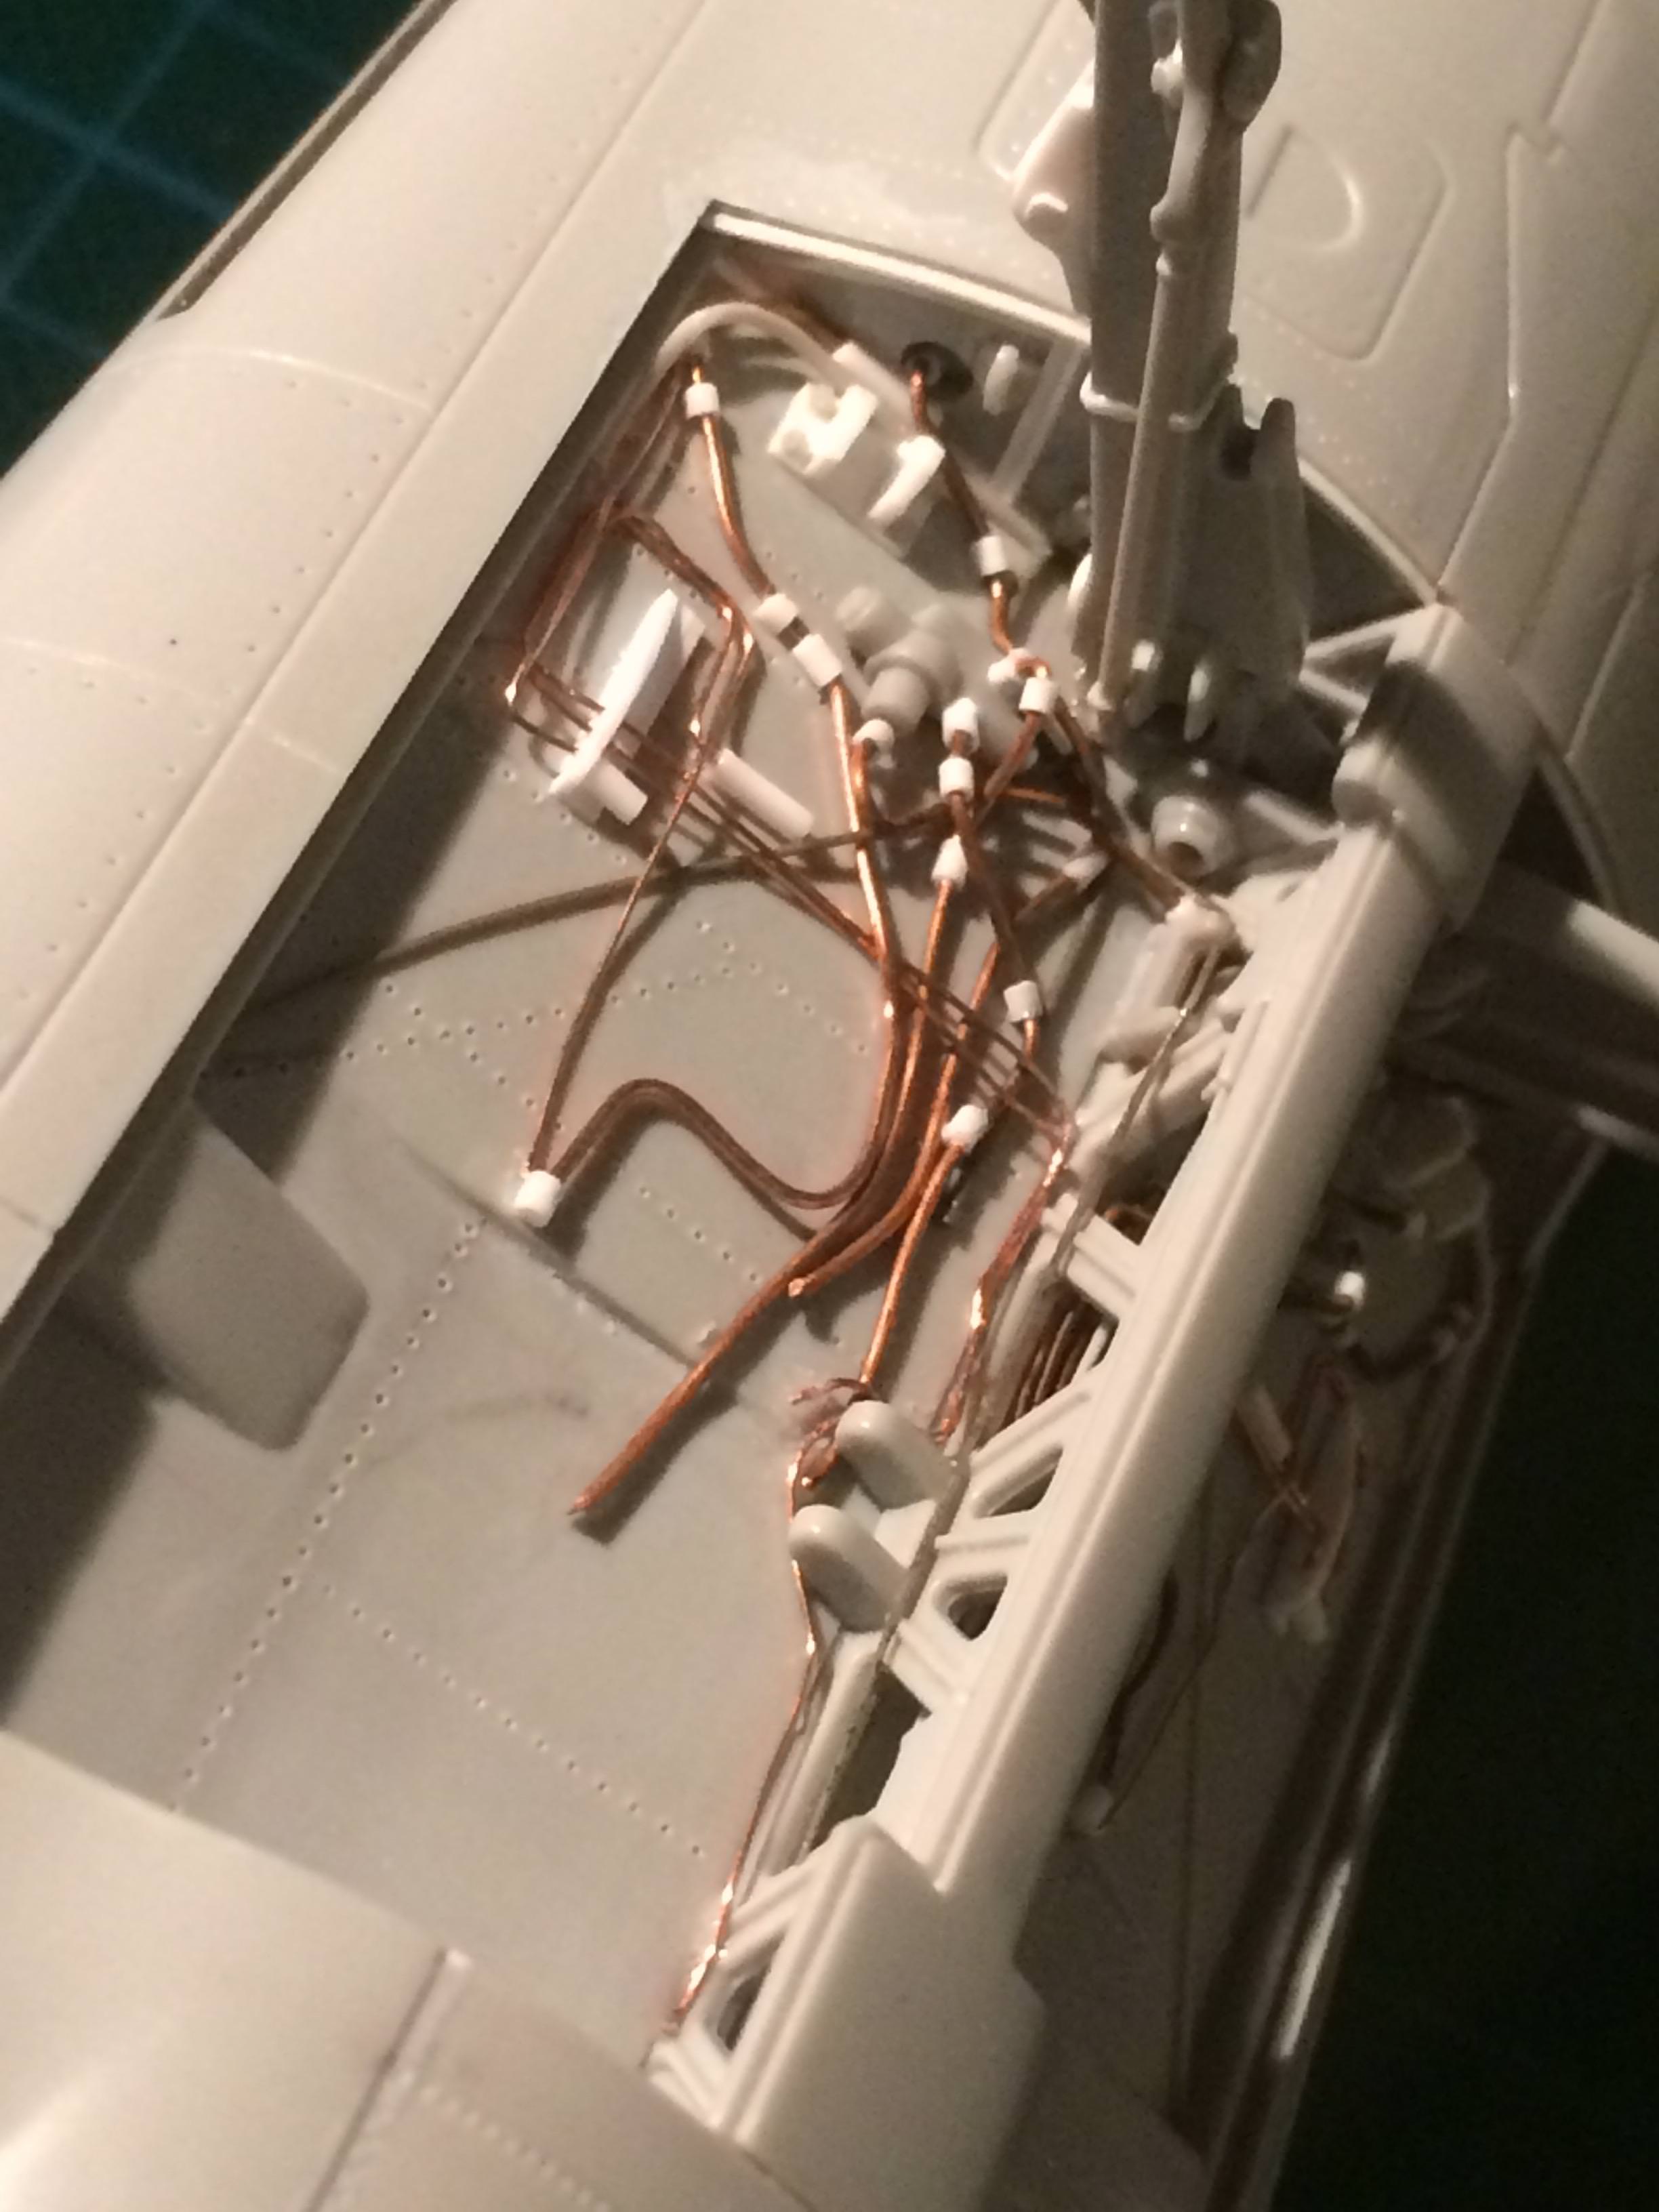
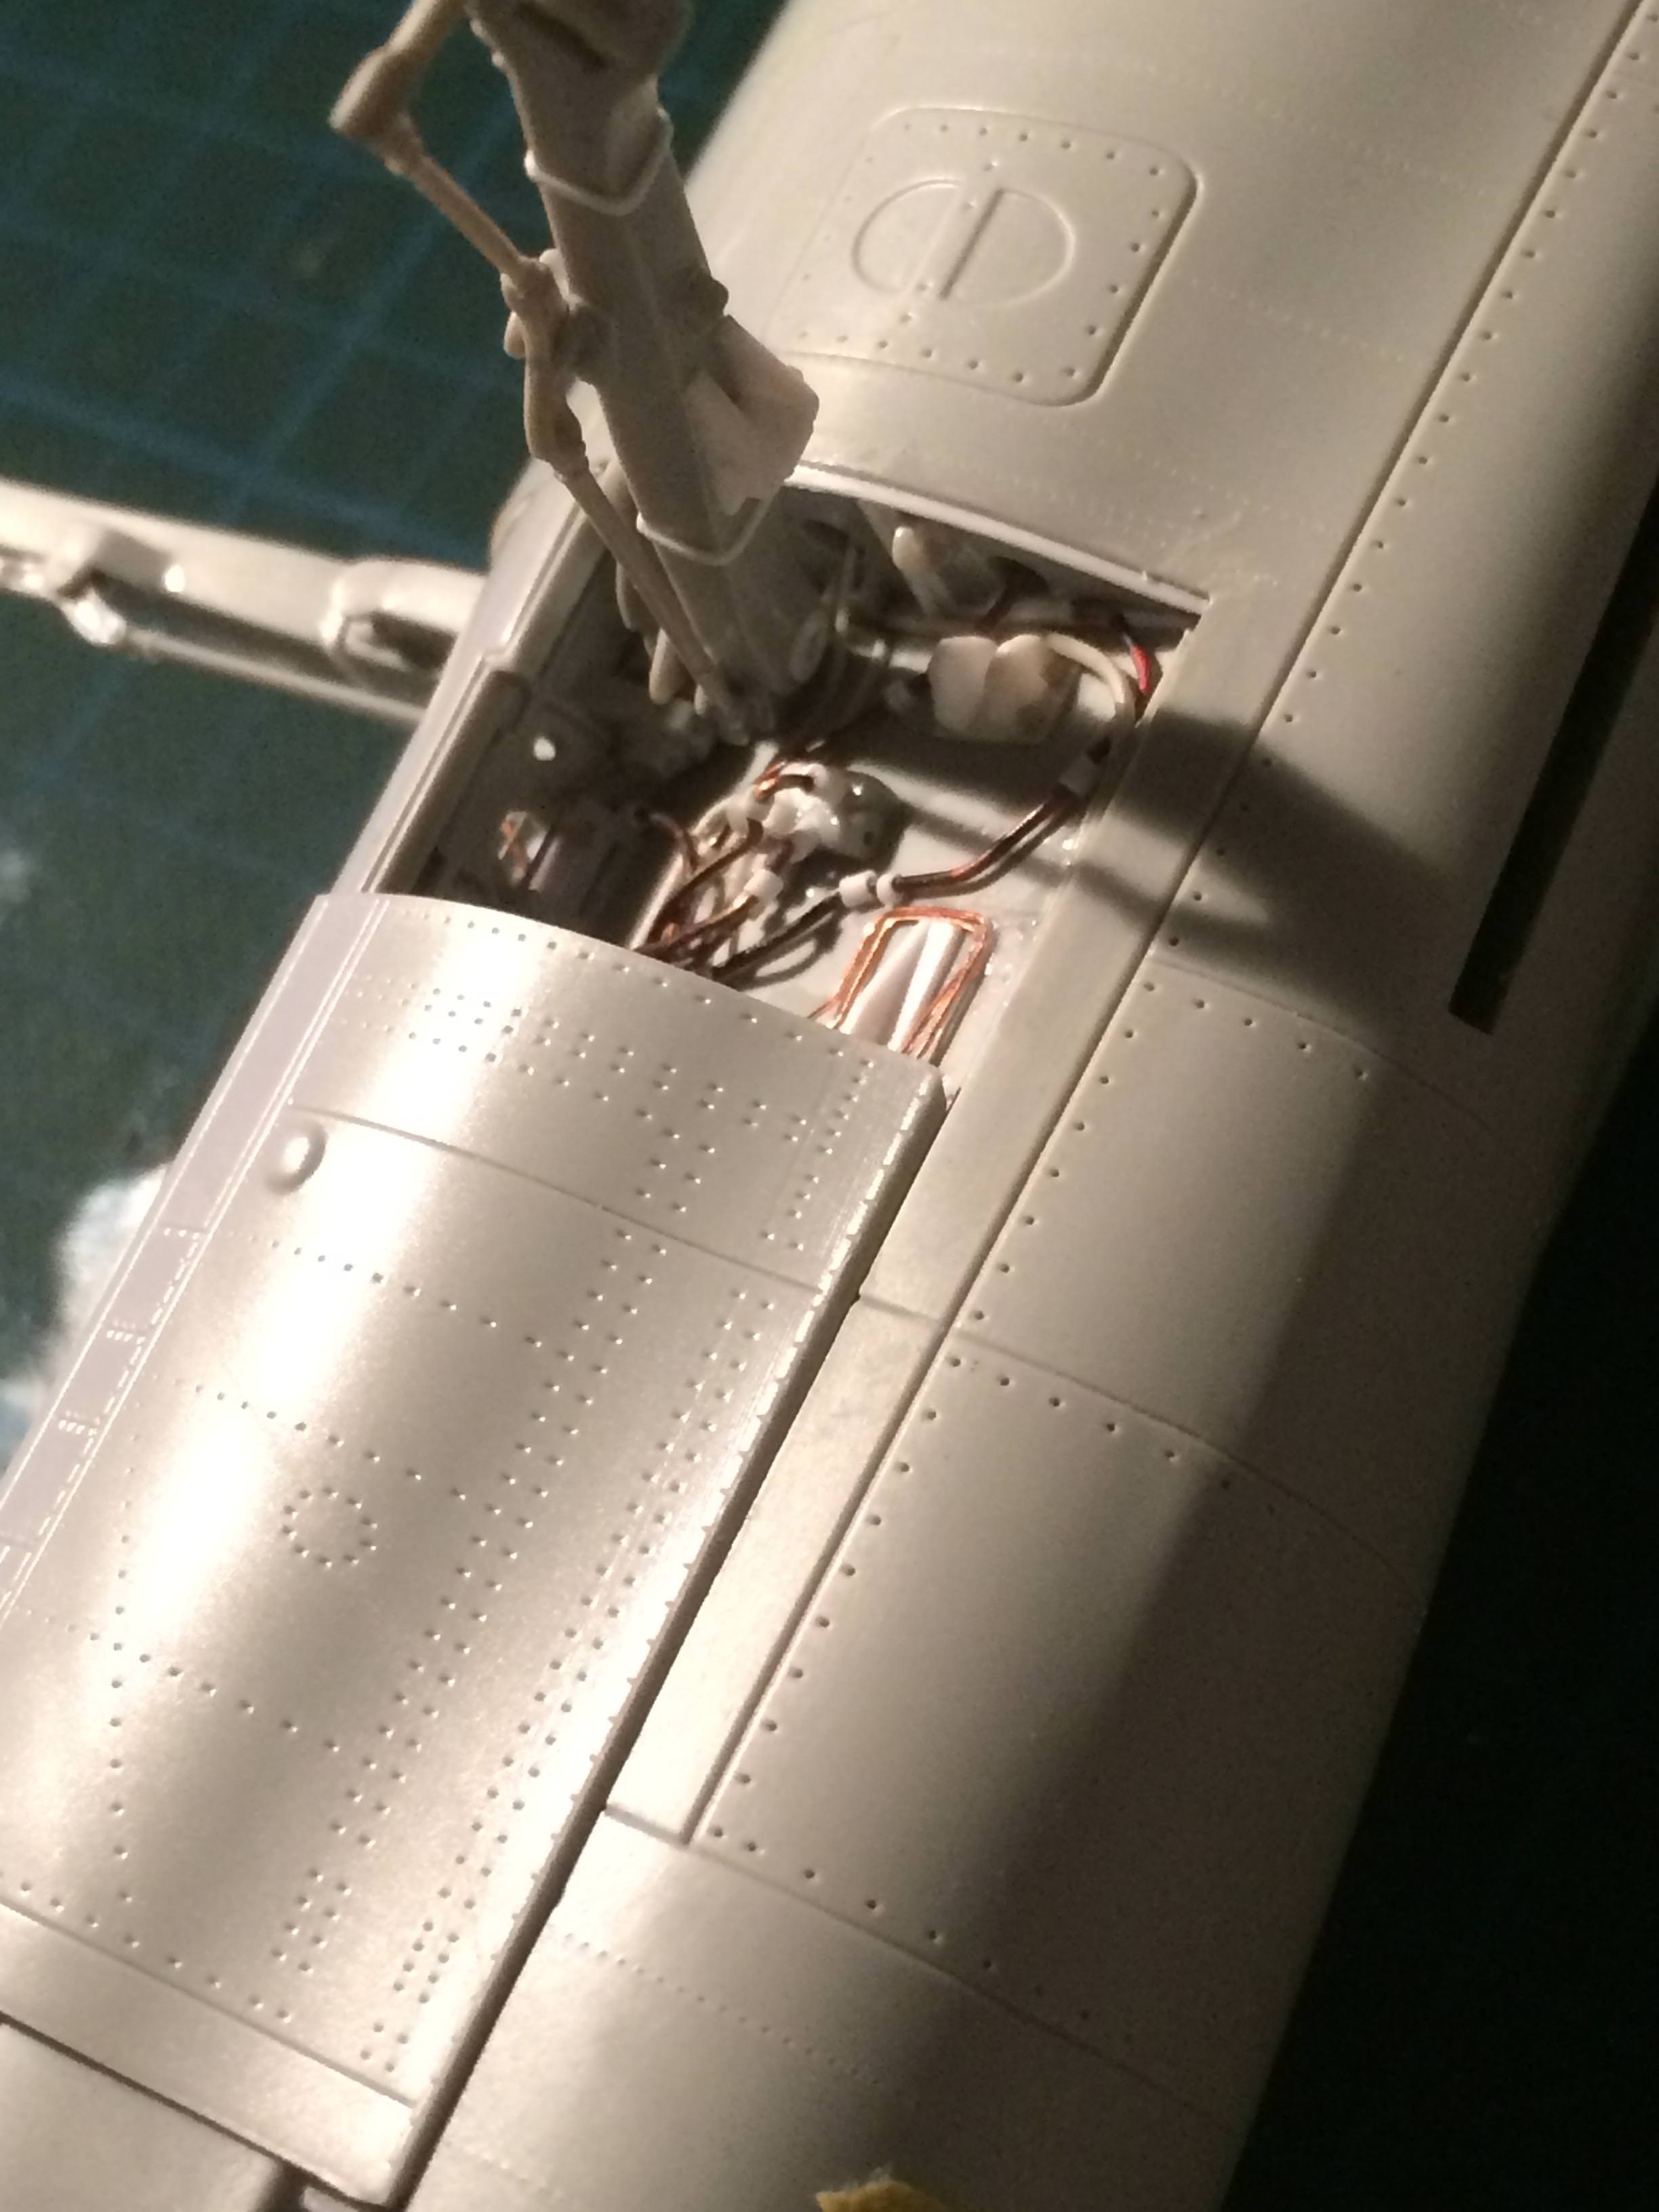
And, there are more pipes and cables going in. I dry fitted the forward doors again to check the amount thatís visible and I think Iíll be OK. Nearly finished!
Happy modelling guys.


Happy modelling guys.

RhinoSpit

Joined: September 22, 2016
KitMaker: 224 posts
AeroScale: 191 posts

Posted: Monday, October 29, 2018 - 08:12 PM UTC
wow, your work is mind-blowing !

SteveAndrews

Joined: August 16, 2010
KitMaker: 693 posts
AeroScale: 551 posts

Posted: Monday, October 29, 2018 - 11:25 PM UTC
Merci beaucoup Franck. It's a labour of love, and sometimes perseverance.
Thanks for looking in :-)
Thanks for looking in :-)
Joel_W

Joined: December 04, 2010
KitMaker: 11,666 posts
AeroScale: 7,410 posts

Posted: Tuesday, October 30, 2018 - 08:22 AM UTC
Steve,
the amount of detail you're adding to the wheel well really is making a huge difference.
Joel
the amount of detail you're adding to the wheel well really is making a huge difference.
Joel

Scrodes

Joined: July 22, 2012
KitMaker: 771 posts
AeroScale: 763 posts

Posted: Tuesday, October 30, 2018 - 11:06 AM UTC
I have access to a pair of Starfighters, so shoot me a PM if you need any photos taken.
Posted: Tuesday, October 30, 2018 - 01:00 PM UTC
Brilliant!

SteveAndrews

Joined: August 16, 2010
KitMaker: 693 posts
AeroScale: 551 posts

Posted: Wednesday, October 31, 2018 - 05:22 AM UTC
Hi guys,
Thanks very much for the continuing encouragement.
Matt, I have a vision of two F-104's parked on your drive. I could do with as much reference as I can get so I will pm.
Joel and Gaz, you are gentlemen.
Happy modelling folks.
Thanks very much for the continuing encouragement.
Matt, I have a vision of two F-104's parked on your drive. I could do with as much reference as I can get so I will pm.
Joel and Gaz, you are gentlemen.
Happy modelling folks.

Scrodes

Joined: July 22, 2012
KitMaker: 771 posts
AeroScale: 763 posts

Posted: Thursday, November 01, 2018 - 10:39 AM UTC
Sorry Steve
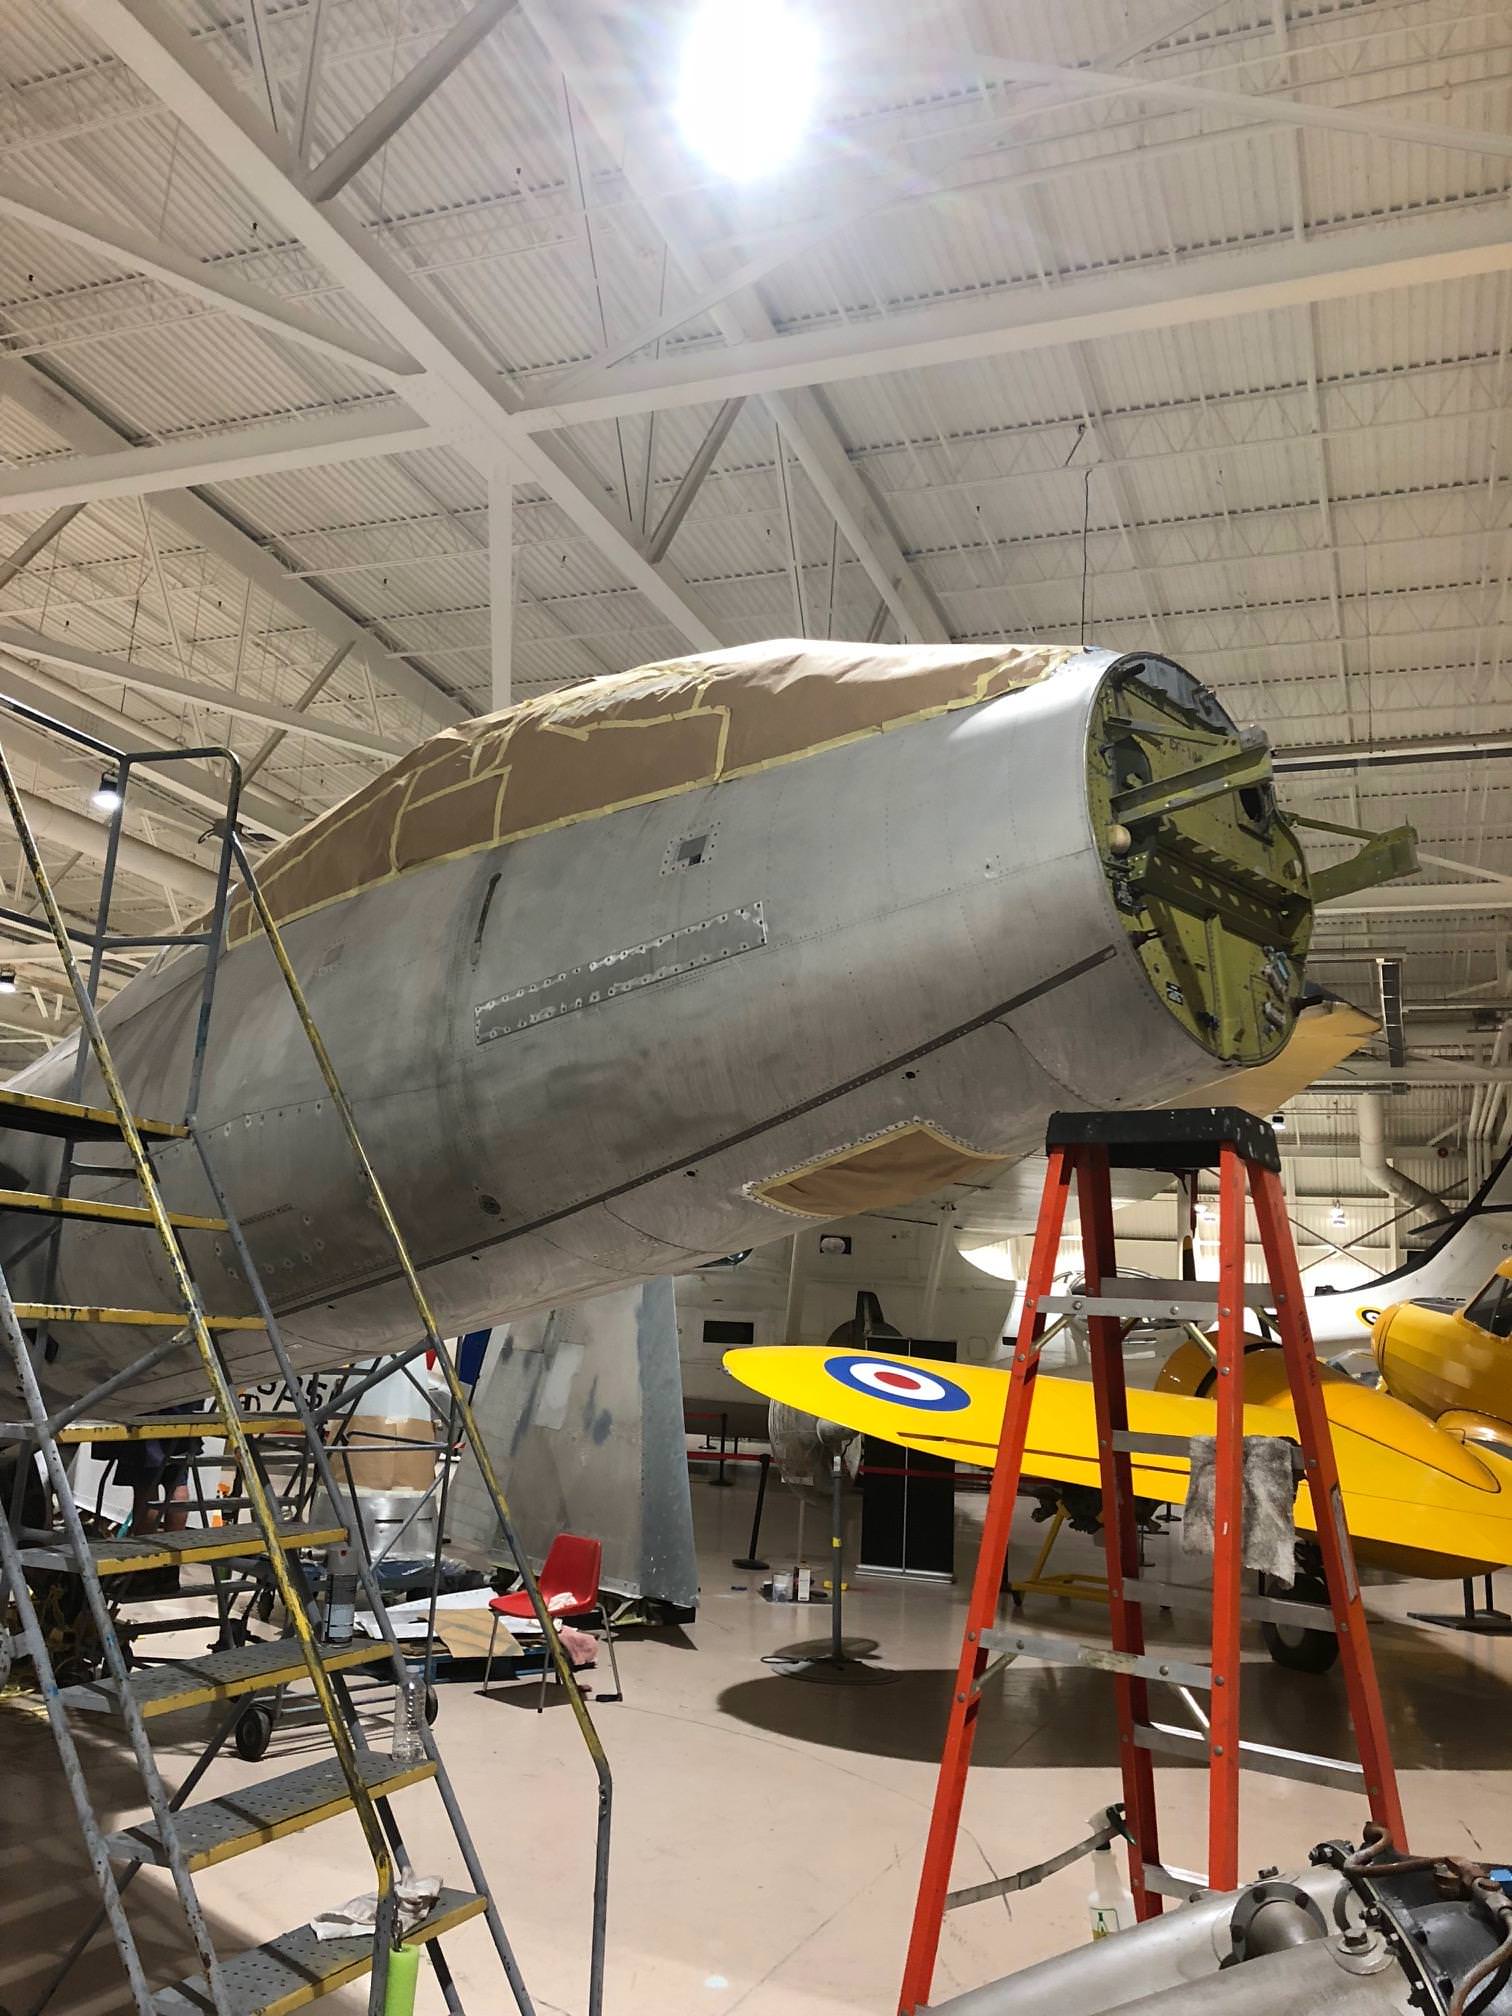
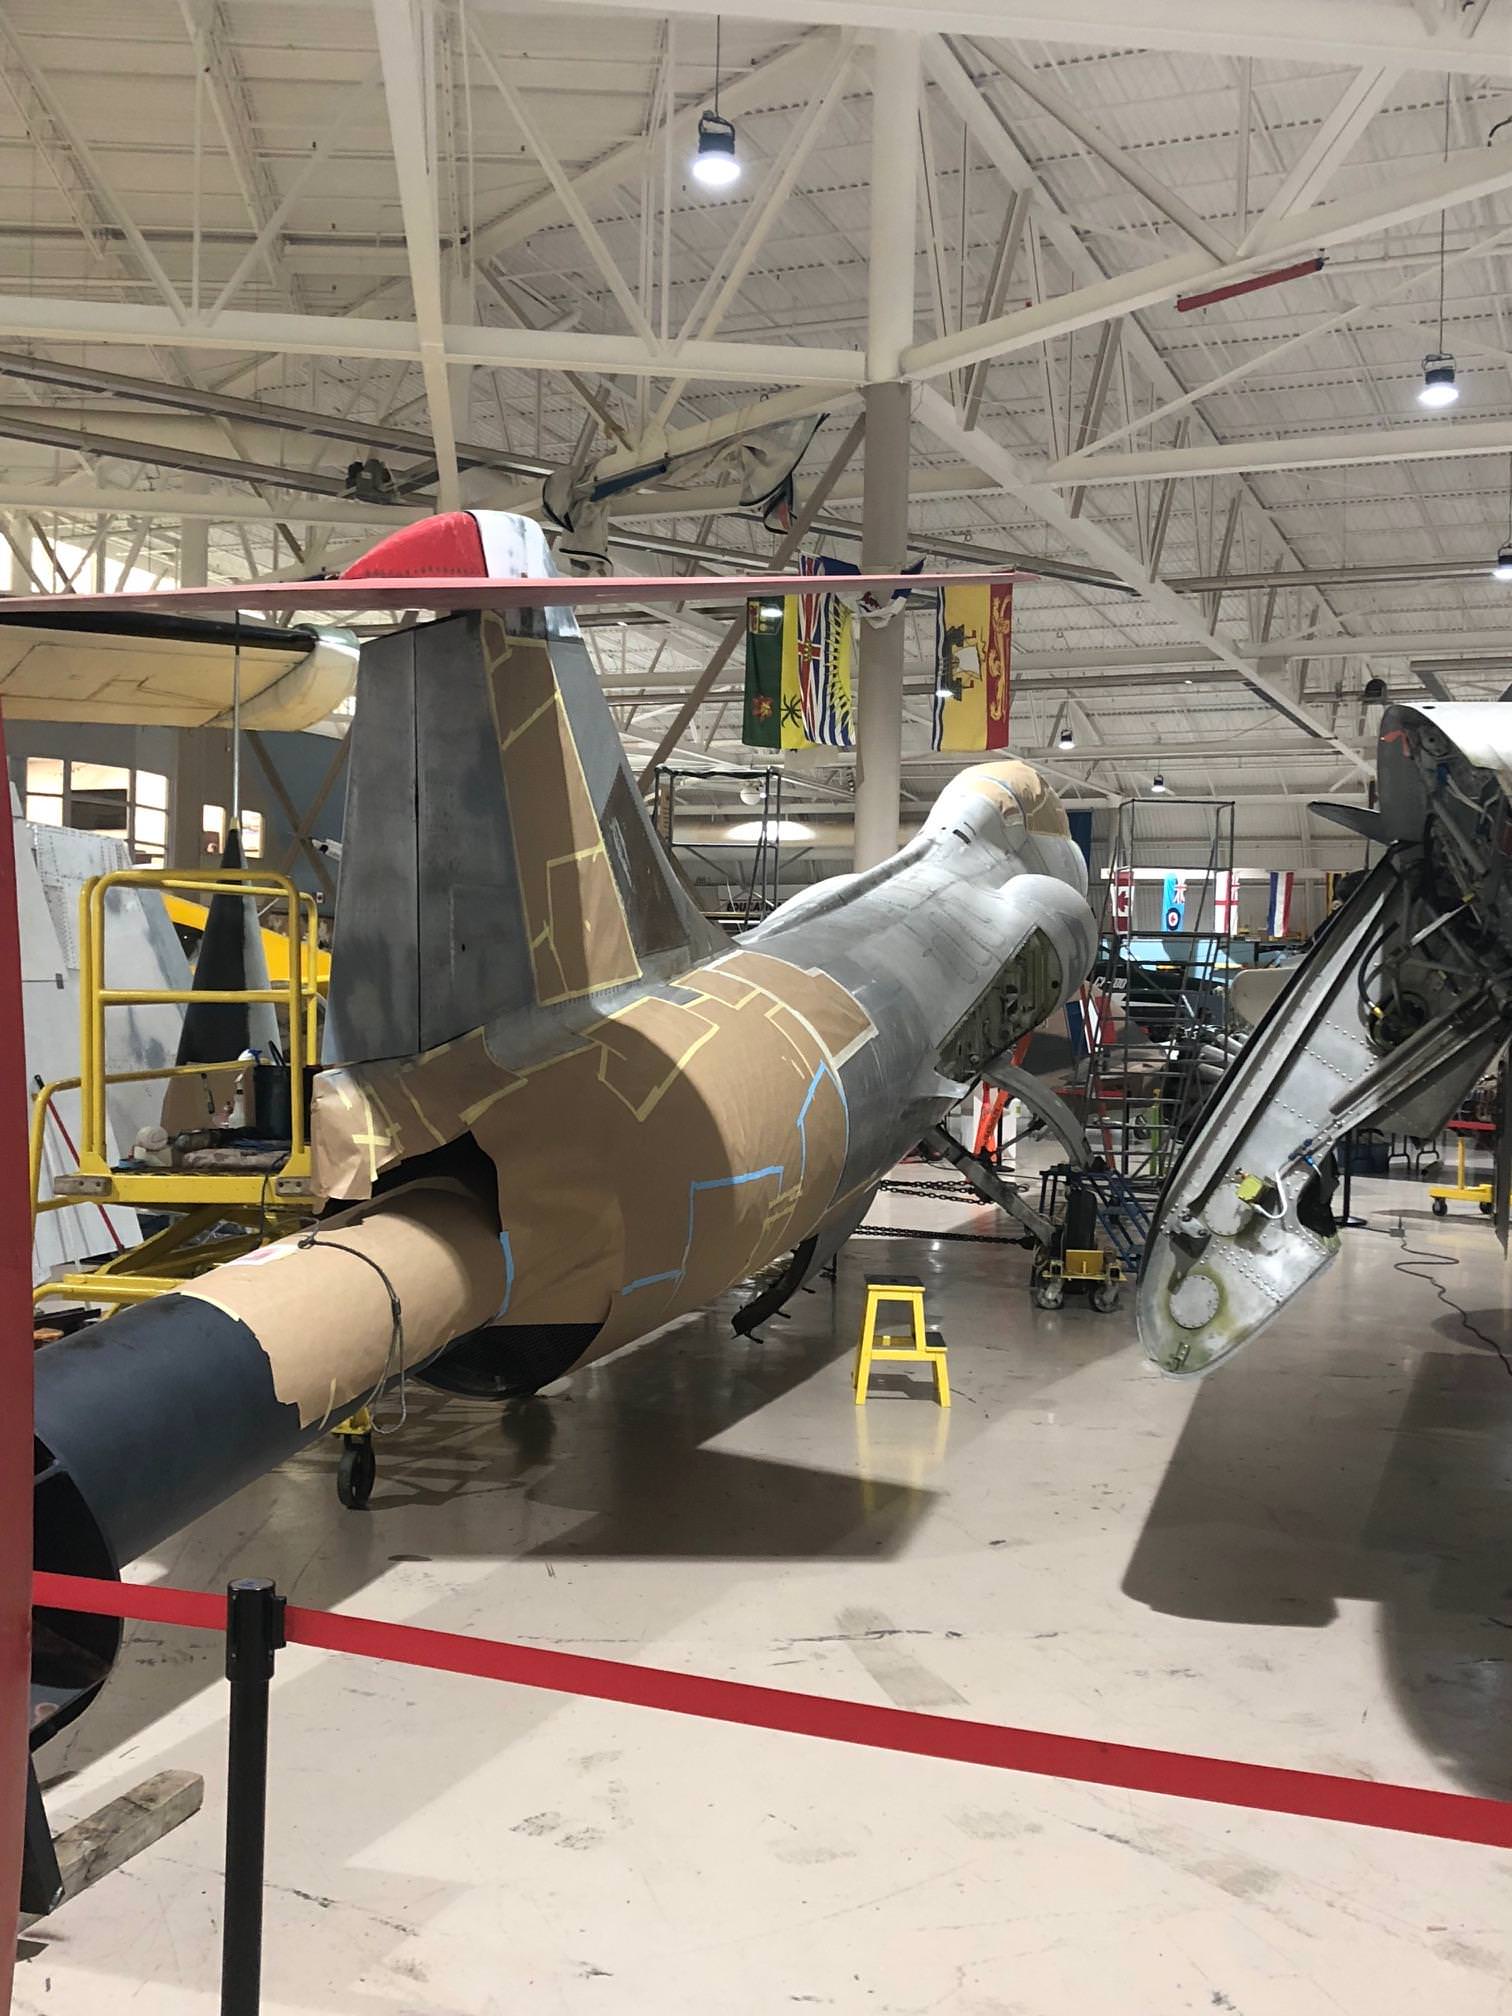
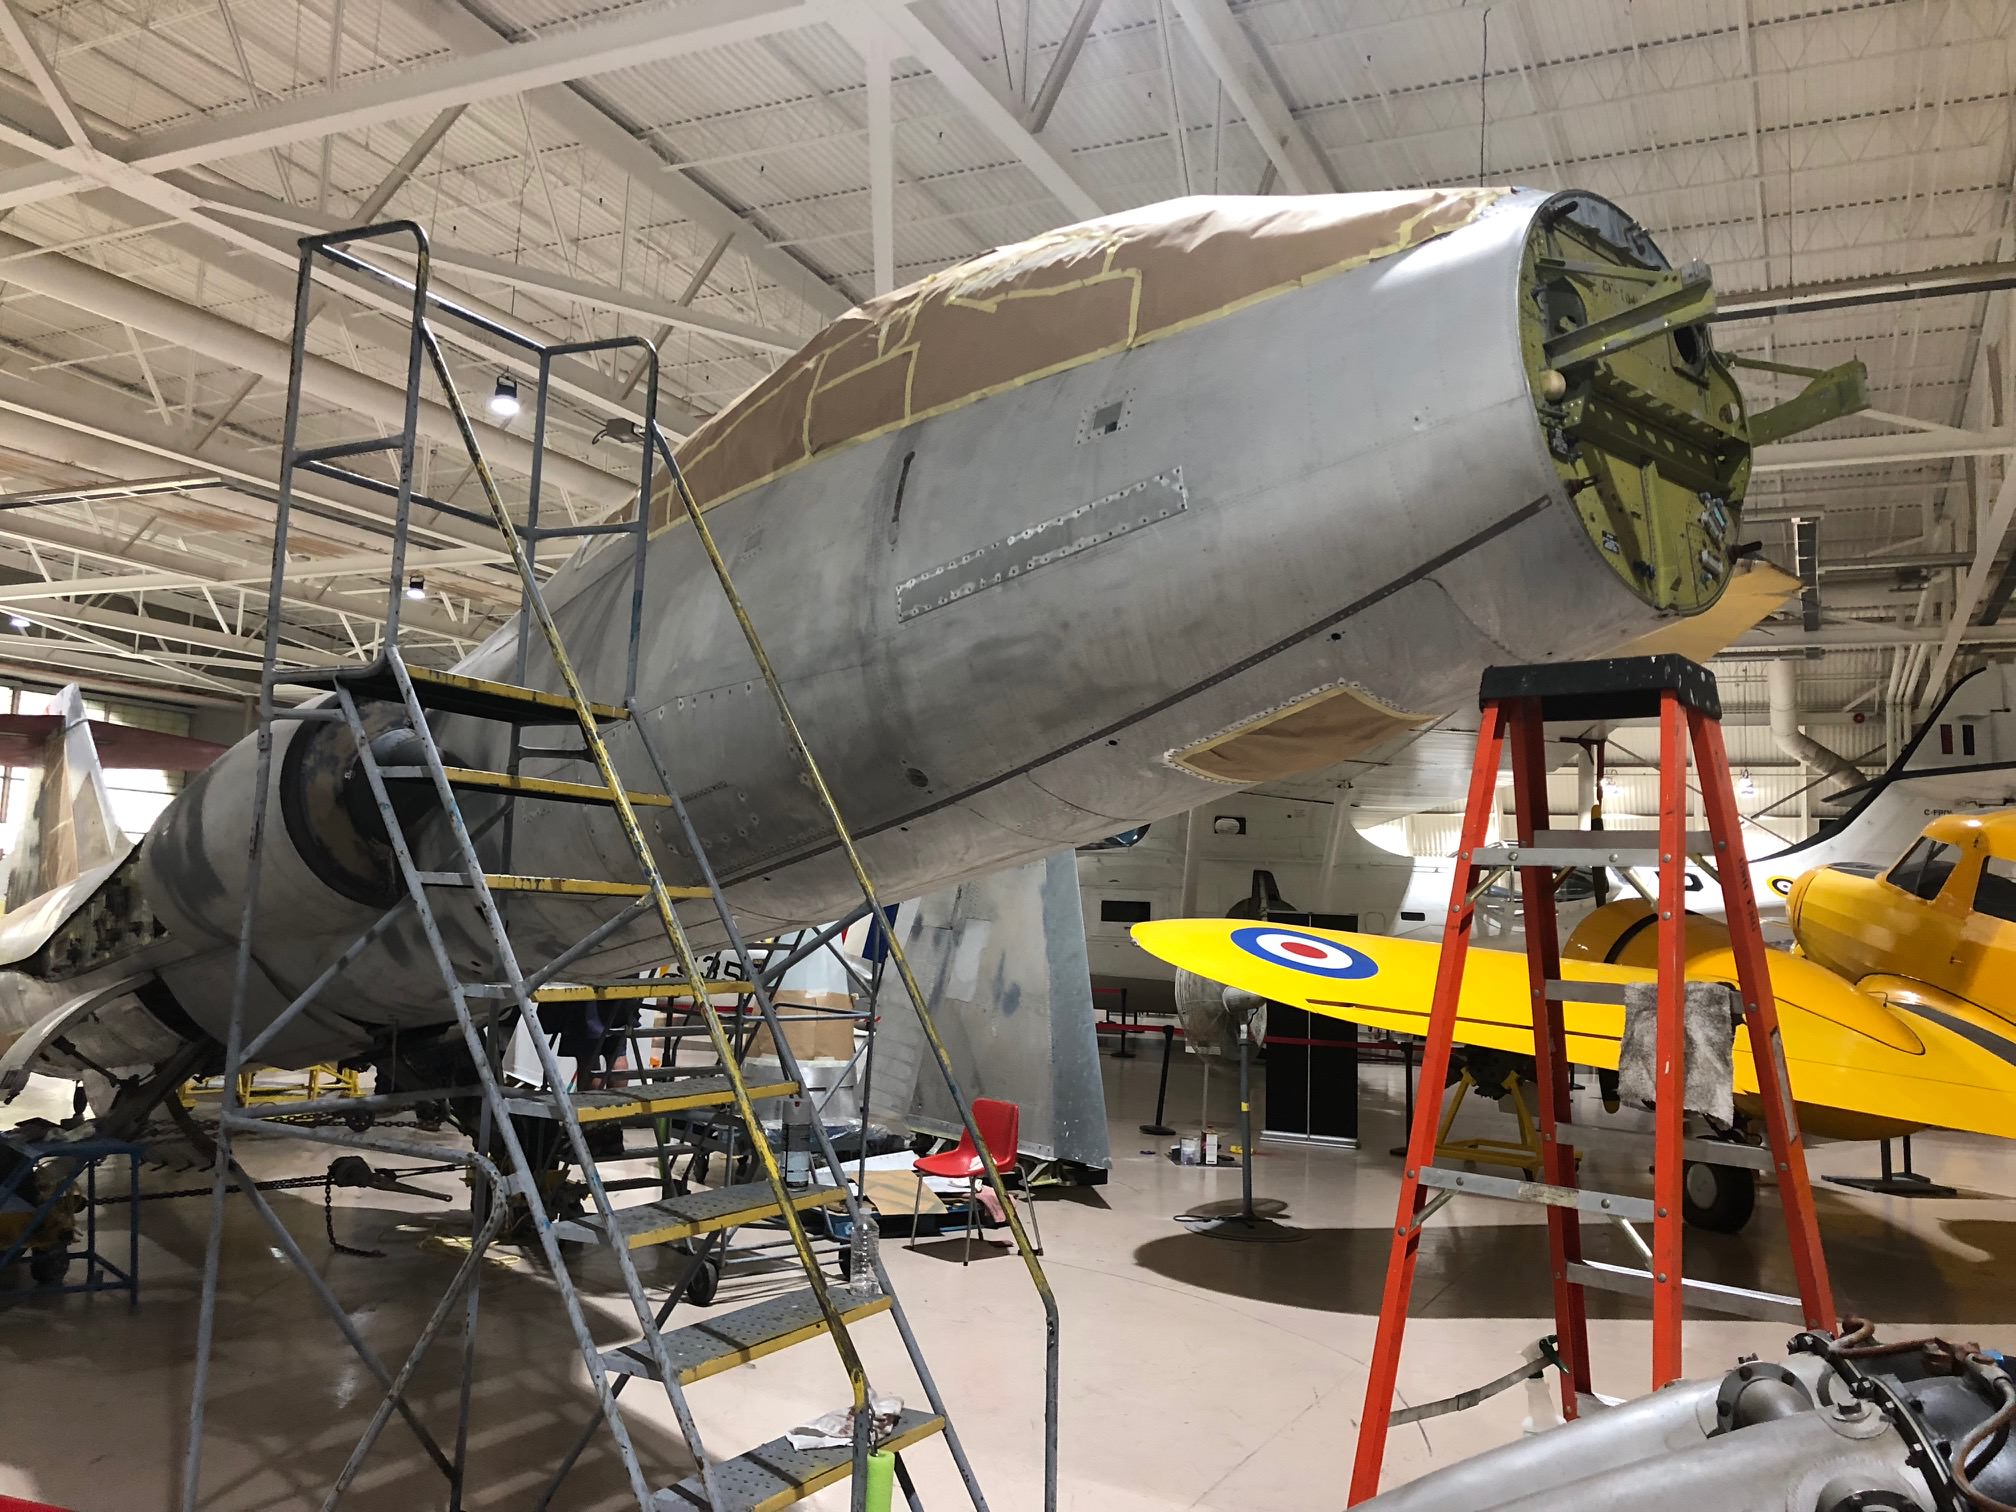
Wouldn't you know it, THE day I offered to grab photos for you the museum finally masked (specifically the areas you needed photos you needed) off for paint, after the project being neglected for most of this year!!!! Arrrgh. They were literally finishing up the air brake masking as I signed in.
I'll go back to get the nosewheel photos on the other one soon - it's outside and it was POURING rain today.


SteveAndrews

Joined: August 16, 2010
KitMaker: 693 posts
AeroScale: 551 posts

Posted: Friday, November 02, 2018 - 02:05 AM UTC
Hi Matt
No worries at all. Thanks for trying and also thanks for the great shots you posted. Even covered up and ready for paint she's a lovely bird.
Have a great day,
Steve.
No worries at all. Thanks for trying and also thanks for the great shots you posted. Even covered up and ready for paint she's a lovely bird.
Have a great day,
Steve.

Scrodes

Joined: July 22, 2012
KitMaker: 771 posts
AeroScale: 763 posts

Posted: Sunday, November 04, 2018 - 10:47 AM UTC
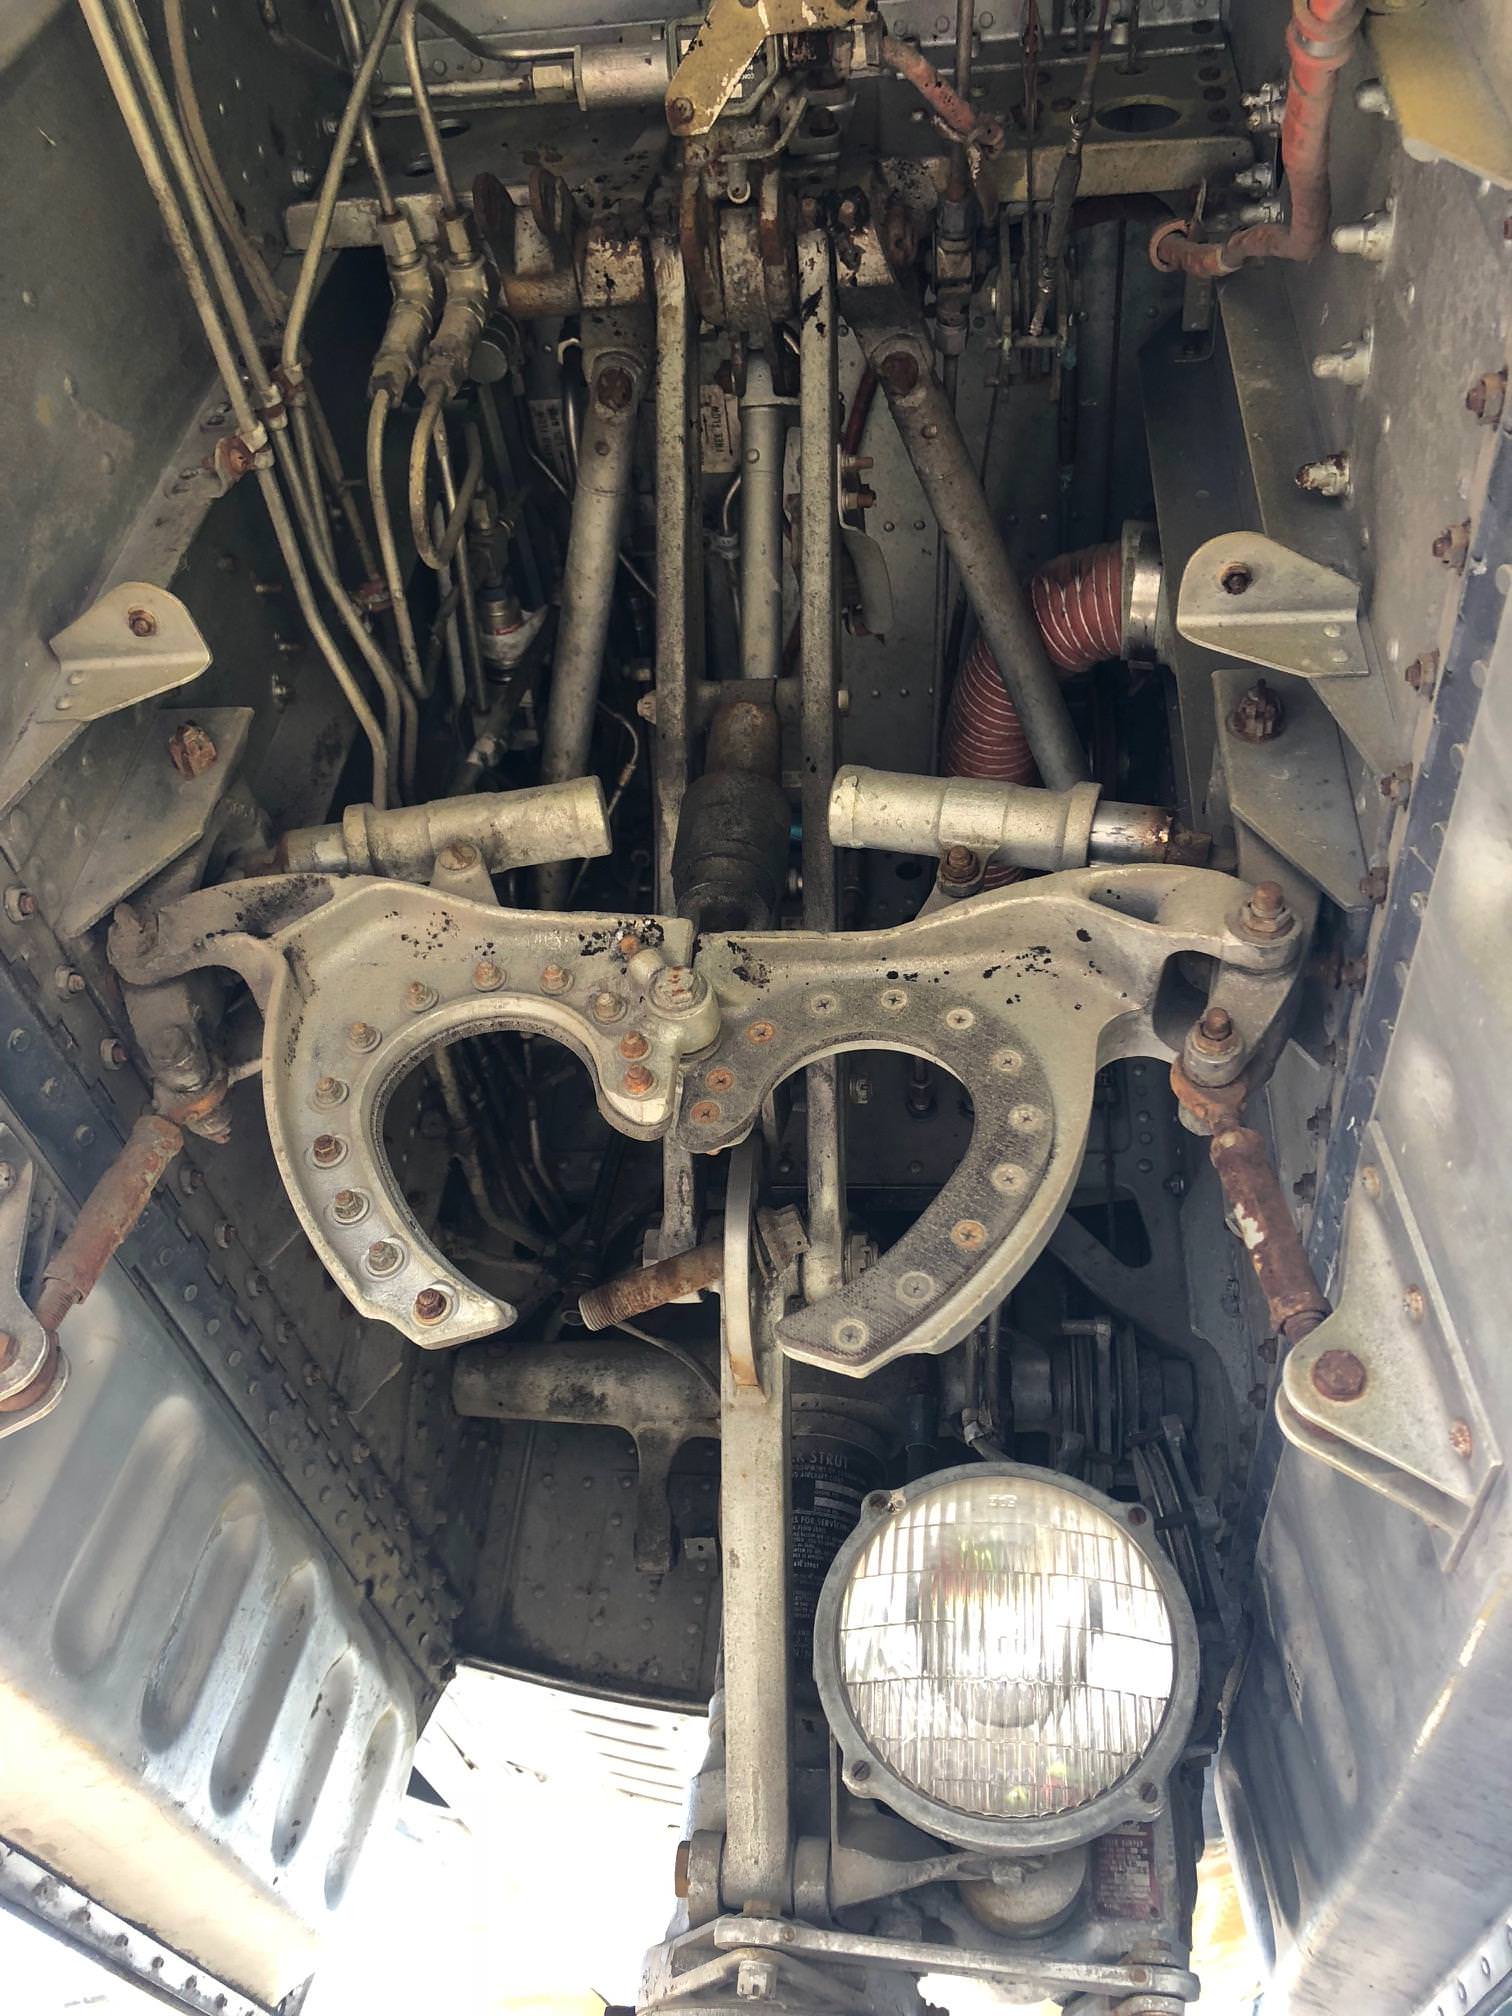
Round two - I don't mind crawling around on my back when it's not pouring rain out.
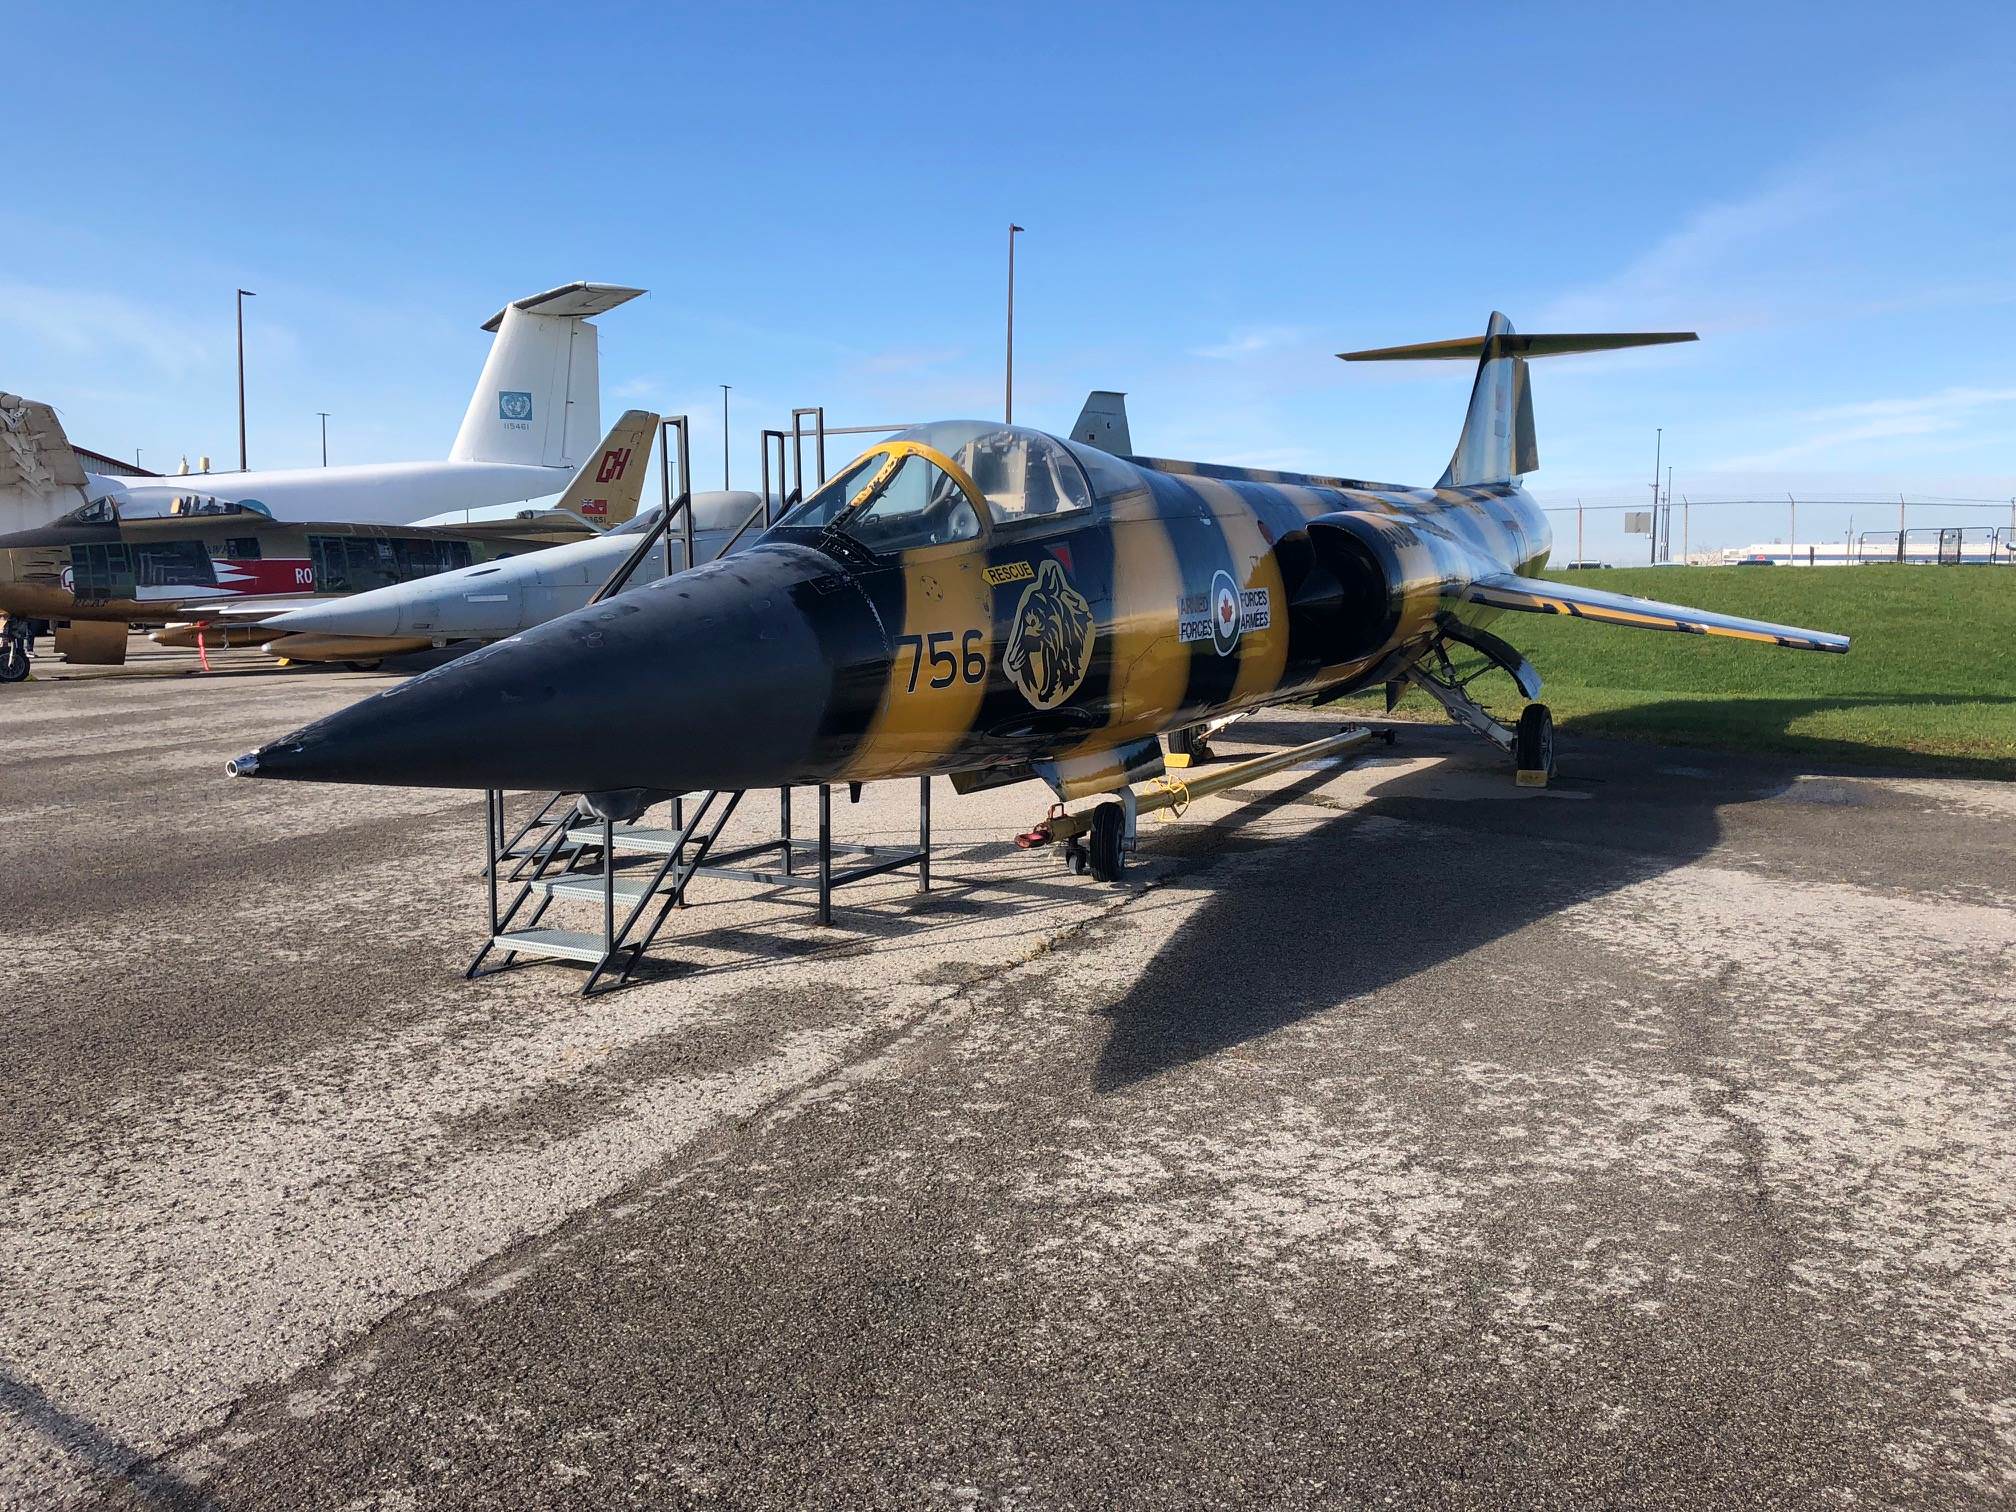
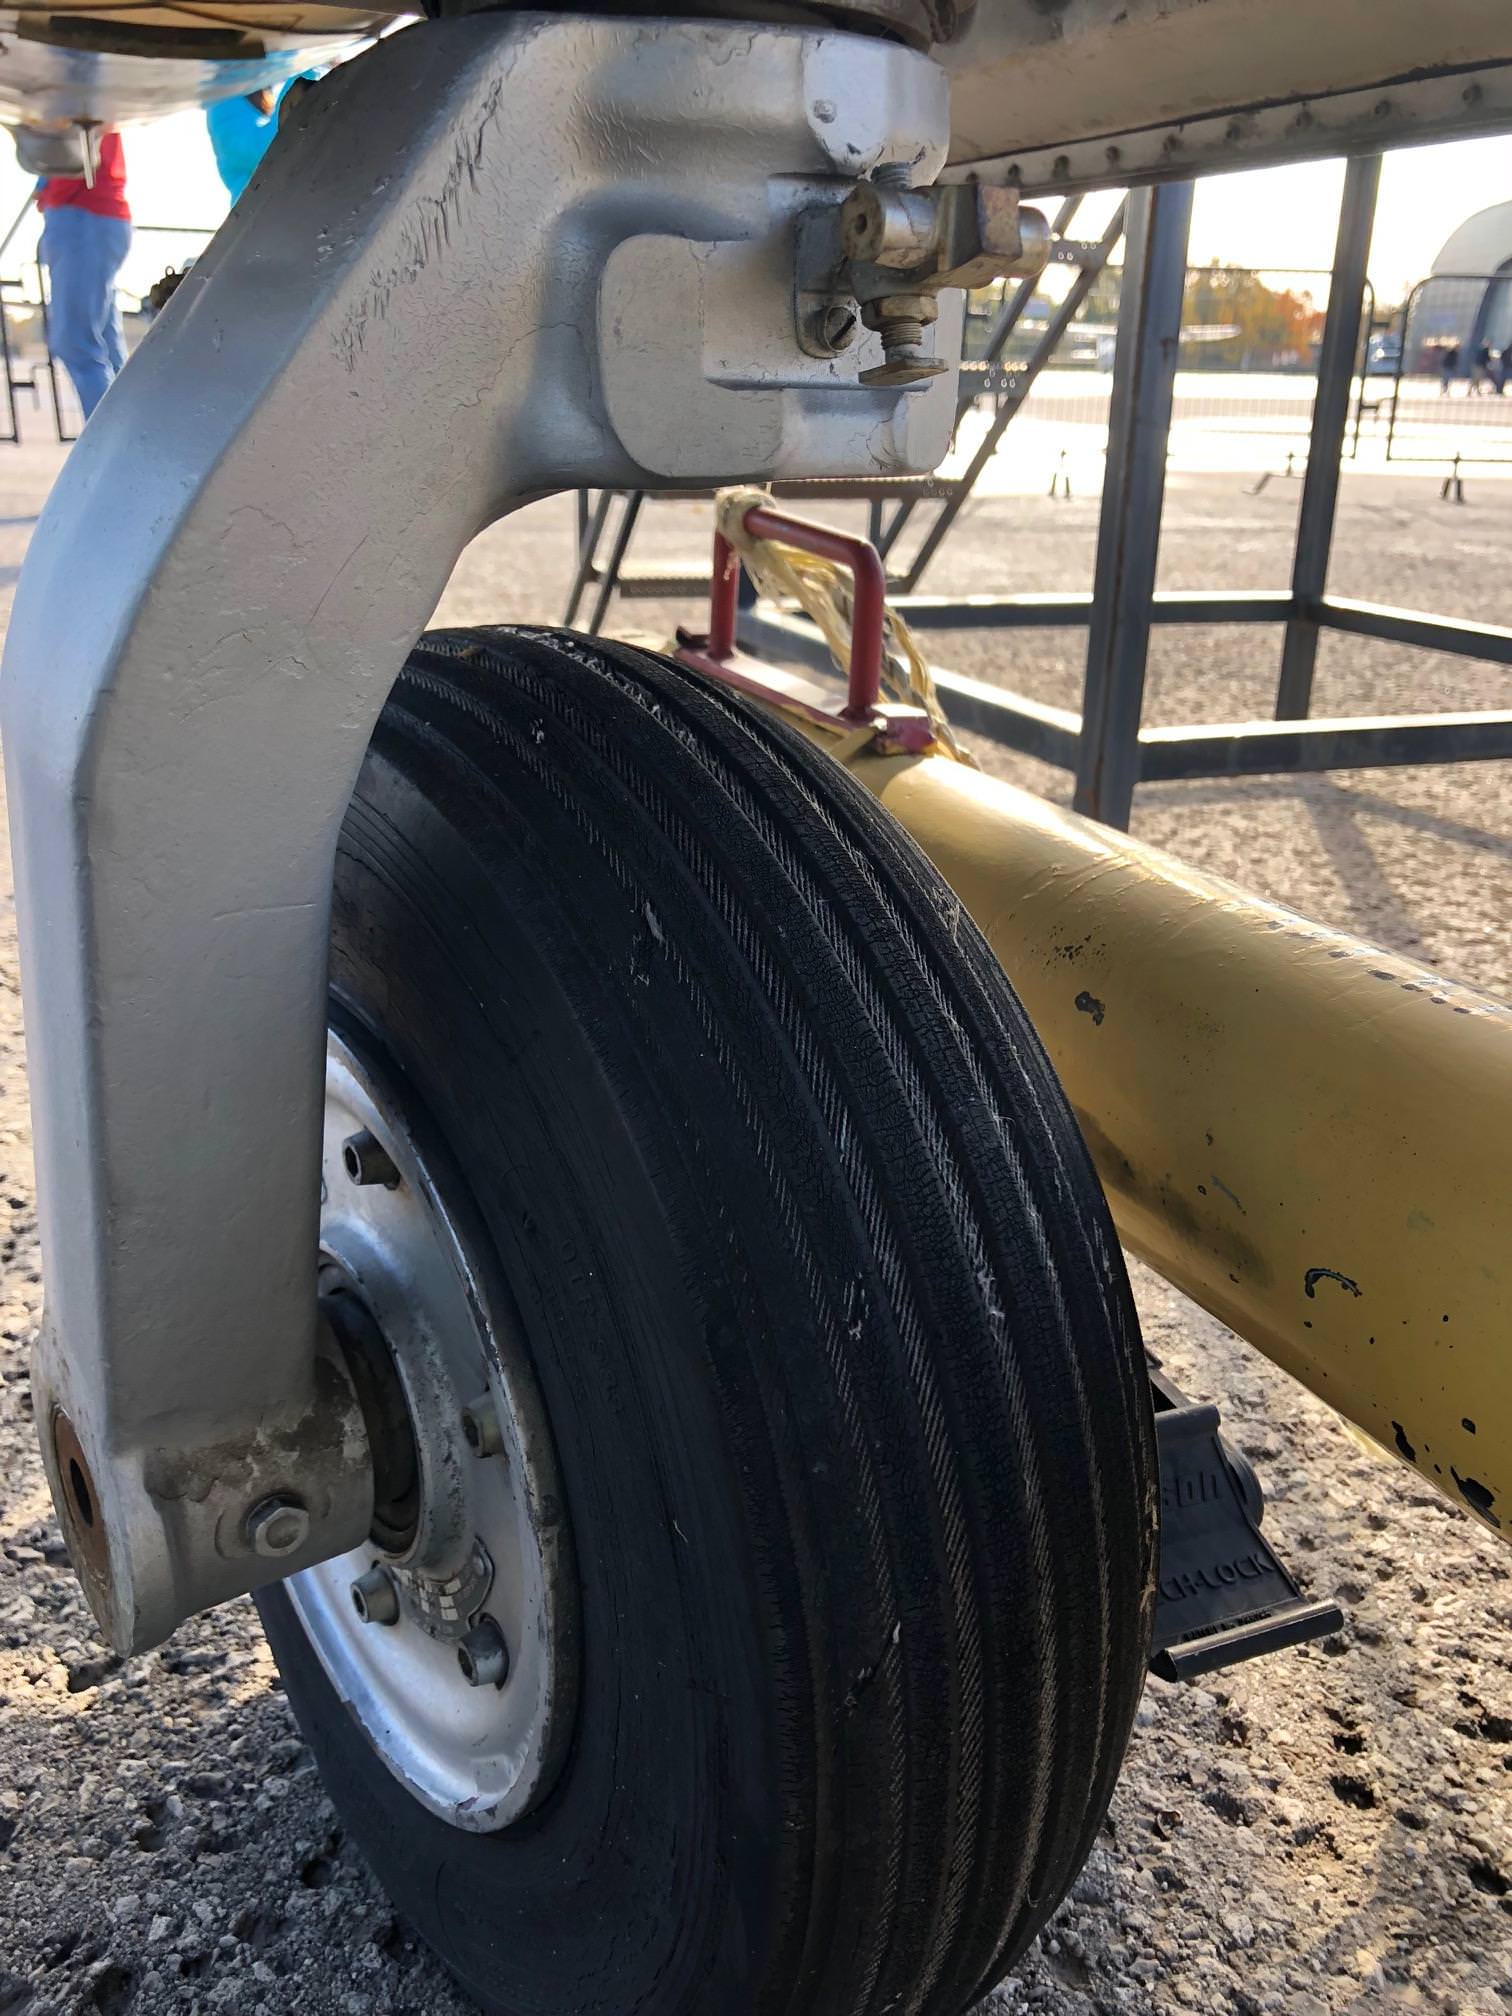
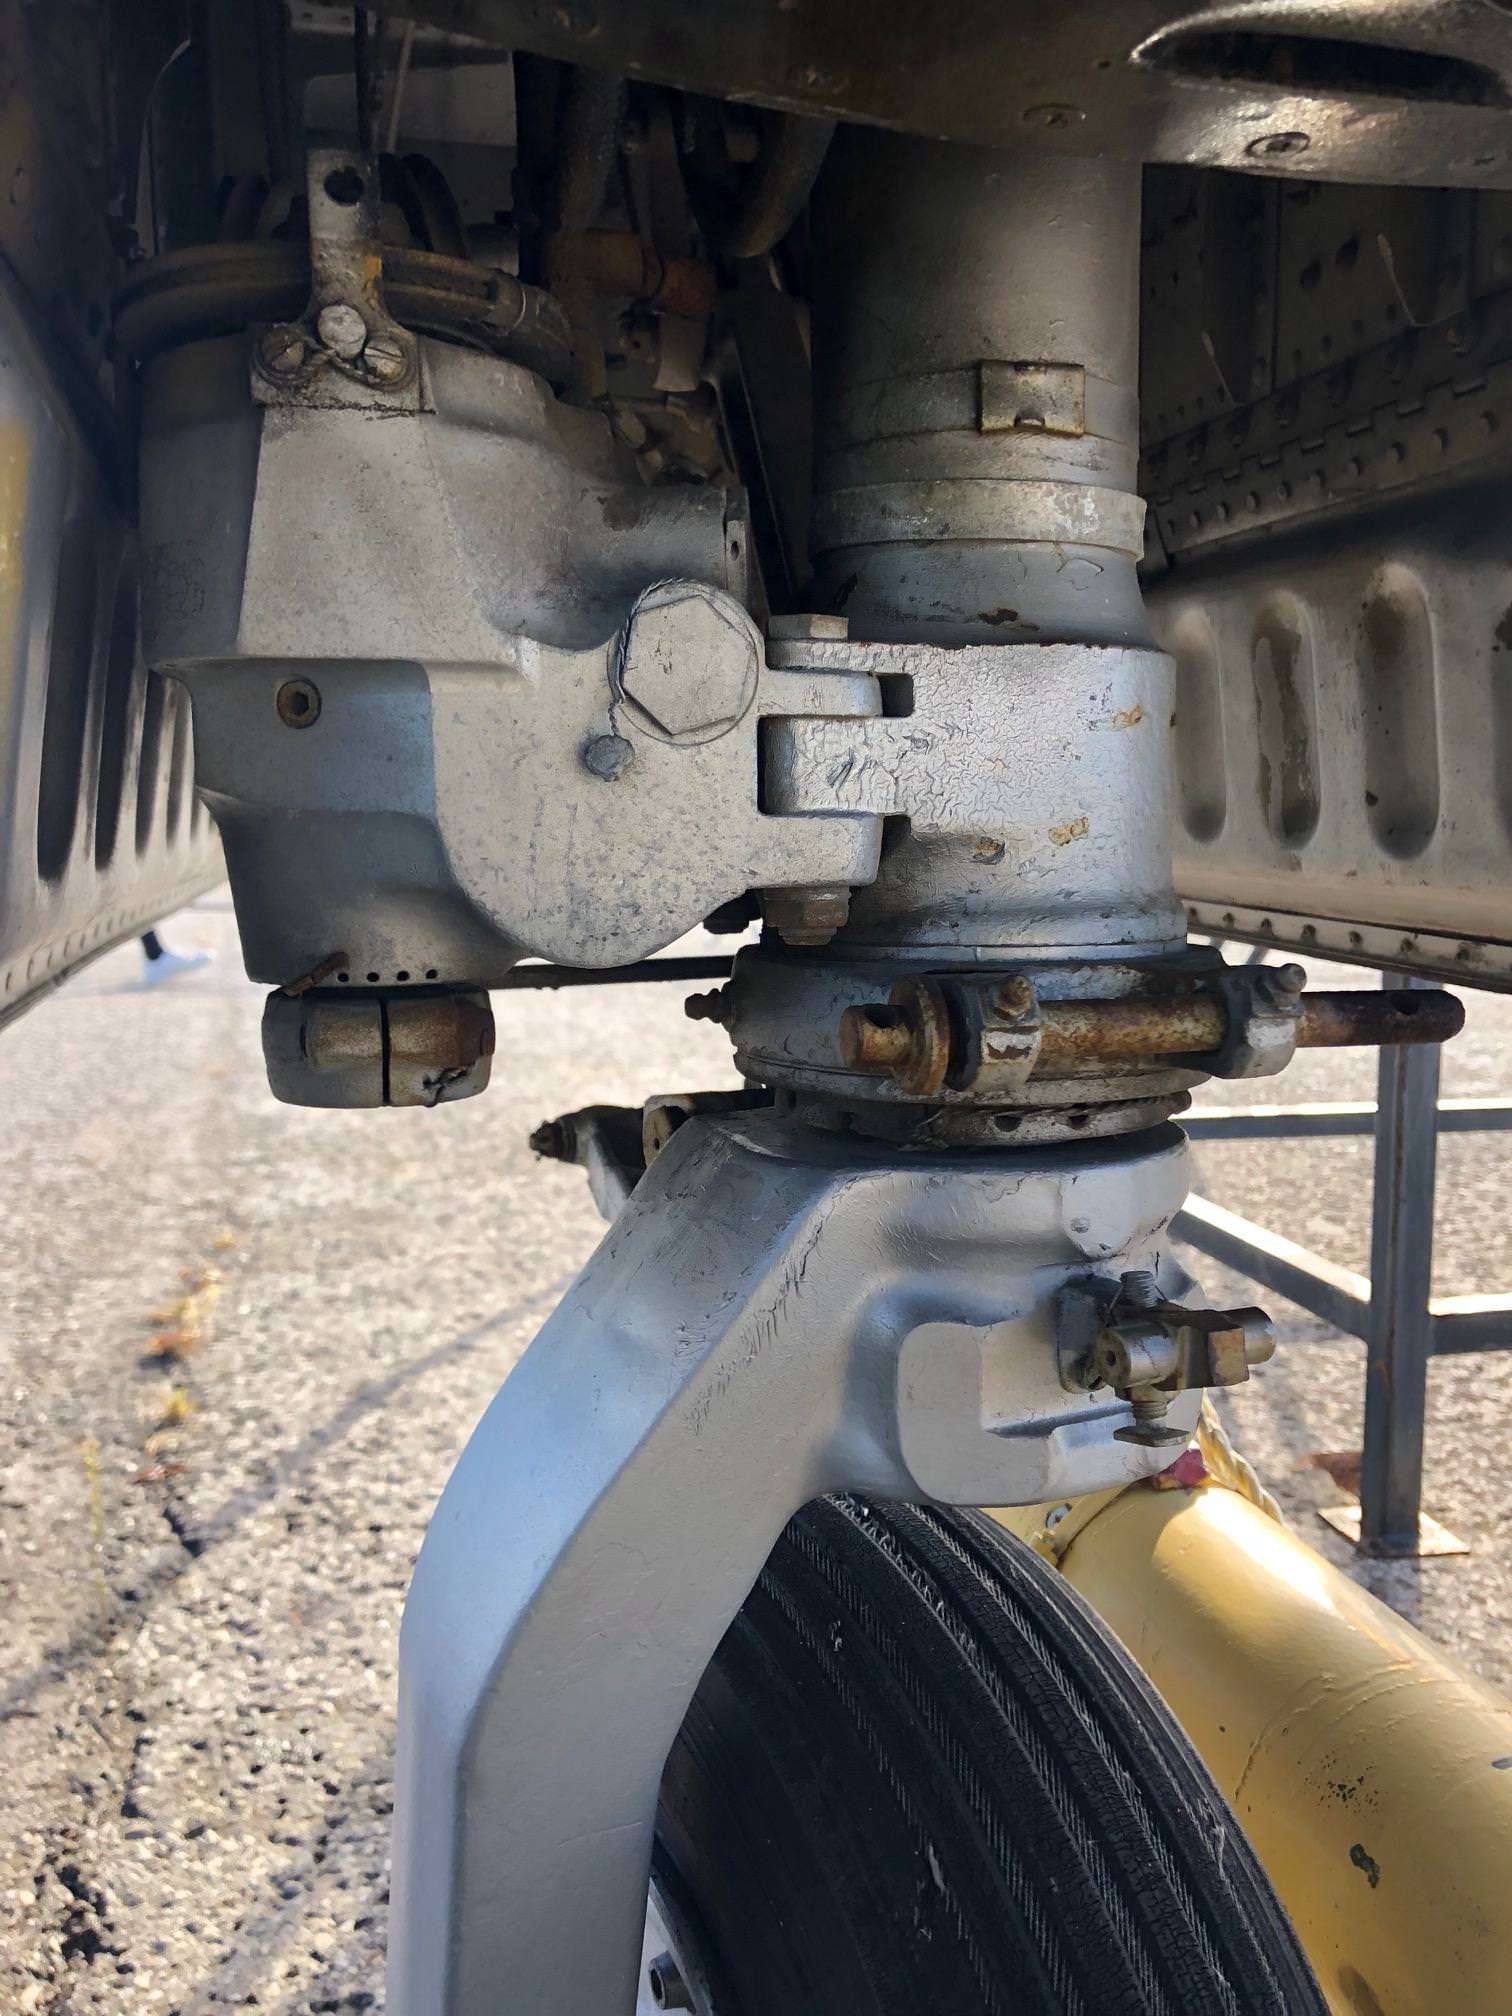
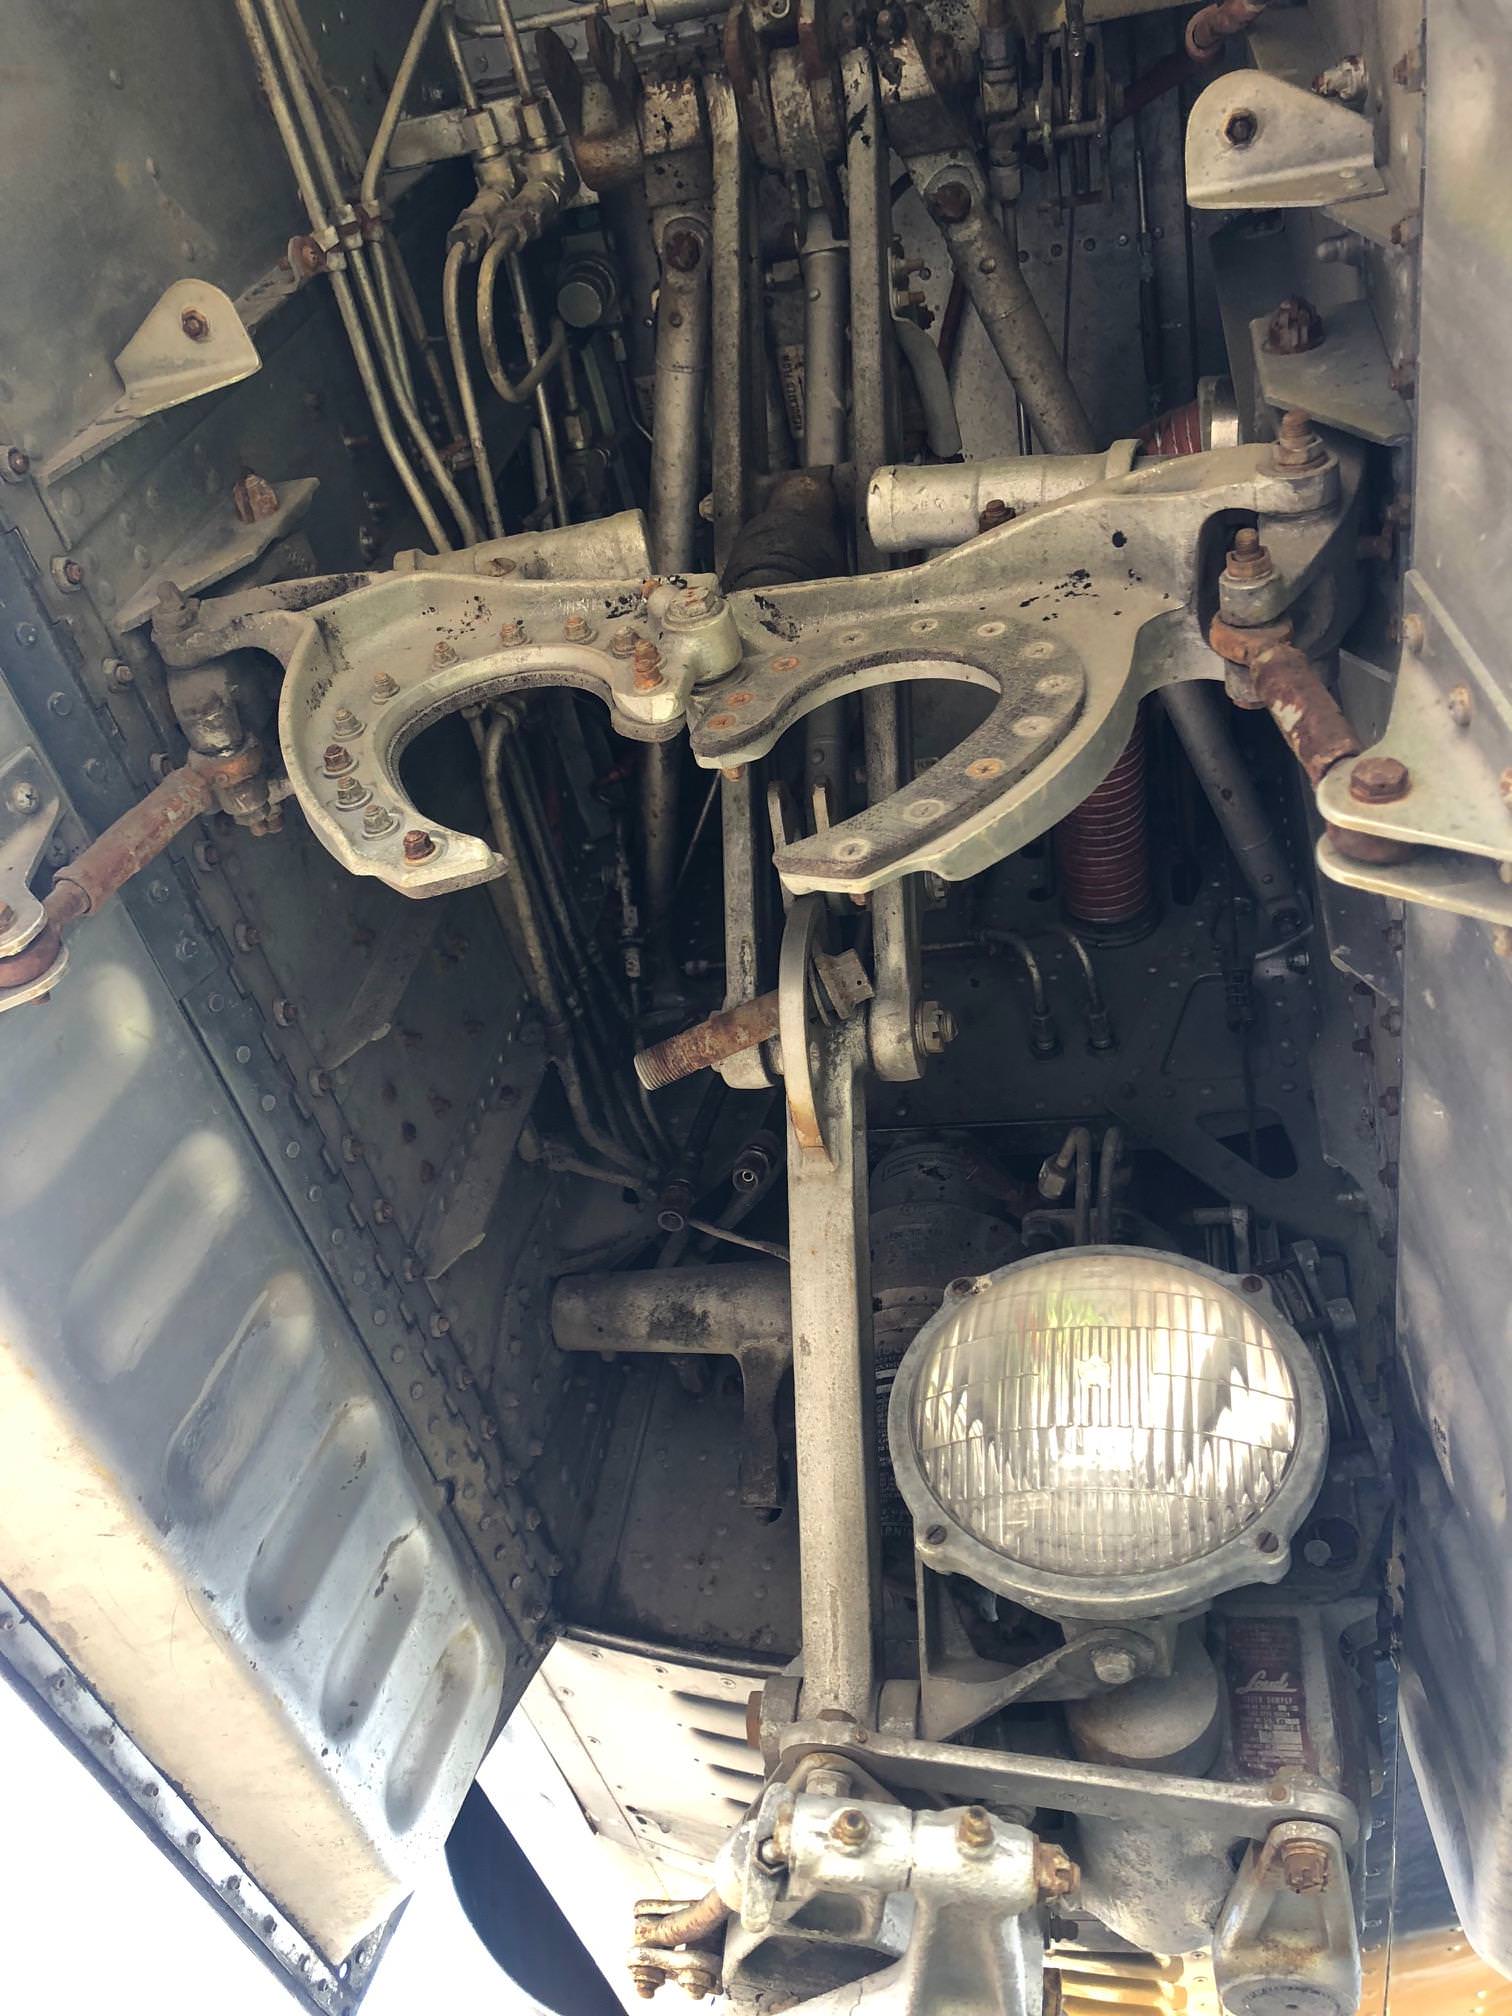
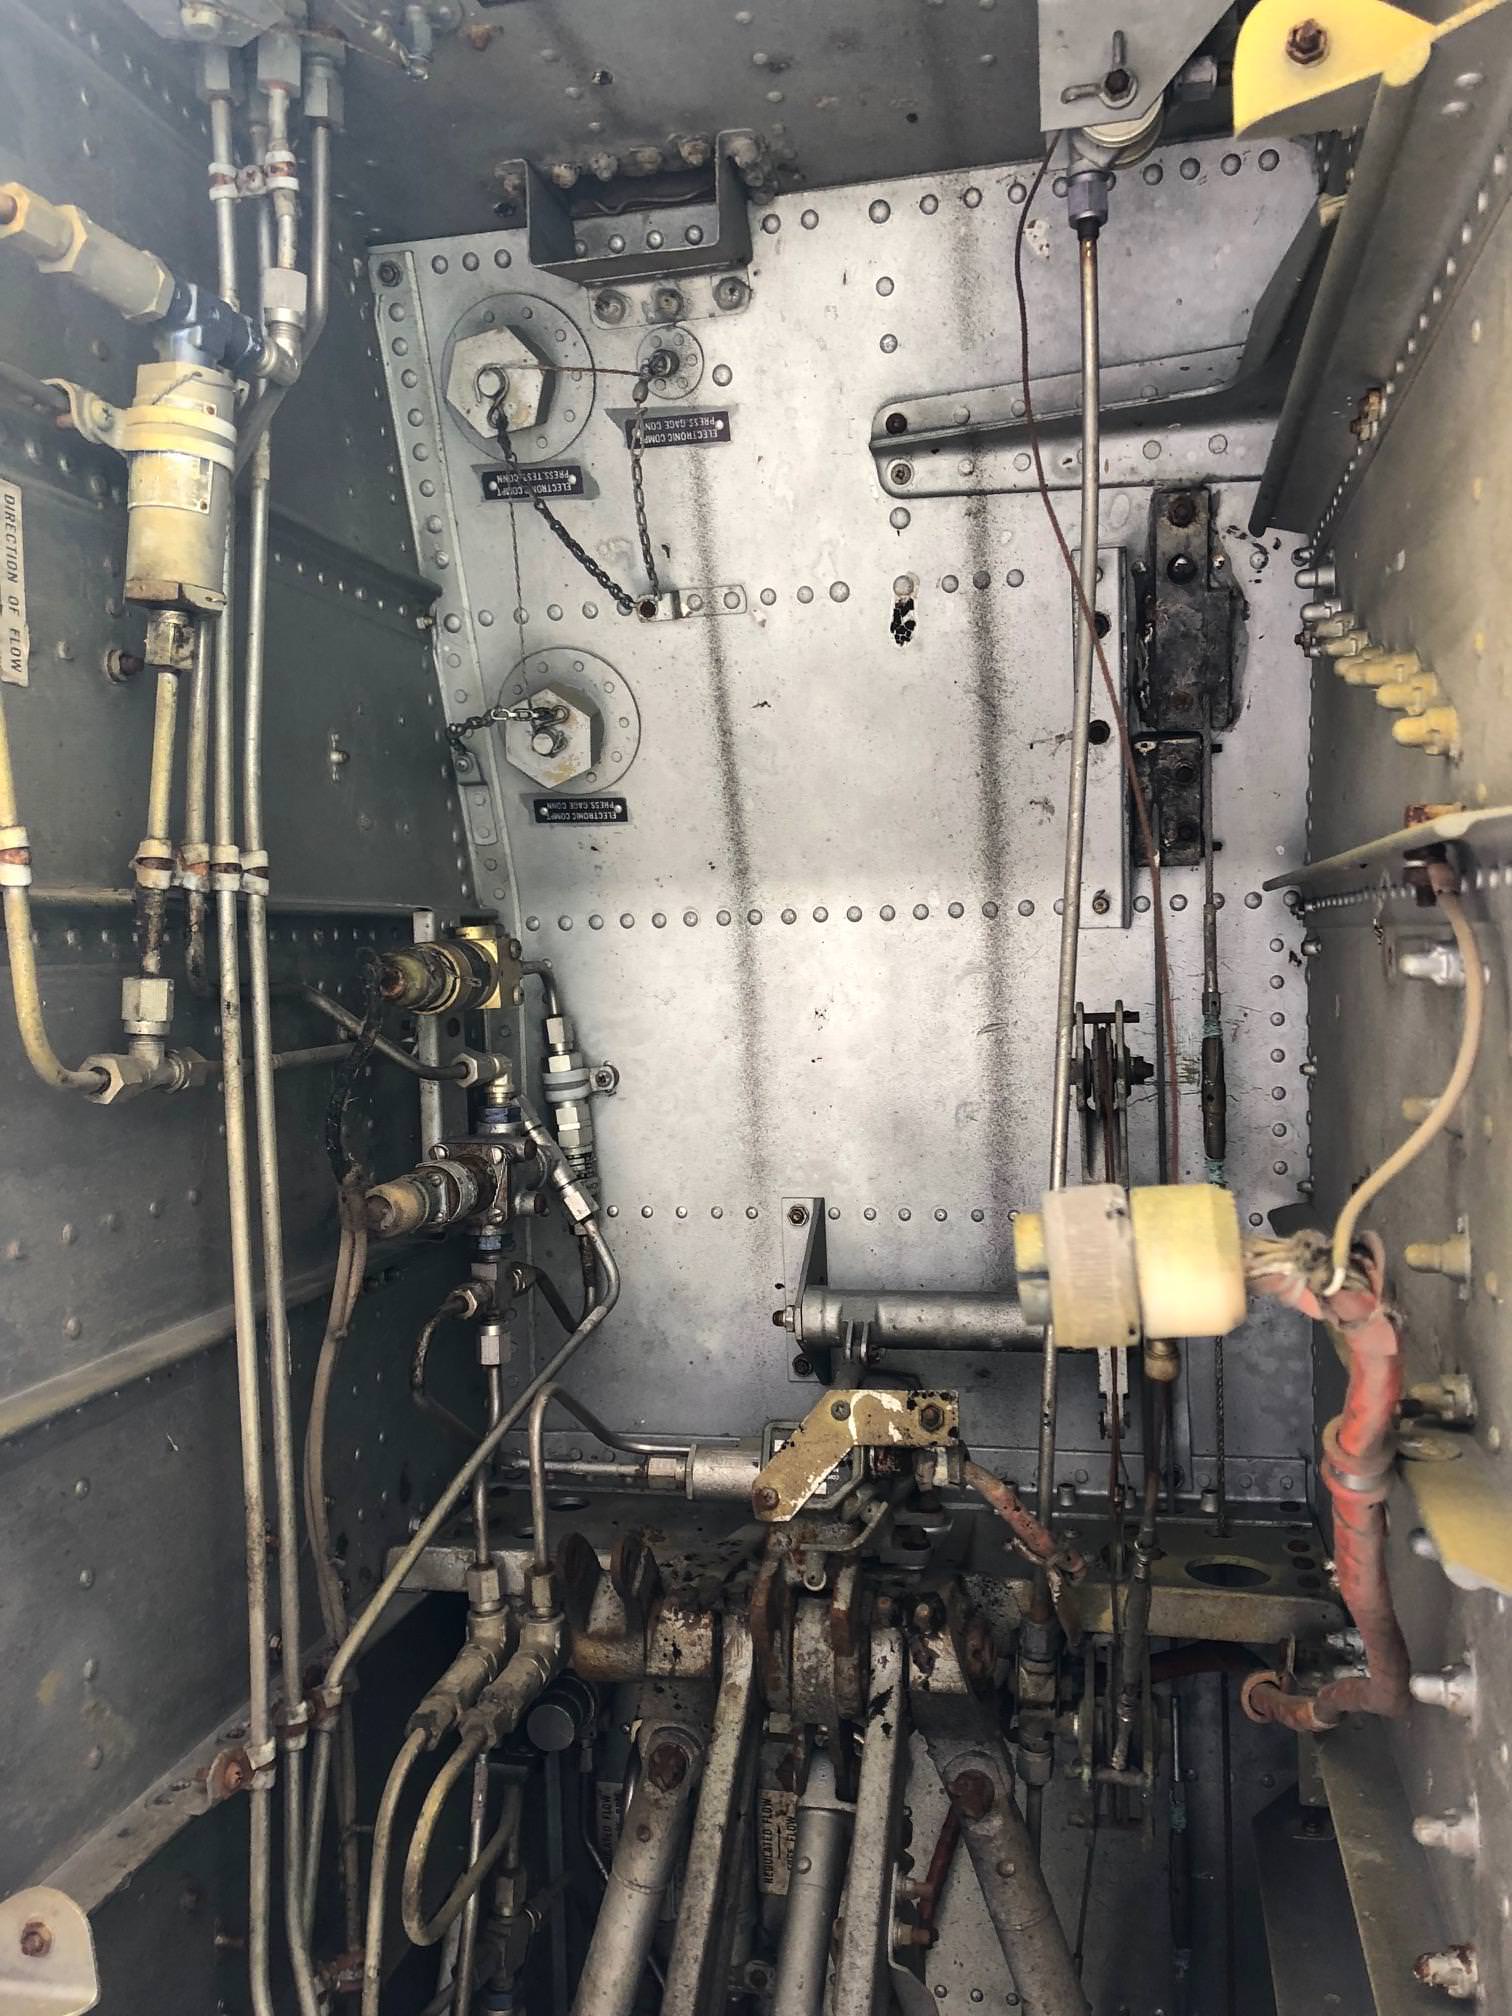
Top is front.
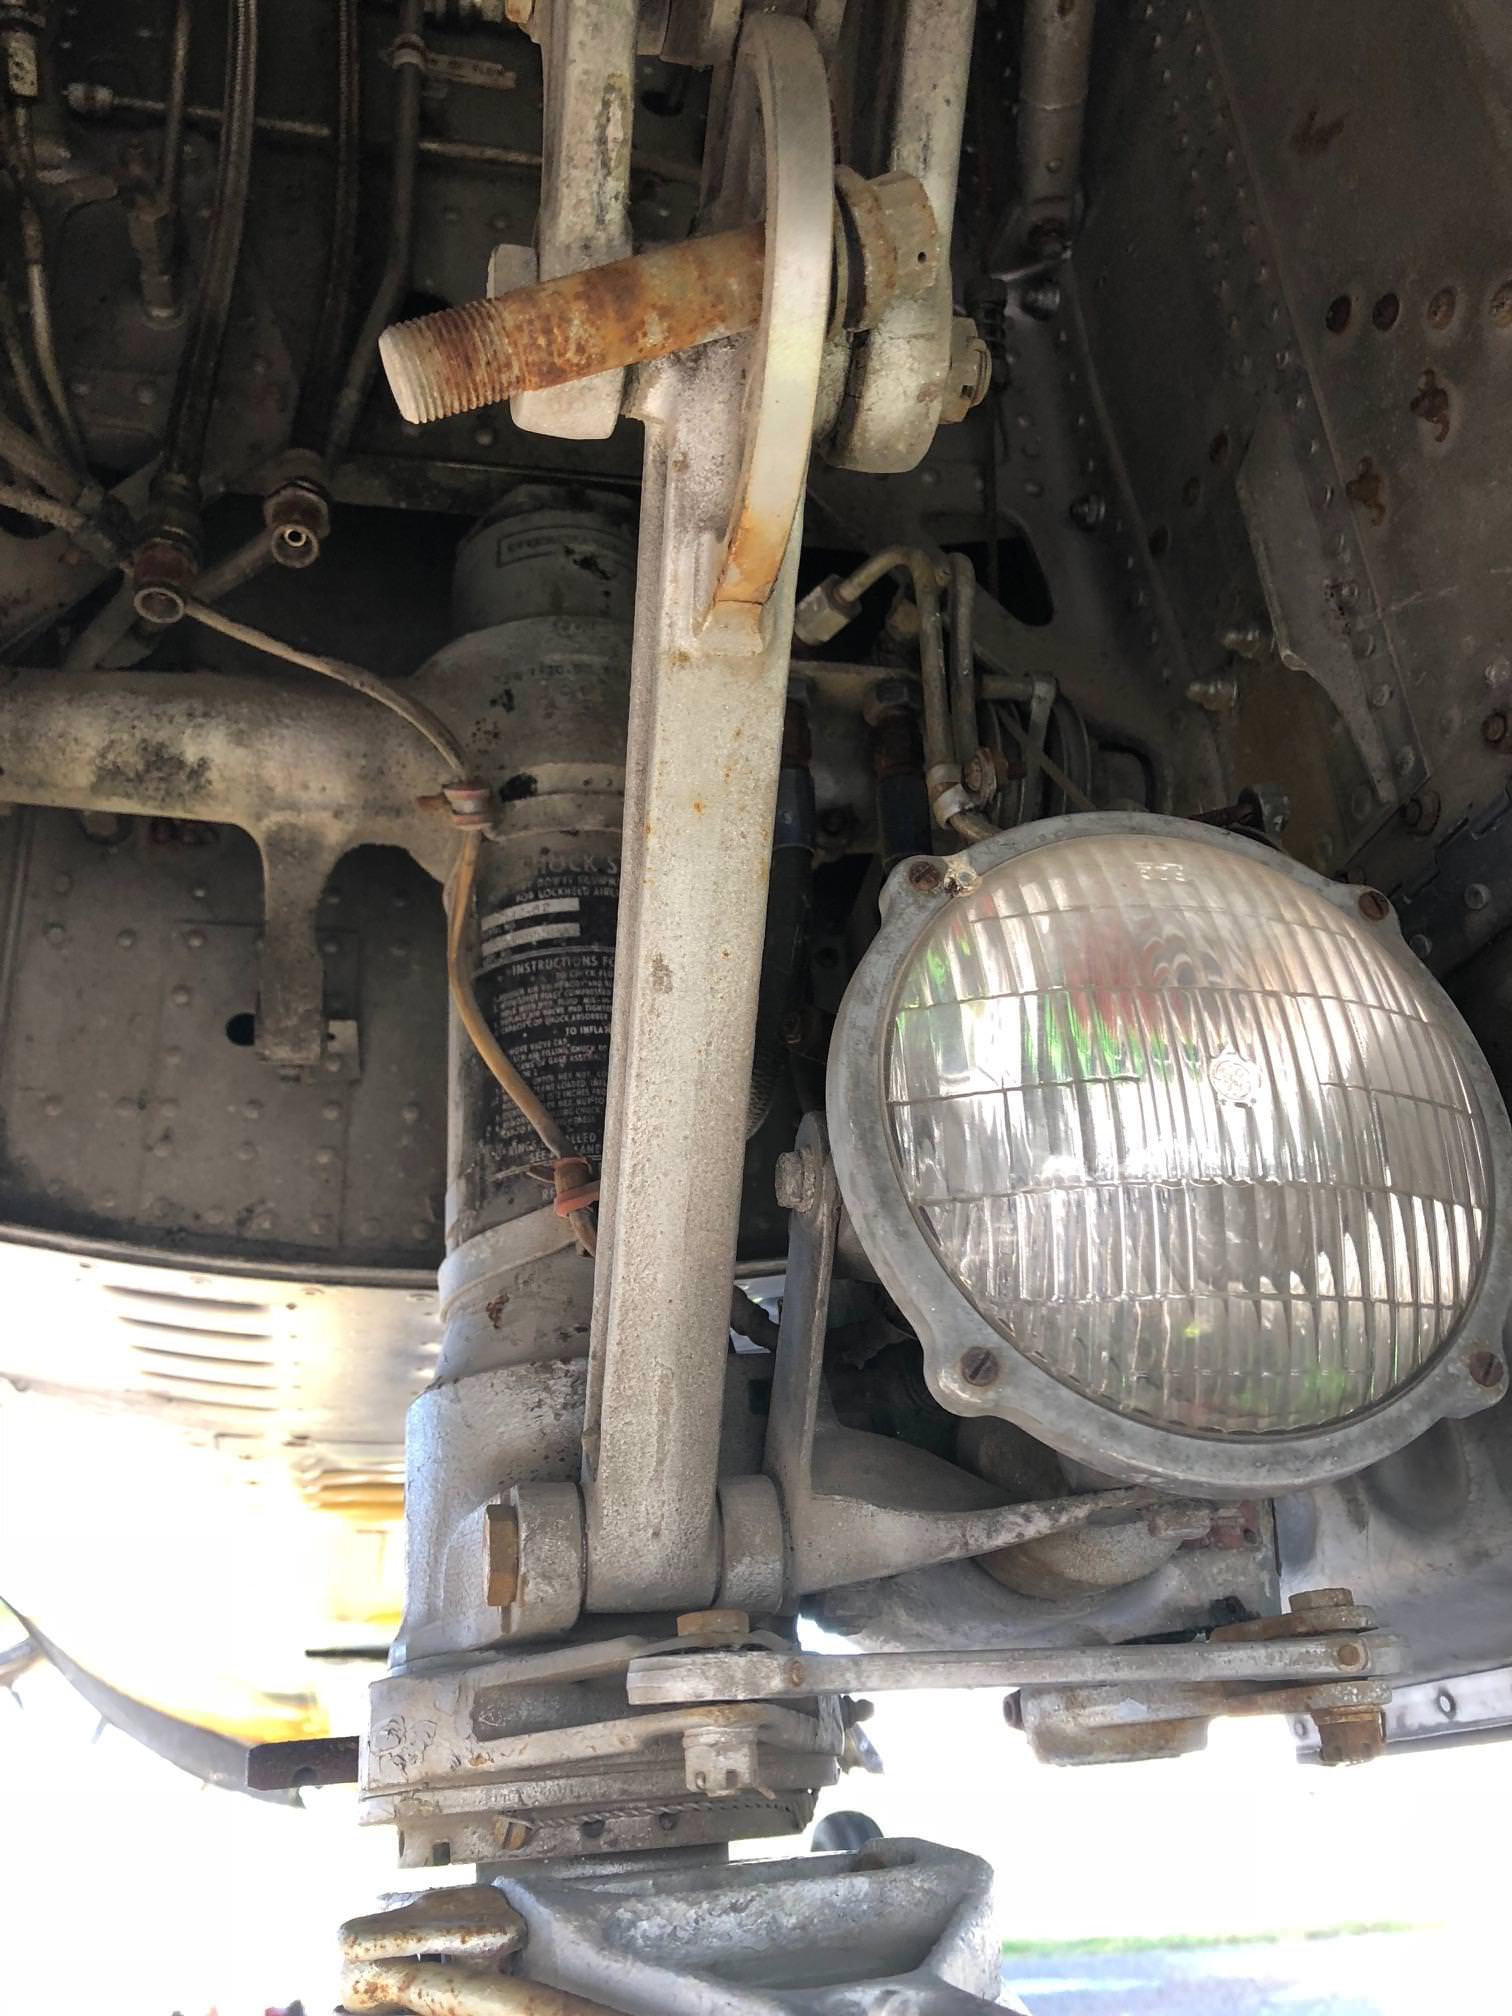
*Bolt might not be original... hahaha
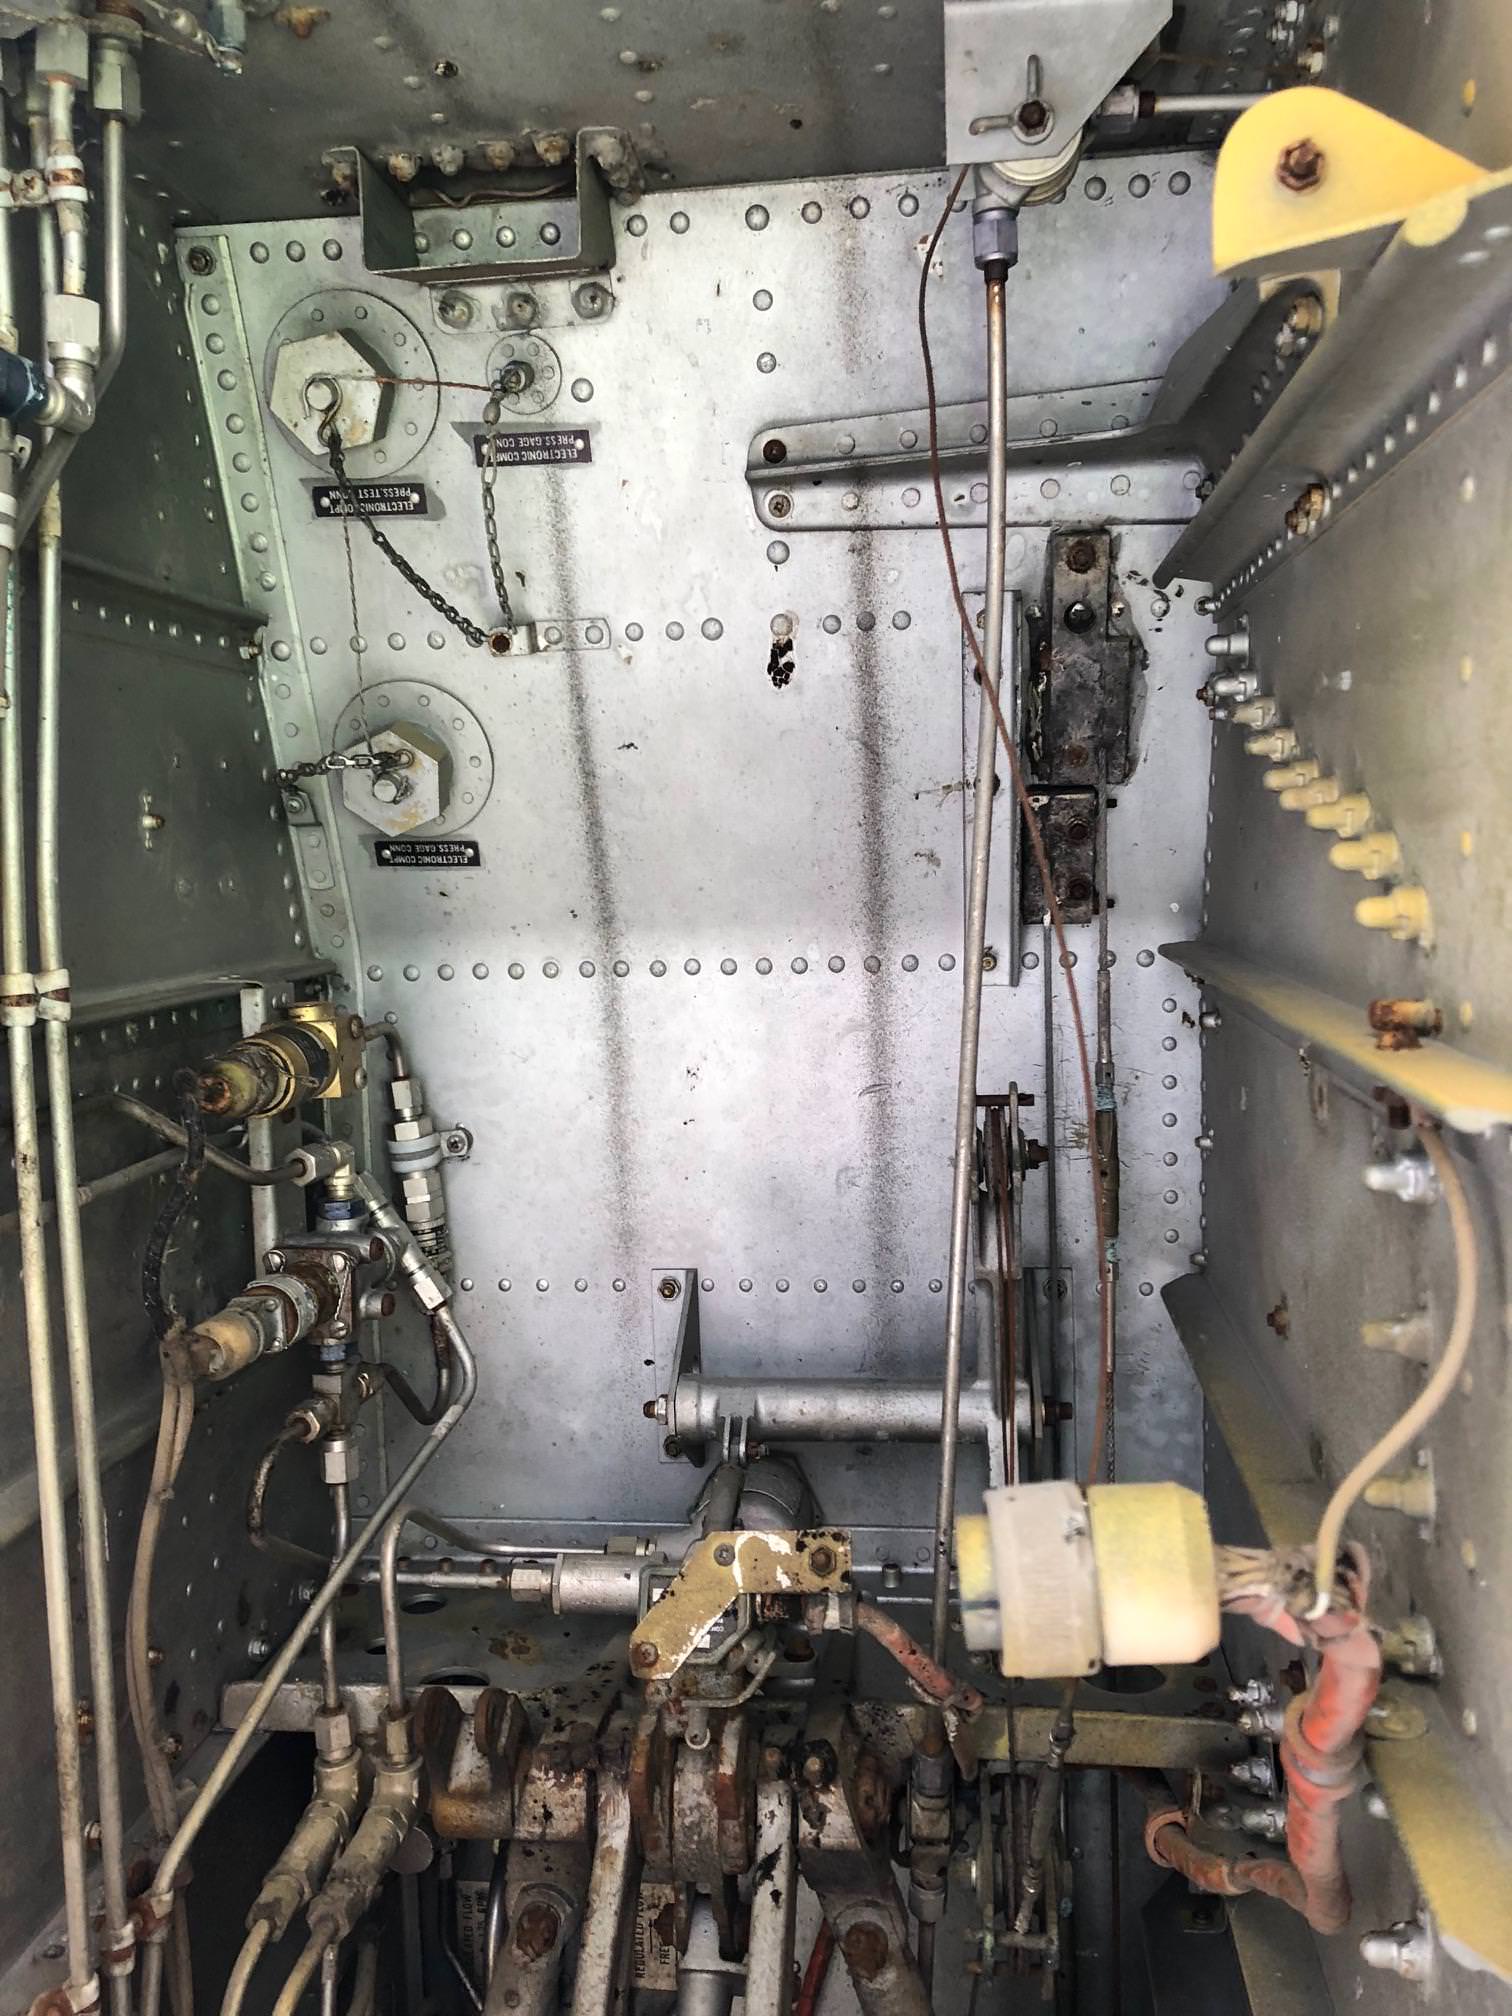
Top is front again
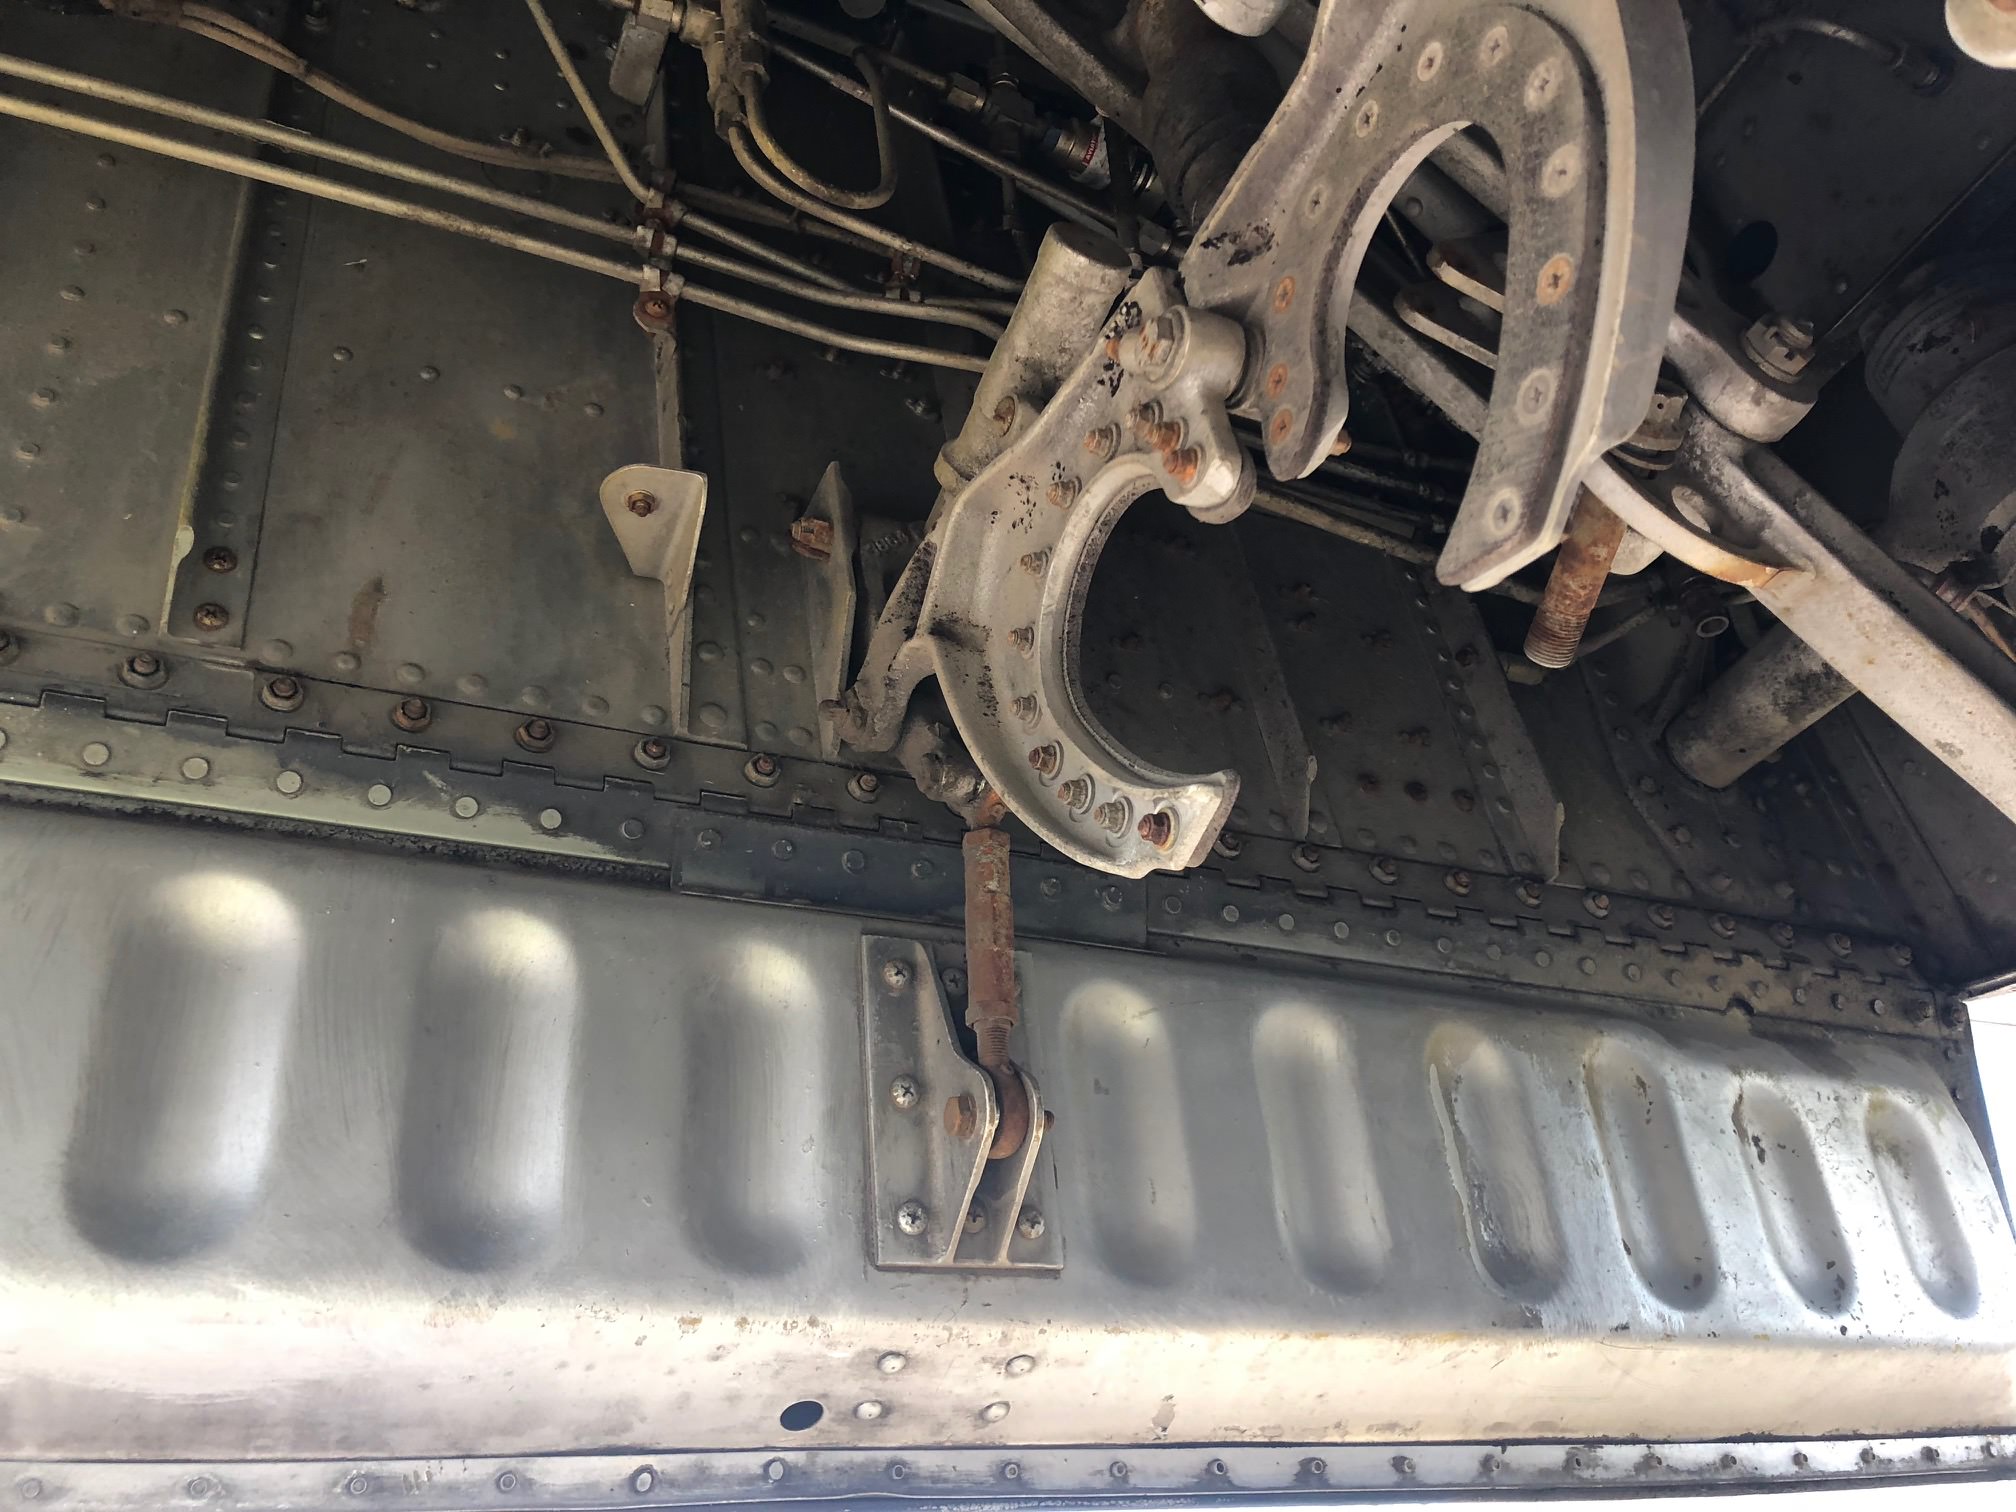
From the first airframe - this hatch is behind the main gear bay on the left side and hinges downwards from center.
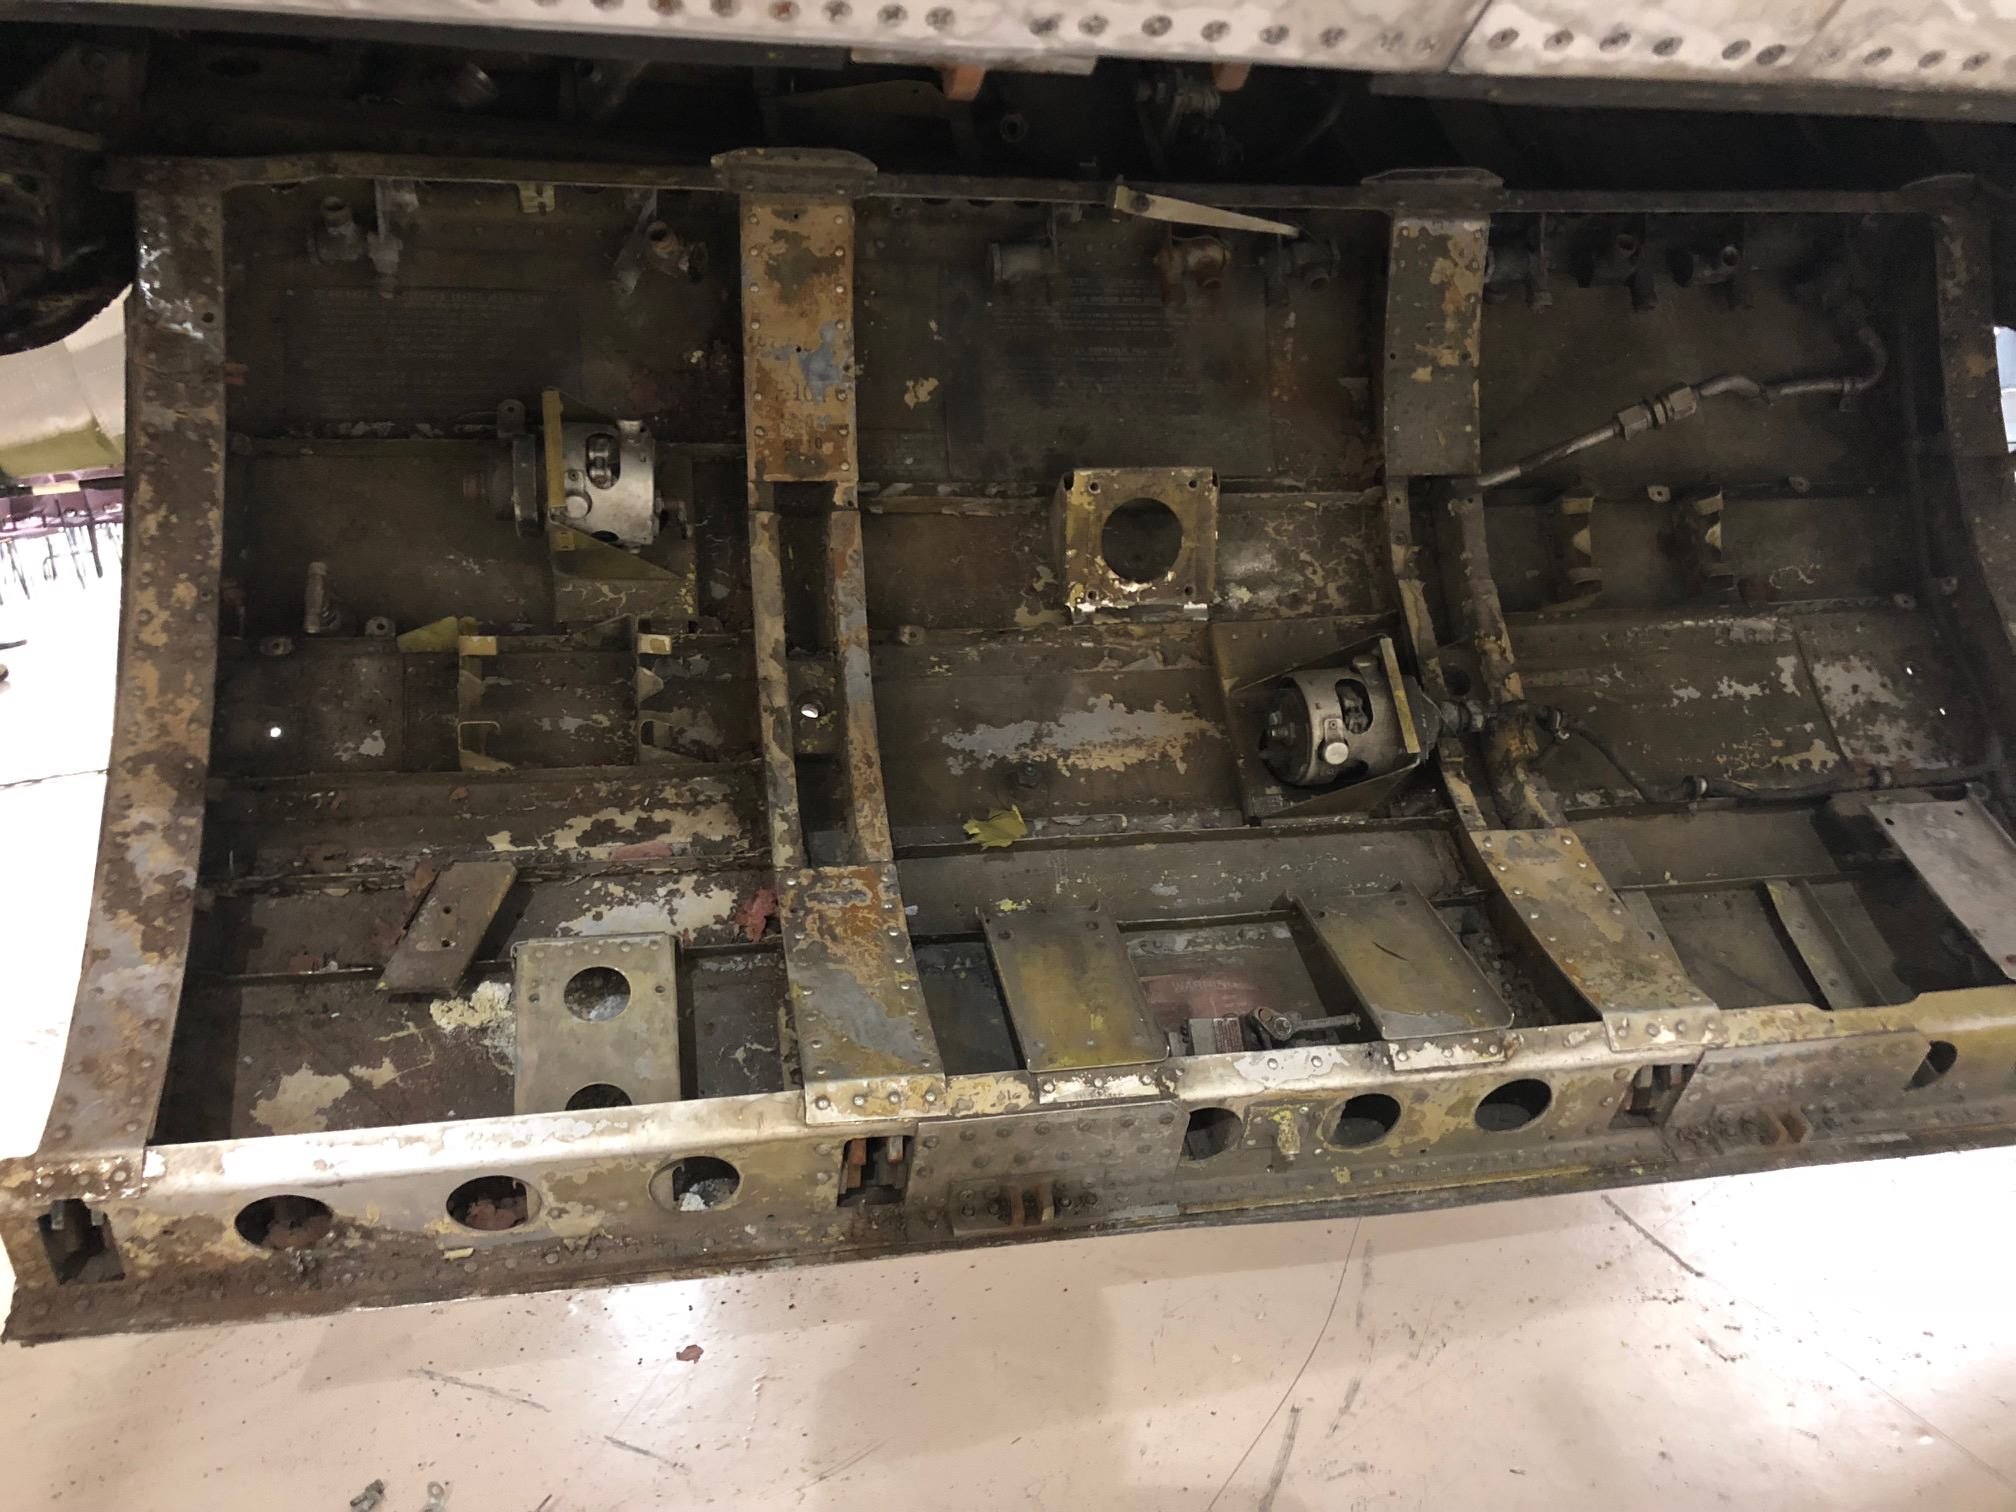
Looking up through that opening. Interior colours are original.
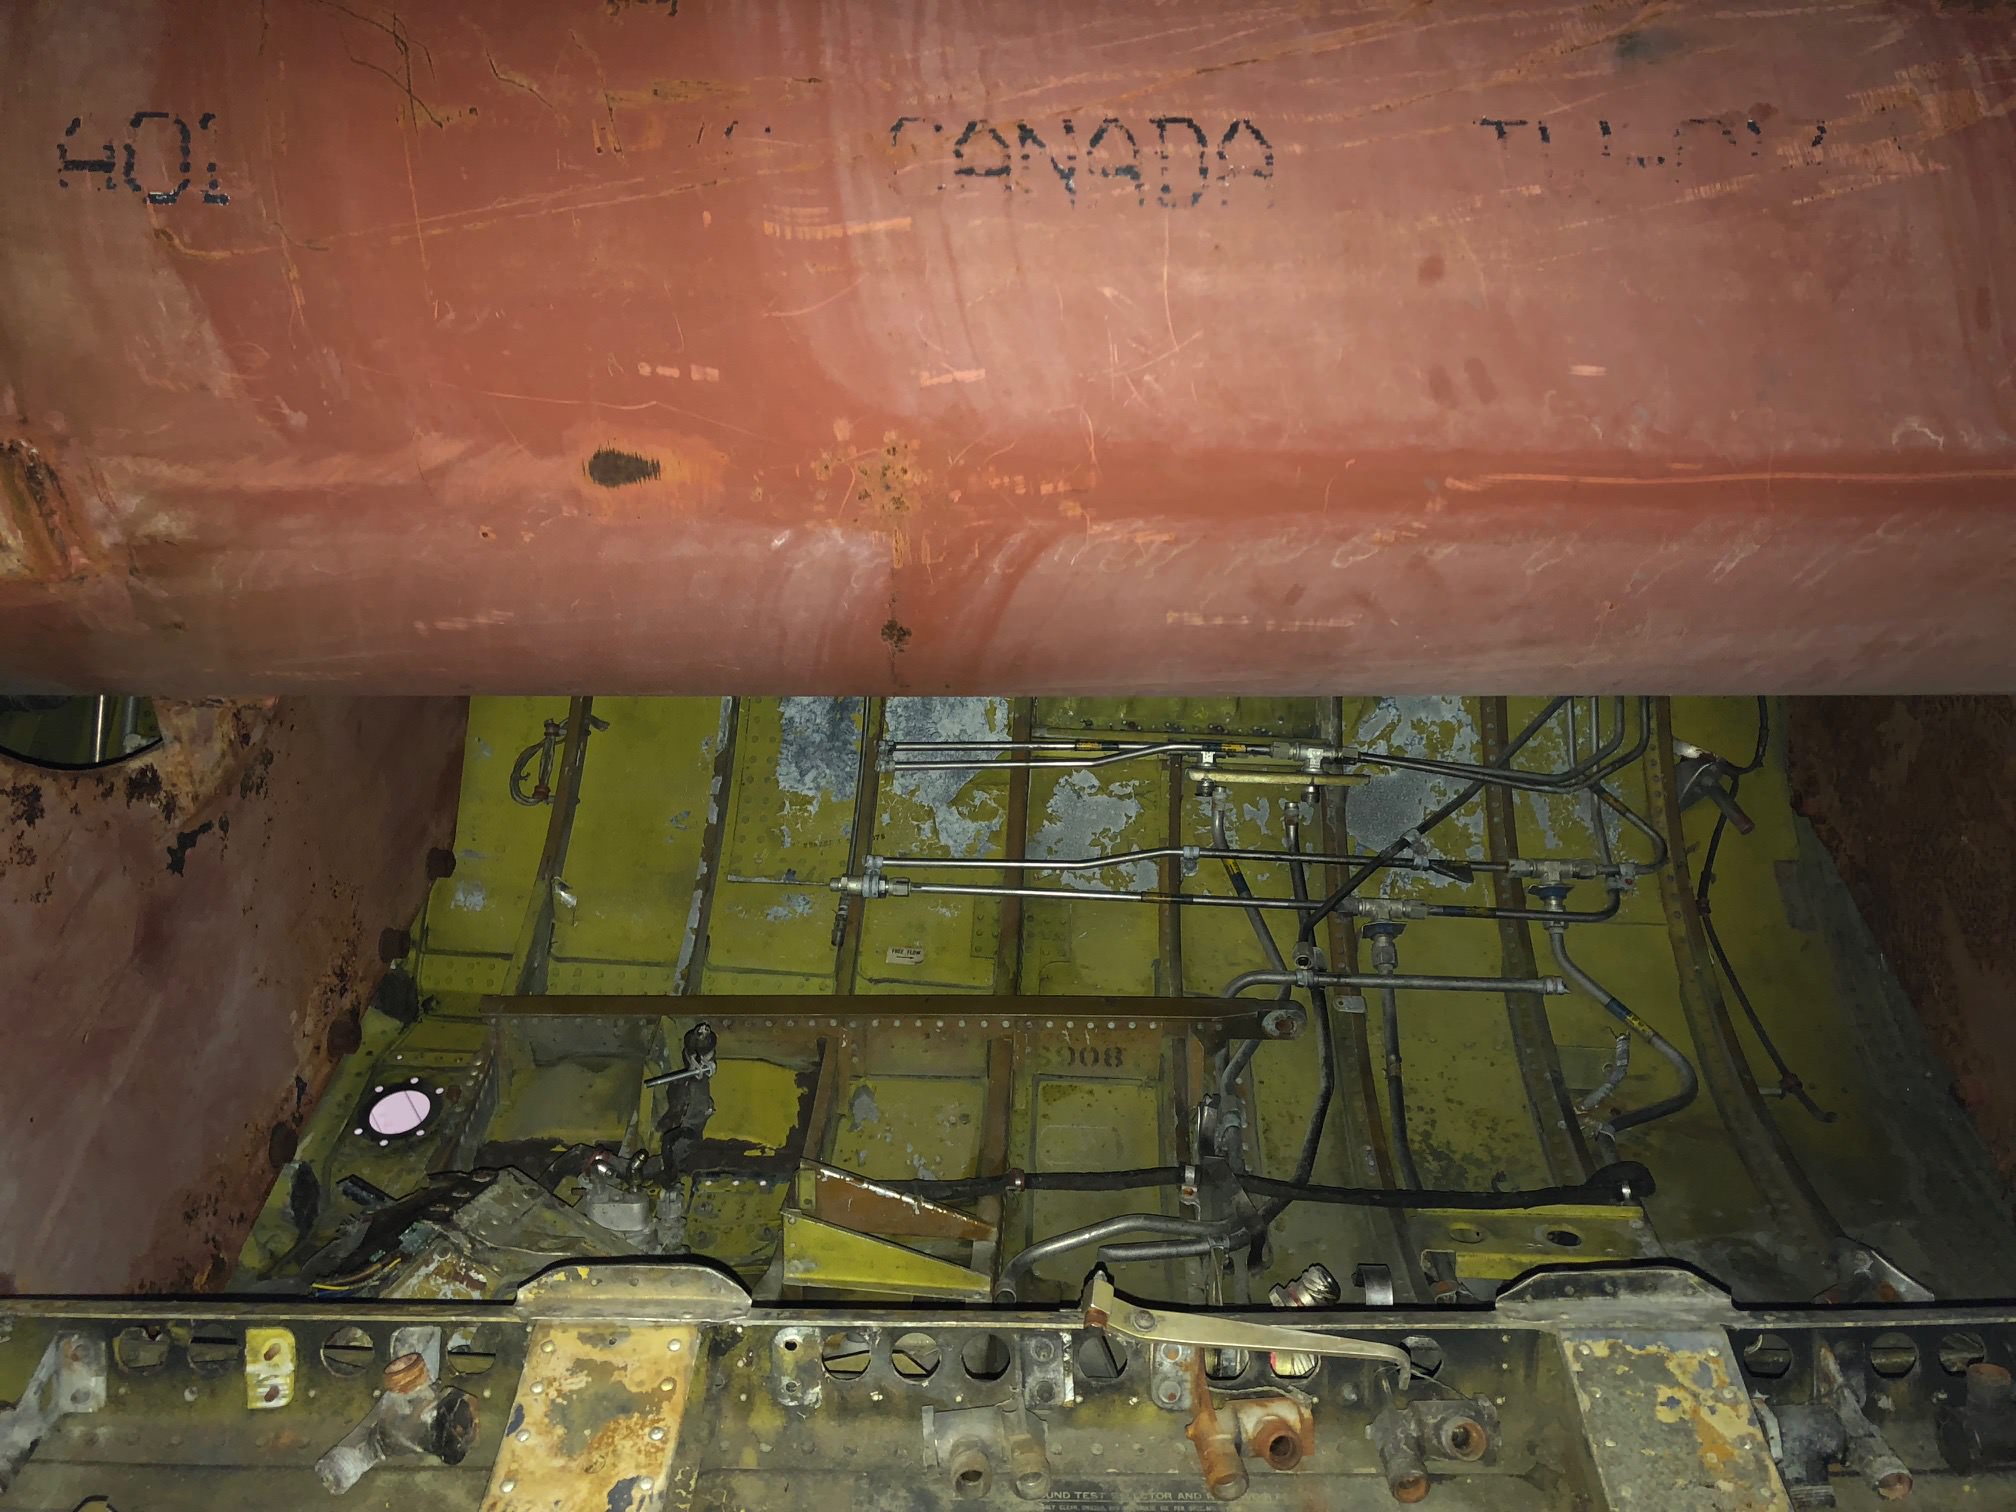


Top is front.

*Bolt might not be original... hahaha


Top is front again

From the first airframe - this hatch is behind the main gear bay on the left side and hinges downwards from center.

Looking up through that opening. Interior colours are original.


SteveAndrews

Joined: August 16, 2010
KitMaker: 693 posts
AeroScale: 551 posts

Posted: Sunday, November 04, 2018 - 07:22 PM UTC
Wow Matt, it's Christmas come early. Thanks so much for getting these photos.
What's your role at the museum?
With a big thank you,
Steve.
What's your role at the museum?
With a big thank you,
Steve.

Scrodes

Joined: July 22, 2012
KitMaker: 771 posts
AeroScale: 763 posts

Posted: Monday, November 05, 2018 - 03:51 AM UTC
Quoted Text
Wow Matt, it's Christmas come early. Thanks so much for getting these photos.
What's your role at the museum?
With a big thank you,
Steve.
No problem Steve.
I volunteer at the museum as member of the Lancaster Crew and spend many hours there to keep our Lancaster flying.

SteveAndrews

Joined: August 16, 2010
KitMaker: 693 posts
AeroScale: 551 posts

Posted: Monday, November 05, 2018 - 08:00 AM UTC
Hey Matt,
That sounds like a very special experience. More power to you.
Have a great day.
That sounds like a very special experience. More power to you.
Have a great day.

SteveAndrews

Joined: August 16, 2010
KitMaker: 693 posts
AeroScale: 551 posts

Posted: Monday, November 05, 2018 - 08:01 AM UTC
When I was a boy it was common knowledge that too much time spent on a particular activity would make you go blind. Well, itís taken a few years but I realise that the activity in question is not what I imagined. It is actually scratch building. Thankfully Iíve finished the rear landing gear bay with my eyesight largely in tact. Here it is in all its glory - finished off with the big struts and pistons from the kit.
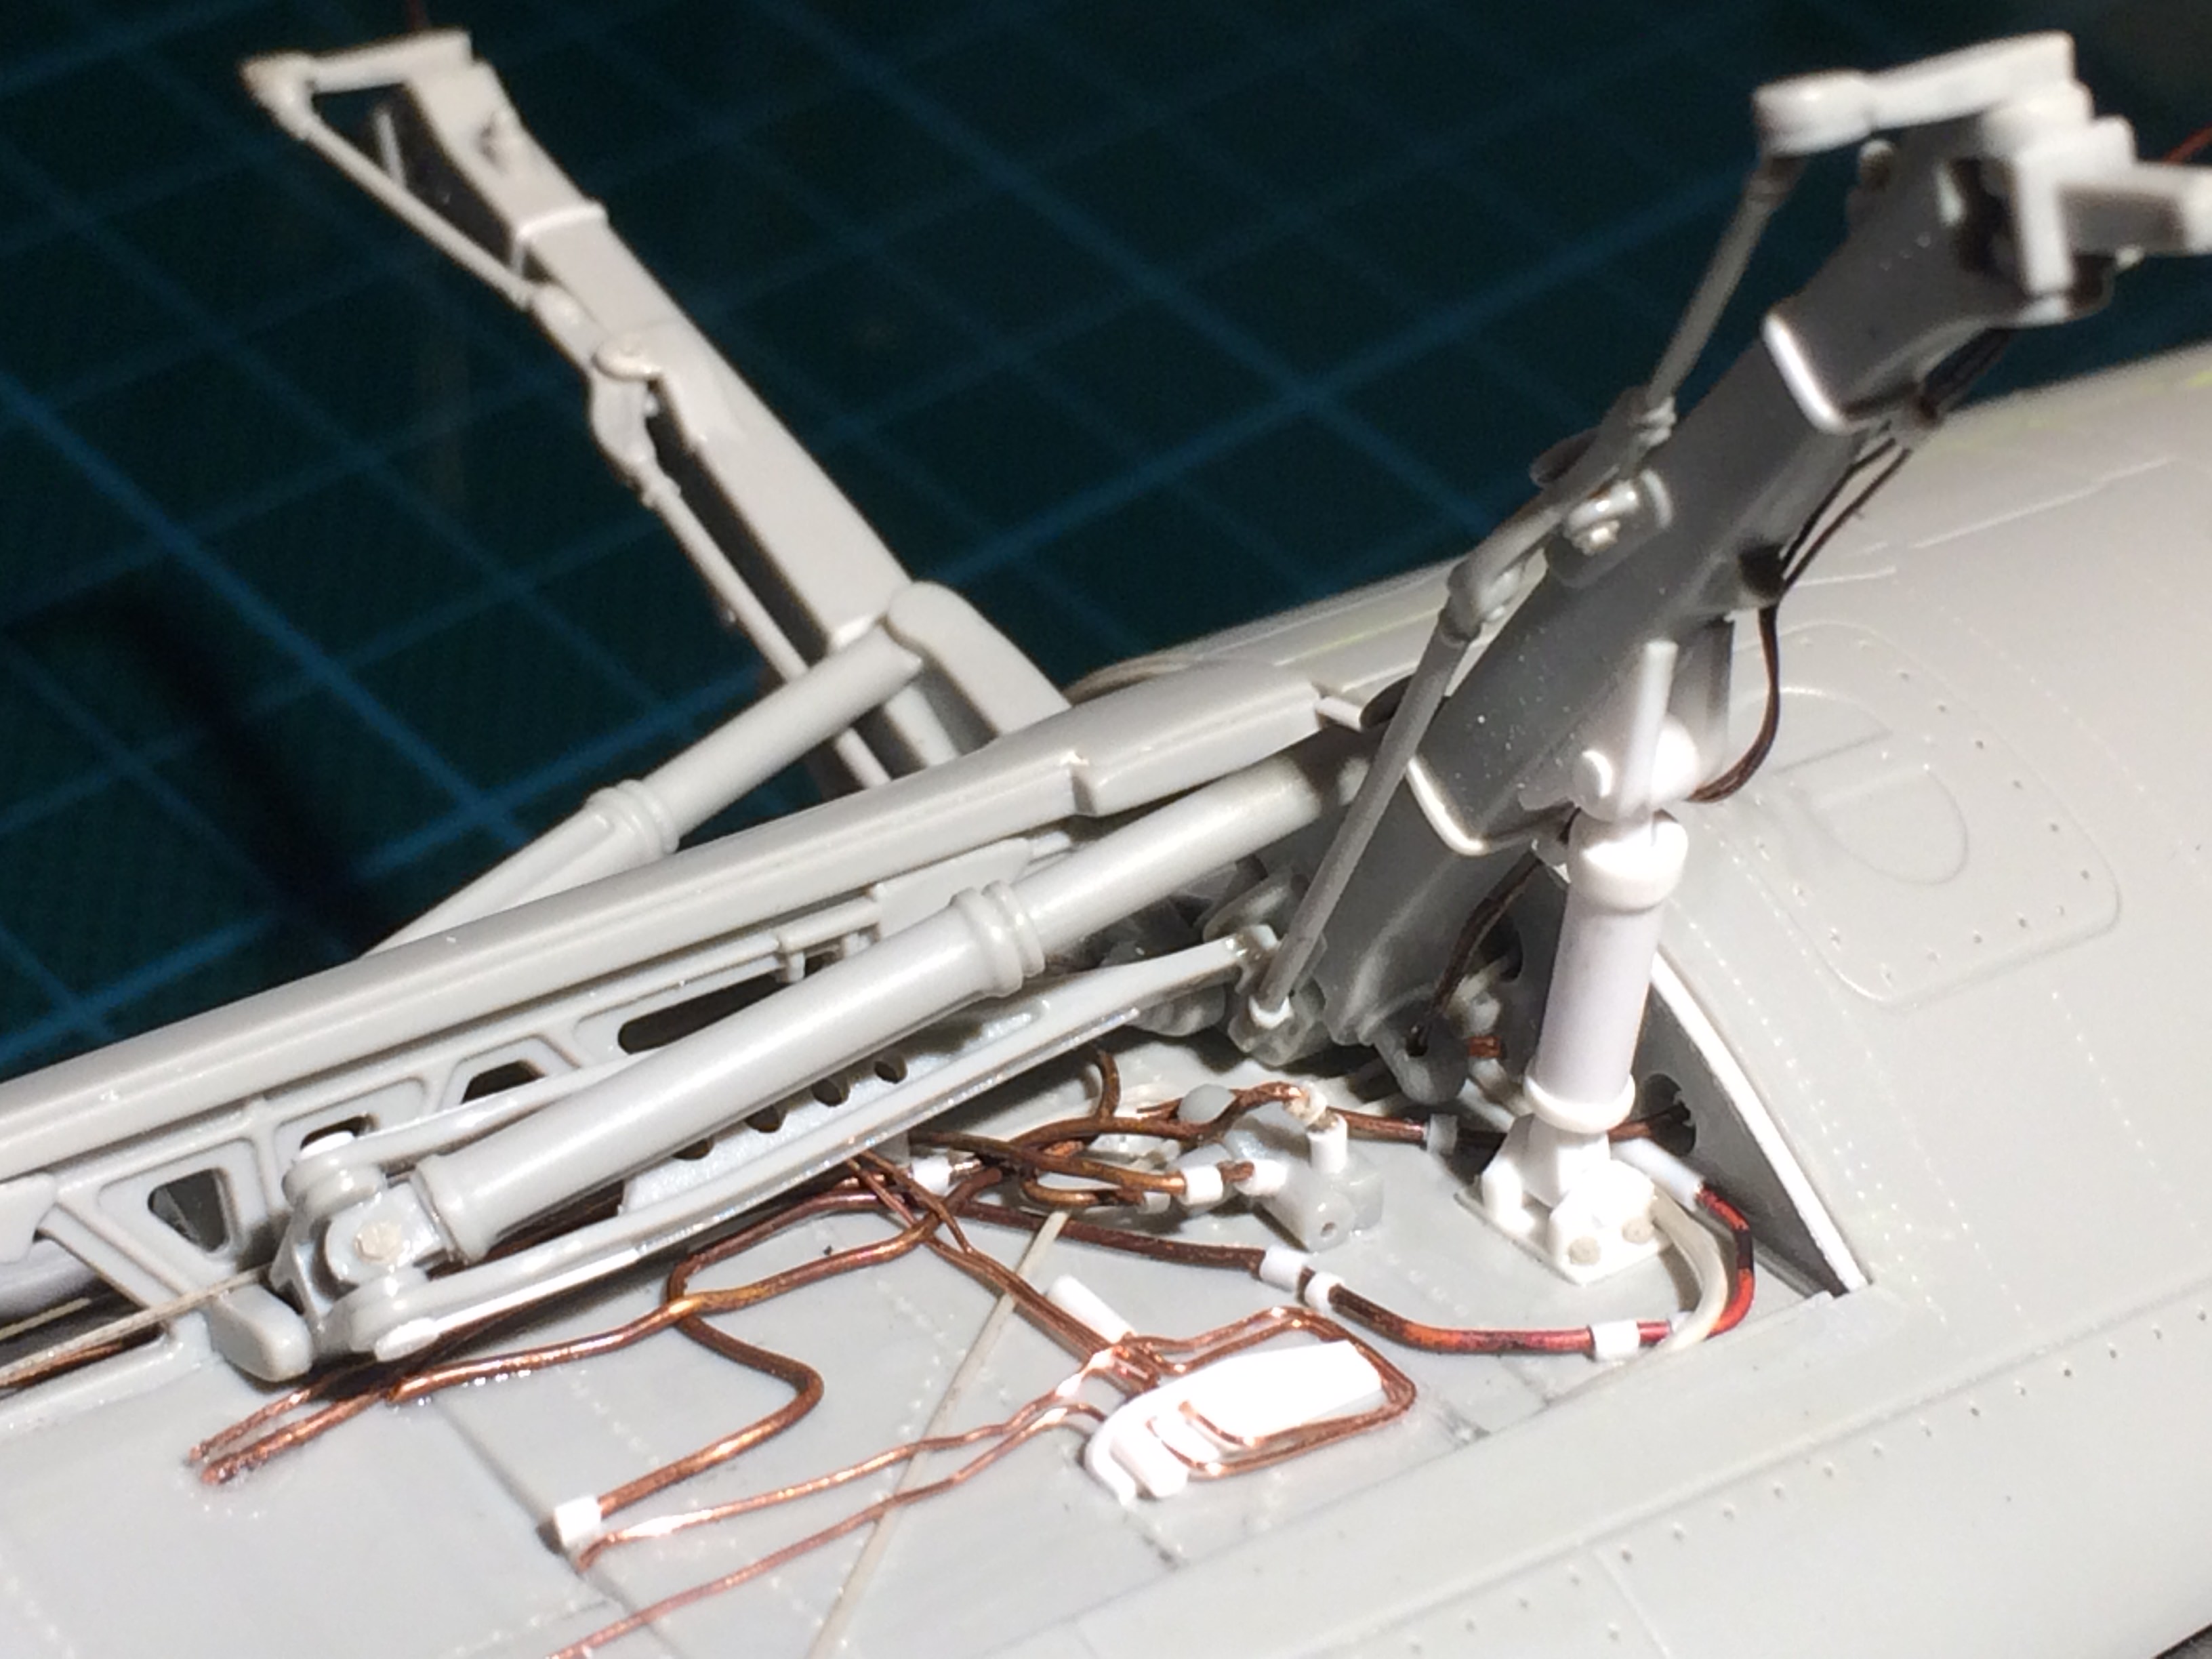
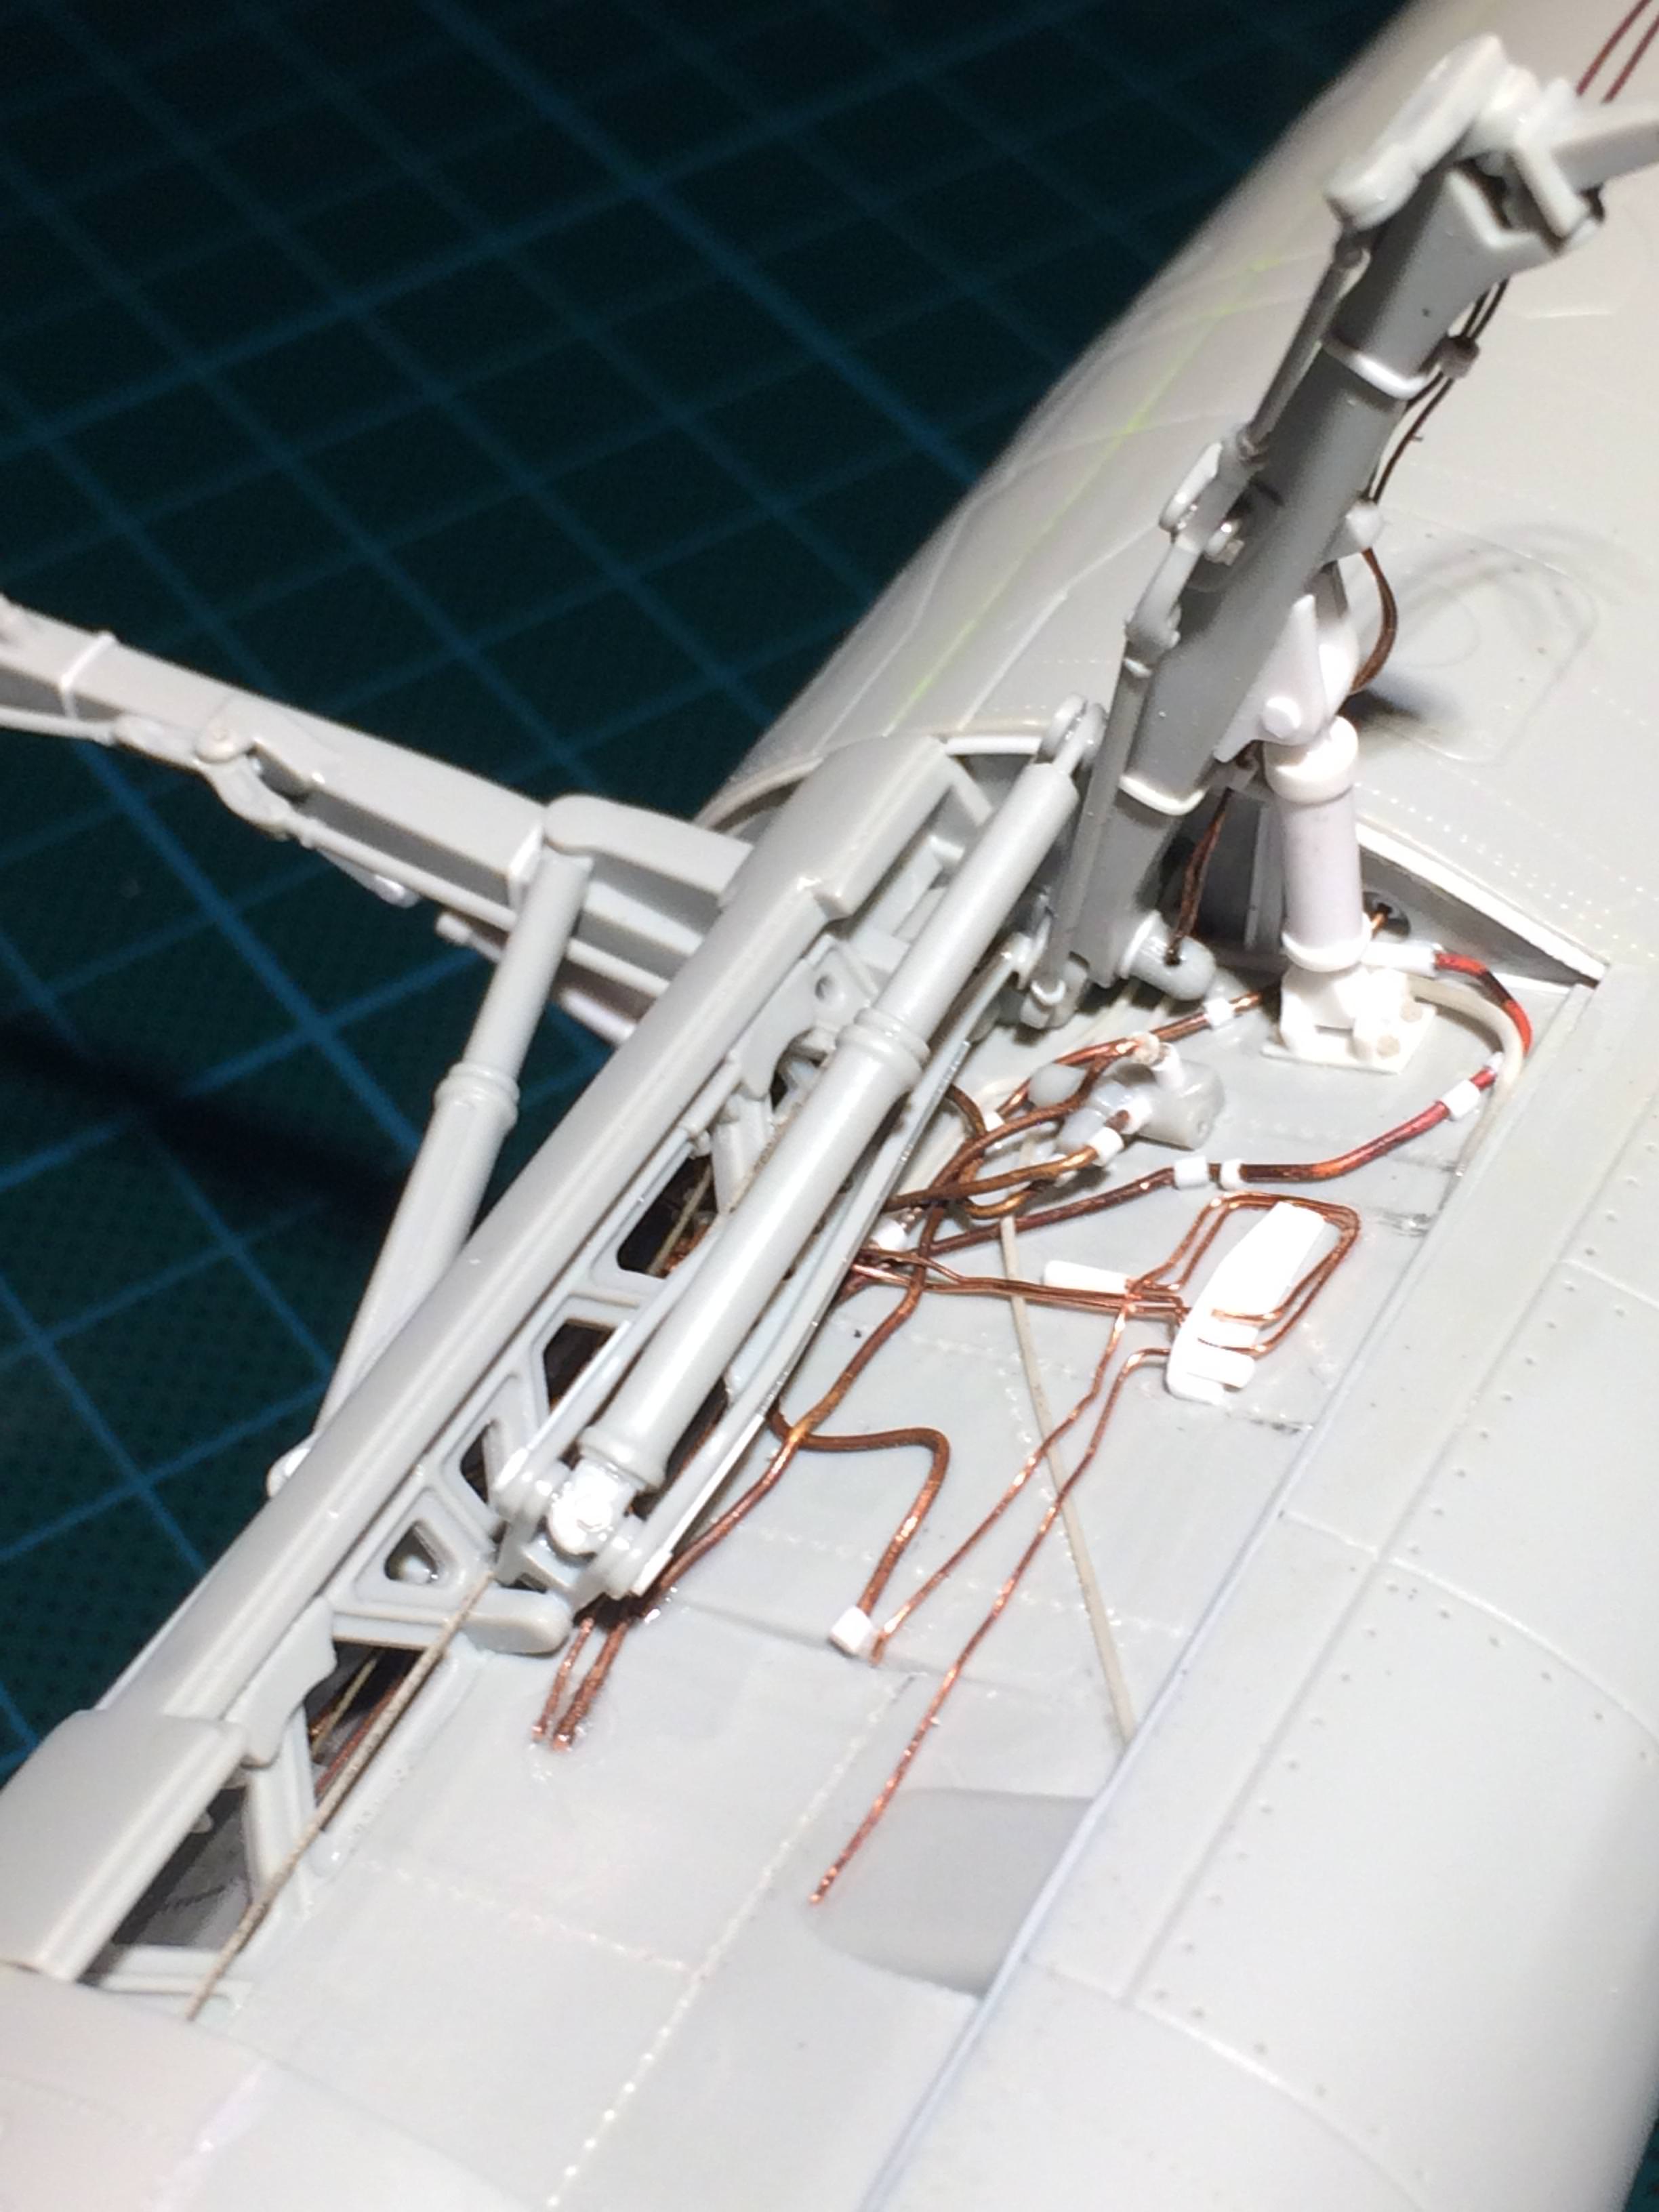
I need a bit of a rest from hoses, pipes and hydraulics so next up is the gun bay.
Happy modelling guys.


I need a bit of a rest from hoses, pipes and hydraulics so next up is the gun bay.
Happy modelling guys.
Joel_W

Joined: December 04, 2010
KitMaker: 11,666 posts
AeroScale: 7,410 posts

Posted: Monday, November 05, 2018 - 08:37 AM UTC
Steve,
The wheel Well looks fantastic. With some paint, and weathering it could easily pass for the real thing.
Joel
The wheel Well looks fantastic. With some paint, and weathering it could easily pass for the real thing.
Joel

SteveAndrews

Joined: August 16, 2010
KitMaker: 693 posts
AeroScale: 551 posts

Posted: Monday, November 12, 2018 - 09:26 AM UTC
Joel,
Thanks a million. It's going to be tricky to paint I think, but fingers crossed.
Have a great day,
Steve.
Thanks a million. It's going to be tricky to paint I think, but fingers crossed.
Have a great day,
Steve.

SteveAndrews

Joined: August 16, 2010
KitMaker: 693 posts
AeroScale: 551 posts

Posted: Monday, November 12, 2018 - 09:33 AM UTC
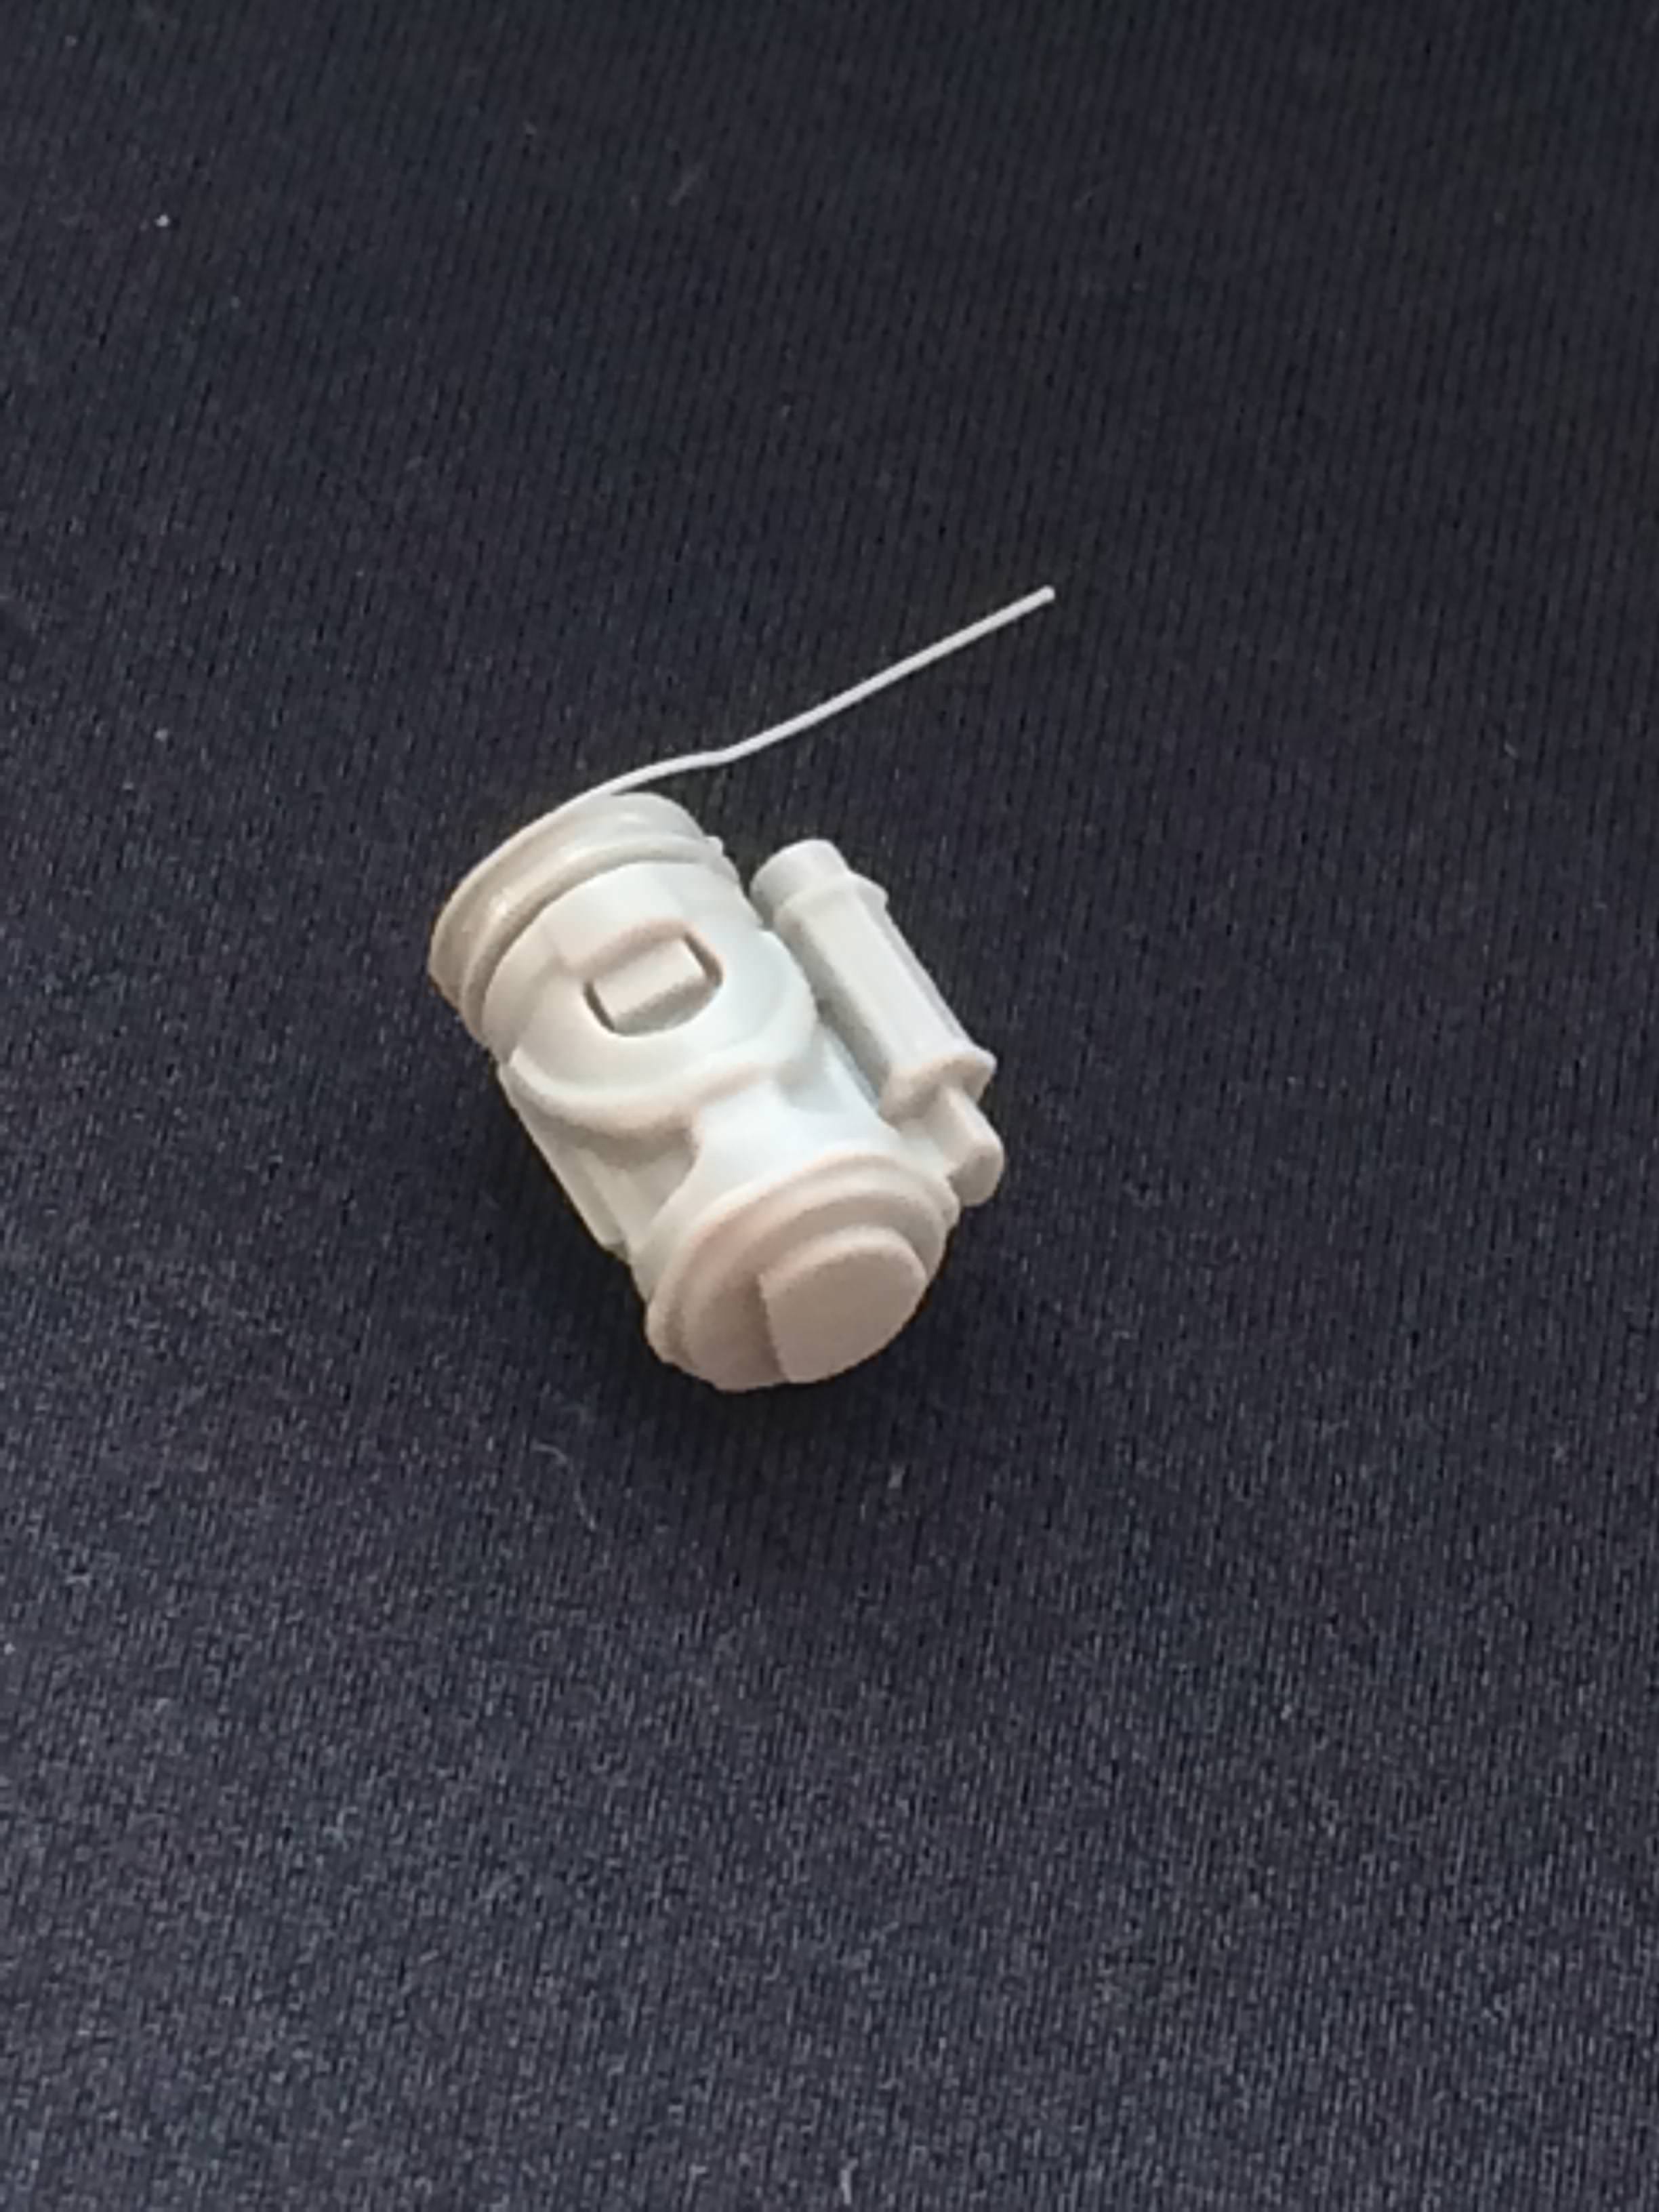
The F-104ís main armament is the famous M61 Vulcan rotary cannon. Italeri gives us the option to have the gun bay open, and they made an attempt at the M61 too. After cleaning up weíre left with a passable impression, however a quick look at photos of the real thing shows up the limitations in the kit parts; the details are vague and a good deal is missing. Really it would be best to replace it with an aftermarket option, but I donít want to hold things up so Iím going to try and enhance what is in the kit.
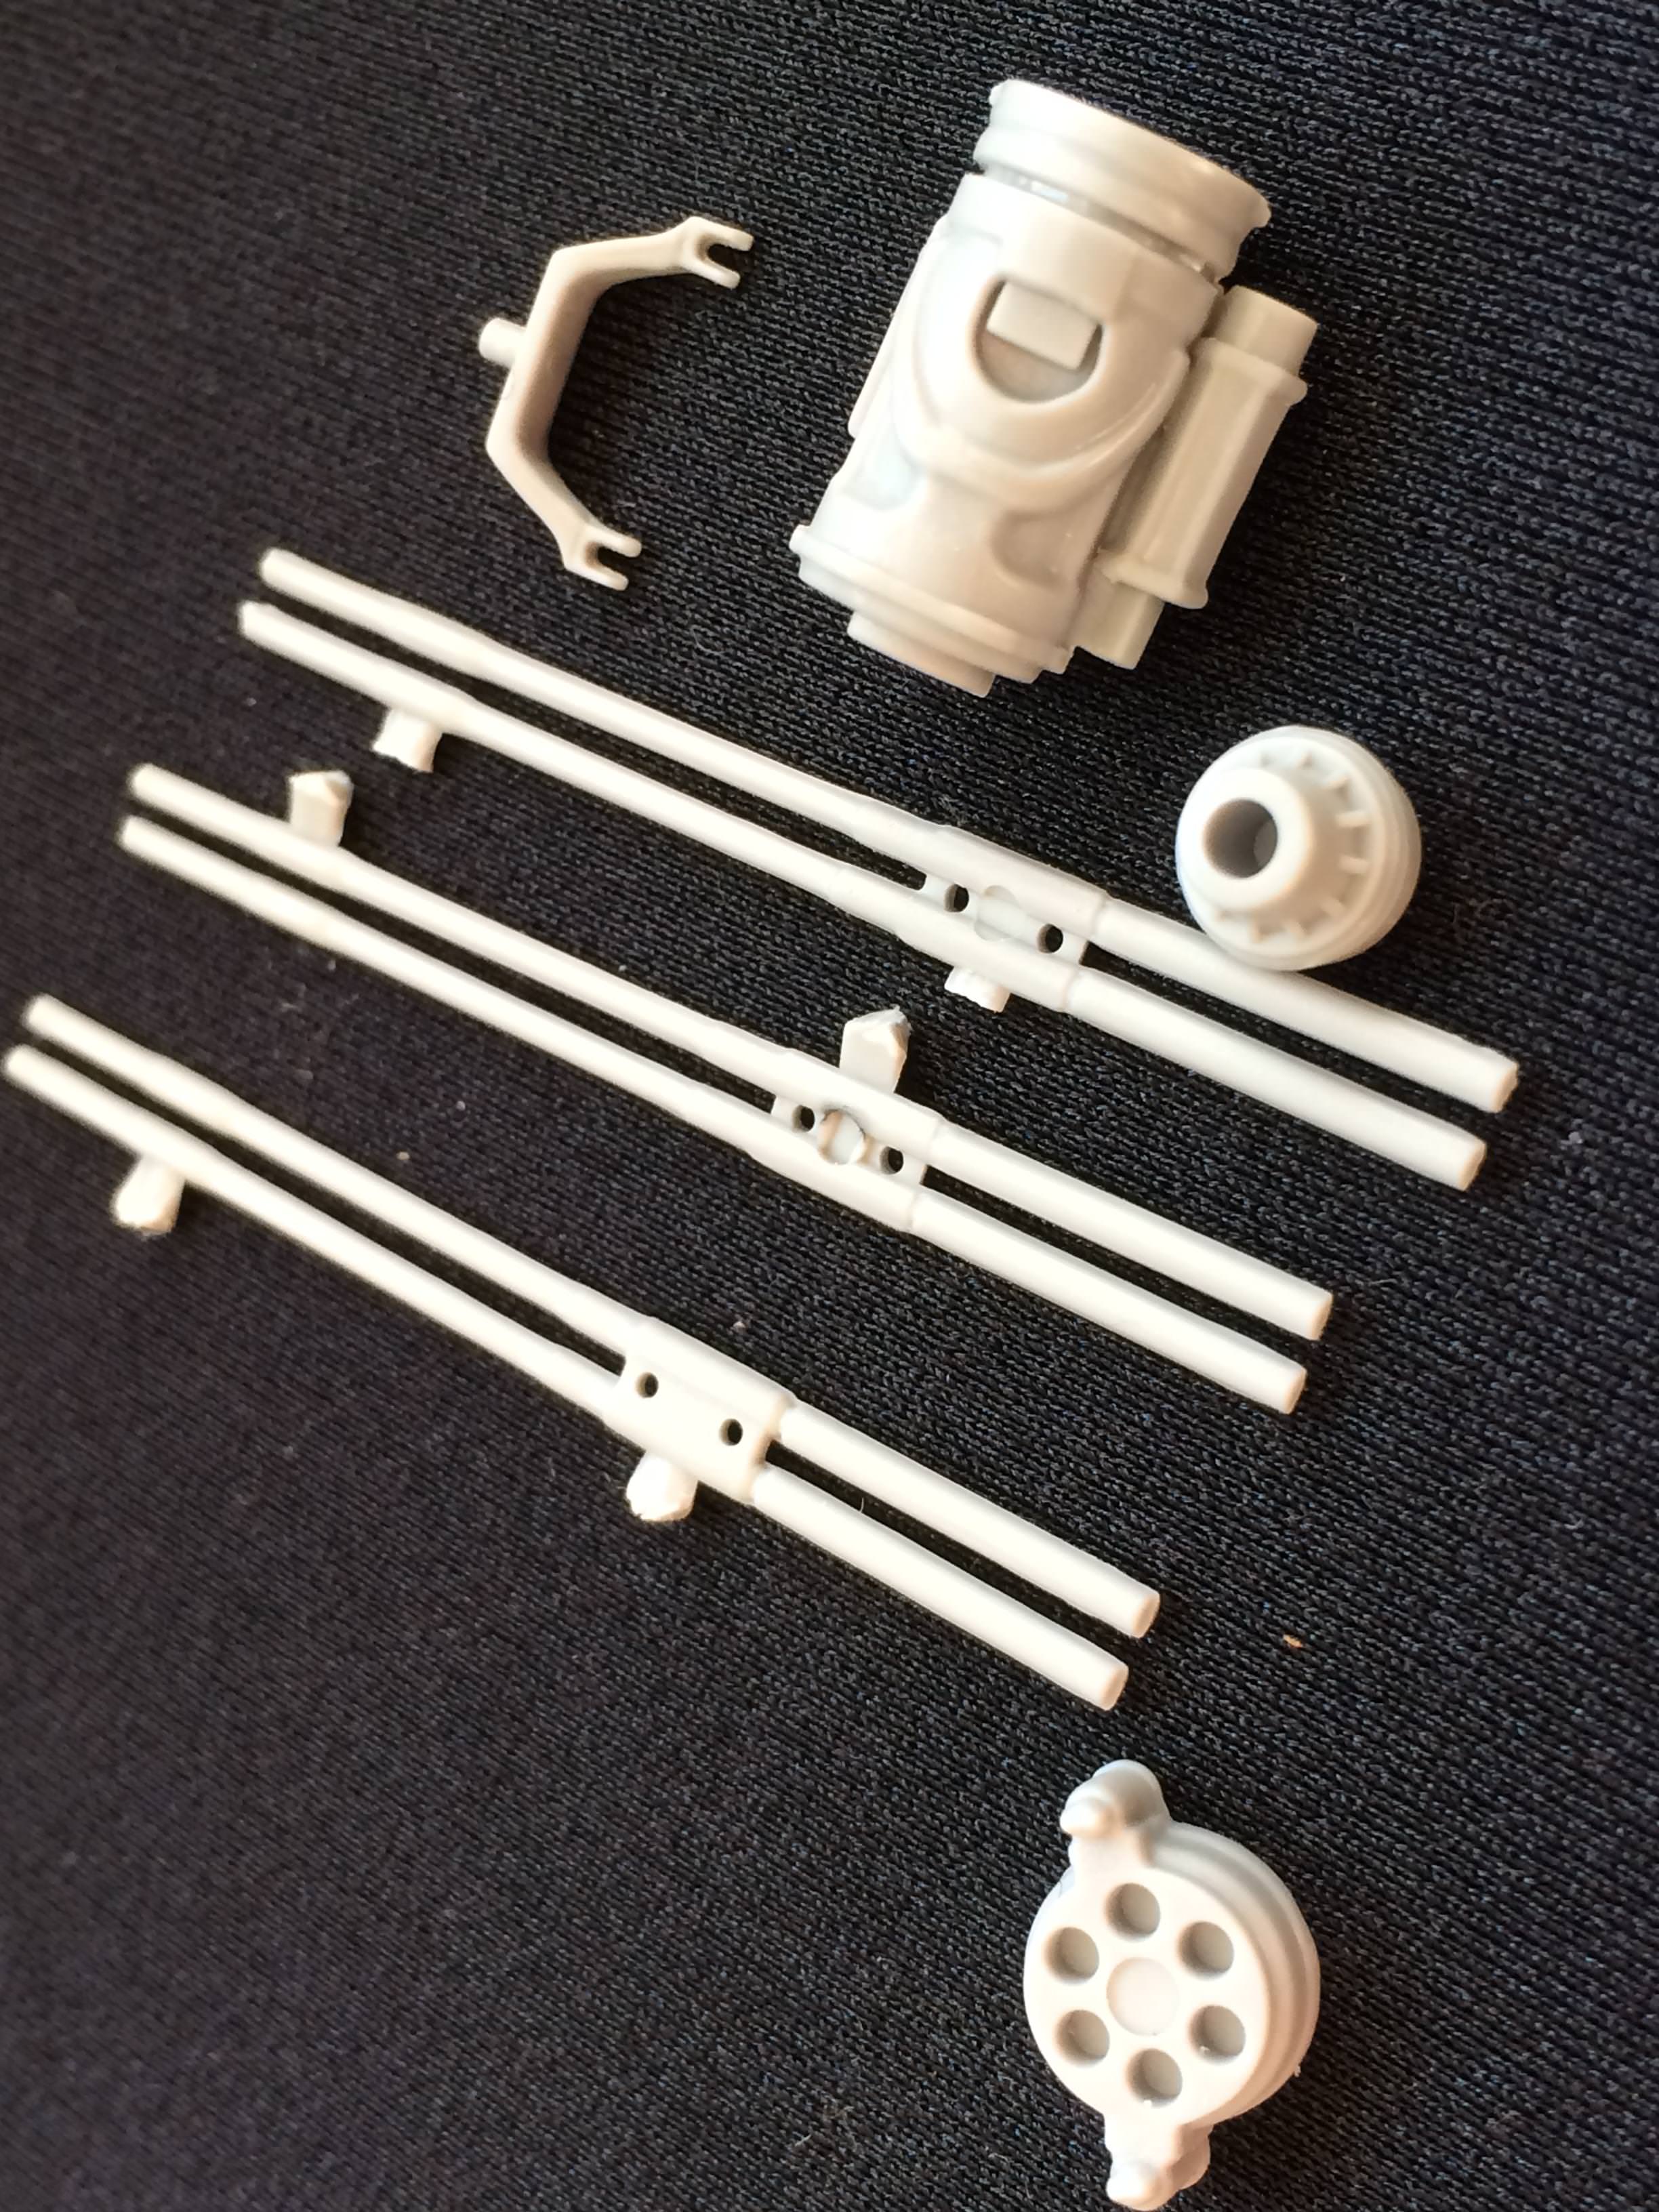
Iím emphasising some the detail by adding stretched sprue and small pieces of plastic card. Basically using the techniques described earlier. The Eduard set for the gun bay also gives a little panel. The shot below is an early work in progress view showing stretched sprue being attached. Iíll upload again more when thereís more progress.
Happy modelling guys.

Iím emphasising some the detail by adding stretched sprue and small pieces of plastic card. Basically using the techniques described earlier. The Eduard set for the gun bay also gives a little panel. The shot below is an early work in progress view showing stretched sprue being attached. Iíll upload again more when thereís more progress.

Happy modelling guys.

SteveAndrews

Joined: August 16, 2010
KitMaker: 693 posts
AeroScale: 551 posts

Posted: Monday, November 19, 2018 - 10:16 AM UTC
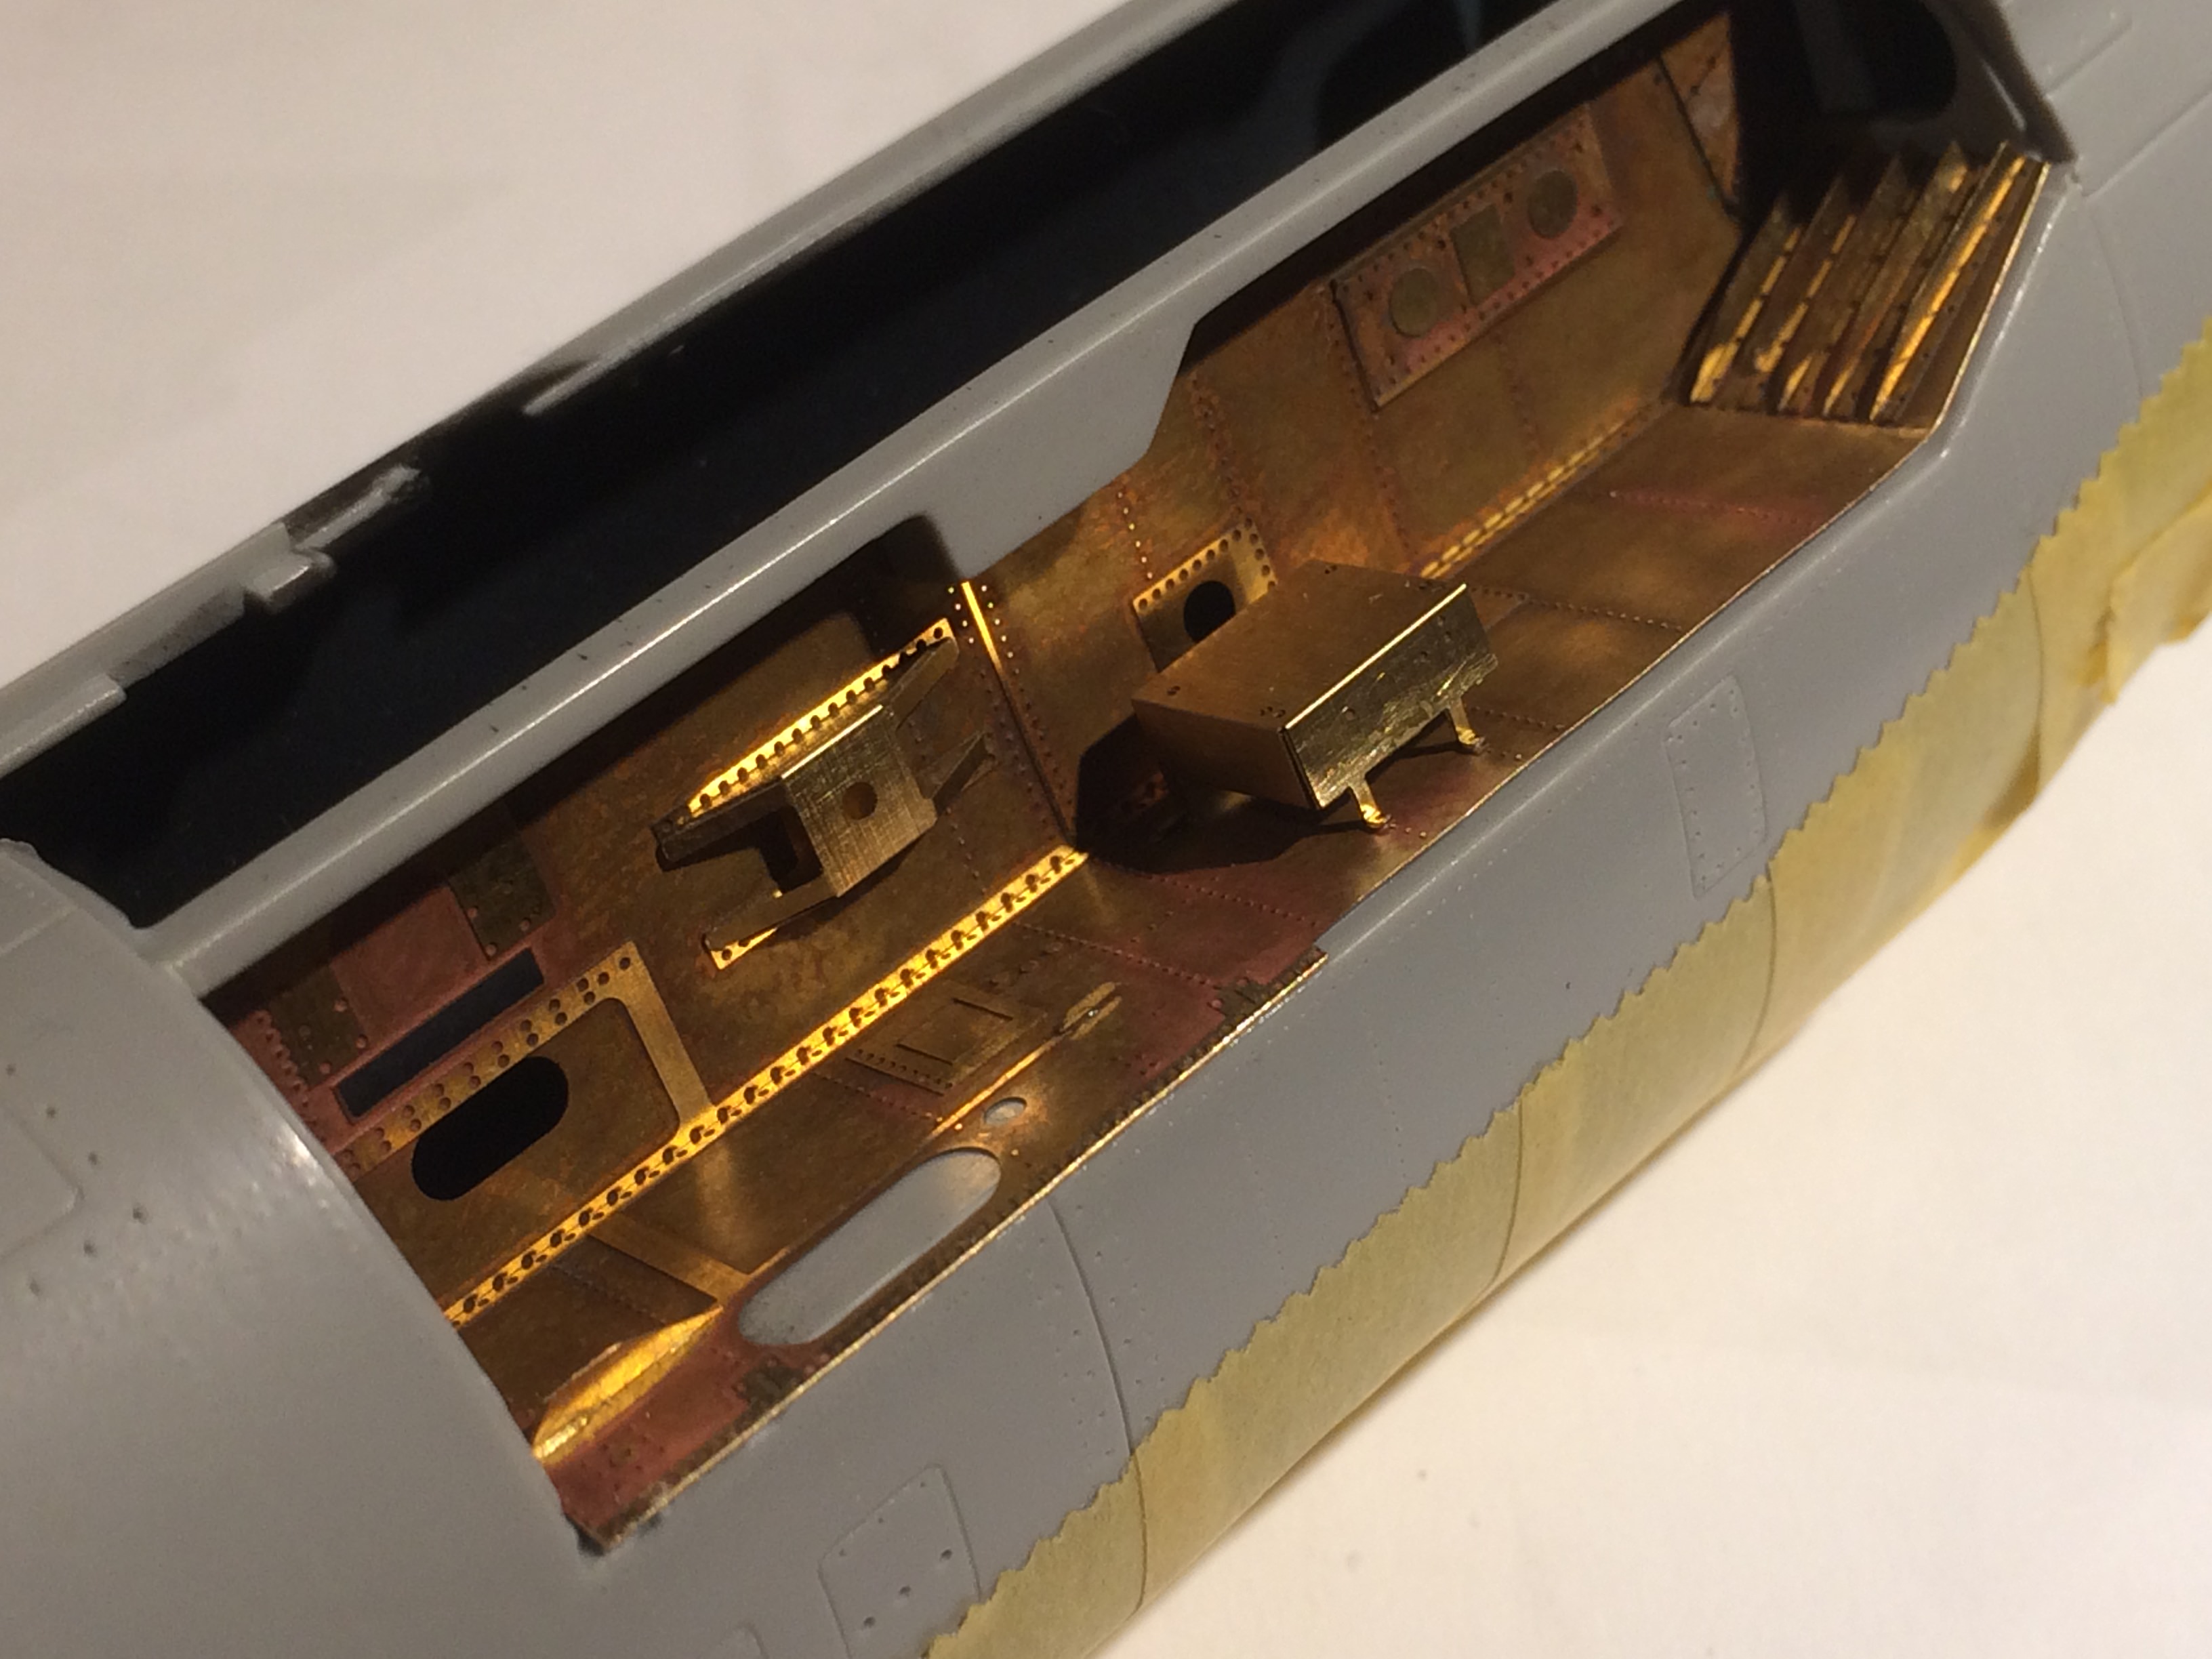
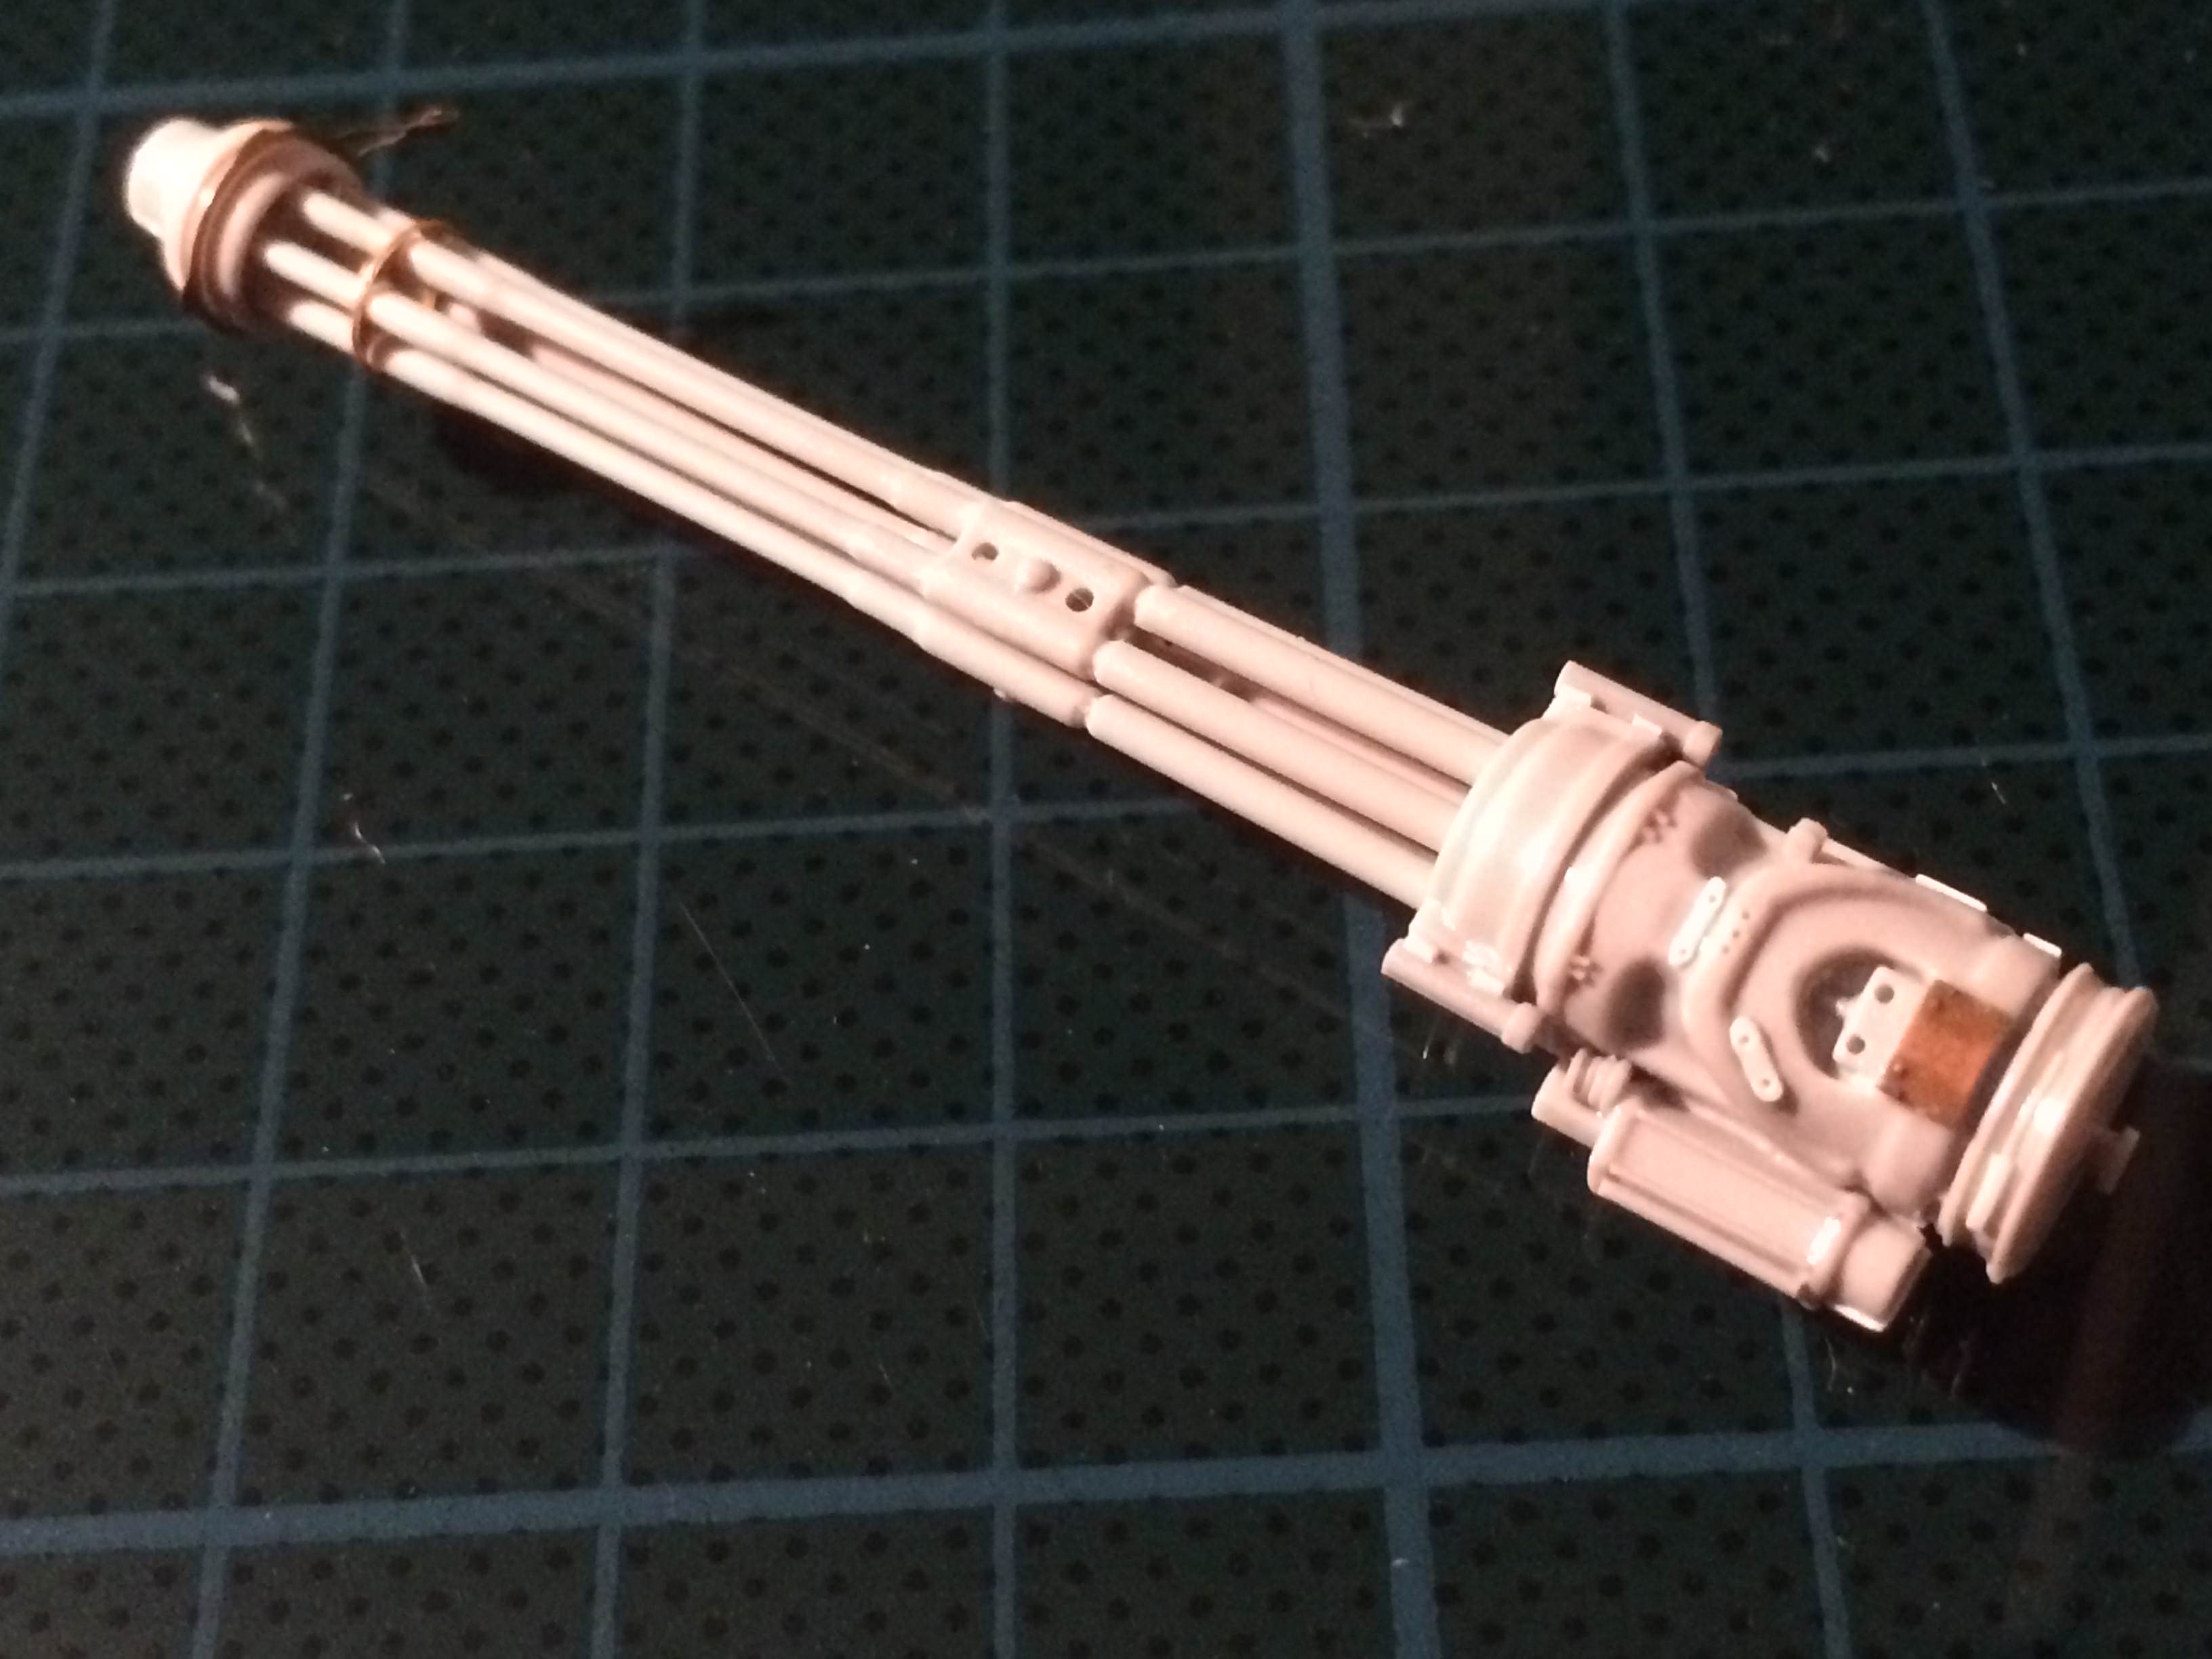
Itís hard to see the changes made to the M61A1, but changes there are. A combination of small pieces of evergreen strip, stretched sprue, parts cut from spares, and some pin holes has added some of the missing details. At the same time Iíve been building up the interior of the gun bay using Eduardís lovely photo etch. Itís all a bit fiddly and painstaking but thereís a much more authentic interior coming together.
Either construction errors on my part or a little bit of optimism on Eduardís part means the photo etch interior is just a bit too big to fit into the area left when kit parts are removed. Sanding way the interior edges of the PE did the job. Hereís how it all looks now. Not finished yet but its coming along.
Happy modelling,
Steve.
Either construction errors on my part or a little bit of optimism on Eduardís part means the photo etch interior is just a bit too big to fit into the area left when kit parts are removed. Sanding way the interior edges of the PE did the job. Hereís how it all looks now. Not finished yet but its coming along.


Happy modelling,
Steve.
Joel_W

Joined: December 04, 2010
KitMaker: 11,666 posts
AeroScale: 7,410 posts

Posted: Tuesday, November 20, 2018 - 02:30 AM UTC
Steve,
You certainly succeeded in making the M61 look a lot more detailed and thus closer to a replica then a model kit part.
Honestly. I much rather see bits & pieces then just bought AM, as modelers at your skill level can turn those home made pieces into something very special, that is truly a one of a kind.
Joel

RhinoSpit

Joined: September 22, 2016
KitMaker: 224 posts
AeroScale: 191 posts

Posted: Tuesday, November 20, 2018 - 07:53 PM UTC
Don't forget to unload the gun before assembly 


SteveAndrews

Joined: August 16, 2010
KitMaker: 693 posts
AeroScale: 551 posts

Posted: Tuesday, November 20, 2018 - 11:51 PM UTC
Hi Joel
I have to agree. There's something very satisfying about a DIY approach.
Franck, I'll be careful! I don't want a 1/32 scale 20mm shell in the finger. Ouch. :-)
Have a great day,
Steve.
I have to agree. There's something very satisfying about a DIY approach.
Franck, I'll be careful! I don't want a 1/32 scale 20mm shell in the finger. Ouch. :-)
Have a great day,
Steve.
 |


