Cold War (1950-1974)
Discuss the aircraft modeling subjects during the Cold War period.
Hosted by Tim Hatton
Best Starfighter Ever?
SteveAndrews
_VISITCOMMUNITY
England - South East, United Kingdom
Joined: August 16, 2010
KitMaker: 693 posts
AeroScale: 551 posts
Posted: Wednesday, August 29, 2018 - 07:37 AM UTC
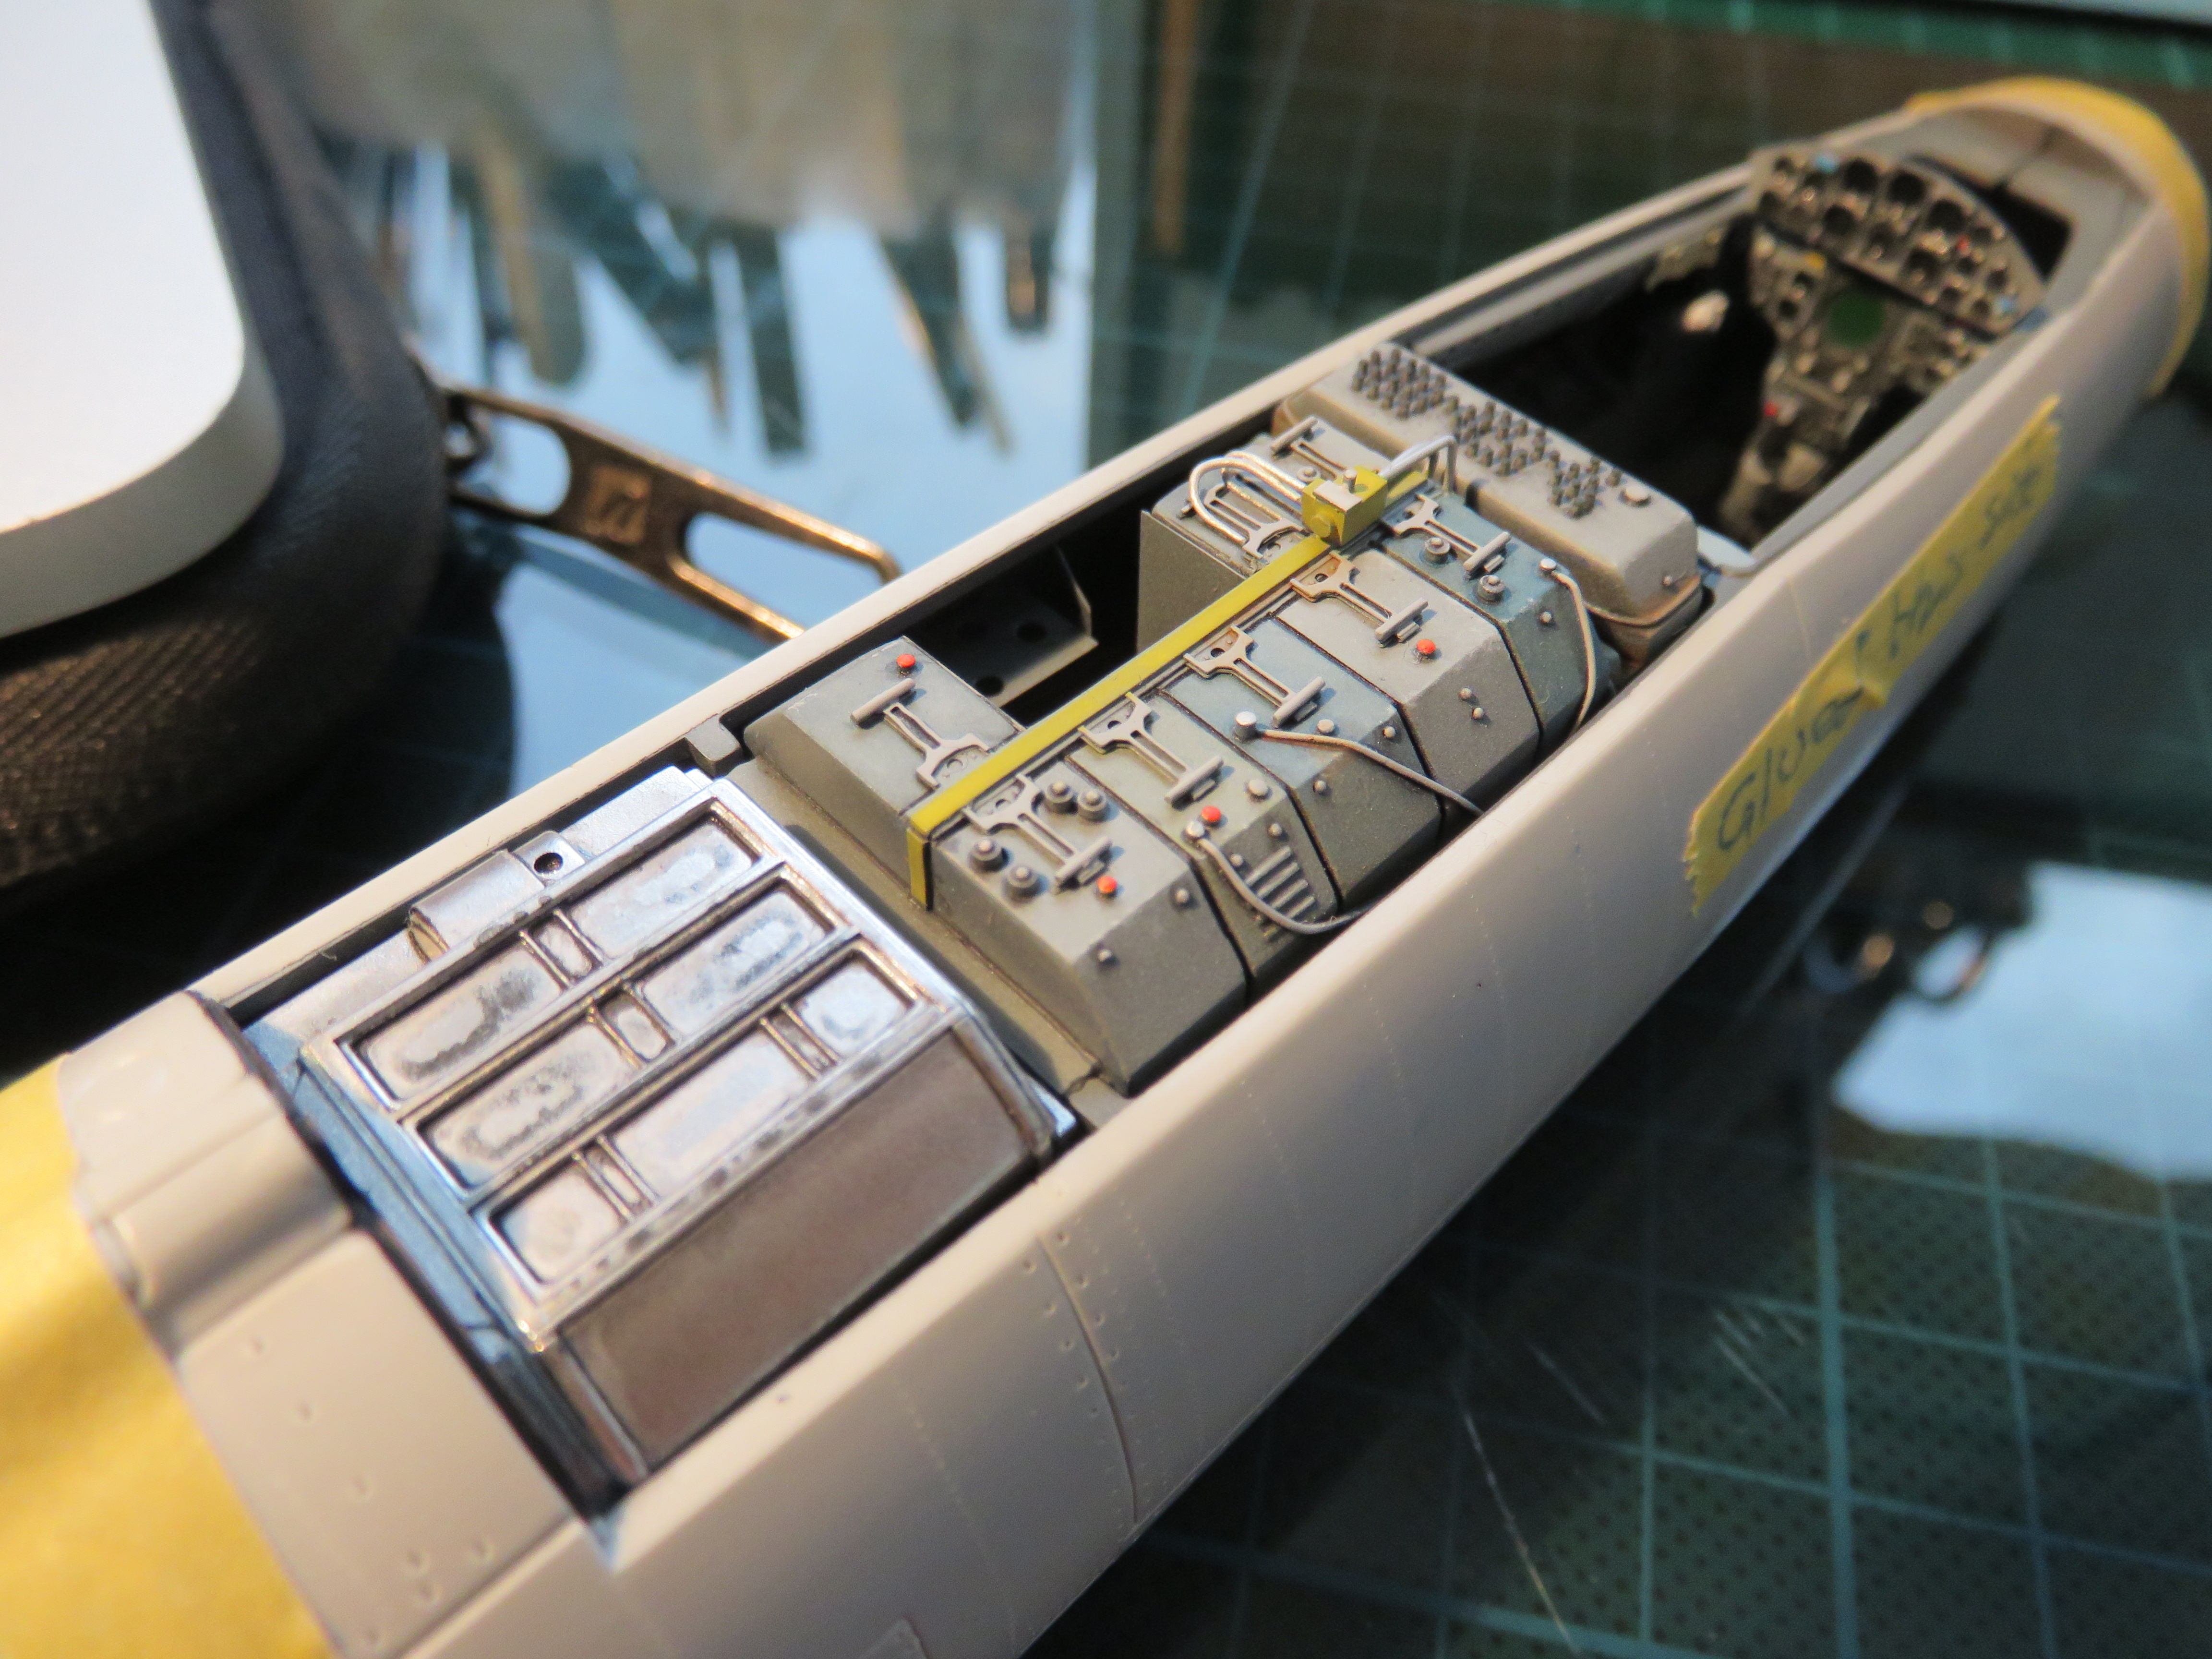
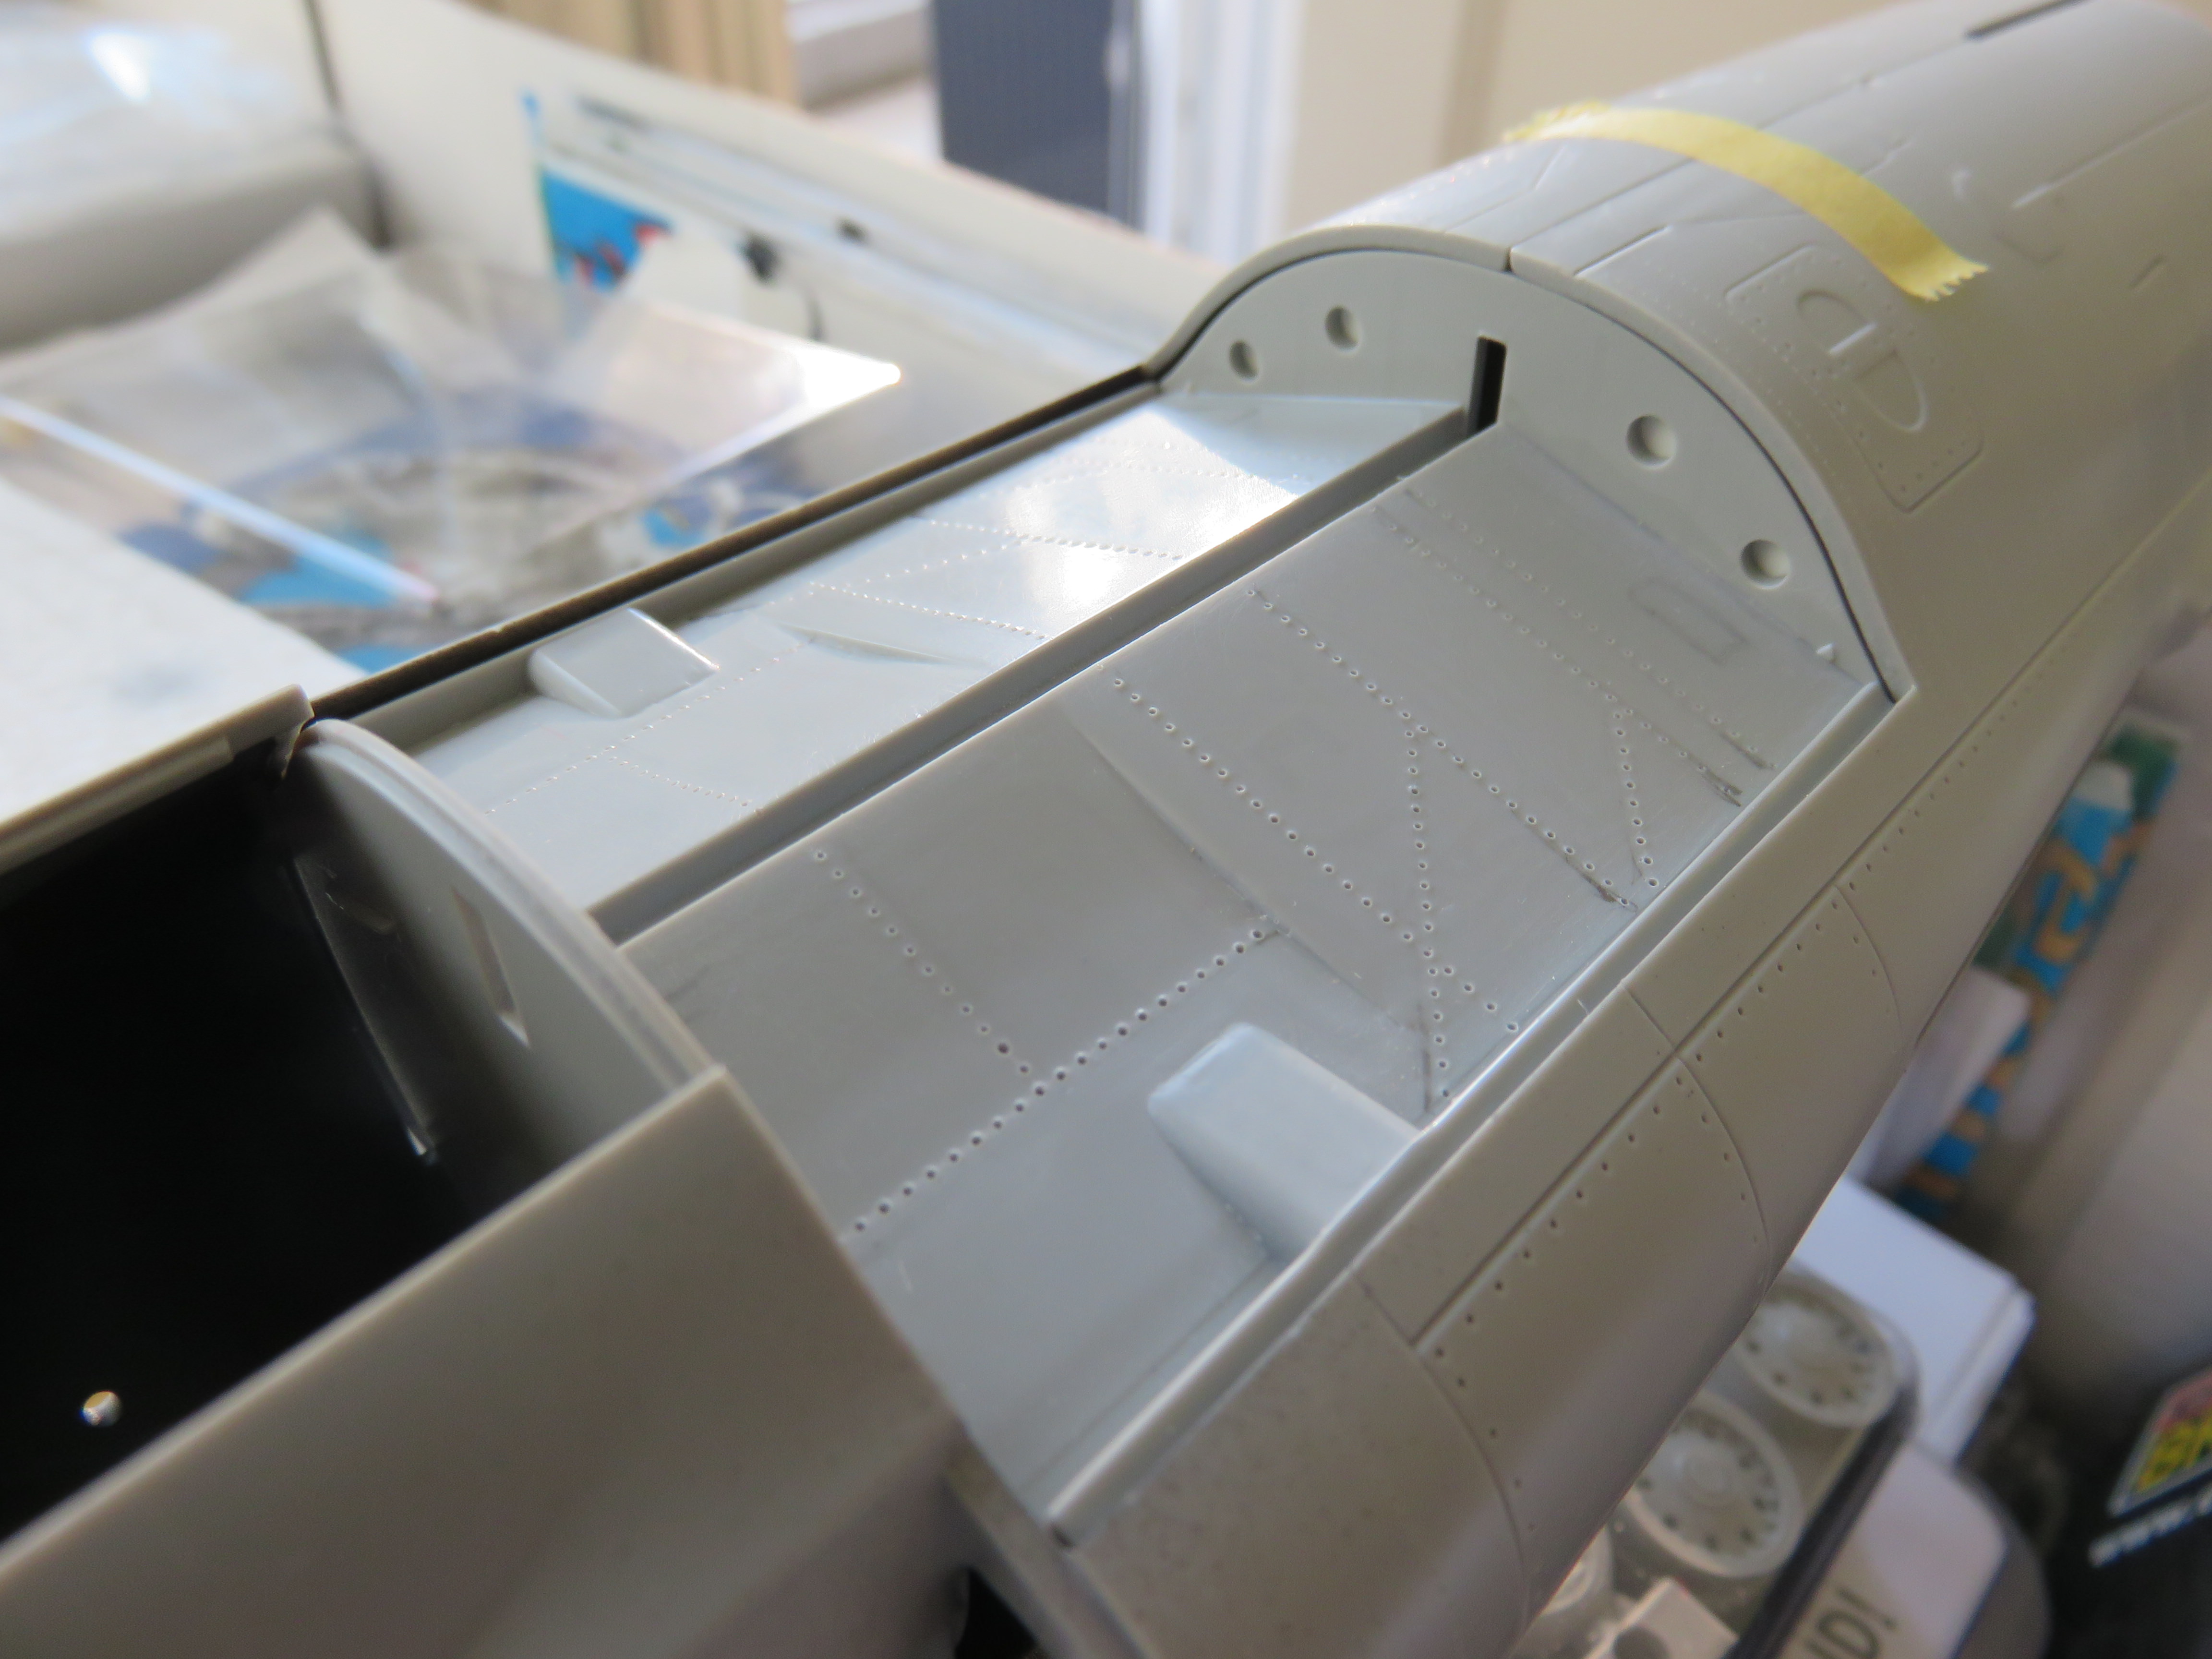
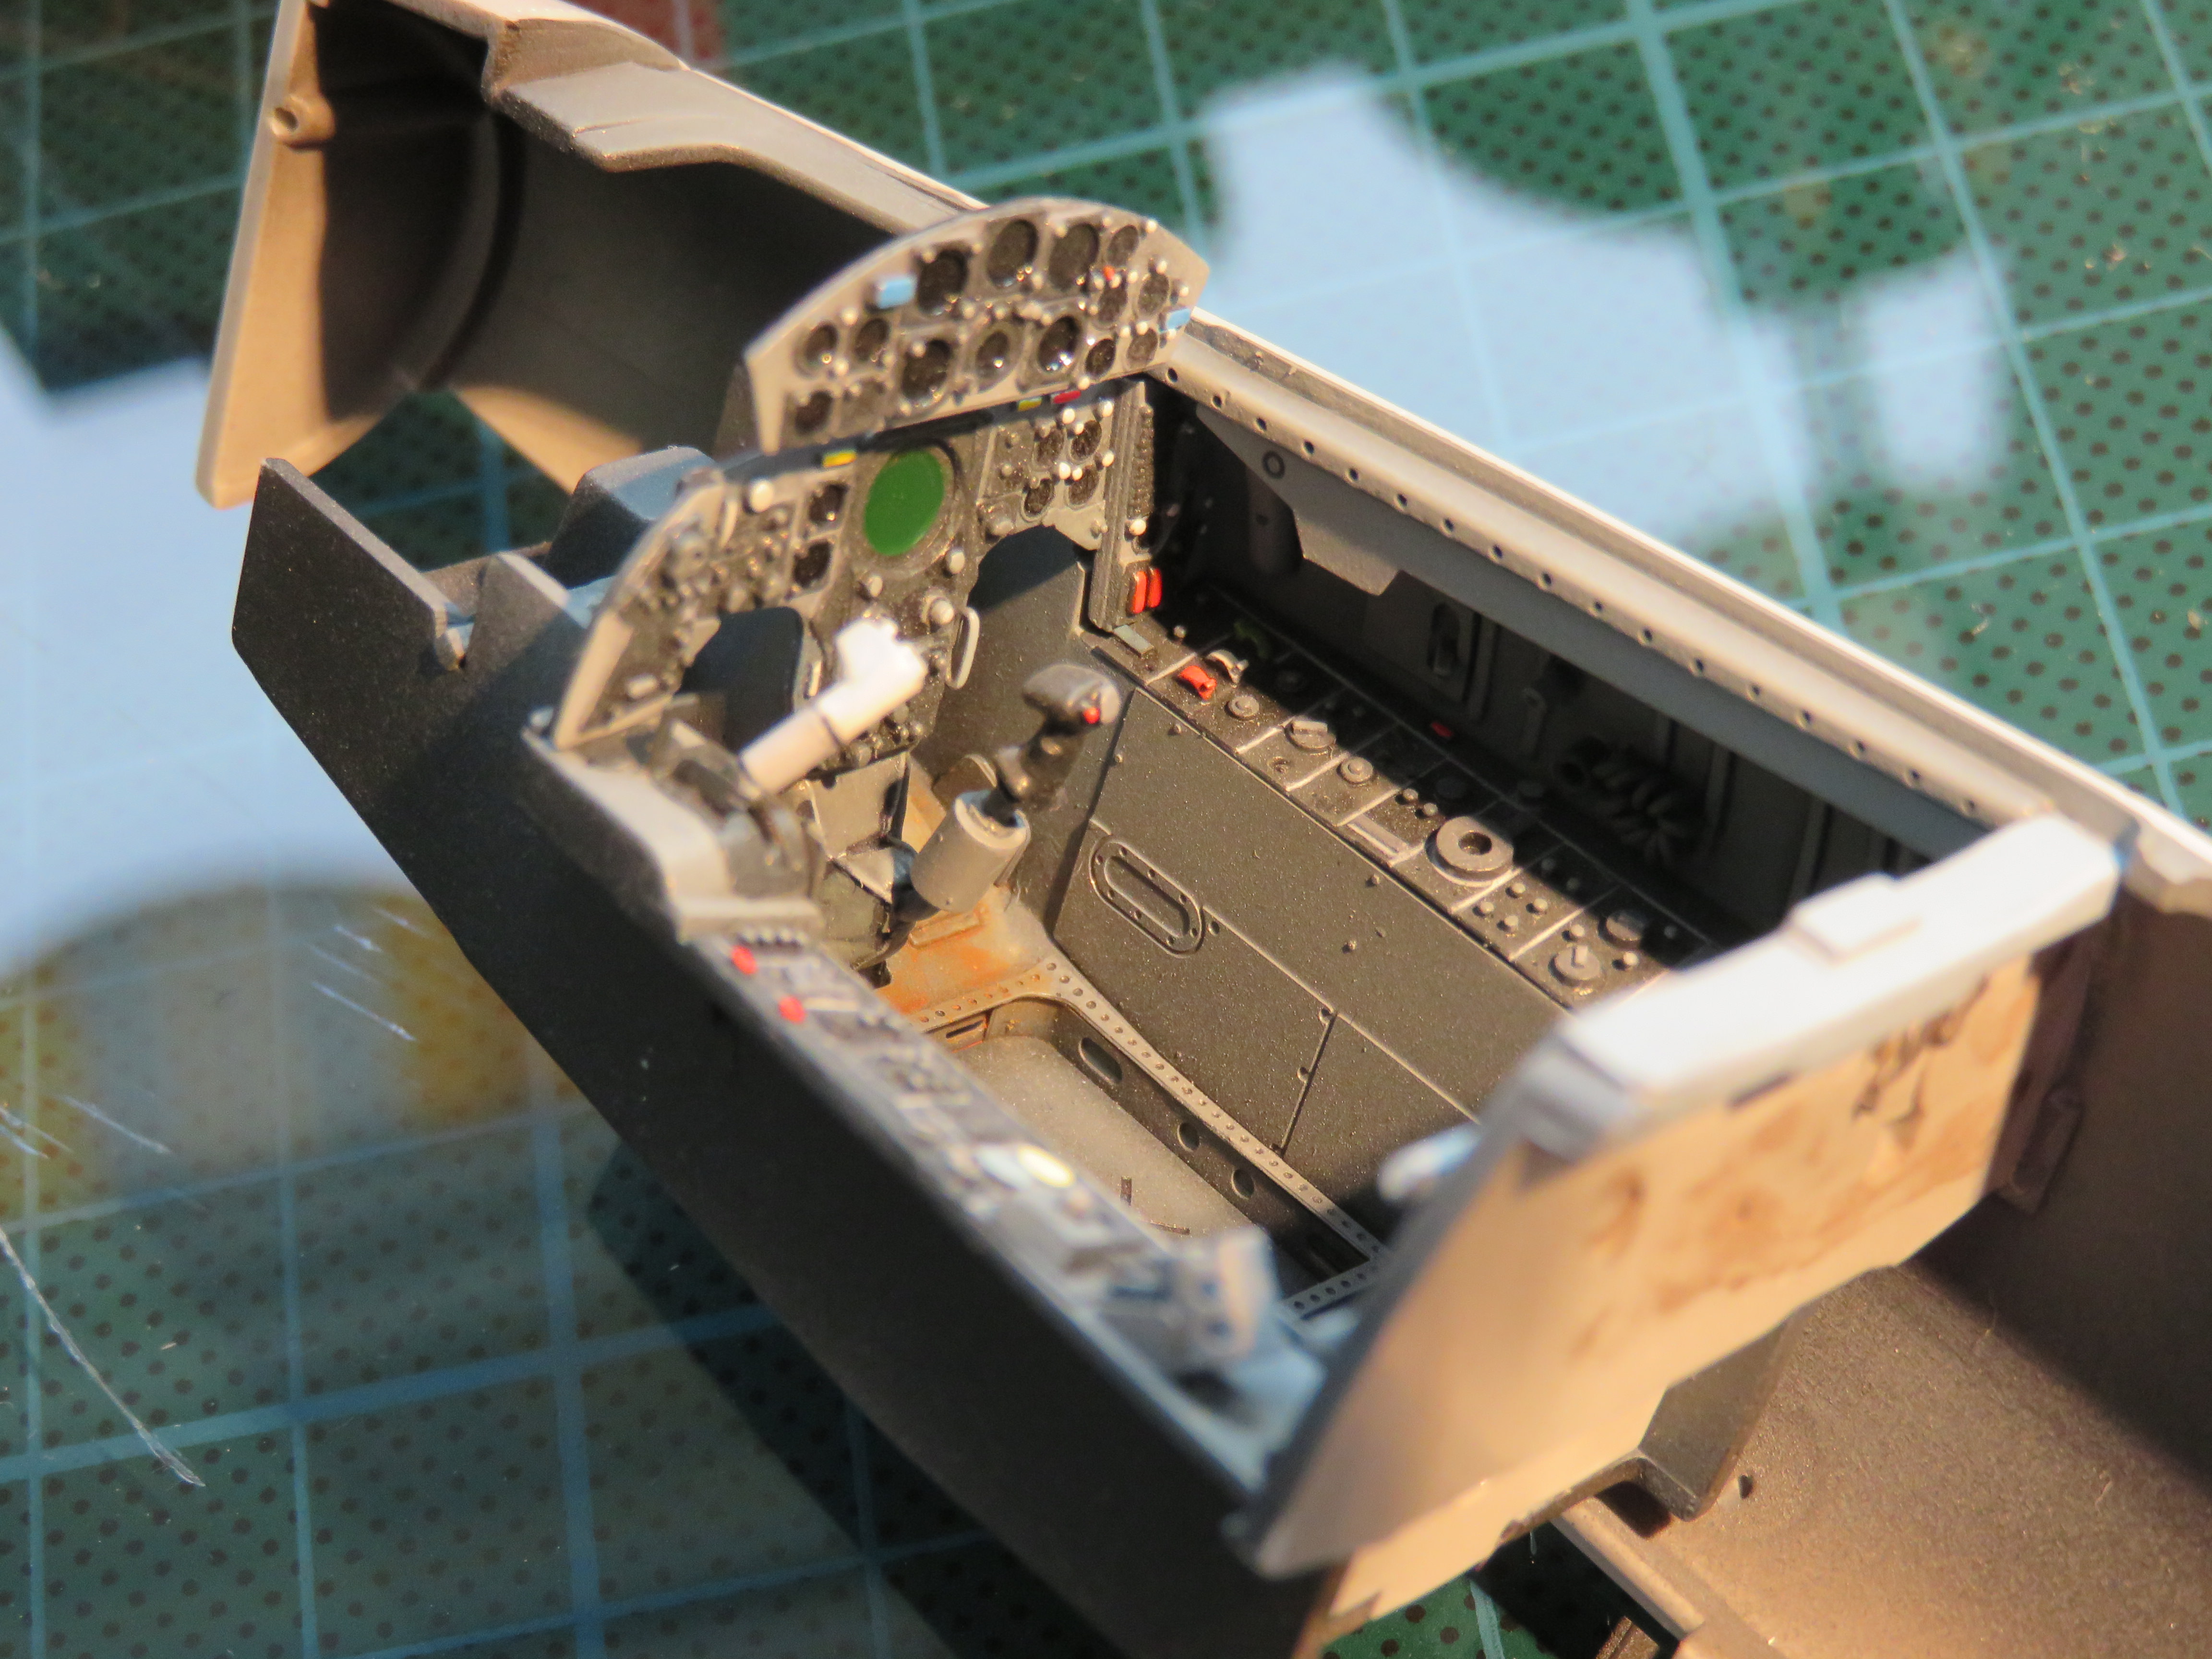
With the cockpit and avionics parts ready, I can start gluing things in place. In the past I’ve had problems with getting parts aligned, so these days I dry fit the cockpit, tape the fuselage sides together and then add glue to one side. That gets everything aligned, and by gluing one side only I can split the fuselage halves to add more parts. Luckily this kit has a lot of gaps in the fuselage so I can get to the interior parts easily. Et voila…


Happy modelling guys.
RhinoSpit
_VISITCOMMUNITY
Bas-Rhin, France
Joined: September 22, 2016
KitMaker: 224 posts
AeroScale: 191 posts
Posted: Wednesday, August 29, 2018 - 09:41 PM UTC
I follow this build since the beginning and i'm astonished of the level of details put in each pieces.
Cosimodo
#335
_VISITCOMMUNITY
Auckland, New Zealand
Joined: September 03, 2013
KitMaker: 1,808 posts
AeroScale: 195 posts
Posted: Wednesday, August 29, 2018 - 10:29 PM UTC
Hi Steve,
I haven't seen this for a month or so. Great to see the painting finished on those parts you have expended so much time on, the result certainly confirms it was worth it.
Hope you didn't head to Silverstone on Sunday for the rain. I stayed up to watch it and ended up watching Spa instead

cheers
Michael
SteveAndrews
_VISITCOMMUNITY
England - South East, United Kingdom
Joined: August 16, 2010
KitMaker: 693 posts
AeroScale: 551 posts
Posted: Thursday, August 30, 2018 - 12:27 AM UTC
Salut Franck! thanks very much. I probably spend far too much time looking at tiny bits of plastic :-)

Michael, thank you too. My feelings about the kits I build go through many stages from joy to frustration. This one definitely falls into the 'joy' category. At least for now.

Luckily, I was at home watching the... I was going to say race, but it turned out to be rain.

Happy modelling guys.
SpeedyJ
_VISITCOMMUNITY
Bangkok, Thailand / ไทย
Joined: September 17, 2013
KitMaker: 1,617 posts
AeroScale: 212 posts
Posted: Thursday, August 30, 2018 - 02:33 AM UTC

Quoted Text

I follow this build since the beginning and i'm astonished of the level of details put in each pieces.


Hi Steve, I second the comment above.
However more or less from the background, as this is a long time ago I logged in to Aeroscale. Marvellous job you're doing with the kit.
I was searching for the etched details you add to this build and have a question about the cockpit floor (the sink). Is that a common thing on all Starfighters? What I understand is that the C model is also the base for the NATO G type. NATO partners Industry like Fokker, Fiat build a lot of them.
They differ however, which I saw in avionics behind the cockpit and have a larger tail for sure, but basically it is a C upgraded to NATO G, where G stands for German.
The seat is also different later on, after multiple crashes, the G's were equipped with M.B. Q7"s, like the German F-104's for example. So what seat is provide for a C in your build? C2? Is there also a M.B. provided with the kit?
I'm planning a Marine version of the Modern German Airforce. Not doing a Italeri but a Hasegawa, My research did not give me the full satisfaction of this issue, but I want to be correct. Maybe someone else knows...
The prices really got down for Hasegawa kit, and research for build logs gave me a solid base to buy those kits.
Aftermarket shall be my friend to get some levelling up to 2018 standards.
All is on different planes heading Thailand.
Will keep watching your progress, for the painting approach of details I already got my notebook deployed.

Happy building.

Kind regards,

Robert Jan
Jessie_C
_VISITCOMMUNITY
British Columbia, Canada
Joined: September 03, 2009
KitMaker: 6,965 posts
AeroScale: 6,247 posts
Posted: Thursday, August 30, 2018 - 04:28 AM UTC
No Starfighter ever had a cockpit floor. It's a legacy of the -A model's downward ejection seat. When you remove the seat, there's nothing there apart from the outside skin. Any "floor" in models is inaccurate, but there as a result of limitations of the moulding process and a place to glue the seat.
SteveAndrews
_VISITCOMMUNITY
England - South East, United Kingdom
Joined: August 16, 2010
KitMaker: 693 posts
AeroScale: 551 posts
Posted: Thursday, August 30, 2018 - 07:28 AM UTC
Hi Robert and Jessie

Thanks very much for the comments on my work so far.

I'm no expert on the Starfighter or any aircraft for that matter. I love building them and I rely heavily on references to inform my builds. Yes, there sure were a lot of versions of the F-104. It can be confusing to sort them out, and the references don't always seem to agree.
Robert, I used a combination of the kit parts, Eduard photo-etch and scratch built items. That recess under the seat is from the Eduard set. My final result is probably not 100% accurate. As Jessie says, there's a limit (in this case my limited patience).
Frankly, with the seat installed you can't see what is underneath, so unless you really, really care about accuracy, you don't need to worry too much. Anyhow, it's your kit and your call of course.

Have a look at this, for a super virtual tour of an F-104C cockpit:

http://www.nmusafvirtualtour.com/cockpits/CW_tour/CW-22.html

Maybe some other folks can shed more light on the ejector seats used in various US and export versions?

I hope you enjoy building whatever version you go for.

Thanks both for looking in.

Steve.

P.S. Eduard produce lovely kits in 1/48 scale if you feel like going down that route. I made a C version some years ago and it was a gem - easily as much detail as the Italeri kit in 1:32, but not as impressive when its built. Big can be beautiful :-)
Jessie_C
_VISITCOMMUNITY
British Columbia, Canada
Joined: September 03, 2009
KitMaker: 6,965 posts
AeroScale: 6,247 posts
Posted: Thursday, August 30, 2018 - 08:09 AM UTC
From the Ejection Site:

The F-104 A used downward-ejection due to fears that the pilot wouldn't clear the tailplane in an upward ejection. Stanley B (first 26 A/C), C (next 15 A/C) and C-1 (remainder of F-104A production run) seats were used.

After discovering that pilots really, really didn't like to eject downwards at low altitude, Lockheed developed The Stanley seat into the C-2 upwards ejection seat (commonly called the Lockheed seat), which equipped the majority of F-104s made. Some late -104s were fitted with S/R-2 seats which were a modification of the C-2.

The Martin-Baker Q7 seat was retrofitted to -G models in several European countries when the Lockheed seat's poor performance in rapidly-descending aircraft became known. The Q7 had a much faster ejection sequence which pilots appreciated.
Joel_W
Staff MemberAssociate Editor
AUTOMODELER
_VISITCOMMUNITY
New York, United States
Joined: December 04, 2010
KitMaker: 11,666 posts
AeroScale: 7,410 posts
Posted: Thursday, August 30, 2018 - 09:58 AM UTC
Steve,
As usual, great progress. The installed Pit looks outstanding, and well worth the effort you put into it.

Joel
SteveAndrews
_VISITCOMMUNITY
England - South East, United Kingdom
Joined: August 16, 2010
KitMaker: 693 posts
AeroScale: 551 posts
Posted: Thursday, August 30, 2018 - 10:29 AM UTC
Hi Joel,

Thank you very much. It feels good to get a major step done.

Jessie, thanks a million for the references too.

Have a great day folks.
SteveAndrews
_VISITCOMMUNITY
England - South East, United Kingdom
Joined: August 16, 2010
KitMaker: 693 posts
AeroScale: 551 posts
Posted: Monday, September 03, 2018 - 07:14 AM UTC
If you follow the kit instructions you will build the rear landing gear assembly before installing it in the fuselage. I want to change the order so that I can deal with any fit issues between the bay walls and the fuselage before I start scratch building new details. That will avoid sanding and filling with small and breakable parts in place.

Adopting the same technique used to get the cockpit aligned, I dry fitted the basic parts then glued them together without gluing them to the fuselage. The fit is actually pretty good but there’s still need for some filling and sanding.


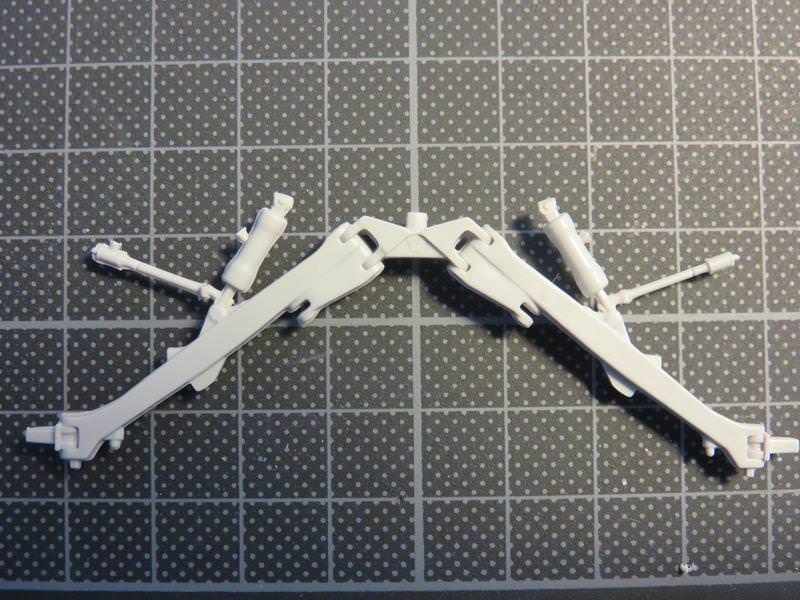
A big centre spar fits over the landing gear legs and holds them in place. I modified it so that the spar and legs can be fitted after the walls are in place. It’s easy enough - just remove the two locating tabs. There’s still a deep channel to guide fitting, and the part drops straight in with the tabs taken off. Hopefully that means there won’t be any alignment problems later.

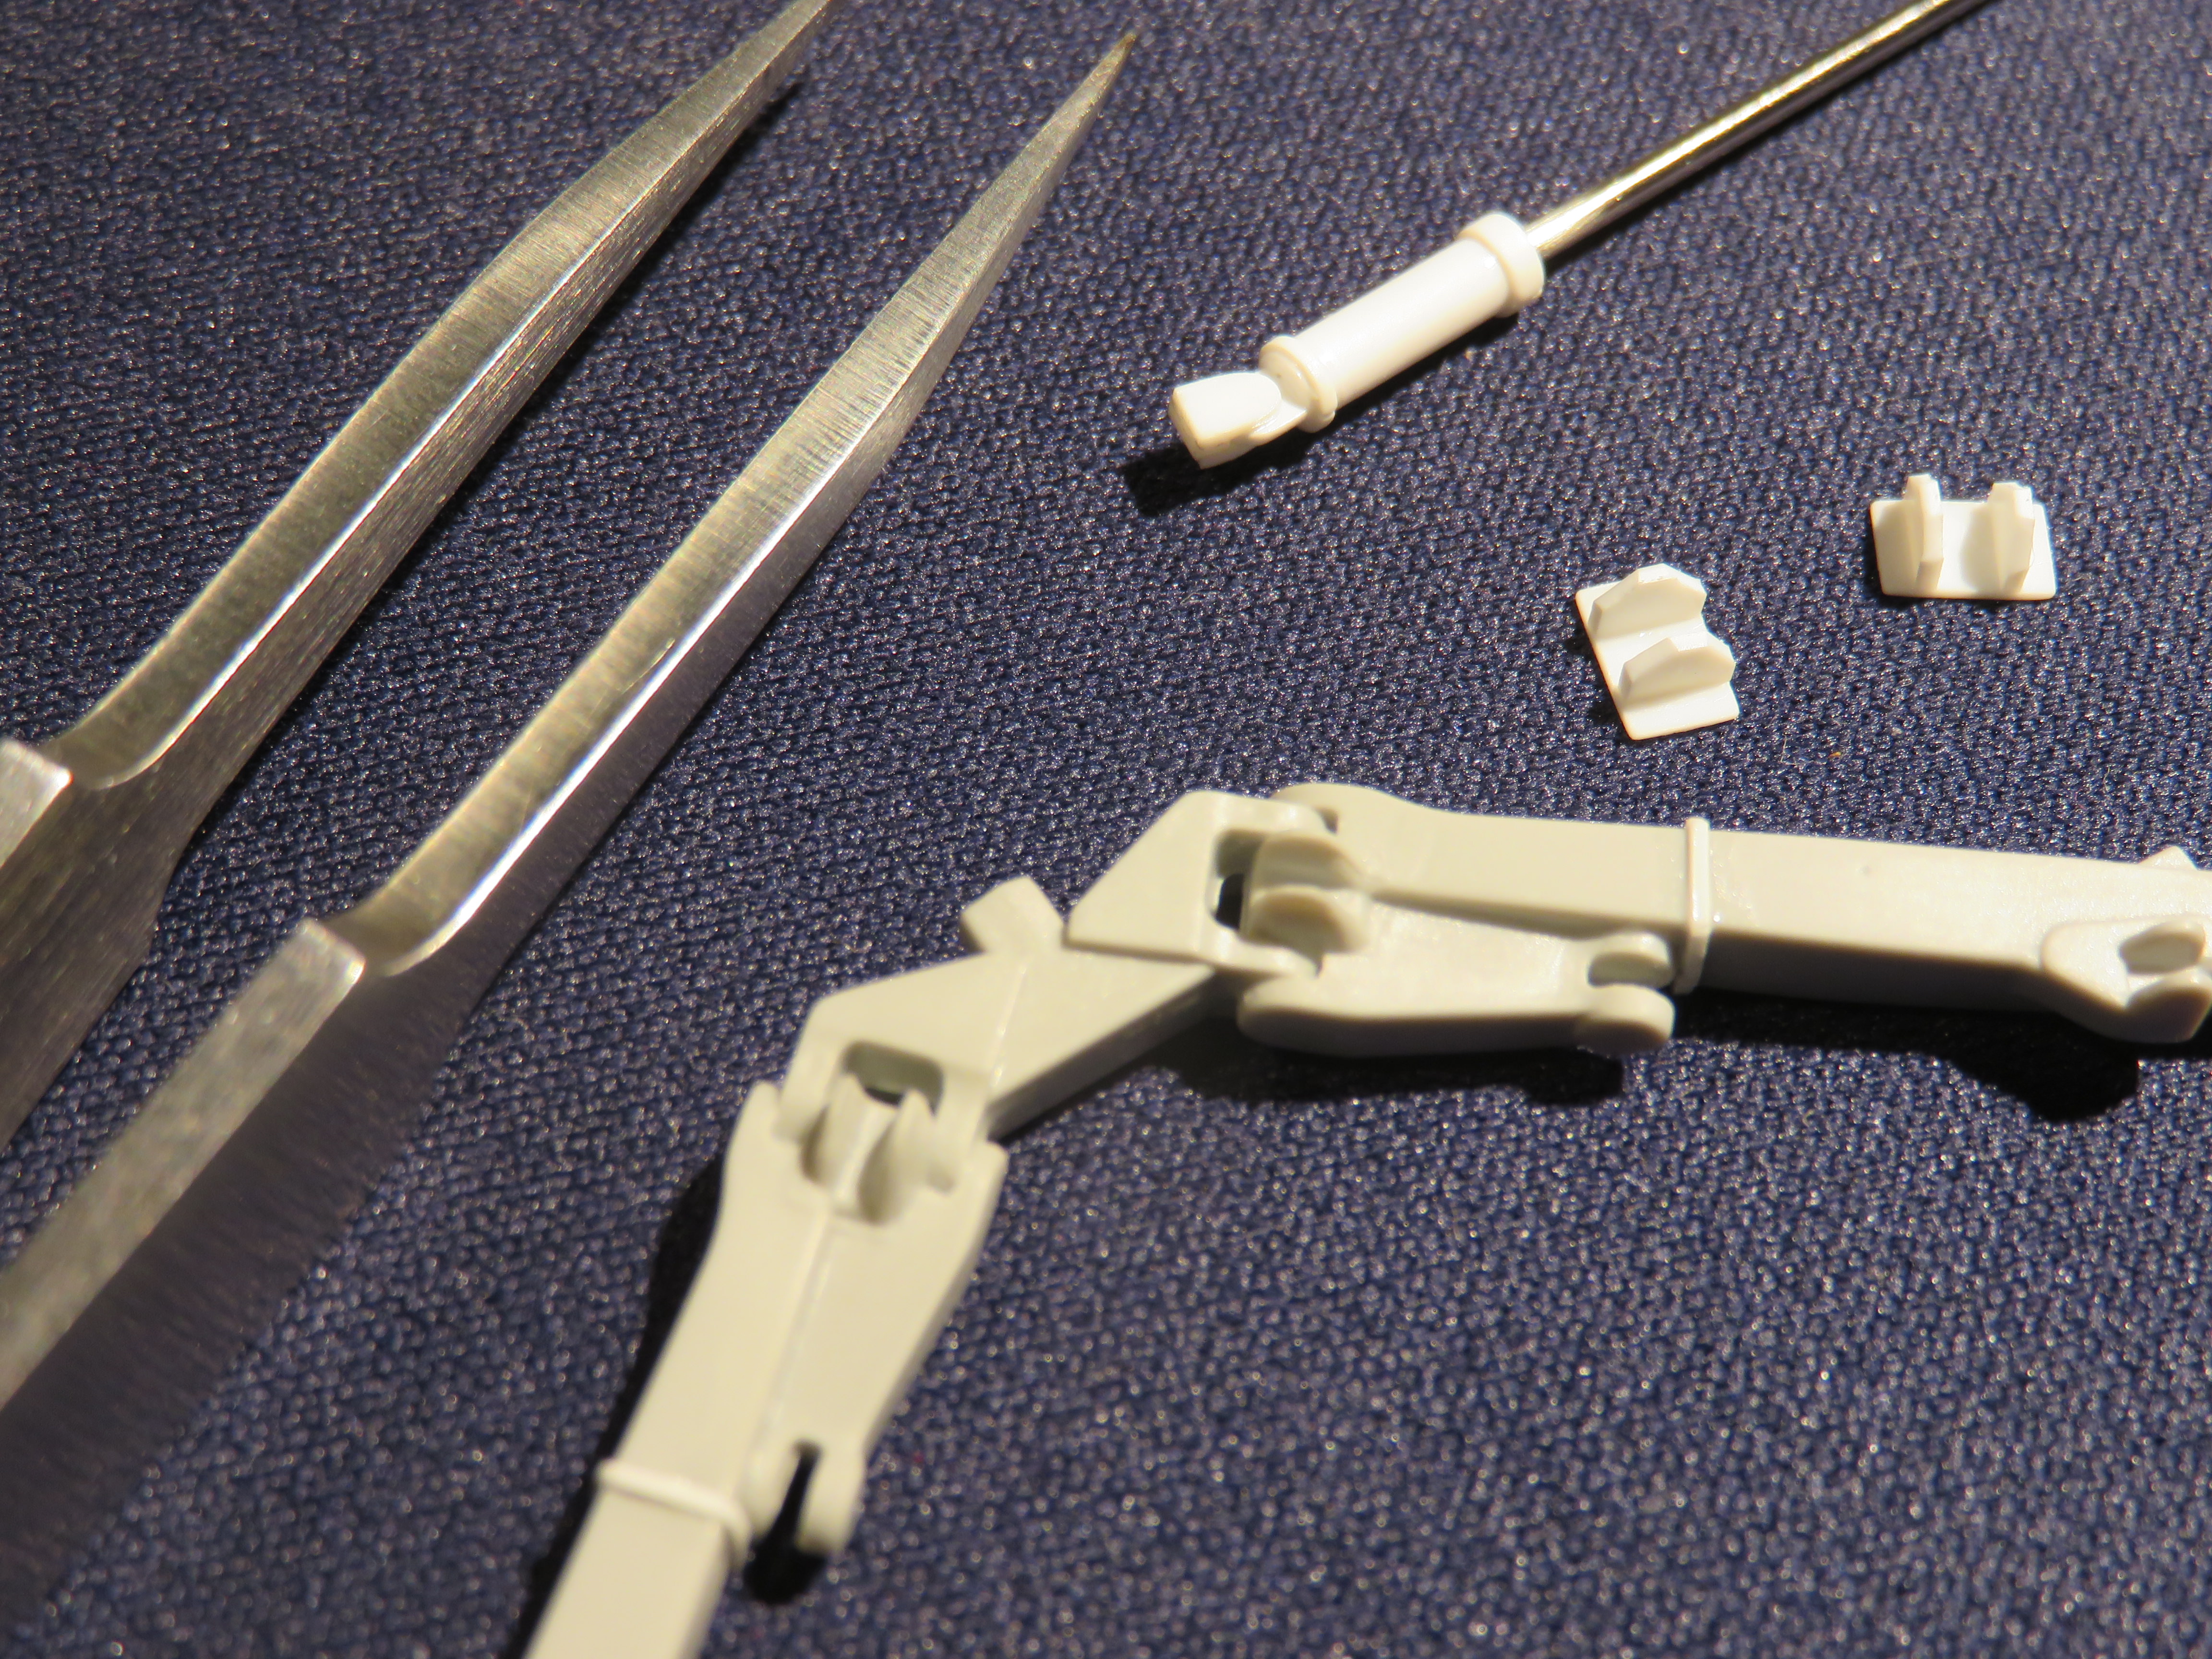
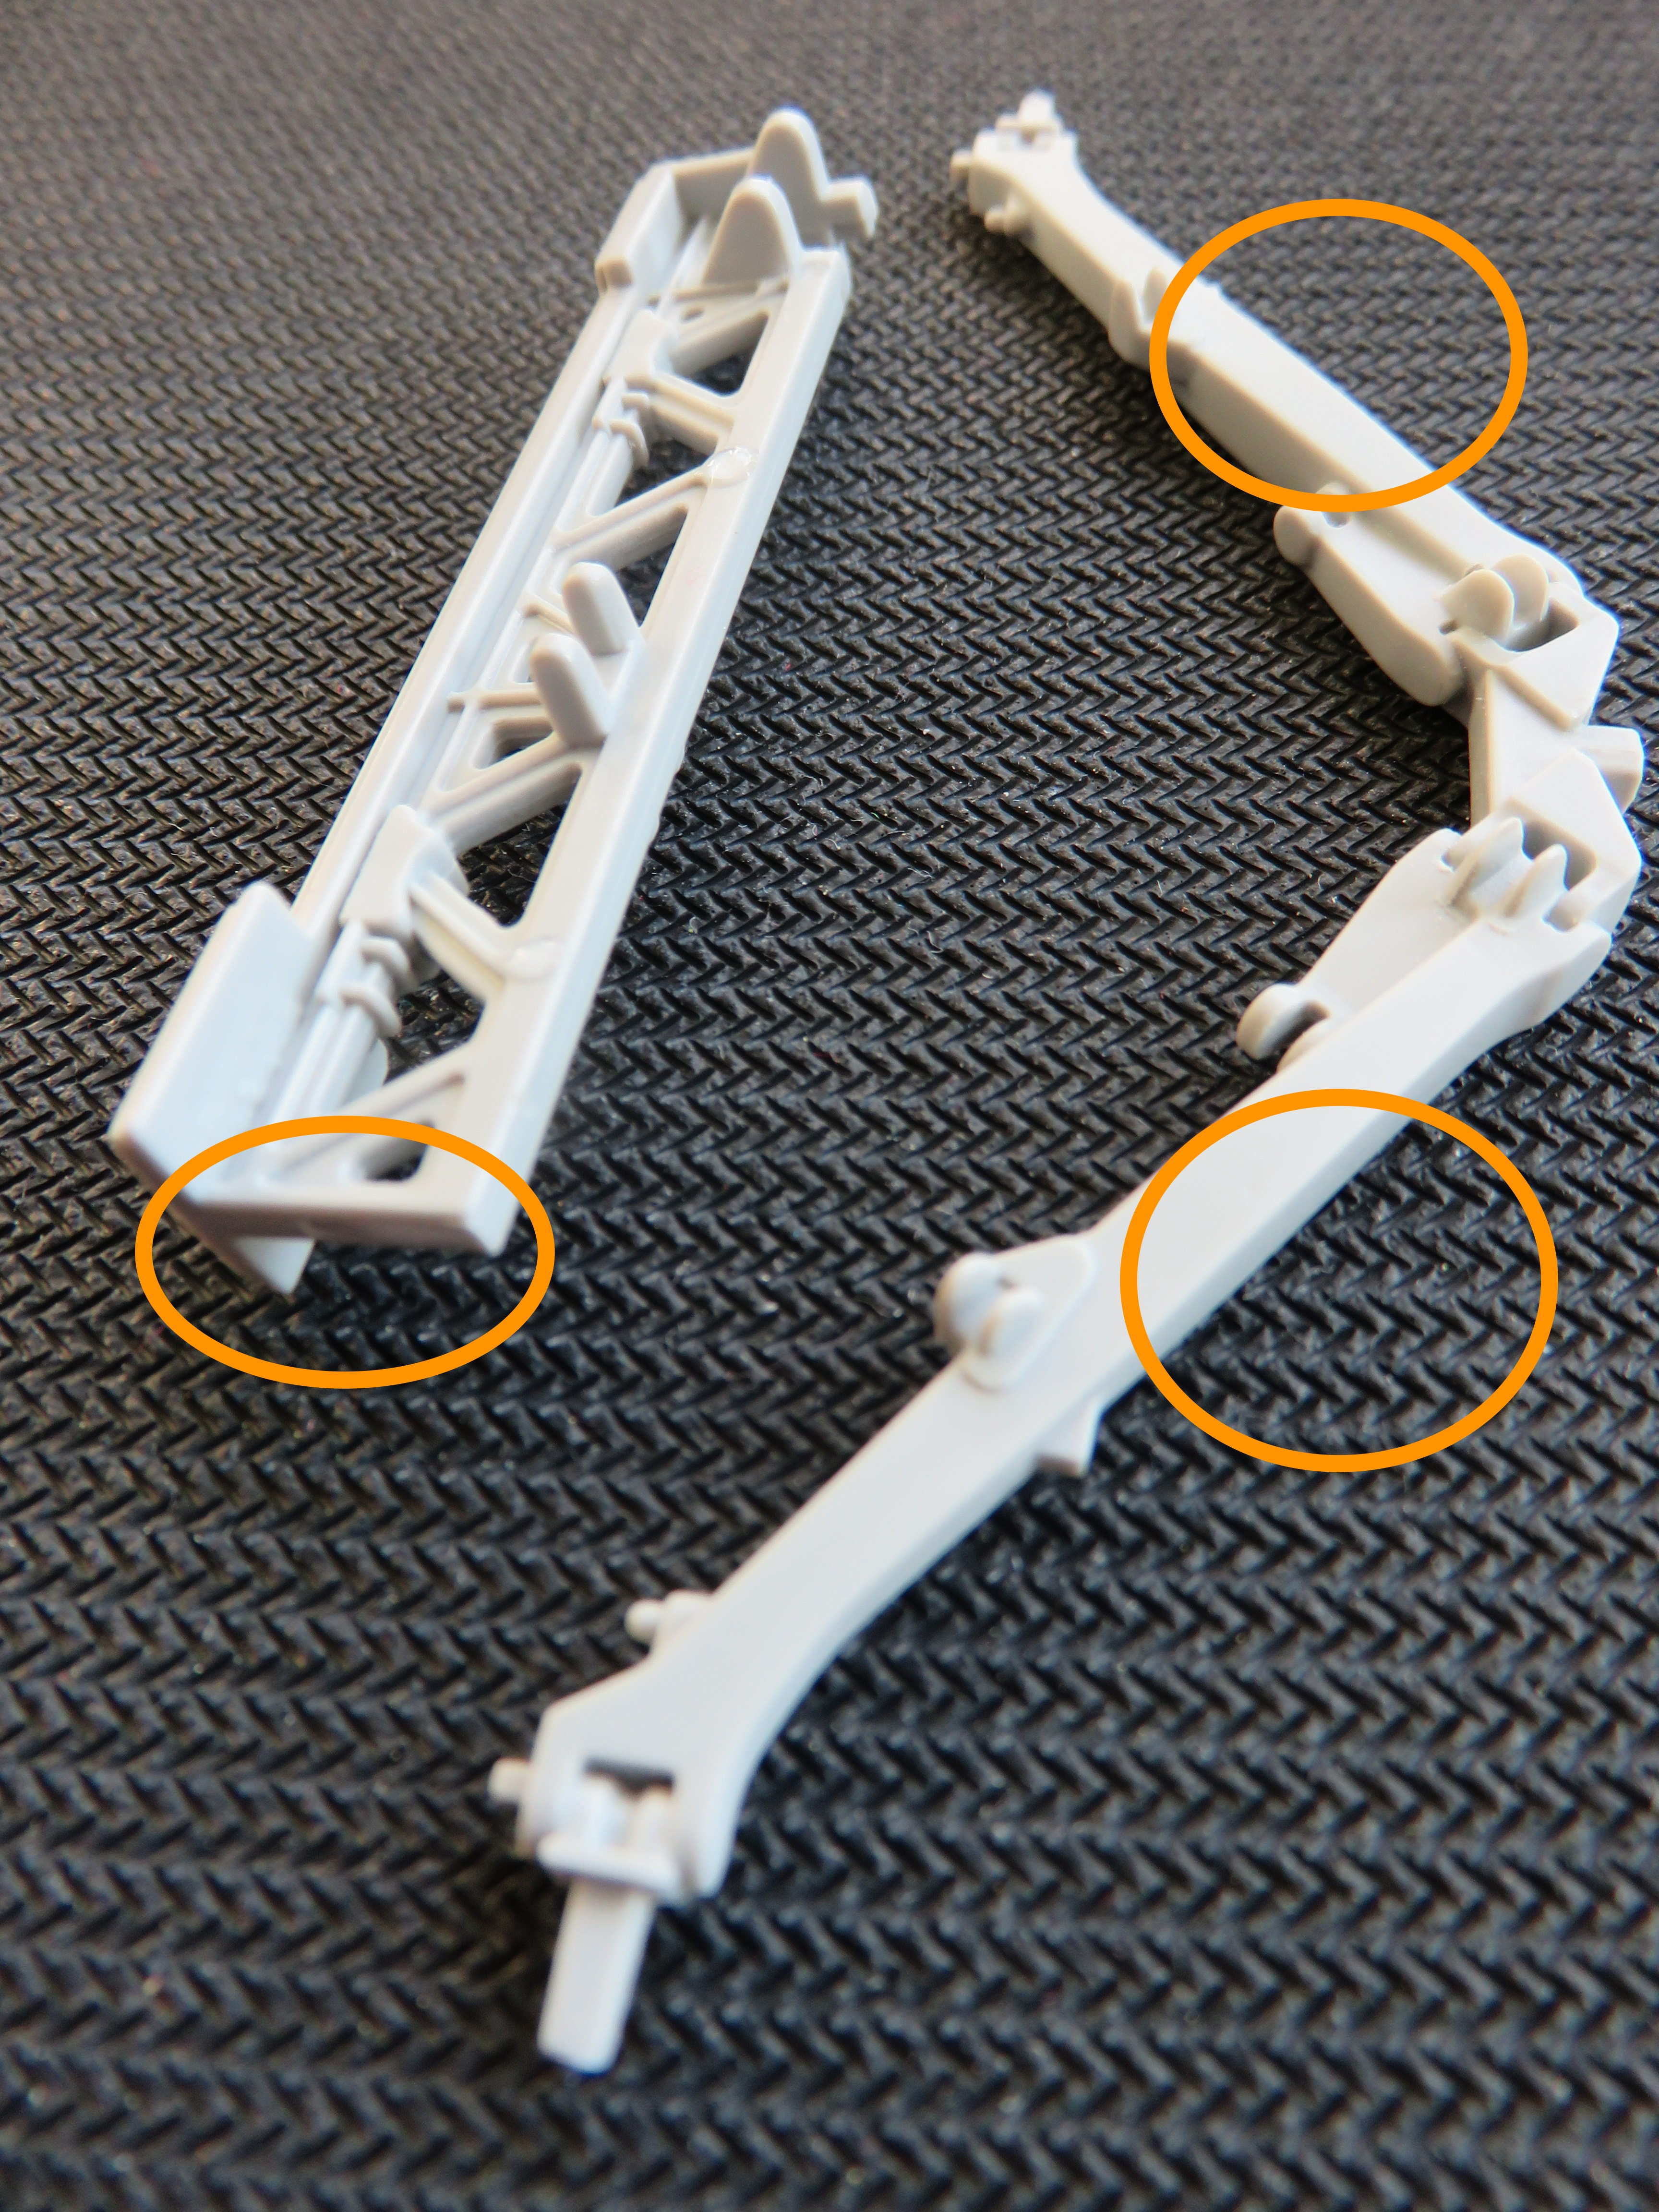
The landing gear legs themselves have had the poorly moulded pistons and arms removed so I can scratch build new ones. Compare the kit part supplied with how it looks now.

As it comes:


And with the yucky bits removed, and the centre spar next to it. Orange means material removed.


All this is getting the landing gear and bay ready for some serious attention.

That’s all for now. See you soon.


Joel_W
Staff MemberAssociate Editor
AUTOMODELER
_VISITCOMMUNITY
New York, United States
Joined: December 04, 2010
KitMaker: 11,666 posts
AeroScale: 7,410 posts
Posted: Monday, September 03, 2018 - 08:04 AM UTC
Steve,
Your plan for the landing gear bay sounds really sound, and with your detailing ability should really be a treat for us once it's completed.

Looking forward to how you detail the main gear strut assemblies

joel
SteveAndrews
_VISITCOMMUNITY
England - South East, United Kingdom
Joined: August 16, 2010
KitMaker: 693 posts
AeroScale: 551 posts
Posted: Tuesday, September 04, 2018 - 01:53 AM UTC
Hi Joel

Thanks very much. If your kit gives you an itch - scratch it :-)

Have a great day,

Steve.
SteveAndrews
_VISITCOMMUNITY
England - South East, United Kingdom
Joined: August 16, 2010
KitMaker: 693 posts
AeroScale: 551 posts
Posted: Wednesday, September 19, 2018 - 07:11 AM UTC
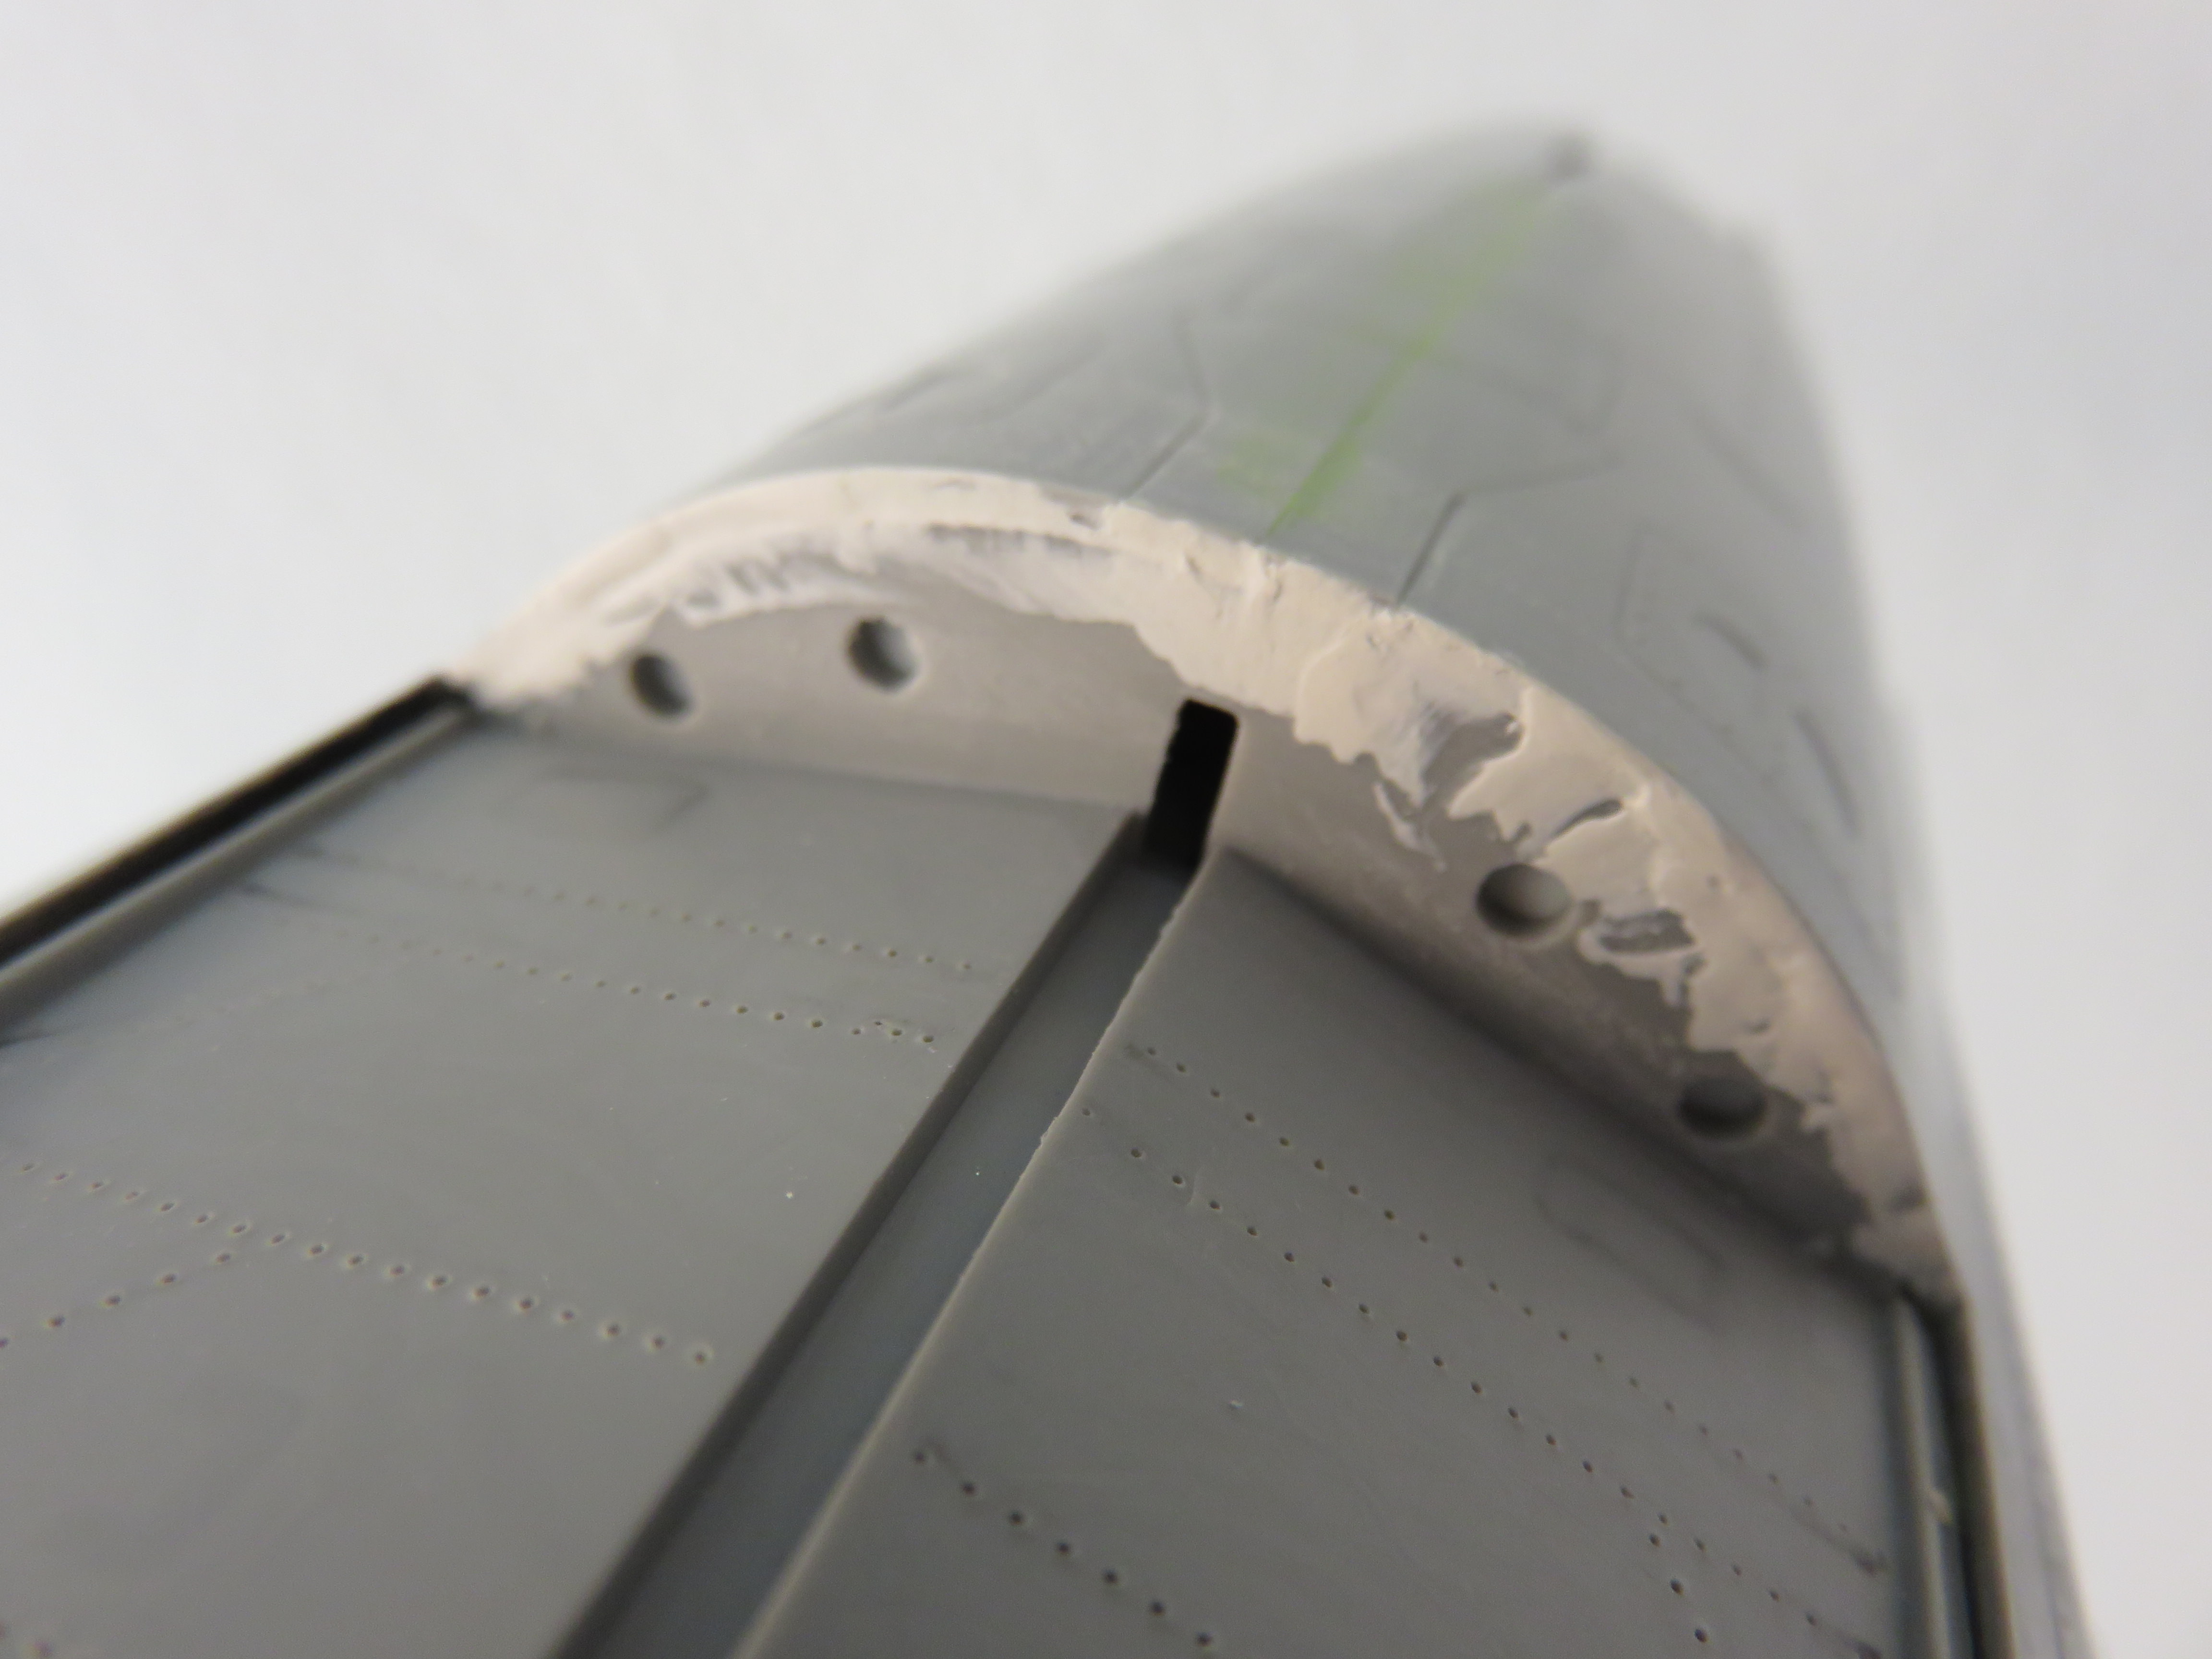
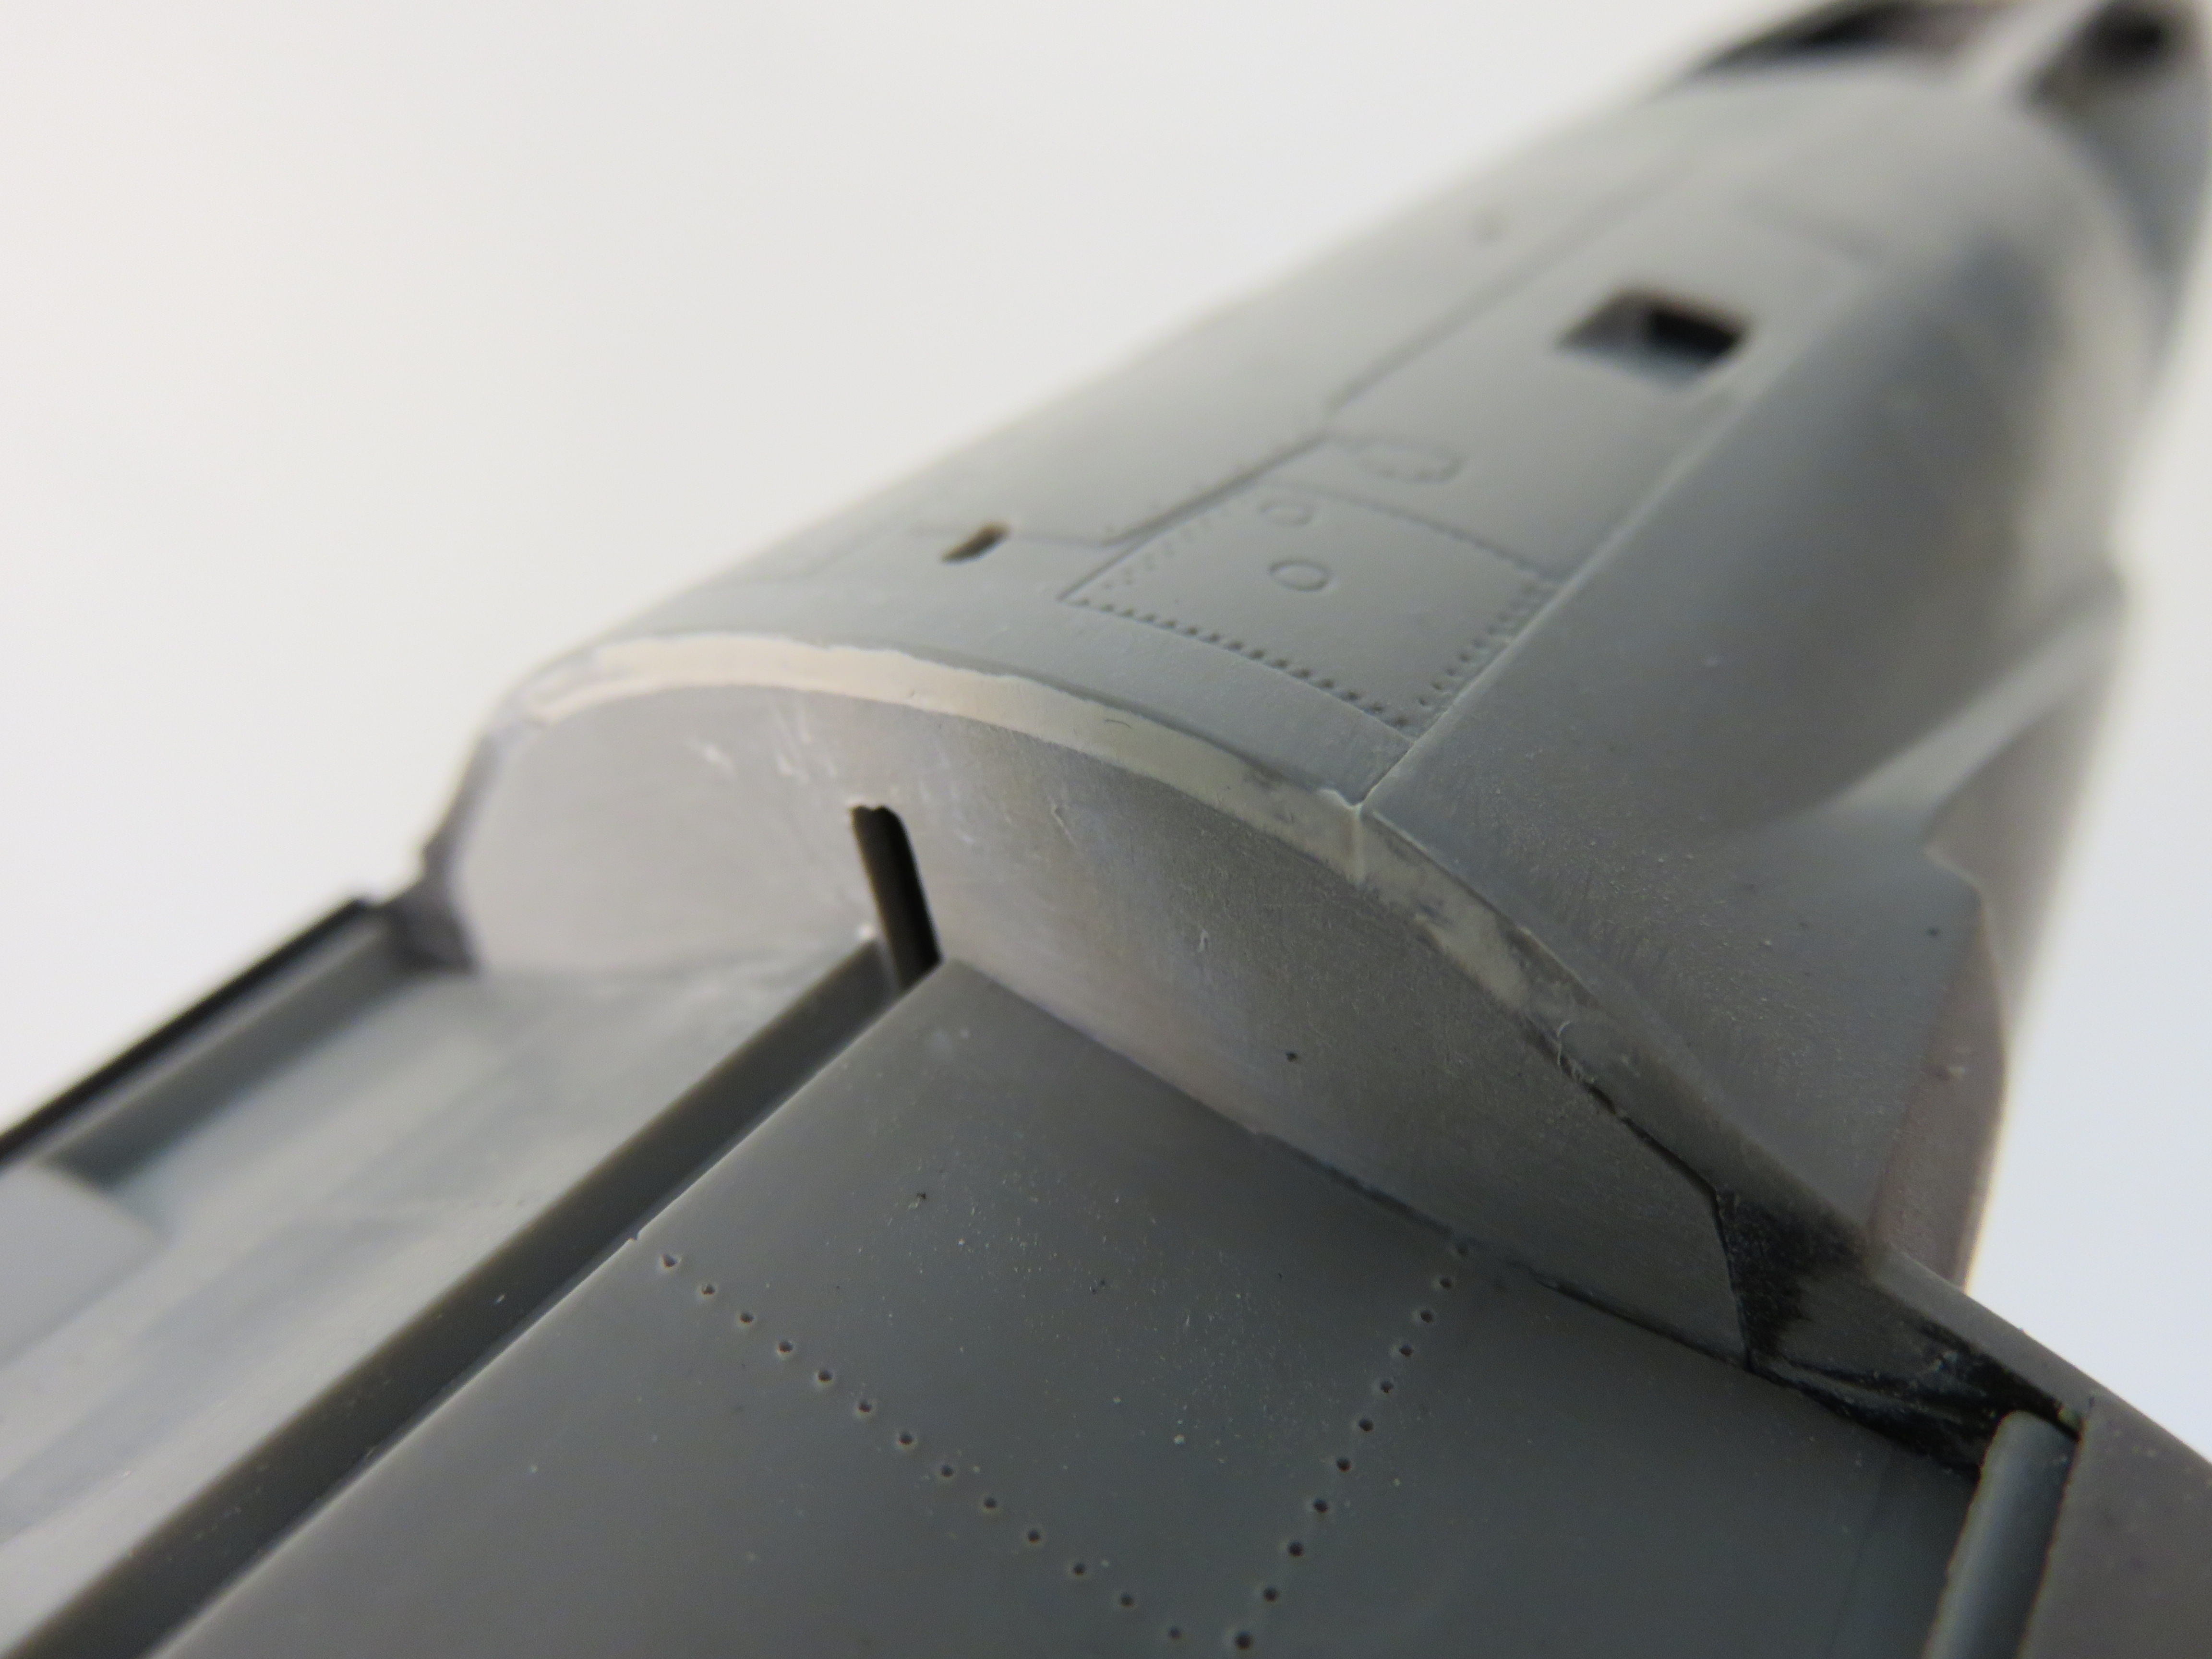
Sometimes, I wonder if I have bitten off more than I can chew with this project. I watch Youtube magic and a kit goes from pieces to finished in a few minutes. I know it’s all editing and fast forward, but then I go back to my bench and spend just as long creating one tiny part. It can sap a guys motivation. Even so I’m determined not to get distracted. Slowly but surely the landing gear and the big brackets that hold on the landing gear pistons are taking shape. Oh yes, there was some filler work needed between the bulkhead and fuselage too.

Here is the putty going on


and the sanded result (I did a little more work with Mr Surface 500 after I took this photo because it showed up some small gaps).


Then some of the replacement landing gear parts I’ve been scratch building. At least at this stage I can see the fruits of my labour, and that feels good.


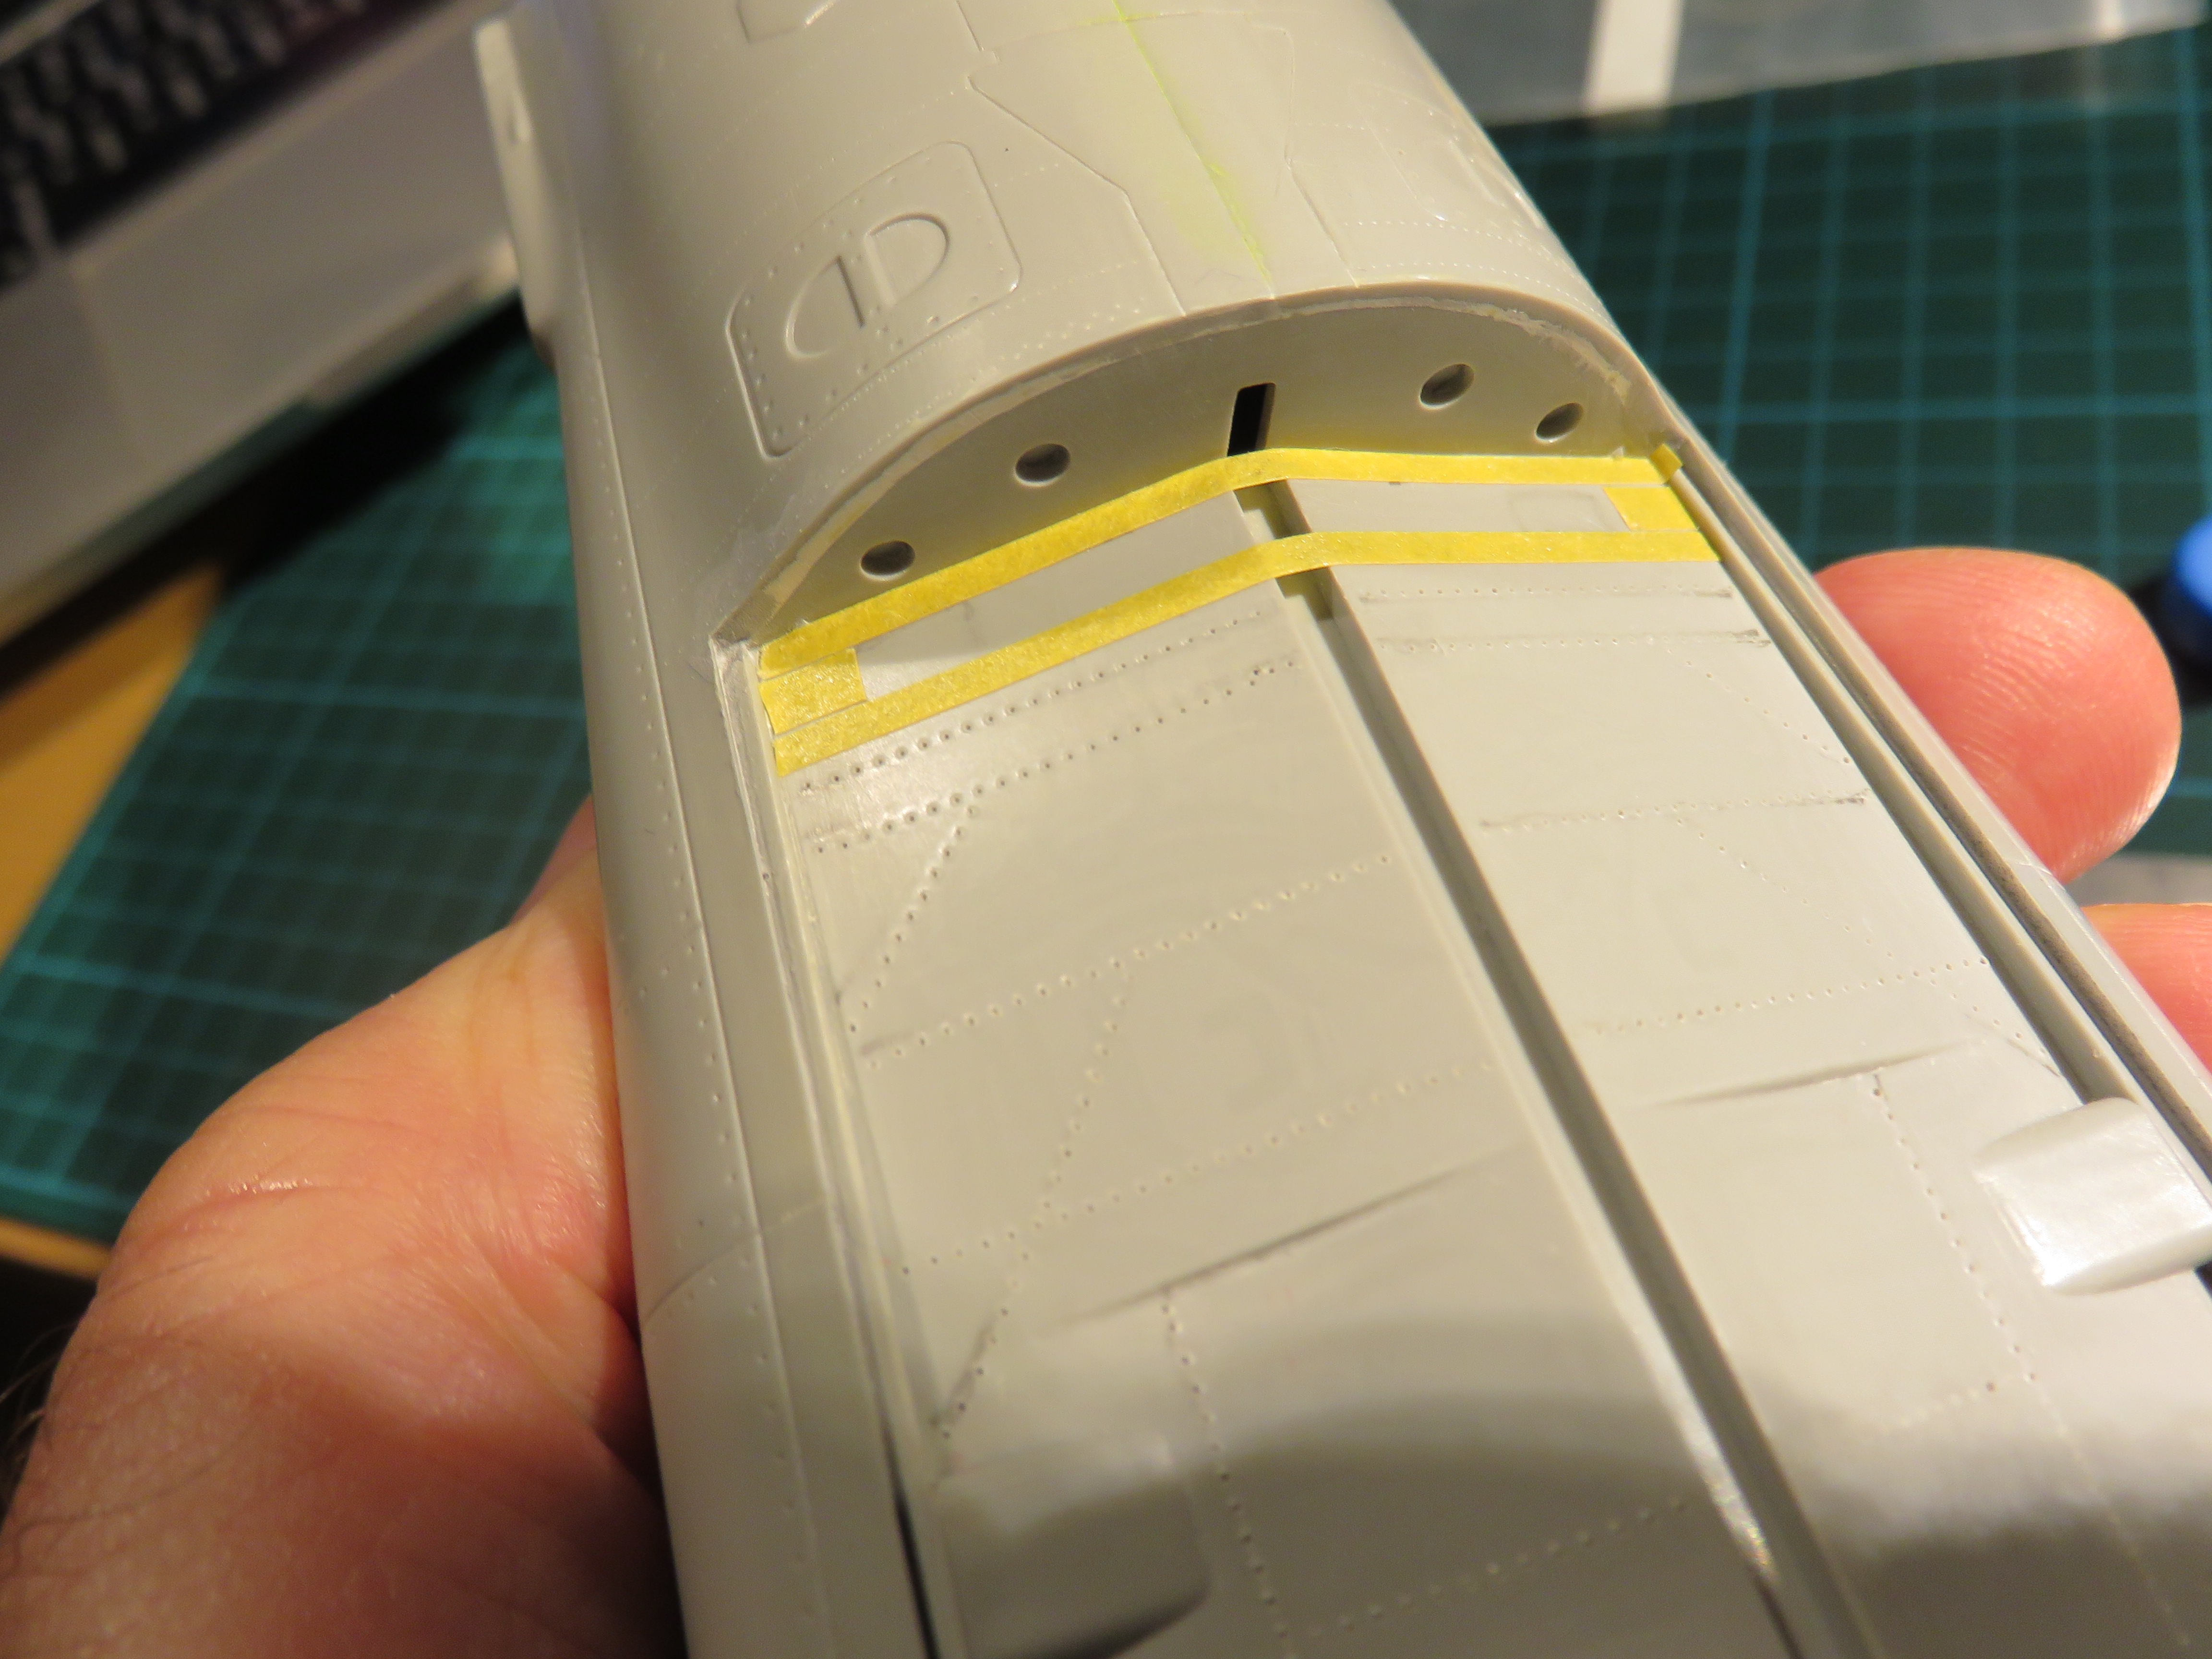
By the way, I thought I’d pass on a tip. I use thin strips of masking tape to create guides when I need to position a scratched part accurately. Here you can see where I marked out the location of the brackets shown above. It’s so much easier than trying to manoeuvre in rulers, pencils and the like, and if (when) I get it wrong, I can simply reposition it.


I hope your plastic is cooperating.

Steve.
SteveAndrews
_VISITCOMMUNITY
England - South East, United Kingdom
Joined: August 16, 2010
KitMaker: 693 posts
AeroScale: 551 posts
Posted: Tuesday, October 02, 2018 - 08:40 AM UTC
There seems to be a point with every kit when I fall out of love. It all starts with a flash of excitement and then, with each little problem, the fire fades until one day I look at it and think ‘I just don’t love you anymore’. And my eyes start wandering. I notice the attractive Tamiya kit sitting in my stash, or I secretly start surfing the reviews. It can take every ounce of self discipline not to stray, but I remind myself of all the good qualities, and the hours of fun we had. Somehow the magic returns and I’m enjoying the build again.

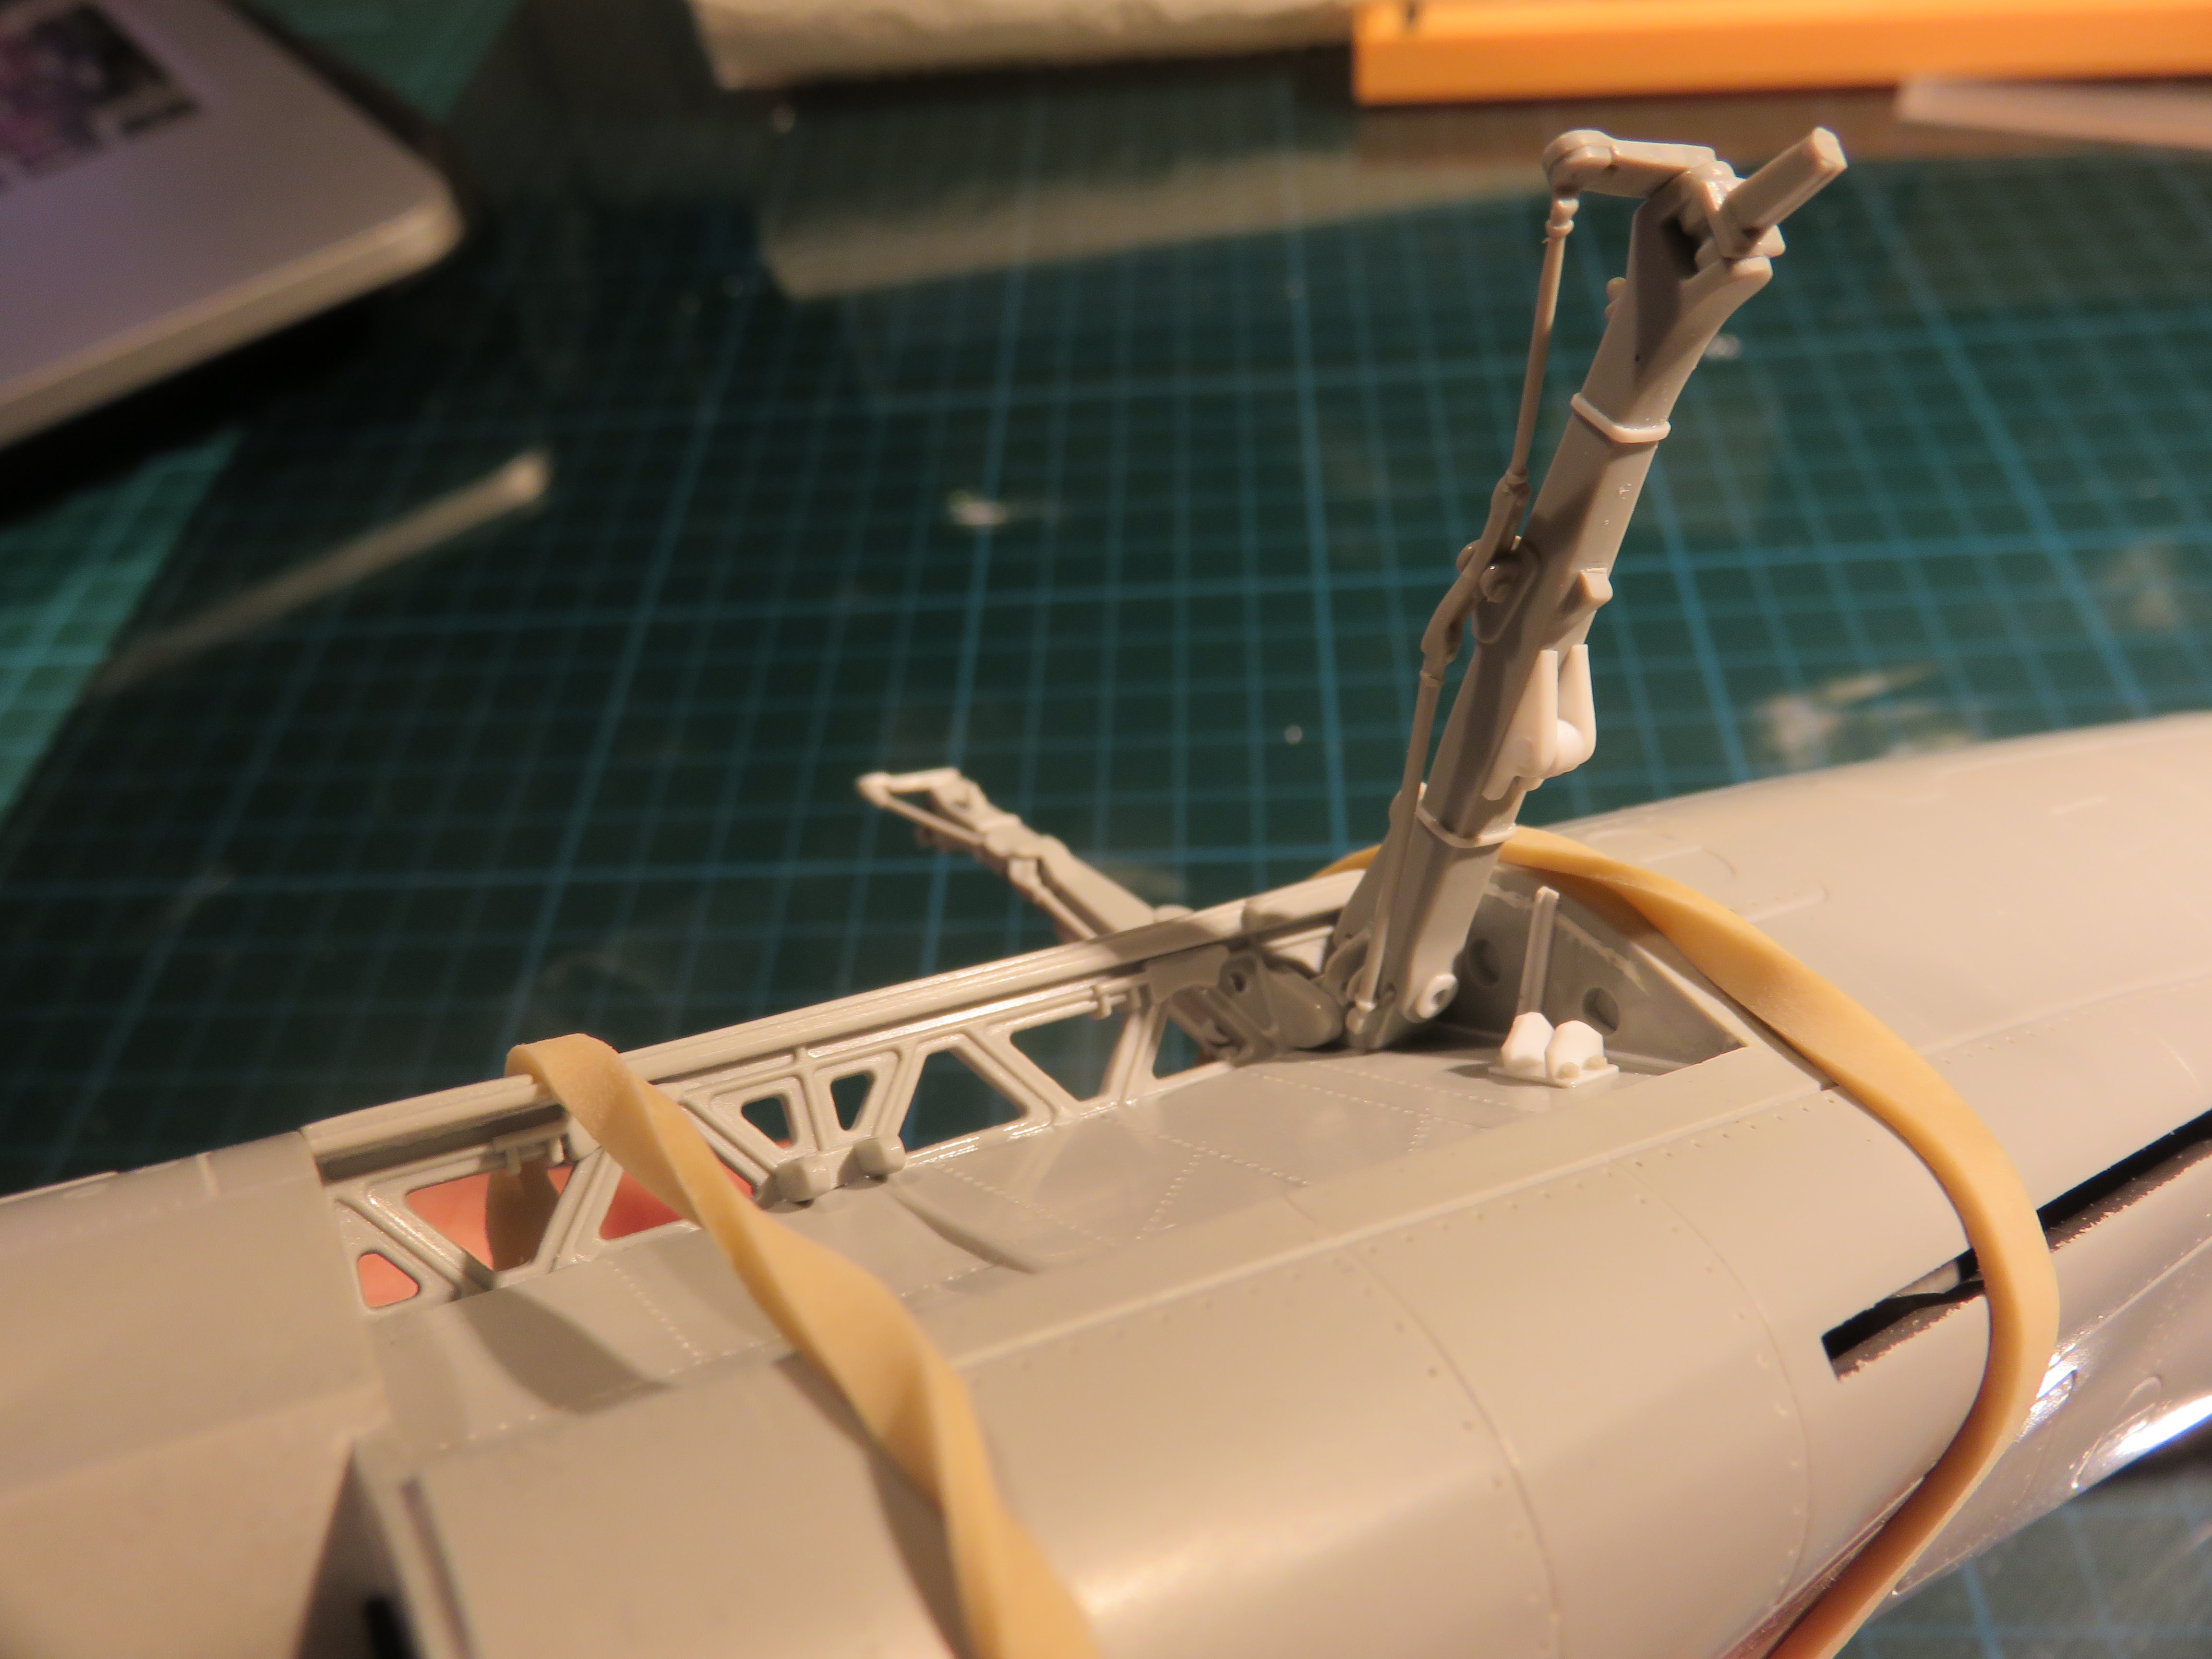
So it has been with the F-104 recently. I had to make myself work on it. Not fun. Even so, I’ve added detail to the landing gear and got the legs fixed in place. I had all sorts of fit problems to get to this point - some the fault of the kit and some of my own making. There was a lot of sanding and fiddling about which I won’t bore you with. You can see the scratch built parts in white and the kit parts in grey of course. Now it is all together I feel much better. I plan to snuggle up on the sofa and watch a film with it.

Kevlar06
_VISITCOMMUNITY
Washington, United States
Joined: March 15, 2009
KitMaker: 3,670 posts
AeroScale: 833 posts
Posted: Tuesday, October 02, 2018 - 12:07 PM UTC
Steve,
I feel your pain. That's why I have a stack of about 10 kits in various states of assembly or paint on shelves above my workbench. But this is indeed "the Best Starfighter Ever" and you need to continue "for our sake". I recommend curling up with your F104 and a movie like "Jet Pilot" or "Top Gun" to get back "into the mood". If all else fails, supplement your "love life" by indulging with a "quick build" to get back into the program. I'm currently taking a break from Revell's old "Everything is Go" Atlas and Mercury Capsule with an LVM studios launchpad (it's now three feet long, a foot tall and 10 inches wide) by "cheating" with an "easy" Tamiya 1/35 Sturmtiger. But you can't give up-- you have a lot of folks depending on you!
:D
VR, Russ
SteveAndrews
_VISITCOMMUNITY
England - South East, United Kingdom
Joined: August 16, 2010
KitMaker: 693 posts
AeroScale: 551 posts
Posted: Wednesday, October 03, 2018 - 03:29 AM UTC
Russ, you are a gentleman, and a good motivator too. Don't worry, I am in until the end (even if a Tamiya f-16 looks sooooo good). And good luck with your, er... harem of kits. I hope they all get the attention they deserve.
Bye for now and thanks for the pep talk. It worked.
SteveAndrews
_VISITCOMMUNITY
England - South East, United Kingdom
Joined: August 16, 2010
KitMaker: 693 posts
AeroScale: 551 posts
Posted: Sunday, October 07, 2018 - 07:59 AM UTC
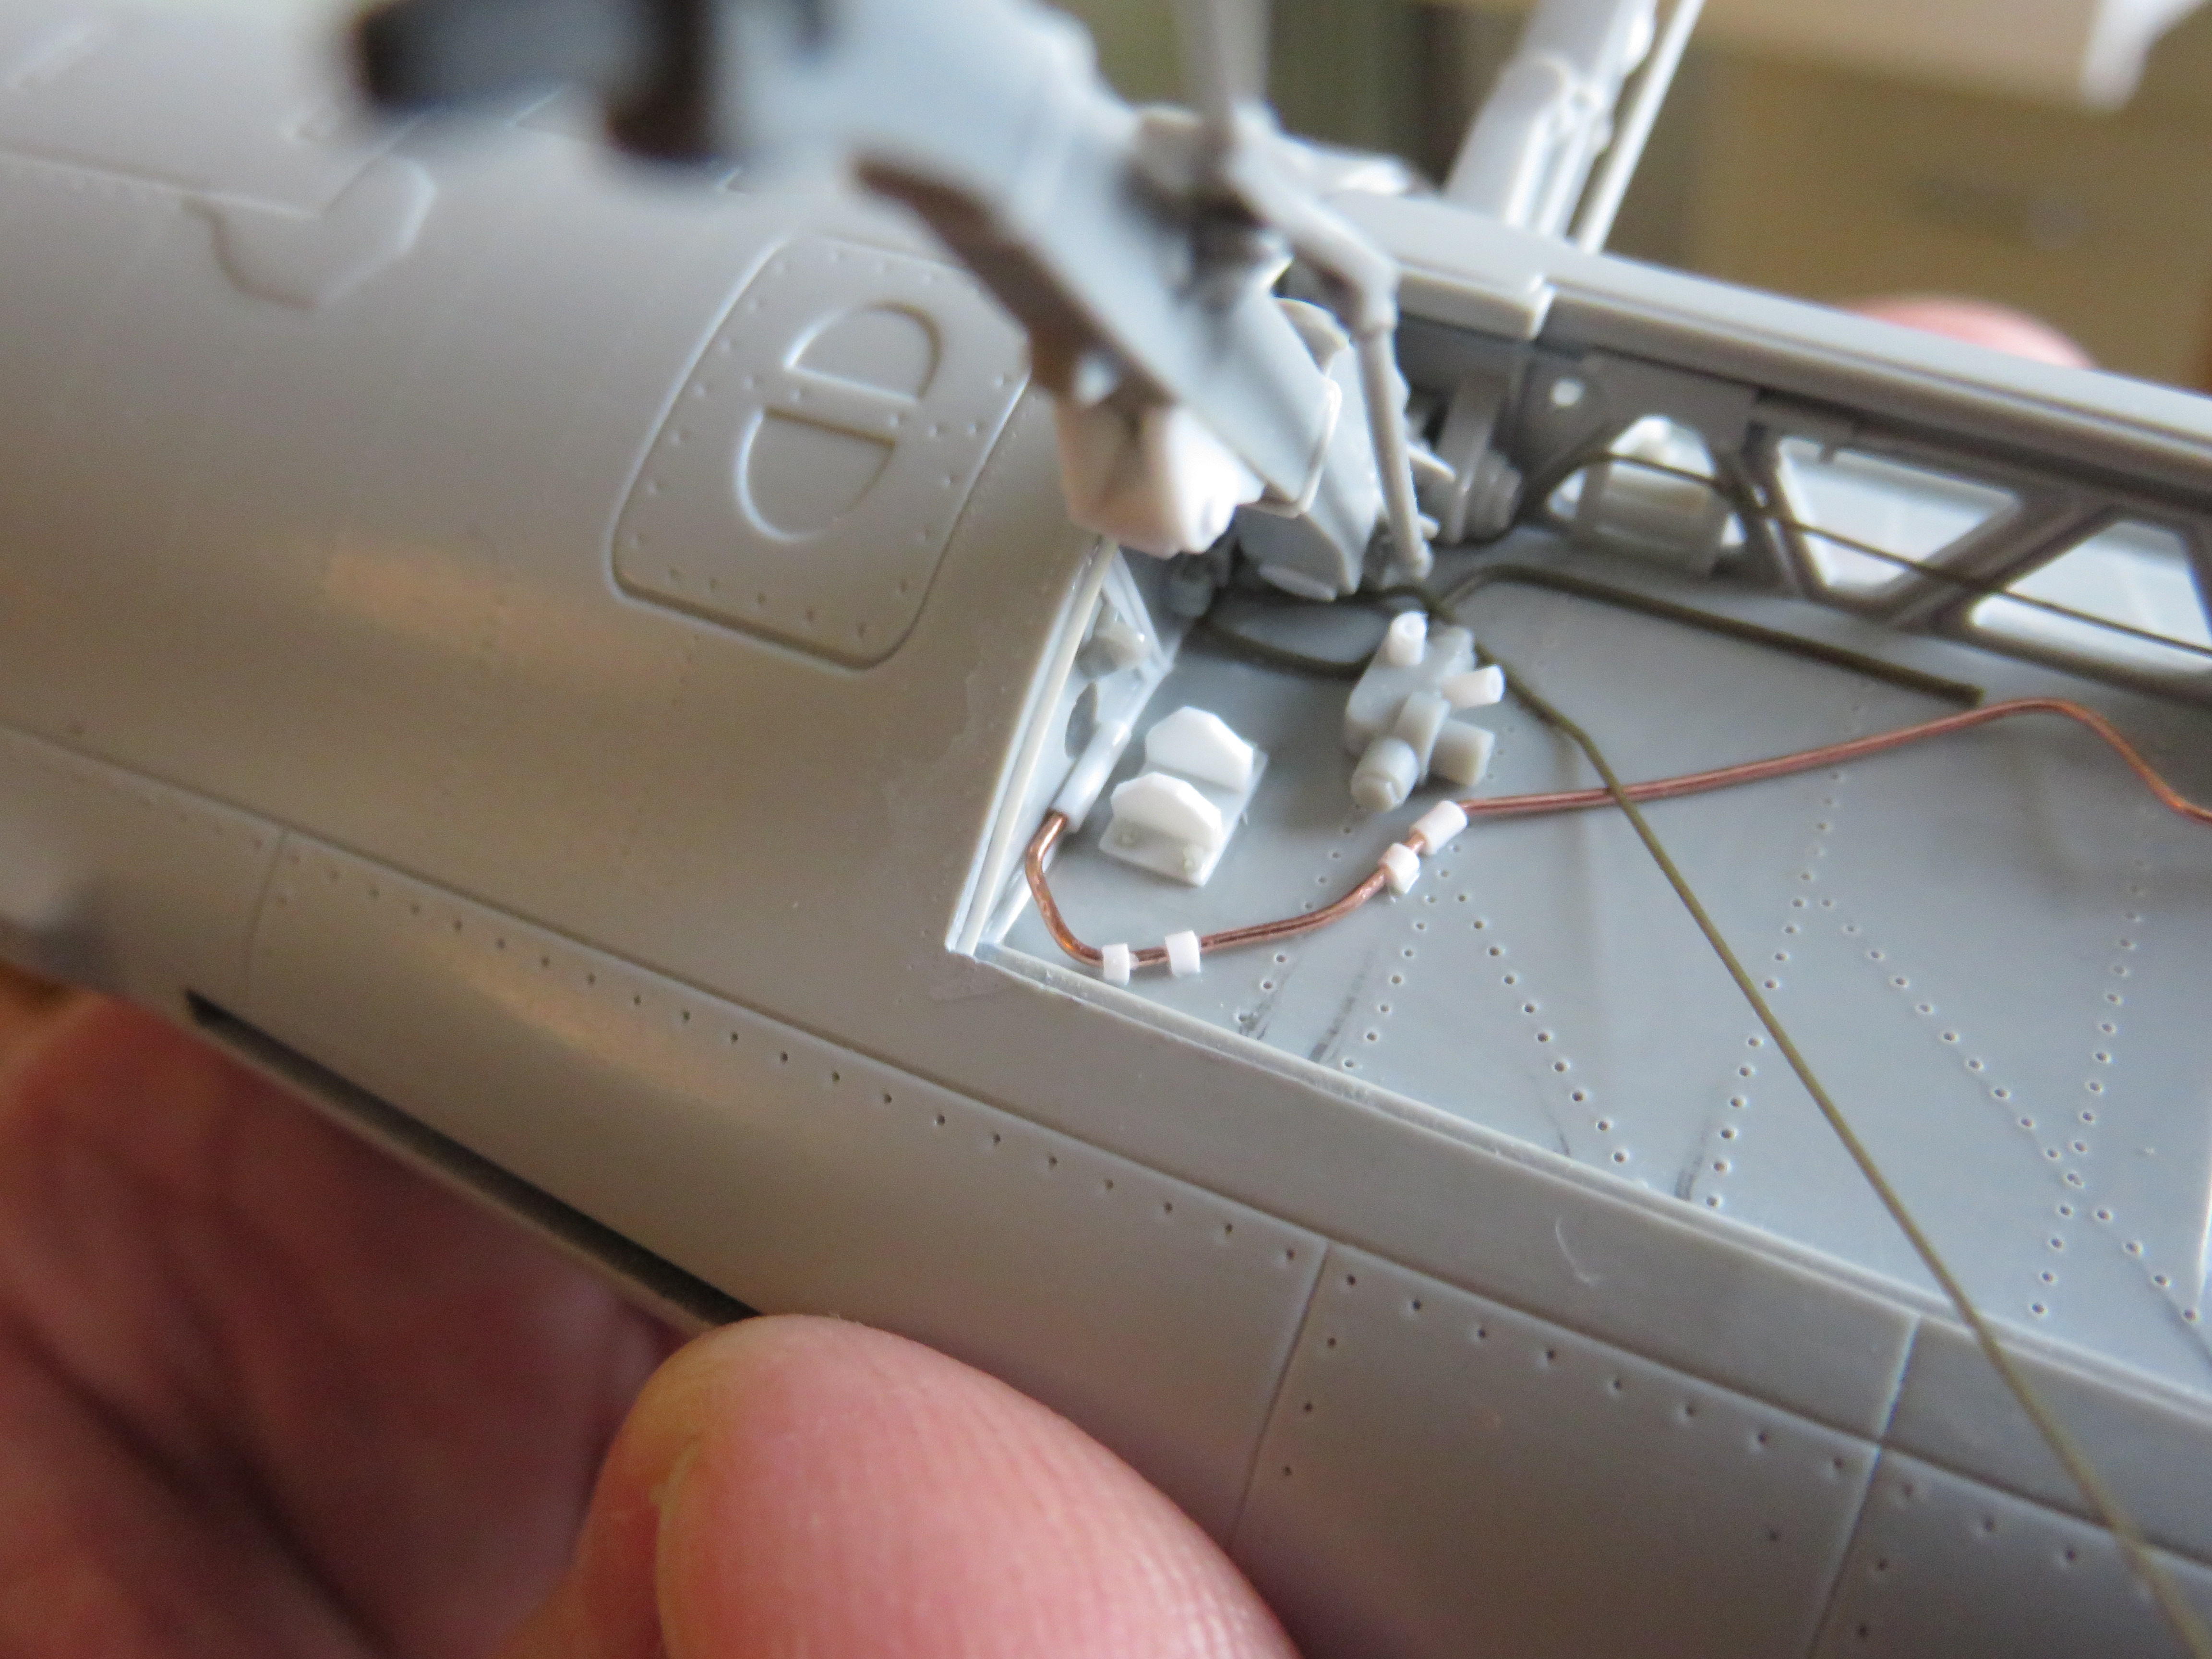
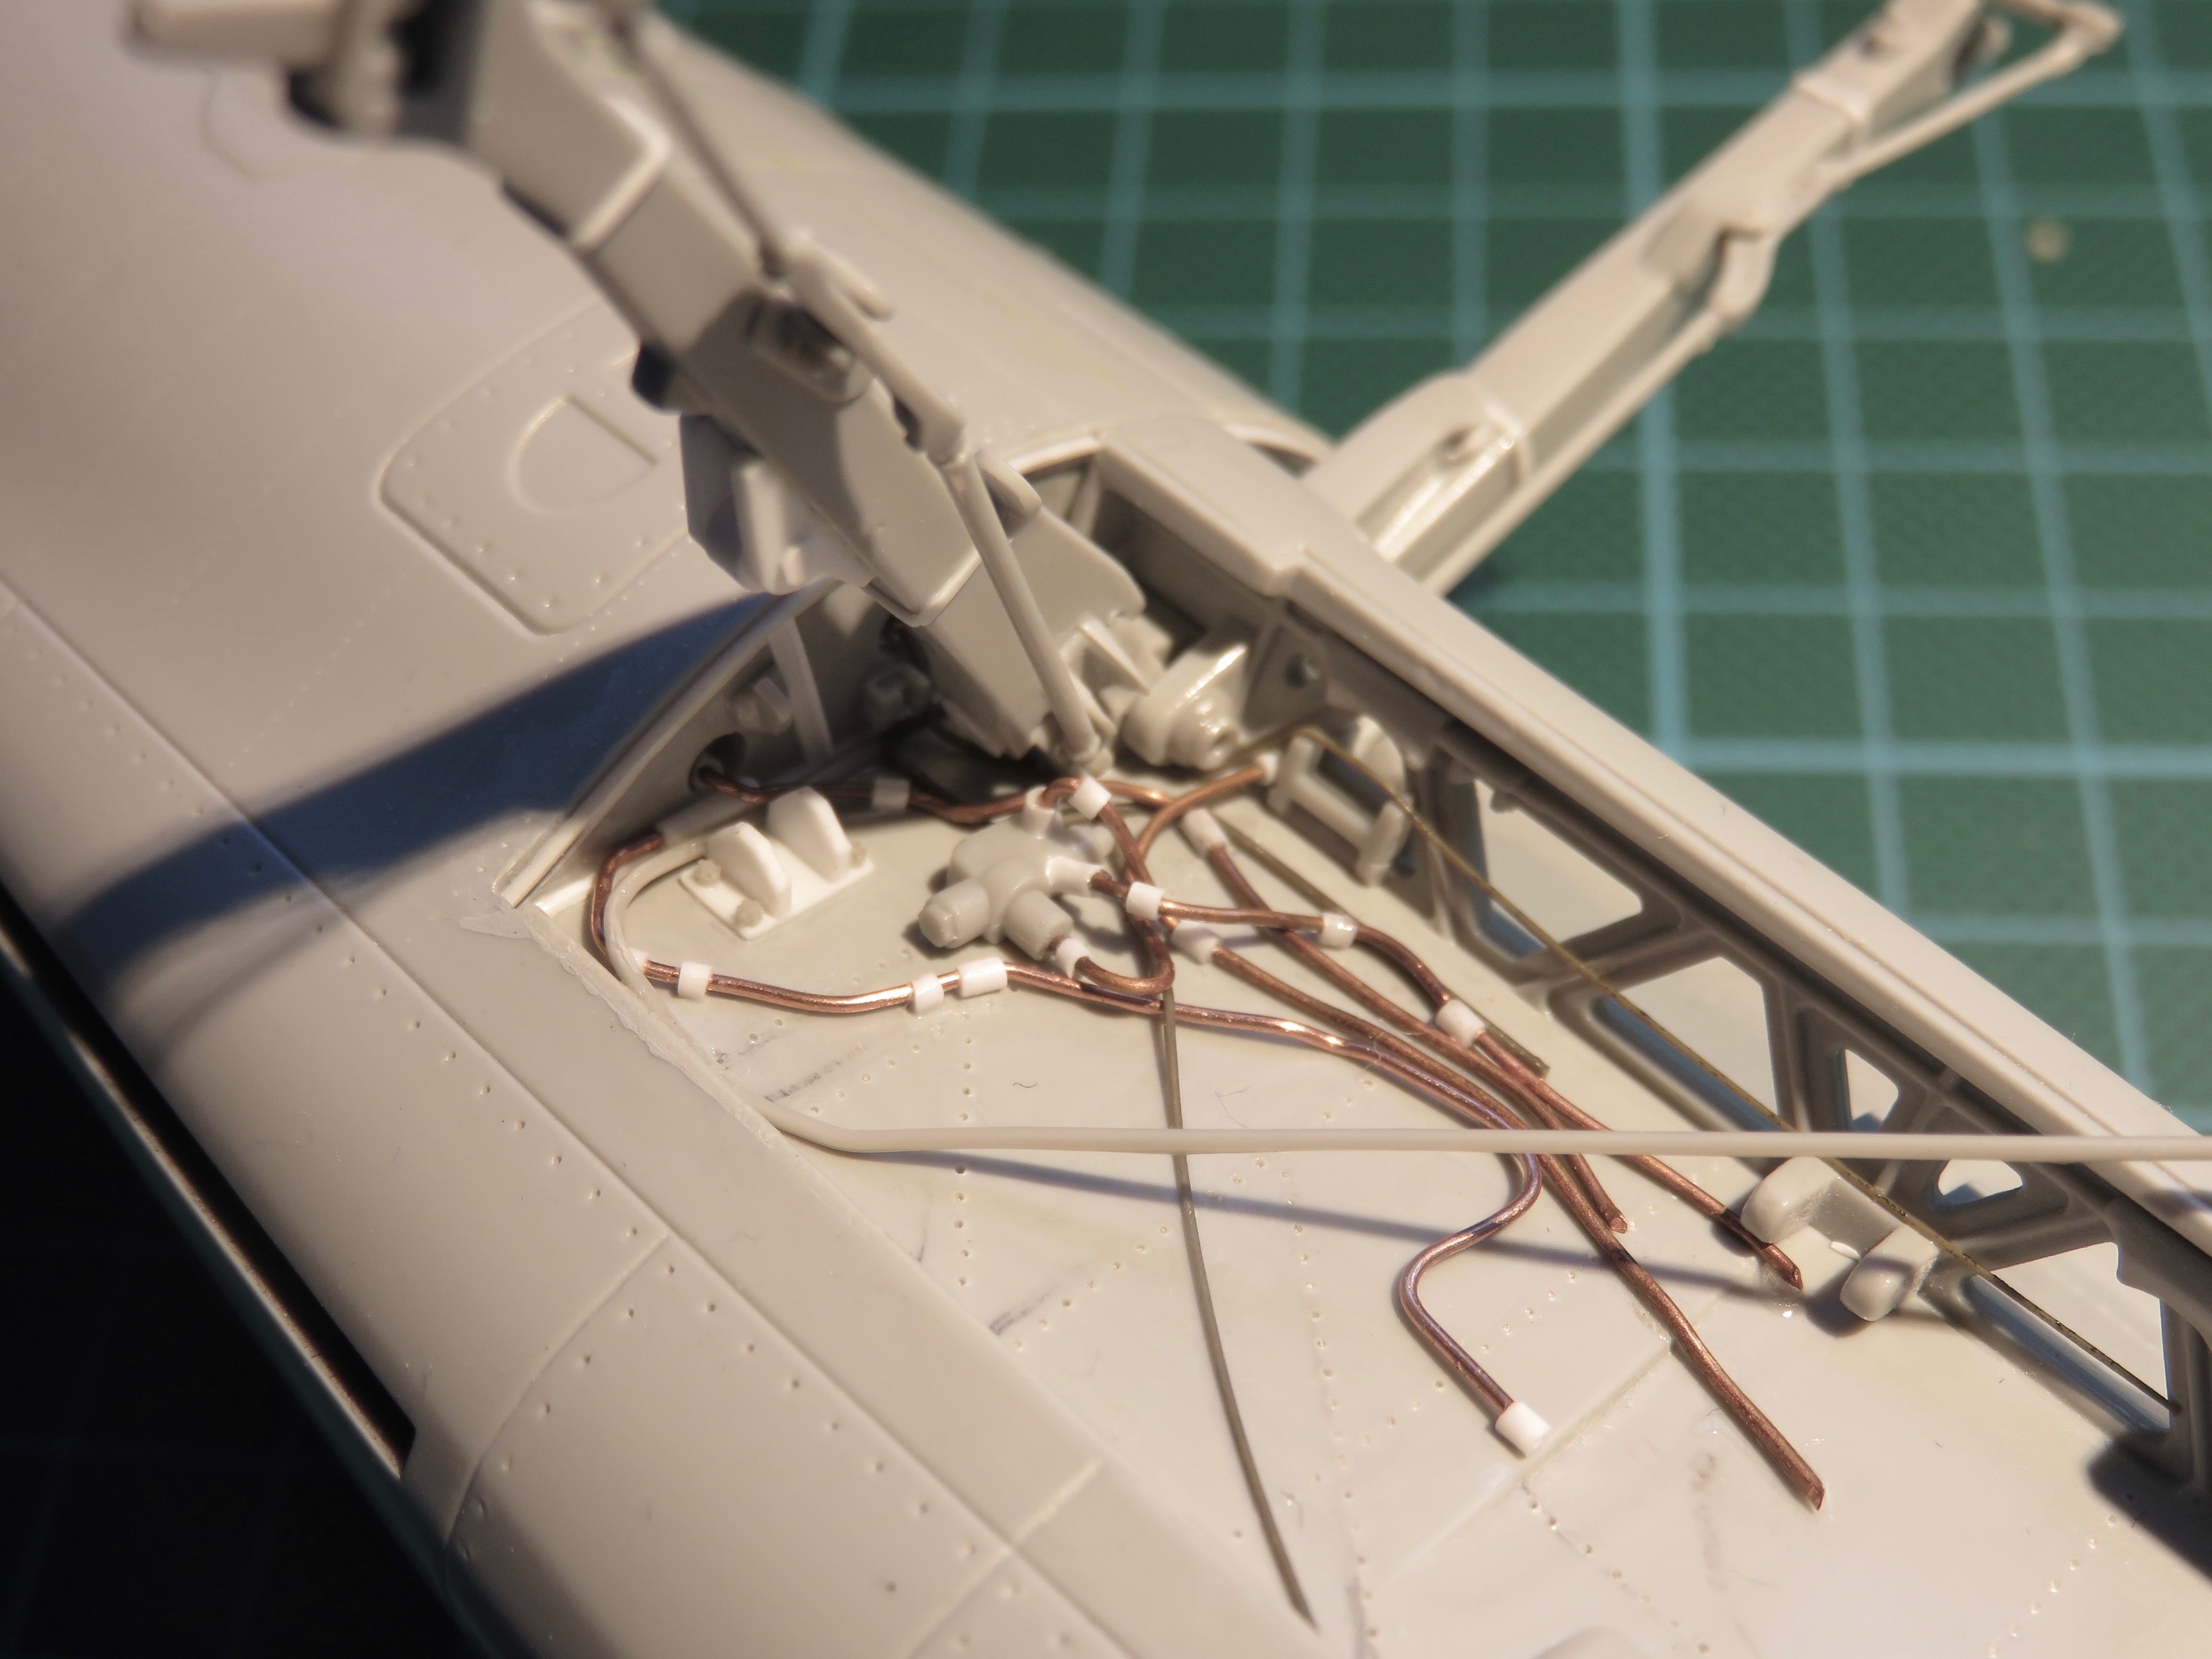
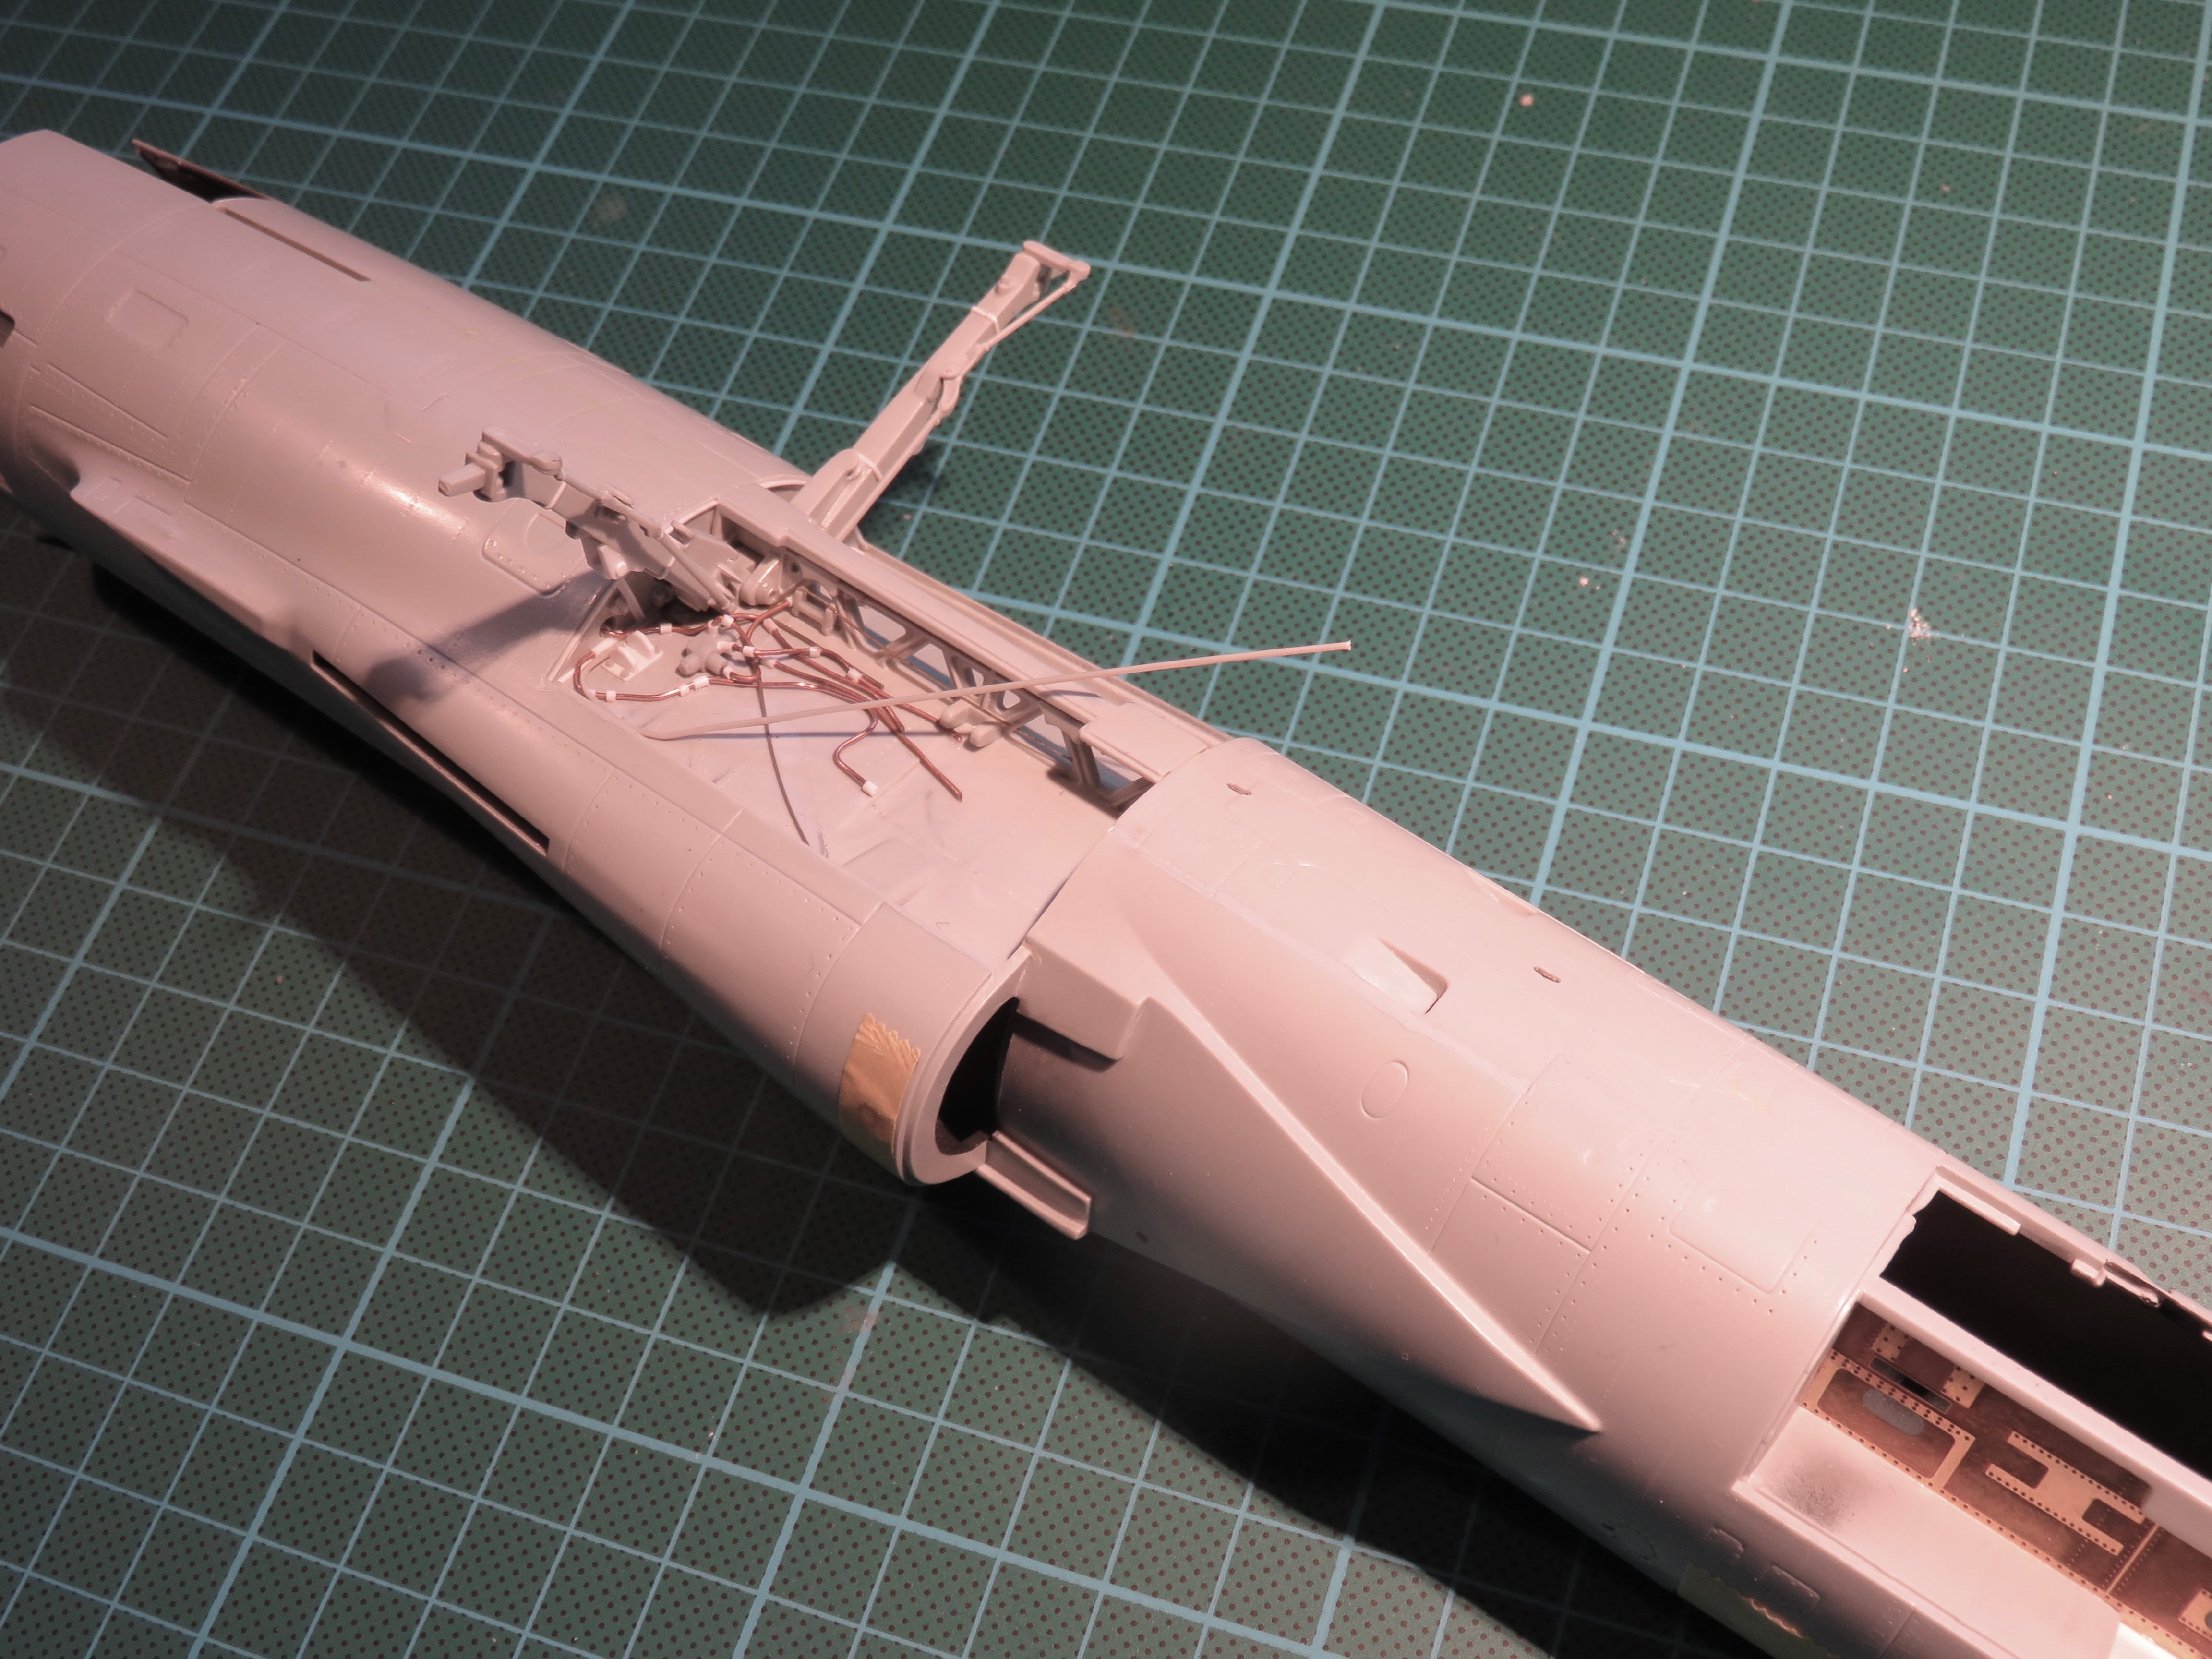
The say that the devil is in the detail, which is odd because all I can see is lovely angelic little things. The over-cooked spaghetti mix of hydraulic pipes and connectors inside the F-104’s wheel bay needs a bit of planning to reproduce but should look good when it’s done.

I’m trying to recreate the general look and feel, not replicate every bend and pipe. This is my way. Even so, I’ve opted for a range of materials to stay fairly close to the original and get the depth I want. That sense of depth was totally missing from the original Italeri moulds, and is the biggest feature.

I work slowly when I’m doing this job. It’s too easy to mess up. Generally I fix a section, let it dry and then move on. Work for five minutes, wait for ten. I try and bend the material into shape before fitting it too - that reduces breakages and frustration. If I’m careful I can bend stretched sprue into just about any shape. Copper wire is stronger but harder to manipulate. For each item you see fixed in place I’ve probably had two or three attempts at getting it right, sometimes switching between materials. I’ve also raided the spares box to find something resembling the more complex parts.

By the way the bulk of the bay is covered by the forward landing gear doors when the F-104 is parked, so I’m worrying less about the area underneath them. No one will ever see it. Come to think of it when the model is on display no one will be able to see most of this. Ah, there’s the little forked tailed bloke, waving cheerily at me. Seems like the devil is in hidden details. Here’s a work in progress shot.


And a little music to keep you in the groove.

https://www.youtube.com/watch?v=kyK_GbGuxyA
Joel_W
Staff MemberAssociate Editor
AUTOMODELER
_VISITCOMMUNITY
New York, United States
Joined: December 04, 2010
KitMaker: 11,666 posts
AeroScale: 7,410 posts
Posted: Sunday, October 07, 2018 - 09:29 AM UTC
Steve,

Outstanding detailing, and your explanations make a lot of sense. Sure hope I can remember them, when I need to.

Any idea of when your next video will be out?

Joel
Kevlar06
_VISITCOMMUNITY
Washington, United States
Joined: March 15, 2009
KitMaker: 3,670 posts
AeroScale: 833 posts
Posted: Sunday, October 07, 2018 - 12:34 PM UTC
Steve,
Your copper wire will bend much easier if you anneal it first-- just heat it on the stove or with a small torch. You can also use fine solder, which will bend perfectly to every curve. I especially like your retainers and couplers on the wire-- looking good!
VR, Russ
SteveAndrews
_VISITCOMMUNITY
England - South East, United Kingdom
Joined: August 16, 2010
KitMaker: 693 posts
AeroScale: 551 posts
Posted: Sunday, October 07, 2018 - 11:10 PM UTC
Hey Joel and Russ

Joel, thanks as ever for the encouragement. I've ben thinking about video and even tried a couple of shots. This stuff is so tiny that its hard for me to get anything useful, but maybe I'll try a video and stills combination.

Russ, now that's a great idea with the copper wire. Tonight I will try it out. Thanks very much for the tip. Those little connectors are made by drilling out Evergreen tubing, but I have a plan B.

Great to hear from you guys.

More soon I hope.

S


Antilles
_VISITCOMMUNITY
Nordrhein-Westfalen, Germany
Joined: March 22, 2015
KitMaker: 671 posts
AeroScale: 614 posts
Posted: Monday, October 08, 2018 - 03:58 AM UTC
Steve:
Just found Your thread and all I can say is that the level of detail here is really amazing. Wonderful work!

Keep on building!

Oliver
Kevlar06
_VISITCOMMUNITY
Washington, United States
Joined: March 15, 2009
KitMaker: 3,670 posts
AeroScale: 833 posts
Posted: Monday, October 08, 2018 - 04:03 AM UTC

Quoted Text

Hey Joel and Russ

Joel, thanks as ever for the encouragement. I've ben thinking about video and even tried a couple of shots. This stuff is so tiny that its hard for me to get anything useful, but maybe I'll try a video and stills combination.

Russ, now that's a great idea with the copper wire. Tonight I will try it out. Thanks very much for the tip. Those little connectors are made by drilling out Evergreen tubing, but I have a plan B.

Great to hear from you guys.

More soon I hope.

S


Steve, another idea for the connectors and insulators on the copper wire is to use copper "telephone wire" If you use this method, you don't have to anneal anything, the soft copper wire bends easily). I'm not sure what it would be called in the U.K., but it's solid wire of the appropriate diameter with a thin vinyl or plastic coating. Using a sharp knife, I separate the appropriate number of "connectors" at one end by running the blade around the wire just enough to cut through the coating. Then I strip off the rest of the insulation, and slide the "connectors" down the length of the wire and position them where I need them. It's a lot easier than drilling out those small bits of evergreen tube. Also, the USAF had a distinct method of labeling thier wires and tubing. I've photographed a marking guide in the wheel well of a C124 at McChord Air Base. It's included in a photo feature I did on the Base Museum for Large Scale Planes-- you might find it useful.

https://www.largescaleplanes.com/articles/article.php?aid=3151

There's also a some shots of my Hasegawa F-104C GE 79 engine showing the "telephone wire" insulation technique in the article I wrote for Large Scale Planes below. I used the "telephone wire" technique in the gear bays, cockpit, and engine:

https://www.largescaleplanes.com/articles/article.php?aid=3172

I tried to isolate the photos, but for some reason can't post the individual photos from the features. Hope you find them useful
VR, Russ
SteveAndrews
_VISITCOMMUNITY
England - South East, United Kingdom
Joined: August 16, 2010
KitMaker: 693 posts
AeroScale: 551 posts
Posted: Tuesday, October 09, 2018 - 06:24 AM UTC
Hey Russ

Great tip on the wire, thanks. I went hunting today but it seems oddly in short supply here in Switzerland. I'll order some on line for future work. In the meantime I annealed the wire and it makes it a lot more flexible like you said. Thanks also for the links - fabulous references!

Hi Oliver

Thanks for dropping in and for the kind thoughts. This is a 'throw-everything-at-it' build for sure. I have to treat it like a series of sub-kits or I go ever so slightly mad.

Happy modelling guys,

Steve.
SteveAndrews
_VISITCOMMUNITY
England - South East, United Kingdom
Joined: August 16, 2010
KitMaker: 693 posts
AeroScale: 551 posts
Posted: Monday, October 15, 2018 - 07:43 AM UTC
In these days of Snapchat, Instagram, Tweet and other ways of saying things using almost no words at all, I guess I should try keeping things short. @everyone, here’s the latest.

That was short but totally unsatisfying #using words in sentences can be fun and informative.