Cold War (1950-1974)
Discuss the aircraft modeling subjects during the Cold War period.
Hosted by Tim Hatton
Best Starfighter Ever?
SteveAndrews
_VISITCOMMUNITY
England - South East, United Kingdom
Joined: August 16, 2010
KitMaker: 693 posts
AeroScale: 551 posts
Posted: Saturday, December 16, 2017 - 02:42 AM UTC
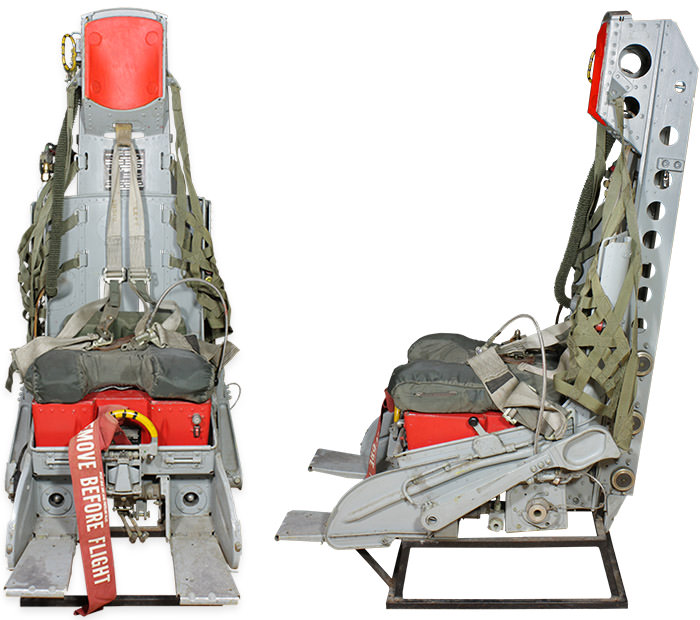
Sometimes it’s the small things that slow me down, like running out of superglue and then constantly forgetting to buy more. Finally, the thought lodged and I bought the sticky stuff. Armed with the CA I finished the belts. My last job was the spider’s web of er… webbing, on the sides of the seat that this shot shows pretty well.


You can see that webbing here too, this time scrunched up in the position it usually takes. I guess these straps are all part of the safety features of the ejection seat. They keep the pilot’s body from snagging on cockpit parts as he is ejected.


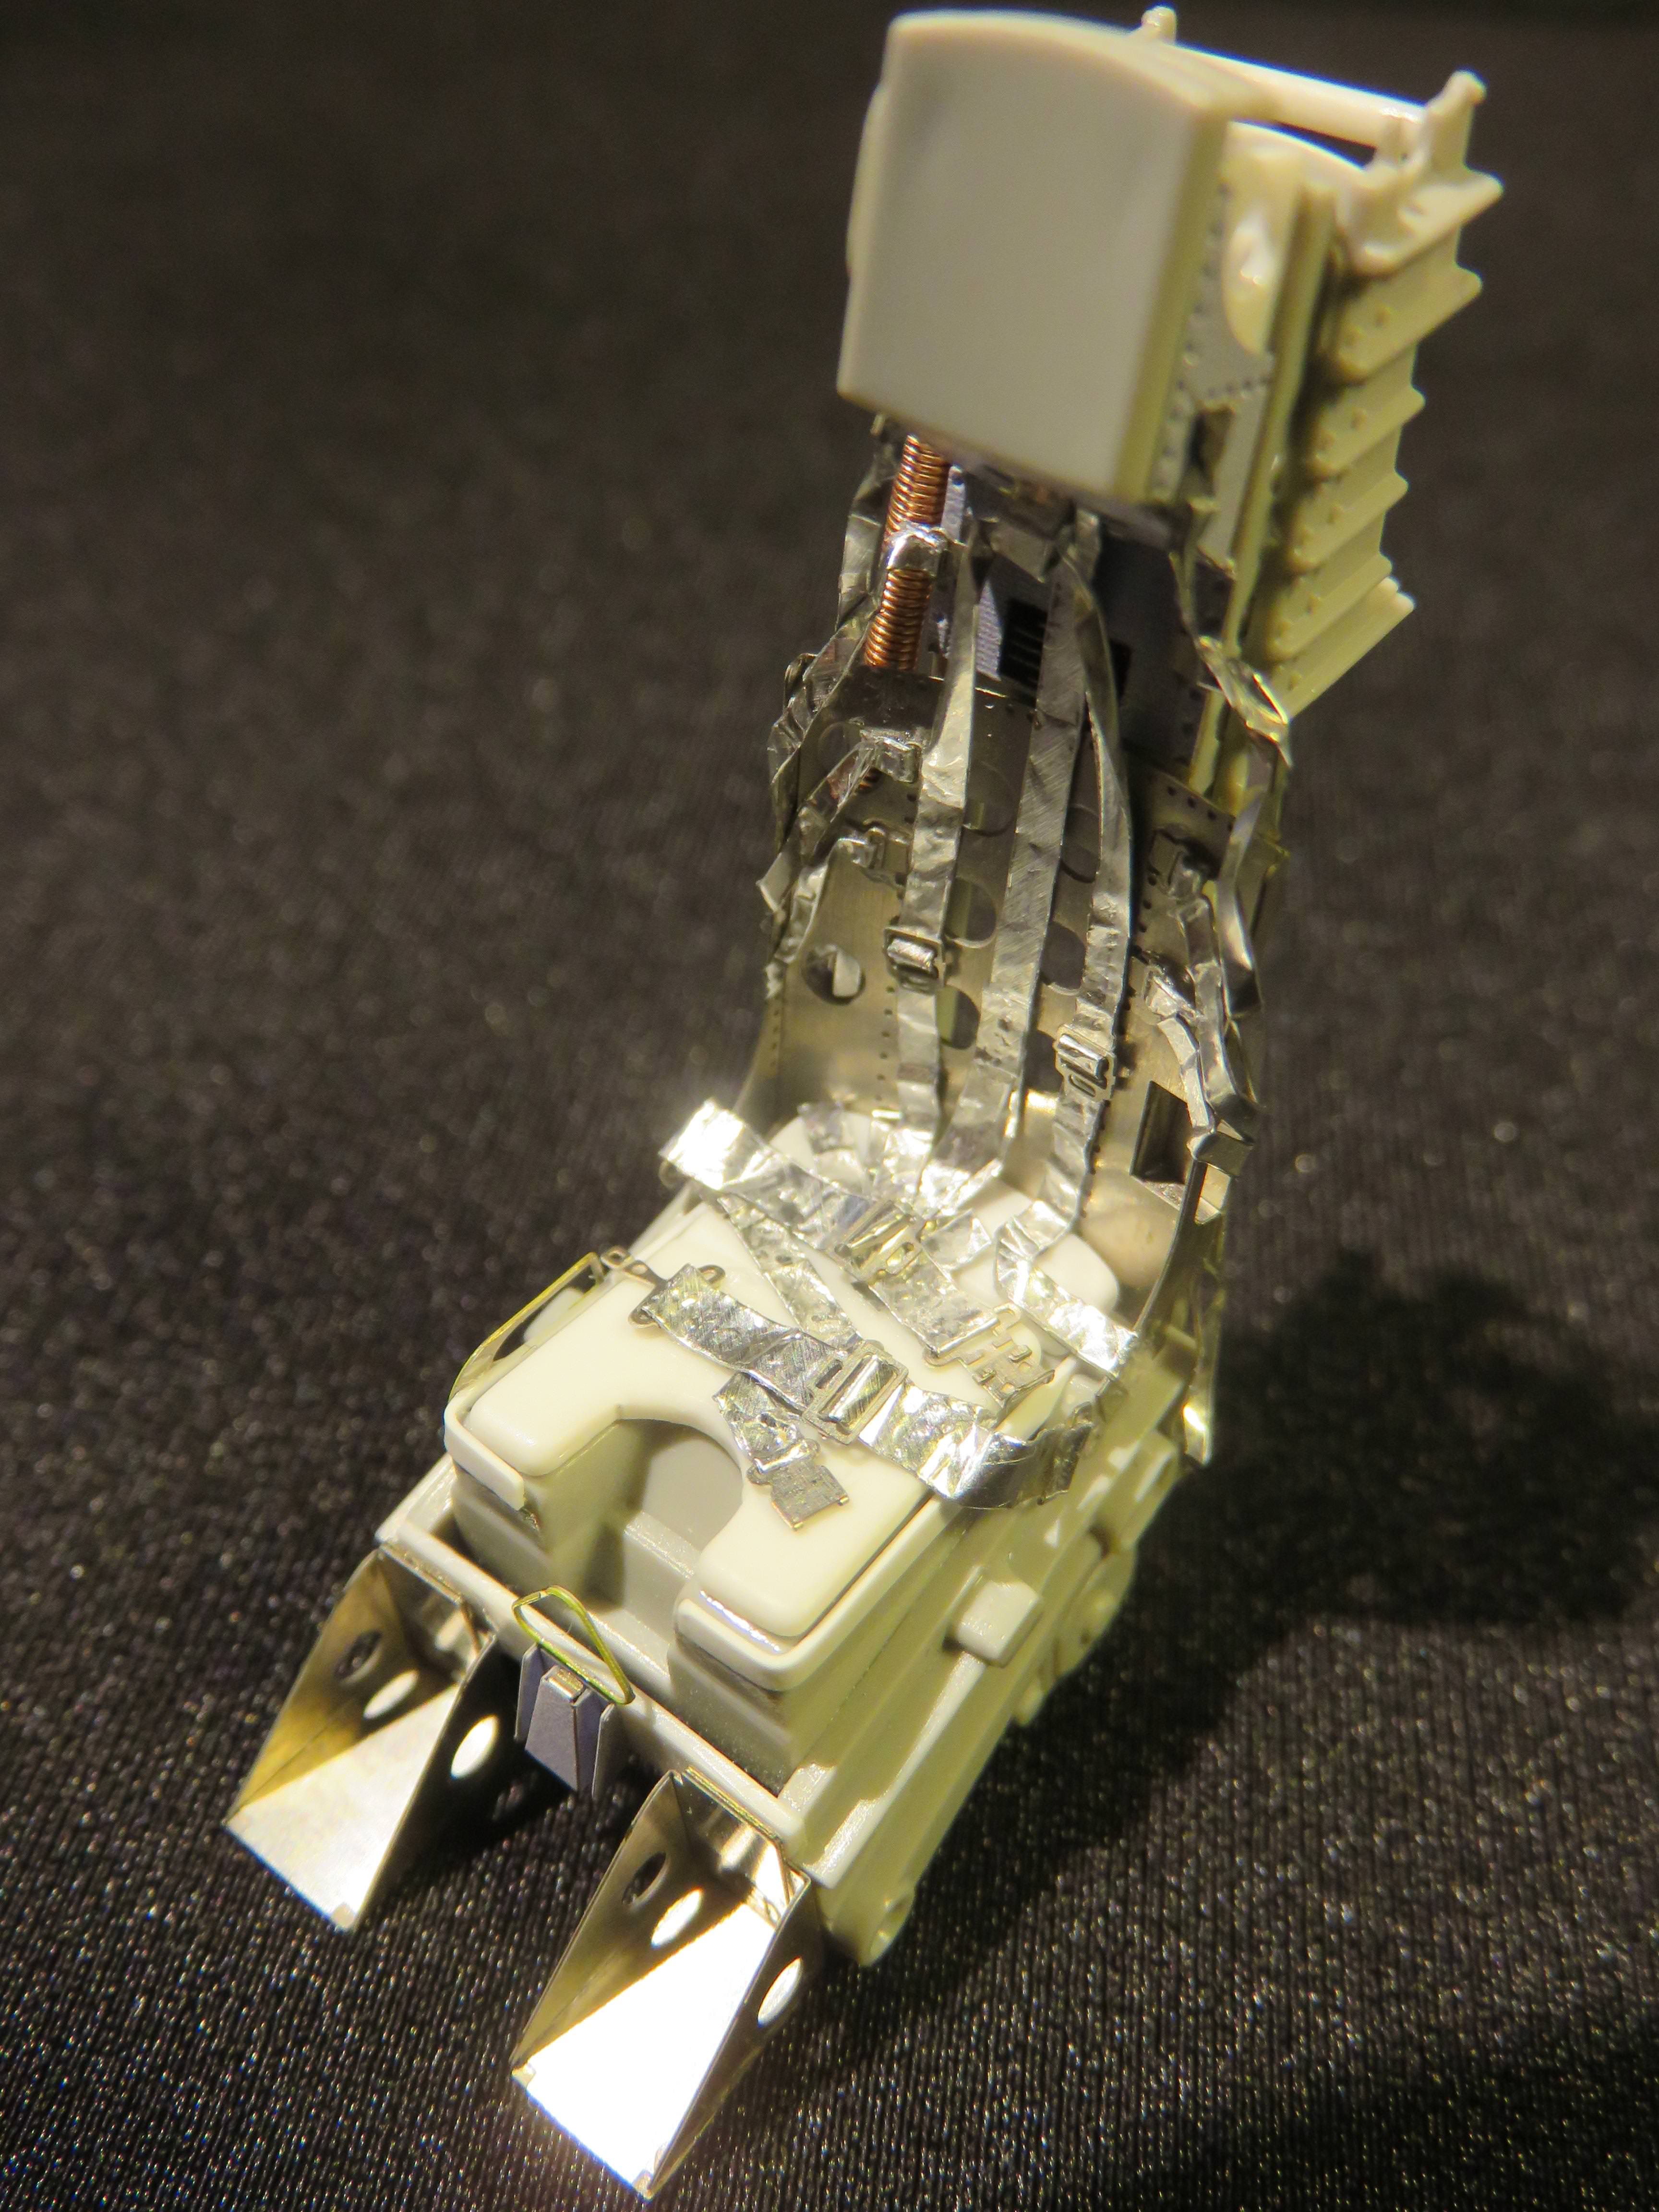
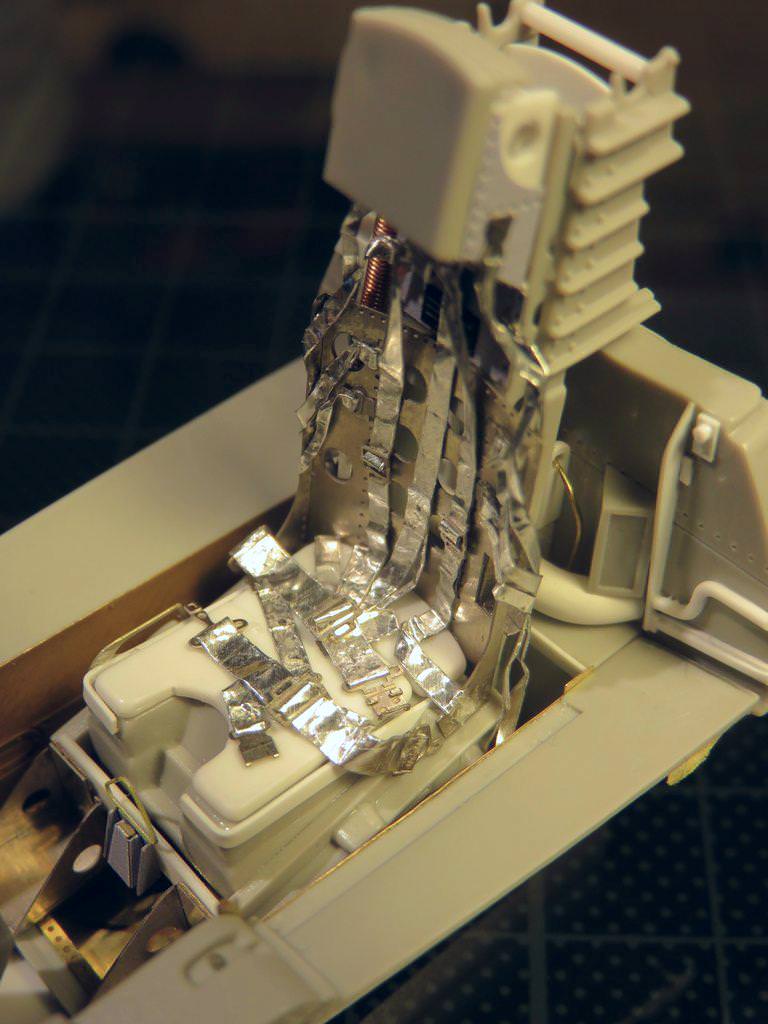
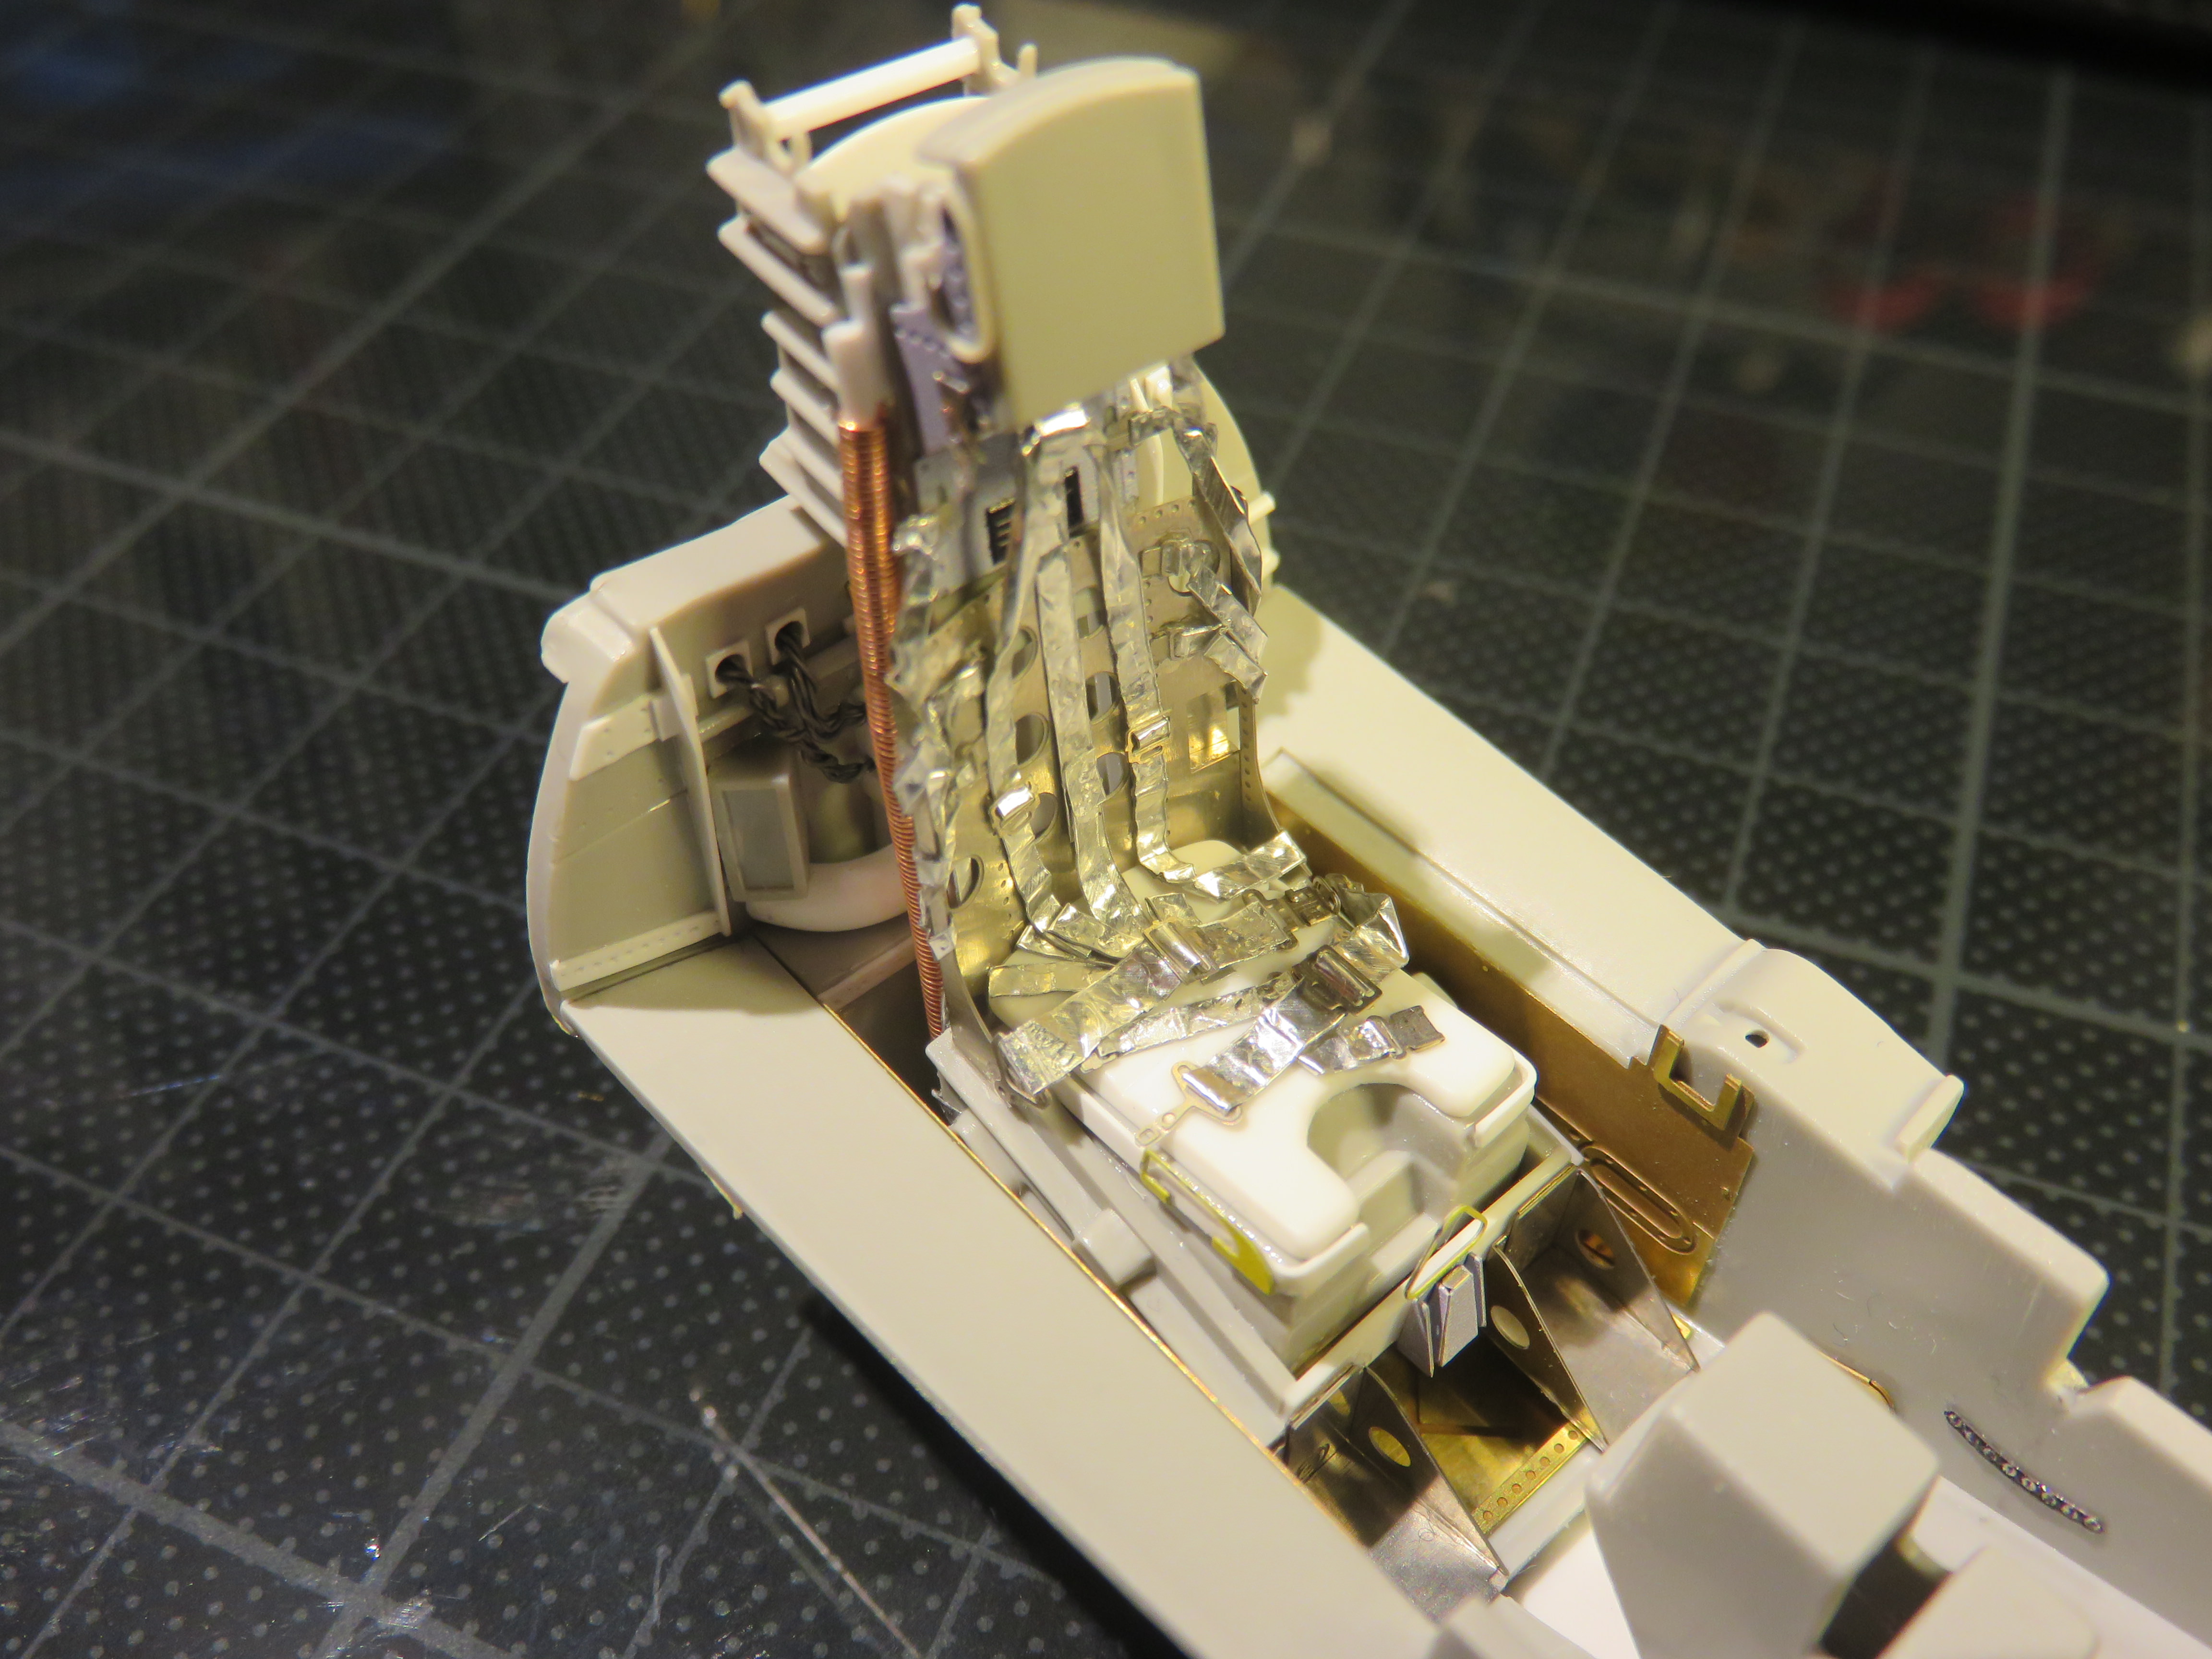
The Eduard PE set provides parts for the straps but they gave me exactly the same problems as the others had. I went back to my new favourite method of making seat belts - laminated kitchen foil. I decided to give the impression of the webbing rather than copy it faithfully. That route would lead to madness. Even more fiddling and gluing, plus attaching the hose I made earlier got me here (sorry about the glare from the foil).


While I was failing to buy superglue I started the next step - the main wheel bays. They come moulded with a fairly crude impression of pipes and hoses. I want to create a more convincing look so I started removing the moulded on detail to give me a clean surface to work with. I used a combination of modellers chisels, sanding sticks and sanding sponges. The latter with a coarse grit. At this stage I just wanted to remove detail and preserve the contours. I took it slow and easy to avoid unwanted gouges and deep scratches. You can see the progress so far in this slightly fuzzy shot.


There we have it. I have to say that I'm really enjoying this build. I’ve done far more scratch building and work with PE than I have assembly of the kit parts (at least thats how it feels). And because I’m allowing myself the luxury of taking as long as I like to finish the 104, the pressure is off. It's just fun and satisfaction with the occasional moment of frustration to spice things up. So far so good.

Happy modelling guys.
Joel_W
Staff MemberAssociate Editor
AUTOMODELER
_VISITCOMMUNITY
New York, United States
Joined: December 04, 2010
KitMaker: 11,666 posts
AeroScale: 7,410 posts
Posted: Saturday, December 16, 2017 - 03:27 AM UTC
Steve,
Every time I see those belts and harnesses, I'm just amazed. A job really done extremely well. Looking forward to how you create those nets. Should be real interesting to say the least.

I didn't realize that your other builds had a time constraint to completion. Was that just self imposed ( I a lot 3-4 months for a build these days), or is it for a contest or convention?
Joel
Kevlar06
_VISITCOMMUNITY
Washington, United States
Joined: March 15, 2009
KitMaker: 3,670 posts
AeroScale: 833 posts
Posted: Saturday, December 16, 2017 - 10:45 AM UTC
Steve,
Really excellent work on the seat and harness system. The harness system arms rotate and snap up and forward, automatically drawing the pilots arms in, at the same time his feet are drawn back into the seat via a cable system and special boots to get him through the small escape panel on the bottom of the nose (for the F104C). As for the spaghetti like tubing in the wheel wells, here's some shots of my Hasegawa F104C. I did the same thing you did, and scraped the interior of the wells clean, then replaced the tubing with fine solder and wire, with some of the actuators made from Evergreen rod and tube. The USAF used a coding system for its tubing-- usually leaving the interior tubing in natural metal. I've attached an actual tubing marking guide in the second link-- from the McChord AFB Air Park. I can't seem to post individual photos, so you'll have to wade through and pick out the ones you might find useful.

Wheel wells:

http://www.largescaleplanes.com/articles/article.php?aid=3172

Tubing guide:

http://www.largescaleplanes.com/articles/article.php?aid=3151

VR, Russ
GazzaS
#424
_VISITCOMMUNITY
Queensland, Australia
Joined: April 23, 2015
KitMaker: 4,648 posts
AeroScale: 1,938 posts
Posted: Saturday, December 16, 2017 - 02:21 PM UTC
Steve,
Can't help but being impressed with your detail work! Those seatbelts are something else!

Gaz
SteveAndrews
_VISITCOMMUNITY
England - South East, United Kingdom
Joined: August 16, 2010
KitMaker: 693 posts
AeroScale: 551 posts
Posted: Saturday, December 16, 2017 - 02:42 PM UTC
Guys thanks for dropping in.

Joel, for me its really a self-imposed deadline. I have a sense of wanting to make progress. In my head I have a picture of how the kit will look when its done and I want to see if my efforts can deliver what's in my imagination. I also have a stash of ideas and kits that call to me. A good psychiatrist could probably sort all this out but as well as a pressure its a motivator.

Russ, your Hasegawa F-104 is a beauty. Thanks so much for the tubing guide. That will be a fantastic help. I'll have fun searching it out amongst the other great references you've shared.

Gaz, thanks a million. You'll notice I'm absent from the Crusader build on Armorama. Definitely a case of biting off more than I can chew but maybe I'll still squeeze some time out to build that Matilda. Hope is a wonderful thing.

Thanks again guys. My daughter is now going to help me make a short video!

Happy modelling

Steve

GazzaS
#424
_VISITCOMMUNITY
Queensland, Australia
Joined: April 23, 2015
KitMaker: 4,648 posts
AeroScale: 1,938 posts
Posted: Saturday, December 16, 2017 - 03:44 PM UTC

Quoted Text

You'll notice I'm absent from the Crusader build on Armorama. Definitely a case of biting off more than I can chew but maybe I'll still squeeze some time out to build that Matilda.


There are still more than six months left in the campaign. I've no doubt you'll want a break from the Starfighter for a couple days in there.

Gaz
Kevlar06
_VISITCOMMUNITY
Washington, United States
Joined: March 15, 2009
KitMaker: 3,670 posts
AeroScale: 833 posts
Posted: Saturday, December 16, 2017 - 07:46 PM UTC
Steve,
The thought just occurred to me that the model of the seat depends on the timeframe of the F104, as there are several types of seats depending on the timeframe. The F104A and some very early F104Cs used the Stanley C and C1 downward ejecting seat, while the majority of F104Cs and the NF104s used the Stanley C2 upward ejecting seats. These were very similar seats, but you might look here:

http://www.ejectionsite.com/f104seat.htm

VR, Russ


SteveAndrews
_VISITCOMMUNITY
England - South East, United Kingdom
Joined: August 16, 2010
KitMaker: 693 posts
AeroScale: 551 posts
Posted: Sunday, December 17, 2017 - 02:24 AM UTC
Guys, I took the plunge and made a short video. The only thing that can be improved is everything, but it's a start. Let me know what you think and if its helpful I'll do some more.

Gaz, yes I'm sure something sandy is going to have appeal after so much that's shiny. If old father time is kind I might just get both done.

Russ, I can't say thanks enough for all your super references.

Right, here's my first ever video. No need to call an agent just yet.

https://www.youtube.com/watch?v=5YokJm3B55s&feature=youtu.be

Happy modelling.

Steve
Joel_W
Staff MemberAssociate Editor
AUTOMODELER
_VISITCOMMUNITY
New York, United States
Joined: December 04, 2010
KitMaker: 11,666 posts
AeroScale: 7,410 posts
Posted: Sunday, December 17, 2017 - 03:25 AM UTC
Steve,
Just watched your 1st video, and it's outstanding both in content and video production.

Joel
Removed by original poster on 12/18/17 - 01:21:38 (GMT).
Kevlar06
_VISITCOMMUNITY
Washington, United States
Joined: March 15, 2009
KitMaker: 3,670 posts
AeroScale: 833 posts
Posted: Sunday, December 17, 2017 - 06:25 AM UTC
Steve,
Excellent Video-- Im going to try your technique on some WWII aircraft I have waiting in the stash-- I have some old German and US buckles that would be perfect for WWII aircraft (and I'm to cheap to waste them and buy replacements)my motto has always been waste not want not!
VR, Russ
Cosimodo
#335
_VISITCOMMUNITY
Auckland, New Zealand
Joined: September 03, 2013
KitMaker: 1,808 posts
AeroScale: 195 posts
Posted: Sunday, December 17, 2017 - 02:23 PM UTC
Hi Steve,
Fantastic work on the seat and the video clip was very helpful. The foil looks a lot more flexible than the usual PE, especially the stuff that comes with kits.

cheers
Michael
GazzaS
#424
_VISITCOMMUNITY
Queensland, Australia
Joined: April 23, 2015
KitMaker: 4,648 posts
AeroScale: 1,938 posts
Posted: Sunday, December 17, 2017 - 02:42 PM UTC
Steve,
Great and useful video! Enjoyed it a lot!

Gaz
SteveAndrews
_VISITCOMMUNITY
England - South East, United Kingdom
Joined: August 16, 2010
KitMaker: 693 posts
AeroScale: 551 posts
Posted: Sunday, December 17, 2017 - 04:41 PM UTC
Hi guys
That's great news regarding the video. I'm really pleased it was a help. I'll get a tripod for my camera so I can improve the definition next time. It was fun to make, and of course the junior members of the household taught me how to use the technology. Its actually quite easy using iMovie or an equivalent.
Next up. Undercarriage.
Have a great day.
Steve
SteveAndrews
_VISITCOMMUNITY
England - South East, United Kingdom
Joined: August 16, 2010
KitMaker: 693 posts
AeroScale: 551 posts
Posted: Sunday, December 17, 2017 - 04:48 PM UTC
And I'll stop describing everything as 'nice'. There must be other adjectives :-)
KelticKnot
_VISITCOMMUNITY
Scotland, United Kingdom
Joined: May 11, 2015
KitMaker: 768 posts
AeroScale: 656 posts
Posted: Sunday, December 17, 2017 - 07:27 PM UTC
A fine first video Steve, the only thing I'd suggest is to keep framing in mind - your talking to camera parts have the top of your head chopped off
And I found the audio to be a bit low. I dont know if you're able to boost it a bit in whatever software you're using?

Anyway, first subscriber and looking forward to seeing more of your vids!
SteveAndrews
_VISITCOMMUNITY
England - South East, United Kingdom
Joined: August 16, 2010
KitMaker: 693 posts
AeroScale: 551 posts
Posted: Sunday, December 17, 2017 - 07:36 PM UTC
Hi Paul

Thanks very much for the feedback. Yes I got the framing a bit wrong in editing, and I hope the audio will be better when I switch to my camera.

Wow, I have a subscriber. Wait until I tell my daughter. Suddenly dad might seem just a bit more trendy. Thanks a million.

Have a great day.

Steve
Joel_W
Staff MemberAssociate Editor
AUTOMODELER
_VISITCOMMUNITY
New York, United States
Joined: December 04, 2010
KitMaker: 11,666 posts
AeroScale: 7,410 posts
Posted: Sunday, December 17, 2017 - 08:01 PM UTC
Steve,
It never occurred to me to subscribe as I've got a few dozen subscriptions already for various interests including modeling of course. But I went to your channel and subscribed. Now you have two of us waiting for video #2.

Joel
SteveAndrews
_VISITCOMMUNITY
England - South East, United Kingdom
Joined: August 16, 2010
KitMaker: 693 posts
AeroScale: 551 posts
Posted: Tuesday, December 19, 2017 - 01:50 AM UTC
Hey Joel,
That's so kind. Thanks very much. Once my director has a finished her homework we'll make a plan for the next one.
Happy modelling.
Steve
SteveAndrews
_VISITCOMMUNITY
England - South East, United Kingdom
Joined: August 16, 2010
KitMaker: 693 posts
AeroScale: 551 posts
Posted: Friday, December 22, 2017 - 03:14 PM UTC
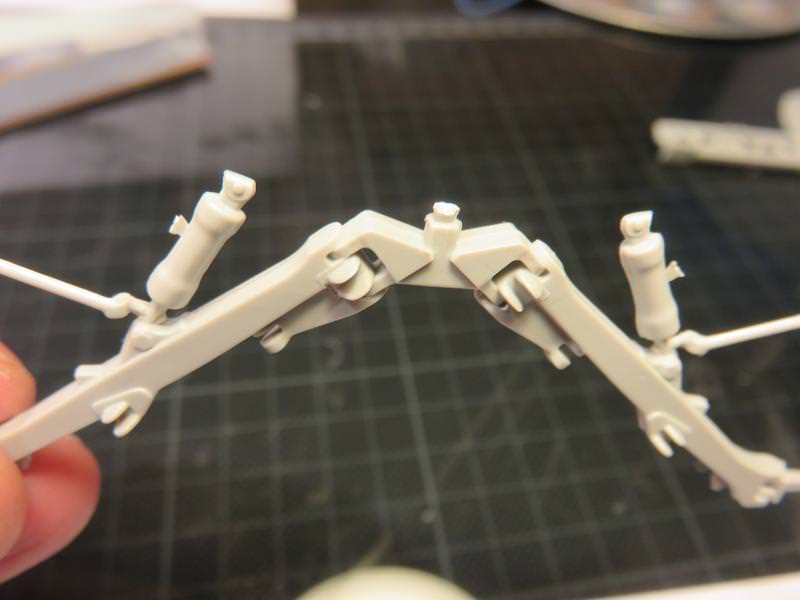
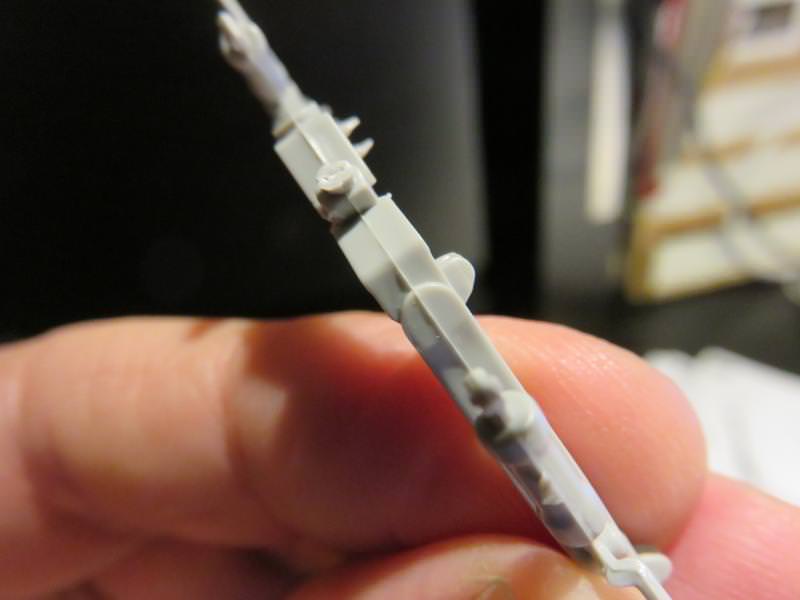
I’m having an Italeri moment. An Italeri moment is time spent wondering how a kit manufacturer can get crisp detail and awful moulding all on the same part. The part in question is the main undercarriage legs (one part of two legs). Having examined it and compared it to the metal replacement, I decided that the kit part was better and plenty strong enough to hold the weight of the completed model. That tells you everything you need to know about the quality of the replacement part.

The problem is that while the kit part is better, it’s not good. There’s a massive seam line to remove, soft moulding and crude detail in places. In addition some of the pistons that raise and lower the legs and wheel bay doors are moulded on, creating little nooks and crannies. It's these areas that are victims of some of the softest moulding and need the most attention. At first I thought that with some patience I could do a good job of cleaning all this. Part way through I decided that a hybrid approach - part clean up, part scratch building - would be easier and in the end give a better result. The plan then is to remove the pistons, scratch build new ones and clean up the legs. Once I have the basic components clean I will assemble the whole main landing gear area and start adding the hoses and other details.

Kit part - not too bad at first glance.


Kit part - ah, that'll need attention.


Replacement metal - alright but the kit part is better and plastic is easier to work with.


As preparation for scratch building I’ve been collecting photos. From those I see there’s a good deal of raised riveting on the ceiling of the landing gear bay. I removed the moulded on detail earlier. Now I’m going to replace it and add what is missing using Masterclub rivets. I've never used them before so an adventure awaits. I’ll let you know how it goes when they arrive. In the meantime I’m planning another video (sound up head in) on the scratch building, so watch out for that over the holiday, and talking of the holiday…

…have a great Christmas if you are celebrating it. I hope Santa brings you something for your modelling life, and that whatever you do there is love and fun all around.
Joel_W
Staff MemberAssociate Editor
AUTOMODELER
_VISITCOMMUNITY
New York, United States
Joined: December 04, 2010
KitMaker: 11,666 posts
AeroScale: 7,410 posts
Posted: Friday, December 22, 2017 - 07:44 PM UTC
Steve,
I see your points about the landing gear with both the plastic and cast parts being less then ideal. I'm currently working on the Eduard struts for my F6F-3, and even though the detail is excellent, every single surface suffers from a main seam line from the mold joint. Just the nature of the beast.

I would take another look at the metal replacement part as it seems to have a lot of crisp detail. Cleaning up metal is a lot different then plastic, and takes a lot of elbow grease and time. Believe me I know that only to well. But done right, it's worth the effort. Then super detailing from there will raise the bar even further.

looking forward to your next Vid for sure.

Have a great holiday.

Joel

Kevlar06
_VISITCOMMUNITY
Washington, United States
Joined: March 15, 2009
KitMaker: 3,670 posts
AeroScale: 833 posts
Posted: Friday, December 22, 2017 - 09:50 PM UTC
Steve,
I agree with Joel regarding the metal struts. The 1/32 Hasegawa kit actually uses a wire sandwiched between two halves of the main landing gear struts that double as the wheel attachment points for strength-- so the Hasegawa folks recognized the gear was a weak point. One of the complaints I've heard about the early Revell 1/32 F104 is the landing gear is rather weak, I'd suspect the same from the Italeri kit if its plastic only. Frankly, after the main fuselage brace is added, and the details are added, you won't be able to see much of the attachment point anyway. You could also shave off or scratch the detail you want from the plastic parts and reattach it to the metal parts with cyanoacrylate. I'd go with the metal-- the kit is heavier than you think, and the metal gear will give you more support.
VR, Russ
SteveAndrews
_VISITCOMMUNITY
England - South East, United Kingdom
Joined: August 16, 2010
KitMaker: 693 posts
AeroScale: 551 posts
Posted: Tuesday, December 26, 2017 - 12:47 AM UTC
Hi guys

Thanks very much for sharing your experience with metal vs plastic. I've actually been working on the plastic parts and the main landing gear seems very sturdy. The metal replacement I have is soft. The small parts are easily bent and doesn't feel much stronger to be honest. Having said that I'll keep your advice in my thoughts and my options open and work on both until the moment of truth comes. In the meantime here's a second instalment of the vlogs.

https://www.youtube.com/watch?v=ss96Qw2pUok

I hope you've both had a great Christmas and are looking forward to the New Year.

Merry Christmas!

Steve.
Joel_W
Staff MemberAssociate Editor
AUTOMODELER
_VISITCOMMUNITY
New York, United States
Joined: December 04, 2010
KitMaker: 11,666 posts
AeroScale: 7,410 posts
Posted: Wednesday, December 27, 2017 - 10:57 PM UTC
Steve.
Just watched your latest vid, and it's technically that much better then the 1st one. you sure you don't do this professionally? As for the content, it's outstanding.

Just one question. After you punch the rivets and get that raised lip, do you sand down the surface or just leave it that way?

Joel
SteveAndrews
_VISITCOMMUNITY
England - South East, United Kingdom
Joined: August 16, 2010
KitMaker: 693 posts
AeroScale: 551 posts
Posted: Thursday, December 28, 2017 - 02:31 AM UTC
Hey Joel

Scout's honour, I'm a newbie when it comes to cameras, youtube and the whole video thing. I've basically copied the style of video tutorials I like. Once upon a time I had some training on talking to camera because I was in a job that got media attention very occasionally but that's it. Basically I imagine I'm talking to a friend.

Thanks very much for the feedback. My next technical challenge is to improve the definition. I think that means a new camera. 'Dear Santa...' Doh! Too late.

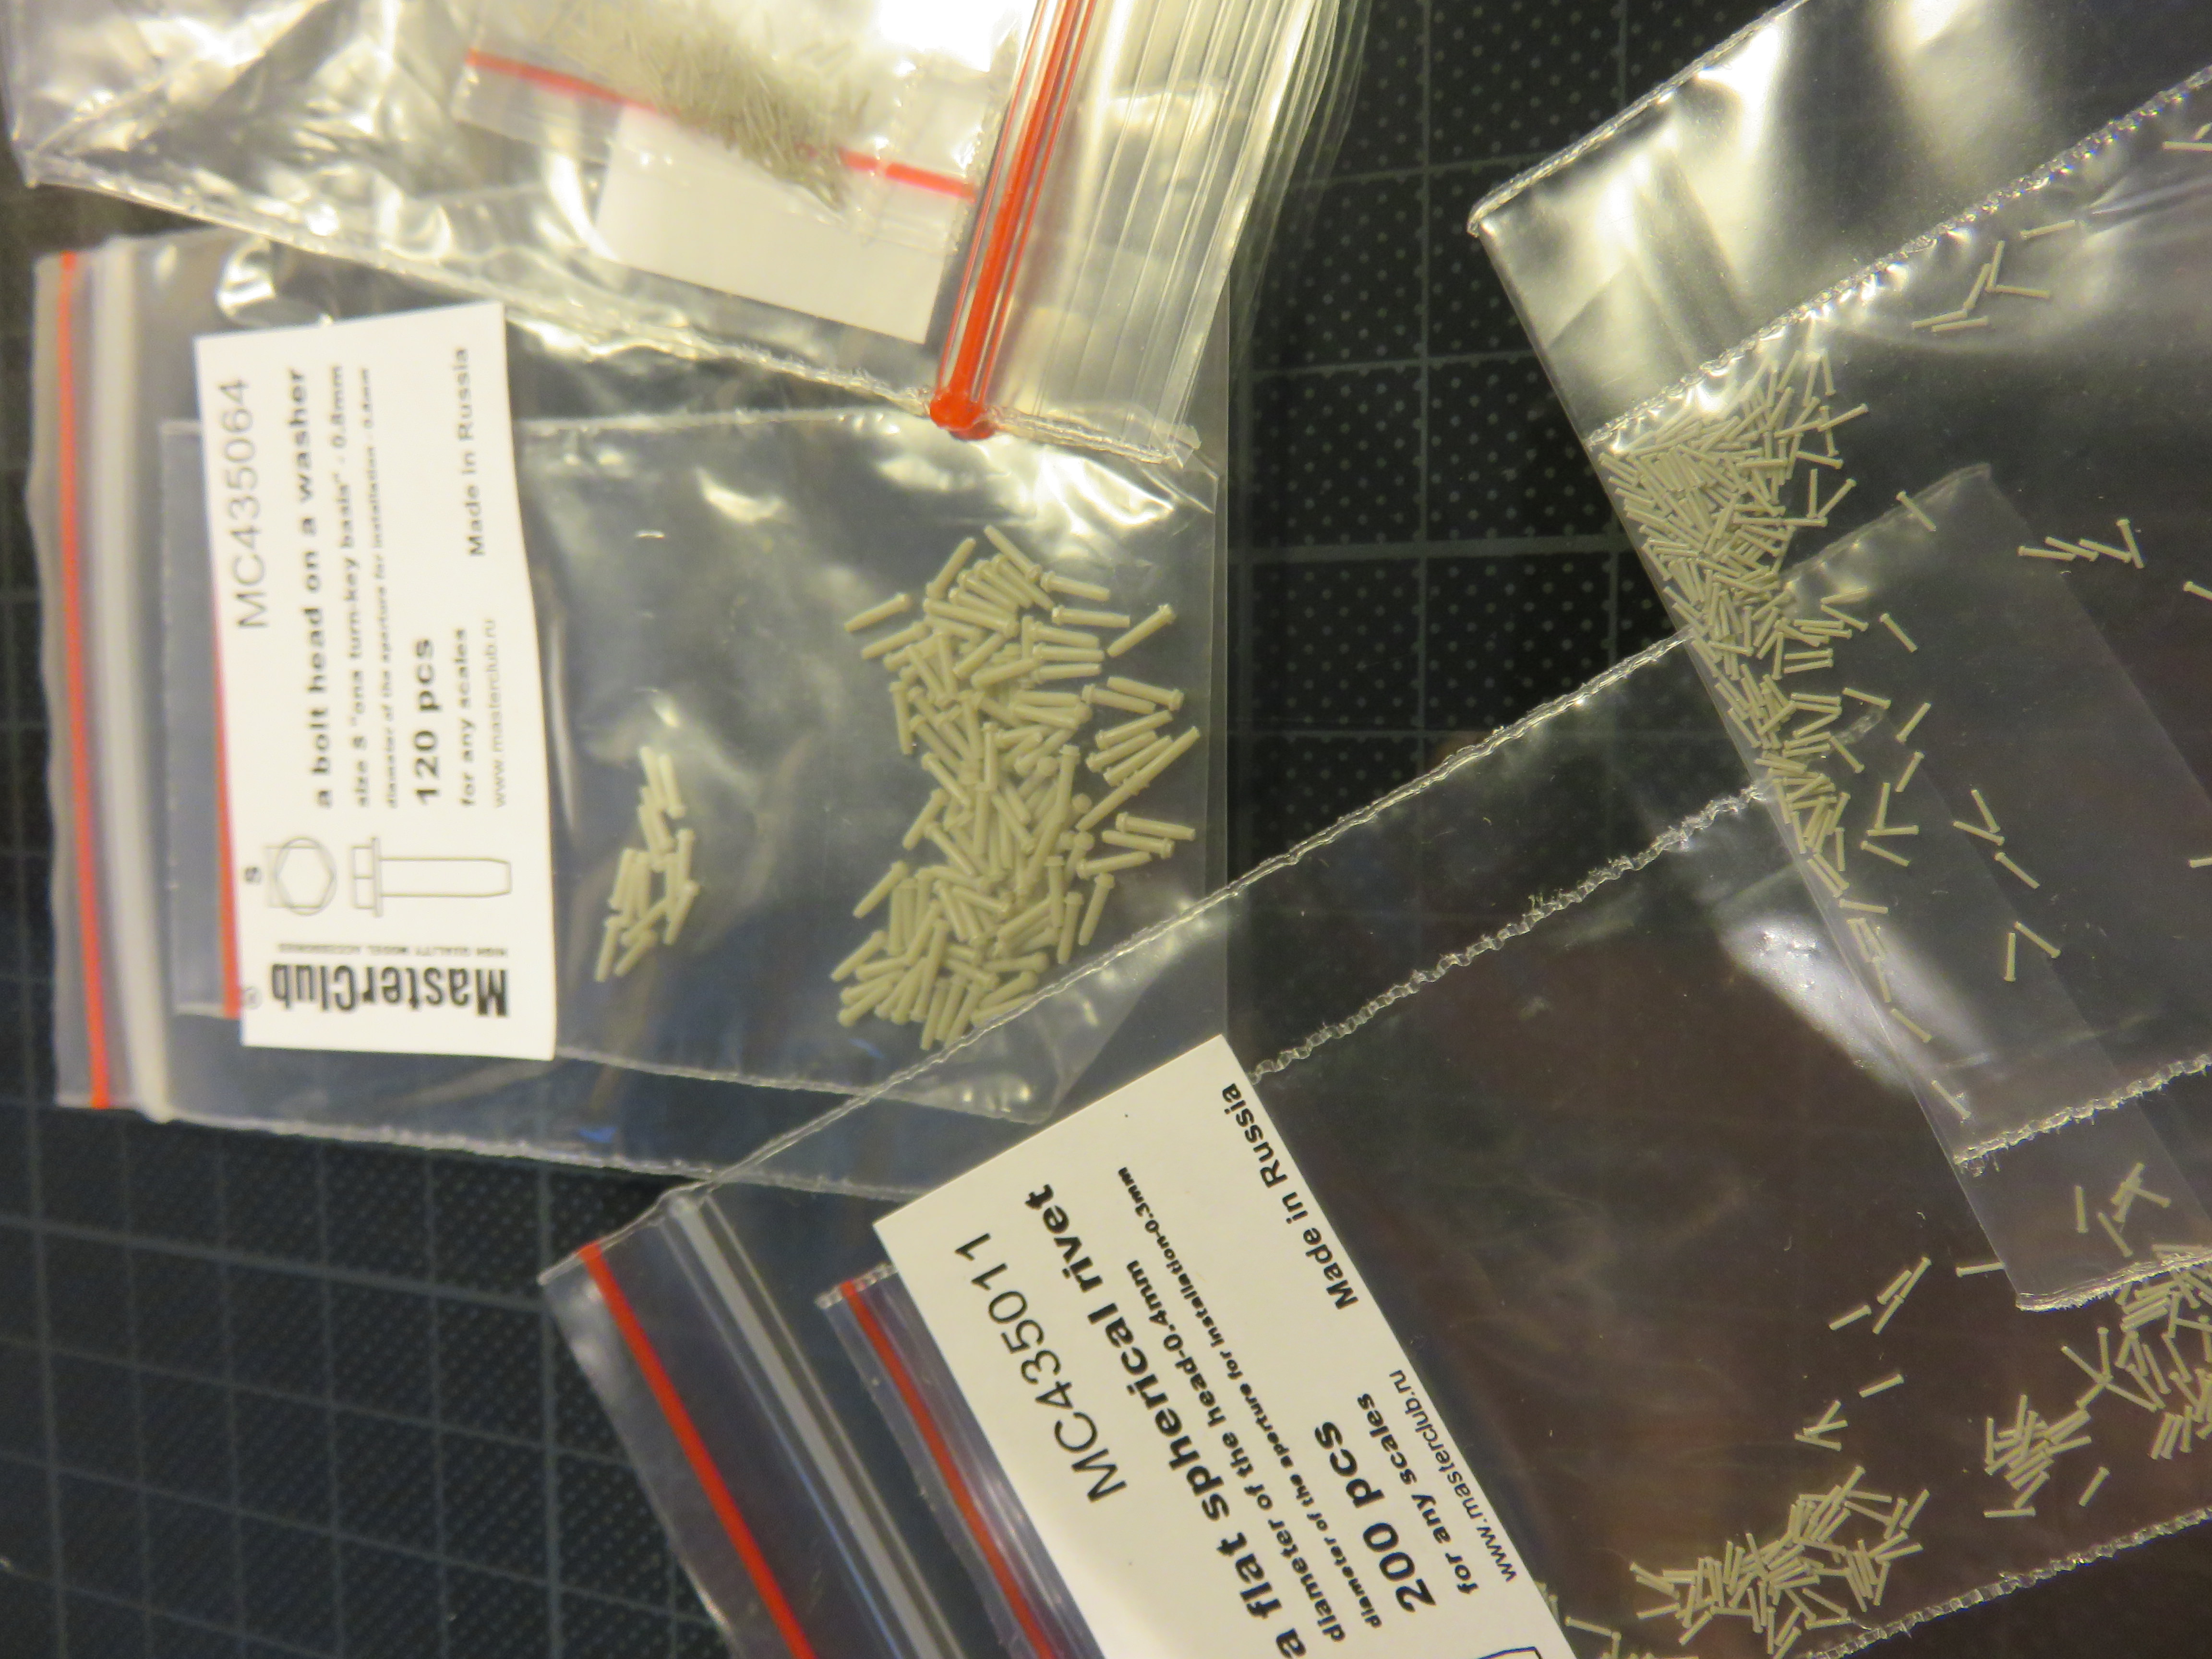
On those rivets, yes sometimes I sand them down but I like the little crater edges that push up, especially if I'm simulating raised rivets. By the way I recently got an order of Masterclub resin individual bolts and rivets. They are beautiful, and ideal for adding spot details but you'd need the patience of a saint rivet a big area. Have a look at these. The squares on my cutting mat are 1cm wide.


Happy modelling.

Steve