OFFICIAL: Pax and Pallets Campaign
Western Australia, Australia
Joined: March 21, 2016
KitMaker: 247 posts
AeroScale: 105 posts
Posted: Sunday, April 22, 2018 - 04:23 AM UTC

#392
Hessen, Germany
Joined: January 09, 2013
KitMaker: 696 posts
AeroScale: 608 posts
Posted: Monday, April 23, 2018 - 12:16 AM UTC
Hi there,
here's a short update on my build, nice little parts for the cockpit, probably later not to be seen

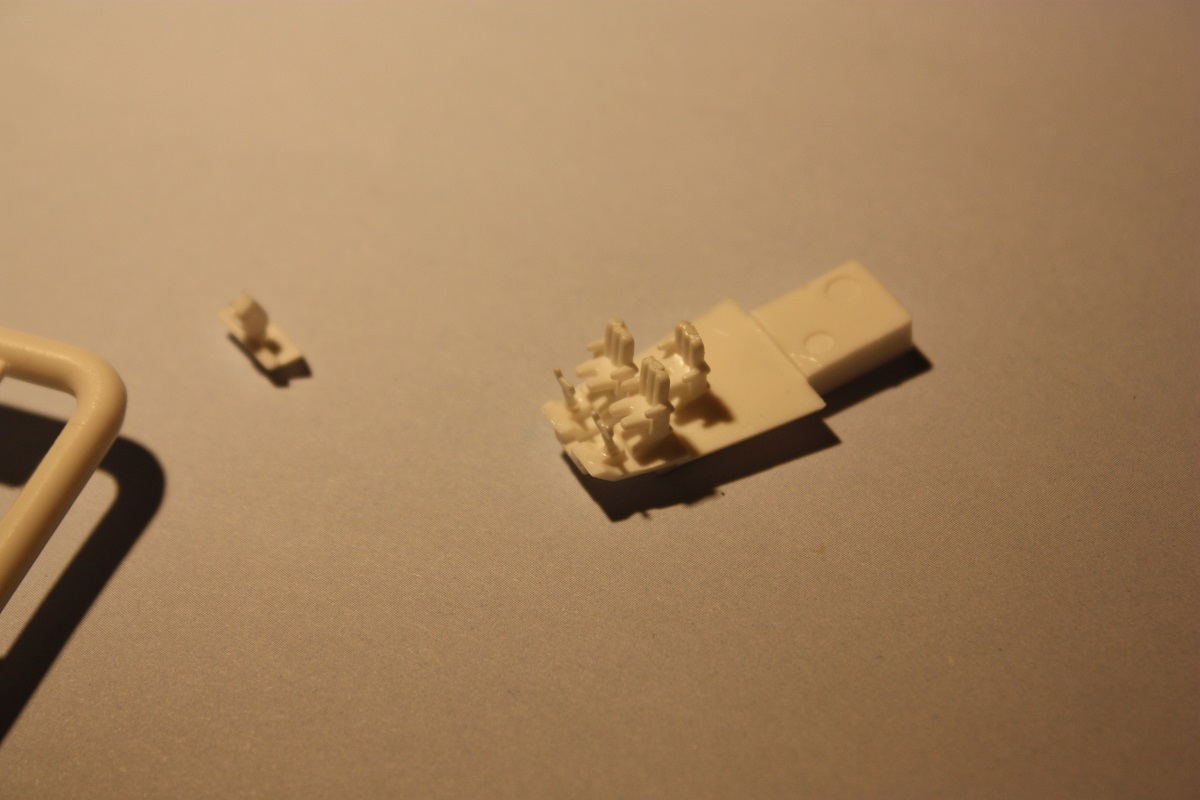
Dry fitting looks promising yet...

Good luck for your builds, very impressive projects so far

On the bench:
EE(BAC) Lightning F.2A (Airfix 1:72)

#259
Massachusetts, United States
Joined: October 23, 2011
KitMaker: 2,265 posts
AeroScale: 1,715 posts
Posted: Monday, April 23, 2018 - 02:19 AM UTC
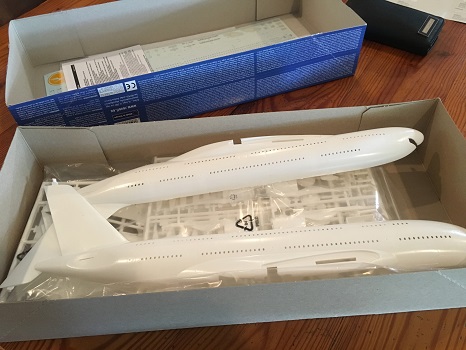
I like the two Lufthansa airliners going up together!

United States
Joined: December 26, 2008
KitMaker: 288 posts
AeroScale: 195 posts
Posted: Wednesday, April 25, 2018 - 07:17 PM UTC
I am now working on the final paint steps for my Cessna 172. As the 172 will be mostly gloss white, my usual strategy is multiple thin coats of gloss white with at least i light sanding/polishing step in the process. It usually looks pretty good but it takes time for the paint to fully harden. Anyway, while I am doing this part of the build, I pulled out my decal sheet to plan ahead. I quickly ran into a bit of a problem. I had not looked at the decal sheet closely when I bought it a few years ago. It turns out that the clear decal film used as the base was not fully printed on the sheet. So some of the decals are printed directly on the bare paper. This will not end well!

I just contacted Draw Decals and they will be sending me the replacement decal parts. They have excellent customer service as I heard back from them within a few hours that they will take care of the problem. Hopefully, the replacements will come soon enough for me to finish the build before the end of this GB. It will be close as I have at least 2 weeks of business travel in May.
I can report a little progress as I finished up my prop so I have something to show today.

I went for a semigloss white spinner contrary to the decal instructions which shows a bare metal spinner. All of the photos I can find on the Ethiopian 172s have white spinners.
Have fun modeling!
Mike


#439
Washington, United States
Joined: November 05, 2005
KitMaker: 4,950 posts
AeroScale: 3,192 posts
Posted: Saturday, April 28, 2018 - 11:15 AM UTC
Progress, starting to look like a Clipper.

Couple of seams left to fill, get the engines and the last of the clear parts added and it's ready prime time.

Hanger Queens in Waiting:
Monogram 1/72 F8F-1
Corsair the Sky Pirate - 1/72 Ace A-7D
Century Series - Airfix 1/72 F-105G
Anti Shipping - Academy 1/72 PBJ-1D
Academy 1/72 F-84E

#392
Hessen, Germany
Joined: January 09, 2013
KitMaker: 696 posts
AeroScale: 608 posts
Posted: Thursday, May 03, 2018 - 12:37 AM UTC
On the bench:
EE(BAC) Lightning F.2A (Airfix 1:72)
TimReynaga
 Associate Editor
California, United States
Joined: May 03, 2006
KitMaker: 2,500 posts
AeroScale: 318 posts
Posted: Monday, May 07, 2018 - 06:01 PM UTC
Colors are on.
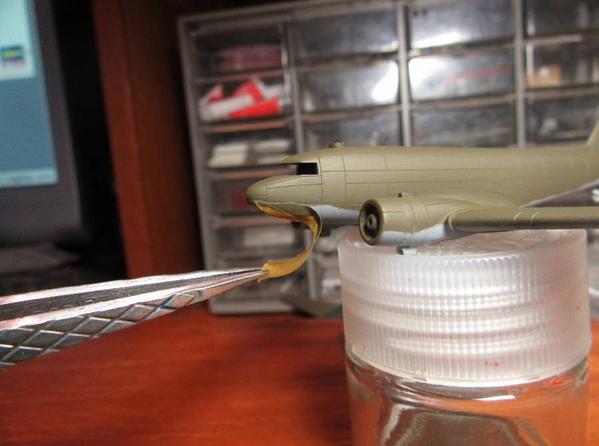
C-47: Tamiya Khaki Drab (XF-51) and Olive Drab (XF-62) - 2:1 ratio mix for the upper, Tamiya Neutral Grey (XF-53) undersides.
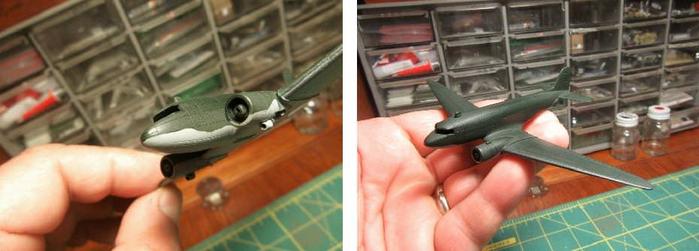
L2D: Tamiya J.N. Green (XF-11) uppers and Tamiya Medium Sea Gray 2 (R.A.F.) (XF-83) undersides.

#439
Washington, United States
Joined: November 05, 2005
KitMaker: 4,950 posts
AeroScale: 3,192 posts
Posted: Thursday, May 10, 2018 - 05:26 PM UTC
The clipper is almost ready for the main paint.
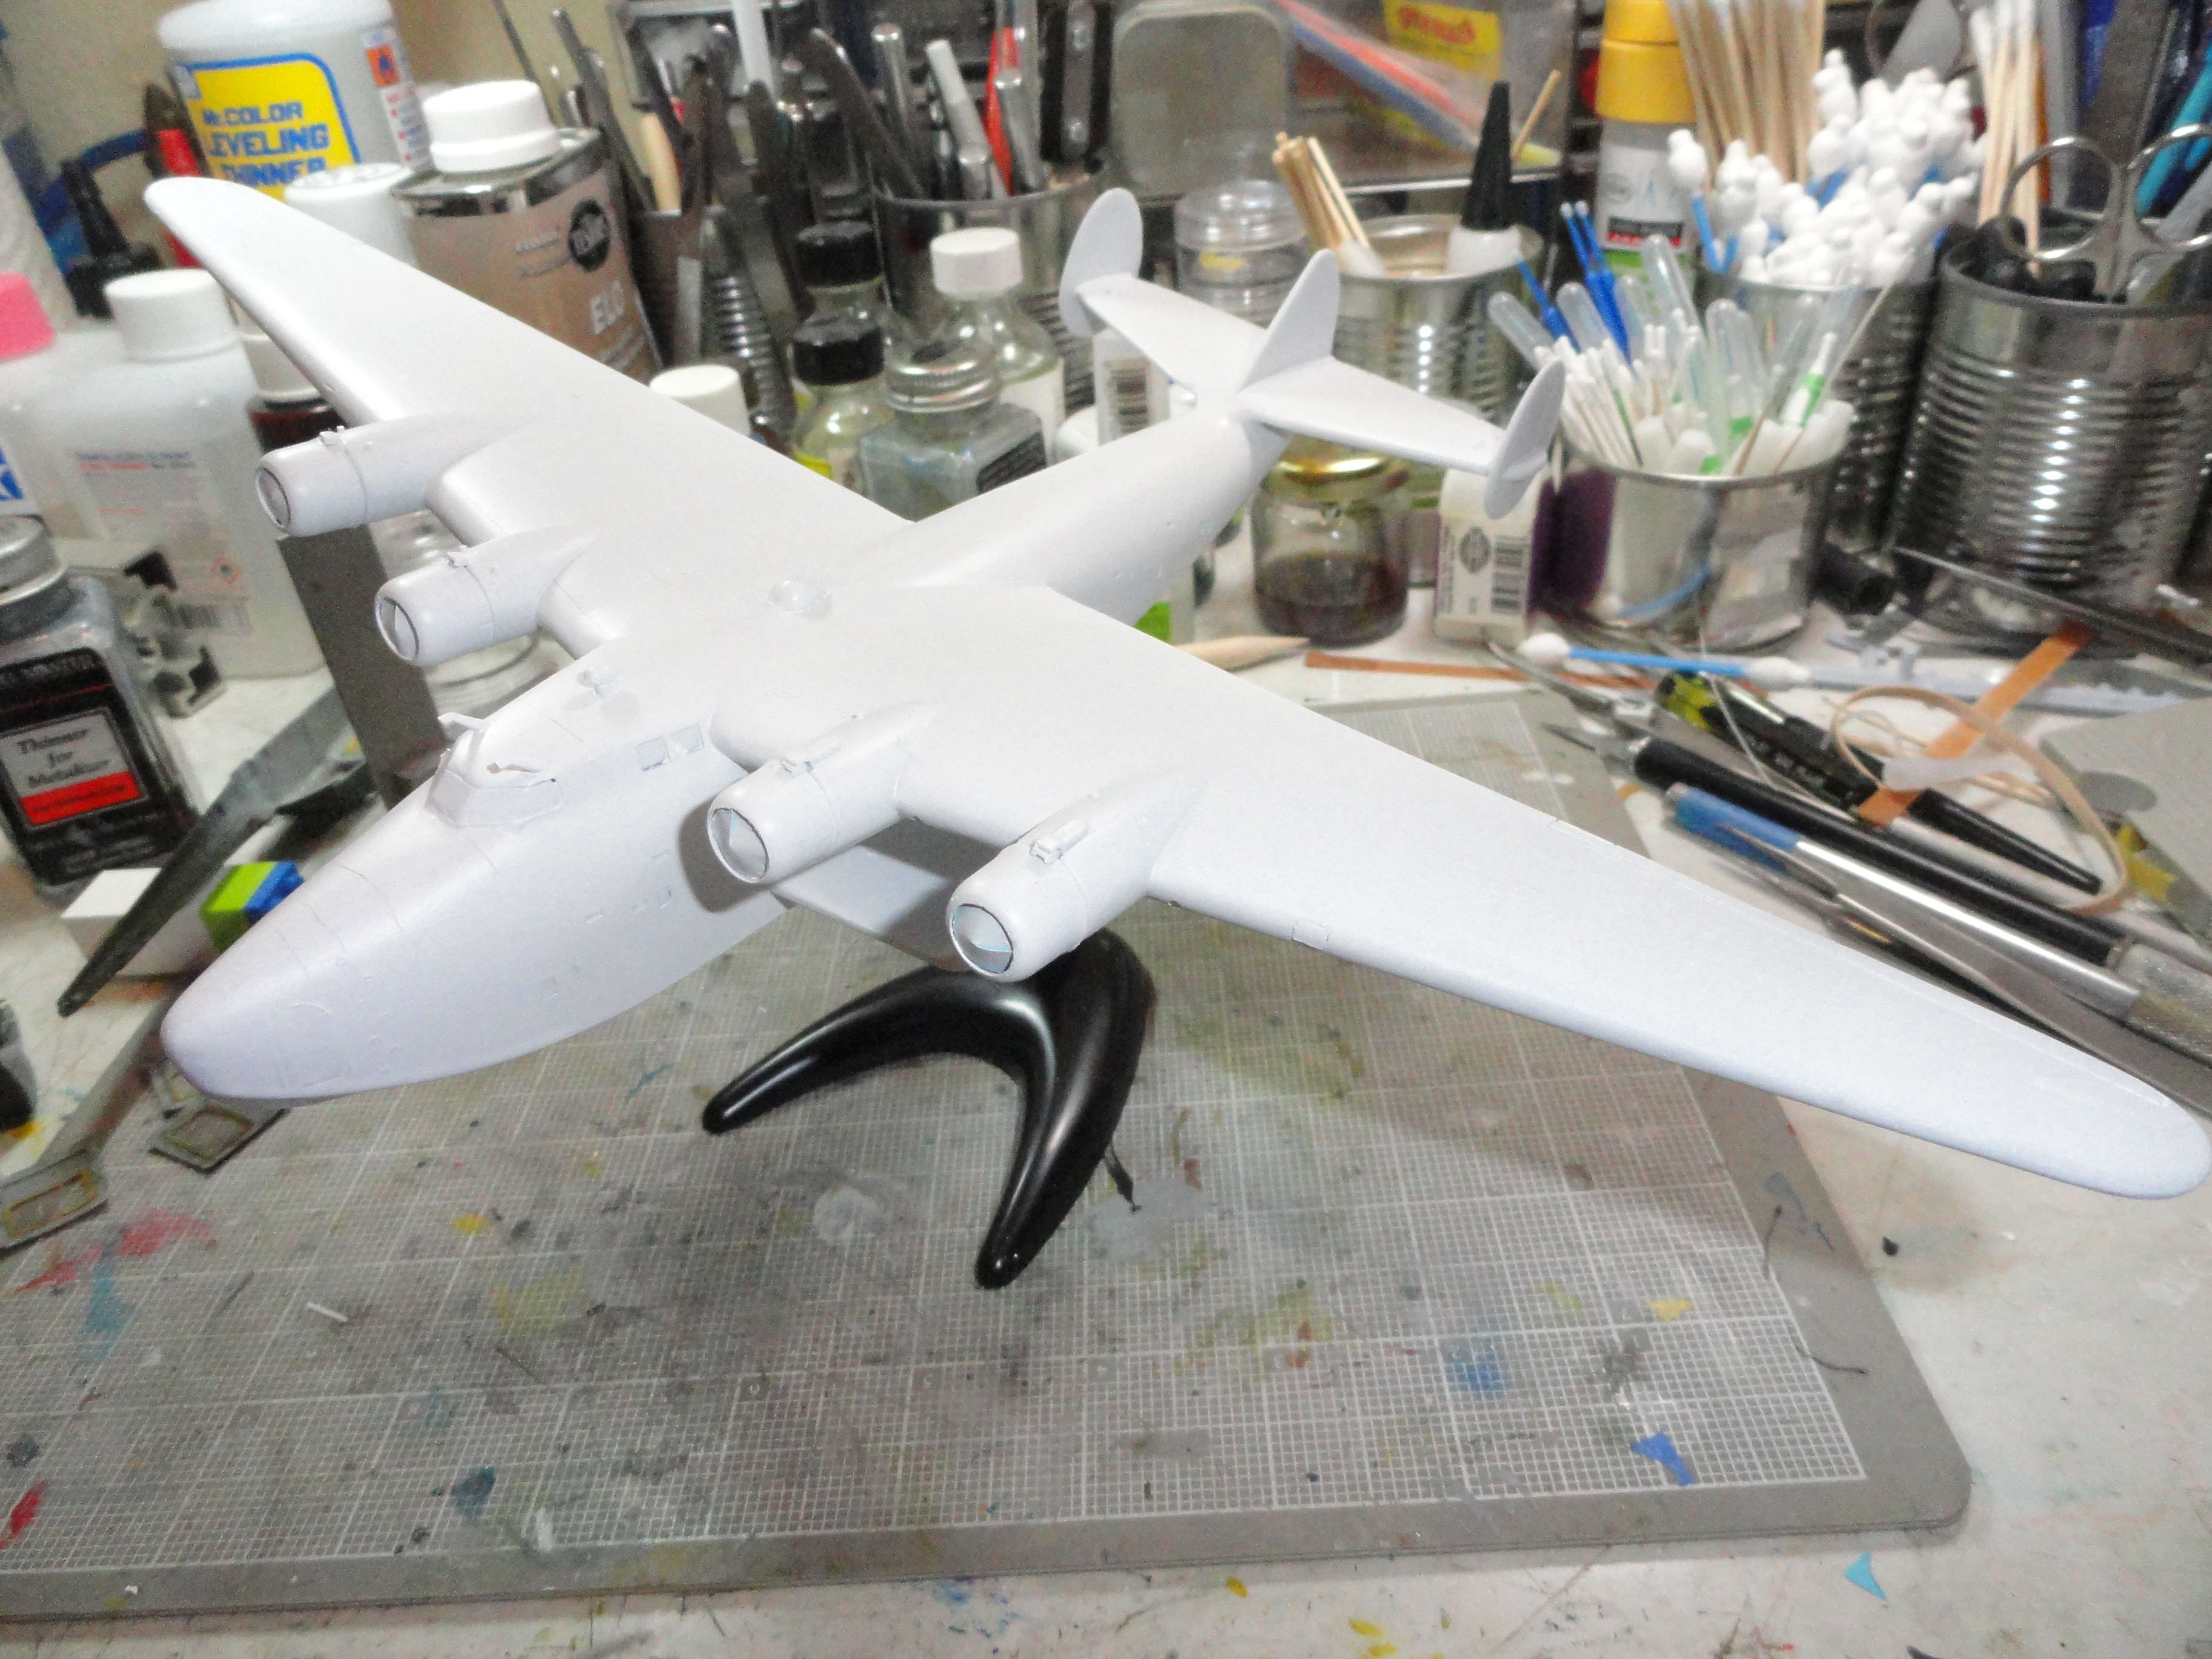
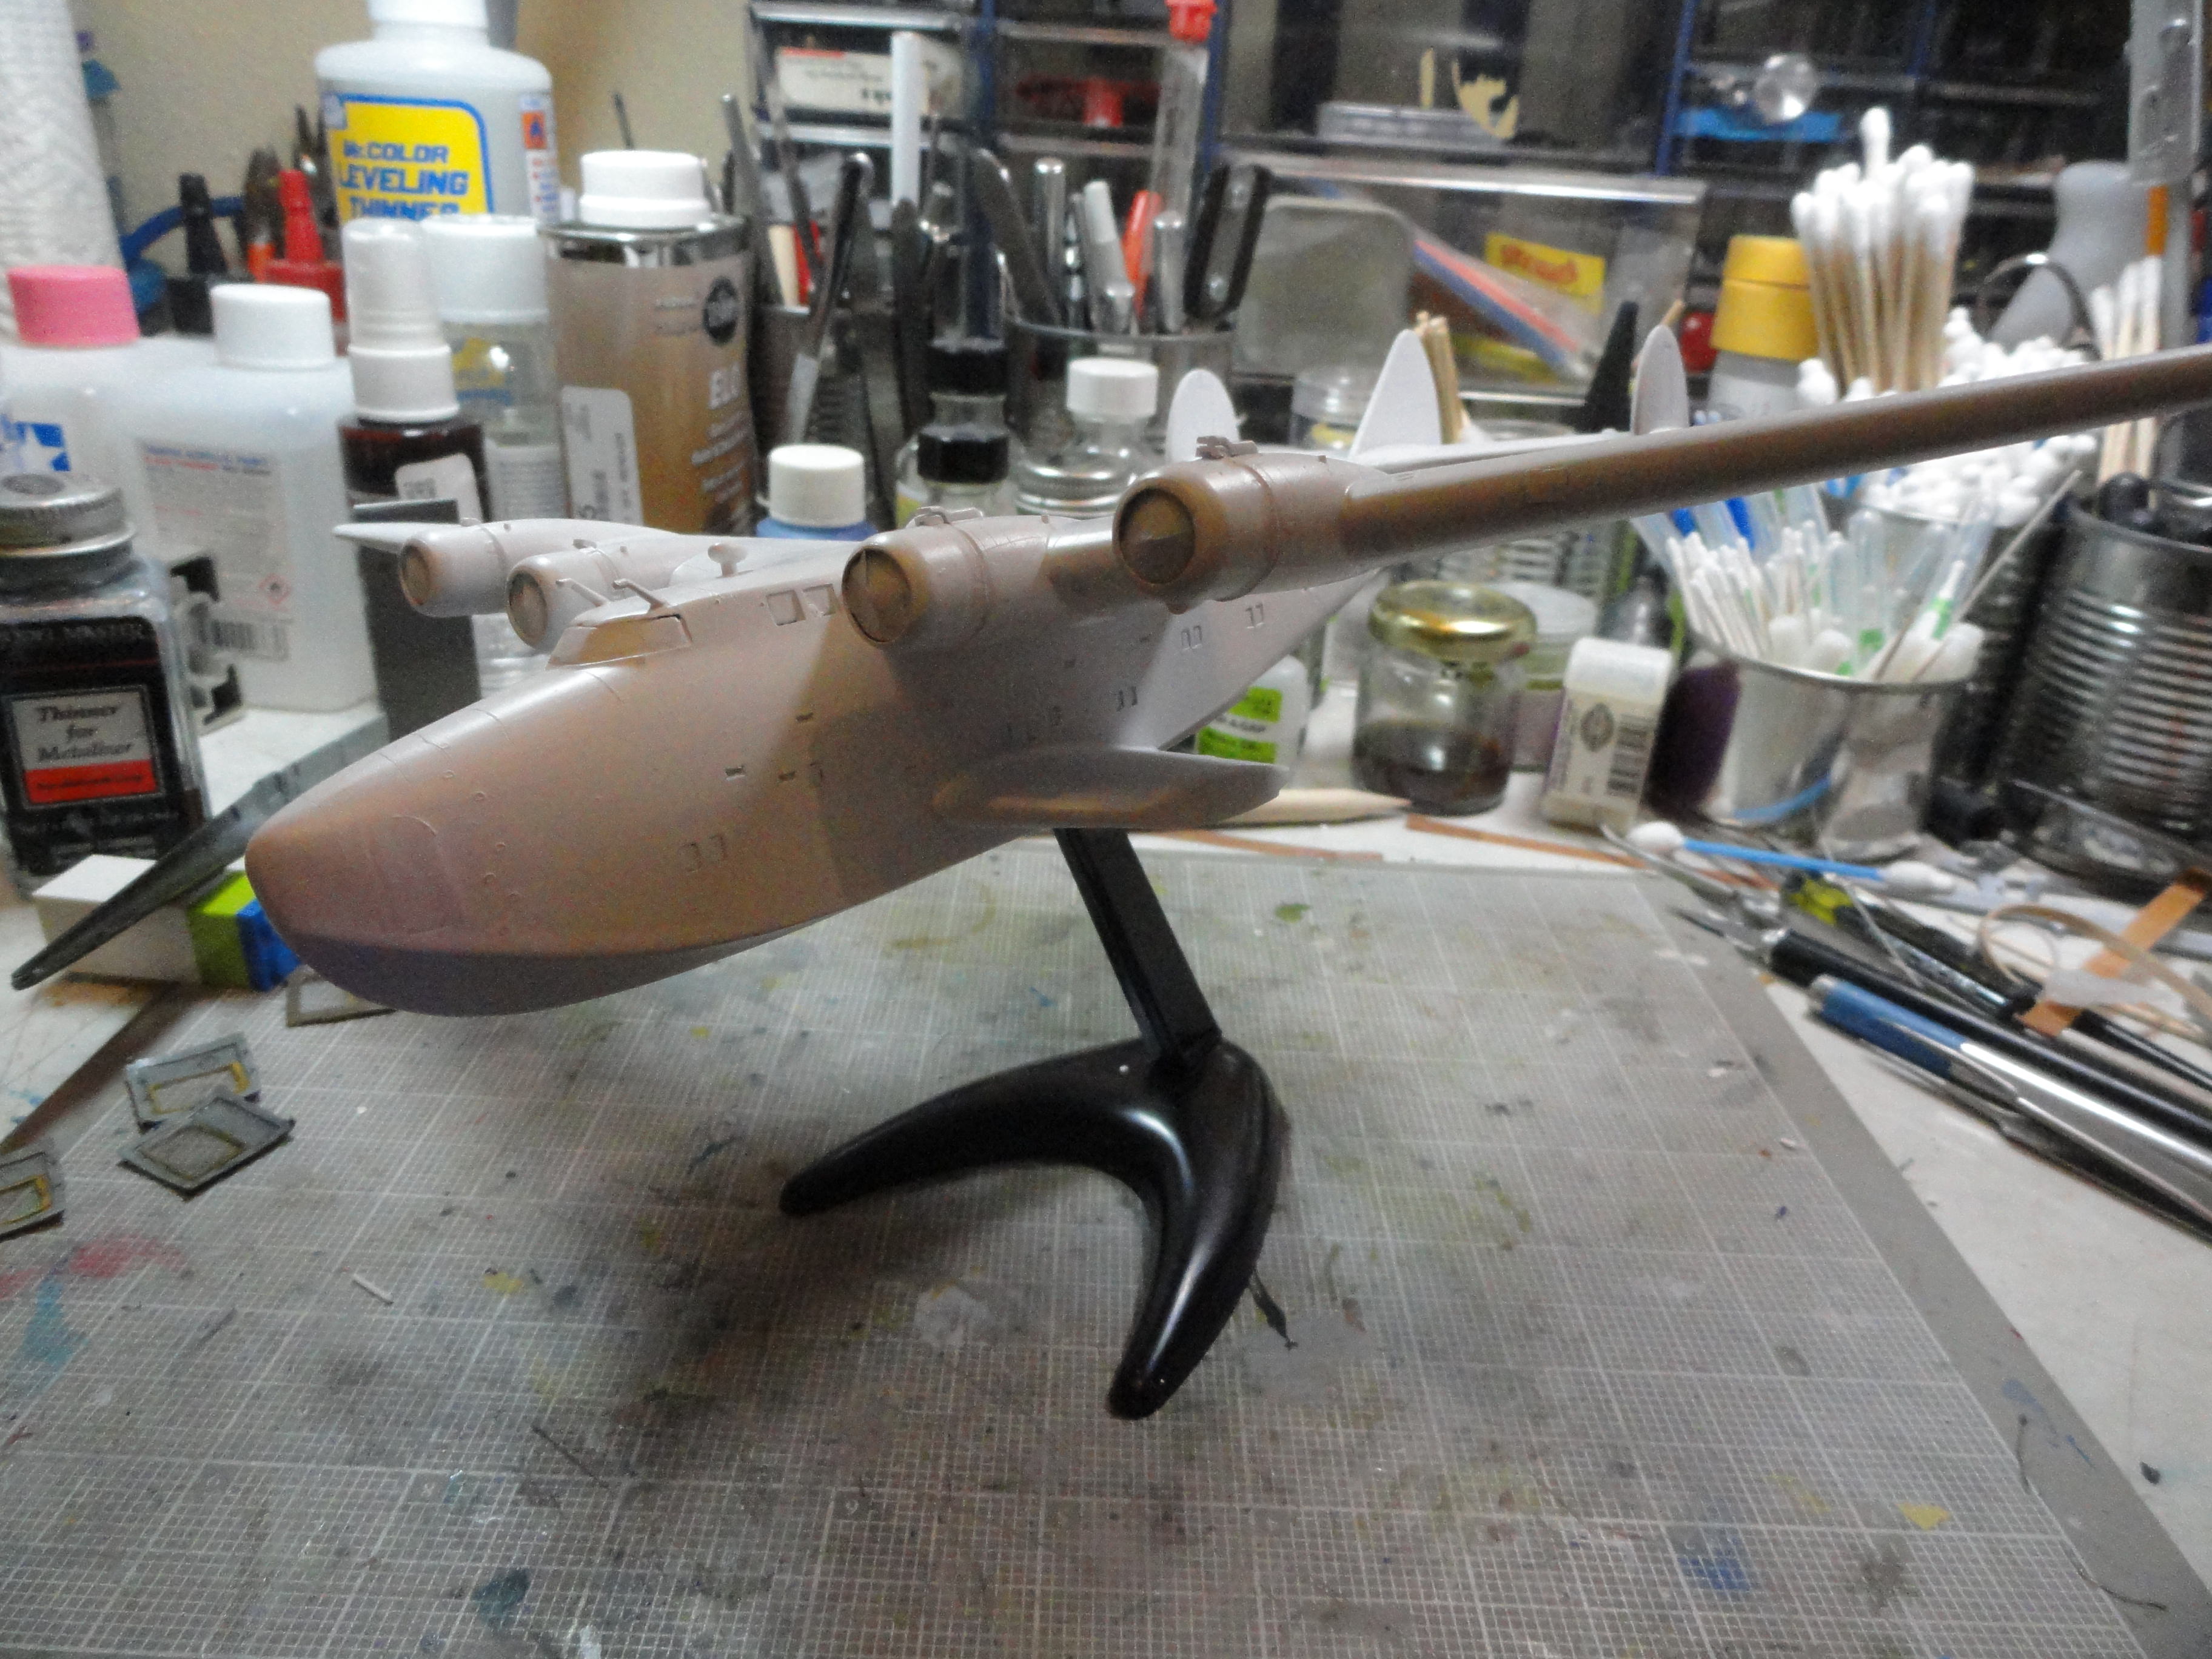
thinking about Testor's aluminum lacquer for the silver, with the red wing patch and a black hull.

Hanger Queens in Waiting:
Monogram 1/72 F8F-1
Corsair the Sky Pirate - 1/72 Ace A-7D
Century Series - Airfix 1/72 F-105G
Anti Shipping - Academy 1/72 PBJ-1D
Academy 1/72 F-84E
United States
Joined: December 26, 2008
KitMaker: 288 posts
AeroScale: 195 posts
Posted: Thursday, May 10, 2018 - 06:23 PM UTC
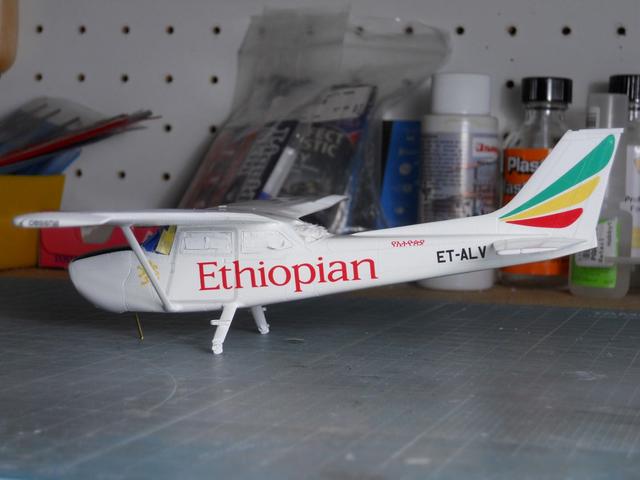
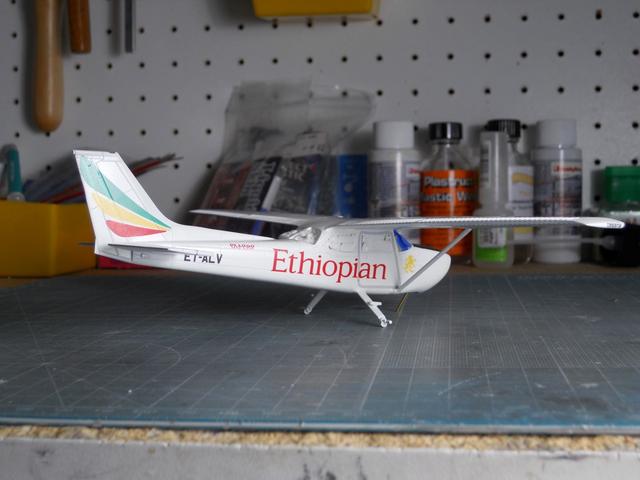
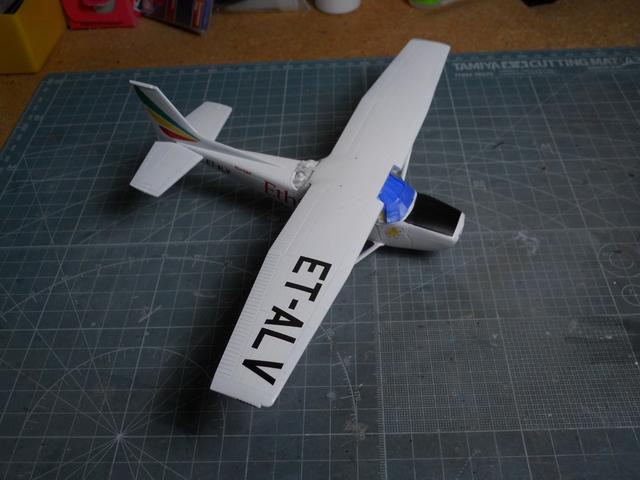
Ready for the decals! My Cessna 172 is now wearing an acceptable overcoat of gloss white paint with the antiglare panel added. It is now time for some color to be added to the model.
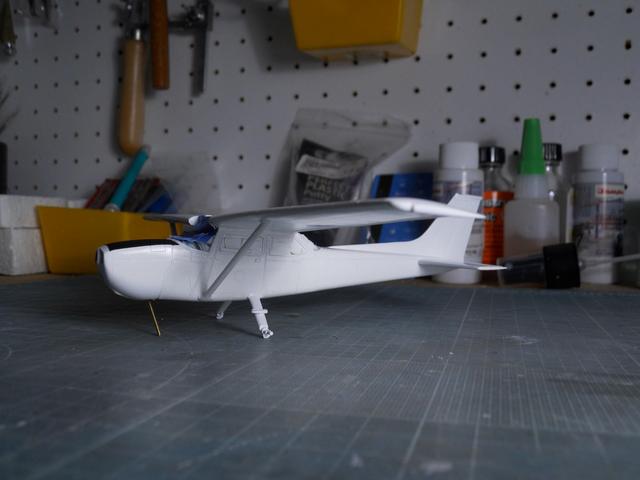

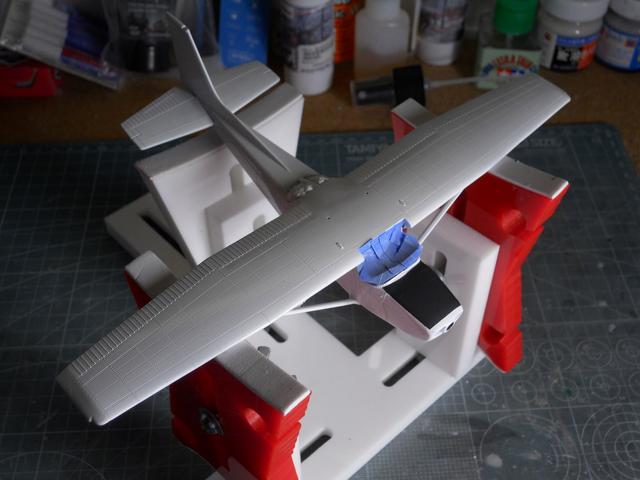
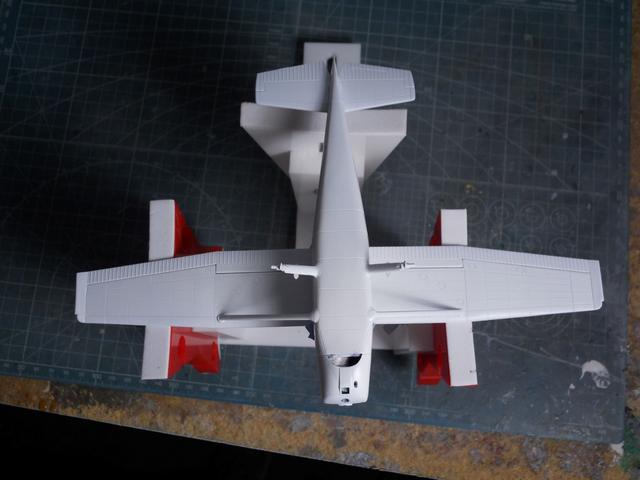
I added a small rod into the front cowl opening for these photos to see what it would look like with the nose gear. It looks like I added enough weight to prevent this from being a tail sitter. Yahoo!
Have fun modeling!
Mike


#392
Hessen, Germany
Joined: January 09, 2013
KitMaker: 696 posts
AeroScale: 608 posts
Posted: Friday, May 11, 2018 - 12:08 AM UTC
@ Mike - Your Cessna is looking better and better!
@ Mark - The Clipper is really impressive! Looking forward to your paint job
Here is a little progress on my Super Connie


I hope to get on with painting this weekend (beside my F-4C on my bench)

On the bench:
EE(BAC) Lightning F.2A (Airfix 1:72)
Nordrhein-Westfalen, Germany
Joined: March 22, 2015
KitMaker: 671 posts
AeroScale: 614 posts
Posted: Friday, May 11, 2018 - 02:41 PM UTC
Tim: Painting these little gems is just a surgical work! Looks good!
Mark: Wow, Your Clipper is really impressive! It will be interesting to see it next to another model in the same scale.
Mike: Nice progress! Soon Your Cessna will be on her own feet!
Peter: Your Connier is coming along well, too! Will You do the Lufthanse version?
Oliver
On the desk: Probably a Panzer III.

#439
Washington, United States
Joined: November 05, 2005
KitMaker: 4,950 posts
AeroScale: 3,192 posts
Posted: Sunday, May 13, 2018 - 09:11 AM UTC
Well some silver lacquer on it, now I gotta fix stuff.....
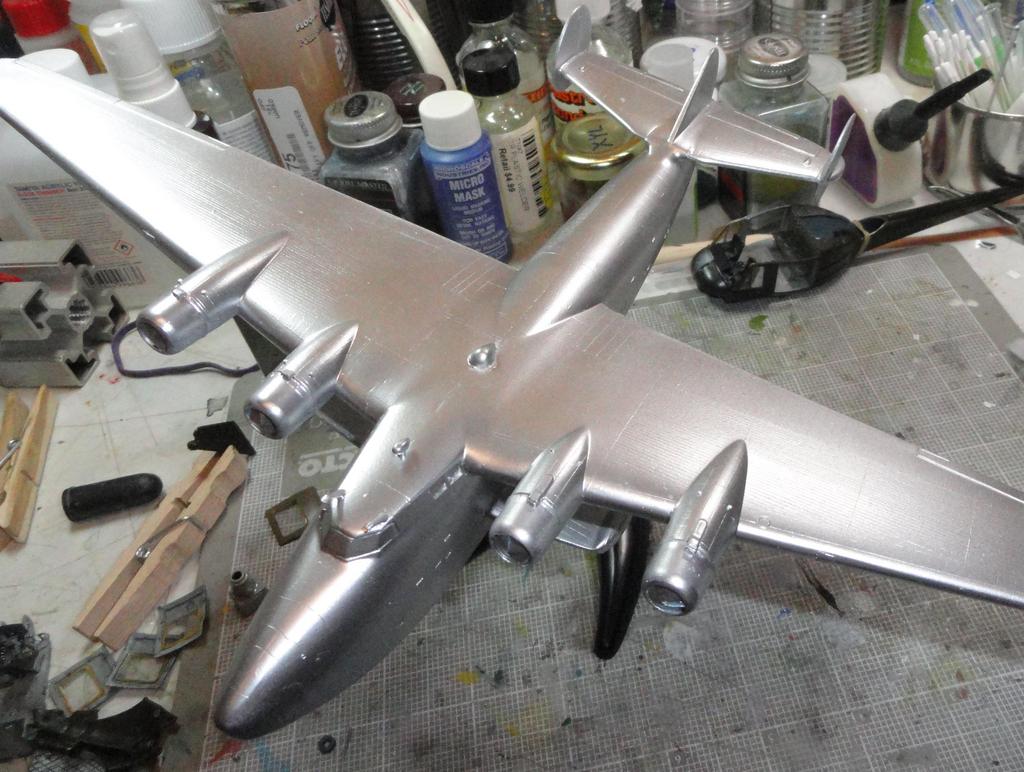

Hanger Queens in Waiting:
Monogram 1/72 F8F-1
Corsair the Sky Pirate - 1/72 Ace A-7D
Century Series - Airfix 1/72 F-105G
Anti Shipping - Academy 1/72 PBJ-1D
Academy 1/72 F-84E
United States
Joined: December 26, 2008
KitMaker: 288 posts
AeroScale: 195 posts
Posted: Friday, May 18, 2018 - 07:12 PM UTC
Mark
The silver coat looks stunning on the mode!
Have fun modeling
Mike

United States
Joined: December 26, 2008
KitMaker: 288 posts
AeroScale: 195 posts
Posted: Friday, May 18, 2018 - 07:17 PM UTC
TimReynaga
 Associate Editor
California, United States
Joined: May 03, 2006
KitMaker: 2,500 posts
AeroScale: 318 posts
Posted: Sunday, May 20, 2018 - 04:28 AM UTC
Mike, your Cessna is looking great with some color!
As for my little Dakotas...
Painting and Future gloss applied, the decalling begins!
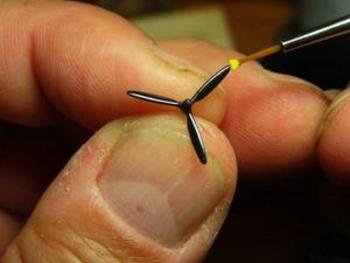
Hasegawa’s decals look great on the sheet, but those propeller tips are tiny!


#335
Auckland, New Zealand
Joined: September 03, 2013
KitMaker: 1,808 posts
AeroScale: 195 posts
Posted: Sunday, May 20, 2018 - 12:09 PM UTC
I can't believe your decalling the tips Tim! I know from that scale they're tiny.
cheers
Michael
Campaign:
Strip, Track and Trail - Porsche 917/20 - On the bench
Phantoms at 60 - F-4J Marines
Below 1000 tons - M50 minesweeper - Sailed for duty

#335
Auckland, New Zealand
Joined: September 03, 2013
KitMaker: 1,808 posts
AeroScale: 195 posts
Posted: Sunday, May 20, 2018 - 02:59 PM UTC
Well it's sometime since I posted an update on my Hastings. A couple of months I painted it using some pretty old Alclad which didn't behave well. I couldn't face the work required to redo it so posted it to the shelf of doom. Since there are so many great builds going here and its only a few weeks to campaign end, two weeks ago its was retrieved, stripped and has been repainted with new Alclad.
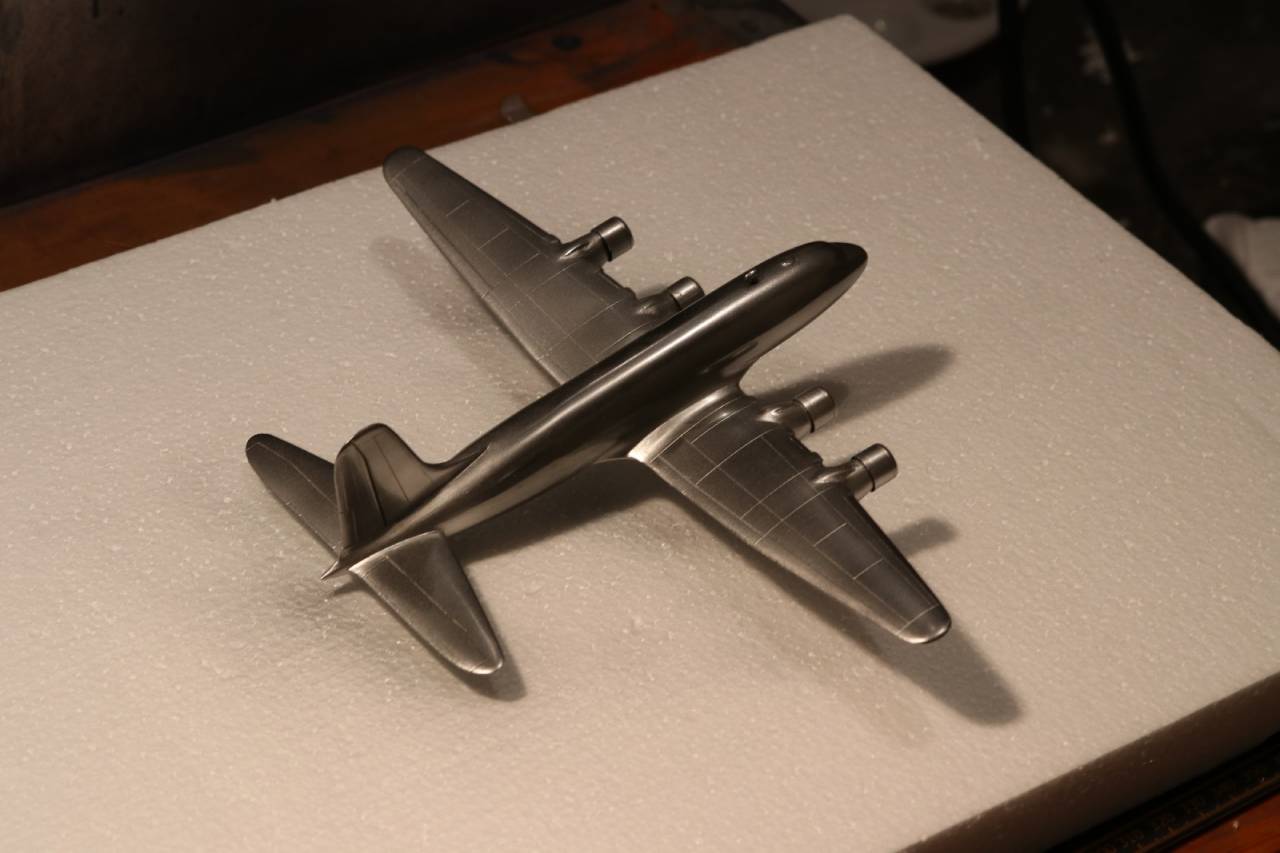
It still needs a white roof on the fuselage and some decals so I may make it yet.
cheers
Michael
Campaign:
Strip, Track and Trail - Porsche 917/20 - On the bench
Phantoms at 60 - F-4J Marines
Below 1000 tons - M50 minesweeper - Sailed for duty

#392
Hessen, Germany
Joined: January 09, 2013
KitMaker: 696 posts
AeroScale: 608 posts
Posted: Monday, May 21, 2018 - 12:17 PM UTC
Quoted Text
Peter: Your Connier is coming along well, too! Will You do the Lufthanse version?
Oliver
Hello Oliver,
it will be done as TWA plane, always liked the red and white scheme

Peter
On the bench:
EE(BAC) Lightning F.2A (Airfix 1:72)

#392
Hessen, Germany
Joined: January 09, 2013
KitMaker: 696 posts
AeroScale: 608 posts
Posted: Monday, May 21, 2018 - 12:19 PM UTC
@ Michael - Your Hastings looks phantastic yet, very good paint job

I hope I can finish my Connie in time if there is no extension. Not much spare time this week in sight...
On the bench:
EE(BAC) Lightning F.2A (Airfix 1:72)
United States
Joined: December 26, 2008
KitMaker: 288 posts
AeroScale: 195 posts
Posted: Monday, May 21, 2018 - 05:56 PM UTC
Michael
Your Hastings looks super with the new repaint. That is a really fine metallic finish, well done! Glad you decided to move this build back of the "Shelf of Doom"
Have fun modeling!
Mike

TimReynaga
 Associate Editor
California, United States
Joined: May 03, 2006
KitMaker: 2,500 posts
AeroScale: 318 posts
Posted: Tuesday, May 22, 2018 - 10:06 AM UTC
Michael, that NMF looks great!
The Hasegawa decals are very complete with two marking options for the Japanese L2D and one for the American C-47. I started with the Japanese plane, applying insignia depicting a L2D2 “Tabby” of the Yokosuka Flying Group.
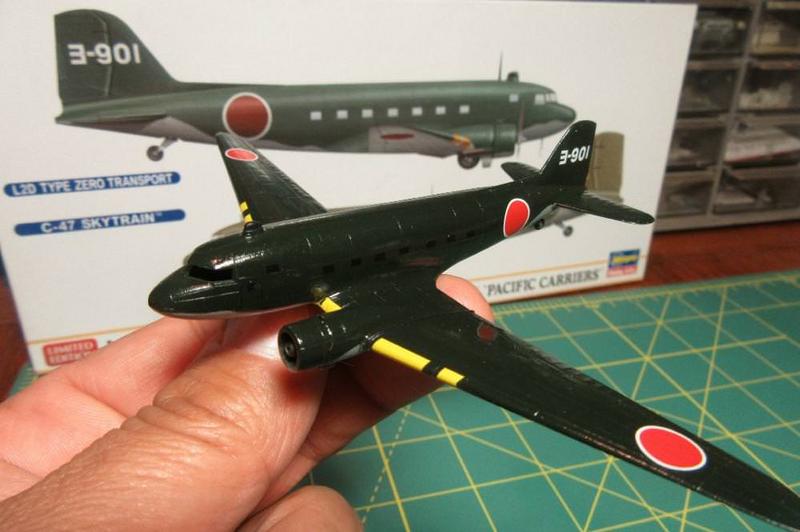
Markings were straightforward. The only change I made was to replace the light blue fuselage windows with new ones made from black decal film. Unfortunately, they almost disappear next to the very dark IJN green paint!

#335
Auckland, New Zealand
Joined: September 03, 2013
KitMaker: 1,808 posts
AeroScale: 195 posts
Posted: Tuesday, May 22, 2018 - 12:14 PM UTC
Thanks all for the kind comments.
Good progress Tim. I like the fact you have space behind the windows rather than solid resin.
cheers
Michael
Campaign:
Strip, Track and Trail - Porsche 917/20 - On the bench
Phantoms at 60 - F-4J Marines
Below 1000 tons - M50 minesweeper - Sailed for duty

#298
Hong Kong S.A.R. / 繁體
Joined: August 08, 2002
KitMaker: 1,182 posts
AeroScale: 351 posts
Posted: Tuesday, May 22, 2018 - 01:55 PM UTC

#259
Massachusetts, United States
Joined: October 23, 2011
KitMaker: 2,265 posts
AeroScale: 1,715 posts
Posted: Tuesday, May 22, 2018 - 07:30 PM UTC
As usual the final weeks of the campaign are the busiest!

good work going on here!

#439
Washington, United States
Joined: November 05, 2005
KitMaker: 4,950 posts
AeroScale: 3,192 posts
Posted: Tuesday, May 22, 2018 - 09:34 PM UTC
Yep, at least 3 more painting sessions, peeling off all of the masks and a decaling effort.

Good thing I don't have to have the stand finished to call the plane complete...

Hanger Queens in Waiting:
Monogram 1/72 F8F-1
Corsair the Sky Pirate - 1/72 Ace A-7D
Century Series - Airfix 1/72 F-105G
Anti Shipping - Academy 1/72 PBJ-1D
Academy 1/72 F-84E





 I just contacted Draw Decals and they will be sending me the replacement decal parts. They have excellent customer service as I heard back from them within a few hours that they will take care of the problem. Hopefully, the replacements will come soon enough for me to finish the build before the end of this GB. It will be close as I have at least 2 weeks of business travel in May.


